Epson Surecolor F100 Setup 🖨️ A4 Sublimation Printer for Beginners
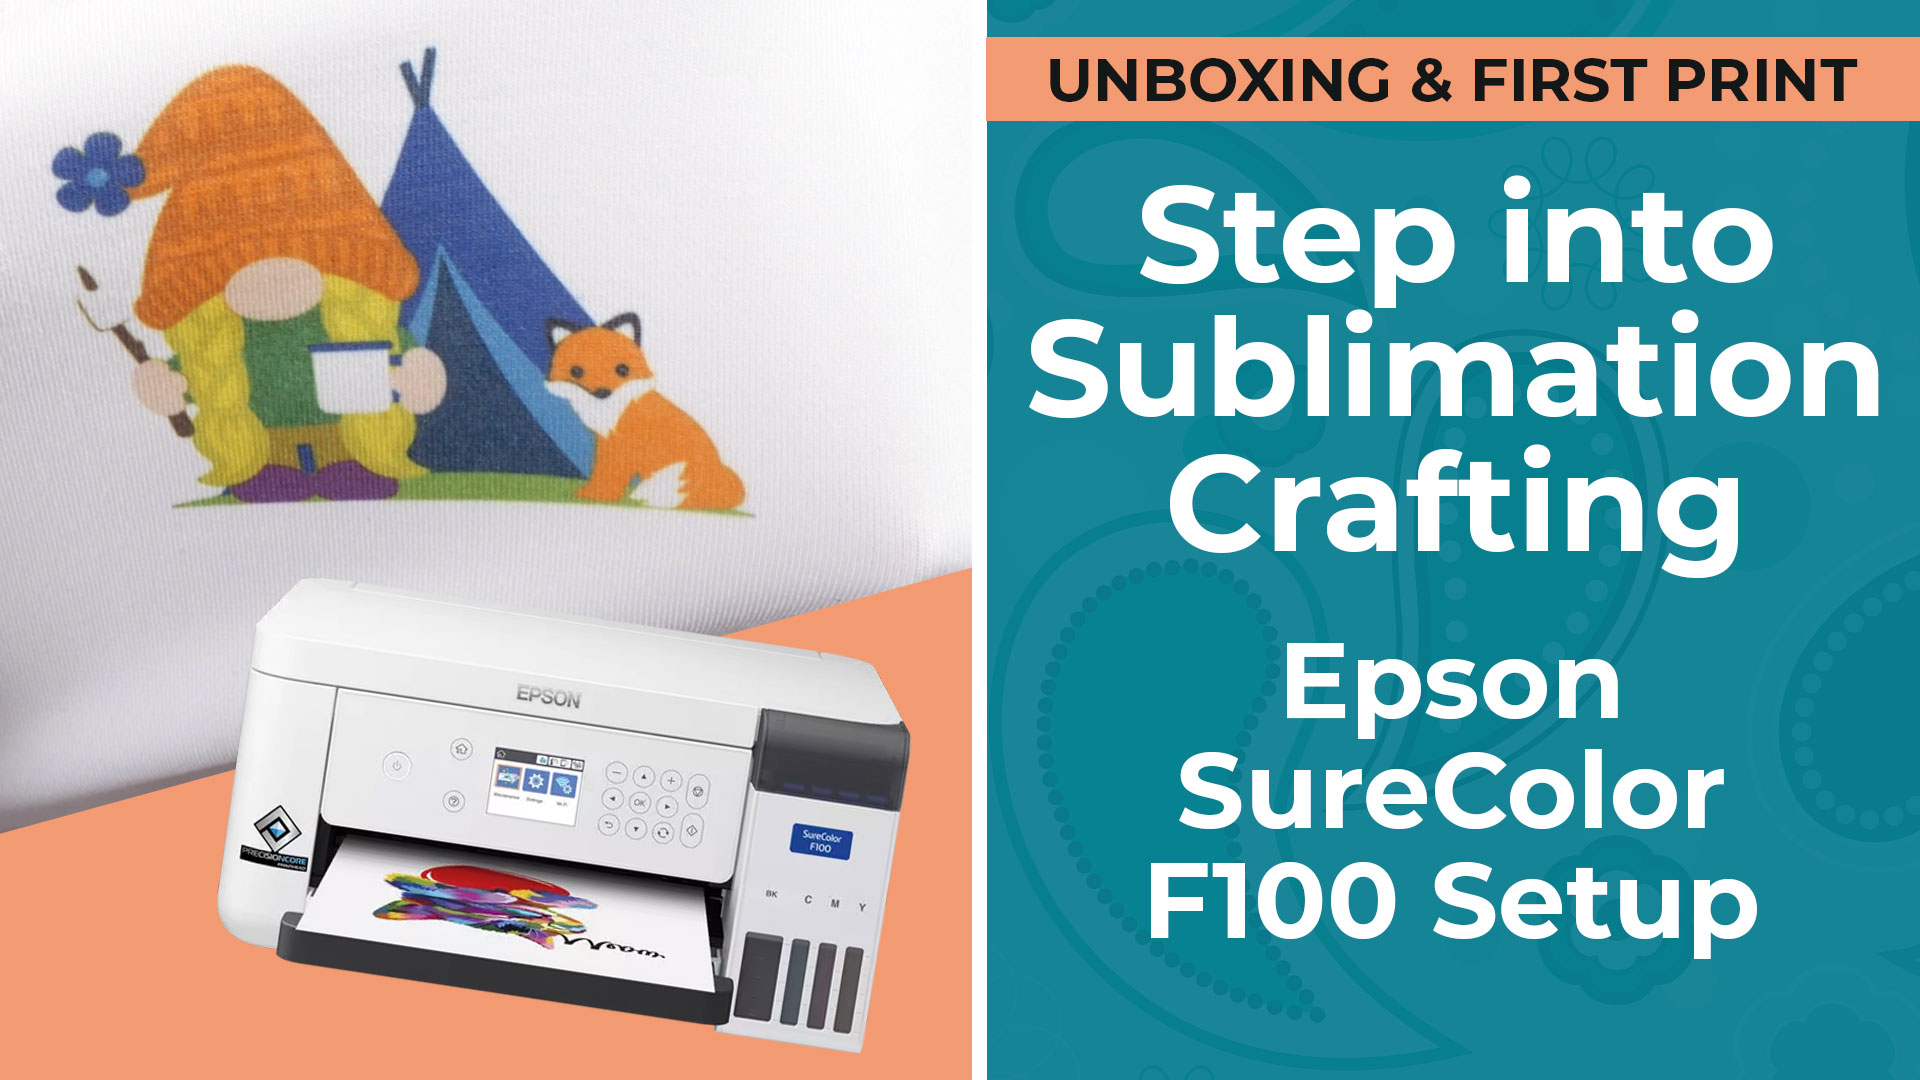
Step into sublimation crafting with the Epson SureColor F100 – a great sublimation printer for beginners.
The Epson SureColor F100 is an A4 sublimation printer that’s budget and beginner friendly and SO easy to setup and start creating with.
It’s a dedicated sublimation printer, so no “converting” is necessary – everything works perfectly, straight out of the box.
I was so impressed at how easy this printer was to setup. I went from taking it out the box to having my first t-shirt pressed and finished within an hour, with no technical headaches along the way!
See how to set up the Epson SureColor F100 printer in this tutorial, plus learn a little more about some of the benefits of choosing this sublimation printer.
IMPORTANT: The F100 is the model of this printer that takes A4 sized paper. The USA equivalent of this printer is the Epson SureColor F170 which takes US Letter paper.
Disclaimer: Epson kindly send me this printer for free and I was compensated for the creation of this tutorial, but all thoughts and opinions are my own.
Please note that some of the links included in this article are affiliate links, which means that if you click through and make a purchase I may receive a commission (at no additional cost to you). You can read my full disclosure at the bottom of the page.
Is the Epson SureColor F100 a good sublimation printer?
Sublimation crafting is something that’s pretty new to me.
About three years ago I purchased an Epson Ecotank printer to try to “convert” into a sublimation printer, but I struggled with getting good prints from it and I guess my heart wasn’t really into learning a new craft at that time, so I only used it a couple of times.
Fast forward to 2024, and I thought it was time to give it another try – but THIS time, I’d use the proper tools!
The Epson SureColor F100 has been designed specifically for sublimation printing, which means it’s even easier to setup and there’s no risk of accidentally putting in the “wrong” ink as a full set of sublimation inks are included in the box.
Setup is straightforward and mess-free, and it even automatically mirrors your prints for you, so you’ll never have a project end up the “wrong way round” once it’s pressed!
The printer comes pre-loaded with two printer modes that are suited to sublimation ink and paper. There are two available drivers: one for if your sublimation print is going on a hard surface (like a mug) and one for soft surfaces (e.g. t-shirts/clothing).
Let’s take it out the box and give it a try!
Epson SureColor F100 setup video
Watch the video below to see a full setup of the Epson SureColor F100 printer, from how it looks straight out the box to loading the ink, charging the ink, turning it on, connecting to your network, updating firmware, nozzle checks and doing the very first print!
Keep scrolling for a written tutorial and printer FAQs.
How to set up a sublimation printer
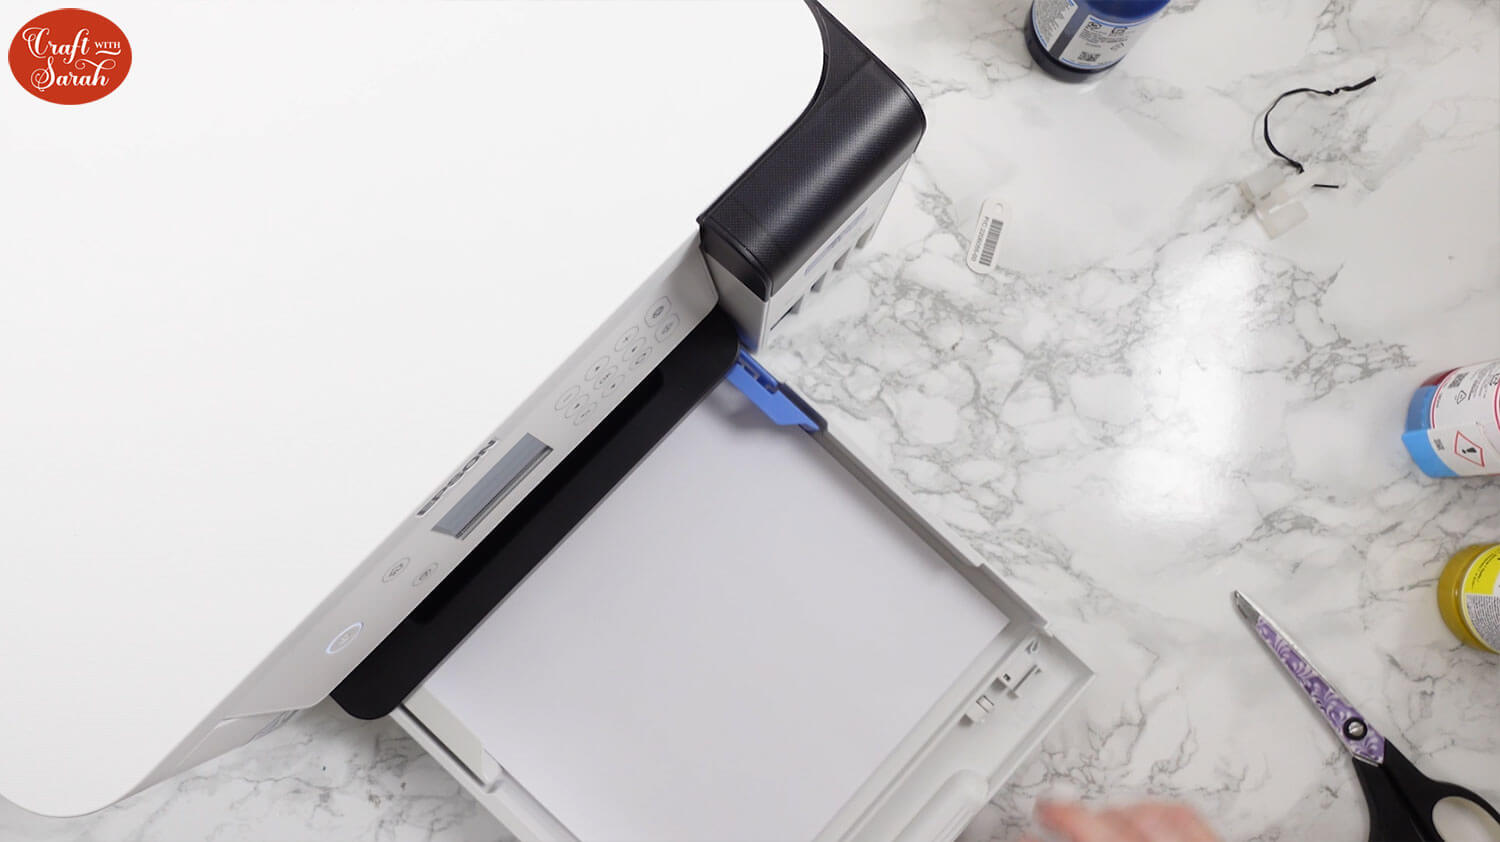
Step 1) Remove the blue tape
Remove the printer from the box.
The printer has some blue tape on it to hold everything securely in place during transit.
Remove all the tape from the front, back and inside the machine.
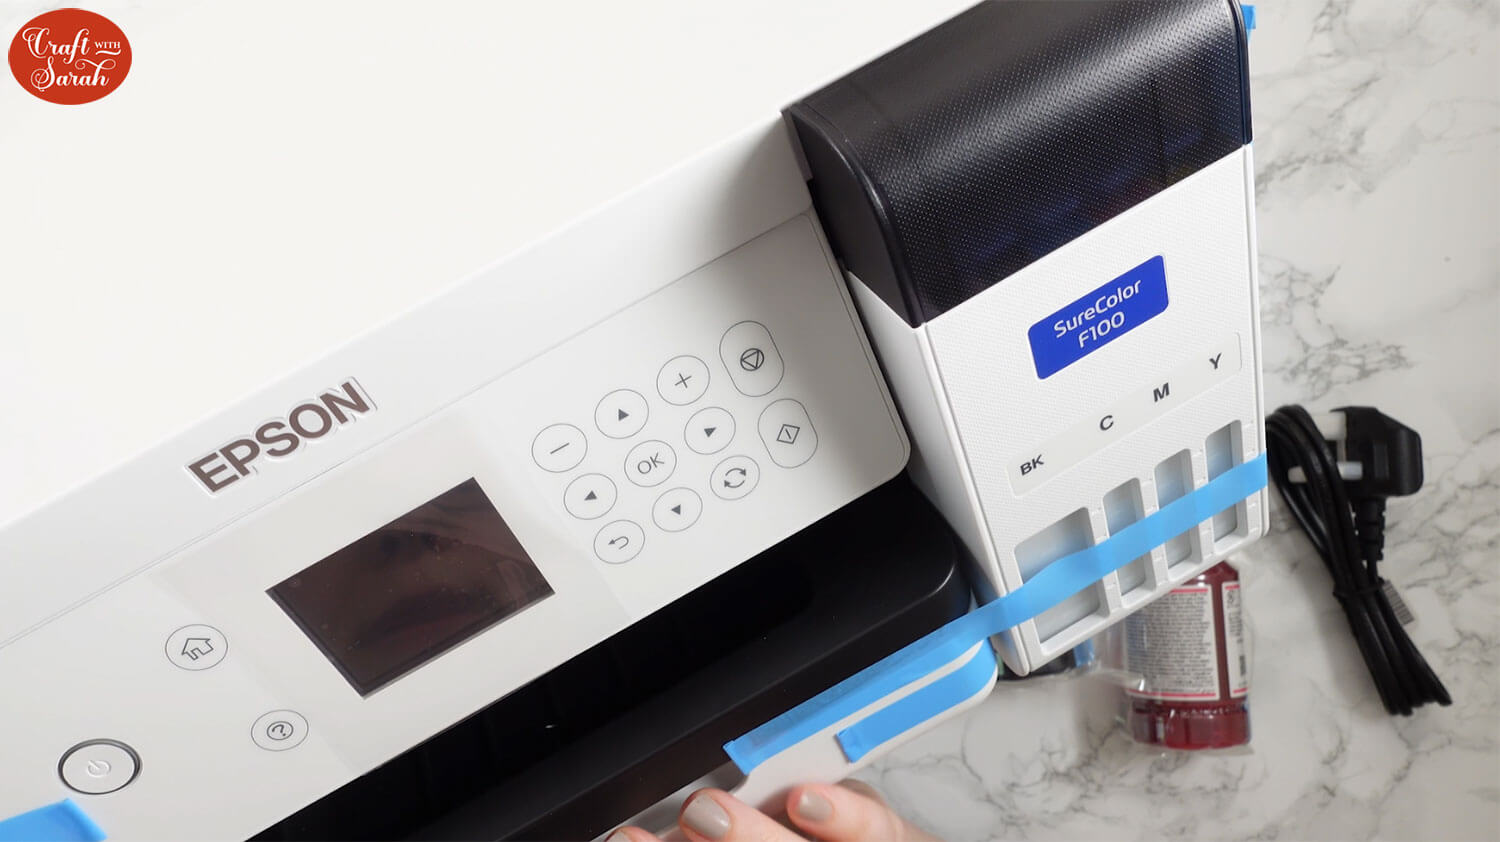
Step 2) Insert the sublimation inks
Four colours of ink are included in the box: black, cyan, magenta and yellow.
Open up the printer lid so you can see the top of the ink tanks.
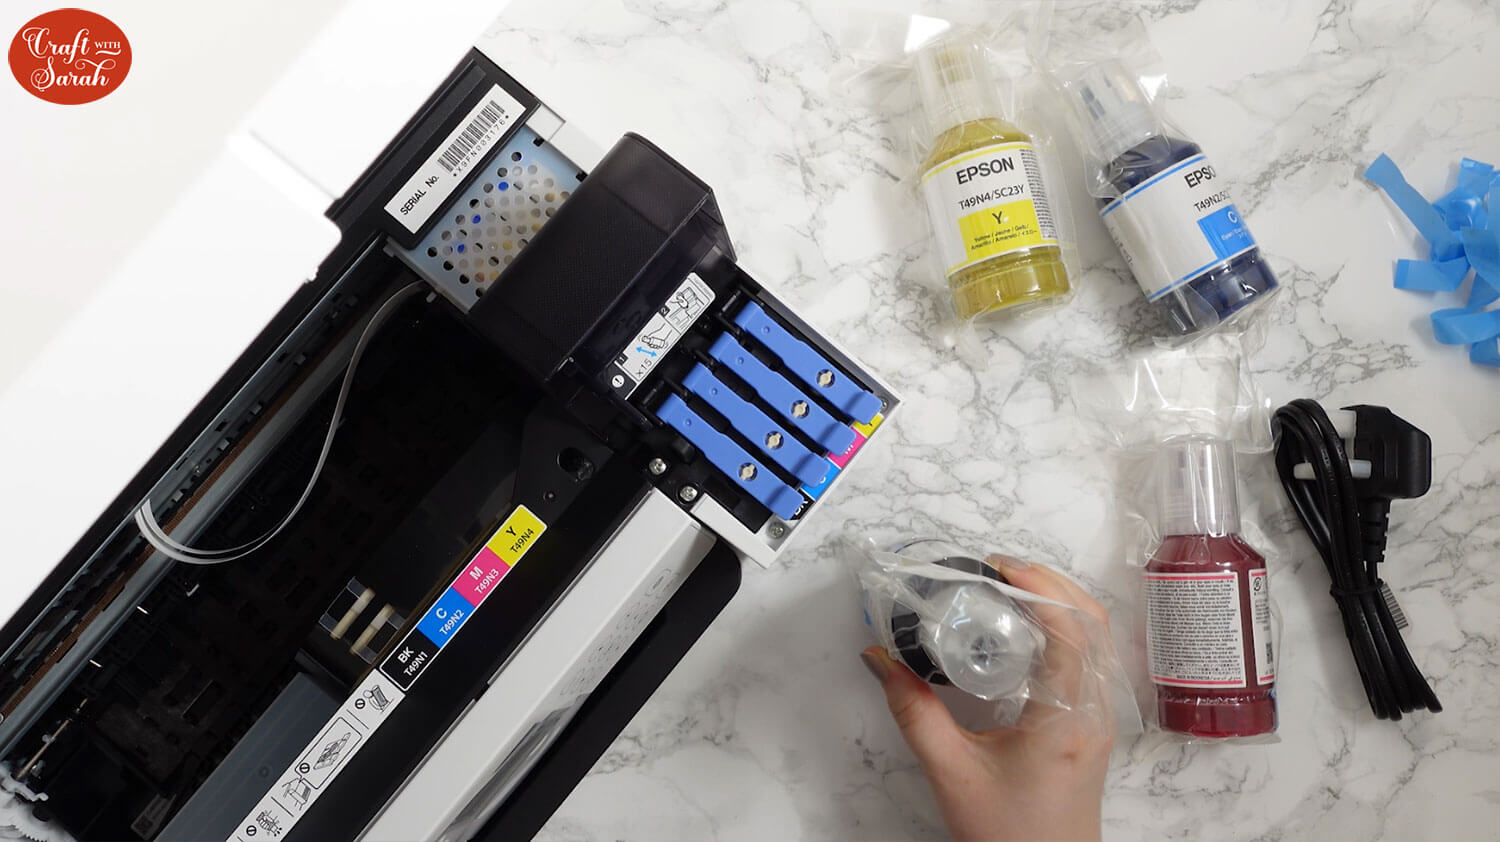
Choose one of the ink bottles and shake it (inside the shrink wrap) around 15-20 times.
Remove the bottle from the shrink wrap.
Open the tank lid on the corresponding colour, remove the lid from the bottle of ink and turn it upside down and slot it into the tank. It has plastic shapes that fit in perfectly to hold it in place.
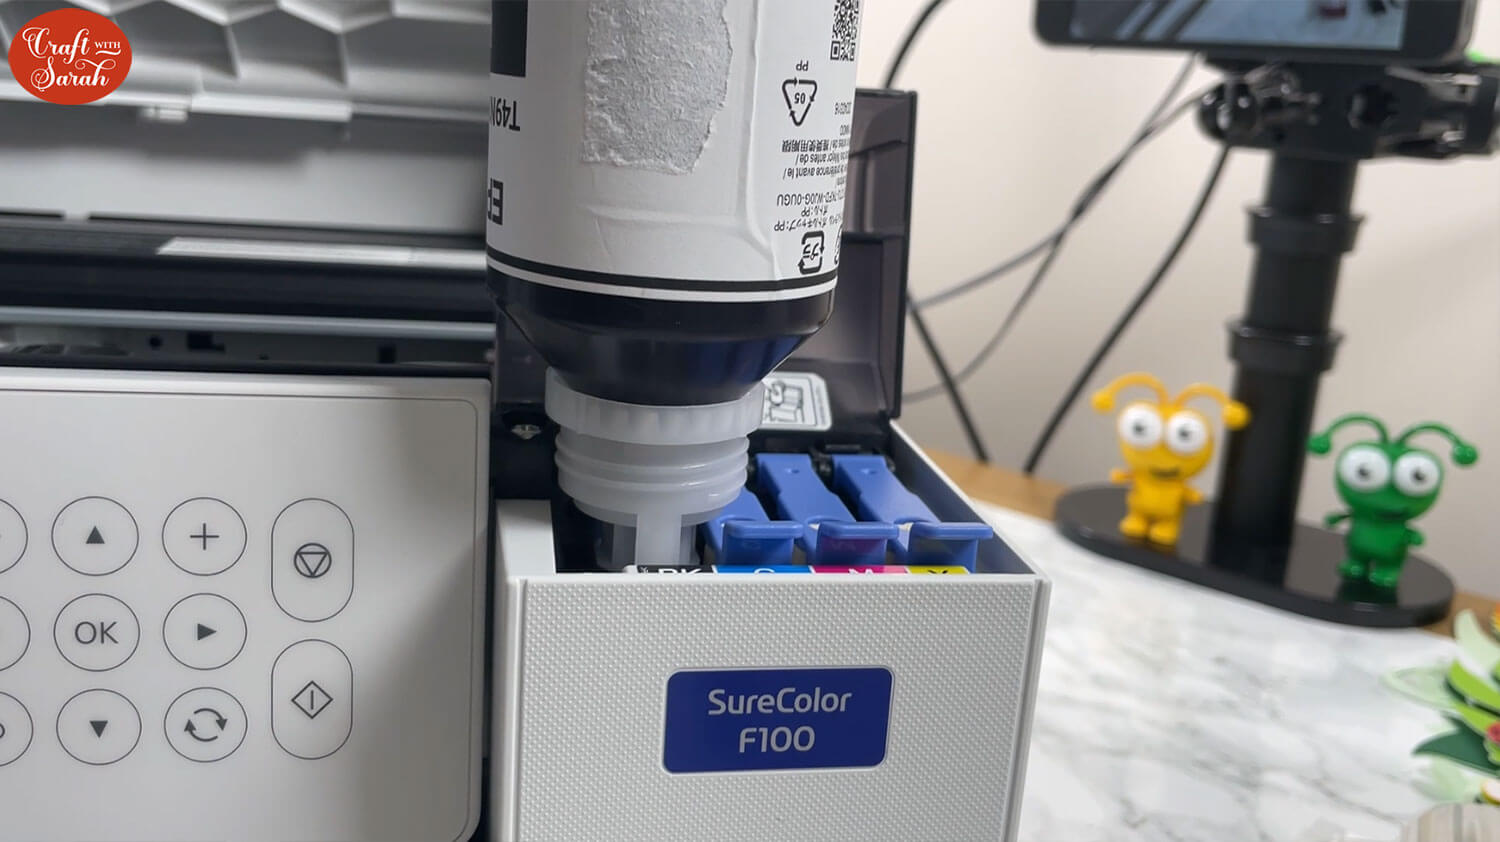
Leave the bottle to fill the tank. Don’t squeeze or press the bottle.
You will be able to hear it “glugging” as the tank fills.
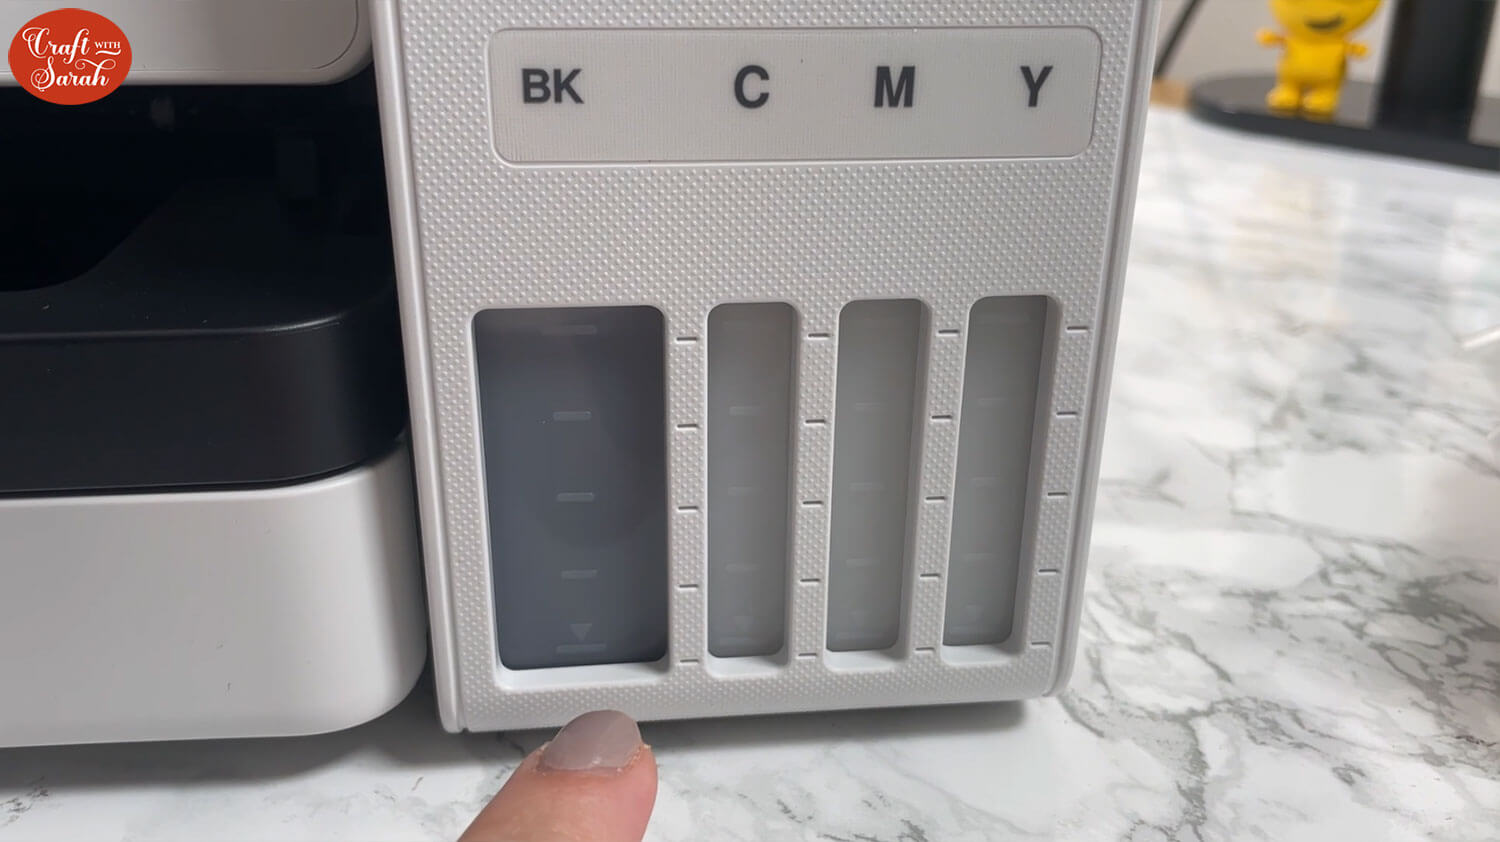
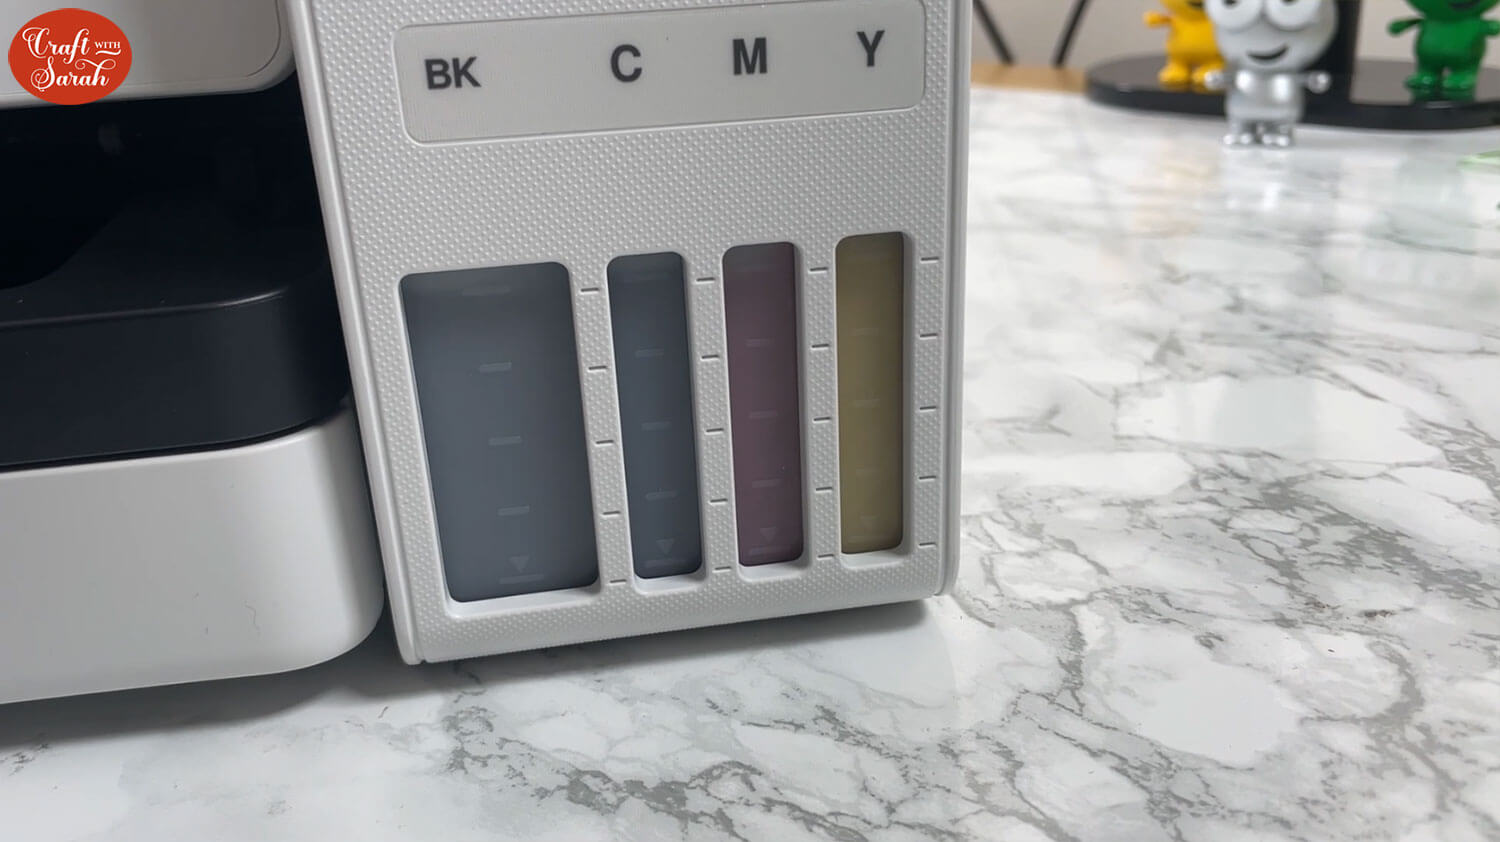
Keep an eye on the front of the printer to see the process. It should automatically stop when it reaches the top line on the tank.
Once the tank is full, carefully remove the bottle and put the lid back on. Watch out for stray drops of ink, as they will stain whatever they land on.
Close the blue lid on the top of the tank for that colour.
Repeat for the other three colours of ink.
Step 3) Turn the printer on & charge the ink
Plug in the printer using the included power cable.
Turn it on and select your country/language using the buttons on the front of the printer.
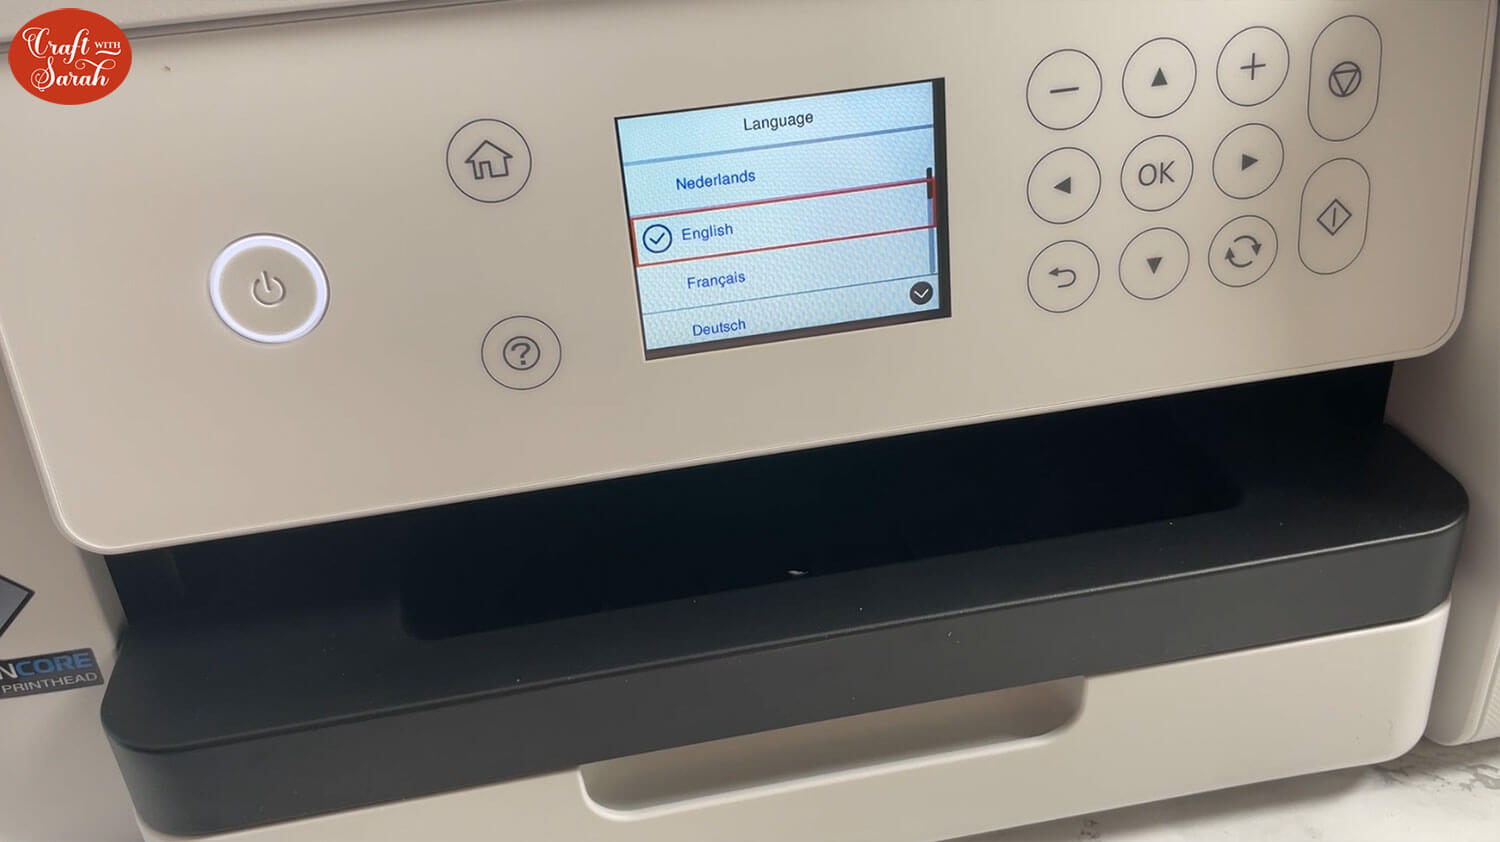
The printer will direct you to read the instructions booklet.
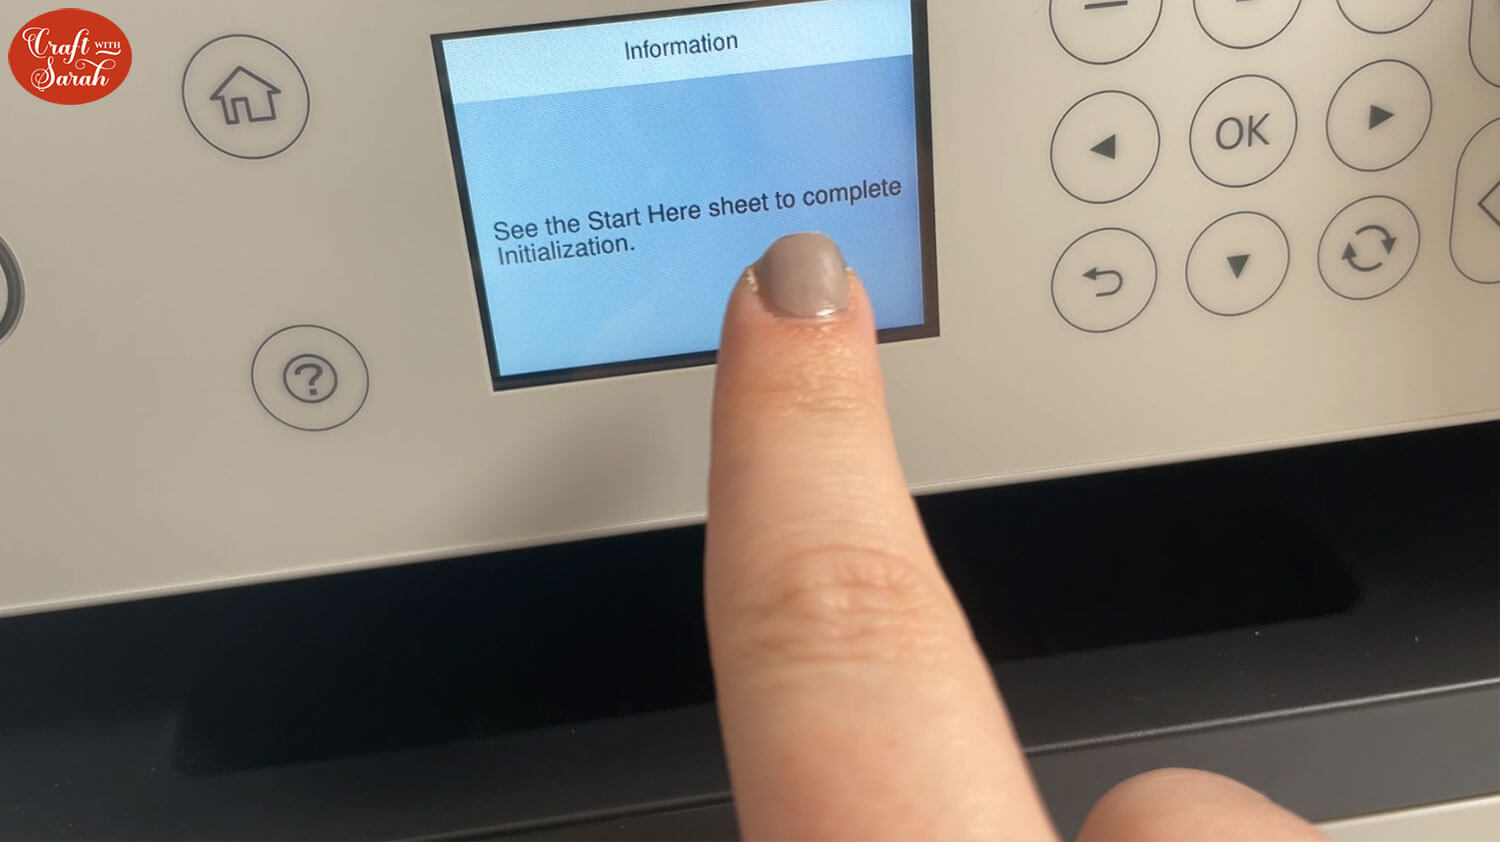
Read the booklet to see how to complete the next stage in detail.
Confirm that you have added the ink to the printer.
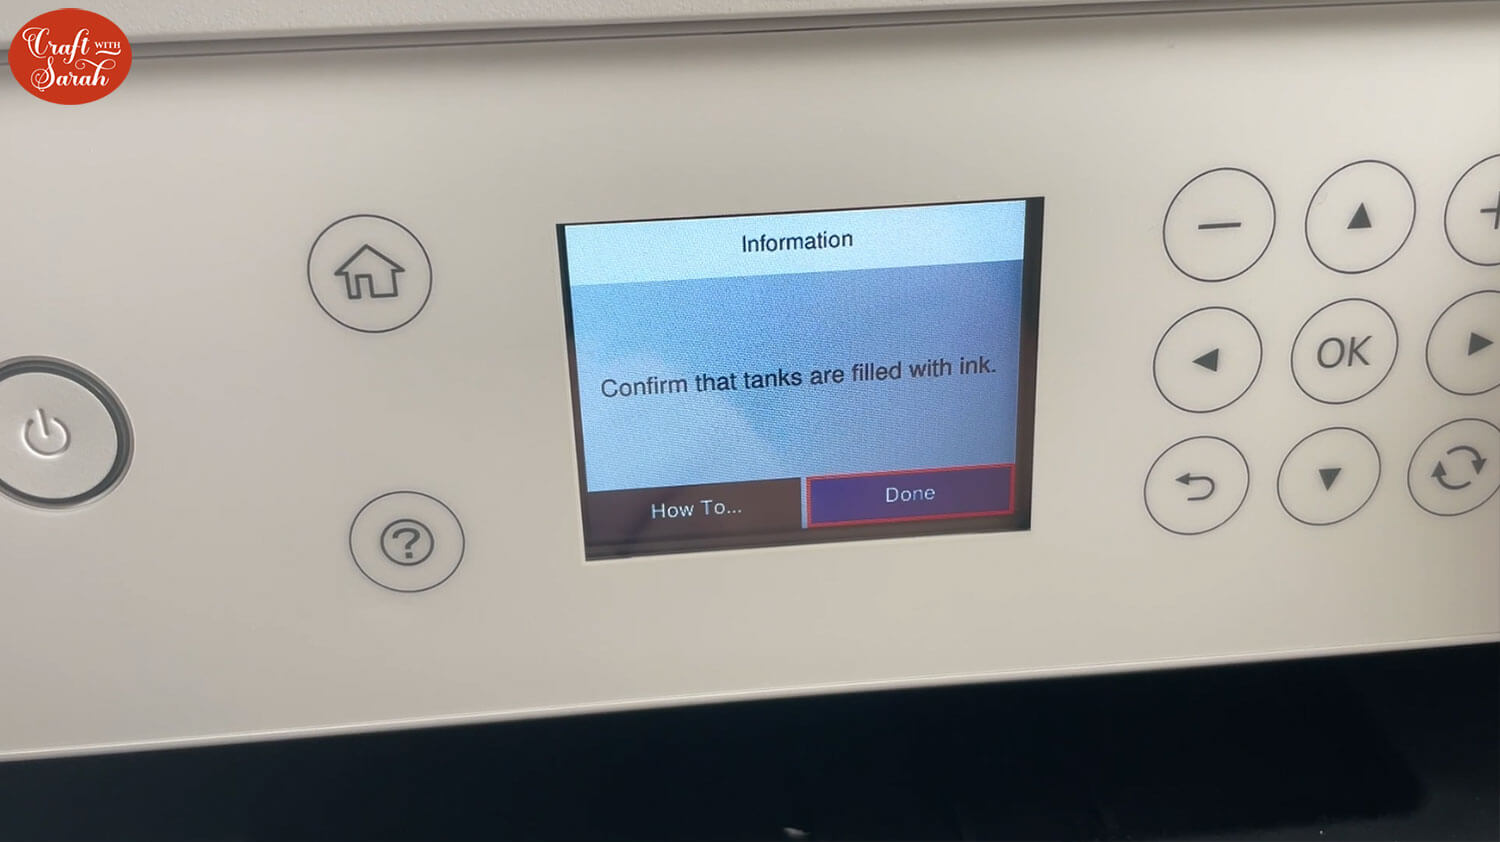
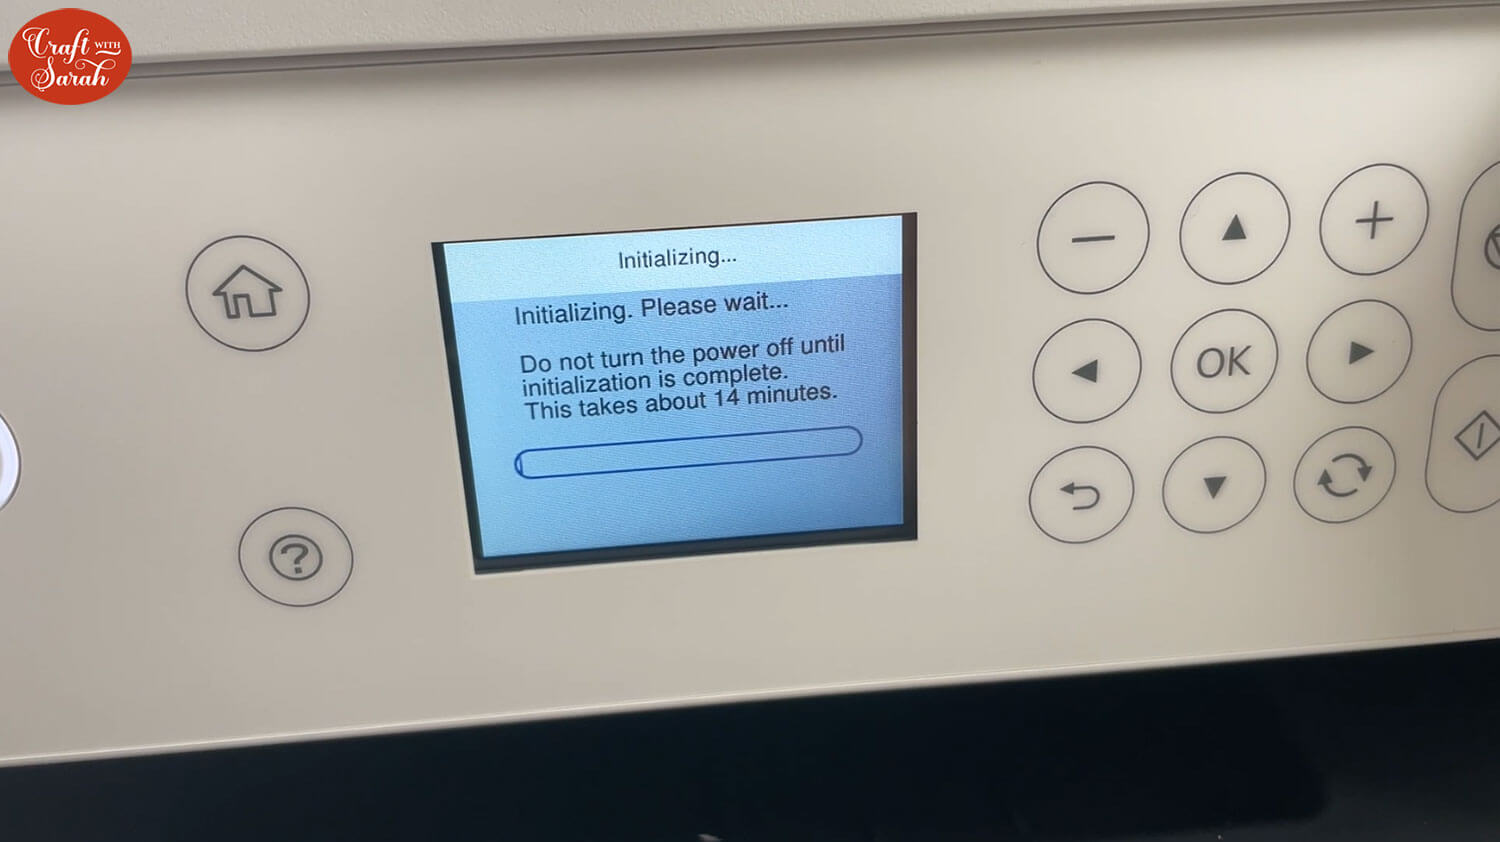
Next, the printer will do an initial setup where it cycles the ink through the printer. This takes around 14 minutes.
The printer will be noisy during this time and you might notice your ink levels go down. Don’t worry – that’s completely normal – it’s because the ink is being distributed around the printer to get it ready to print.
Once the initialization has finished, it’s time to move on to checking the print quality.
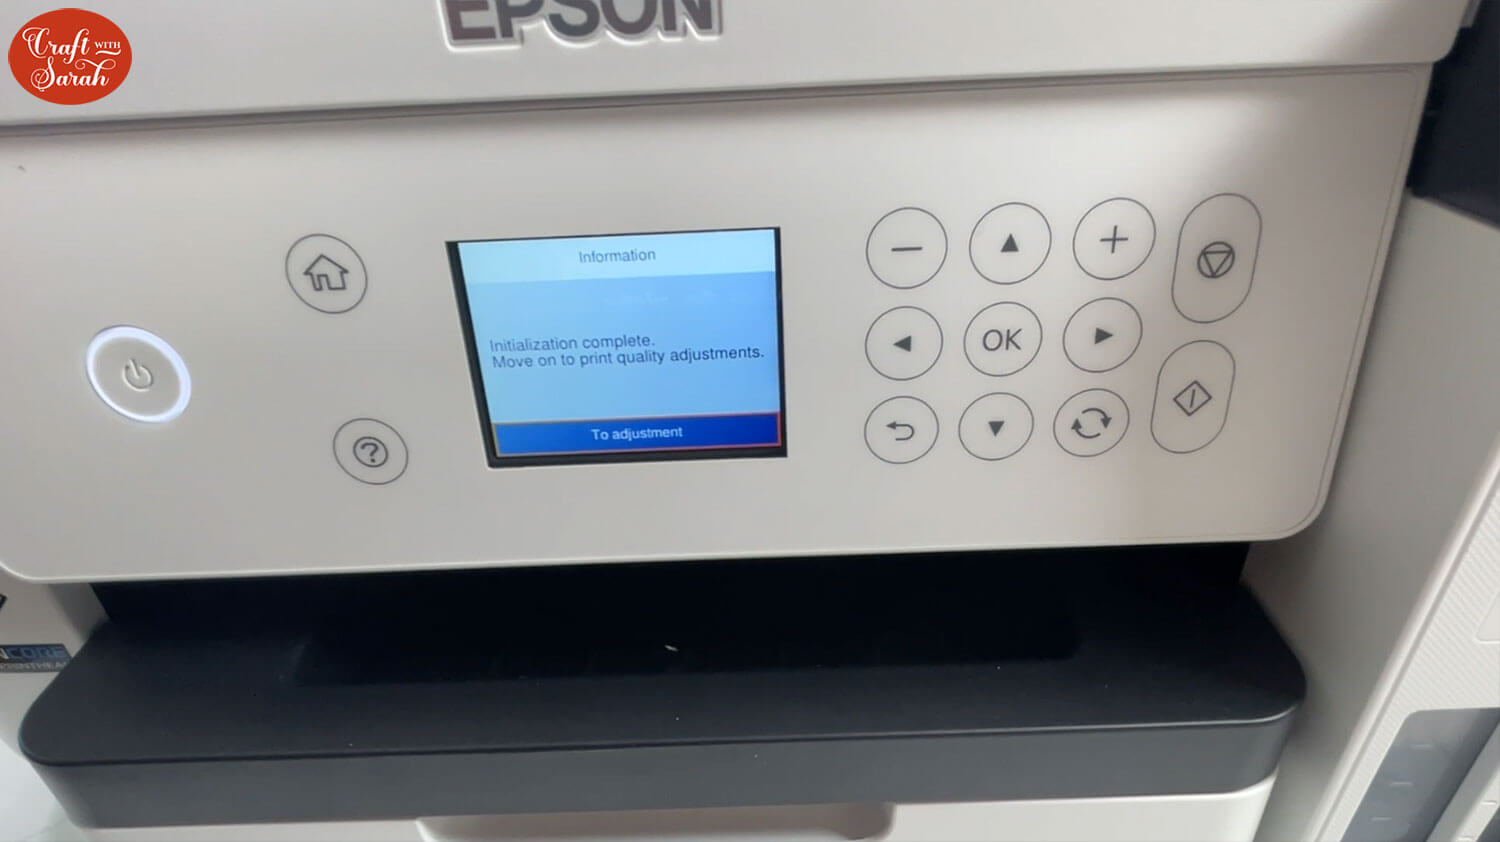
Step 4) Print quality checking
Add some plain A4 paper into the paper tray.
Follow the steps shown on the printer screen to run through some test prints.
There are three different checks in total.
Each will print a sheet and then ask you to select which one matches their example.
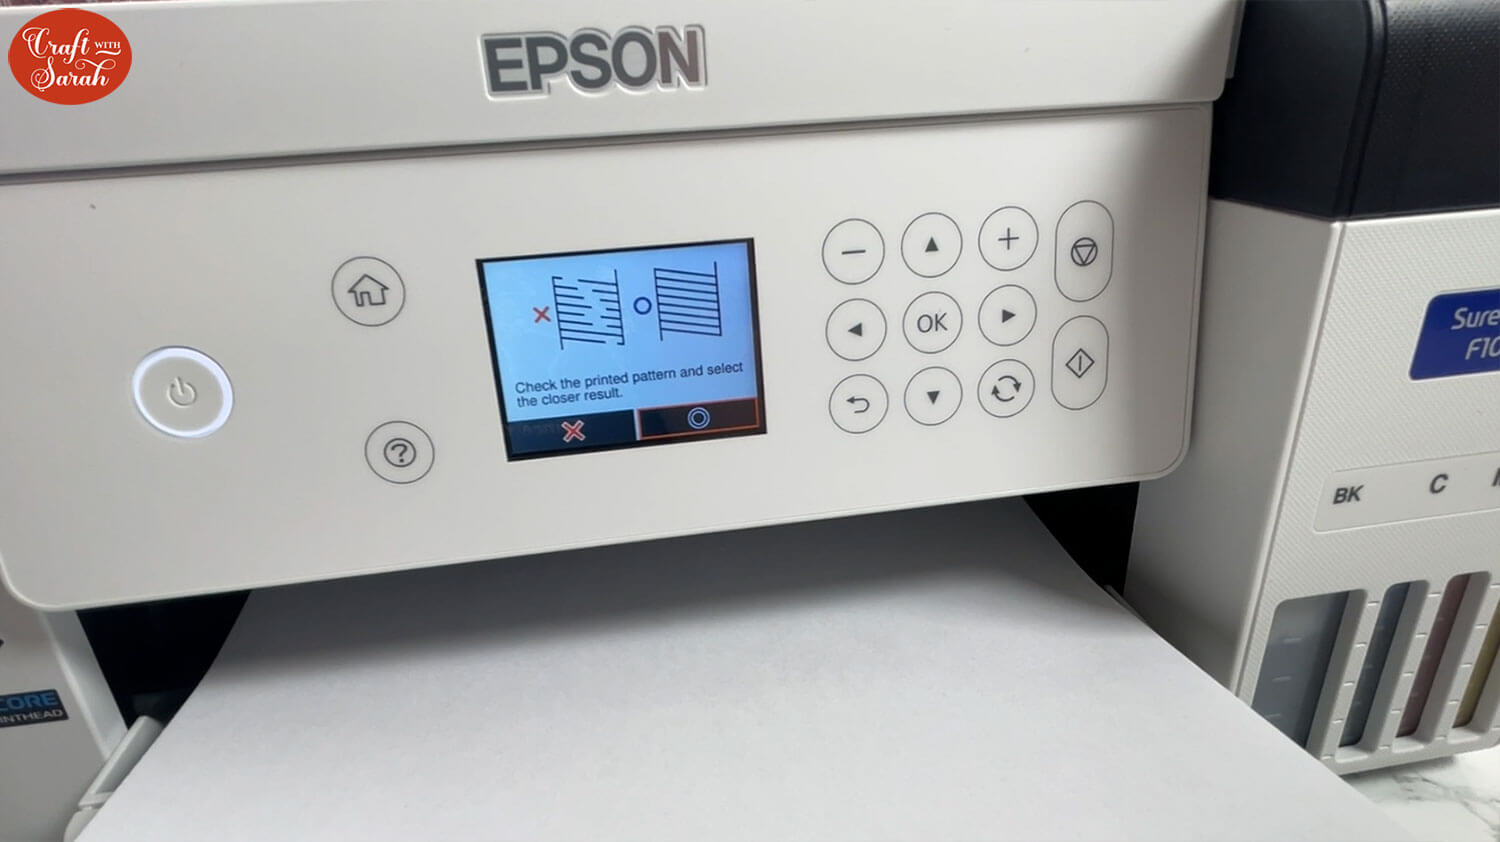

Use the buttons on the front of the printer to select the relevant options.
Step 5) Connect to your computer
Now for the part I wasn’t looking forward to – getting the printer set up on the network.
Actually, it went very smoothly without any problems at all, phew!
Go to https://support.epson.net/setupnavi/ to begin the setup process.
Type “SC-F100” into the search bar at the top and select that option.
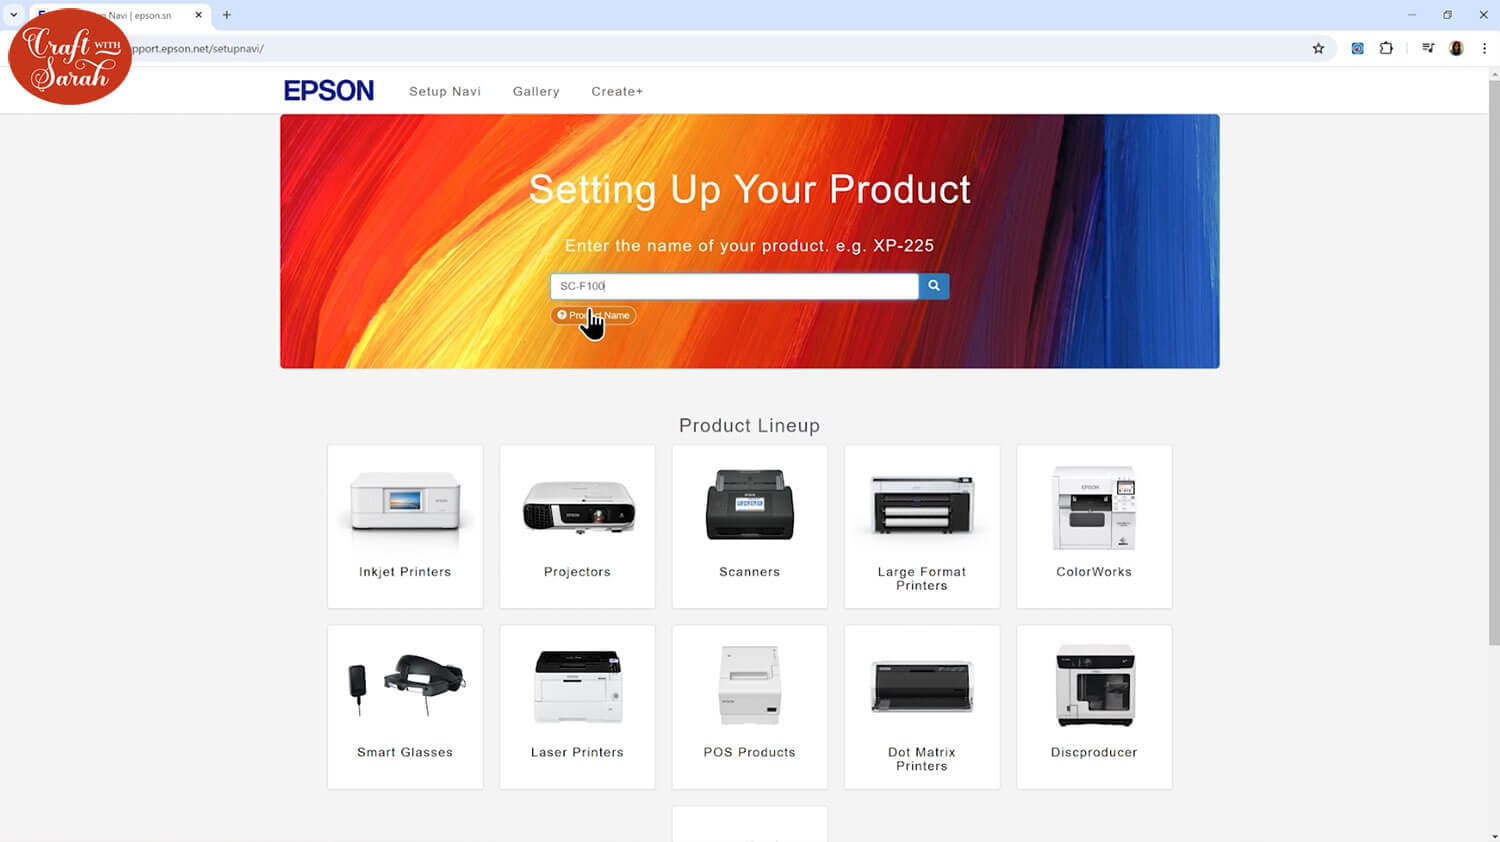
The website does an excellent job of walking you through all the steps and explaining everything you need to do.

Download the installer software and open it.
Follow the on-screen steps to connect the printer to your network and computer.
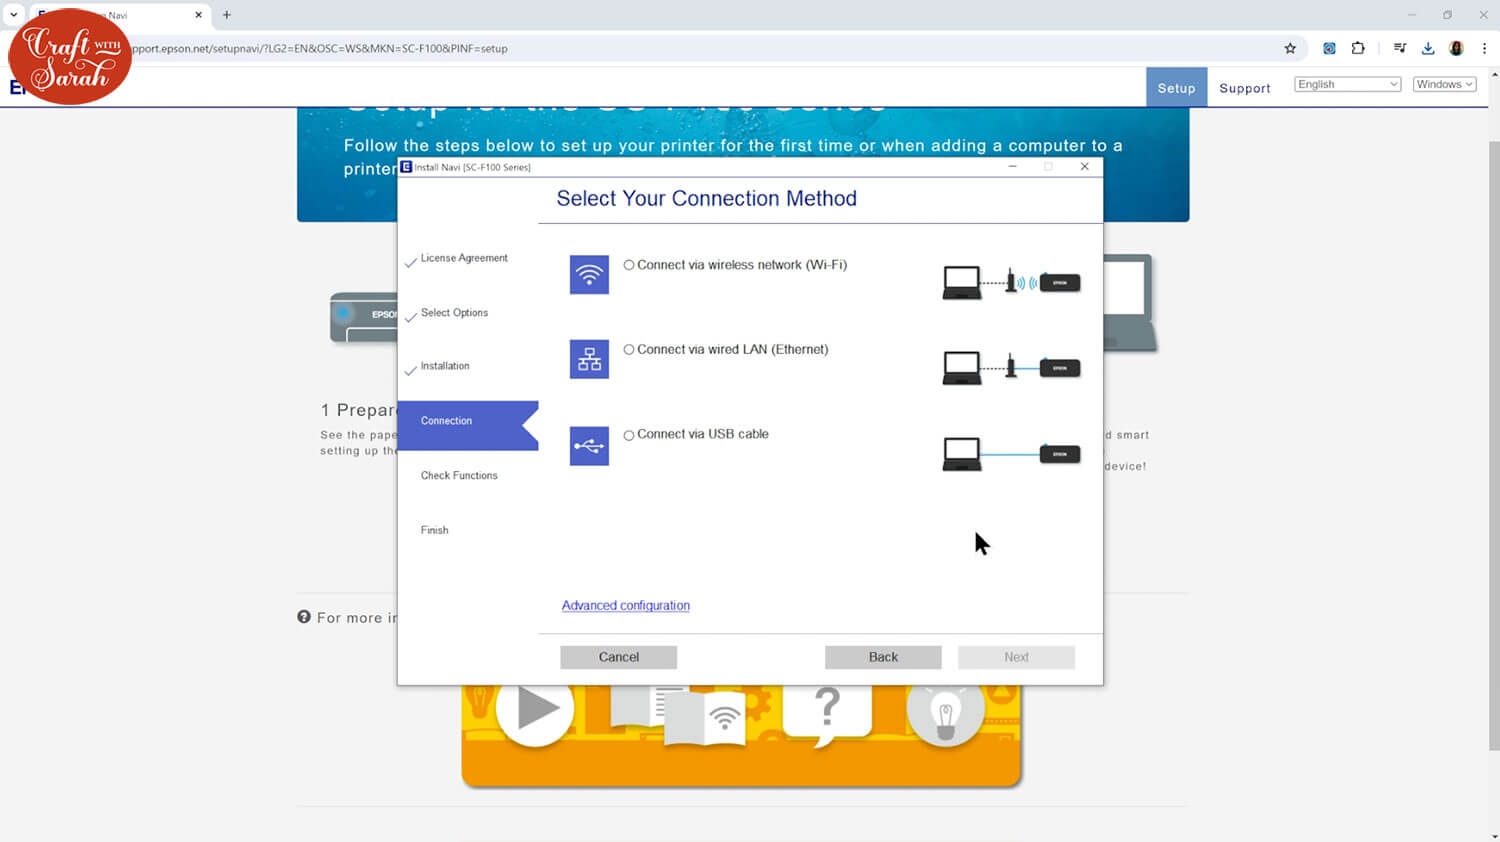
You can either use the buttons on the printer to go through the stages, or click the buttons that will appear on your computer screen.
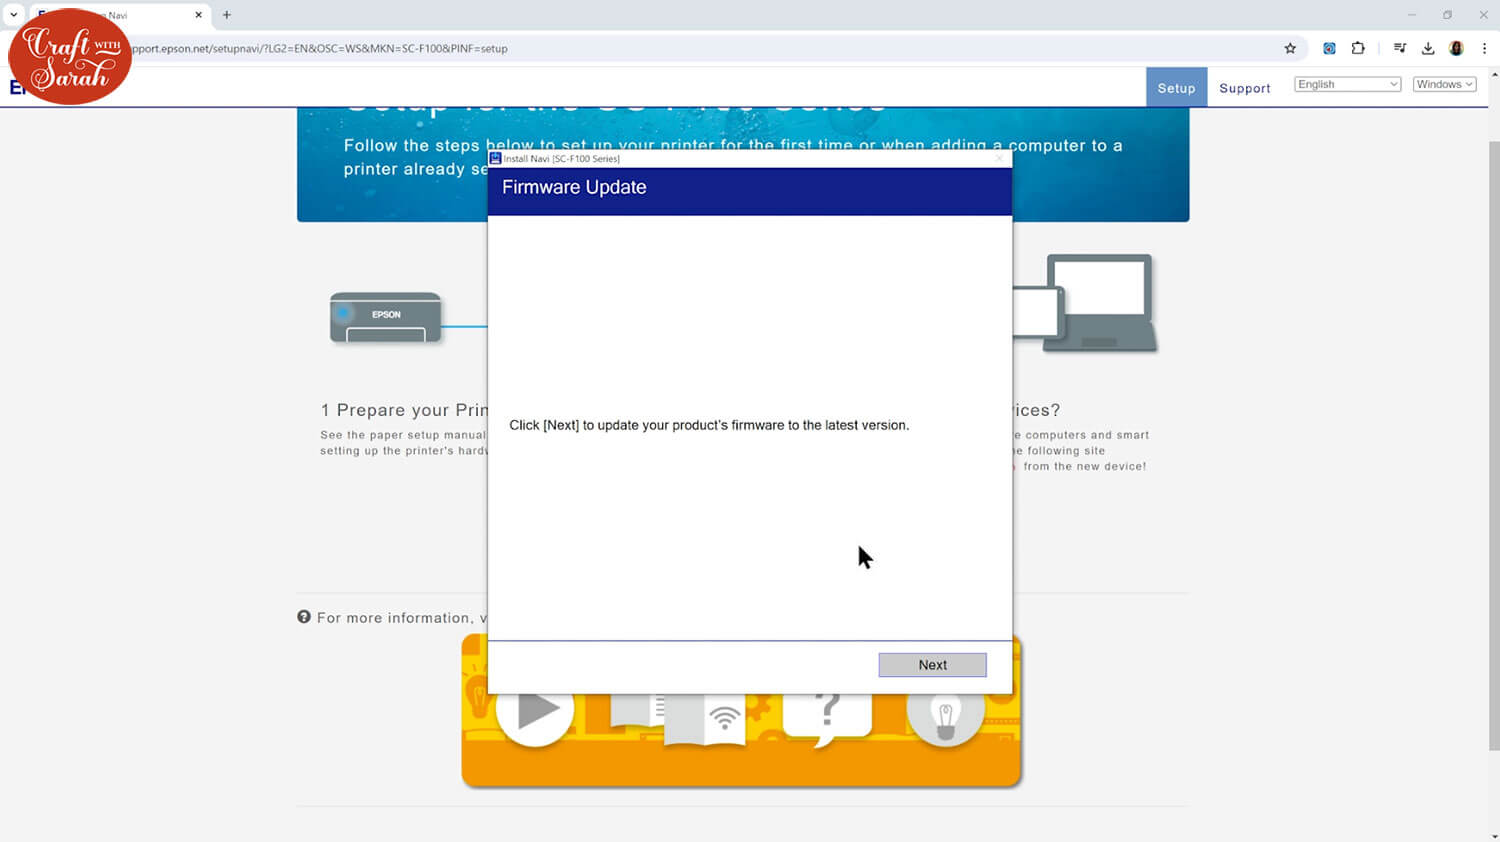
Step 6) Firmware updates
You might find that there are firmware updates available for the printer.
If so, it’s recommended that you do these to make sure your printer is running the latest version of everything. This will help to optimize its performance.
This was the only part of the setup process that I had slight issues with. I think it’s because I was using my printer buttons to go through the setup, but then I selected the firmware update on the computer, so I think I confused it!
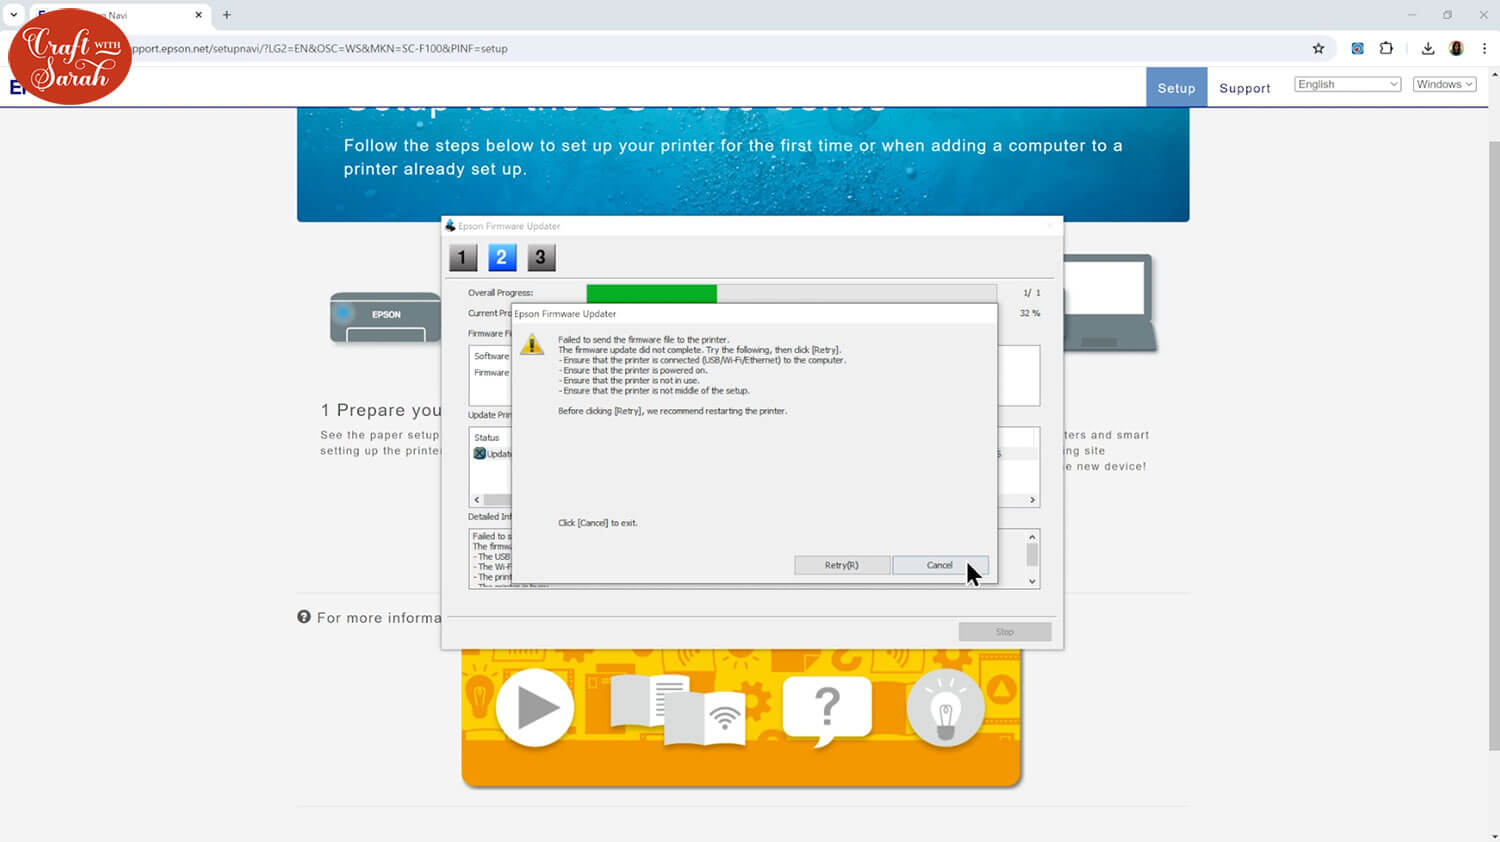
I initially got a “firmware update failed” message on the computer, so I cancelled the updated on the computer and tried it on the printer itself instead using the buttons on the printer and then it worked.
Step 7) Do a test print
The printer setup is now all finished – woohoo!!
But it’s a good idea to do a test project to make sure everything is working as it should be.
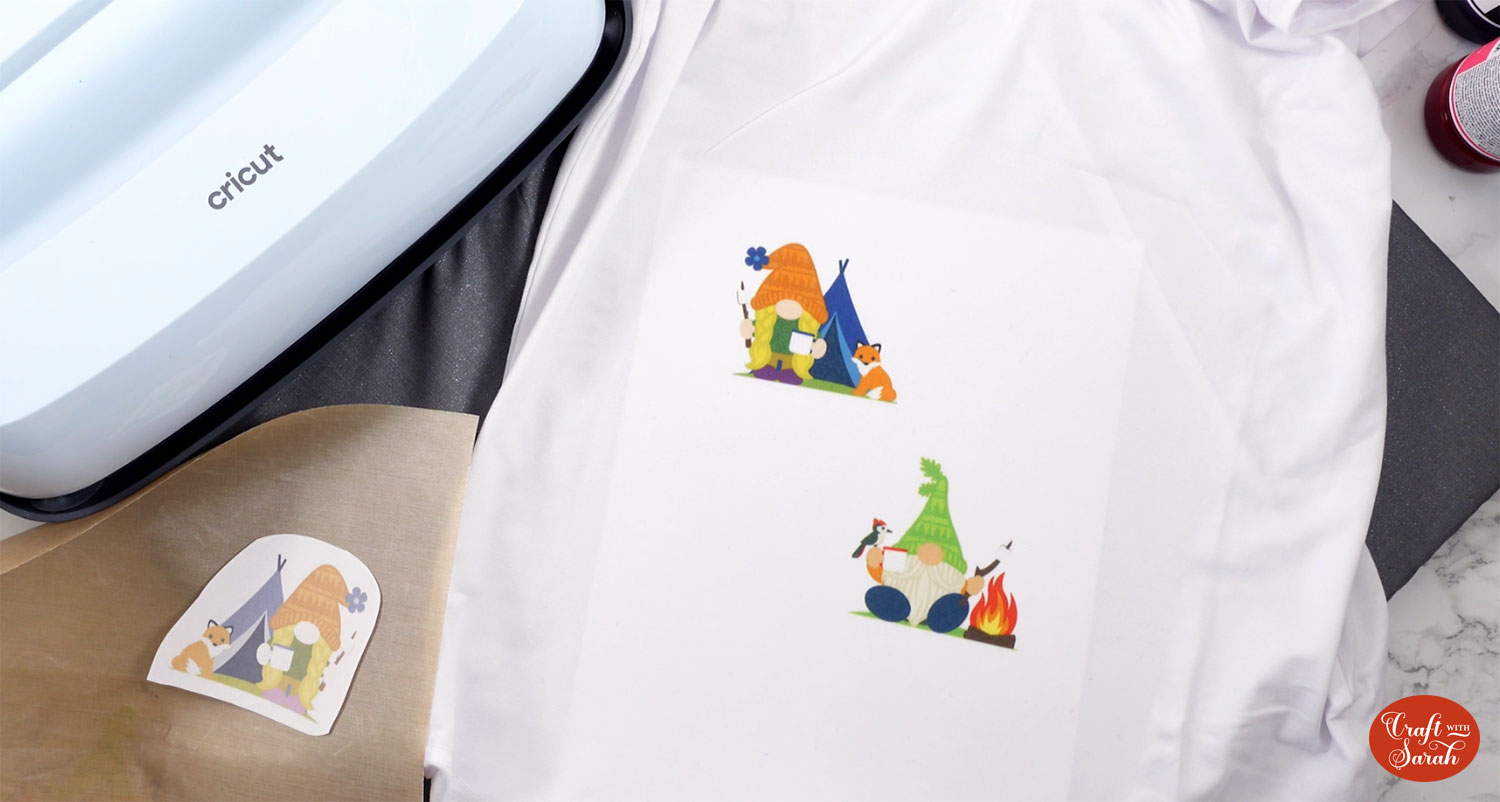
I opened up Cricut Design Space and added two of my layered gnome SVGs to the Canvas.
To convert cuttable designs to ones that will print, click one of the designs and press “Flatten” at the bottom of the layers panel. Repeat for any other images/designs on the screen.
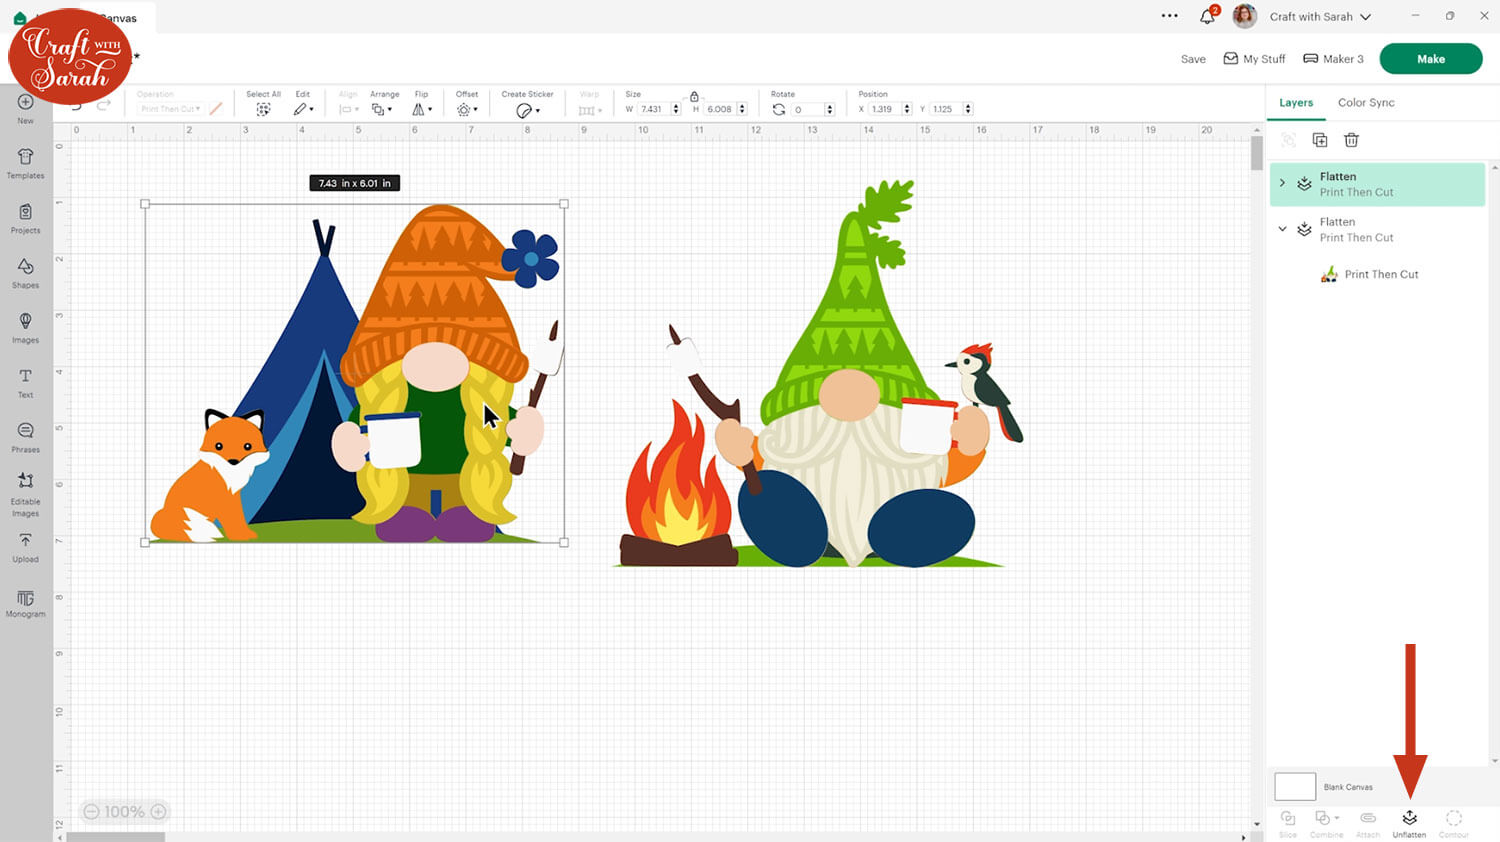
I made the gnomes smaller and then clicked “Make”.
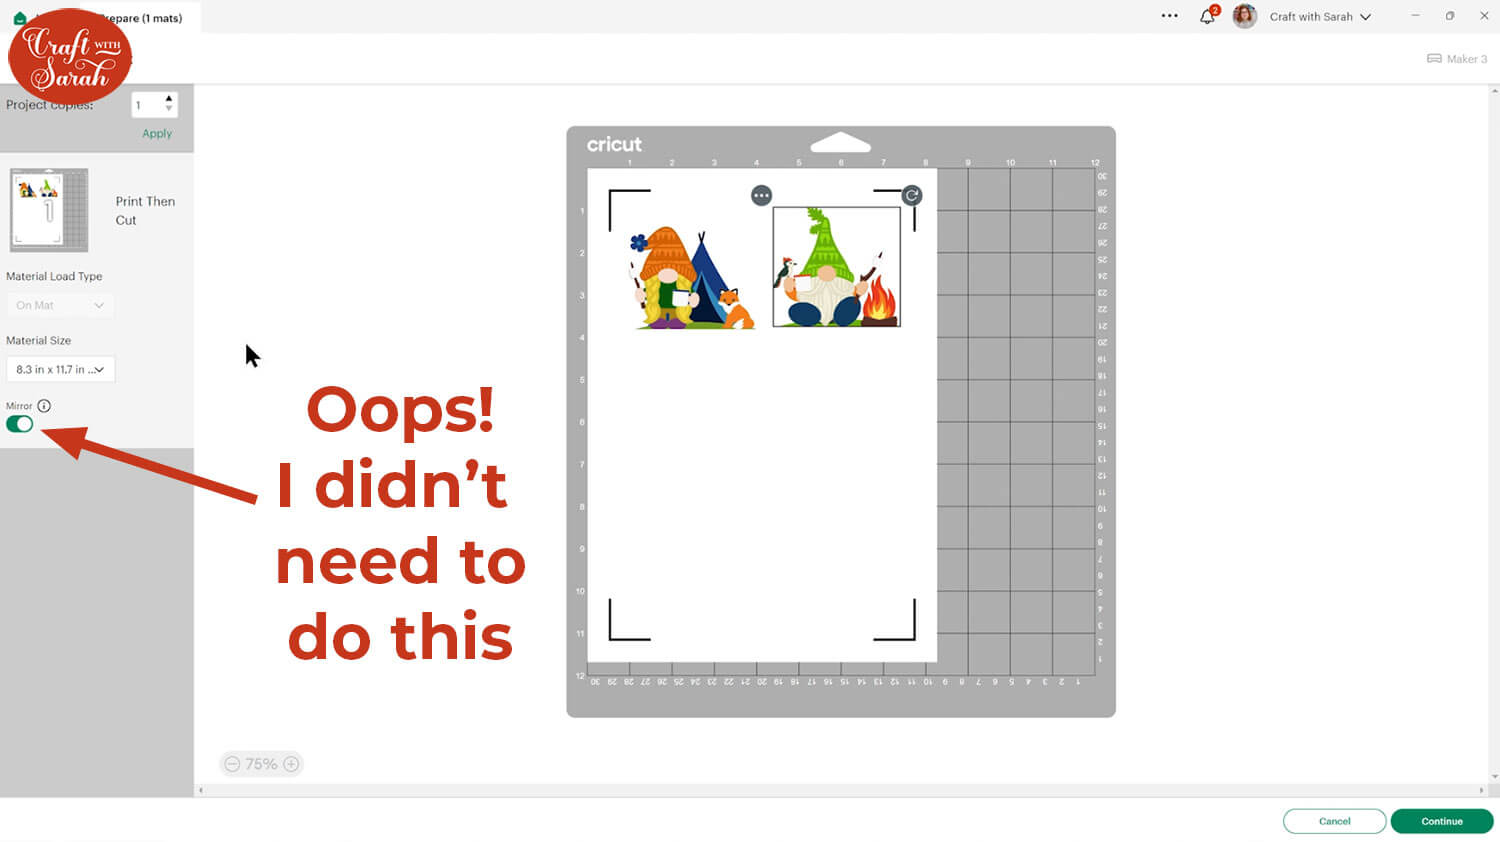
Here’s where I made a mistake!! I didn’t realise that the printer automatically mirrors for you, so I manually “mirrored” the print in Design Space.
That means my images eventually ended up the “wrong way round” after I pressed them onto my t-shirt – but for gnomes, it doesn’t really matter.
Choose the sublimation printer from the list of printer options. Keep Bleed off, but turn on System Dialog.
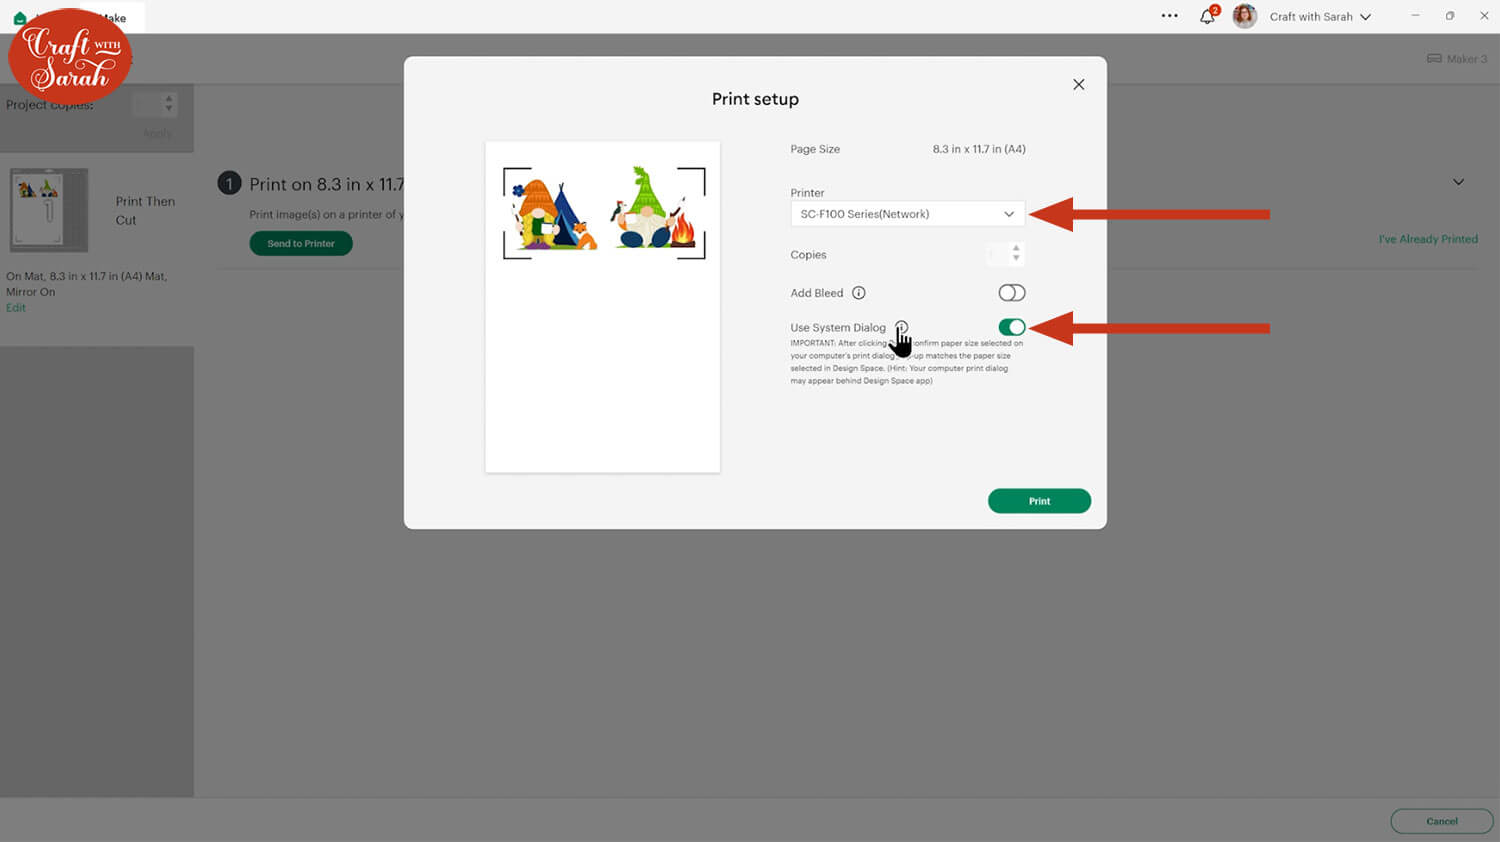
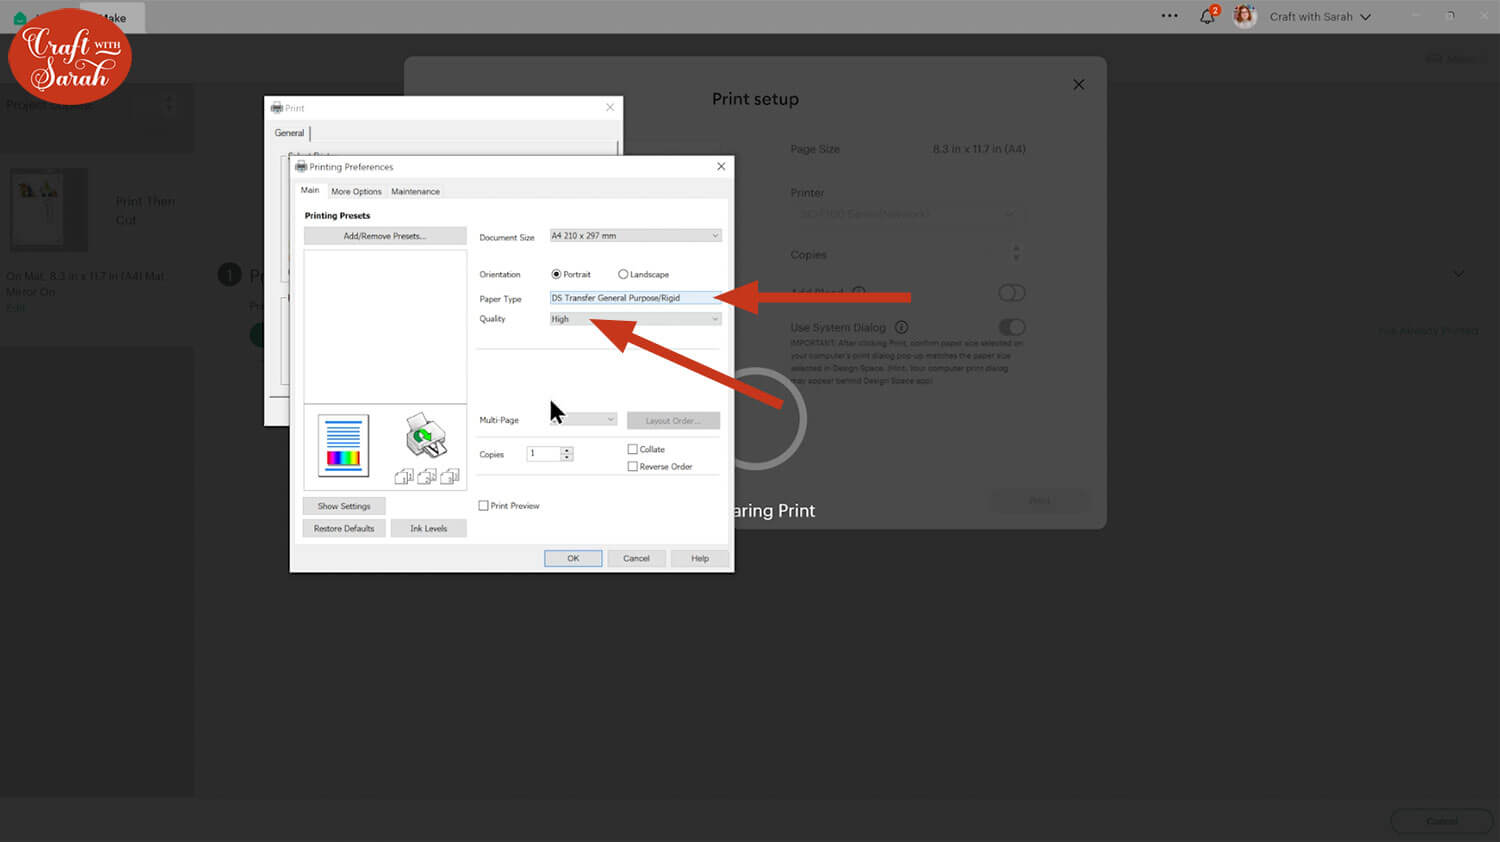
Change the print quality to “High” and select whether you will be putting the print on a hard or soft surface.
I should have chosen “soft”, but I had the “hard” one selected instead. I’m not sure how much of a difference it made, but I’ll be more careful going forward.
Don’t worry that the colours appear “dull” or faded when printed. That’s how they are supposed to look.
They will be beautifully bright and vibrant after you have heat pressed them!
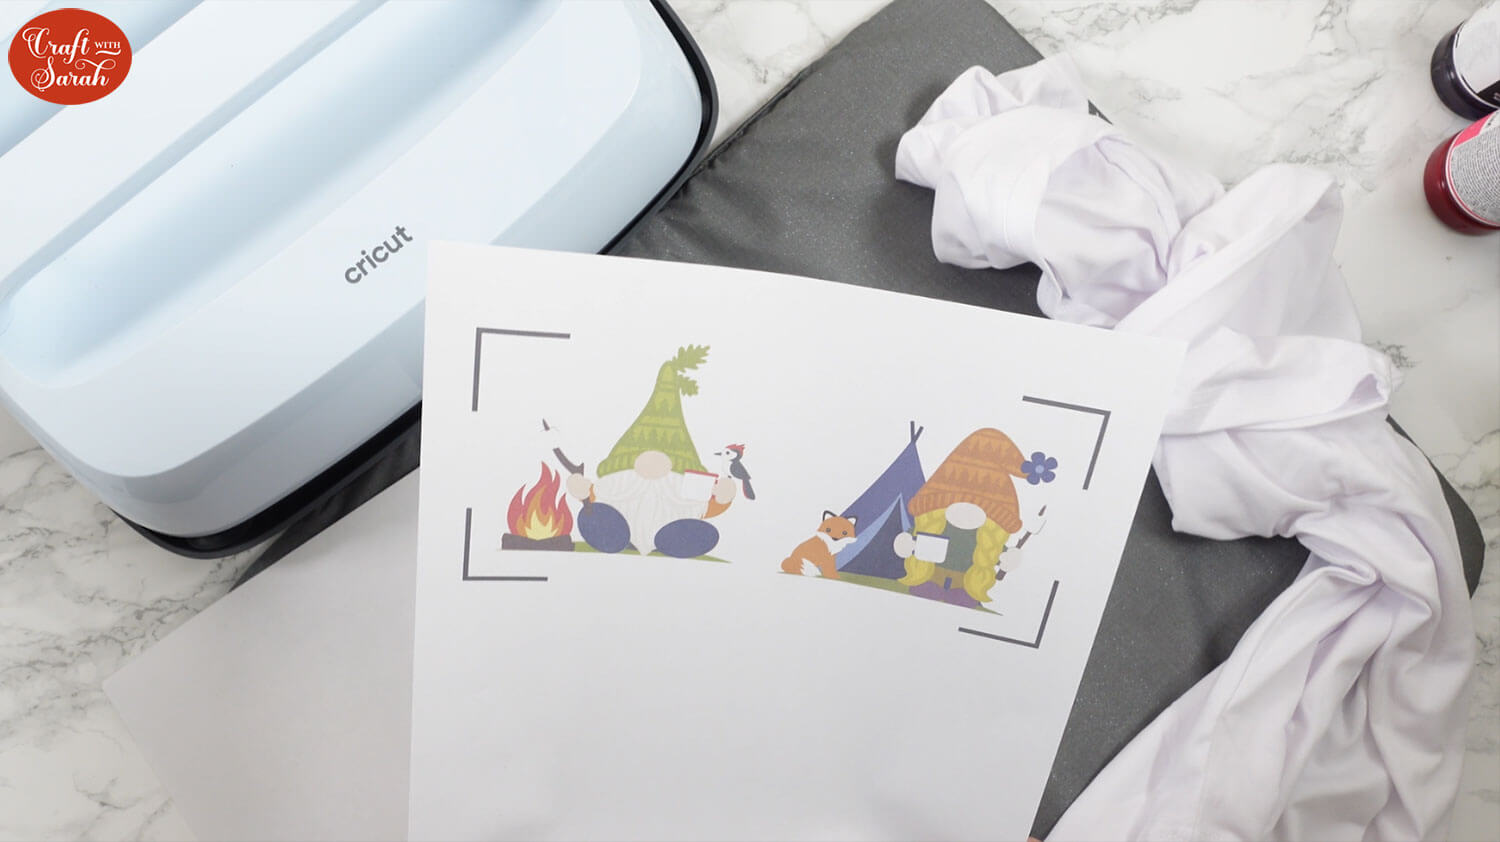
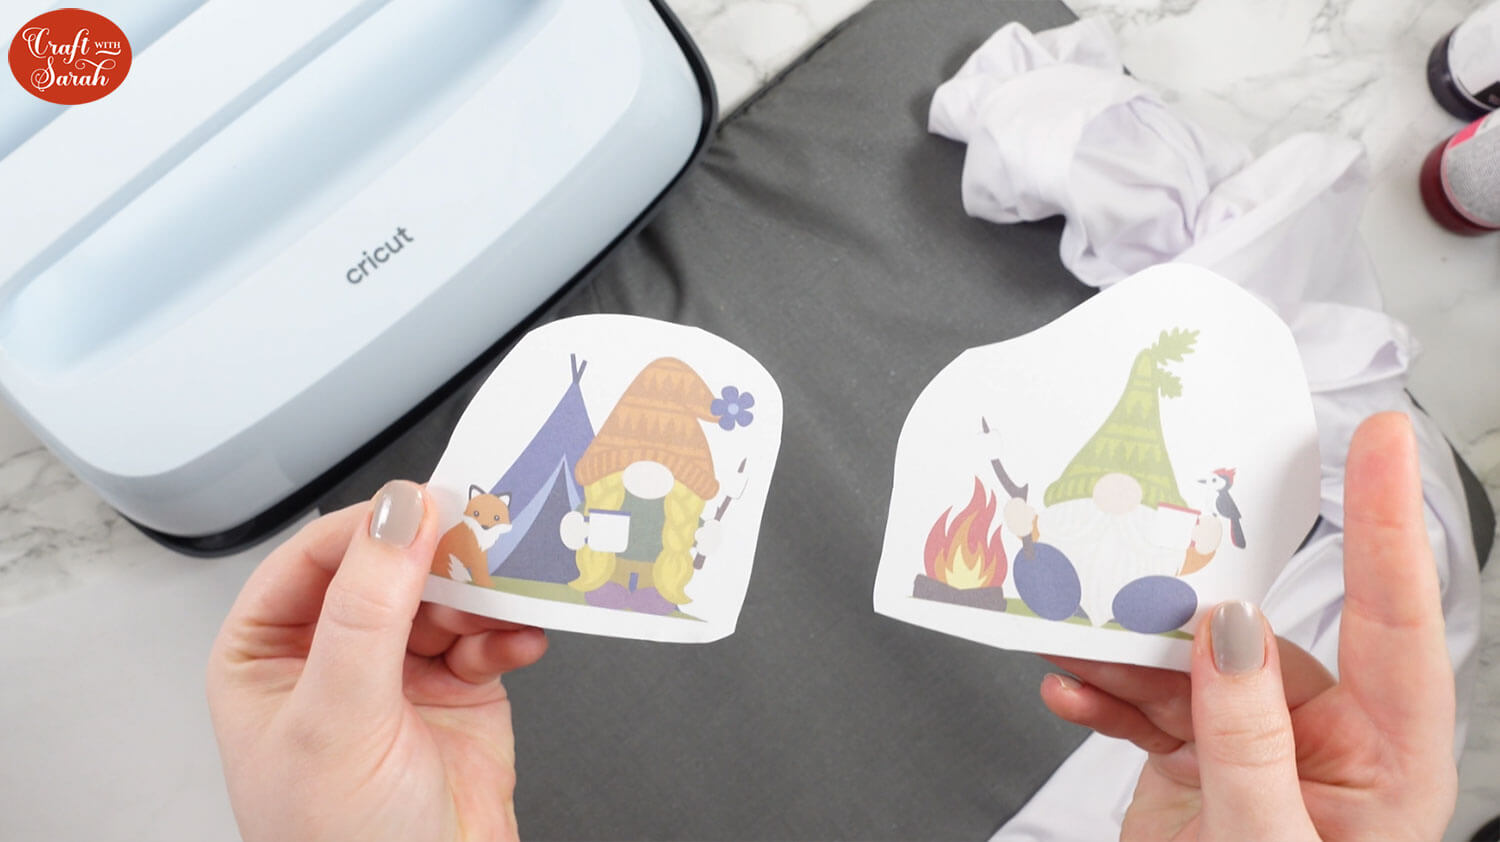
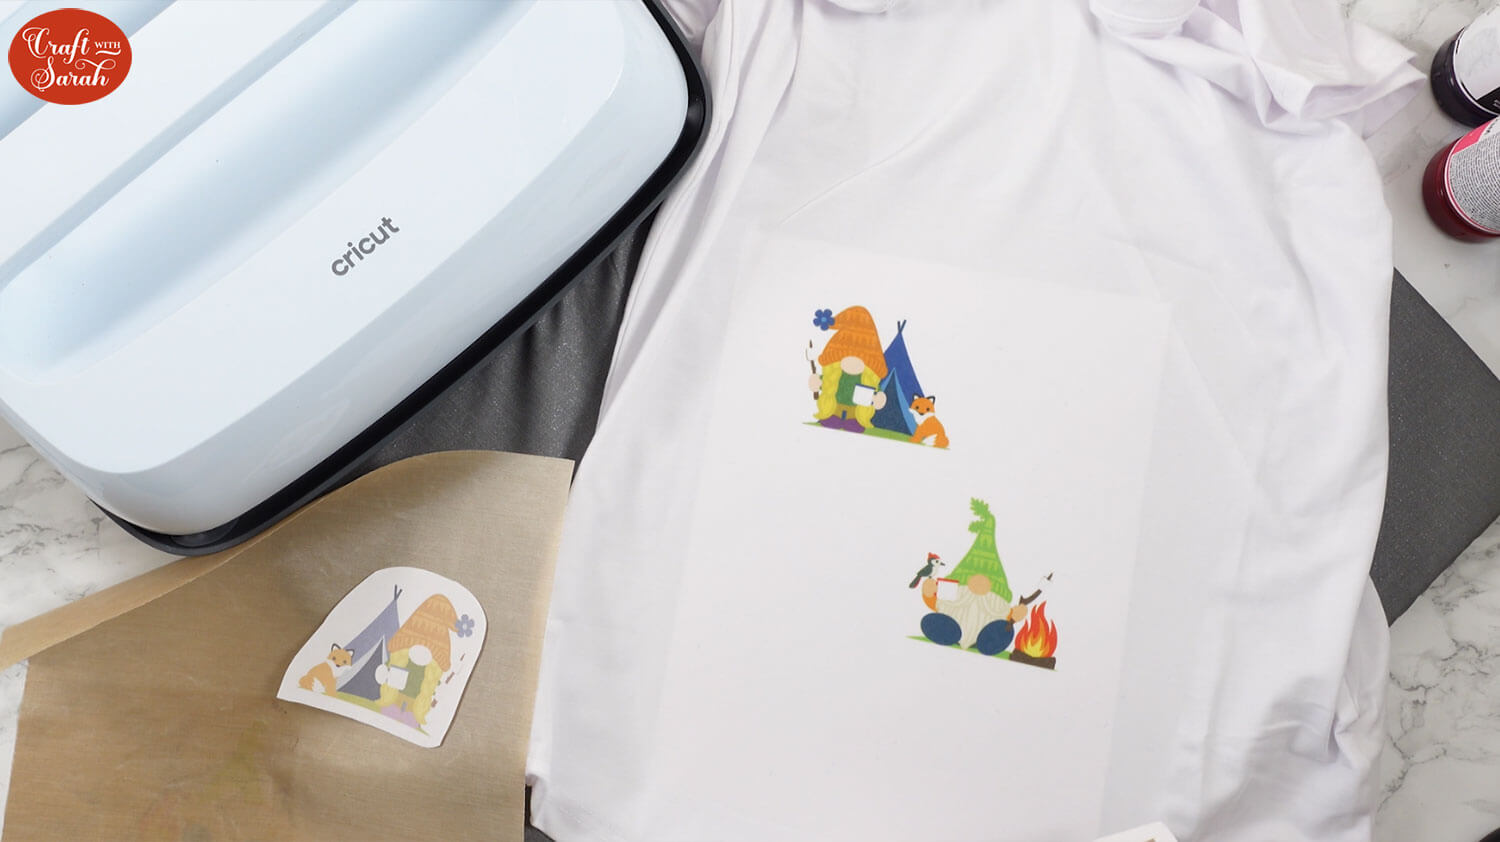
Roughly cut out each image. You could try tearing the paper instead of cutting for a softer edge.
Prepare your work surface with a heat-proof mat.
Put your sublimation blank on the mat. I used a t-shirt.
If your item has two sides (like a t-shirt) then place a blank sheet of paper inside the shirt to prevent the ink from bleeding through onto the back of the garment.
Pre-press the item for a few seconds to remove and wrinkles.
Wait for it to cool down, then place the printouts ink-side-down on your sublimation item, then cover with a Teflon sheet.
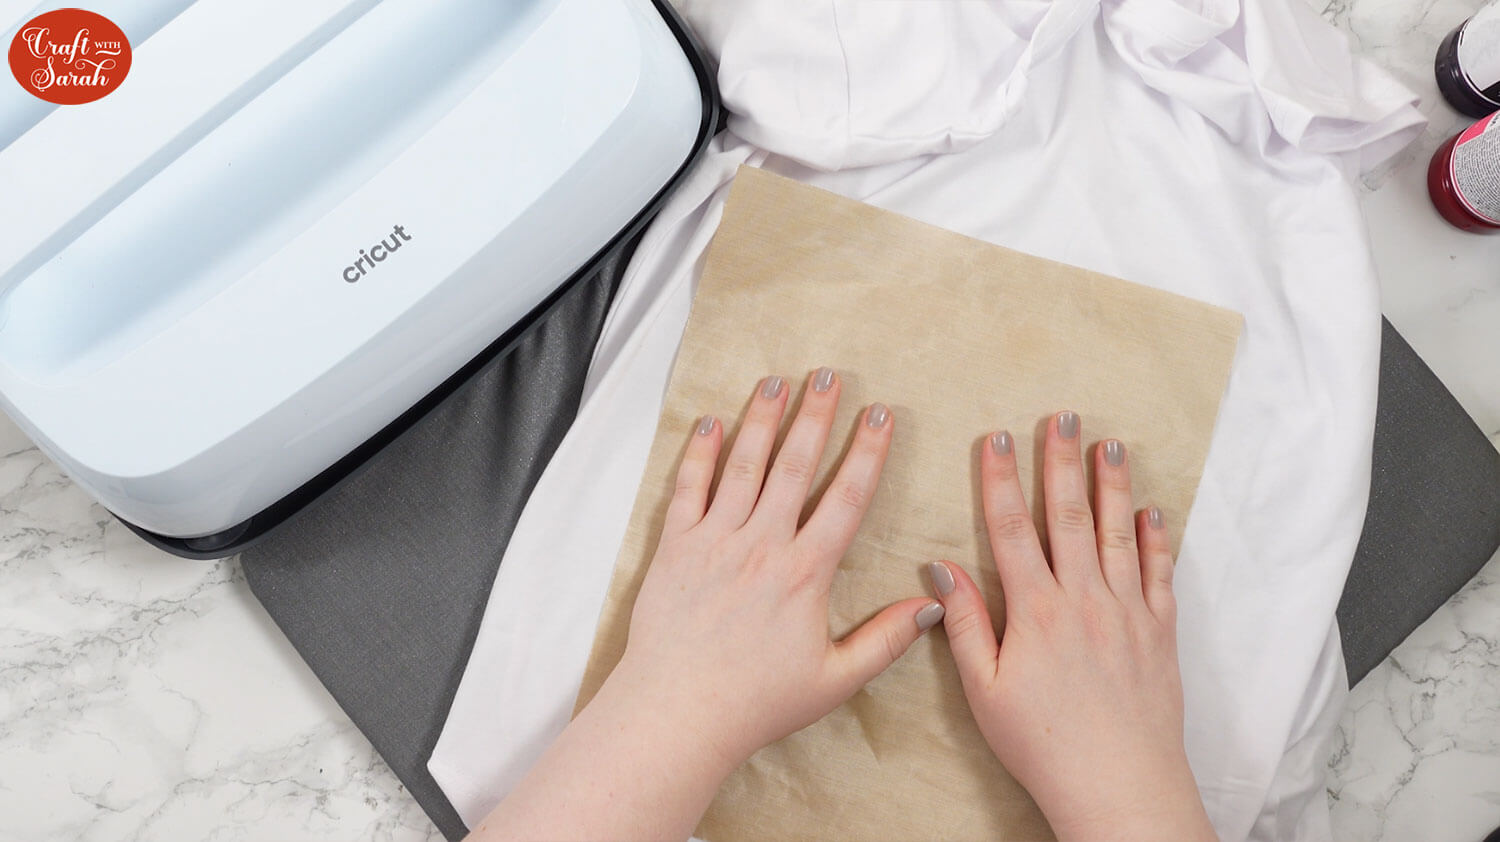
As I am only doing a tester, I just placed the gnomes in random positions on the shirt.
NOTE: You may want to add some butcher paper or a couple of blank sheets of printer paper on top of the print, before you add the Teflon sheet, to help protect against ink bleeding.
Press the sublimation prints. I did 195C for 45 seconds, and put quite firm pressure into the heat press using my body weight.
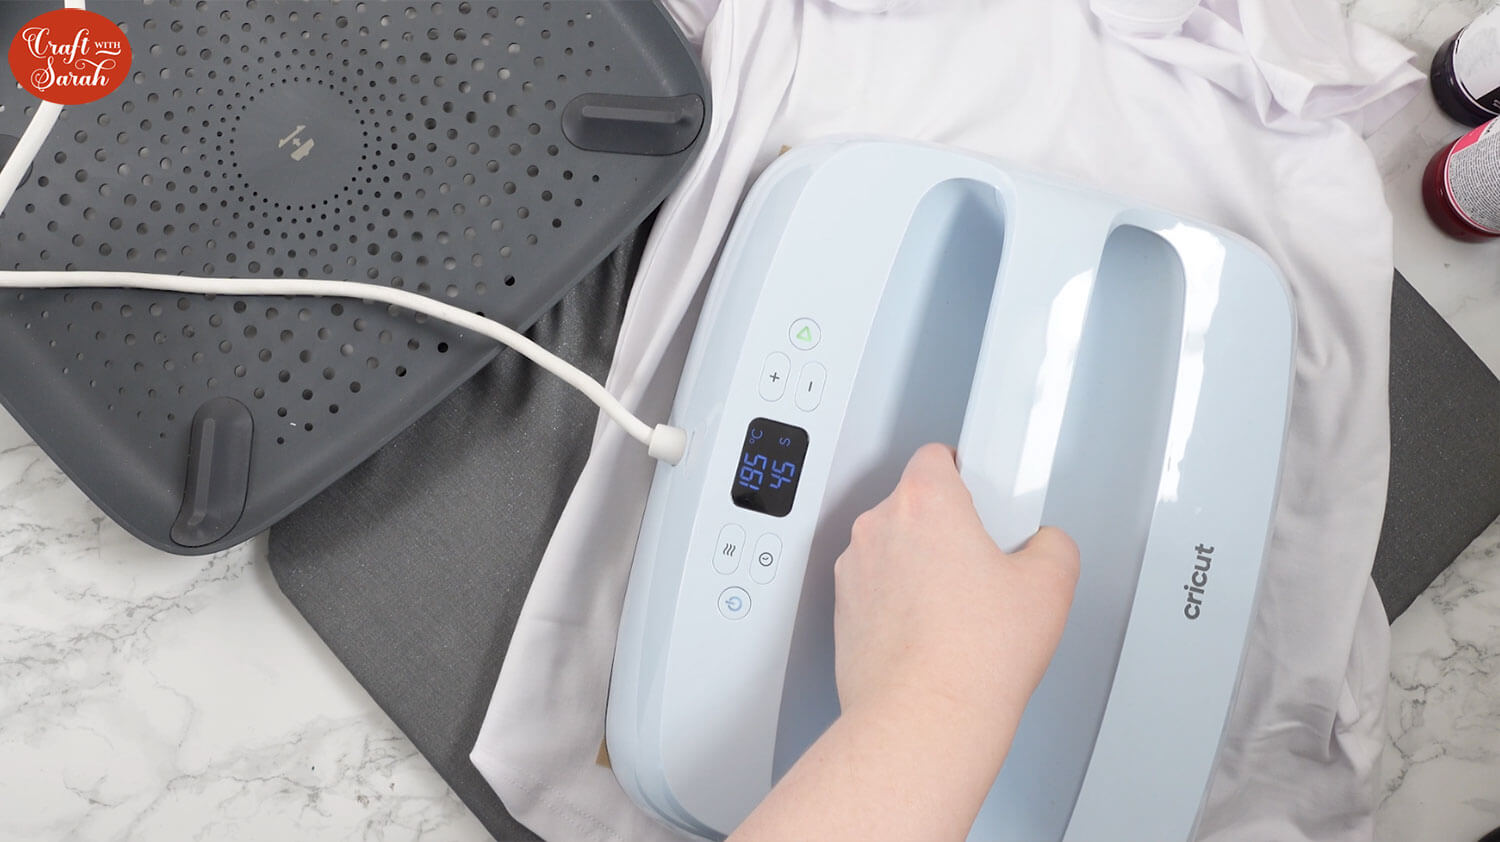
Wait a few seconds for it to cool so you don’t burn your fingers (heat proof gloves are recommended!) then remove the Teflon sheet and paper.
There will still be some ink left on the paper. Throw out the paper; it cannot be used again.
Look how amazing my gnomes turned out!! The level of detail is amazing and the colours are lovely.

I wish I had protected my Teflon sheet by placing one or two blank sheets of paper on top of my printouts, as some of the ink bled through and stained the Teflon sheet. I can’t use that again now as the ink will transfer whenever it gets hot.
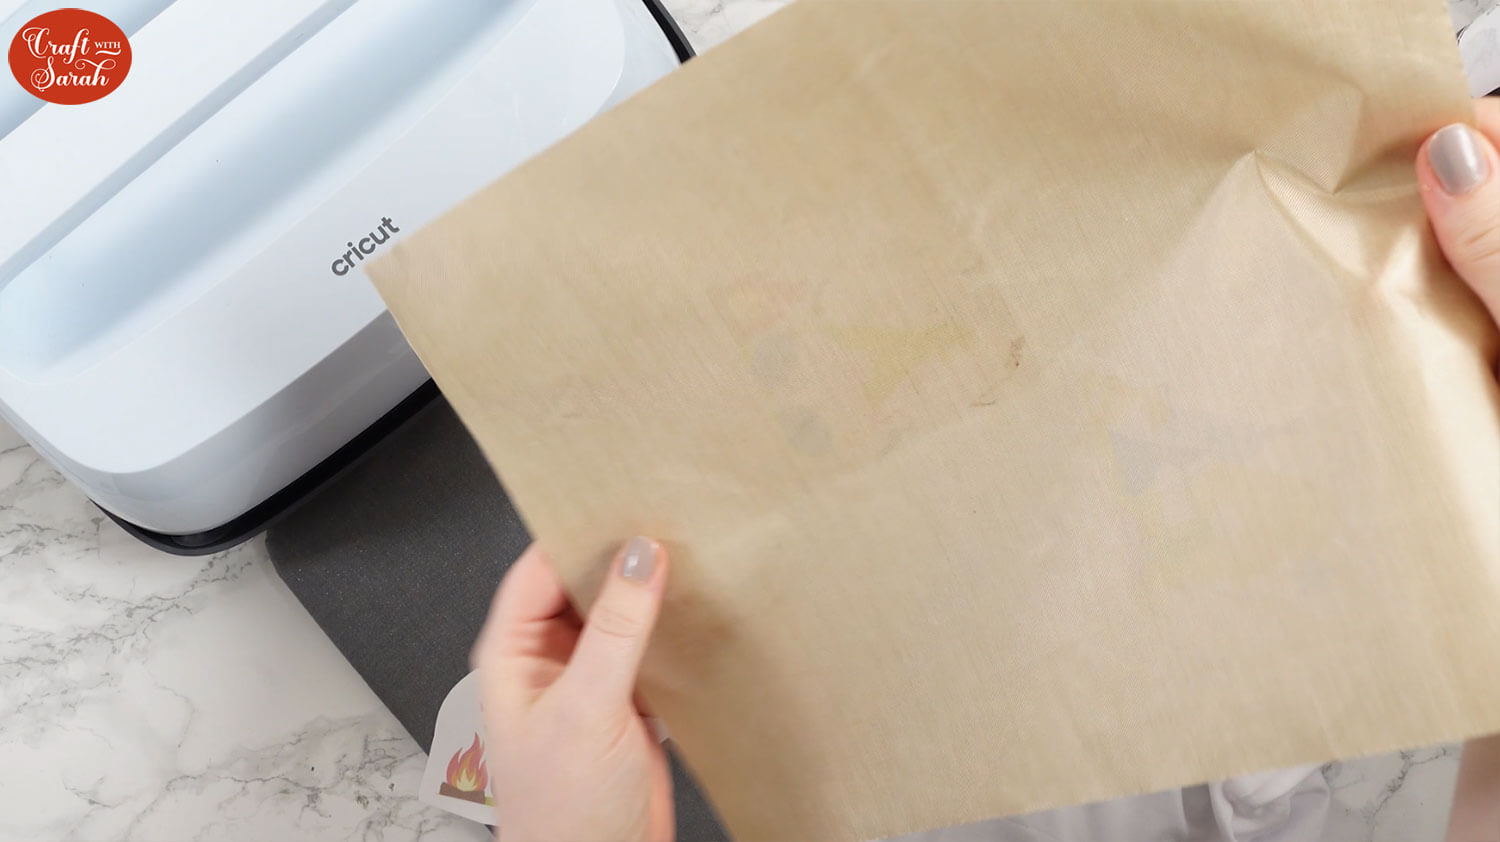
This MIGHT have happened as I used regular printer paper instead of sublimation paper.
I will buy some sublimation paper for the next time I use the printer, to see if that makes a difference.
But overall, I am thrilled with my first sublimation attempt!
Frequently Asked Questions about the Epson SureColor F100
Got questions? Here are some answers to the top sublimation questions I found online relating to this printer.
What is the price of Epson SureColor F100?
As of May 2024, the Epson SureColor F100 retails for around £375 GBP. This includes a full set up sublimation ink.
Do you need to print regularly?
One of the big drawbacks I found when I converted an Ecotank printer was that you have to remember to print something at least once a week, otherwise the printer can jam up as it wasn’t built to handle sublimation ink. I forgot to do that almost from the beginning, so my printer clogged, then it was a right pain to try to fix!
A HUGE benefit of purchasing a dedicated sublimation printer over one to “convert” is that you don’t have to print weekly to keep everything working.
I asked Epson about this, as it was something I was concerned about, and they assured me that it is fine to be left. However, they did recommend at least printing the nozzle check pattern once or twice a month (depending on results and relative humidity in the room) to purge the smallest amount of ink from the printhead to ensure no nozzles are clogged, but you do not need to print full pictures on a regular basis.
The nozzle check patterns only use a tiny amount of printer ink, so no more wasting sublimation ink on expensive “test” prints!
Do you need to set up ICC profiles
If you have converted a non-sublimation printer into one that can be used for sublimation, you will probably see lots of information online about loading ICC profiles to get accurate colours when you’re printing.
There is no need to do this for the Epson SureColor F100 as it has built-in settings designed to work flawlessly with the sublimation ink colours.
There are two print modes in the printer driver. There is a textile setting for soft substrates like t-shirts and clothing, and a rigid for everything else (mugs, etc).
The rigid print mode tends to use smaller ink droplet sizes, which gives a better final press appearance on hard surfaces.
These profiles are loaded into the normal ICC locations depending on your computer’s operating system can be selected from the usual printer settings when you print your project.
Does the Epson SureColor F100 automatically mirror prints?
Yes, it does! I love this feature – it means you will never forget to mirror again, as it does it for you!
Where can I purchase ink refills for the Epson SureColor F100?
Sublimation ink can be purchased from one of Epson’s main suppliers here.
As of May 2024, the price is around £20.95 per colour. There are four colours in total, therefore a complete ink set would be around £83.80.
How long does the ink last?
I’m not sure on that yet! I have only done a couple of prints with my printer so far. However, I’ve just ordered a whole selection of sublimation blanks to try out, so I’ll certainly be putting the printer to work over the next few months.
I will keep track of my prints and the ink levels and will update this post once they have run out.
Final thoughts on the Epson SureColor F100 dye sublimation printer
Overall, I was pleasantly surprised at how easy it was to set up the printer, load the ink, get it connected to my WiFi (I was dreading that bit!) and going from taking the printer out the box to having my first print pressed and ready in front of me.
I’m looking forward to trying out lots of different project with it in the next few months.
I’ve purchased some sublimation blanks to try, including:
- Clothing
- Tote bags
- Christmas tree decorations
- Rulers and stationery
- Sports bags (transparent material)
- Can holders in various colours
- Wooden puzzles
- Metal items
- Soft toys
- + lots more
I’ll let you know once I’ve had a play with them. I’m sure there will be some more sublimation tutorials in the future, too!
Happy crafting,
Sarah x

