DIY Rainbow Craft 🌈 Free Shamrock Lantern for St Patrick’s Day
Create a magical St Patrick’s Day centerpiece with this rainbow lantern.
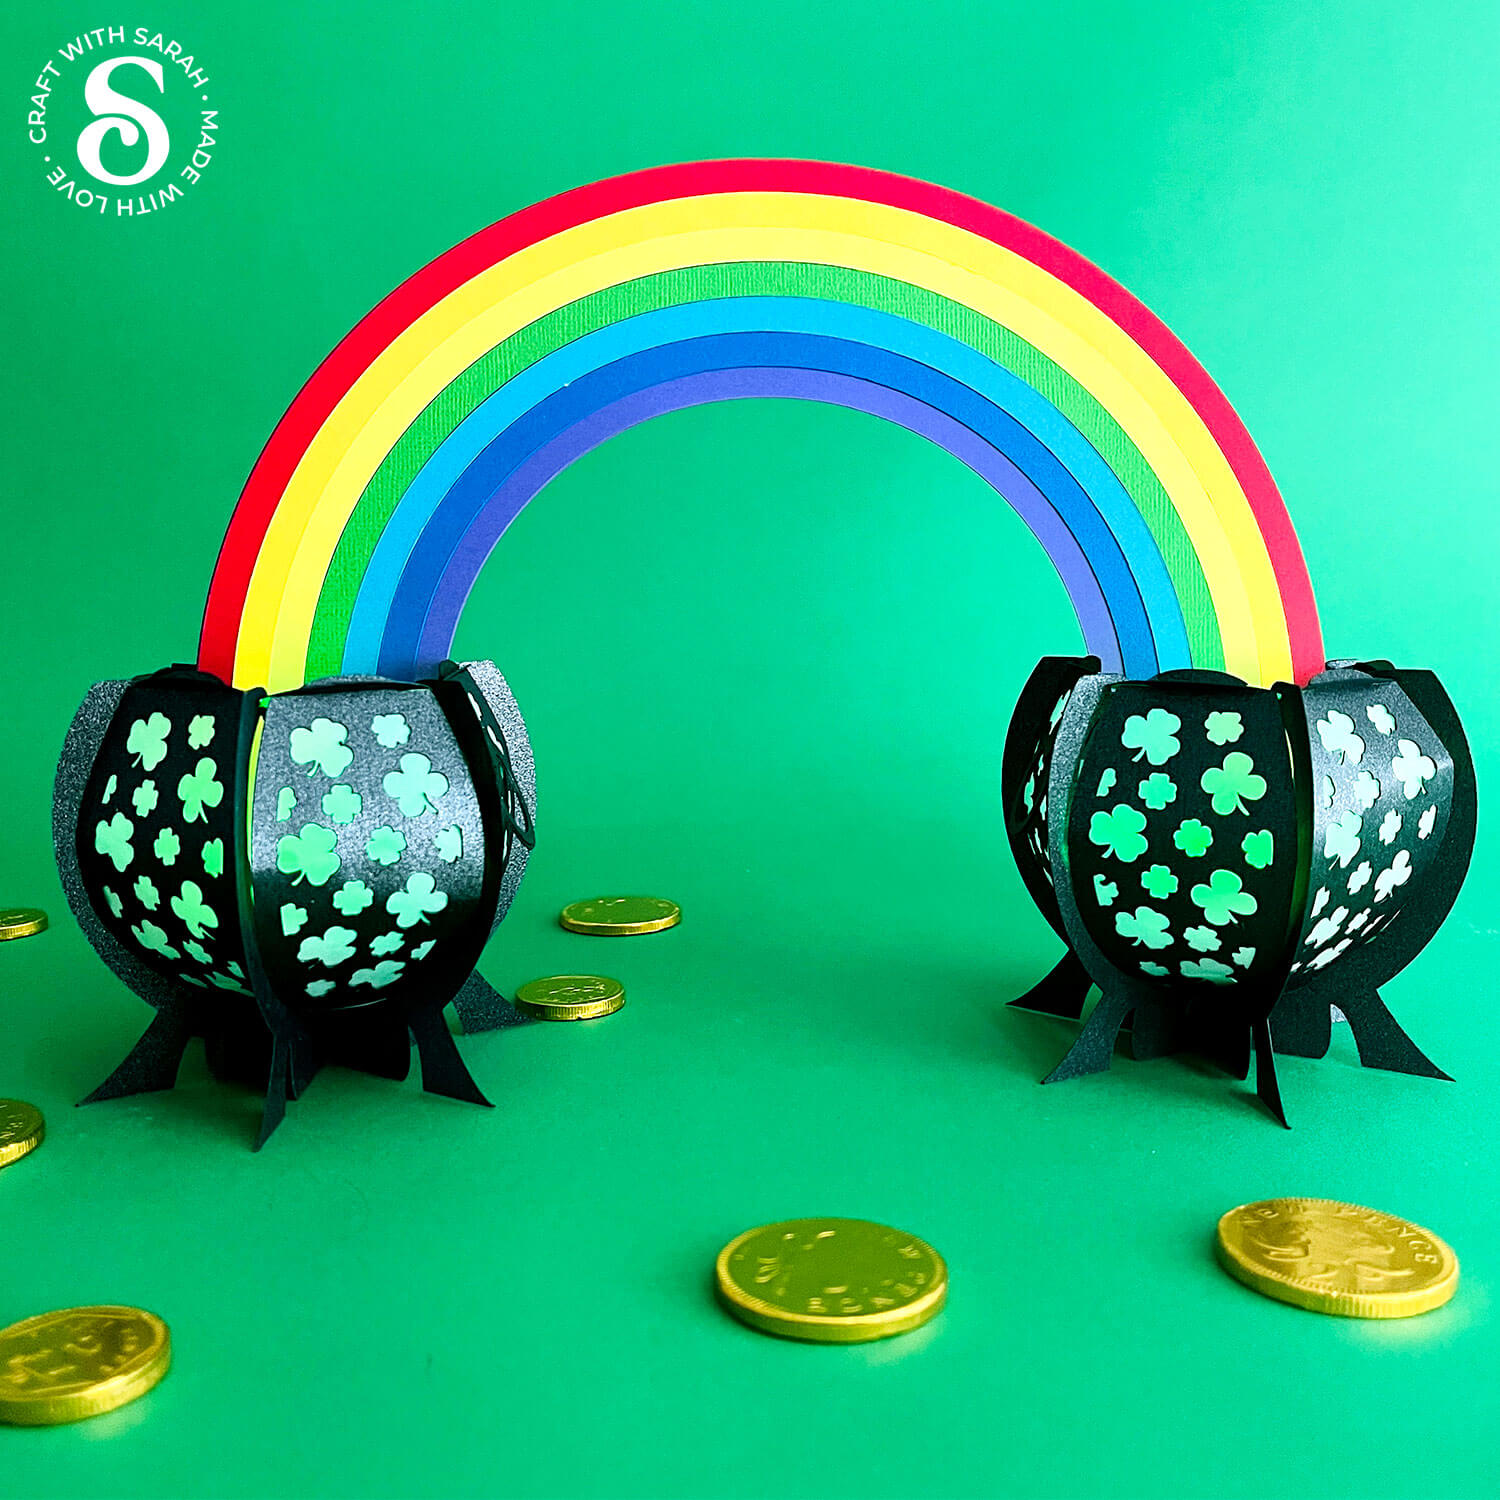
St. Patrick’s Day is just around the corner, and what better way to celebrate than with a stunning, handcrafted lantern that captures the spirit of leprechauns, shamrocks, and rainbows?
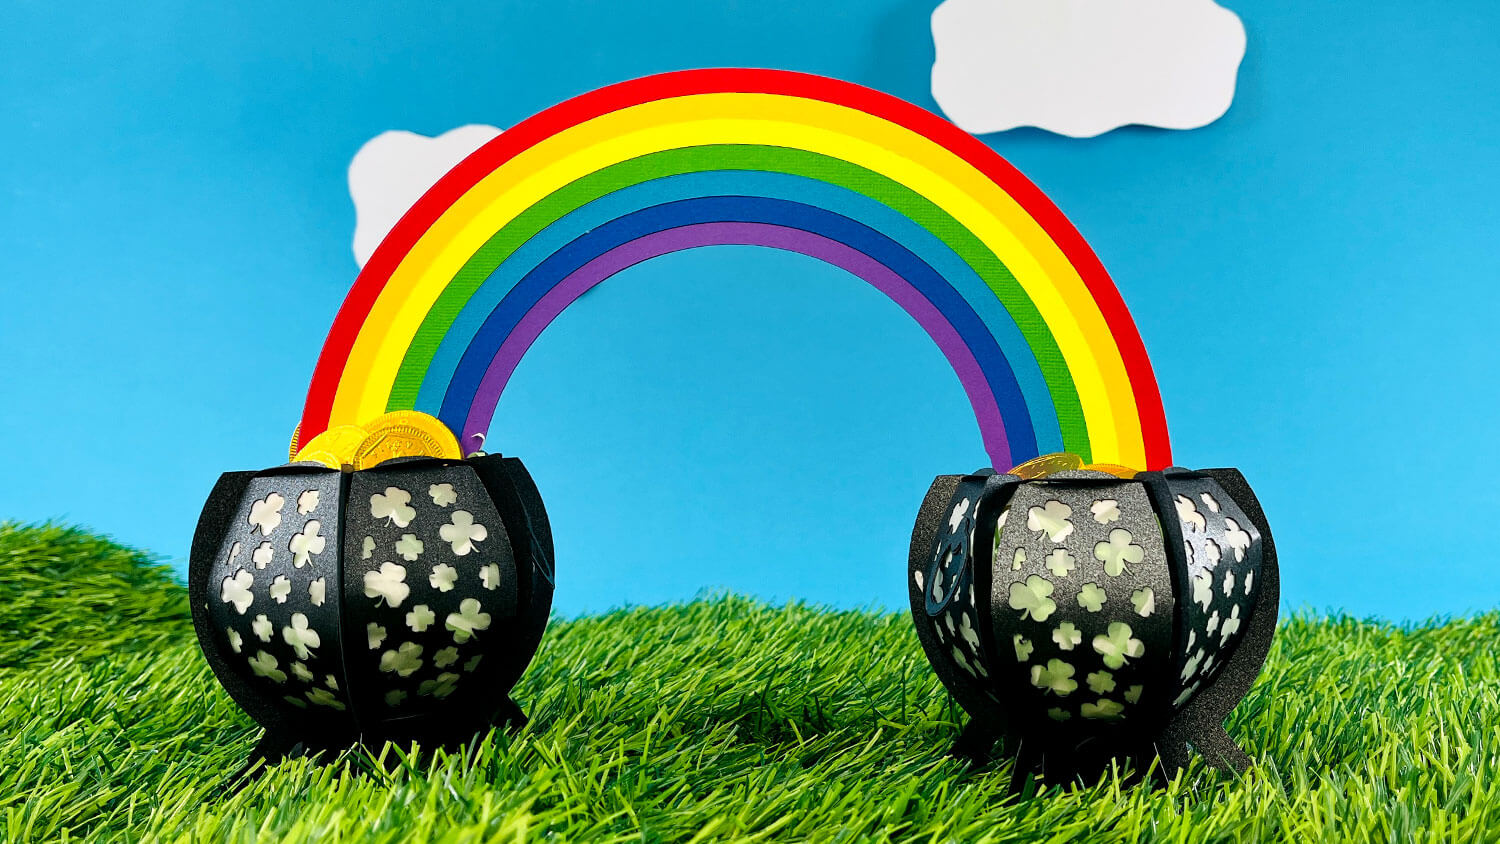
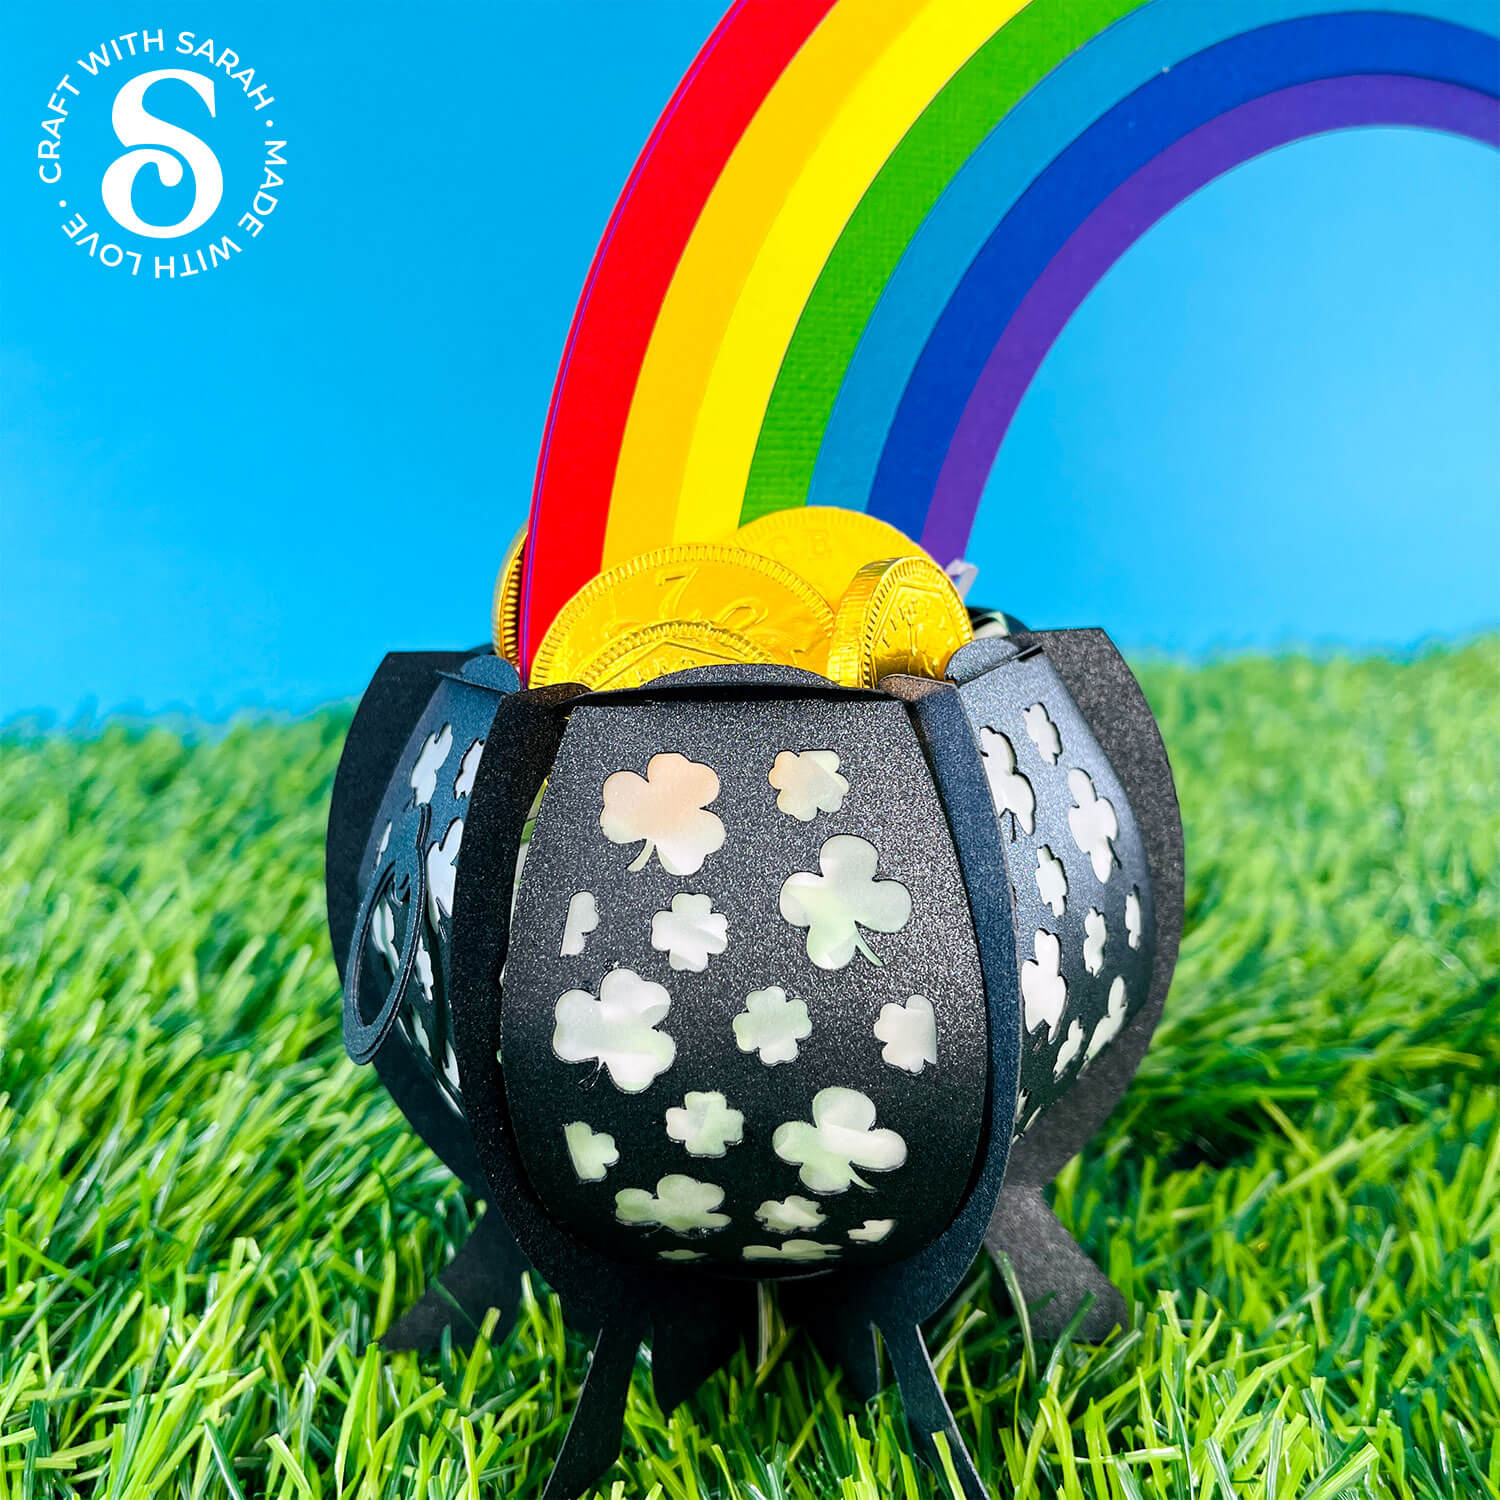
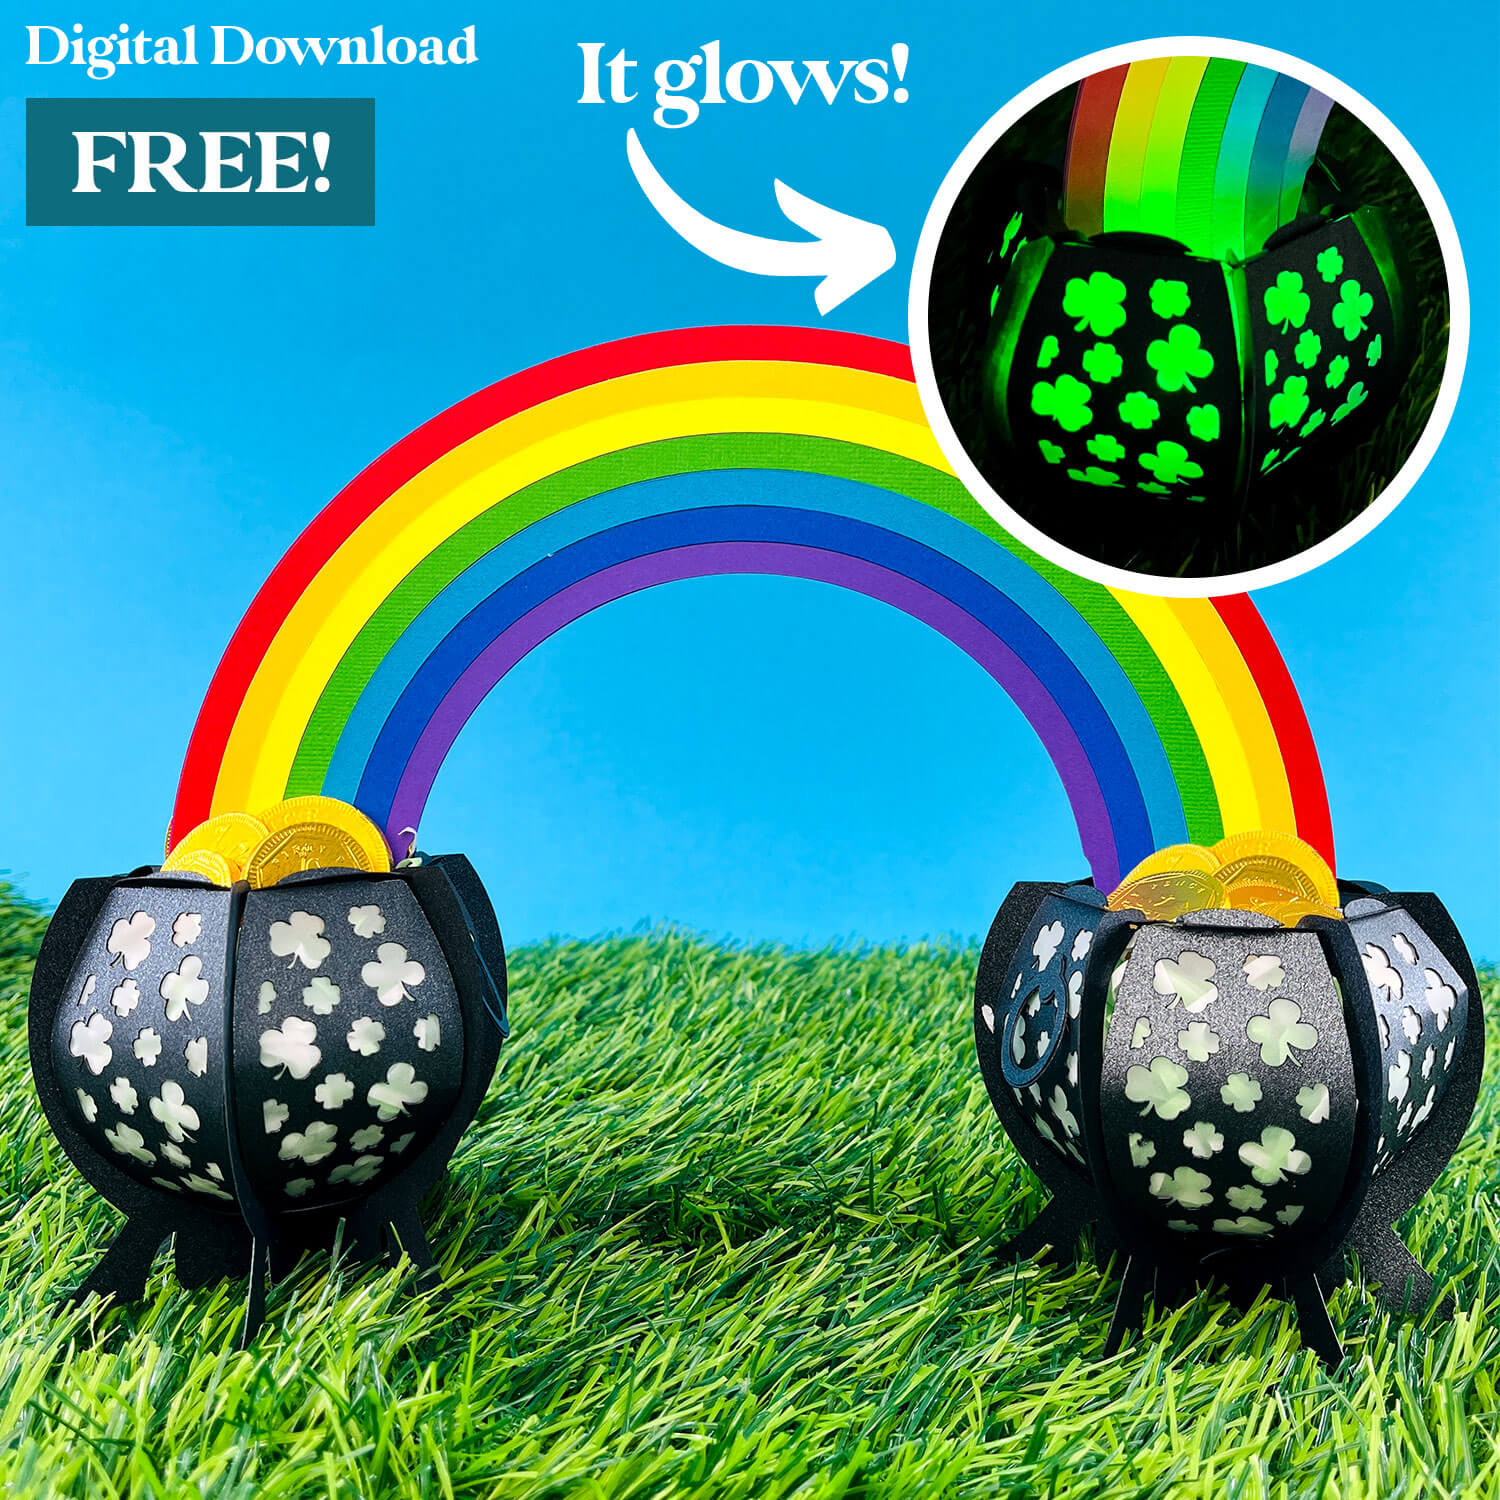
This beautiful slot-together lantern features two pots of gold connected by a colourful rainbow, making it the perfect festive decoration.
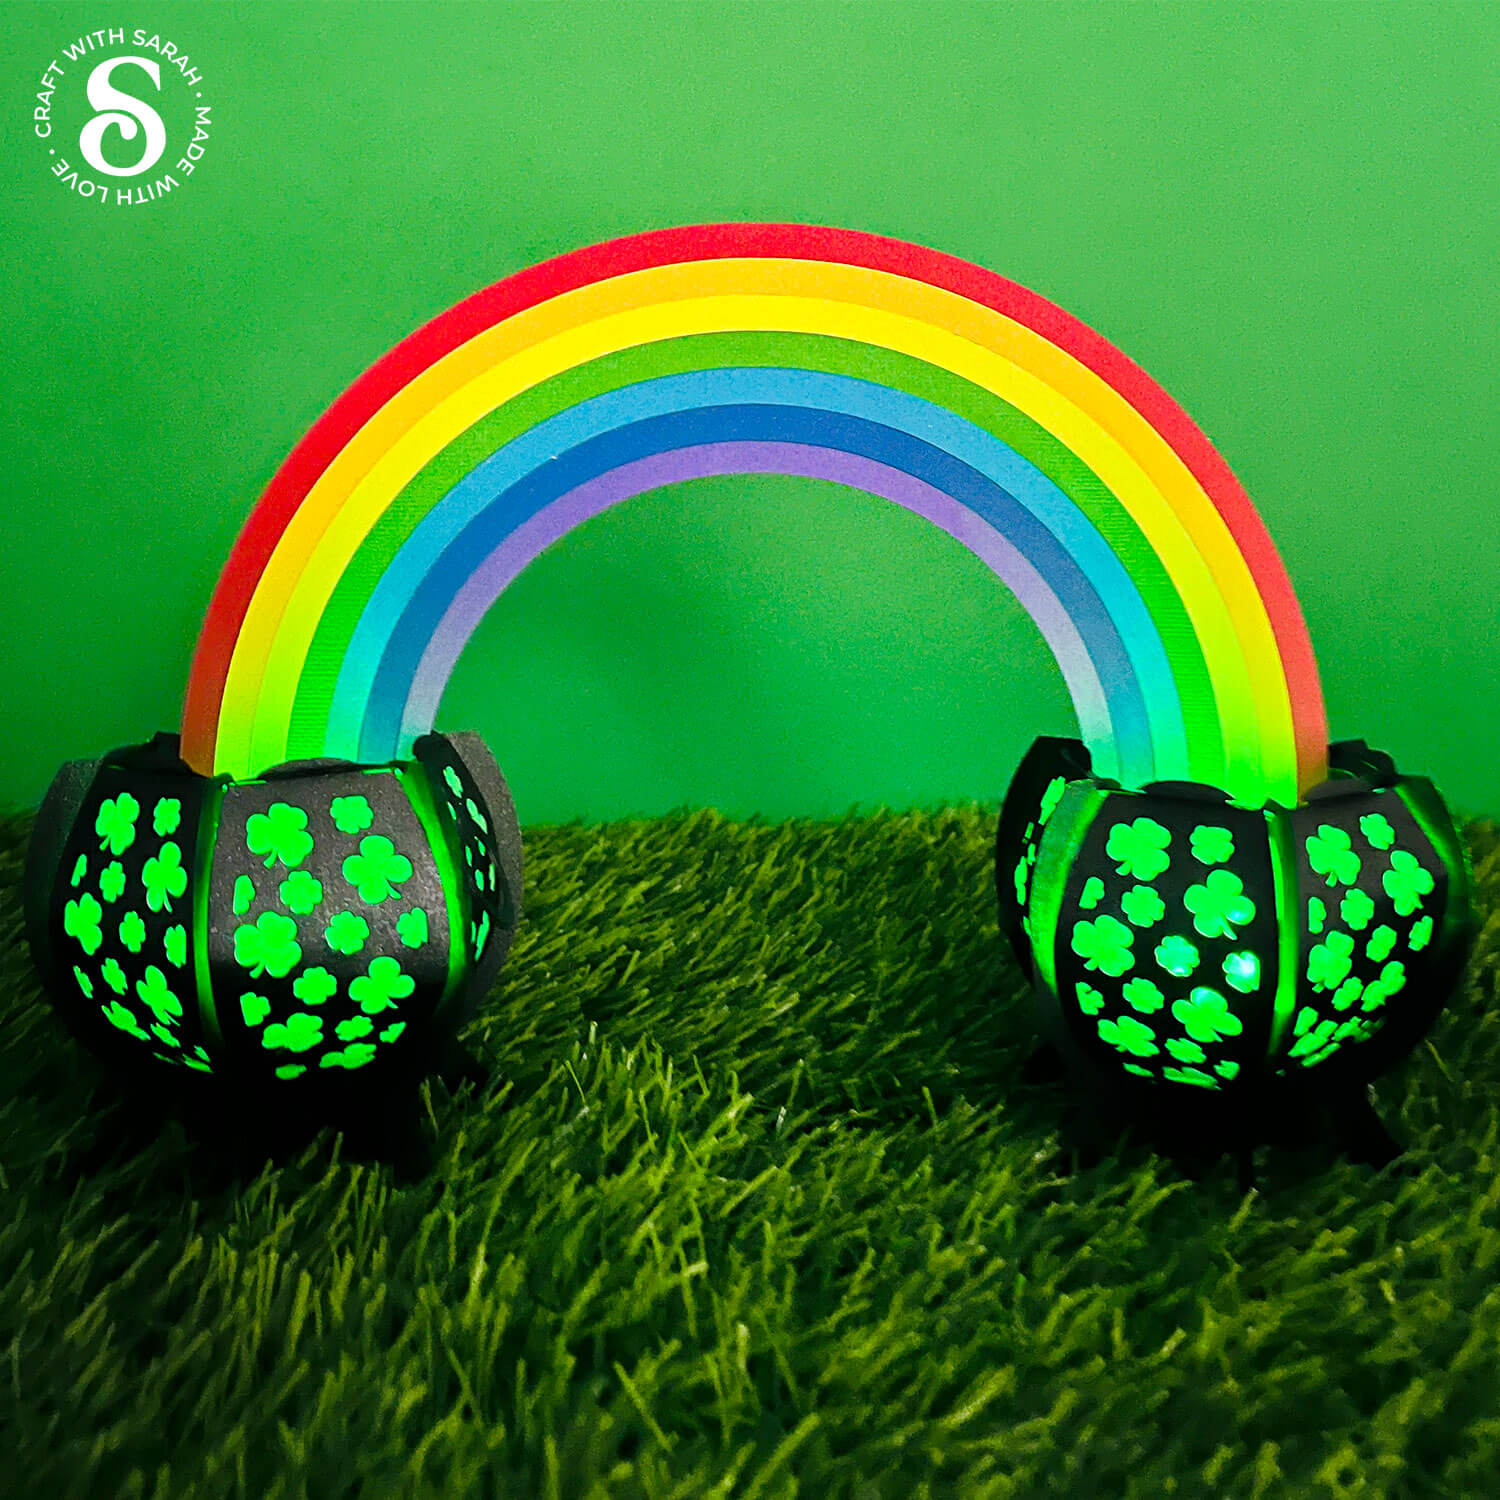
Whether you fill it with battery-powered lights or sweet treats, this lantern is sure to bring a little luck to your home. 🌈
Follow this easy step-by-step guide to create your own St. Patrick’s Day lantern!
Video tutorial for St Patrick’s Day lantern
Watch the video below to see how to make this craft project. Keep scrolling for a written tutorial.
Materials supply list
Here is a list of the materials that I used to make this project.
Please note that some of the links included in this article are affiliate links, which means that if you click through and make a purchase I may receive a commission (at no additional cost to you). You can read my full disclosure at the bottom of the page.
- Cricut machine
- Light blue Cricut cutting mat
- Coloured Card
- Glue (I like Bearly Art Glue and Collall)
- Vellum or tracing paper (if using lights)
- Battery-powered LED lights or chocolate gold coins (optional)
This project is suitable for the following types of Cricut machine: Explore Air 2, Explore 3, Explore 4, Maker, Maker 3, Maker 4, Venture and Joy Xtra. It is too large to be made on the original Joy machines.
Rainbow lantern assembly instructions
Here’s how to make the St Patrick’s Day rainbow lantern design using a Cricut machine.
Step 1) Download the free file & unzip the downloaded folder
Download the Free Cutting File
Please login to your account to download this file.
TERMS OF USE:
You may sell finished, handmade physical craft items that you have made using this product but must not sell or share the digital files. Read full terms of use
Before you upload the SVG to Design Space, you need to unzip the download folder that it comes in.
- How to unzip a folder on Windows computer
- How to unzip a folder on a Mac
- How to unzip a folder on an iPad/iPhone
- How to unzip a folder on an Android device
After unzipping, upload the SVG file into Cricut Design Space. This is the file which starts svg- in the filename.
Not sure how to do this? Here’s how to upload SVGs to Cricut Design Space. Make sure you upload the file which starts svg- in the filename!
Step 2) Check the size and cut the SVG
The SVG should load in at 24 inches wide and 35 inches tall. If not, resize it to match those measurements.
This size can be cut from 12×12 inch or A4 sized cardstock.
If you are going to be using US Letter sized cardstock then you may need to make the design a little smaller. Try 32 inches tall, which works out at just under 22 inches wide.

The design comes ready to cut – there is nothing you need to change on the screen.
If you are planning to put lights inside the post of gold then the blue panel shapes near the bottom of the design should be cut from vellum, tracing paper or some other kind of translucent material.
If you are filling the pots with treats then you can cut these panels from solid coloured card. Green or gold (or a mixture!) would look lovely.

Step 3) Cut out all the pieces
When you’re happy with how the project is looking in Design Space, click “Make” and follow the instructions on-screen to cut out all the pieces.
To change the paper size, go into the dropdowns over on the left side of the screen and choose the paper size that you want to use. You need to change it for every single colour.

To save space on your cardstock, you can move things around by clicking and dragging. Make sure when you’re moving things about that nothing overlaps because otherwise, it won’t cut out properly.
TIP: New to cutting cardstock with a Cricut? Check out this in-depth tutorial which goes through every step of the process, including tips for getting the best quality cuts from your Cricut.
Step 4) Stick the rainbows together
There are two copies of all the rainbow pieces as we’ll be sticking them back-to-back so that the lantern looks beautiful from all angles.
I am using Bearly Art Glue to stick the project together.
It’s SO good because it doesn’t “warp” or bend the cardstock like some glues do. You can use as much of it as you want and the card stays perfect – and it dries perfectly clear too!
Collall All-Purpose Glue is another great one to use for cardstock, which is more readily available in the UK.

Start with the largest base piece (purple) as the foundation.
Layer the red strip on top, ensuring the outside edges align and that the bottom edges line up against the bottom of the purple card.

Continue sticking the coloured strips to the rainbow in this order: orange, yellow, green, light blue, dark blue.
Glue each layer carefully, avoiding excess glue that may smudge.

Repeat this process to create the second identical rainbow piece.
Once both rainbows are complete, glue them back to back, ensuring they align perfectly.

Step 5) Glue the vellum/backings to the side panels
Glue the vellum/tracing paper to the inside of the “pot of gold” side panels. If you are using coloured card instead, glue those pieces.

Glue the smaller rings for the handles of the pots of gold to the larger rings. You will end up with four handles in total.

Step 6) Assemble the base of the pots
Take your three structure pieces of the pots and make sure you have them in this specific order:
- Number 1 has a slit in the bottom section of the base
- Number 2 has a slit in the top and the bottom
- Number 3 has a slit in the top

Take piece number 1 and 2. Slot the cutouts in piece 2 over the cutouts in piece 1 until it reaches the bottom. You end up with a cross shape.

Hold them flat against each other and then slot in the third structure piece which will slide over both of them until it gets to the bottom.
It should open up so you end up with a six-sided shape that will stand up by itself.

To give the pots of gold stability, there are two circles. The smaller circle goes in the bottom and the larger circle goes in the top.
Note: This is the opposite way round to my usual slot together designs, so make sure you get this right!
Start with the smaller circle and use the slits to slot into the gaps on the pots of gold. Take care not to rip anything as you go along.


Take the larger circle and use the slits to slot them into the top of pots of gold. The edges of the pot structure hook into the circle to hold it in place securely – a little bit like a coat hanger.


Repeat for the other pot of gold.
Step 7) Add the sides to the pots of gold
Gently bend the side pieces and use the slots at the top and bottom of the pots to attach the sides by placing the short tab in at the top first, then thread the longer tab through the bottom.

Add all the sides to both pots of gold.

Position the pot so that the two little rectangle cutouts in the smaller circle at the base of the design are positioned horizontally in front of you.
Glue a handle to each of the sides next to those rectangles.
Each pot gets two handles, placed on opposite sides.

Now your pots of gold are finished!

Step 8) Join together with the rainbow
Take the completed rainbow and insert the bottom tabs into the slots inside the pots.
Ensure the rainbow stands upright and is securely positioned between both pots.

Step 9) Fill the posts with lights or treats
For a glowing effect: Place battery-powered LED lights inside the pots. Remote-controlled LED lights work best for an easy on/off function.
For a treat holder: Fill the pots with chocolate coins, candies, or small festive goodies.
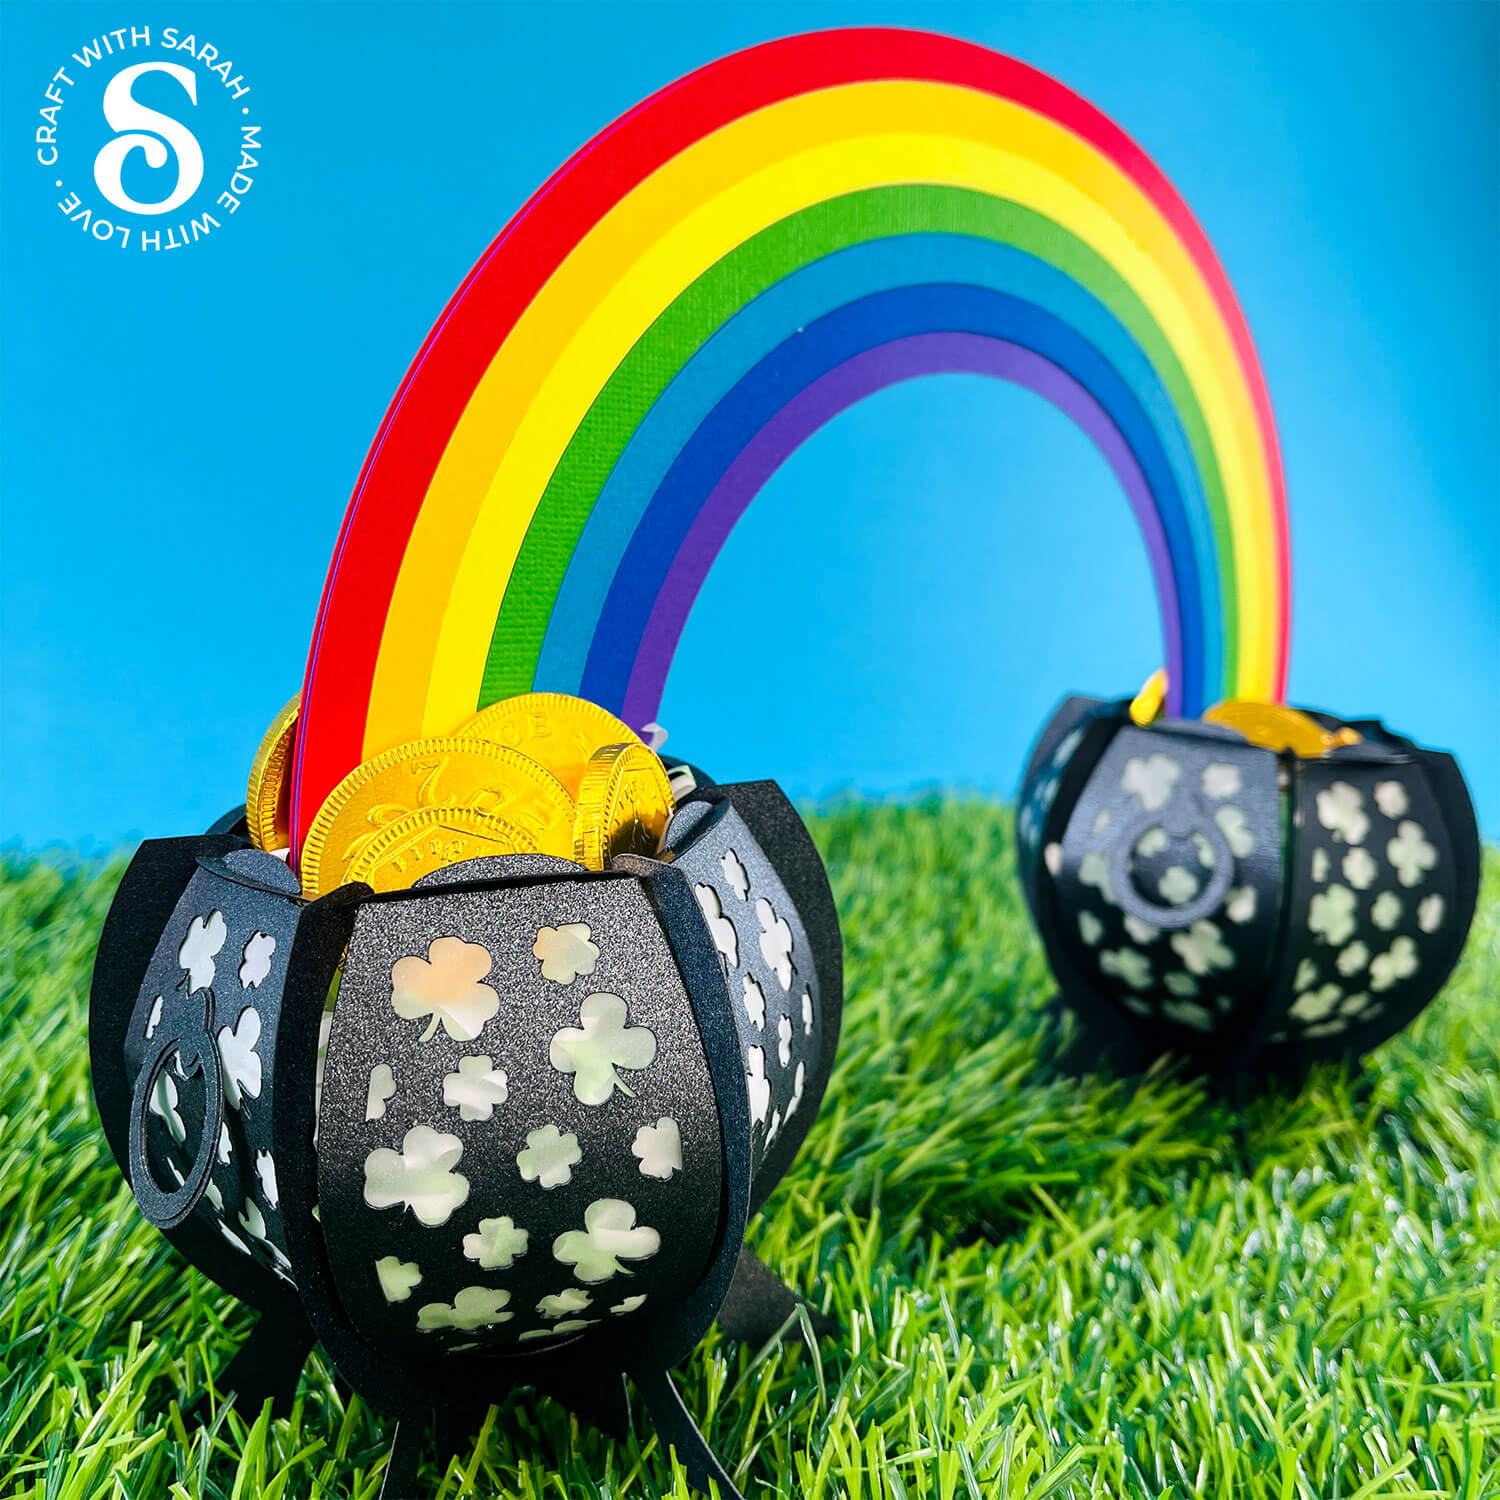
Top Tip: If using treats, add some scrunched-up tissue paper at the bottom to create a fuller look without using too many sweets.
St Patrick’s Day slot-together lantern
And there you have it – your St. Patrick’s Day lantern is finished!
Whether glowing with soft LED lights or filled with delicious golden treats, this craft is a magical way to celebrate the holiday. Place it on your mantelpiece, dining table, or by a window to spread the festive spirit.
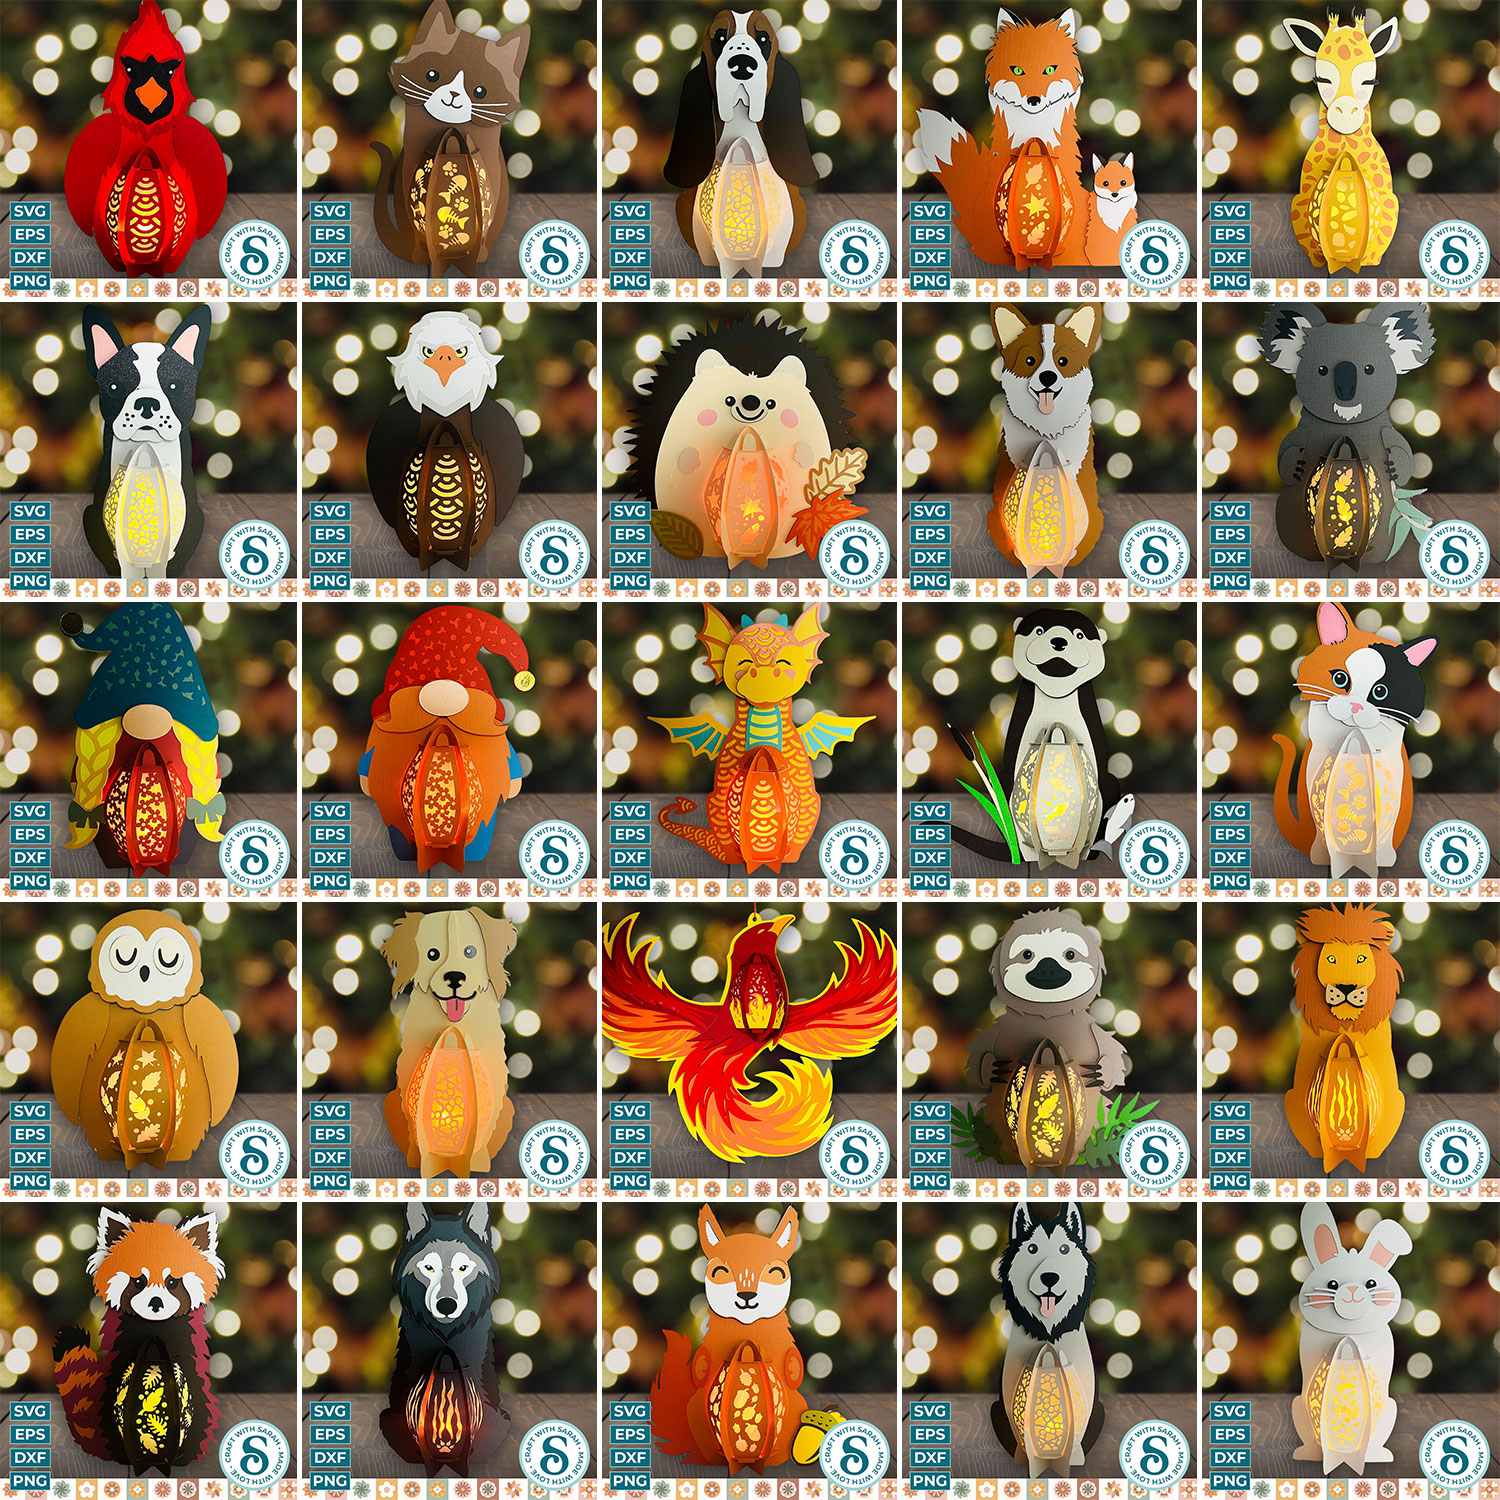
Love this lantern and want to make more? Check out almost 100 lantern designs here, including all the cute animals and gnomes you can see in the photo below.
Happy crafting,
Sarah x

