DIY Halloween Treat Bags with Patterned HTV
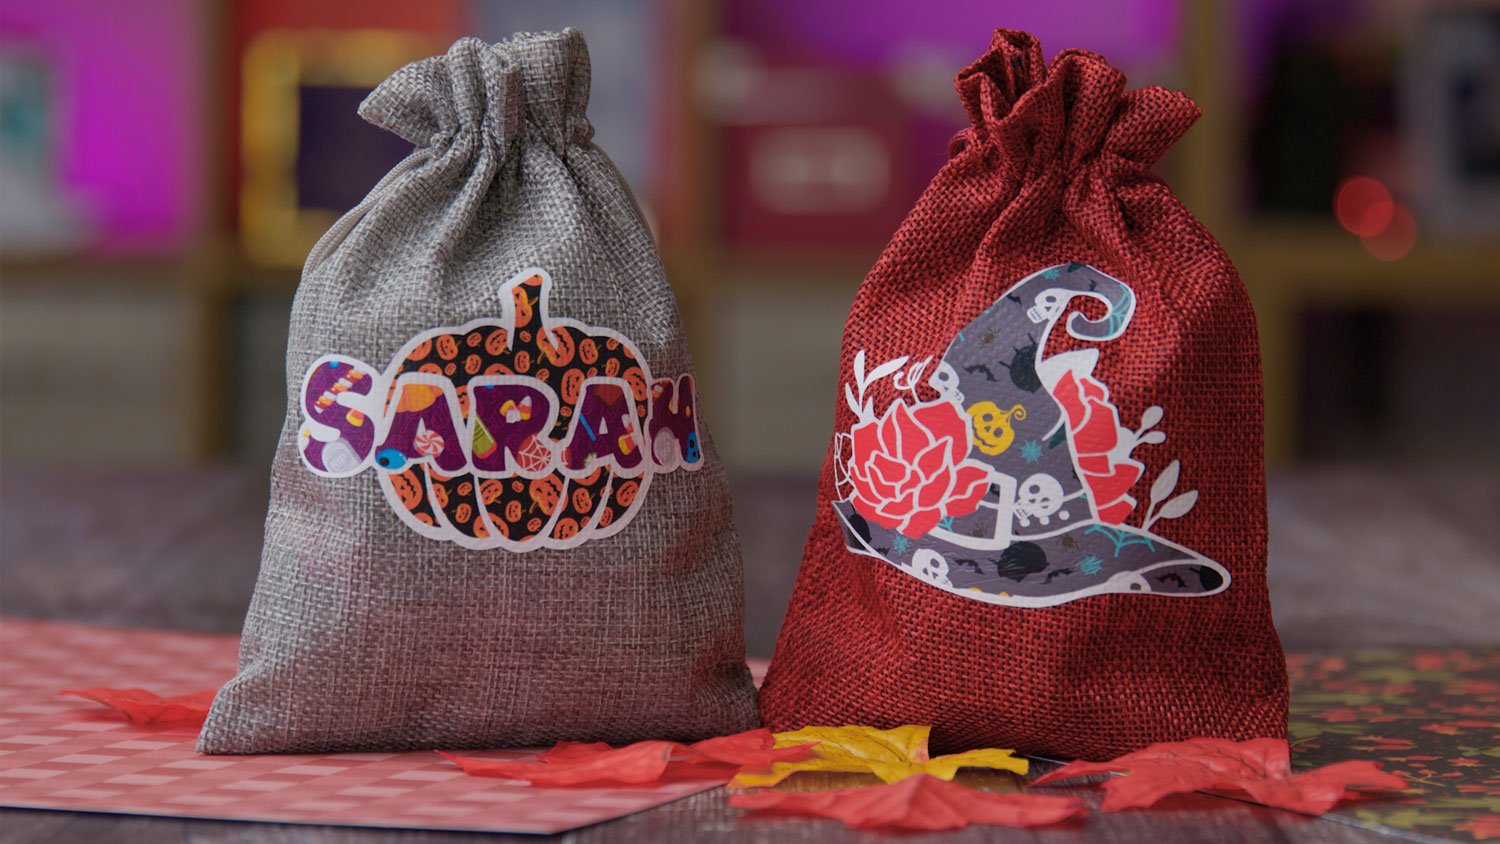
Make the cutest personalized treat bags with Halloween patterned HTV (heat transfer vinyl) for an extra spooky effect!
In this tutorial I’ll share my top tips for designing with patterned vinyl, including how to make sure your patterns stand out against the colour of the treat bags.
[cws_halloween2021]
How to use patterned HTV
The video below shows how to design your own Halloween vinyl design and then how to make the most of your patterned vinyl designs to ensure the best look to your treat bags!
Where to get patterned HTV
There are lots of places online to buy patterned HTV that suitable for Cricuts or other cutting machines.
I live in the UK and my favourite place for vinyl is Greenstik Materials. They have a HUGE collection of vinyls, including heat transfer vinyl (HTV), permanent vinyl and removeable vinyl.
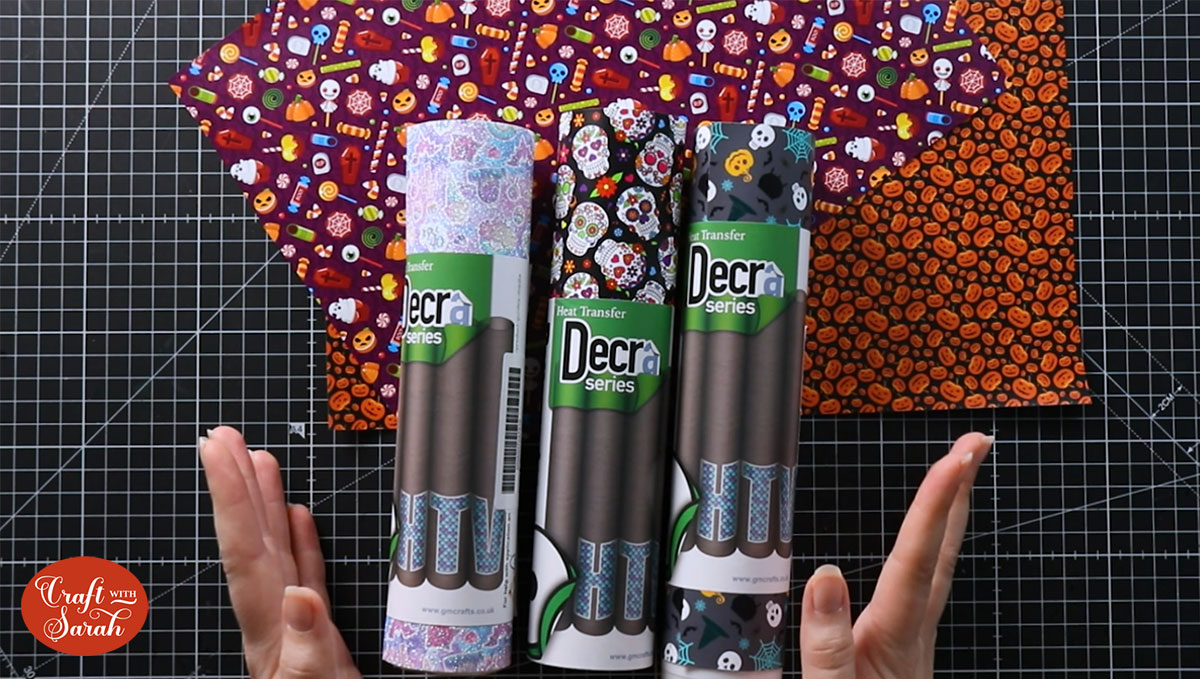
They have a great discount scheme on their vinyl – the more you buy, the cheaper each sheet gets 😀
I’ve ordered from them a few times and have always been happy with the quality of the vinyl. They post products out super quickly too!
DIY personalized treat bags with patterned HTV
Here’s how to design your own treat bags with names on them in Design Space, plus my top tips for cutting patterned HTV so that you can still see the patterns once it is ironed on to your base material.
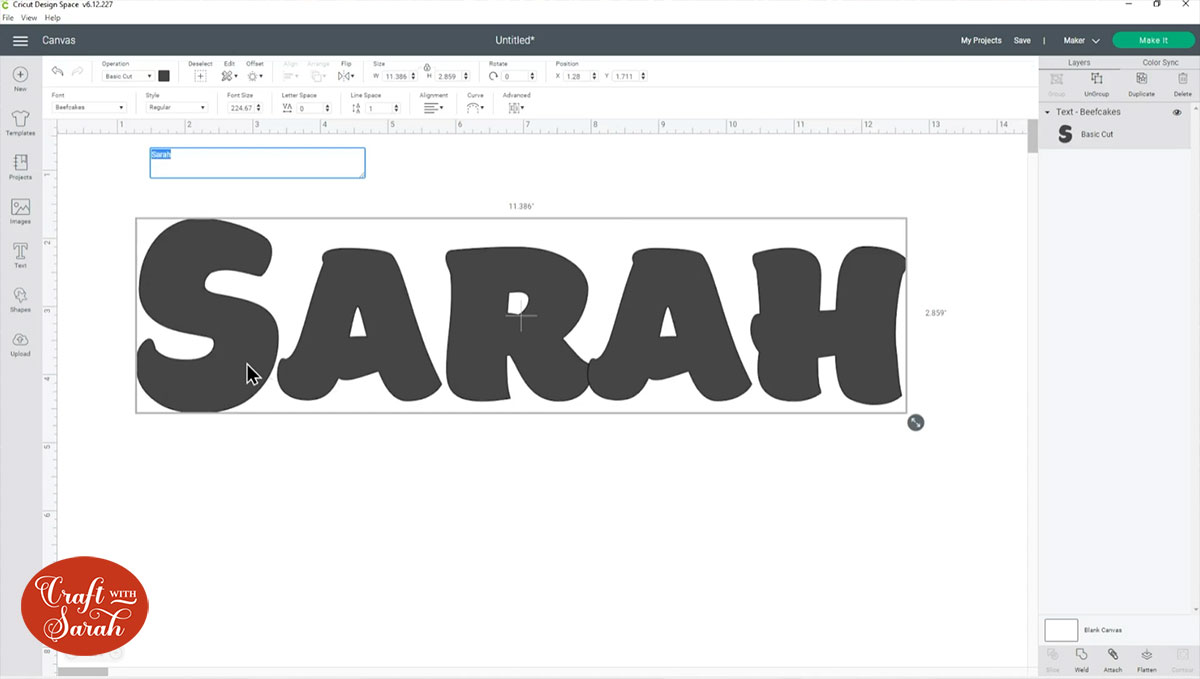
Step 1: Add the name
Click into the “Text” tool in Cricut Design Space and write out your name.

Choose a really thick font. The one I’ve used is a Cricut Access font called Beefcakes.
The reason you want a thick font is so that you will be able to see lots of the patterned HTV inside it!
Step 2: Choose an image
Choose an image to be cut from a different pattern of vinyl.
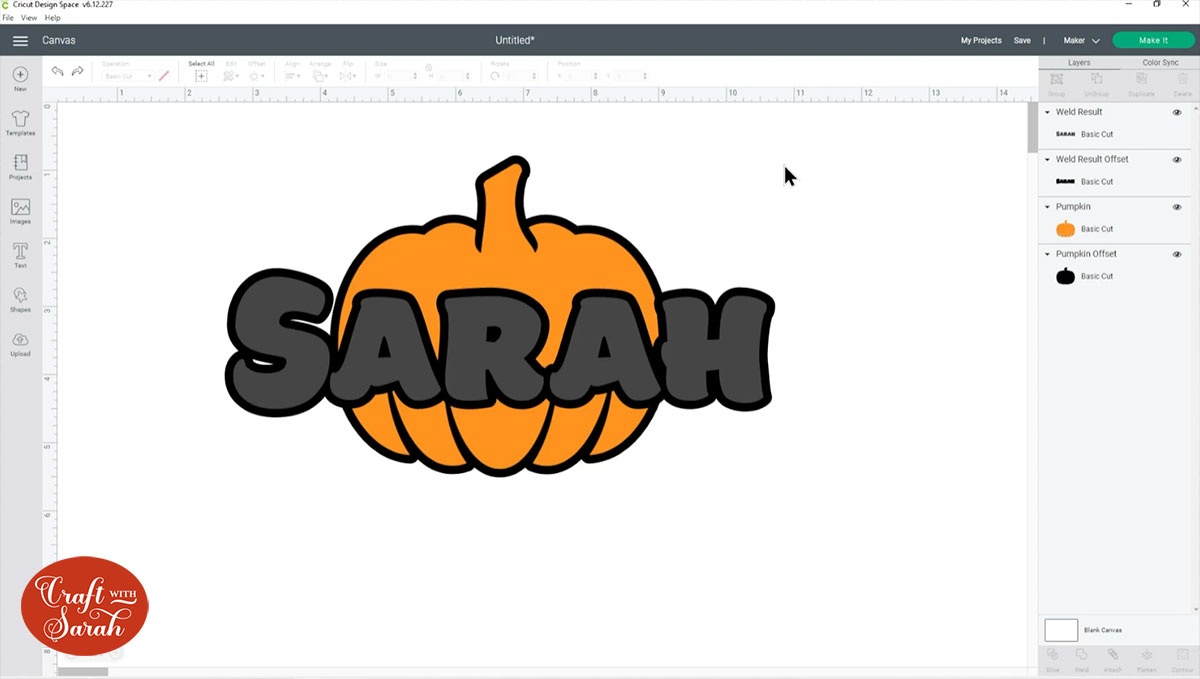
Position the layer underneath the text and center it in the middle of the word using the Align tool and selecting “Align horizontally”.
It should end up looking something like this:
Step 3: Create an “Offset” background
When I was trying patterned HTV for the first couple of times, I ended up disappointed with the end results because the patterned vinyl didn’t really “stand out” from the treat bags and it was difficult to read.
To stop this happening, and to make sure the vinyl looks really vibrant against the treat bags, we are going to add a white outline.
Use the Offset tool to give a thin offset to both the Text and Image.
For consistency, give each layer the same “amount” of Offset.
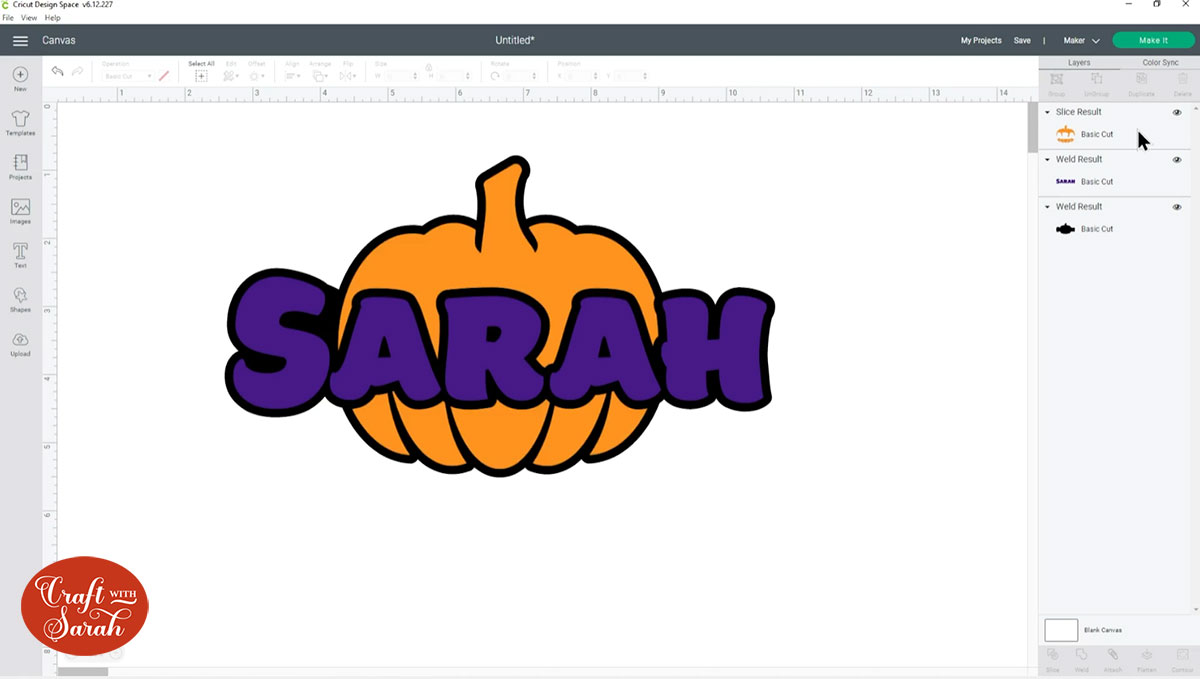
Step 4: Slice the layers
When you’re working with heat transfer vinyl you don’t want to add too many layers of vinyl one on top the other because it can get a little bit tricky to stick it all together, especially if you’re doing loads of layers and it gets quite thick.
Hide the main name layer by clicking the “eye” icon next to it in the layers panel.
Select the offset layer of the text and the orange pumpkin layer and click “Slice”.

That will cut them out from each other and you’ll end up with several “Slice Result” layers.
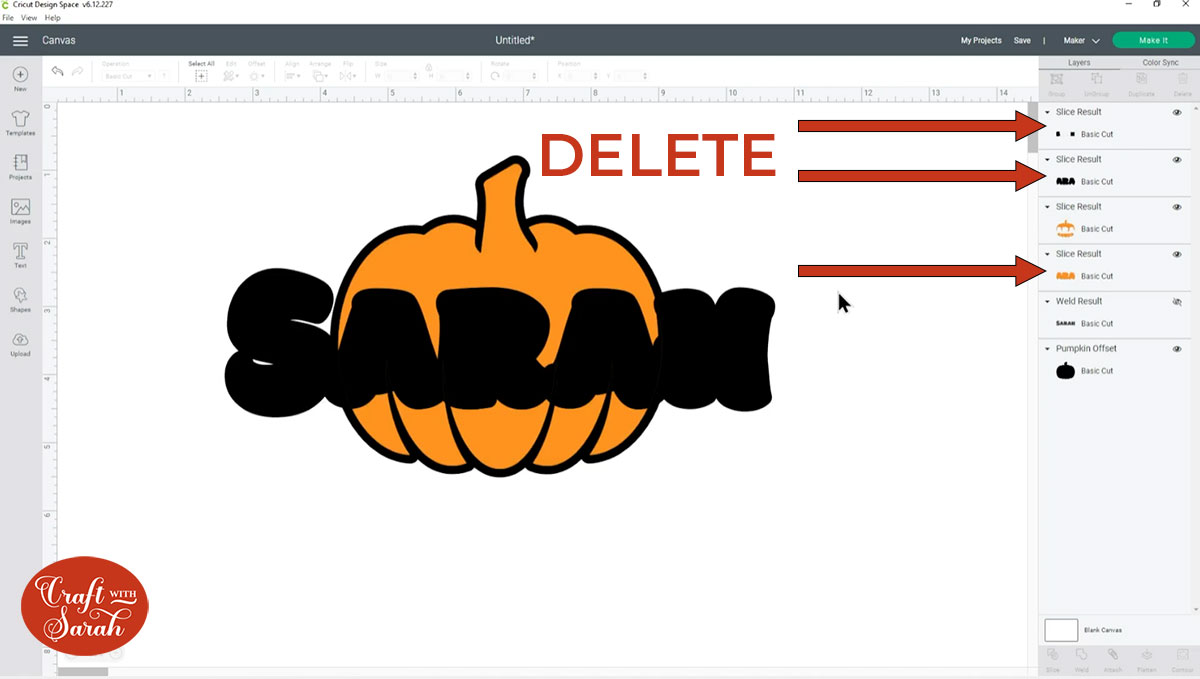
Delete the orange layer that shows the “middle” of the layers, and both layers that were originally part of the Offset of the name.
Now we need to do the full name Offset again, so turn the name layer back on and give it another Offset.
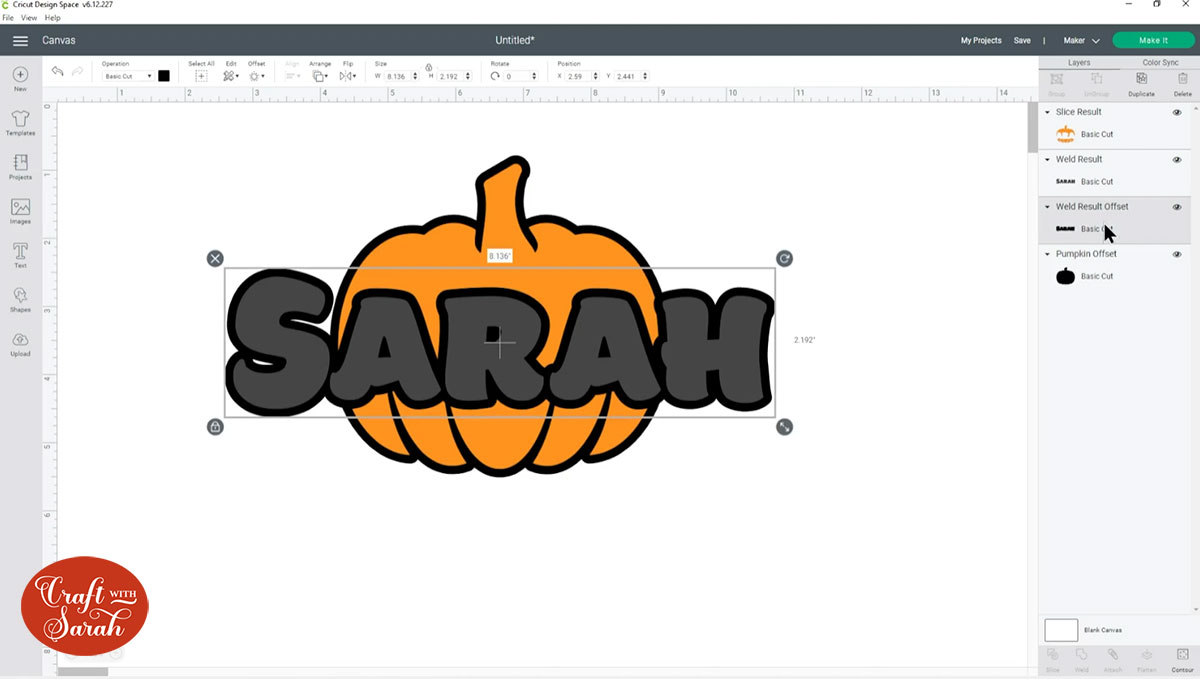
Click that new Offset layer in the layers panel to select it, then press Shift in your keyboard and select the Offset layer of the pumpkin.
Click “Weld” to join them both together into one layer.

If there are any little spaces inside the new layer that you don’t want, use the Contour tool to remove them.

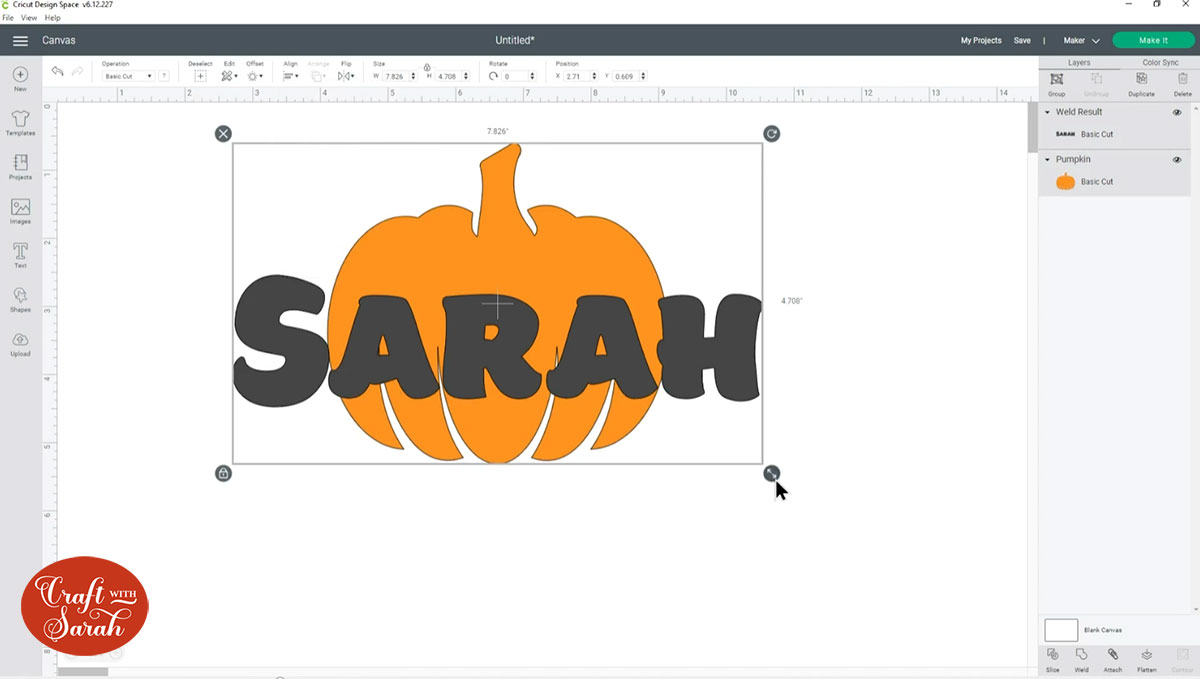
This is how that Welded layer should look:
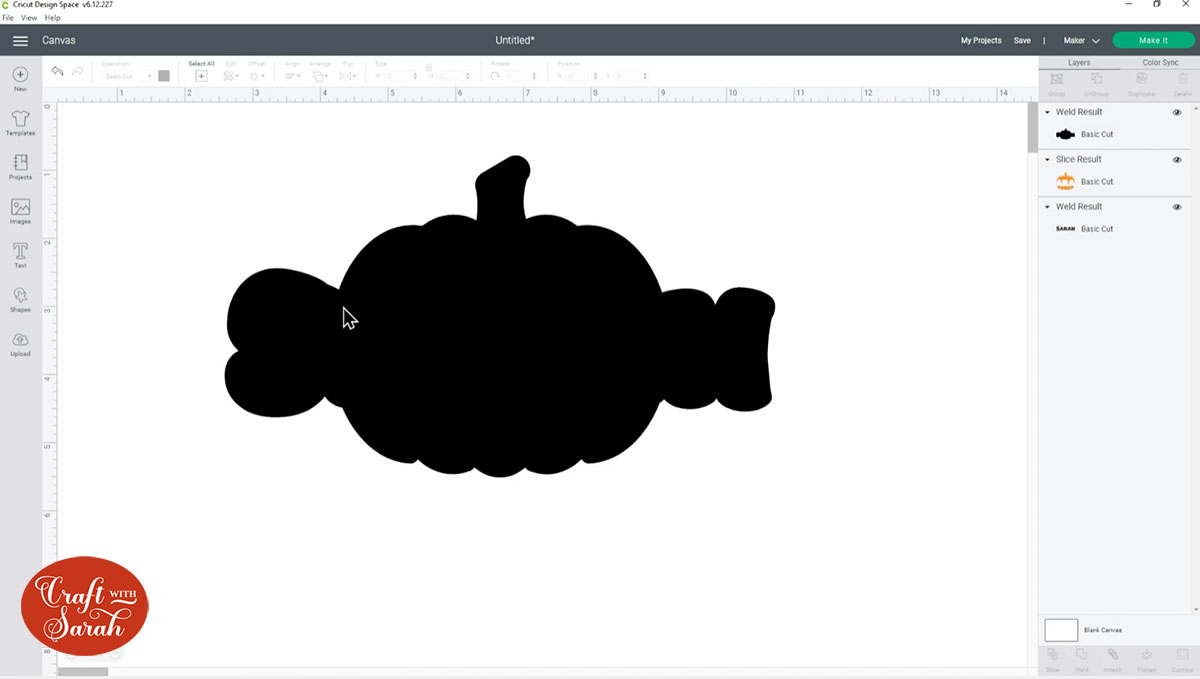
Drag the Welded layer to the bottom of the layers panel and that is your design complete:
Resize it so that it will fit into your treat bag, then it’s time to cut it out!
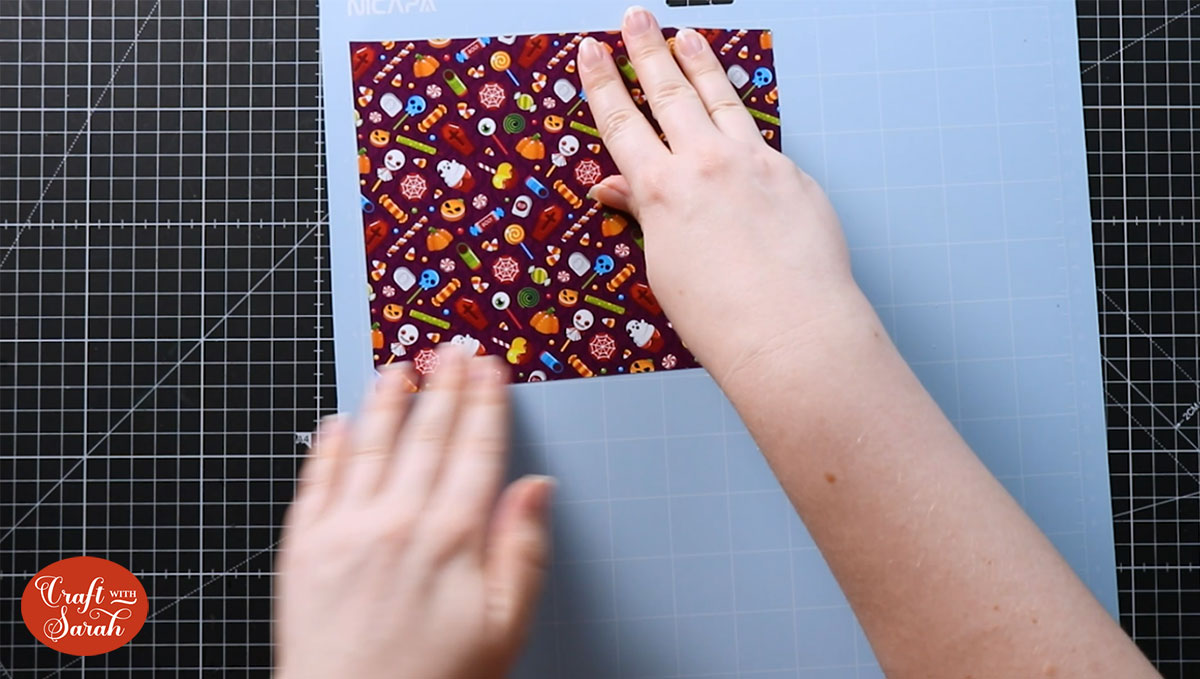
Step 5: Cut out from patterned HTV
At this point, it’s REALLY important to check the instructions which came with the patterned HTV that you purchased.
Some HTVs you have to mirror, and others you do not.
I did NOT have to mirror my HTV because it came with its own carrier sheet, but you may need to mirror yours.
I DID have to mirror the white “Offset” layer, as that was being cut from regular white HTV.
When cutting patterned vinyl, remember to put it on the mat in the correct orientation, so that the pattern is in the correct direction that you want to cut on.
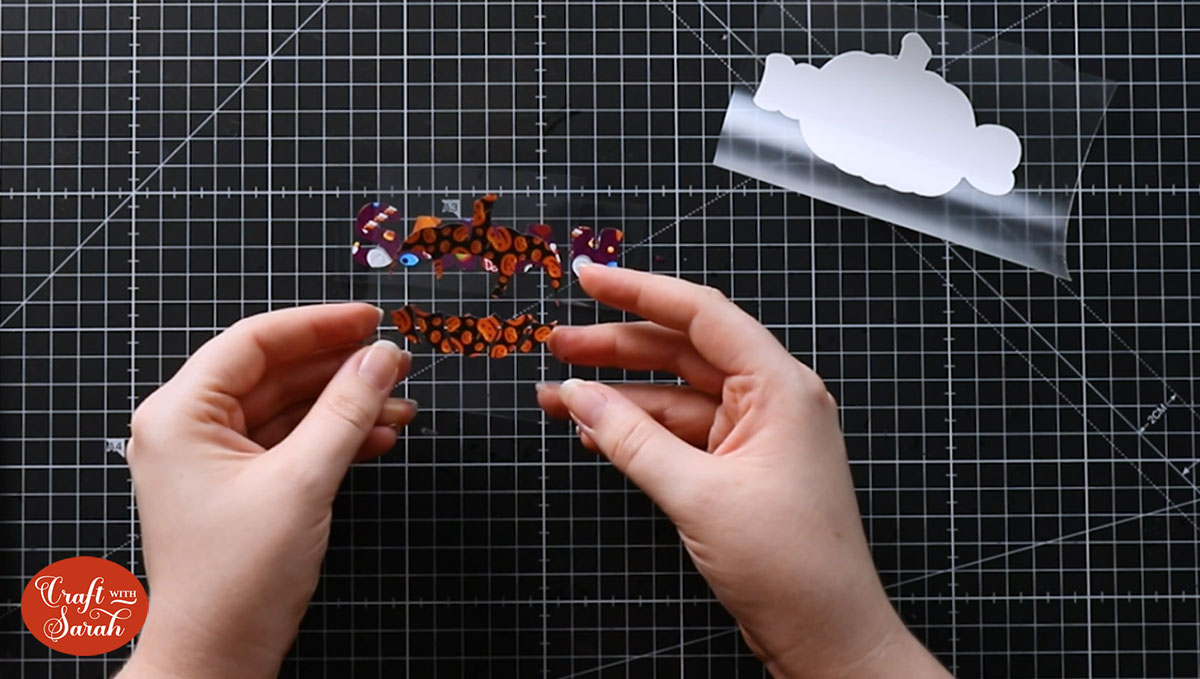
Step 6: Weed the vinyl
Weeding is the process of picking out all of the pieces of the vinyl that you DON’T want to transfer onto the finished project.
Weed out all the different colours and patterns of vinyl using a weeding tool.
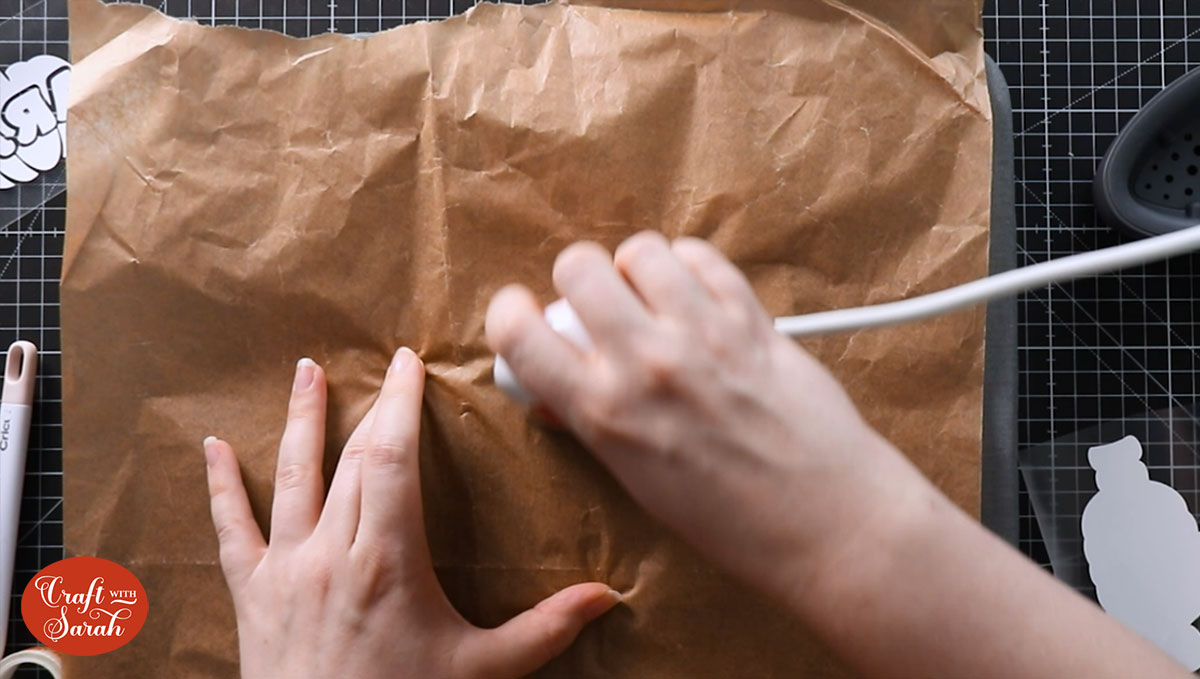
Step 7: Press the patterned HTV
If your patterned HTV came with a heat-proof transfer sheet, cut a small piece of it and place it over the name layer of the patterned vinyl and then add the pumpkin layer around it so that they are on the same piece of transfer sheet.

Pre-press the treat bag to get rid of any moisture and to eliminate creases.
I am using a Cricut Mini-Press and I’ve put the treat bag onto a Cricut heat proof mat.
I’ve got a sheet of parchment paper on top of the bag to iron onto.
Put the white HTV layer onto the treat bag and press it on. I still used parchment paper for this.

Finally, when the white layer is cool, add the patterned HTV on top and press it according to the manufacturer’s instructions.
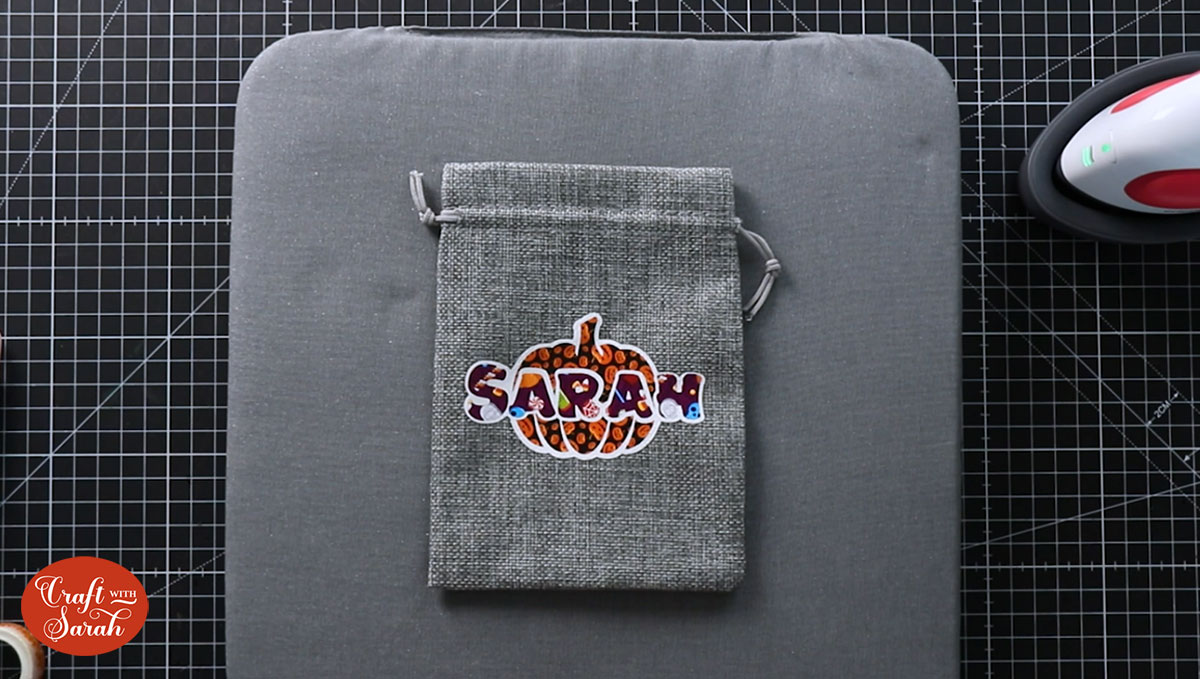
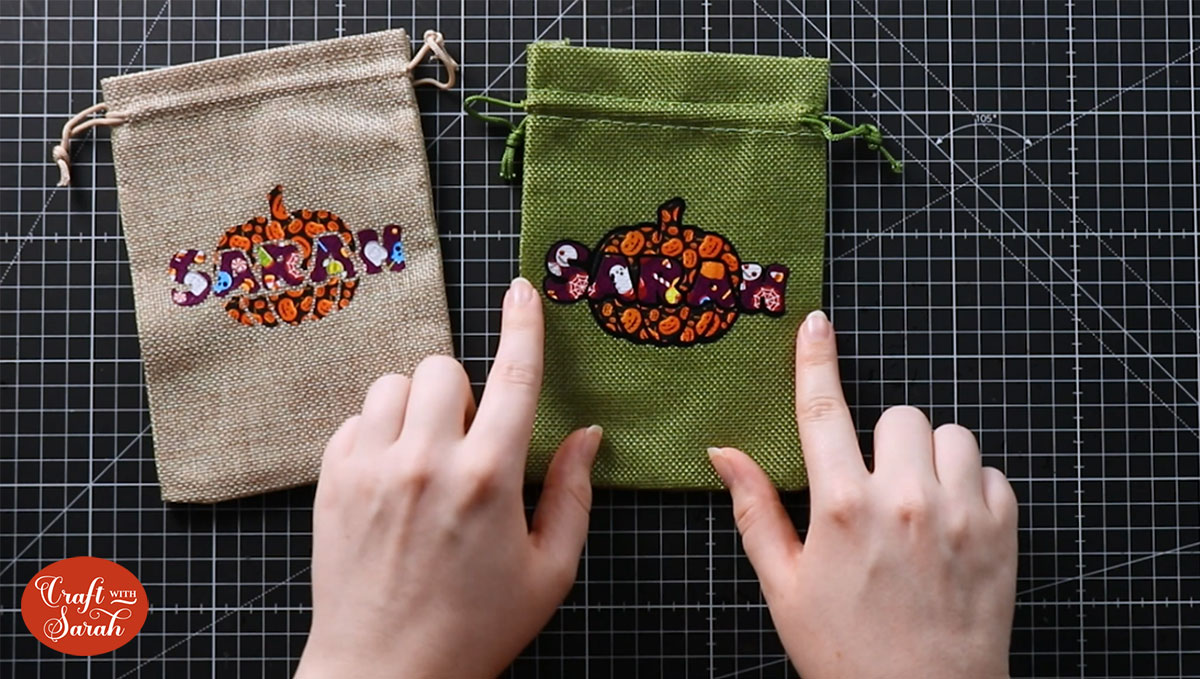
Your treat bag is now ready to be filled with tasty candy, all ready for trick-or-treating!

I hope you enjoyed this tutorial on how to use patterned HTV in your craft projects.
The same tips could be used for any type of patterned vinyl, not just for Halloween!
Happy crafting,
Sarah

