Paper Poinsettia Tutorial ⭐ Easy 3D Cricut Poinsettia Flowers
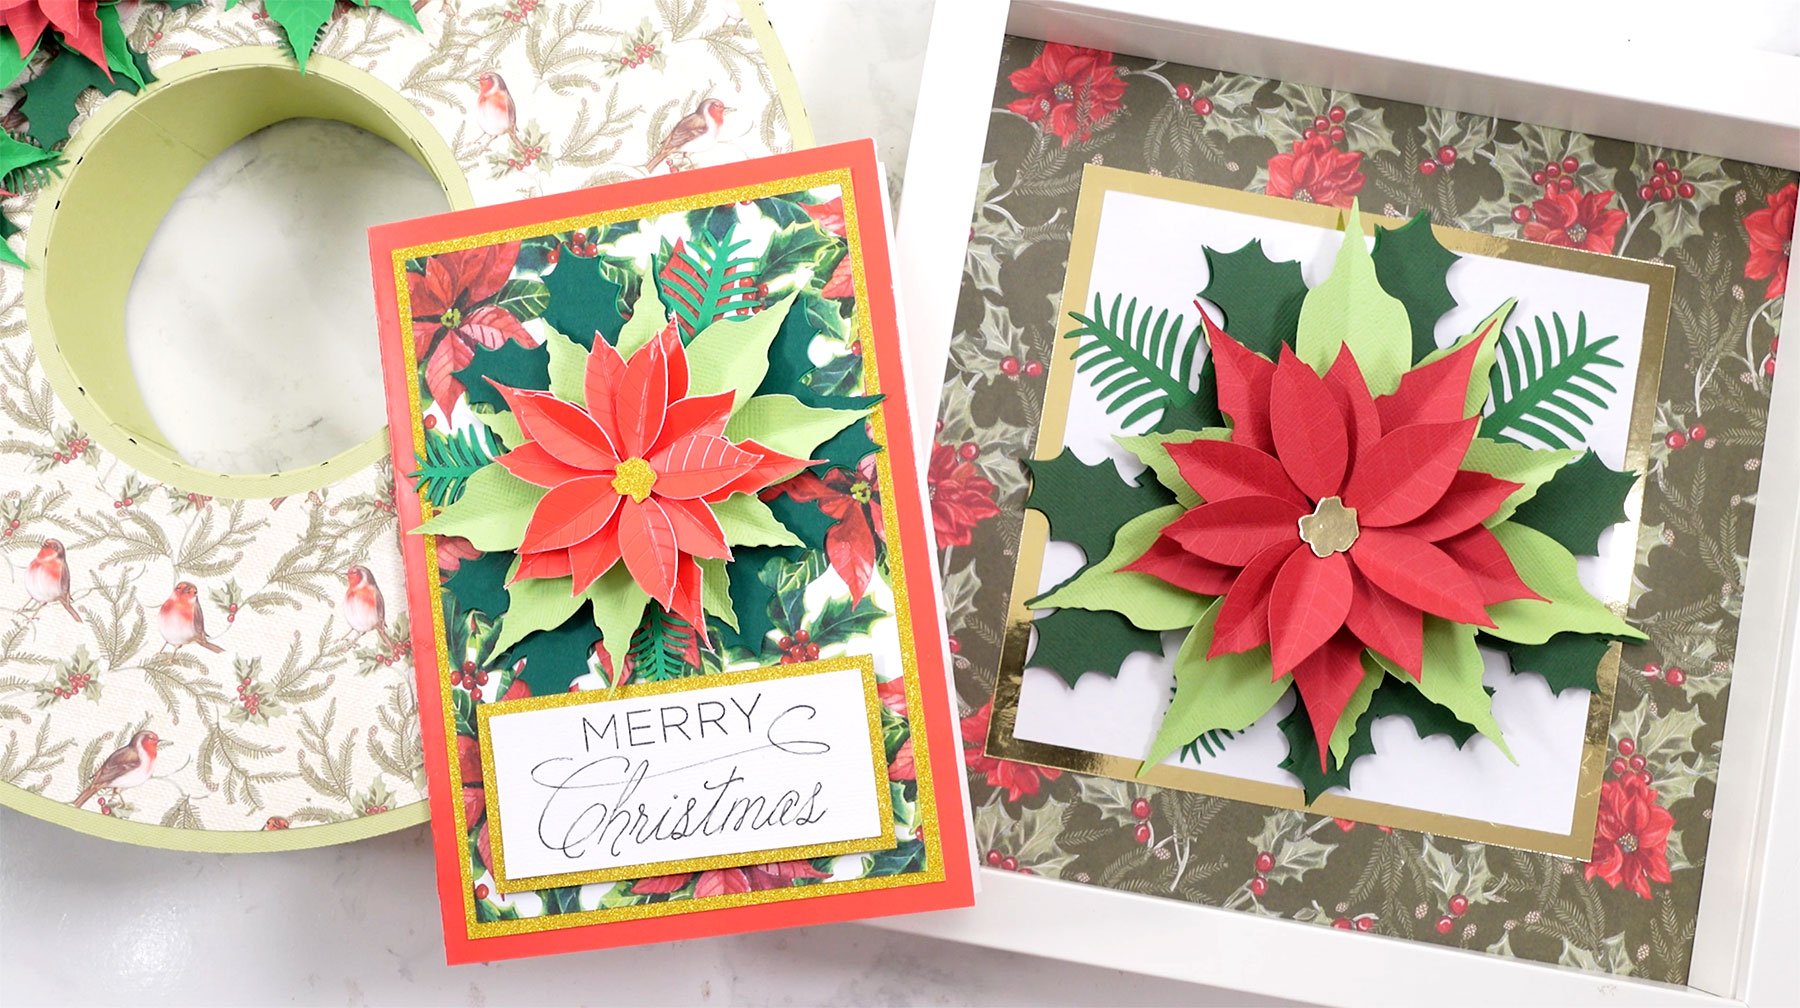
Follow this paper poinsettia tutorial to make stunning Christmas flowers.
Add a touch of holiday elegance to your crafts with a free SVG of a paper poinsettia flower.
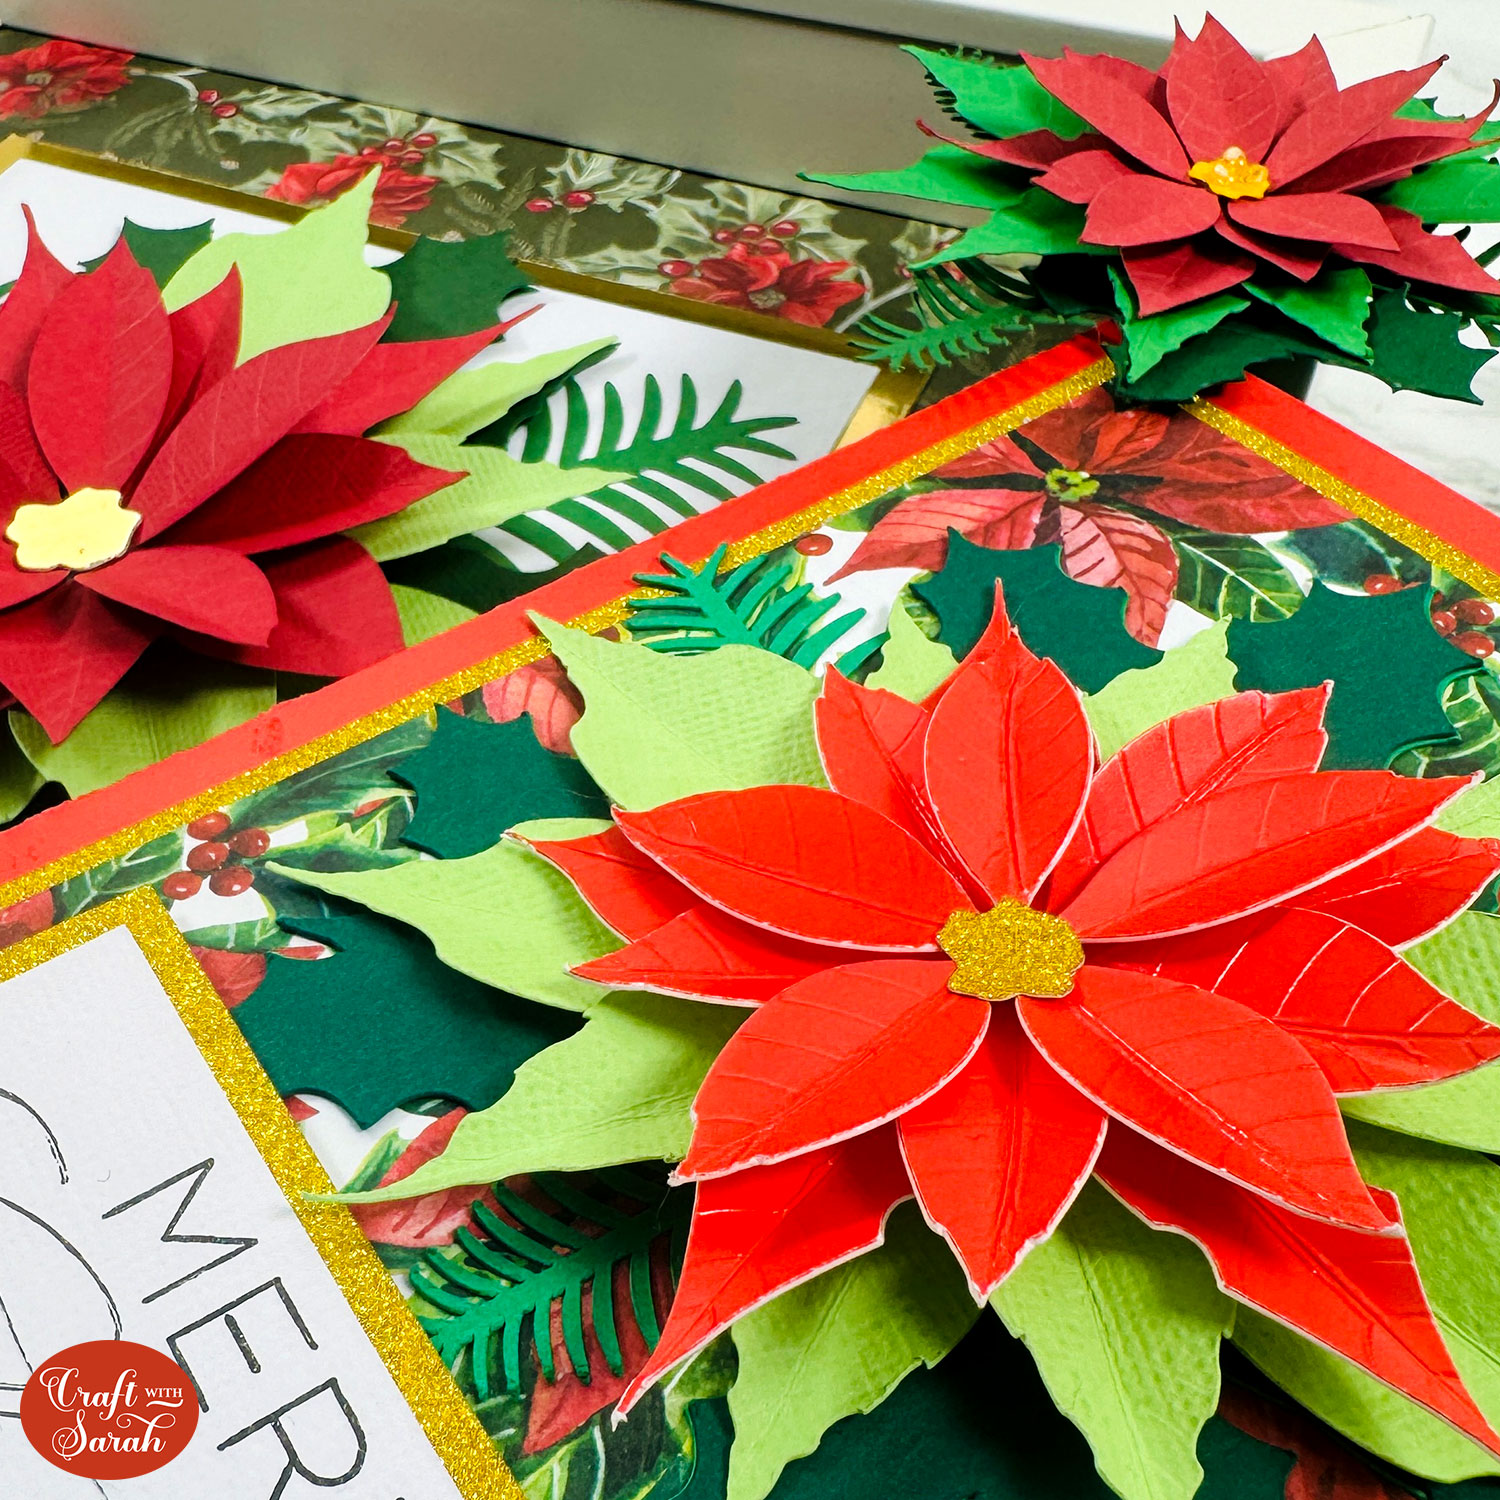
Designed for use with your Cricut machine, this project features detailed score lines to create realistic veins on the leaves.
Don’t have a scoring tool? No problem — you can use Cricut pens for a decorative effect or simply delete the lines.
The poinsettia flower for this tutorial is based off of a slightly different flower I made back in 2022 to decorate this circular wreath box.
I thought it was too pretty not to use for other craft projects too!
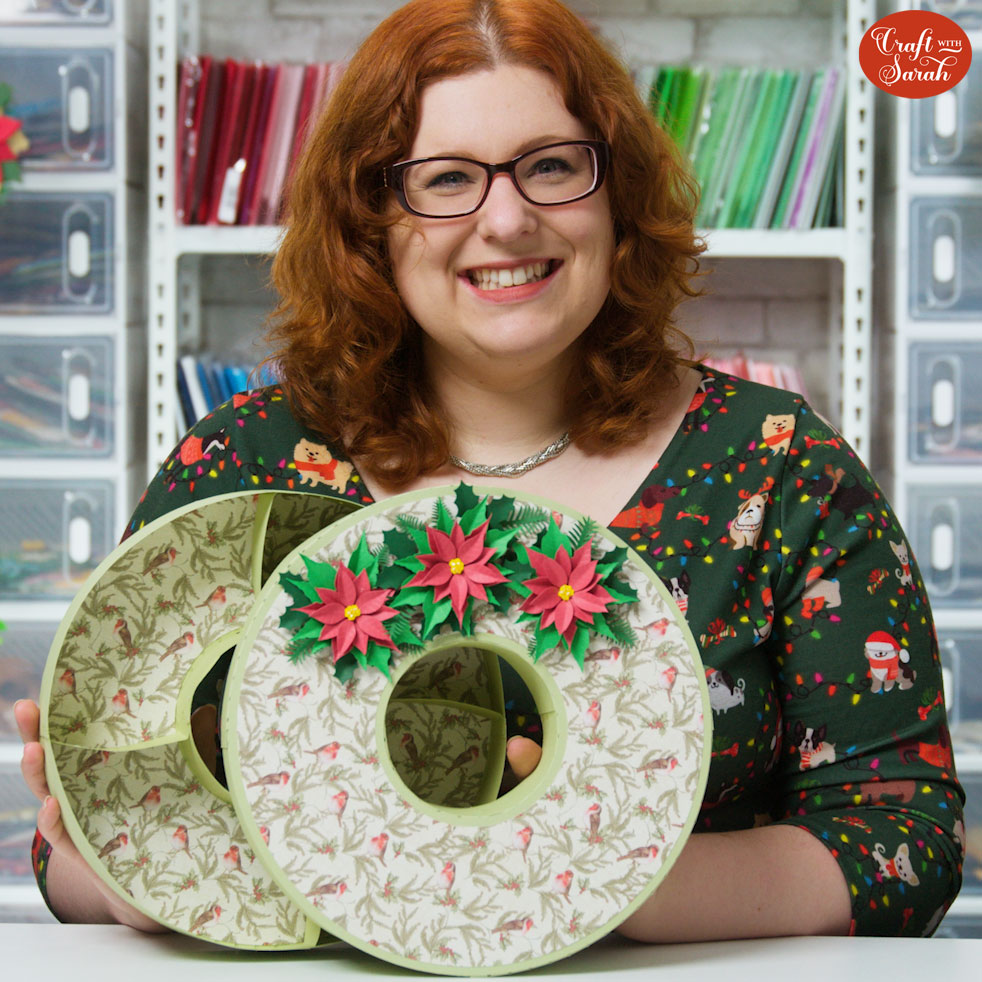
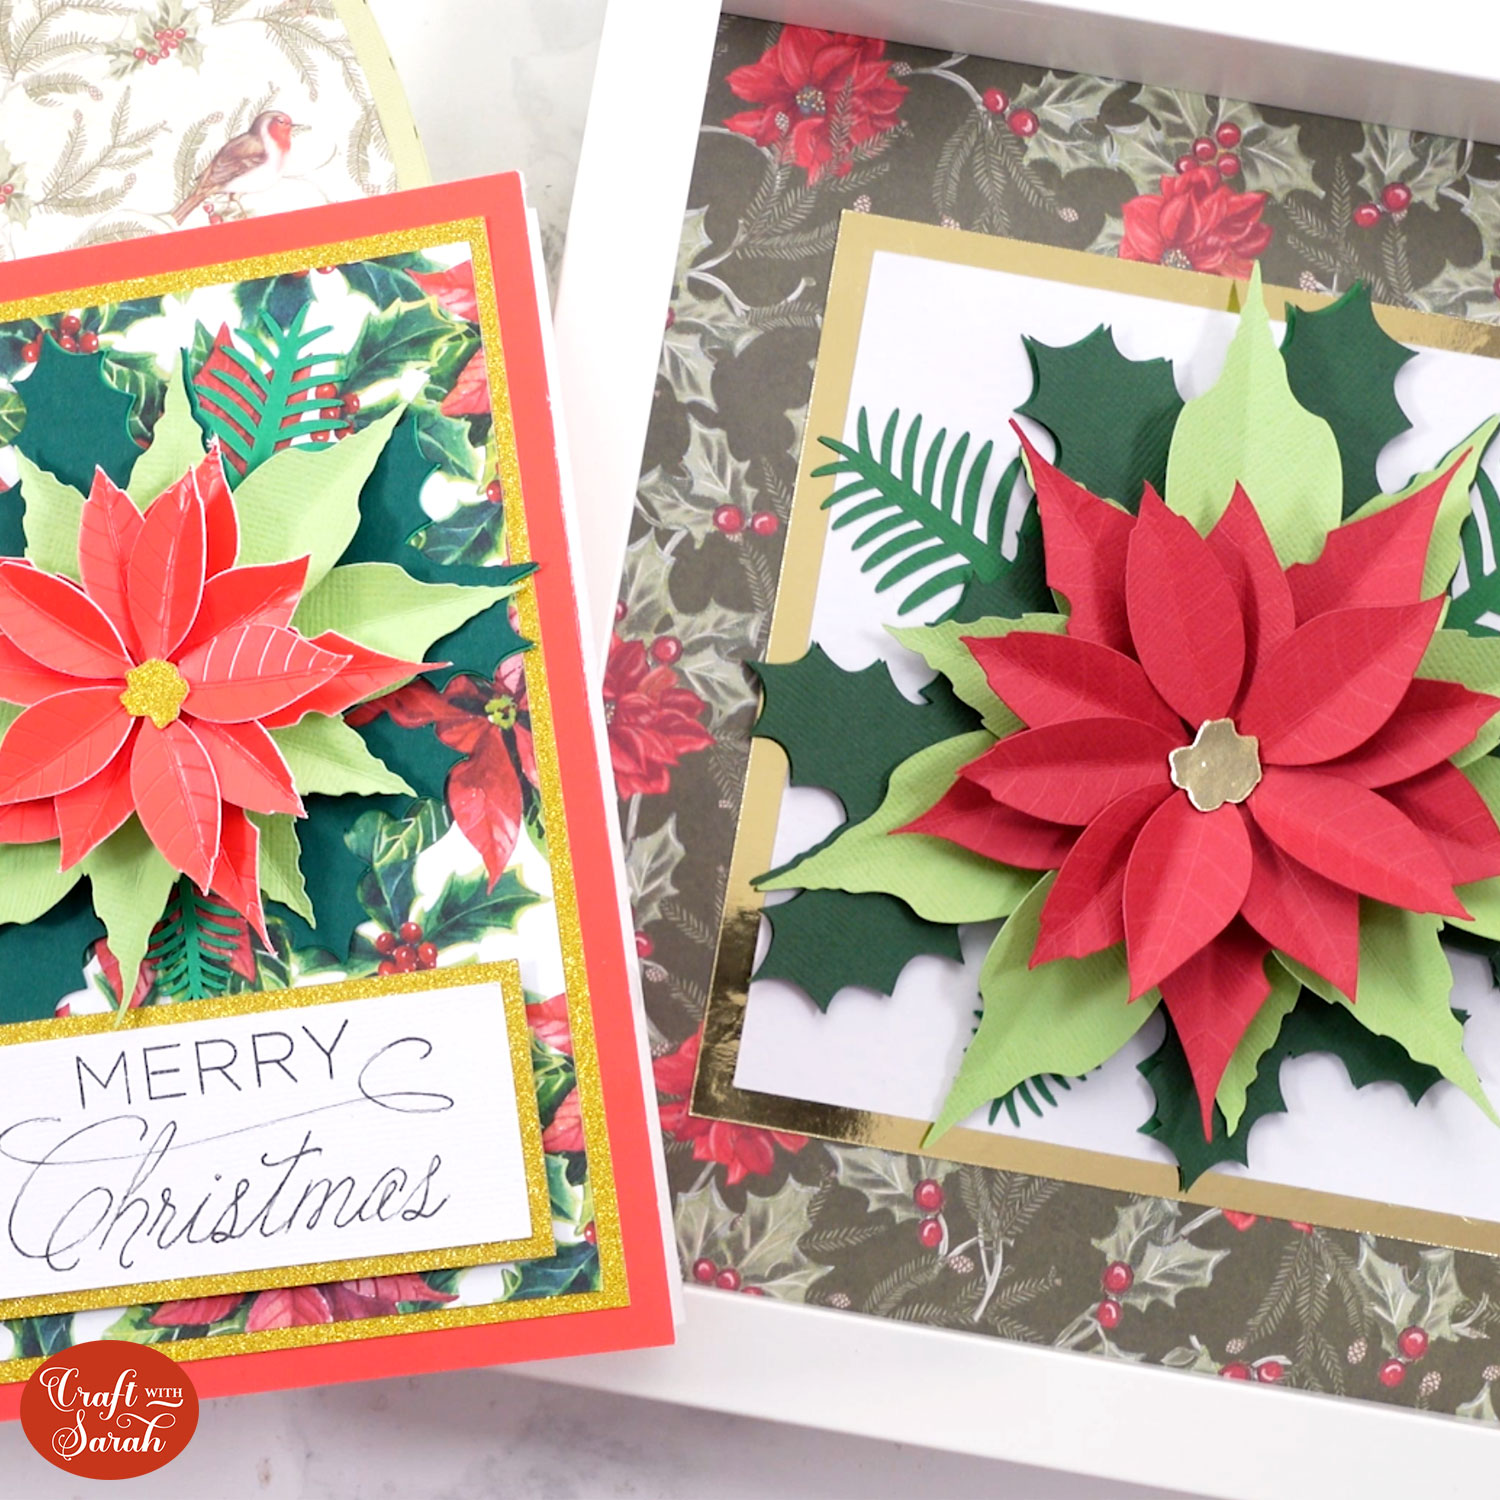
This versatile flower design is perfect for all kinds of projects, from greeting cards to shadow box displays.
Download the file and bring some festive flair to your crafting today!
Paper poinsettia flowers video tutorial
Watch the video below to see how to make this craft project. Keep scrolling for a written tutorial.
MENTIONED IN THIS VIDEO:
Materials list for poinsettia flower craft project
Here is a list of the materials that I used to make this project.
Please note that some of the links included in this article are affiliate links, which means that if you click through and make a purchase I may receive a commission (at no additional cost to you). You can read my full disclosure at the bottom of the page.
- Cricut Machine
- Light blue Cricut cutting mat
- Cricut scoring stylus or scoring wheel (optional)
- Coloured Card (red, 3 shades of green and yellow/gold)
- Collall All Purpose Glue, Bearly Art Glue or similar
- 3D foam pads (optional)
- Glue gun (optional)
- Patterned scrapbook paper
- Square shadow box frame OR cardstock to make a greetings card
- Scraper tool, ruler or something else with a long, straight, hard edge

Christmas poinsettia flower assembly instructions
Here’s how to make beautiful paper poinsettia flowers using a Cricut machine!
Step 1) Download the free file & unzip the downloaded folder
Download the Free Cutting File
Please login to your account to download this file.
TERMS OF USE:
You may sell finished, handmade physical craft items that you have made using this product but must not sell or share the digital files. Read full terms of use
Before you upload the SVG to Design Space, you need to unzip the download folder that it comes in.
- How to unzip a folder on Windows computer
- How to unzip a folder on a Mac
- How to unzip a folder on an iPad/iPhone
- How to unzip a folder on an Android device
Step 2) Upload the SVG file into Design Space
Open up Cricut Design Space and upload the file called svg-paper-poinsettia-craftwithsarah
Make sure you upload the file which starts svg- in the filename!!
This is how it should look after you have selected the file:

Don’t worry if the image preview appears blurry – it’s a bug/glitch in Design Space at the moment.
Press “Continue”, then select “Upload” on the next screen.
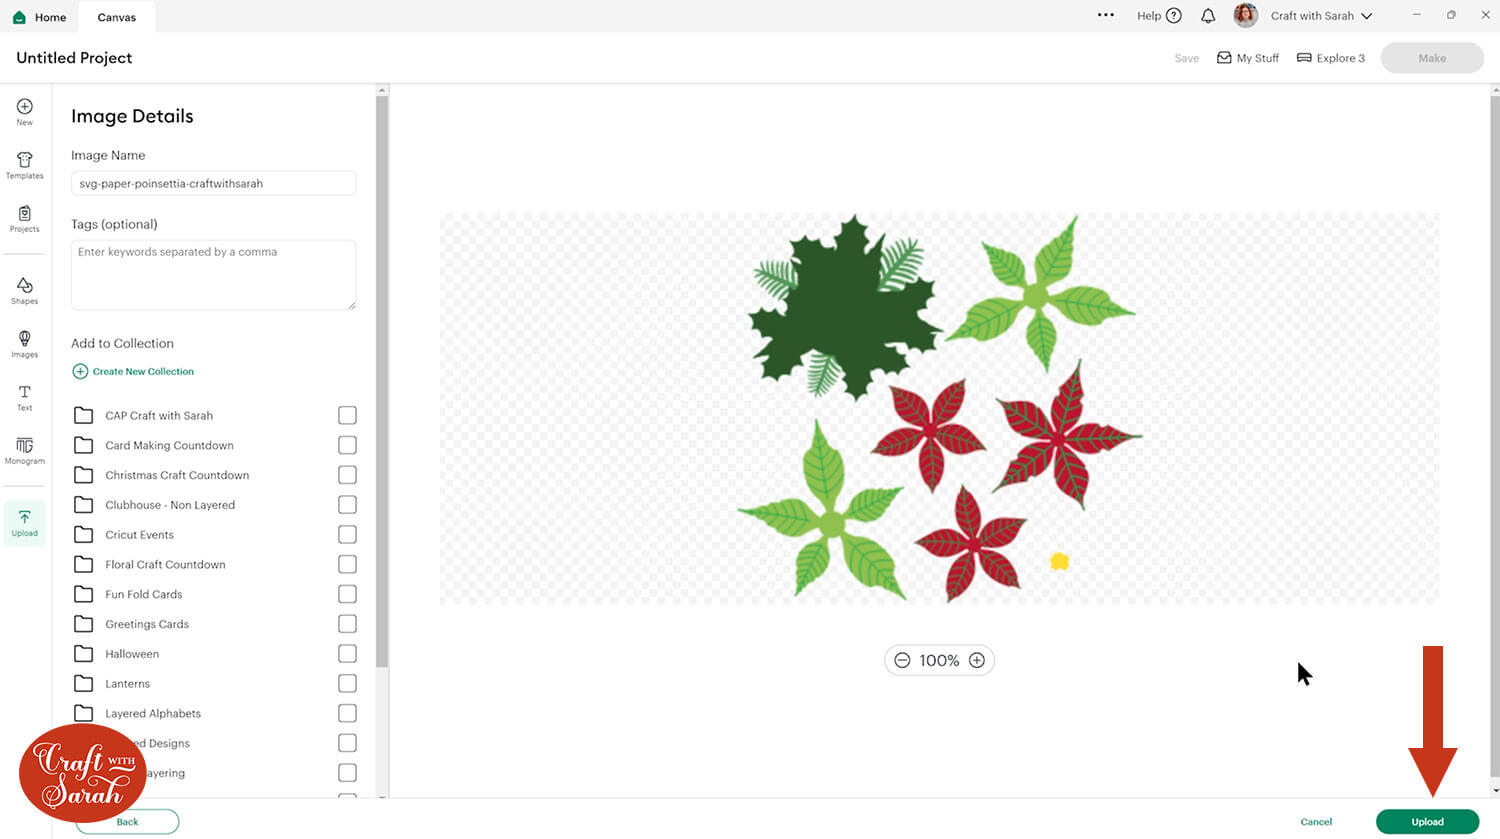
After uploading, the poinsettia design should be automatically inserted onto your Canvas.
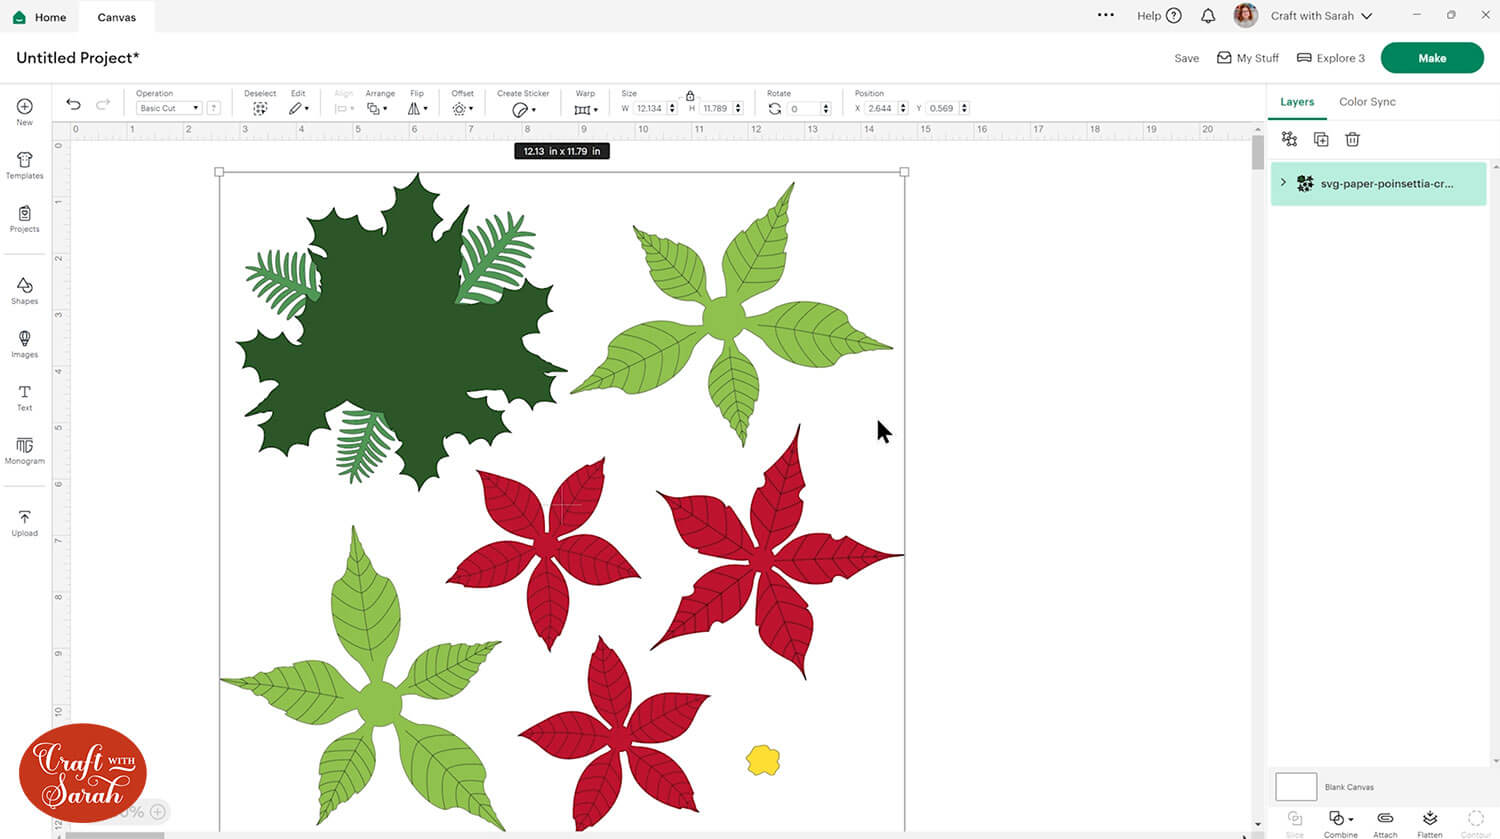
If not, it will show under “Uploads” in your “Recently Uploaded Images”. Click on it and then press “Add to Canvas” to put it onto your Project.
Step 3) Format the score lines
The poinsettia leaves have lines down them to add realistic looking veins. By default, the Cricut will try to cut those lines. You need to change them to score lines instead.
If you don’t have a scoring wheel or stylus you could format the lines to Draw using the Cricut pens instead so that you know where to fold. Alternatively, you could just delete them.
I will walk you through the steps for each option in this tutorial.
First, separate the pieces in the design by pressing the Ungroup button at the top of the layers panel.

The first two green pieces on the top-left of the screen (the ones which are overlapped) don’t have any score lines so you can move on to the lighter green piece on the top-right of the screen.
Click the layer. You will see a little arrow next to it in the layers panel to show that this is a Group of multiple layers.
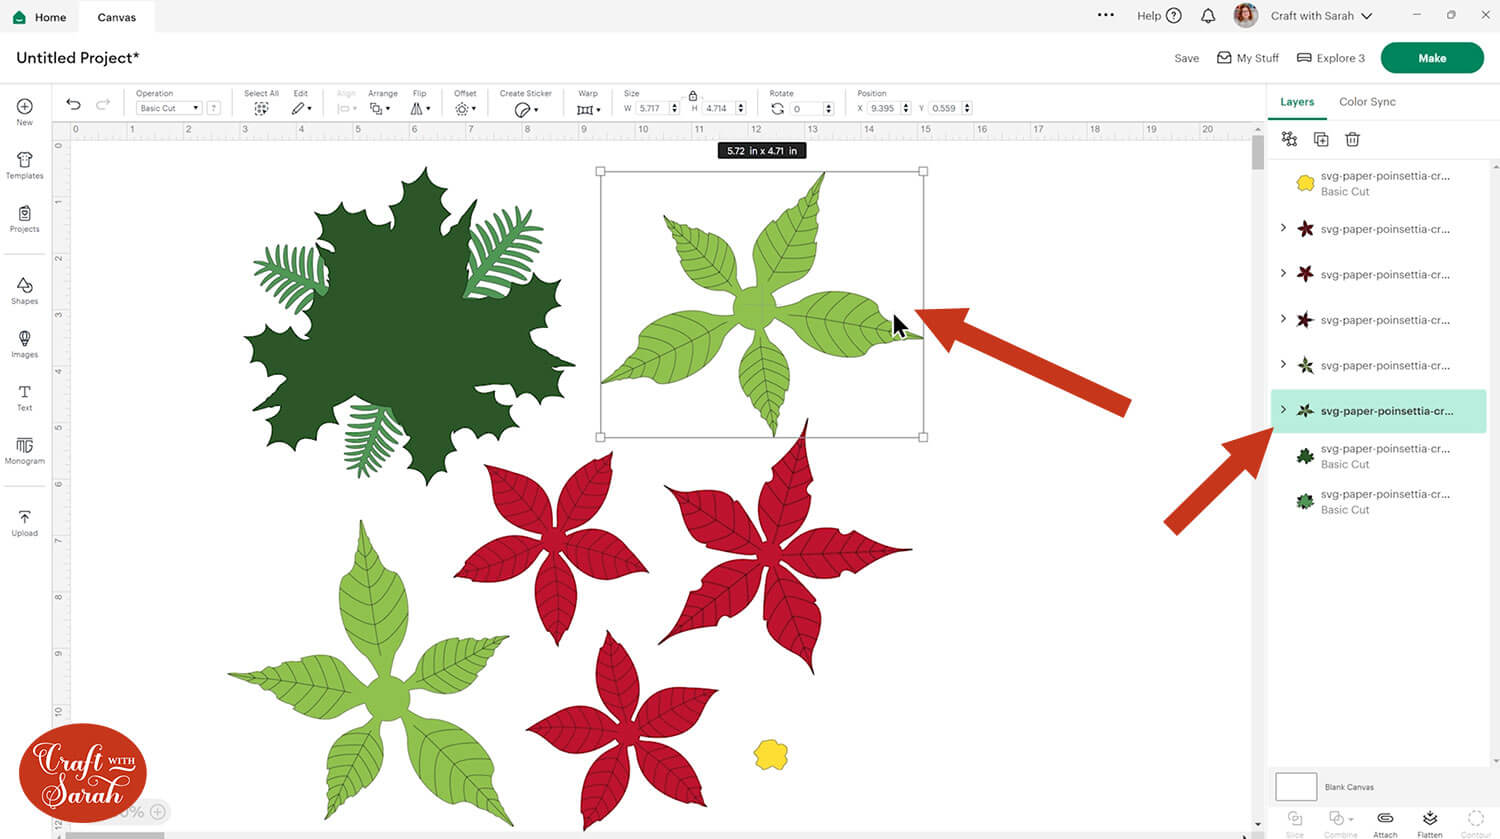
Click the arrow to open the group up and you will see two layers inside. There is a green layer on the bottom and a black layer on top that looks like lots of little lines.
Select that black layer by clicking directly on it.
Make sure you only have that one layer selected – not the green one underneath.

—
SETTING THE LINES TO SCORE
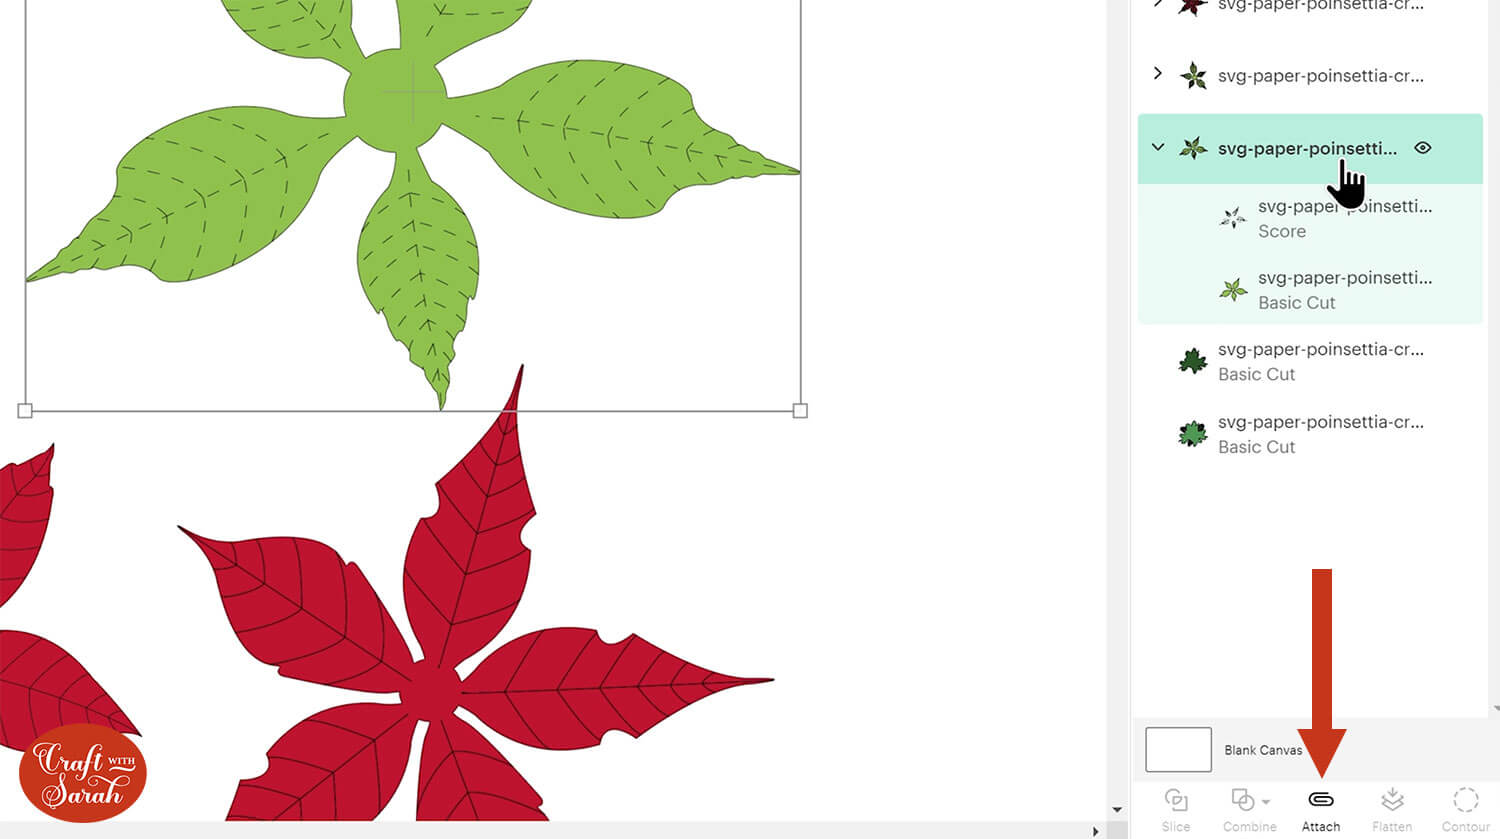
To change the line to be scored instead of cut, select “Score” from the Operations dropdown menu.
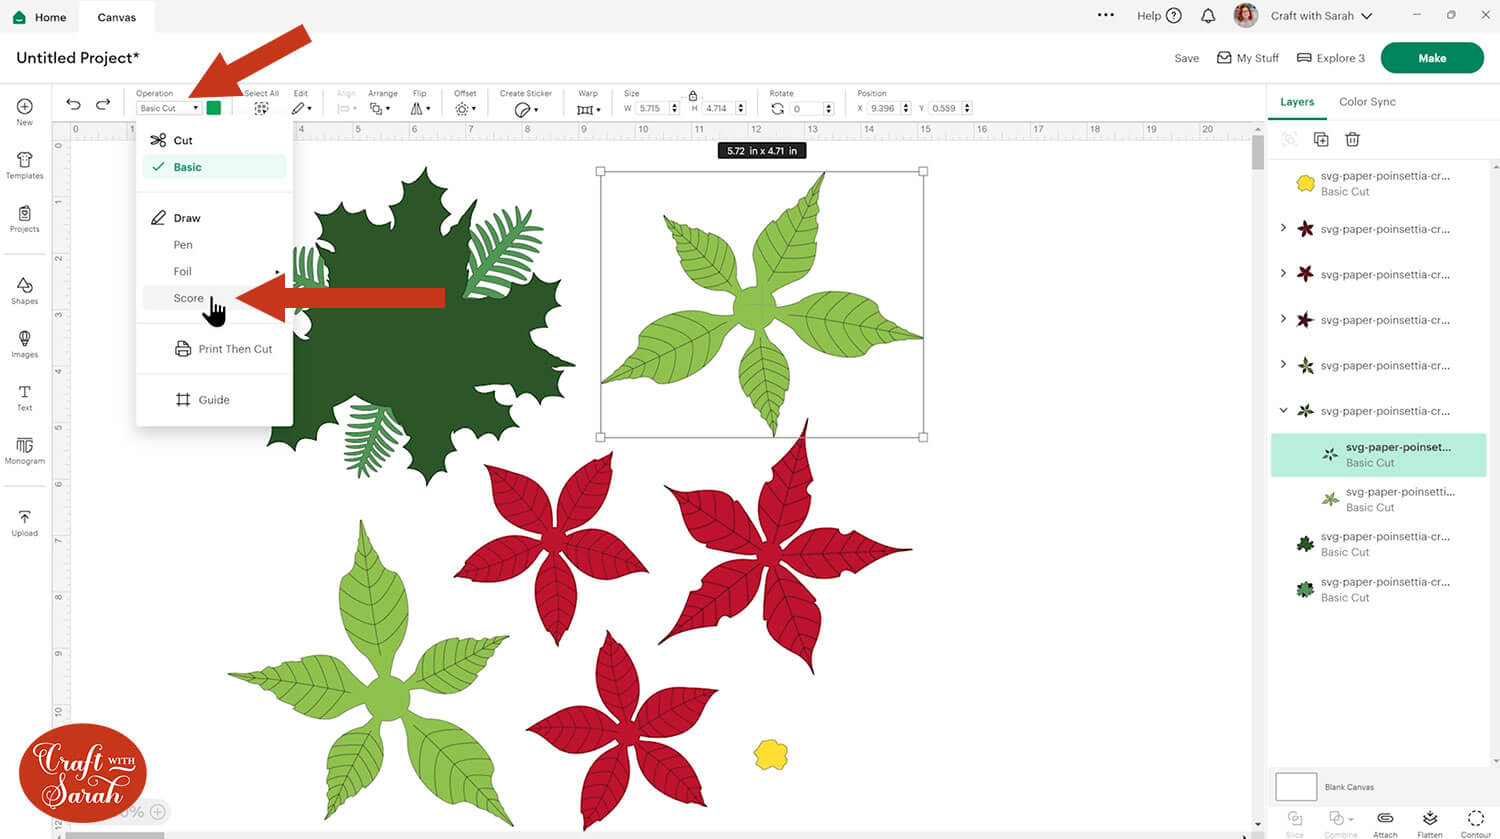
This will change how it looks on the screen, so the lines will now appear “dashed”. This is a visual aid to show you that the lines will be scored – don’t worry, the Cricut will still score them in solid lines, not dashes.
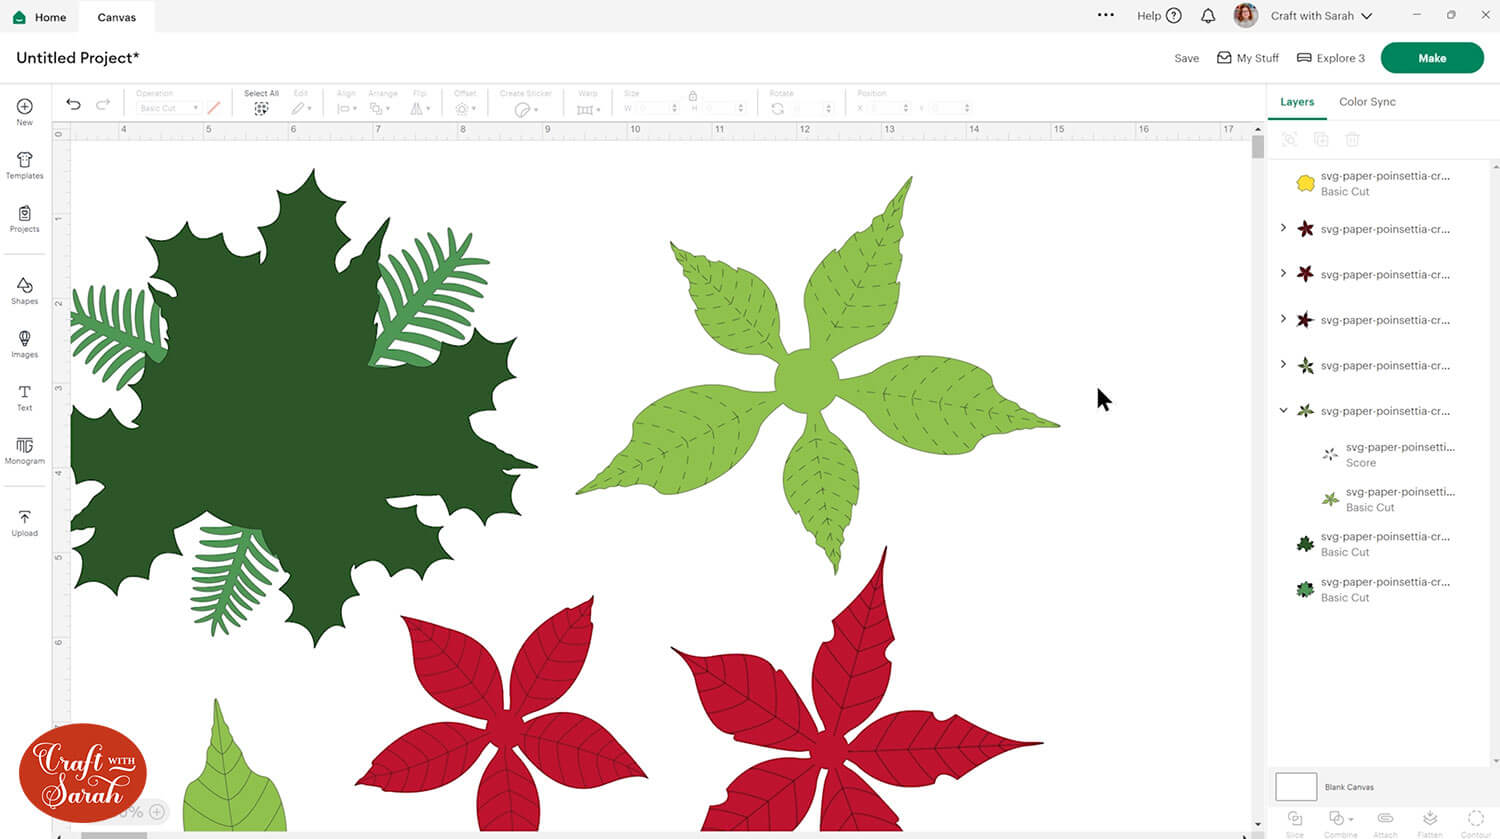
Join the score lines onto the green piece below by selecting the “Group” that contains both layers and then pressing “Attach” at the bottom of the layers panel.
—
SETTING THE LINES TO PEN/DRAW
Instead of scoring the lines, you could have your Cricut draw them instead.
Rather than selecting “Score” in the Operations dropdown menu, choose “Pen”.
Choose a suitable colour that is similar to the cardstock colour.
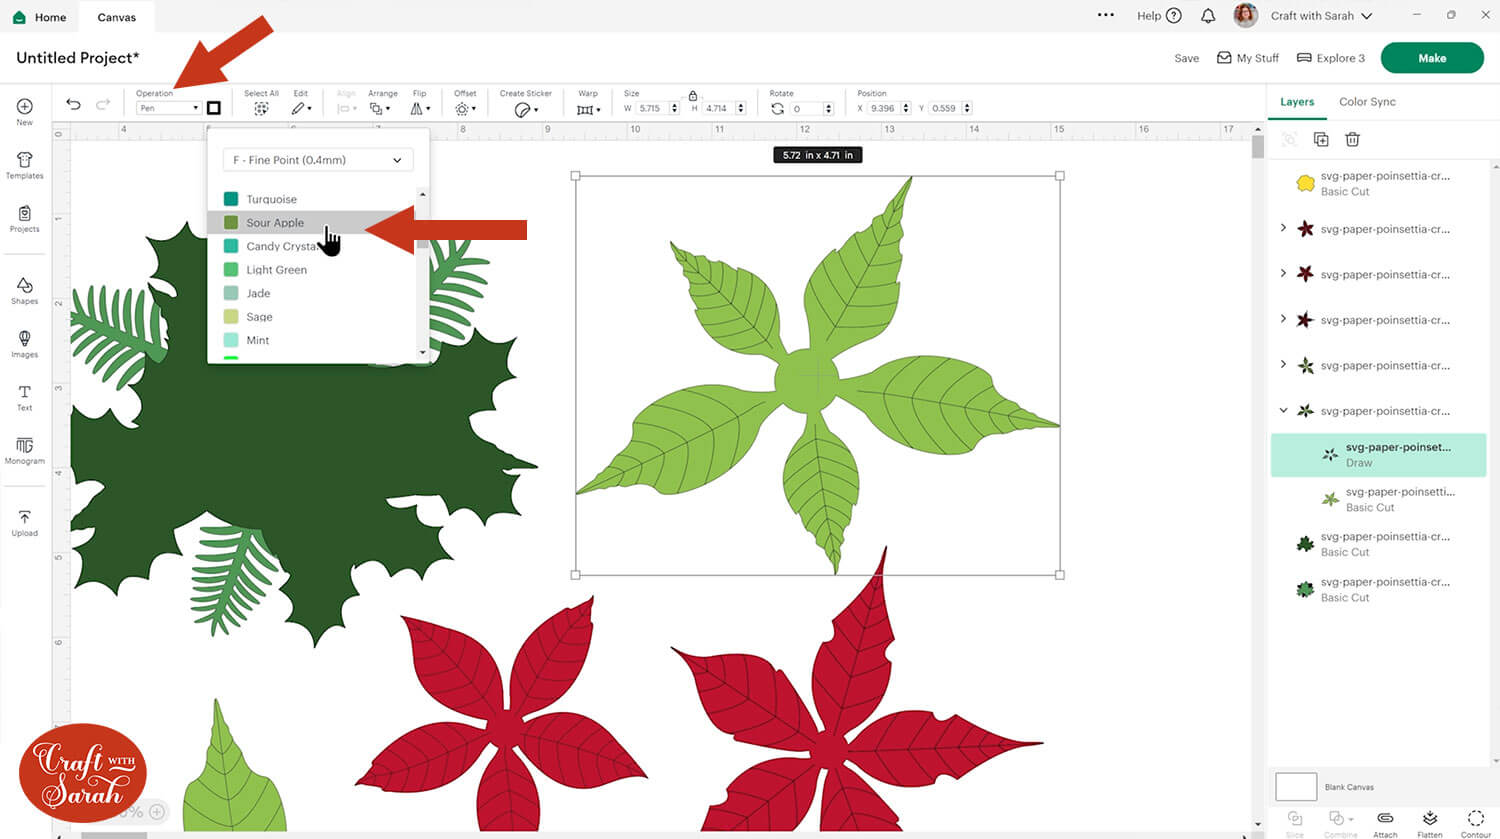
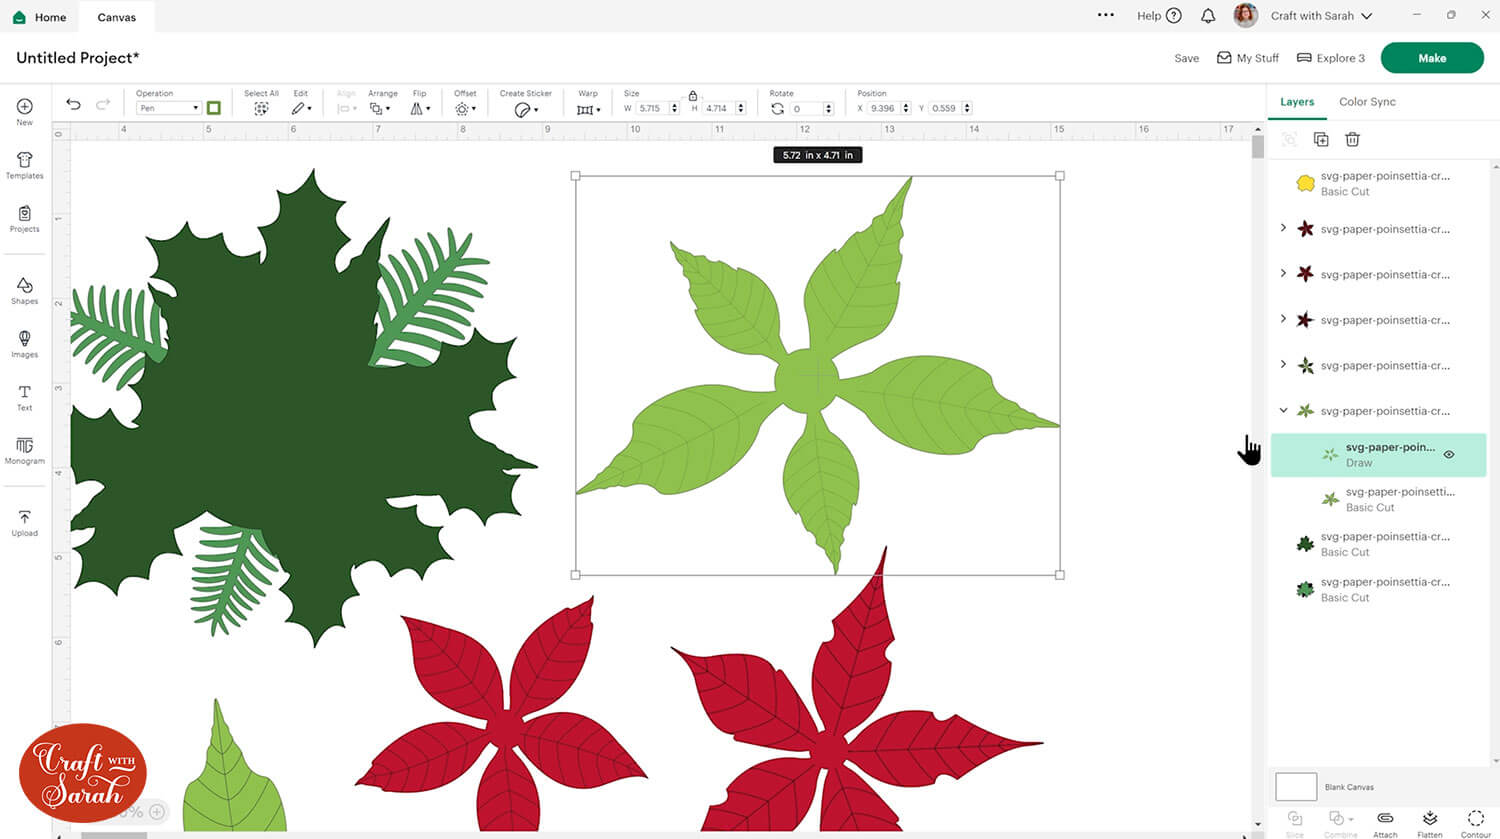
Don’t forget to “Attach” the pen layer to the solid layer underneath.
—
DELETING THE LINES
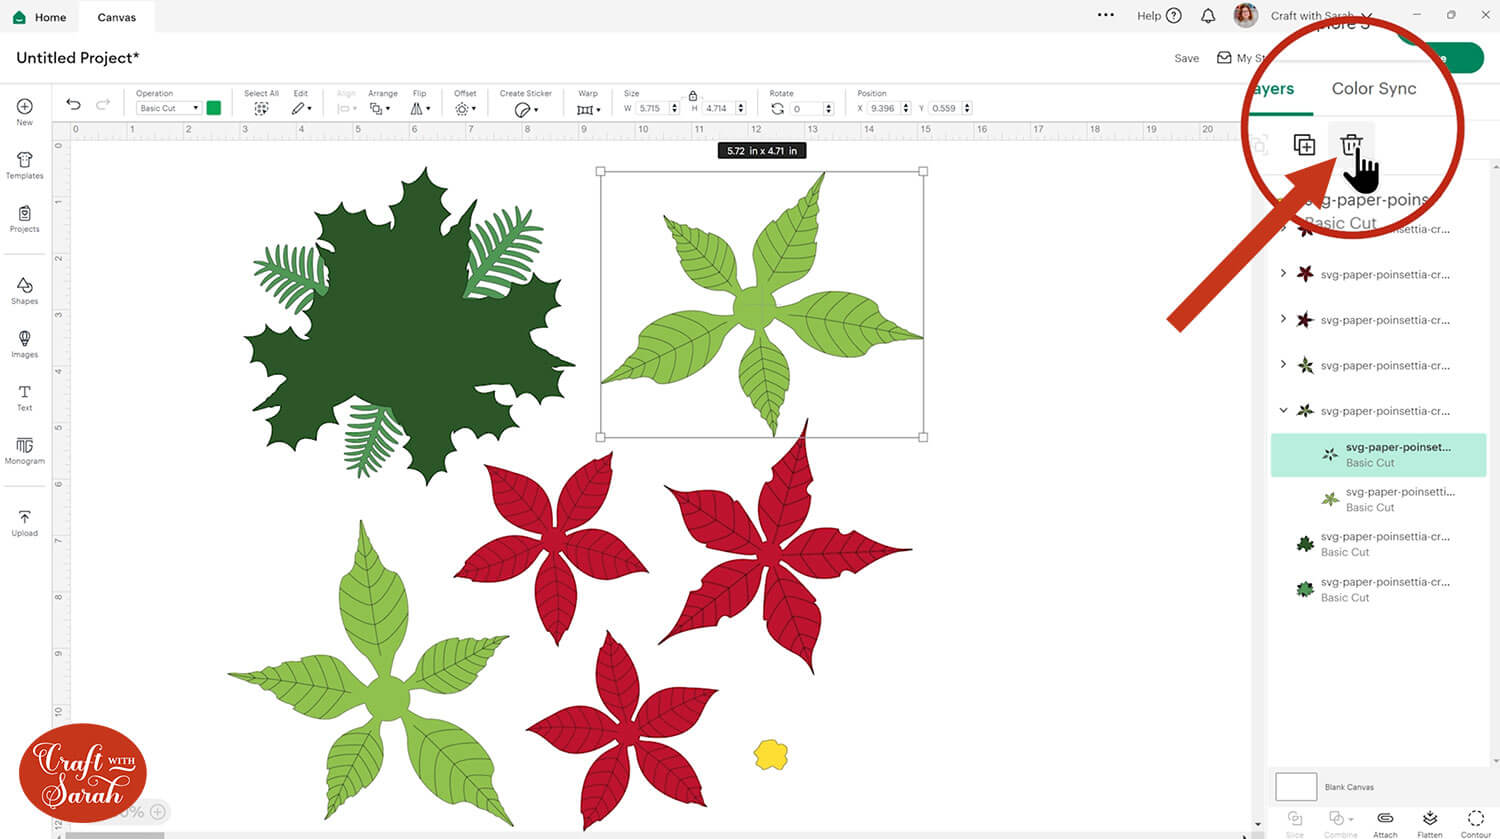
If you don’t have a scoring tool or pens for your Cricut, you can delete all the line layers.
Select them and press the trash can icon at the top of the layers panel, or press “Delete” on your keyboard.
—
Whichever option you choose, repeat the steps for both light green pieces and all three red pieces.
Step 4) Size the poinsettia flower
After formatting all the lines, drag the pieces on top of each other to form the finished poinsettia effect.
You may need to use the “Arrange” tool to move the pieces into the correct order.
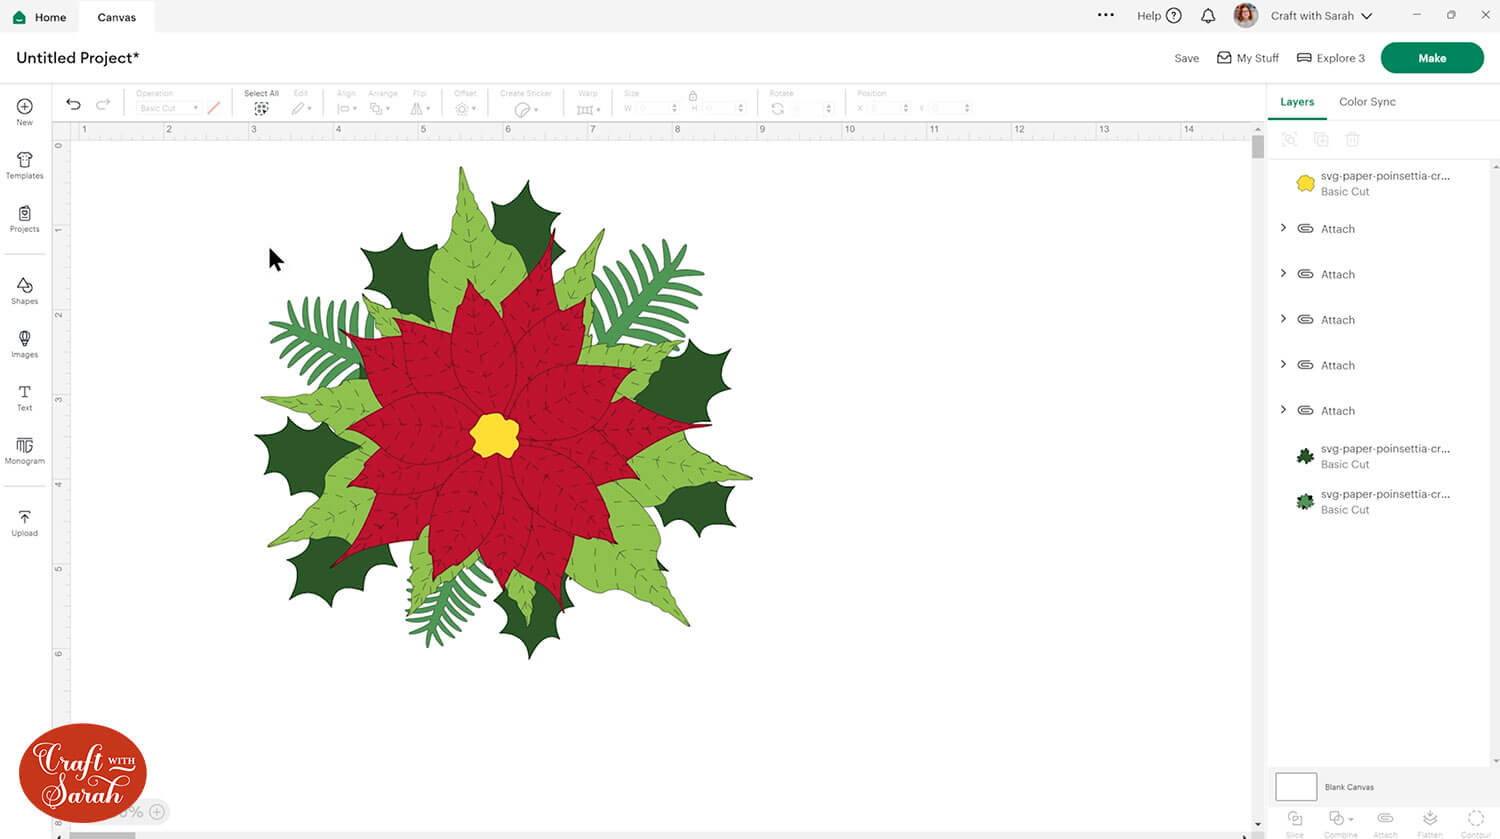
Press “Select All” and then “Group”.
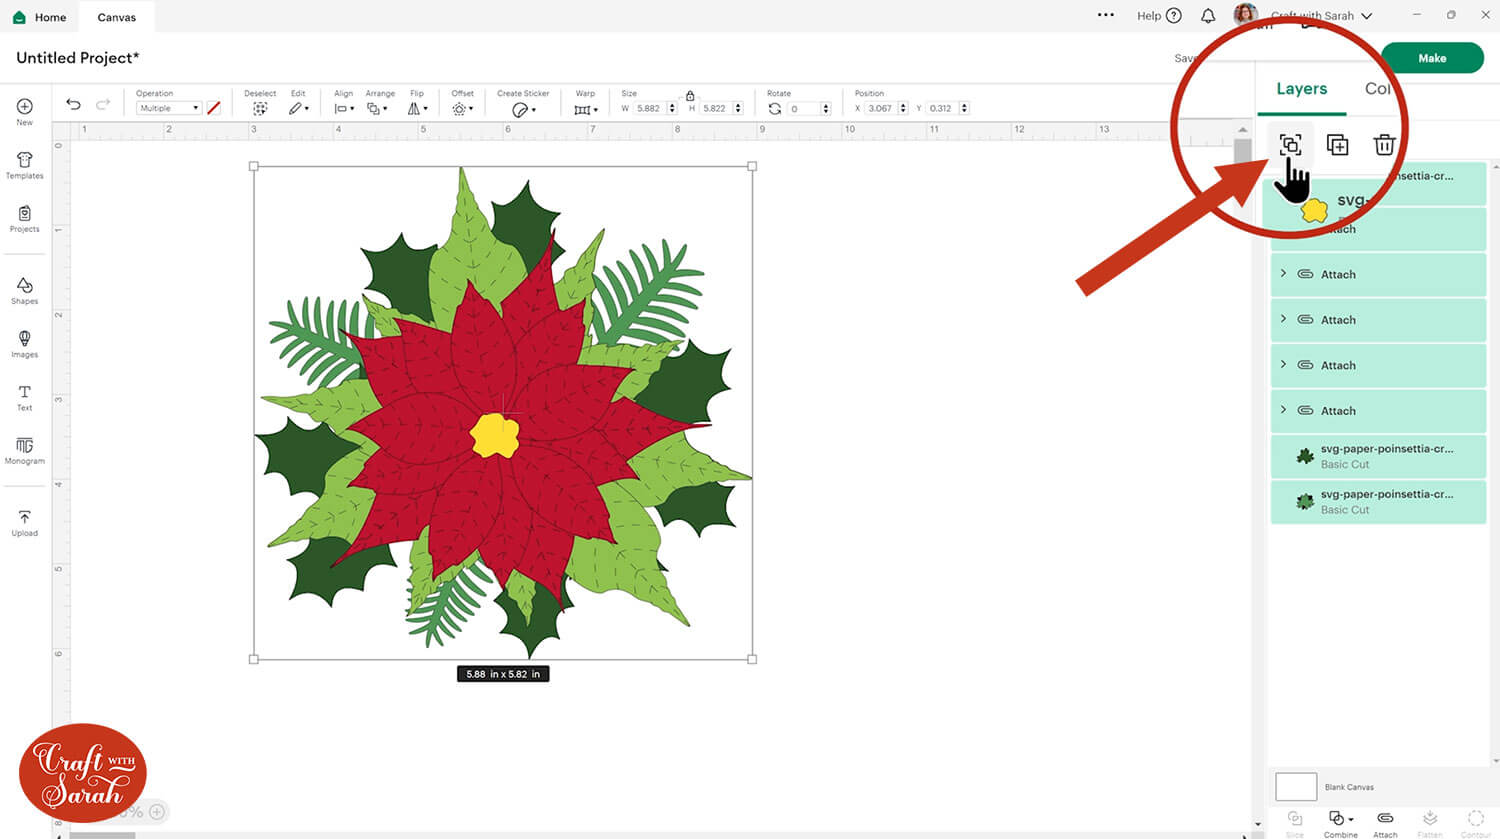
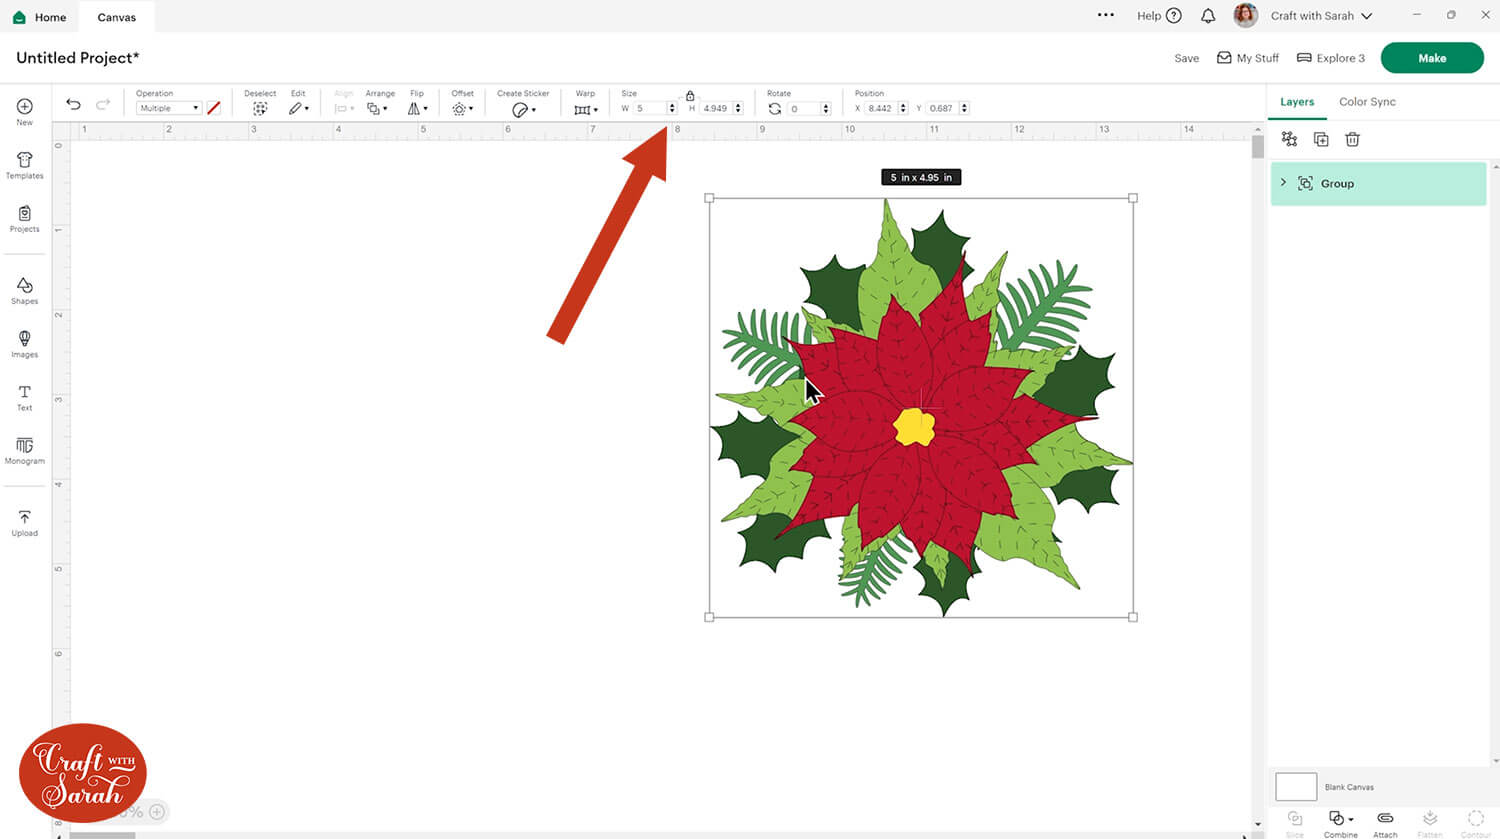
You can now resize the flower and everything will stay in proportion.
If you know the type of project you want to use the paper poinsettia on, it can be helpful to create that in Design Space.
For example, here is how a greetings card could look:
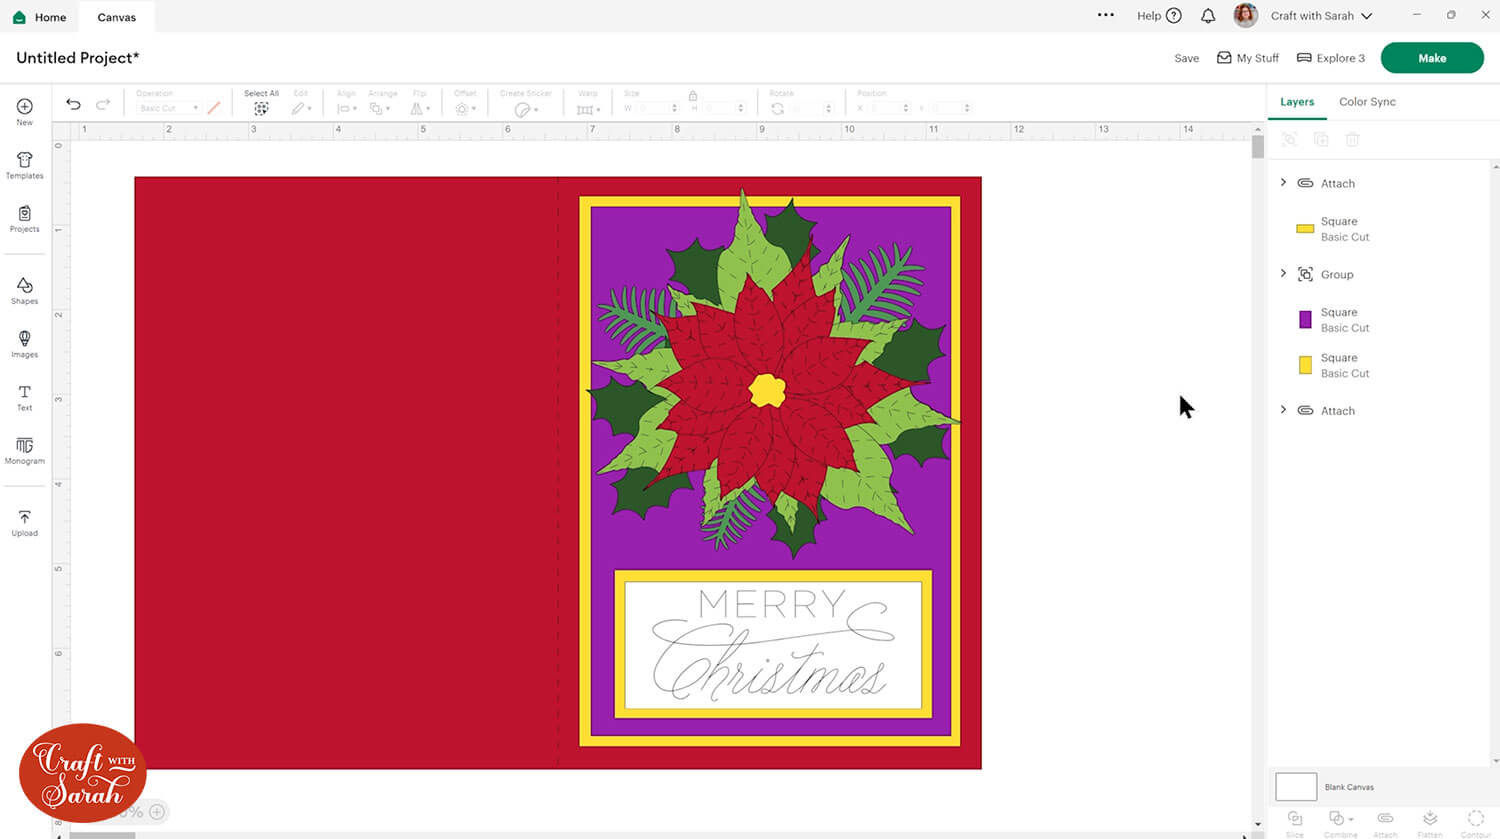
Watch the video at the top of the page for full instructions on how to create this greetings card in Design Space.
Or, you could frame the poinsettia in a shadow box.
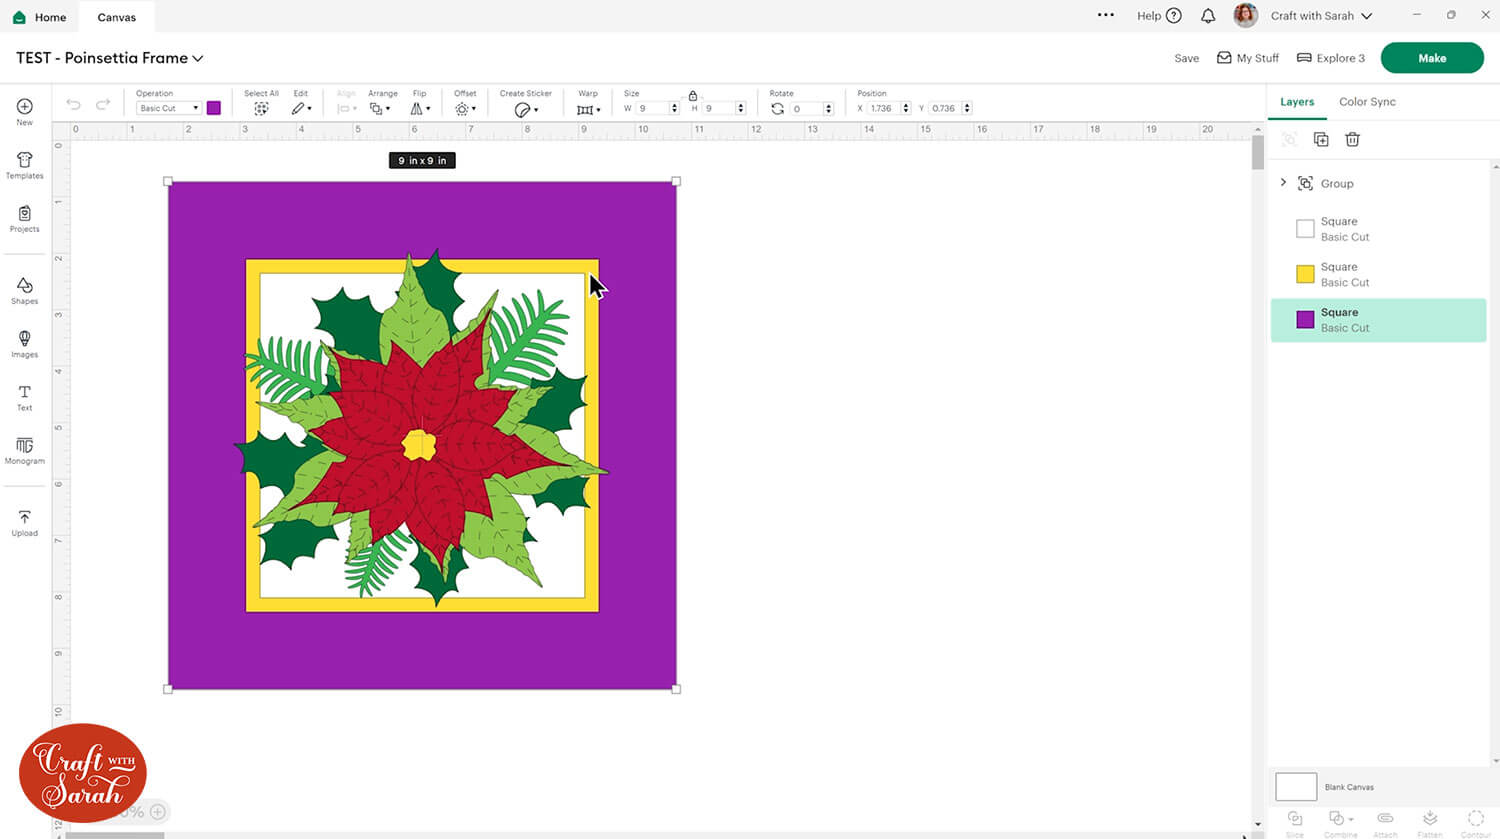
Here’s a tutorial on how to set up shadow boxes in Design Space.
For both of the above projects, I used purple shapes to show the layers that I want to cut from patterned scrapbook paper.
Step 5) Cut the design
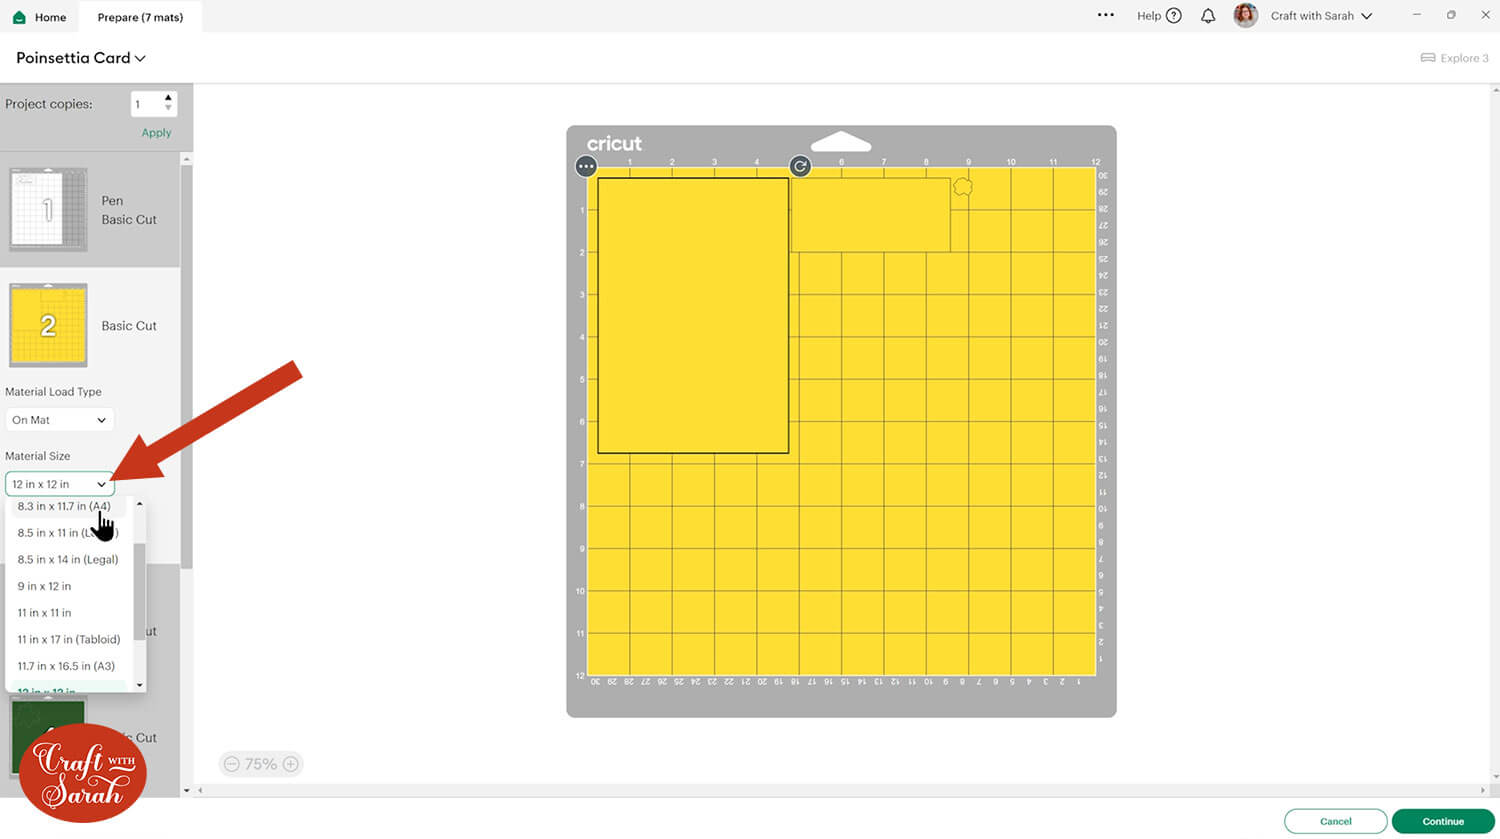
When you’re happy how your project is looking in Design Space, click “Make” and follow the instructions on-screen to cut out all the layers.
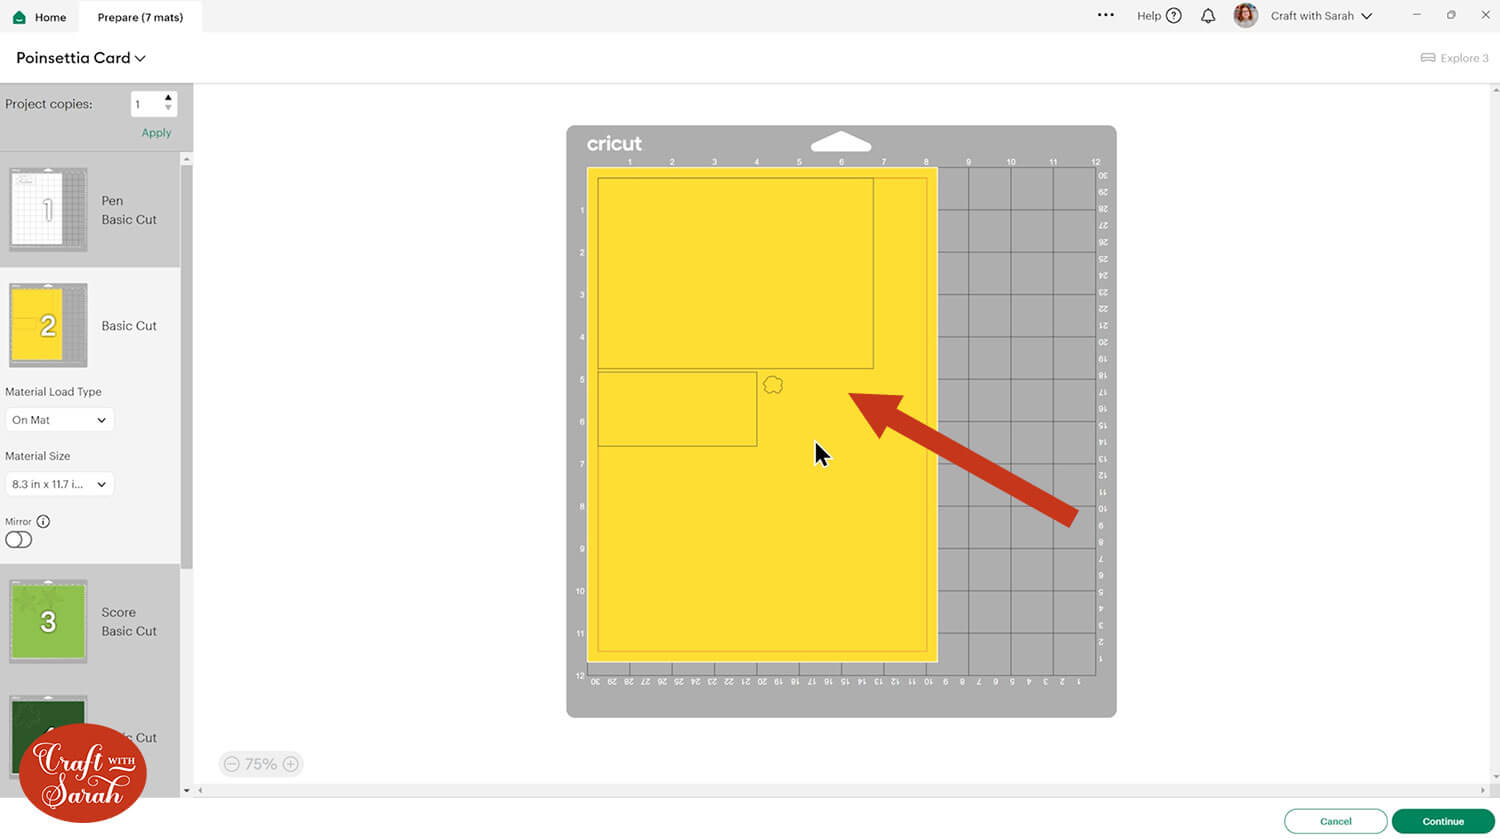
Change the paper size with the dropdowns on the left of the screen. You need to change it for every colour.
You can drag-and-drop the pieces on the screen to move them about to take up less space on your cardstock.
Step 6) Stick the paper poinsettia together
You can use a glue gun, regular craft glue or foam squares to stick the poinsettia together.
First, use a scraper tool, ruler or similar to fold the green and red leaves in half down.
Place the scraper tool along the score/pen line (or guess where half-way is if you deleted the lines) and gently press the cardstock around the edge of the scraper tool.
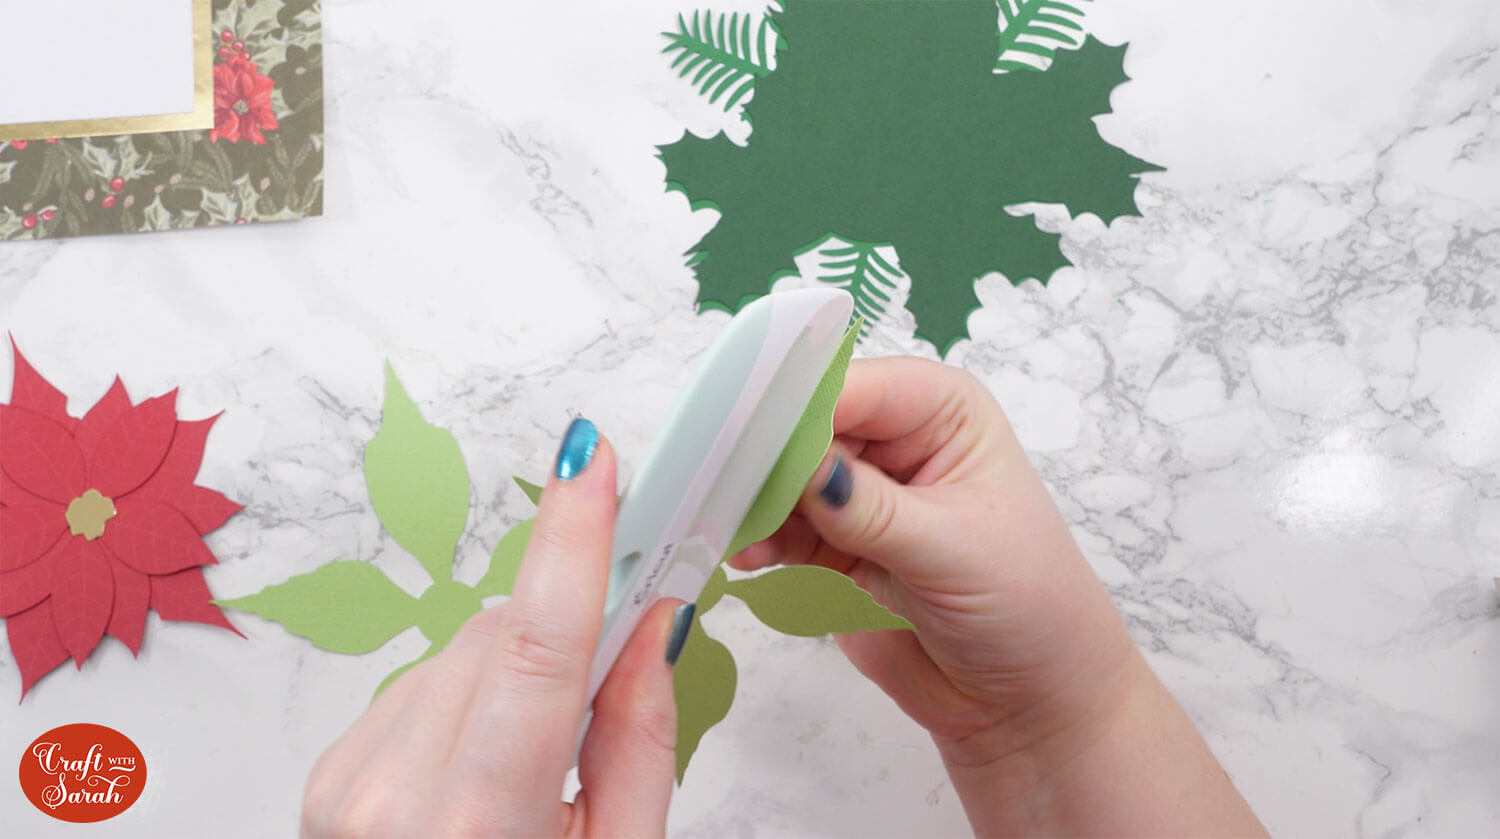
It gives a lovely 3D effect to the flower and makes it look more realistic.
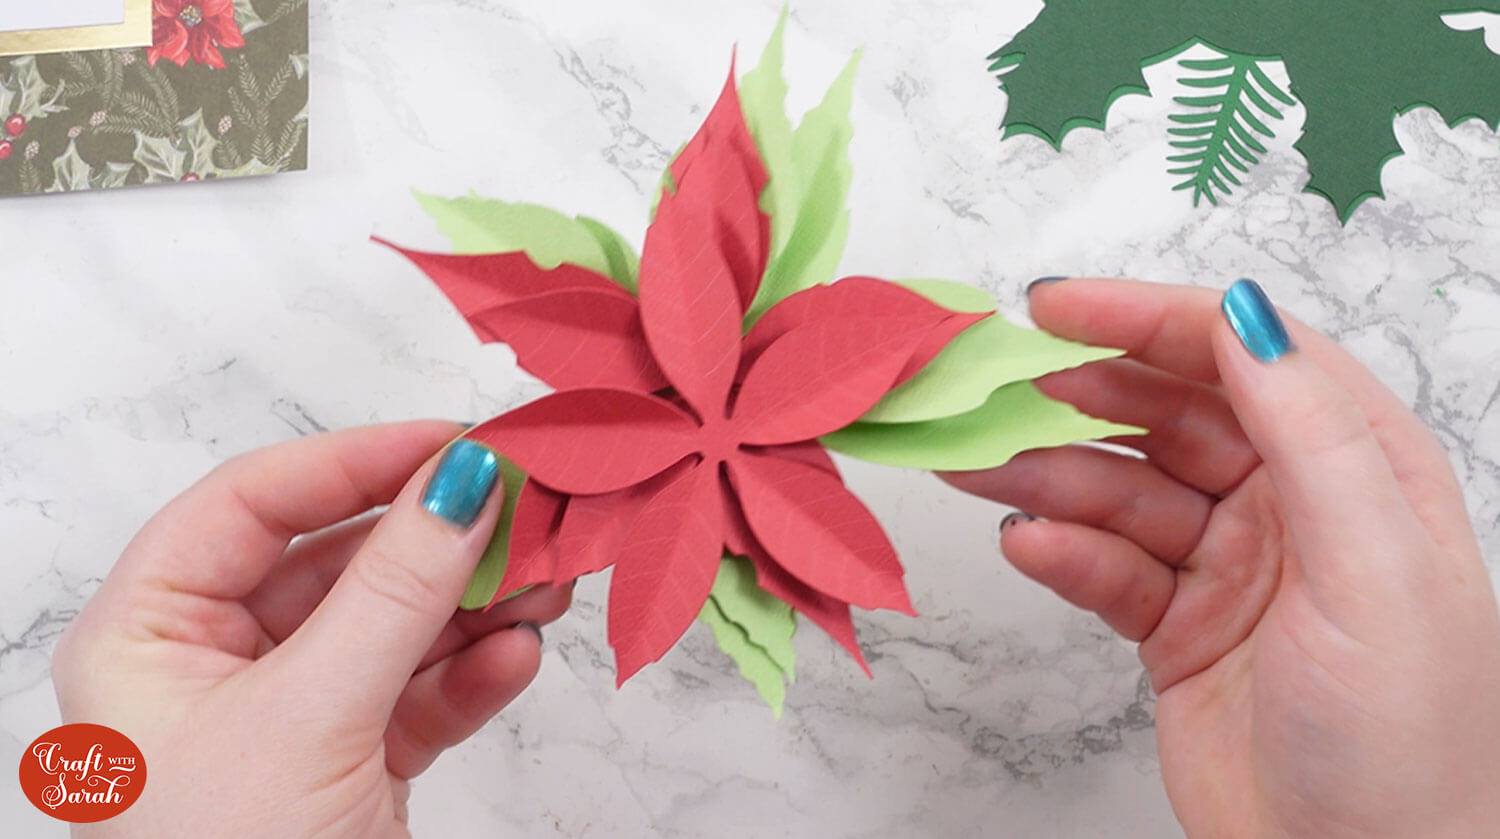
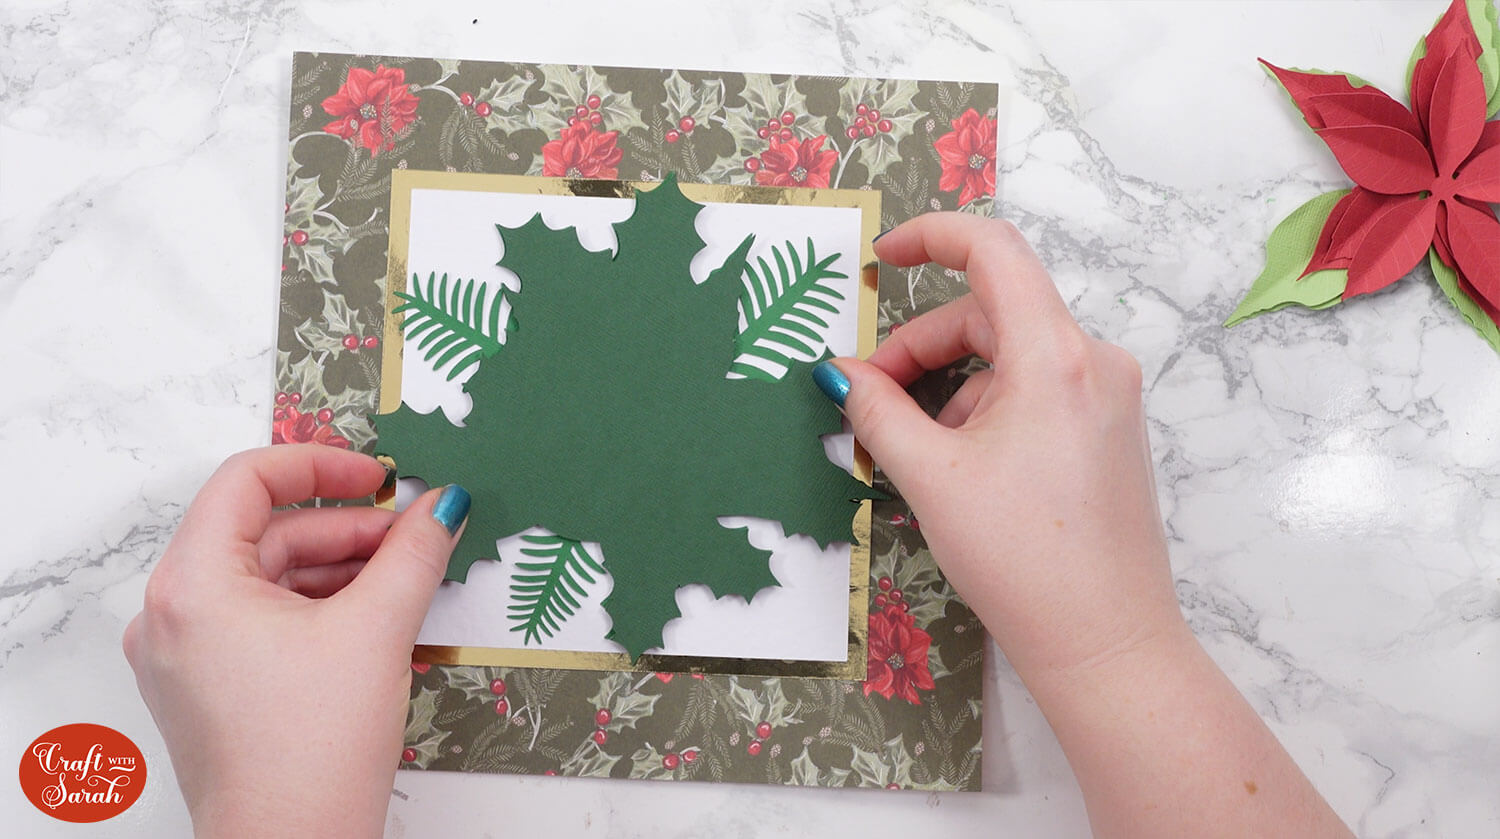
Stick together the base pieces of your shadow box or greetings card, then add the first two leaf layers on top. These are the ones without any score lines.
For my shadow box, I glued the bottom layer on and then used foam squares for the next layer to give a bit of dimension.
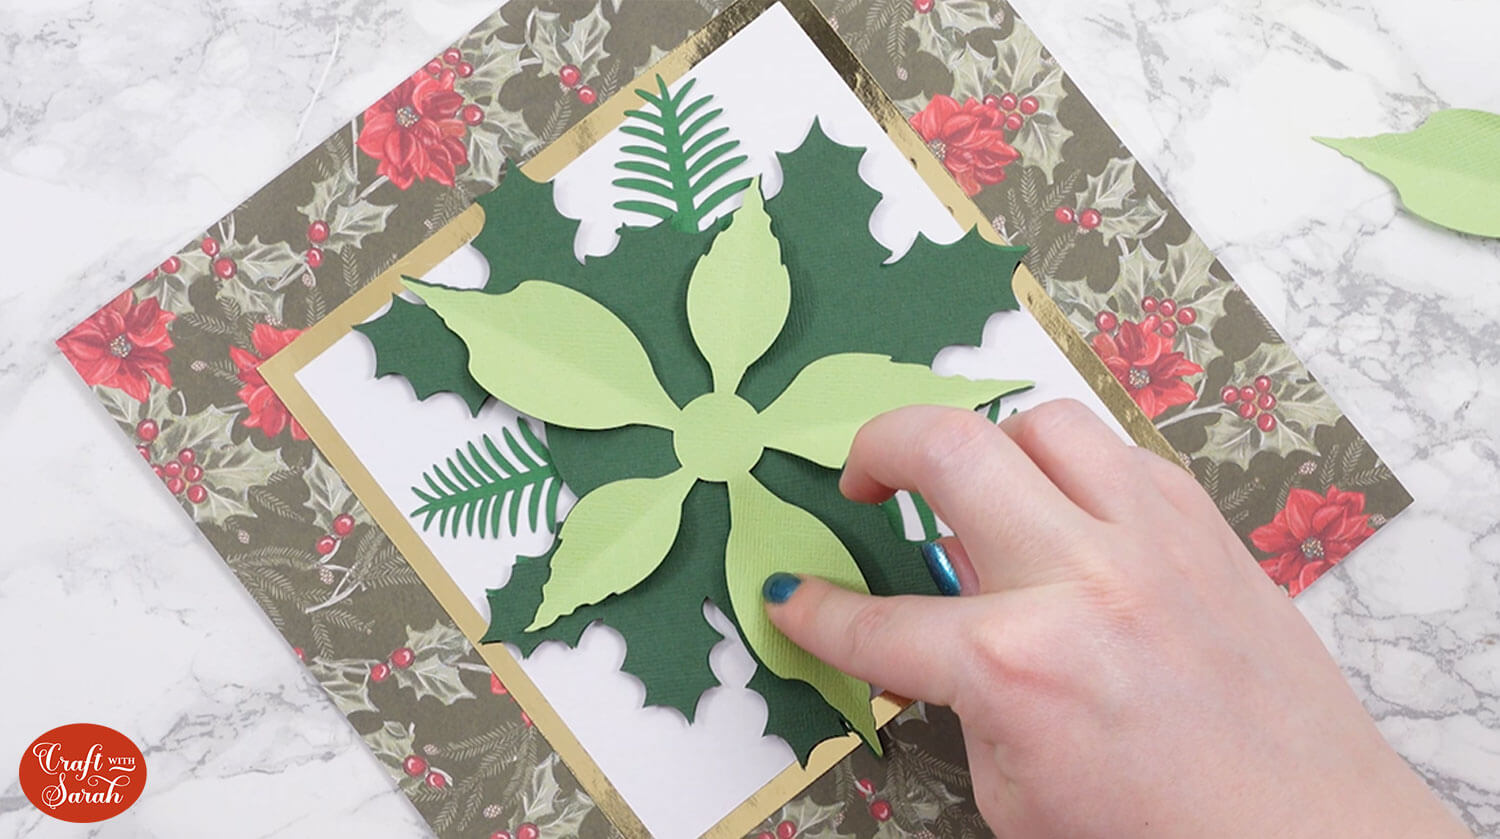
Stick on the first “lighter” green piece using a glue gun, regular craft glue or foam squares.
Line up the points of the leaves with the darker green piece underneath.
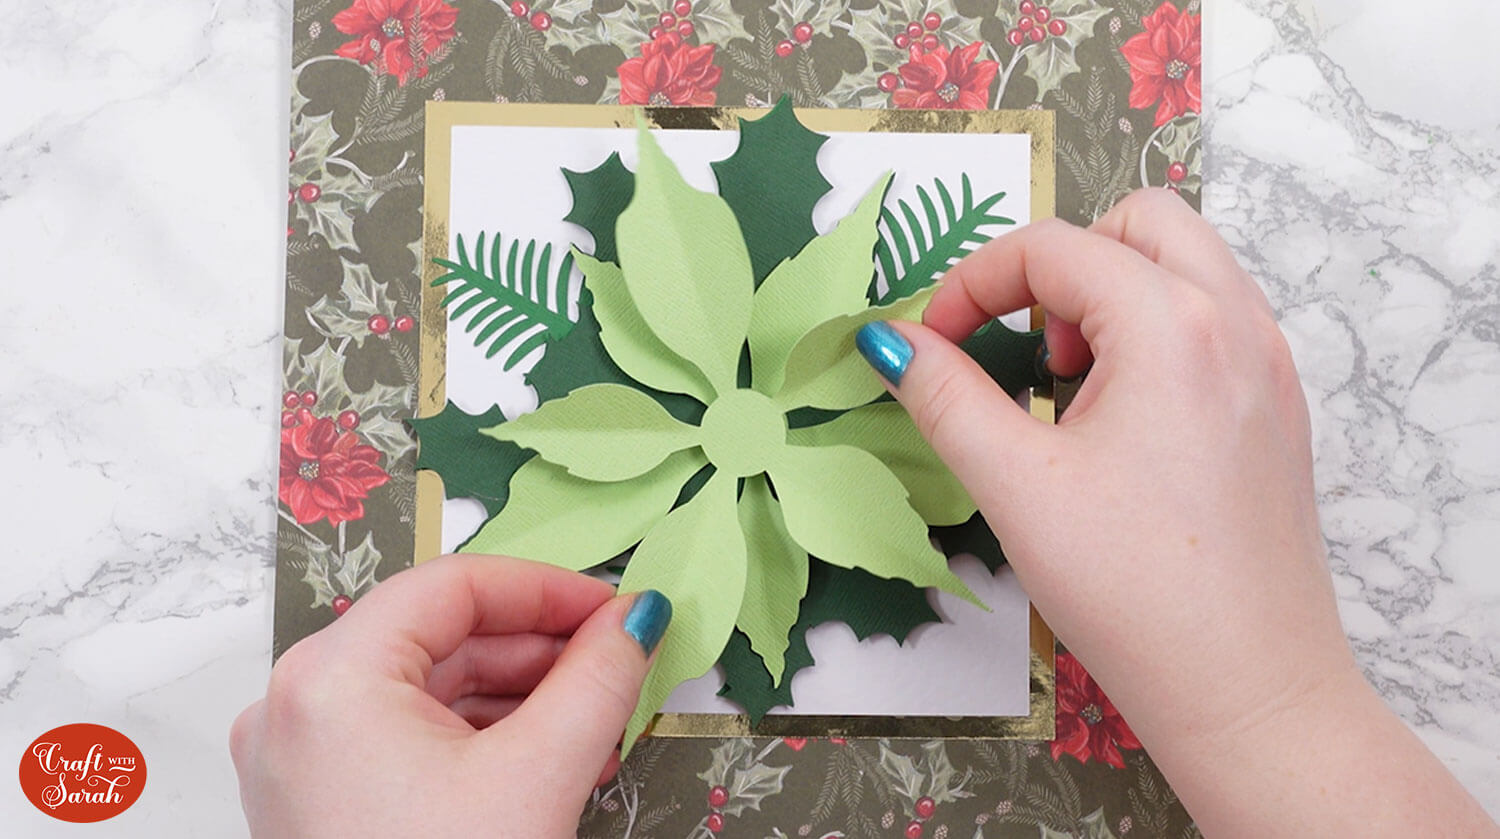
Attach the next green piece at an angle, so that the leaves of the new piece fill in the gaps of the one underneath.
Add on the largest red piece, again making sure that the petals go in the gaps of the green piece underneath.
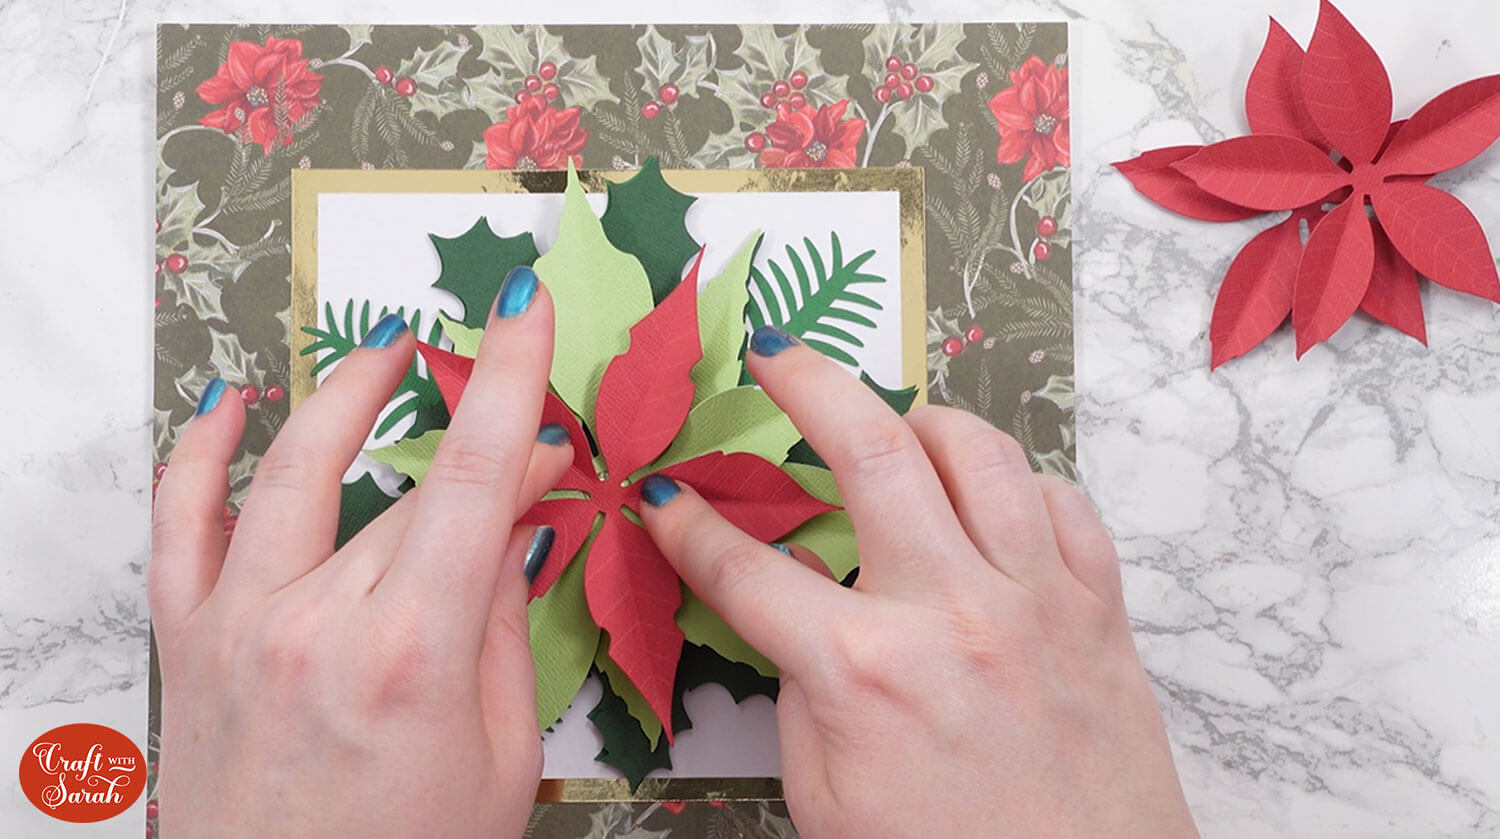
Stick on the other two red pieces.
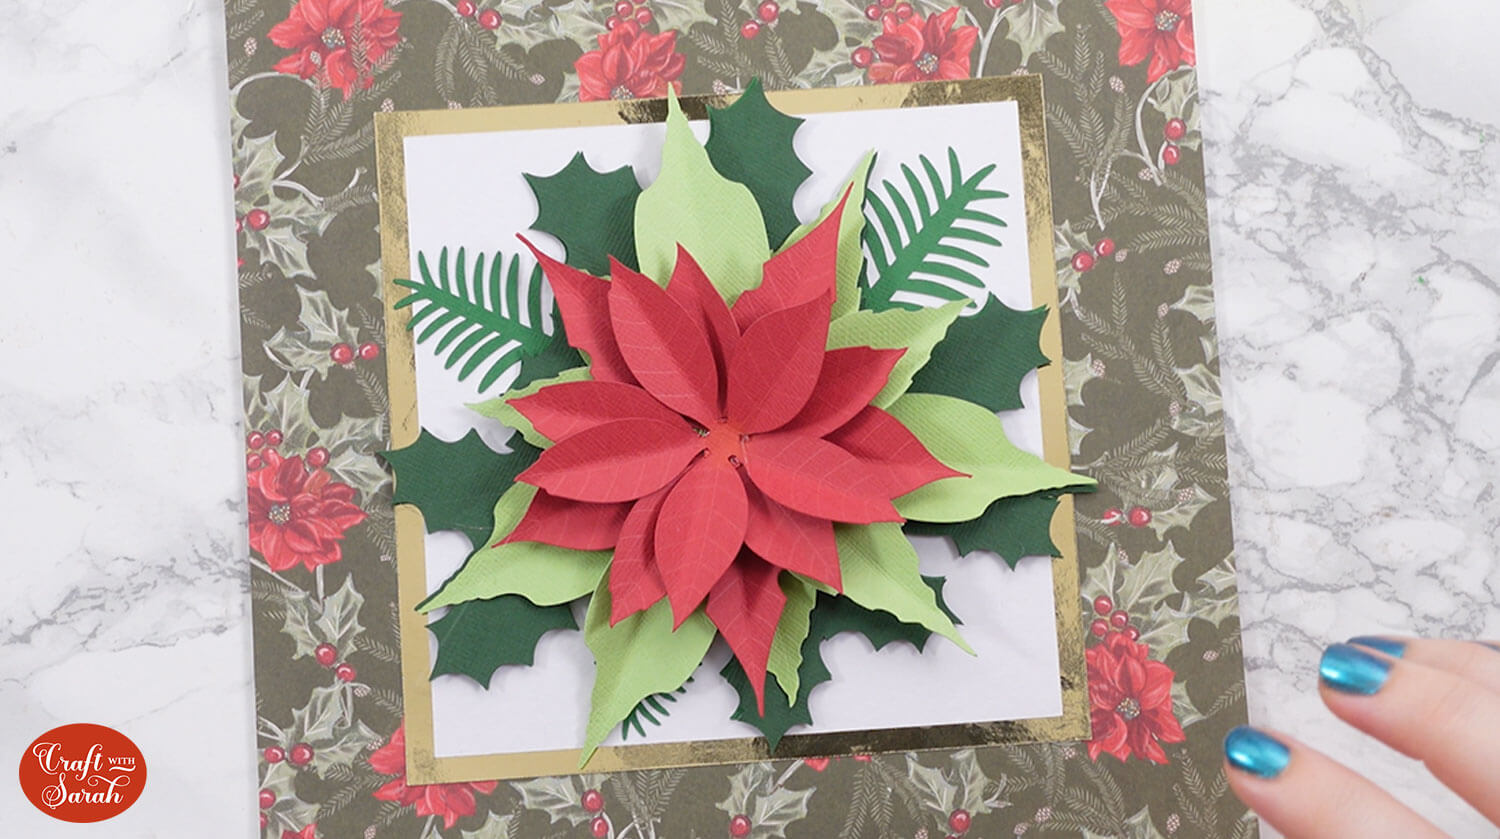
Add the yellow/gold piece in the middle of the flower.
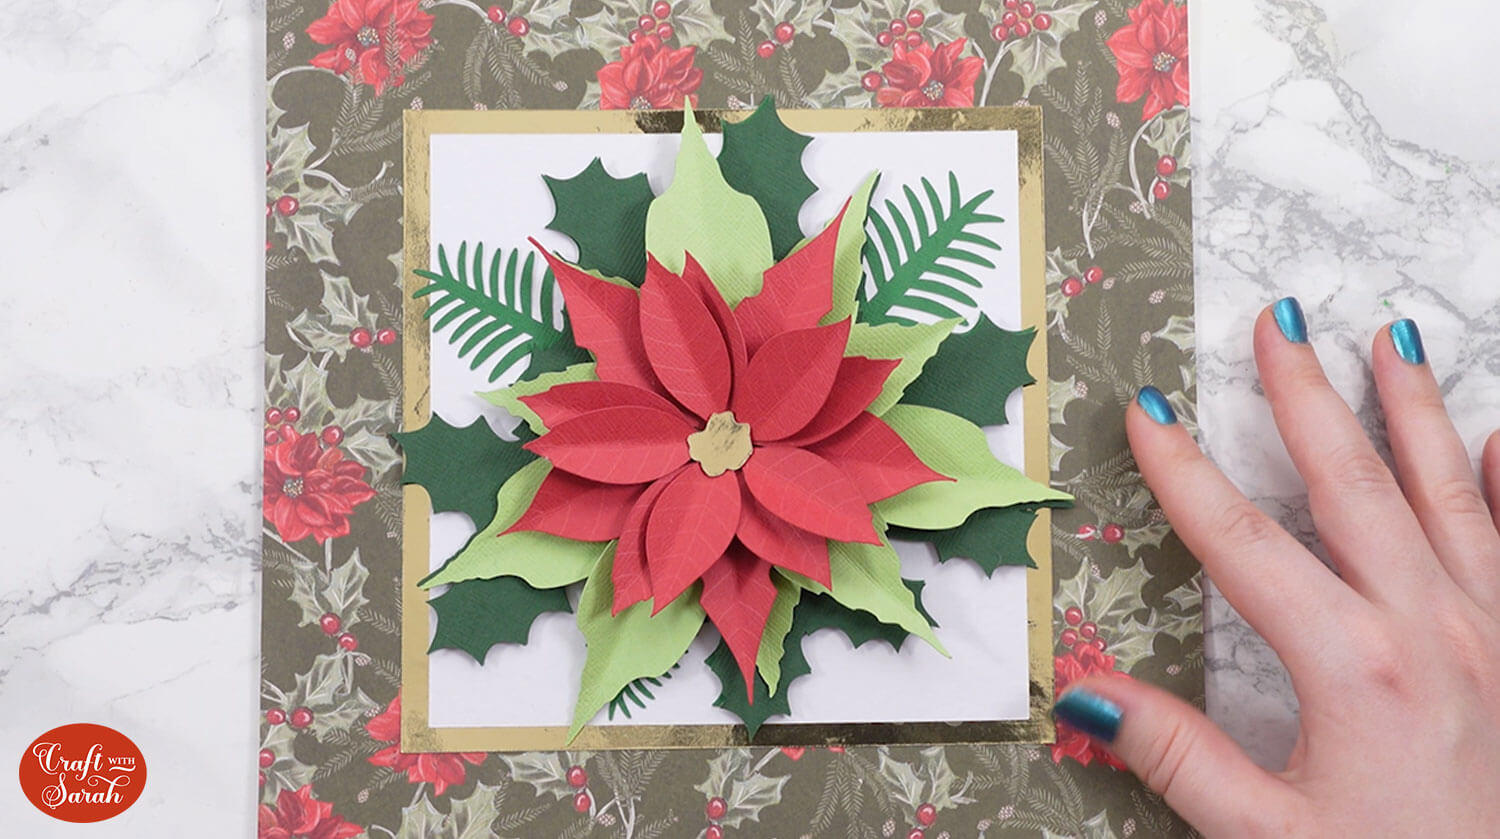
I used a glue gun for the shadow box, but regular craft glue for the greetings card as the pieces were so much smaller. I’m messy with a glue gun, so didn’t want to use it on the small flower!
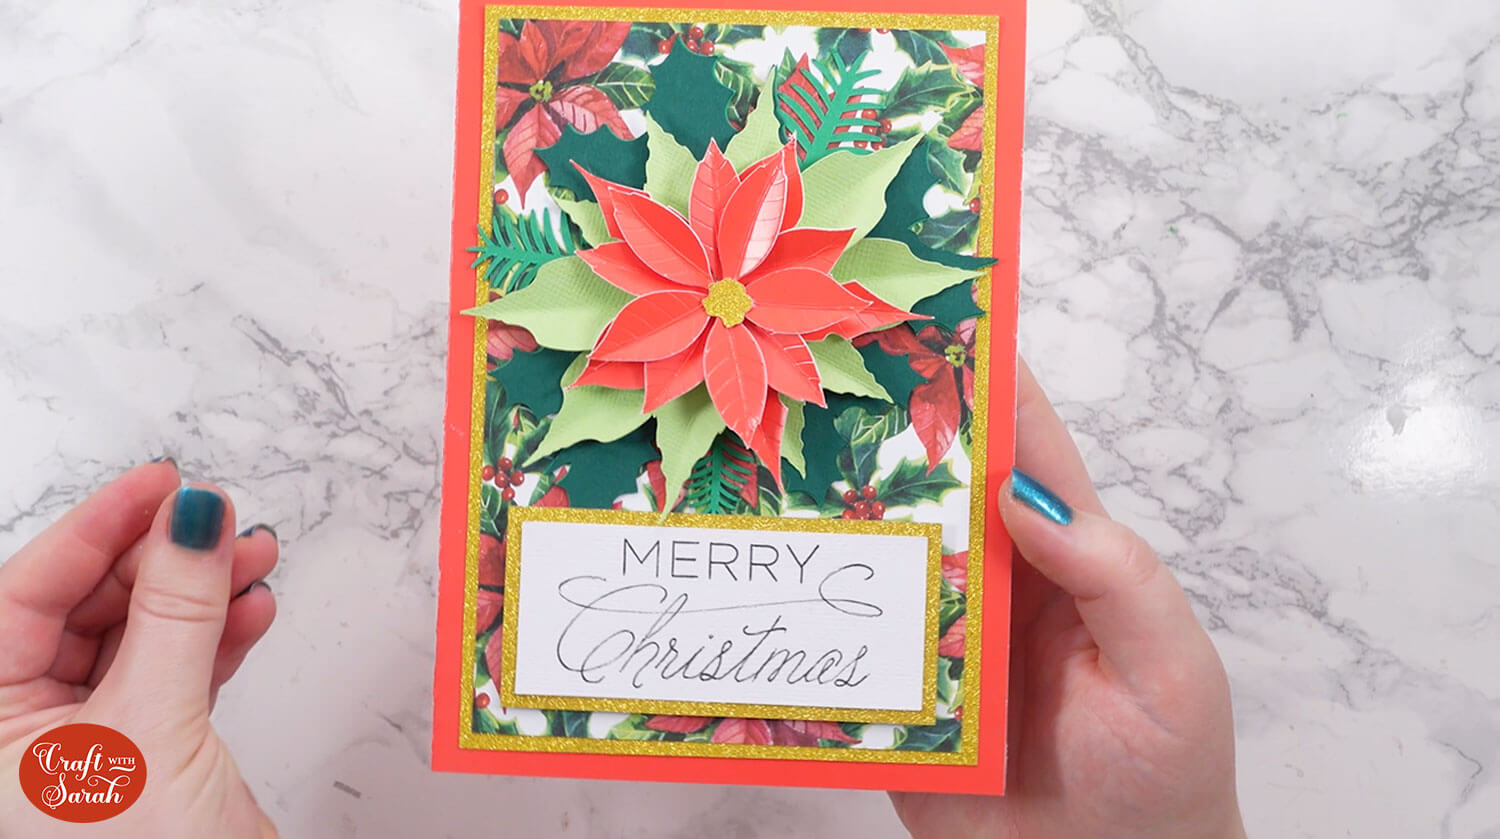
As greetings cards that use this flower will be quite thick and dimensional, I recommend making presentation boxes for them instead of using an envelope.
Free poinsettia flower SVG
Your paper poinsettia flower is now complete, just in time for Christmas!
Whether you are using it for cards, shadow boxes, or other crafts, it’s a great quick-and-easy craft for last-minute Christmas gifts or room decorations.
Happy crafting,
Sarah x

