Iris Folding Bookmarks ✂️ Paper Bookmark Ideas
I can’t wait to show you how to make these beautiful iris folding bookmarks.
After receiving a request for iris folding bookmarks a while ago, I thought I’d sit down and see what I could do. It took a bit of perseverance but I’m so glad that I kept going with it.
They make beautiful gifts and you can even write a message on the back for an extra personal touch. Don’t worry if you’re new to iris folding, I’ll take you through all the steps.
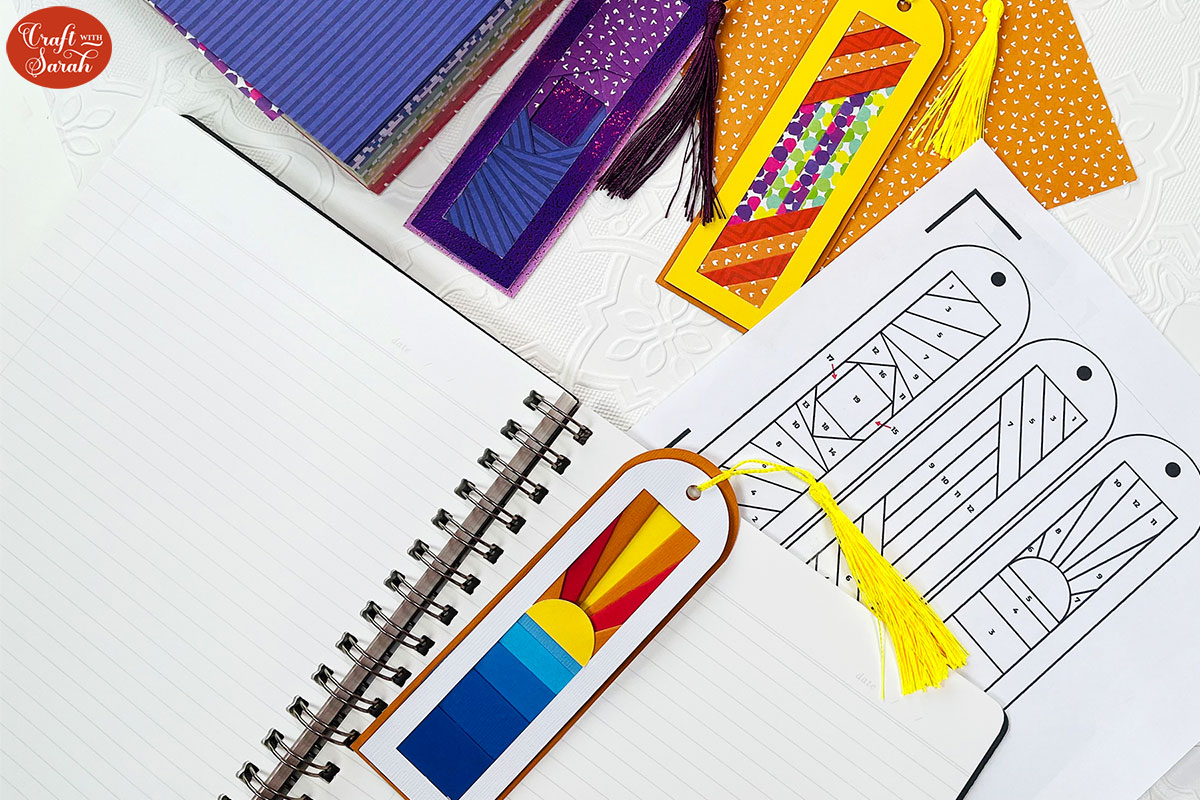
There are three different designs included in the download folder. My favourite is the sunset bookmark.

Materials list
Here is a list of the materials needed to make this project.
Please note that some of the links included in this article are affiliate links, which means that if you click through and make a purchase I may receive a commission (at no additional cost to you). You can read my full disclosure at the bottom of the page.
- Cricut Machine
- Light blue Cricut cutting mat
- Coloured card
- Thin coloured or patterned paper (I like using origami paper)
- Double-sided tape
- Glue
- Scissors
- Bookmark tassels

Video tutorial for iris folding bookmarks
Here’s a video which shows how to make bookmarks with your Cricut machine, using the iris folding technique.
Keep scrolling for a written tutorial.
Iris folding bookmarks tutorial
Step 1) Download the free file & unzip the downloaded folder
Download the Free Cutting File
Please login to your account to download this file.
TERMS OF USE:
You may sell finished, handmade physical craft items that you have made using this product but must not sell or share the digital files. Read full terms of use
Before you upload the SVG to Design Space, you need to unzip the download folder that it comes in.
- How to unzip a folder on Windows computer
- How to unzip a folder on a Mac
- How to unzip a folder on an iPad/iPhone
- How to unzip a folder on an Android device
Step 2) Upload the files into Design Space
Open up Design Space and start a new project. Then press “Upload” and then “Upload Image”.
Each bookmark design has two files to upload. Let’s take a look at the spiral one.

There are three files within here. One of them starts svg- in the file name – that’s the one which is going to cut out the frame of the bookmark.
Then there’s another one which starts JPG in the file name and this is the printable pattern.
There’s one other file which starts DXF, this is for Silhouette machines. If you’re using the free version of Silhouette Studio then you’ll need to use this DXF file instead of the SVG. If you are using a Cricut then you do not need the DXF file.
First, drag the SVG file into Design Space. The exact appearance will vary a little depending on which bookmark design you’re uploading, but it will look similar to this:

Press “Continue” and then “Upload” to insert it onto your project.
Then, go back to “Upload”. This time, select the file that starts jpg- in the filename.
You might find that it looks a little bit blurry on the screen but it will be perfect quality once it’s uploaded.

Press “Continue”, then “Apply and Continue”.
On the next screen, choose “Flat Graphic” and then press “Continue”.

Press “Upload” to put the pattern onto your project. It will probably load in really big, but don’t worry about that as we’ll fix it in the next step.
Step 3) Size the bookmarks
We need to change the size of the pattern so that it matches the bookmark outline shape.
You can make your bookmark whatever size you want. I decided to make mine 6 inches tall.
Size the cutout/outline shape to the size you want to make the bookmark.

Open up the layers in the Layers Panel for the outline shape and click the top layer that has the little cutout window on it.

Make a note of the height of that layer. Mine is 5.781 inches tall.
Click the printable pattern and resize it to match that height. Make sure the padlock above the width/height boxes is closed when you resize.

Once your pattern and bookmark are the same size, you can then add the other bookmark designs and size those too.
Here’s how my three bookmarks look. I changed the colours of some of them.

Step 4) Cut the bookmarks and print the patterns
Once you’re happy with how your bookmarks are looking, click “Make” to begin the cut process.
The sheet with the bookmark pattern will be a print then cut image but you don’t actually need to cut it out. You can just send it to your printer and then move on to the next cut image without actually cutting out the pattern.

One thing to note when you are printing them out is you don’t need to turn the bleed on because it’s not going to be cut out.
We’re only using this as a template, it’s not going to be part of the final bookmark so you don’t have to use your high quality settings if you don’t want to, you can just use regular printer paper for this. Just print it out as you would a regular document.
Step 5) Prepare the paper strips
I will show you how to do both the spiral and sunset bookmark. You can use the same steps to make the “lined” bookmark.

Cut some coloured paper into strips with scissors. Make sure that they will be wide enough to cover the shapes in the printed template when the strips are folded in half.

I like to use origami paper as it is thin. The thinner the paper, the better the effect of the final bookmarks as they will be less bulky.
However, you can use cardstock or thicker scrapbook paper if you prefer. I am using cardstock for the sunset bookmark as I didn’t have thin paper in the colours that I wanted to use.

Take the bookmark outline shape and turn it upside down. Add double sided tape all the way around the back of the bookmark. This is how we will secure the paper strips.

Fold over any tape that you can see from the front to make sure the edges are neat.

Place the bookmark upside down/sticky side up on the printed pattern and use a small piece of washi tape, masking tape or sticky tape to secure it at the top so that it doesn’t move around too much.

Fold your paper strips either in half or around 2/3 of the way.
This will give you a crisp, straight line to do the folding with. You can go down the fold with your brayer tool for an extra crisp edge. Folding the strips also gives a pronounced edge so that your folding is neat and the line is obvious.

Fold all your papers in preparation for starting on the pattern.
Step 6) Complete the iris folding
The iris folding pattern has numbers on it to show the order to complete the folds.
Start at number 1.
Take a folded strip and line it up with the line on the bottom of the 1 section. You may want to snip your strips smaller but so that they will cover the numbered sections.
Once it’s lined up, push it down to secure it to the bookmark using the double sided tape that’s already on the outside of the bookmark.

It doesn’t matter if you have gone over the edge of the bookmark with the paper, we will sort that out at the end.
Take your double sided tape again and tape over the top of the paper you just stuck.
This will help to secure the next piece.

The next fold to complete is number 2 which is at the bottom. Stick your folded strip of paper in the same way.
You may wish to change colours for the spiral at the bottom of this design. I’m using a different shade of purple paper.

Go over the top of the paper with double sided tape.

Continue following the pattern, using the same steps until you get to number 15.


Number 15 will be the same colour as what you’ve used for the top section along with 16.
17 and 18 will be whatever colour you have used for the bottom.

You will then be left with number 19 in the middle. Traditionally this would be a glitter, holographic or metallic paper to look like the iris of a camera.
I used a purple cardstock which has a lovely sparkly effect.
Take your card and stick it over the whole middle section.

Then peel the tape off which has been securing your bookmark to the pattern.
Take your scissors and trim the edges where the paper is coming out the side of the bookmark.
Take care not to snip the bookmark!

Once you’ve neatened up the bookmark, take the backing piece and glue or double-sided tape the bookmark to it.

Make sure you line up the holes at the top of the bookmark.
Finally, add a bookmark tassel to the top.

Now your spiral iris folding bookmark is finished!
The sunset bookmark is a little bit different as it has the shape of the sun in the middle of the bookmark.

Take care when adding Number 5 that the strip does not go above the sun shape.

I used lots of blue shades of card to make it look like the gradient effect of the sunlight on the ocean.

Once the folding is finished, glue on the yellow semicircle cutout to the front of the bookmark as the sun.

You might find that your bookmark is pulling away from the backing if you’ve used thicker paper or cardstock. You can place the bookmark under some books for a few days to help that or add some glue on the edges to help it stick down tightly.

If you would prefer neater edges on the bookmark then you could create and cut a border in Design Space to glue over the edge of the iris folded piece, to help “sandwich” the iris folding in the middle of the front and back pieces of the bookmark. Please note that I have not create a template for this.
You could also try laminating the bookmarks to make them more secure. This would have the added benefit of making them water resistant!
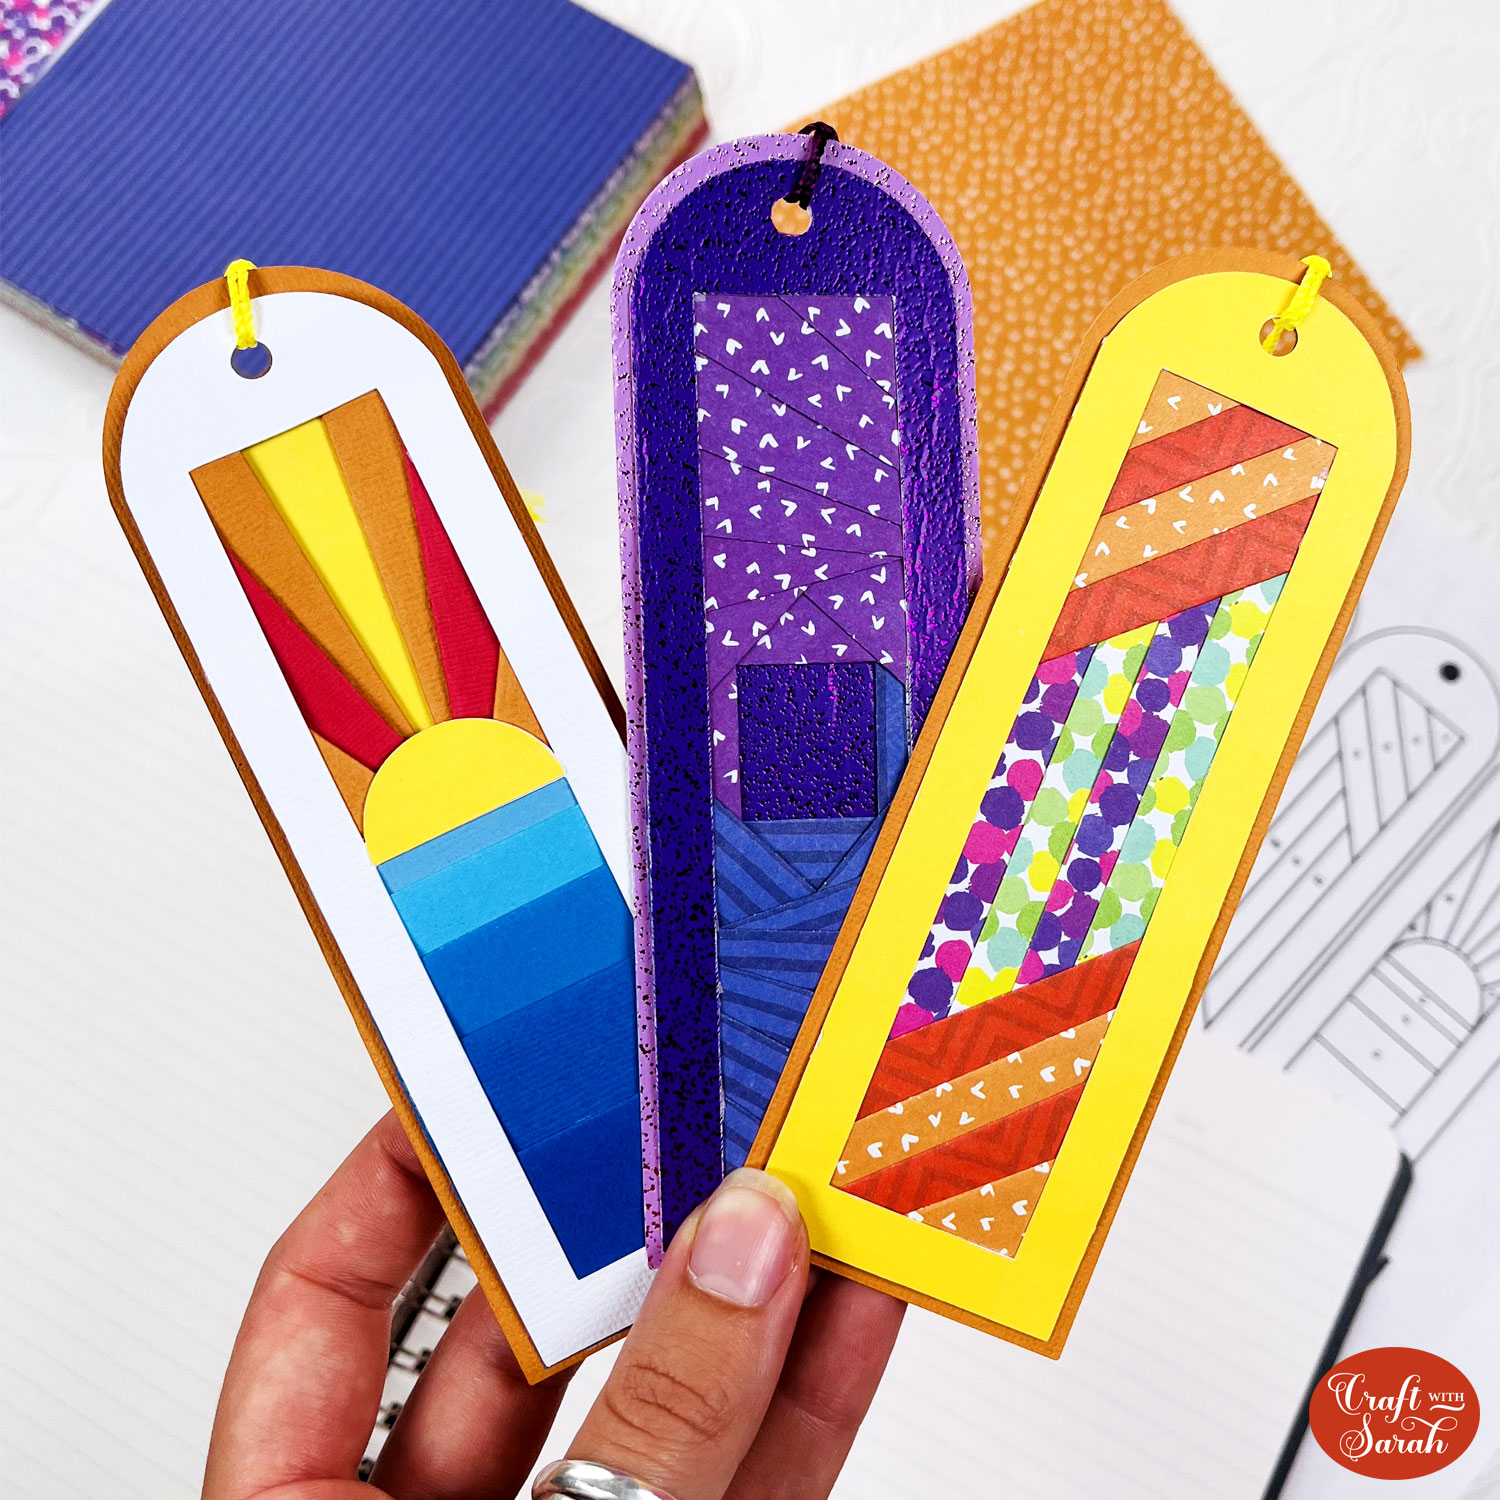
Here’s how my three bookmarks look when finished:

Cricut bookmarks using the iris folding technique
I hope that you enjoy making these iris folding bookmarks with your Cricut.
They make such beautiful gifts and look very impressive when they are made!
If you’d like to continue your new-found love for iris folding, check out the following tutorials and resources:
Happy crafting,
Sarah x

