Handmade Cards with the Cricut Foil Transfer Tool
Make cards that SHINE with the new Cricut foil transfer tool. Adding foil to handmade cards gives a whole new level of luxury!
In this tutorial I’ll show you how to add some metallic glamour to your cards with Cricut’s new pressure-activated foil.
Contents:
Please note that some of the links included in this article are affiliate links, which means that if you click through and make a purchase I may receive a commission (at no additional cost to you). You can read my full disclosure at the bottom of the page.
About this project
Did you see the announcement about Cricut’s NEWEST product – the Foil Transfer Tool?
It’s SO cool – it’s a new “blade” for your Cricut Maker or Explore (although it doesn’t cut – it works more like the embossing tips) that can transfer metallic FOIL onto your craft projects!
I was lucky enough to pick one up on the day they were released, so I’ve had a couple of weeks now to play with it and get to know the best ways to get a good transfer of foil onto my card.
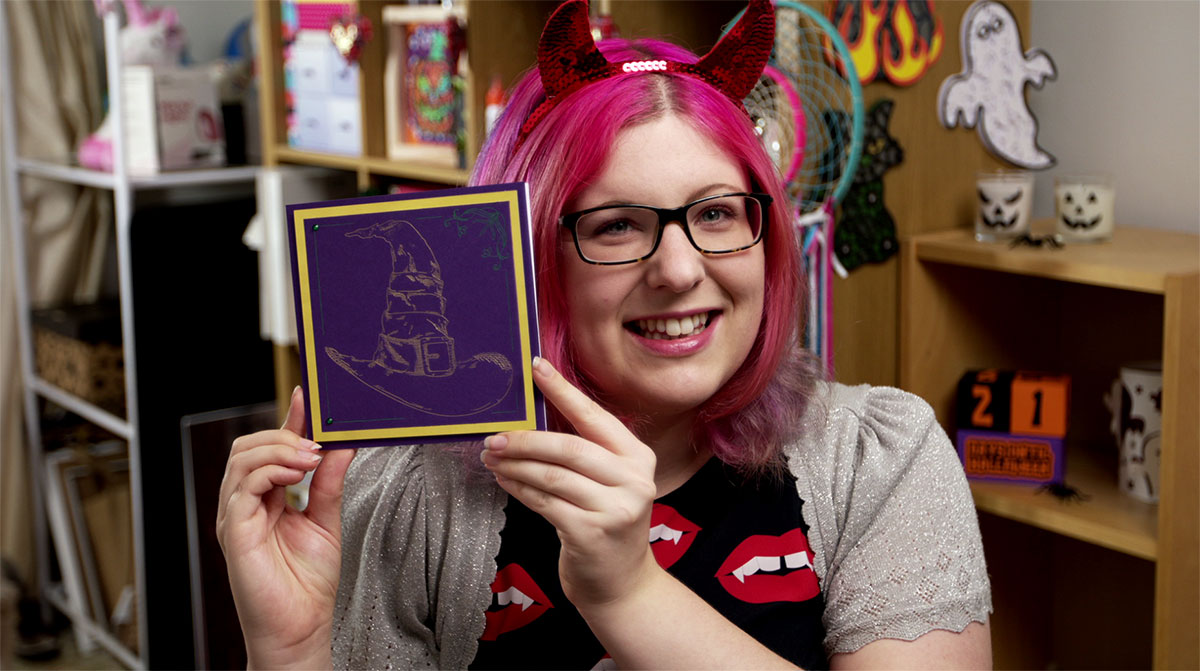
There are definitely a few things to watch out for when using the Cricut foil tool, so be sure to read all the notes below so you can learn from my mistakes!!
Video tutorial for the Cricut foil transfer tool
Watch this video to see how to design your handmade card and then how to use the Cricut foil transfer tool.
A full written tutorial is available further down on this page.
[cws_halloween2020]
Materials list for Cricut foil handmade cards
- A digital cutting machine such as a Cricut Maker or Cricut Explore
- A light-grip Cricut mat
- 6×6 inch card blank
- Purple card
- Gold mirror card
- Cricut foil transfer tool
- Cricut foil (Jewel collection)
- Cricut foil (gold)
- Double sided tape
- 3D foam pads
- Green stick-on gemstones
[cws_clubhouse design=’1104′]
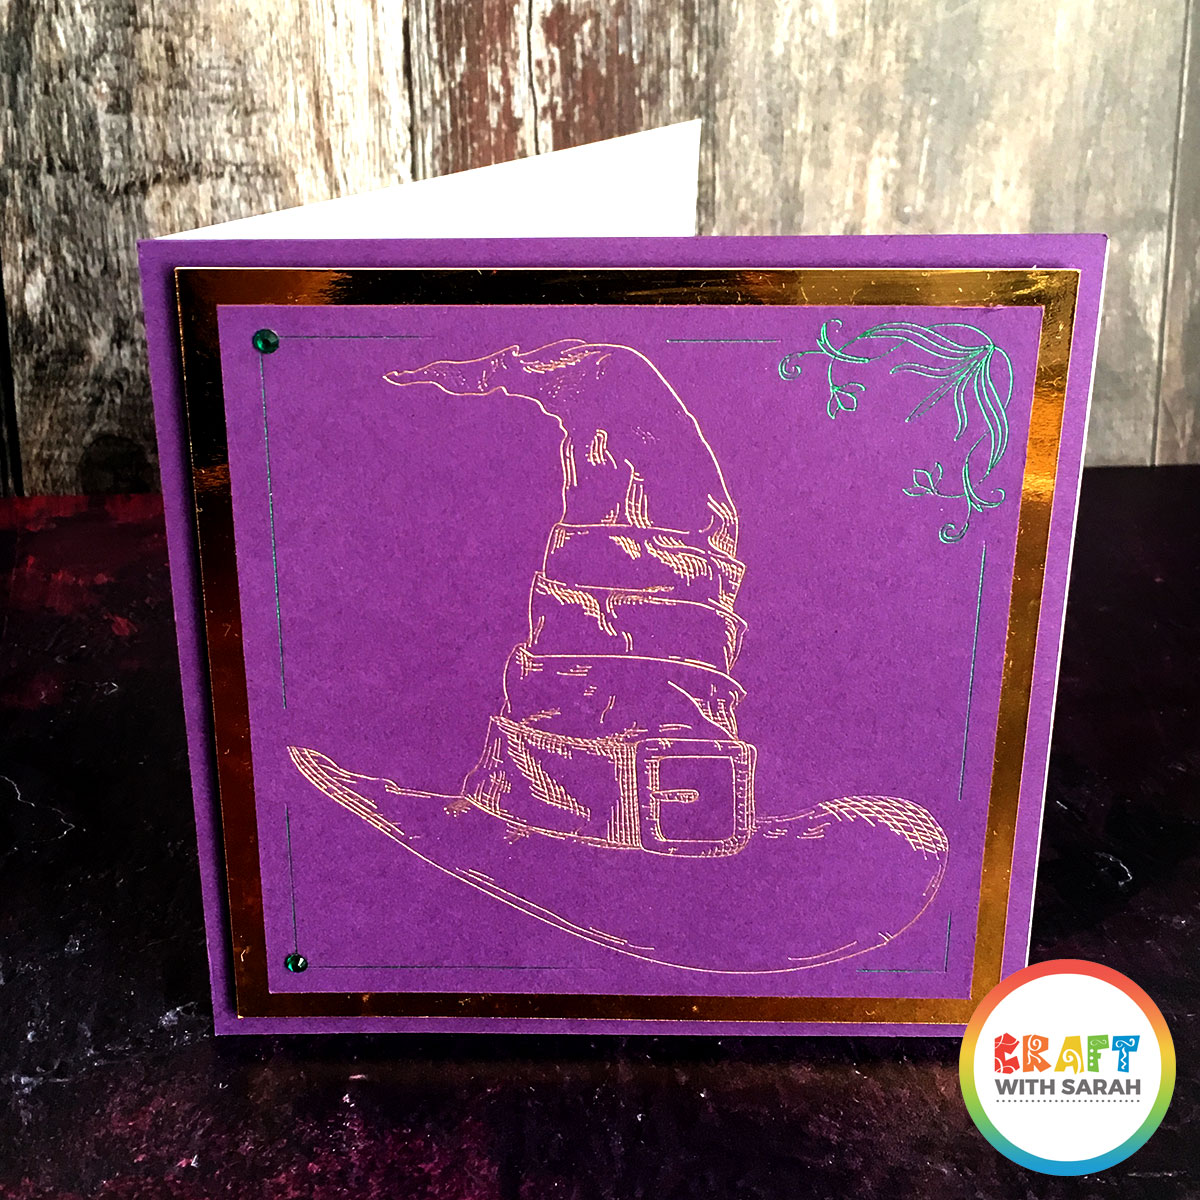
How to design greetings cards to foil with your Cricut
Step 1) Make your base layers
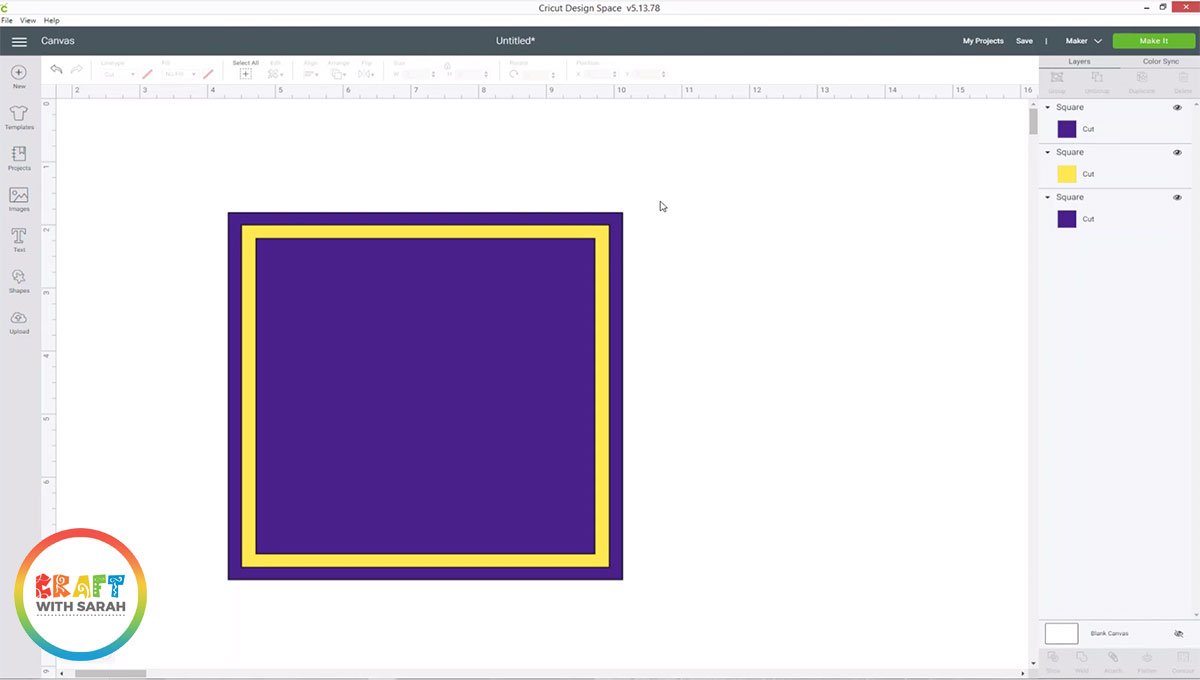
Decide on the size of the card you wish to make. I’m using a 6×6 inch card blank, but I measured it and it’s actually slightly smaller than that, so I made a square in Design Space the same size as my card front.
I then made two more squares, each slightly smaller than the other.
I positioned all three squares on top of each other by selecting them all and then pressing “Align” in the top menu and then “Center”.
Step 2) Choose a “draw” image
Choose the image to add to your card front.
I chose this fun Halloween hat. The best type of images to choose are “Draw” images as they have lots of detail in them which will look great when foiled.
The witch hat is from an Image Set called “Classic Halloween” and the Cricut Access ID is #M1AB0BFF4.
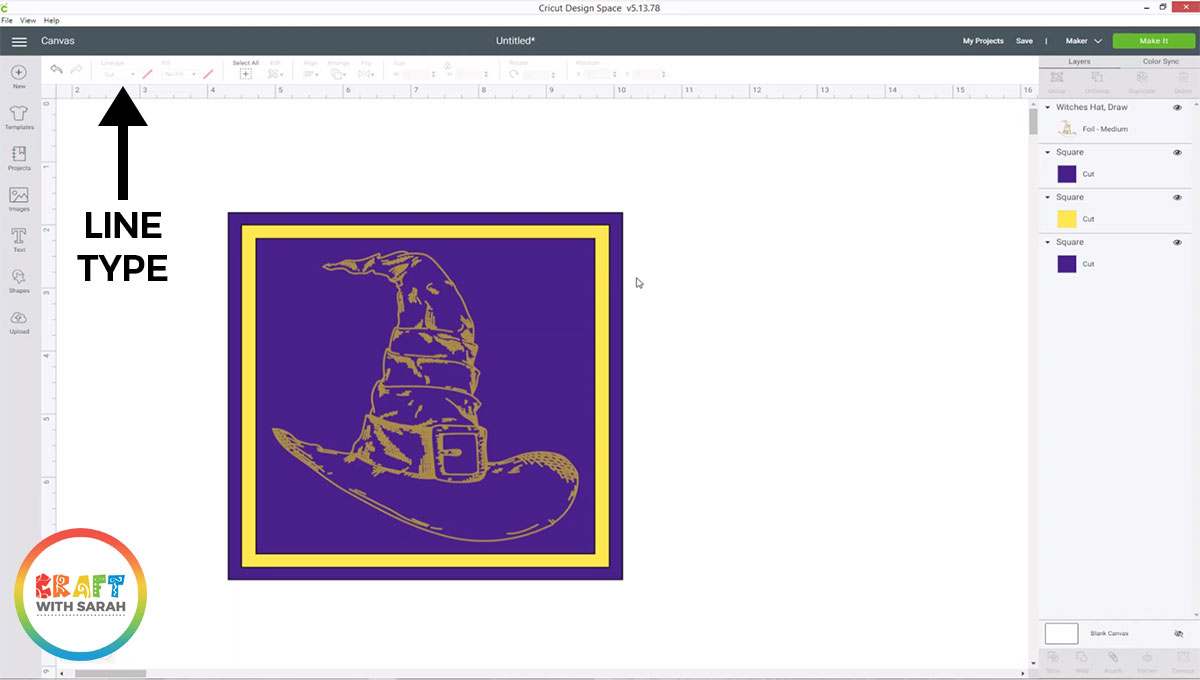
Here is what it looks like when we first insert it:
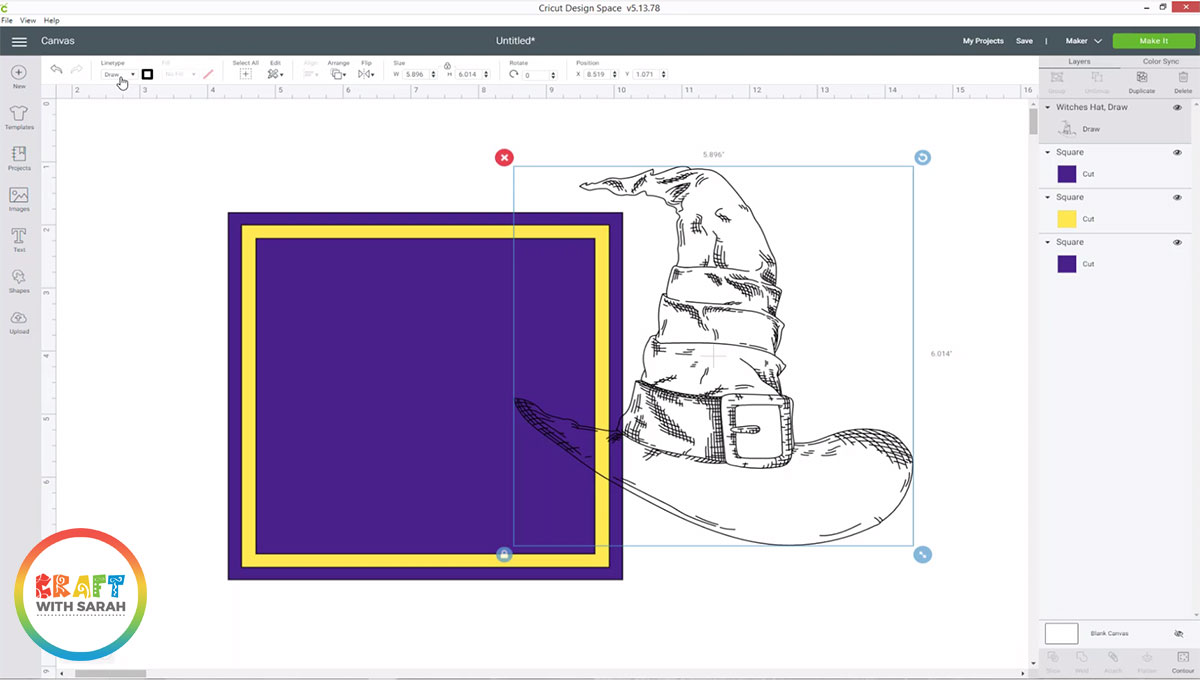
To change it to a Foil image, go to the “Linetype” dropdown in the top left and choose “Foil” and then choose whether you want to use the fine, medium or bold tip.
I chose the medium one for the witch’s hat.
Step 3) Add a decorative border
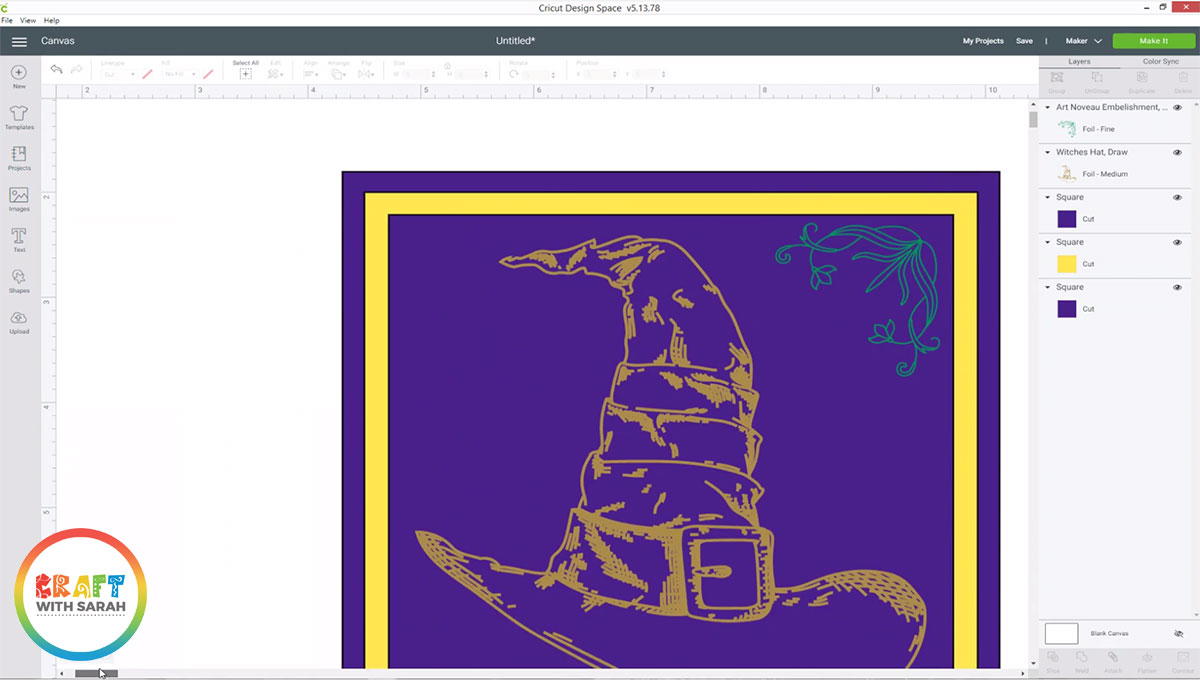
I found a decorative flourish to go in the top-right of the card.
The Cricut Access ID of this flourish is #M1BBB7B13.
Change it to a “foil” type and change the colour by clicking the little colour box next to the “Linetype” dropdown.
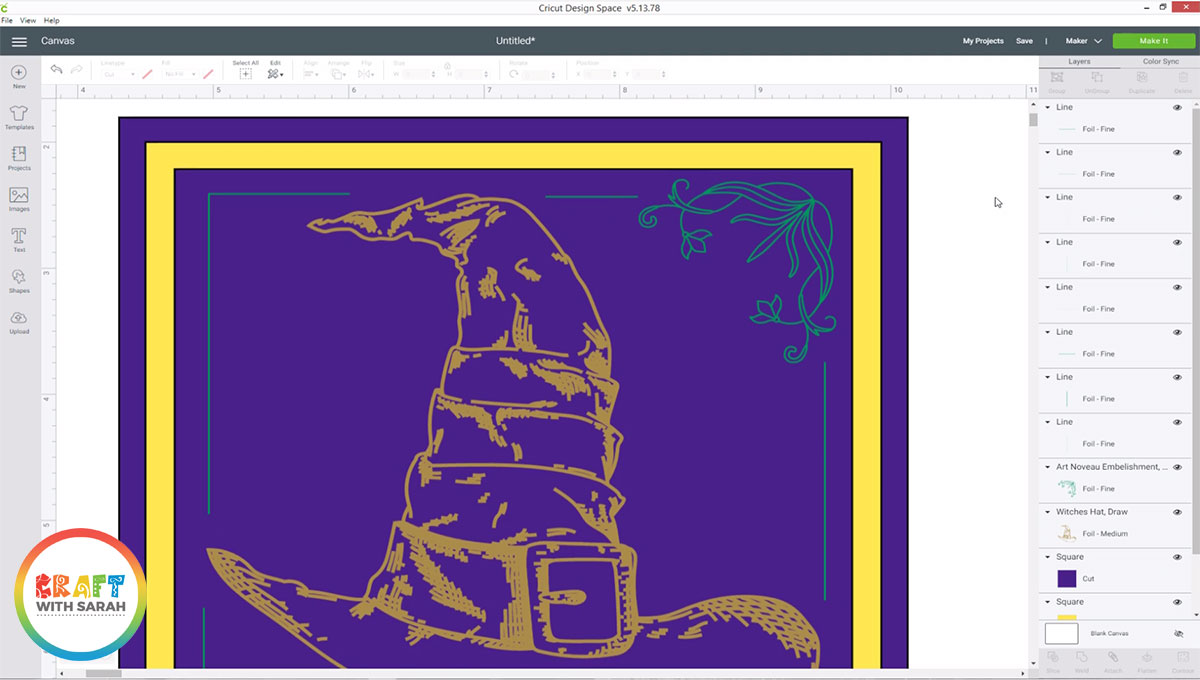
I added a thin line of green foil around the edge of the purple square by going to “Images” and selecting a Score Line, then changing that to a “foil” type in the “Linetype” dropdown.
I kept adding score lines along all the edges of the square to create the final effect.
Step 4) Attach the foil layers to the square underneath
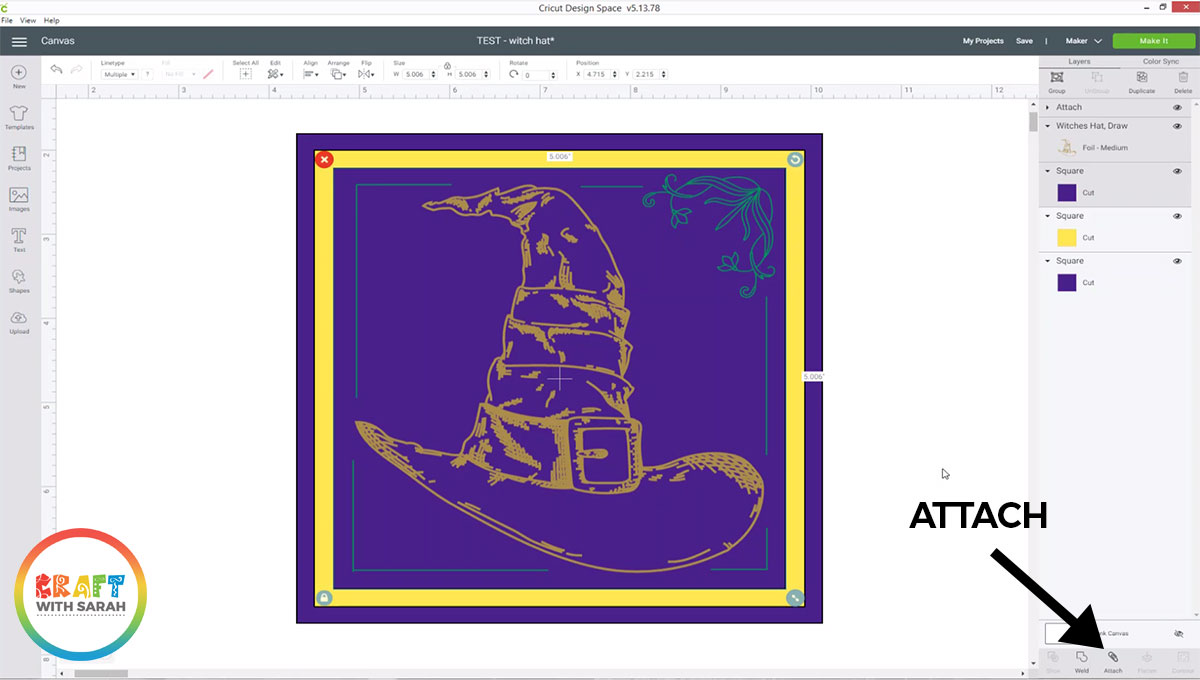
We need to tell the Cricut to add both colours of foil on top of the purple square.
To do that, select all the “foil” layers and the top purple square and then press “Attach” down the bottom of the layers panel.
This is now ready to make! Click “Make It”.
How to use the Cricut foil transfer tool
Step 1) Move your design on the mat
It will be easier to add the foil onto the card if you move it to the middle of the mat.
Click-and-drag it on the preview screen in Design Space to move it into the middle.
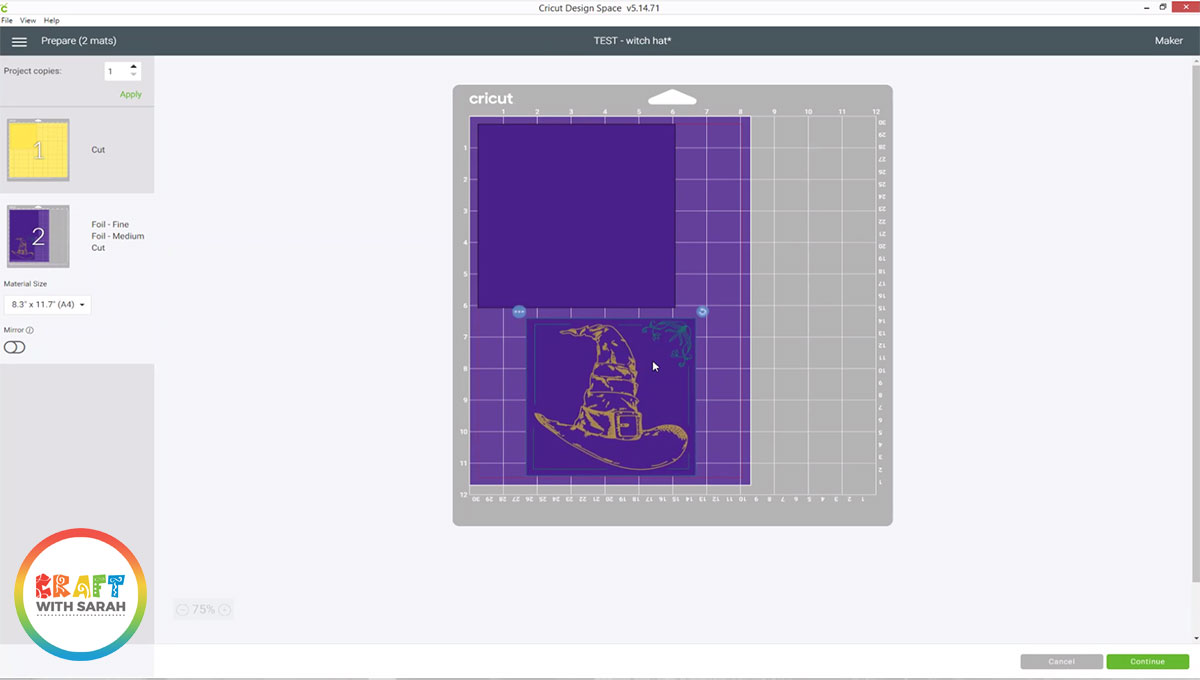
Click “continue” and select your material type.
Your Cricut will probably cut the gold mirror card layer first (the middle sized square) and then move on to the purple squares that will include the foiling.
Step 2) Add the green foil
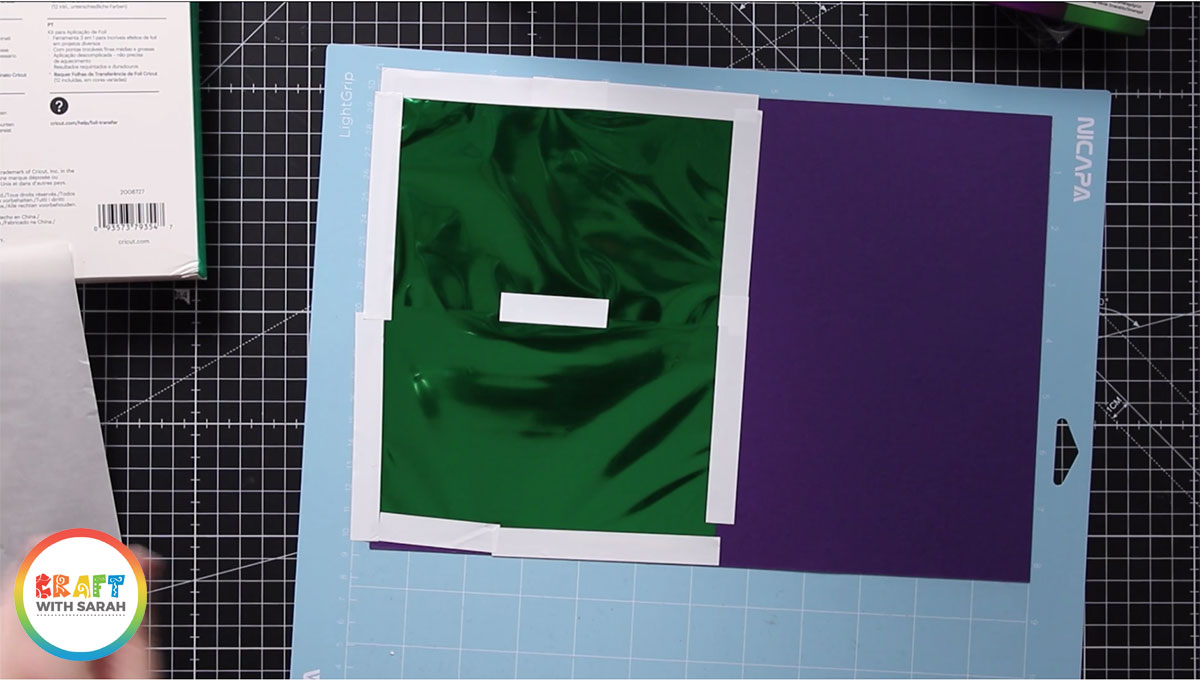
You will need two sheets of green foil from the “Jewel” foil pack.
Place them over your card and securely tape them down using the white tape that comes in the foil pack.
You want to try and position the foil so it is really flat and pulled tight, without any air bubbles underneath.
Do not let the foil touch the sticky part of your mat as it may rip or damage the foil.
Step 3) Put into your Cricut machine
Open up the foil tool and put in the appropriate tip.
There are little lines on the tips to show you if it’s the fine, medium or bold one.
One line is the fine, two lines is the medium and three lines is the bold.
To insert the tip, simple hold the main tool upside down and drop the tip in, with the point with the lines on it pointing out the end.
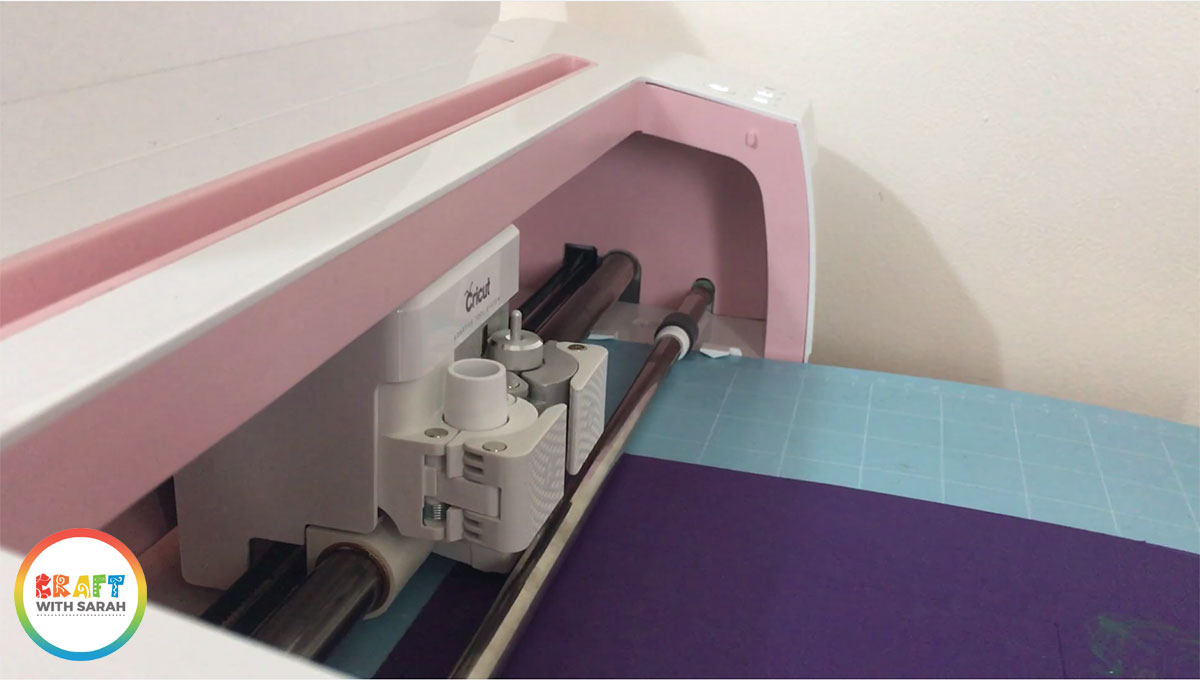
Insert the tip into your Cricut machine.
Move all of the white “star wheels” to the edge of your Cricut machine by pushing them along the silver bar. If you don’t do this, they will mark and possibly rip the foil.
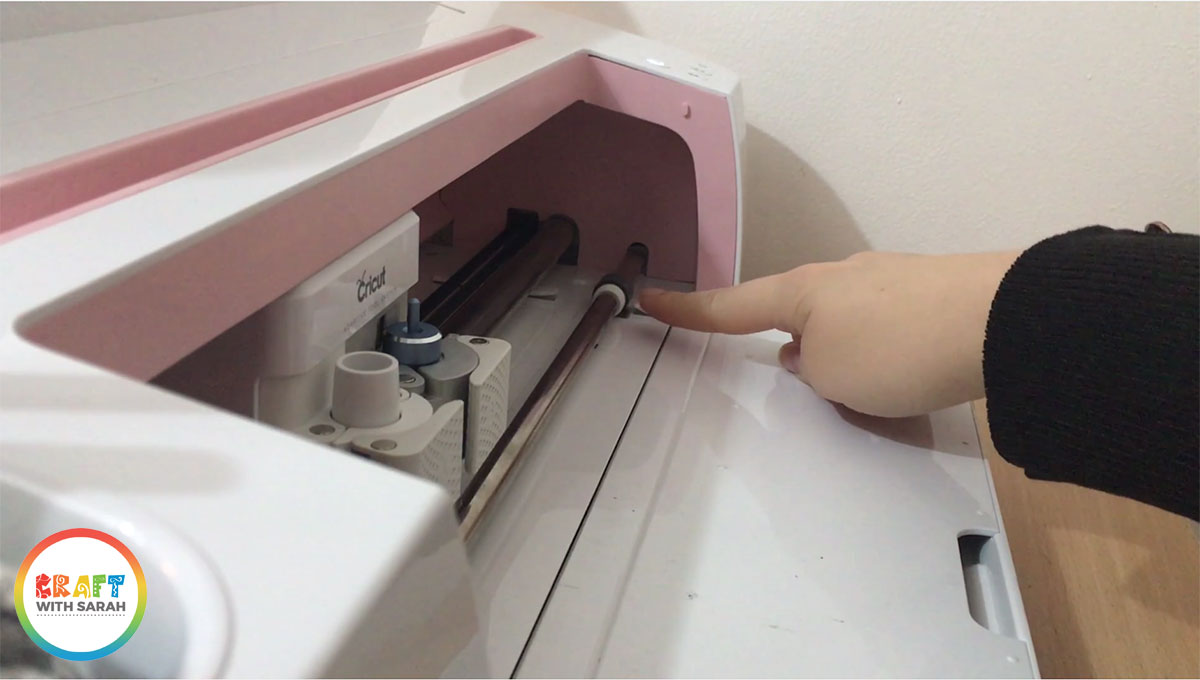
Now, it’s time to load your cutting mat.
Step 4) Change to the gold foil
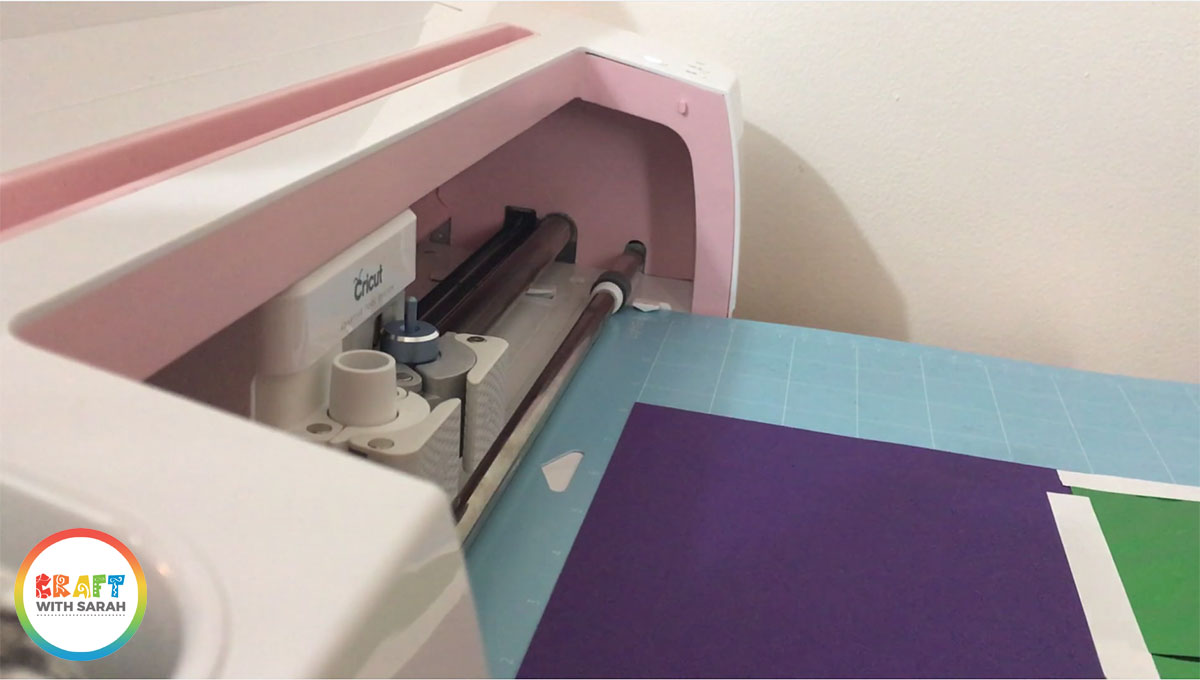
When your Cricut has finished foiling the green foil, DO NOT EJECT YOUR CRICUT MAT!!!
This is REALLY important – your Cricut mat must NOT be ejected until ALL OF THE FOILING is complete!!
Carefully take the green foil off of the card whilst it’s still loaded into the Cricut machine.
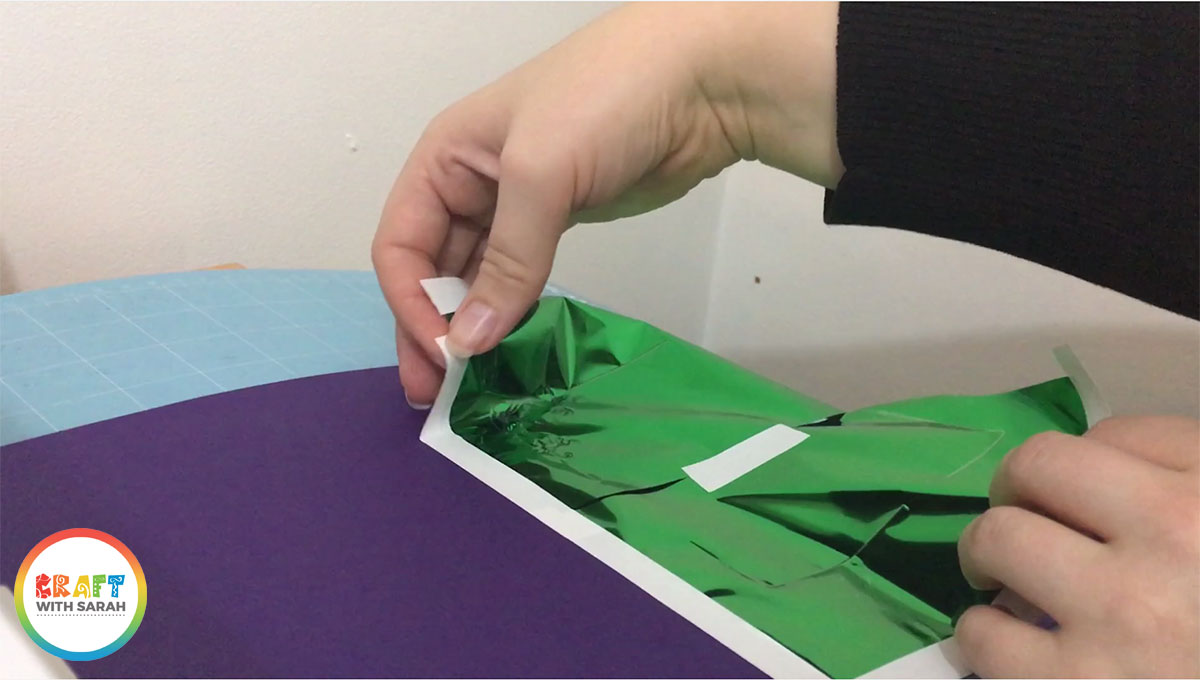
Then, add the gold foil.
The white tape is re-usable, so you can use the same pieces for the gold foil.
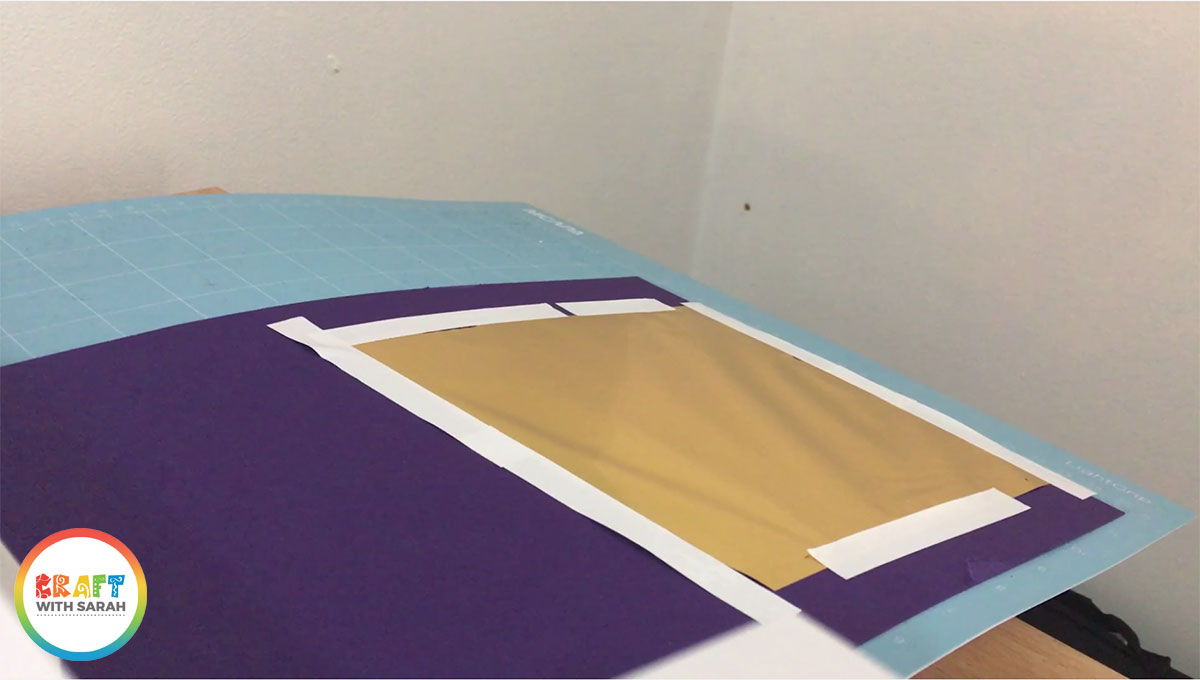
Press the “go” button on your Cricut to complete the gold foiling.
Step 5) Remove the gold foil and re-load your cutting blade
When the foiling process is complete, carefully remove the tape and gold foil (DO NOT EJECT YOUR CRICUT MAT!)
Remove the foil tool from your machine and replace it with your regular cutting blade.
Press the “go” button on your Cricut, and now it will cut out the two purple squares.
How to assemble your foiled card
Here’s how to make your card now that you have foiled the design and cut everything out.
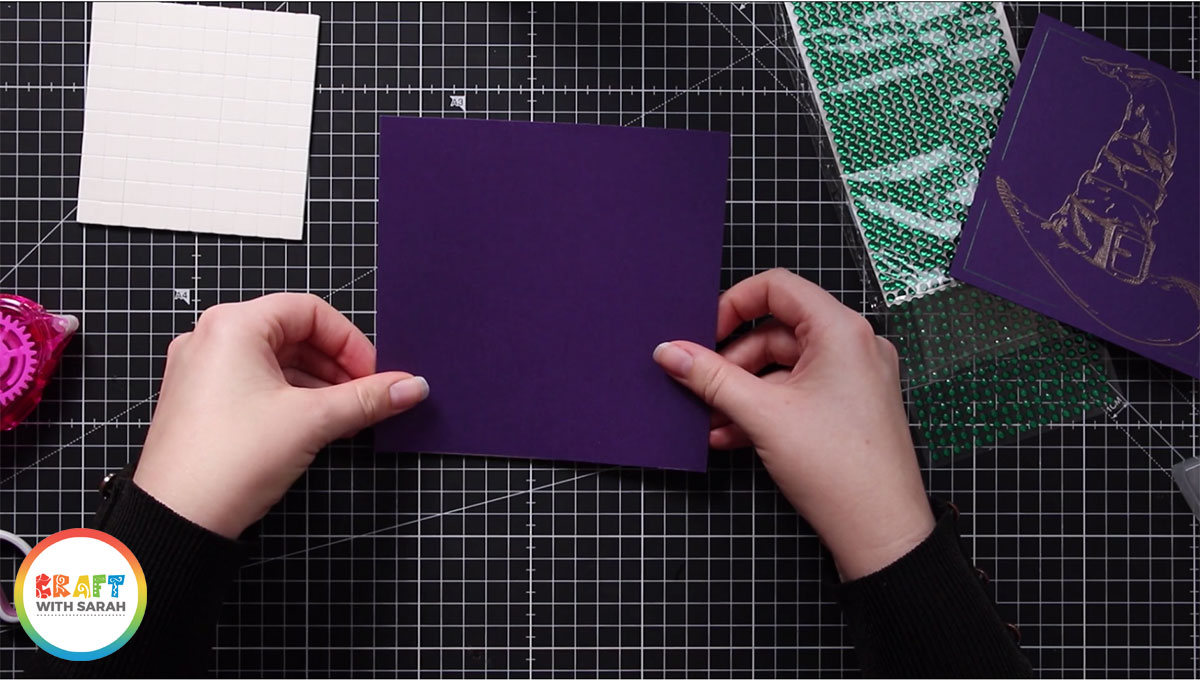
Step 1) Stick the largest square to the front of your card blank
Use double-sided tape to stick the largest purple square onto the front of your card blank.
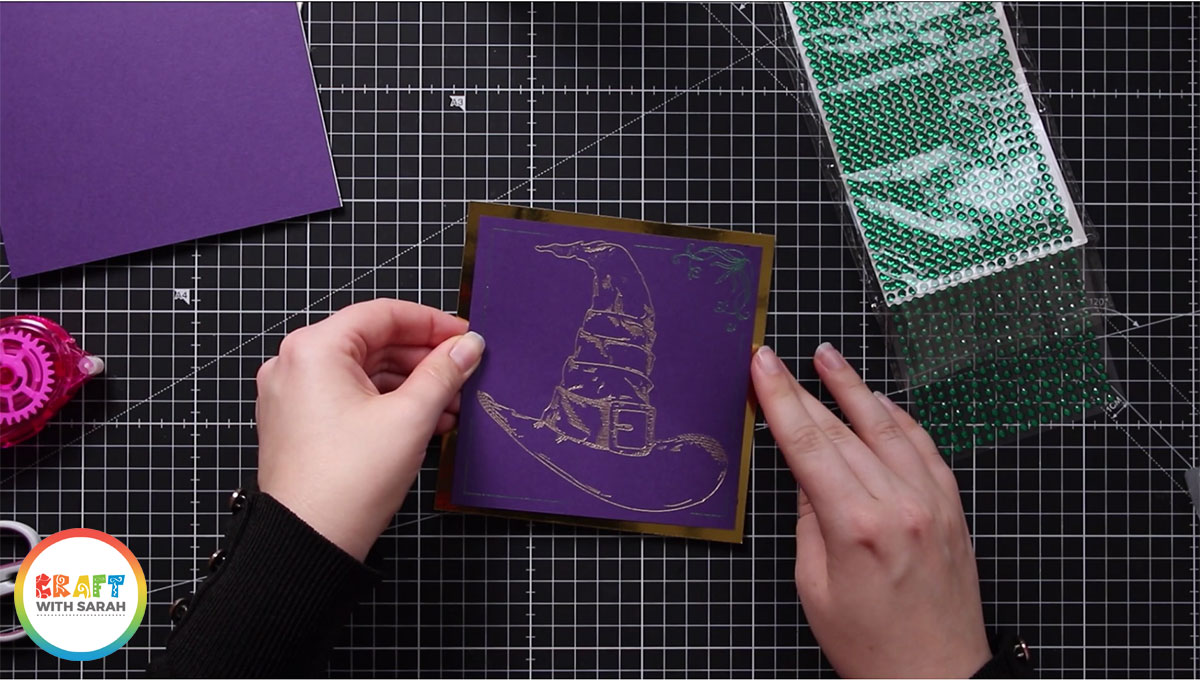
Step 2) Attach the foiled design to the gold mirror card
Use double sided tape to stick the smaller purple square (with the foiled design) to the square of gold mirror card.
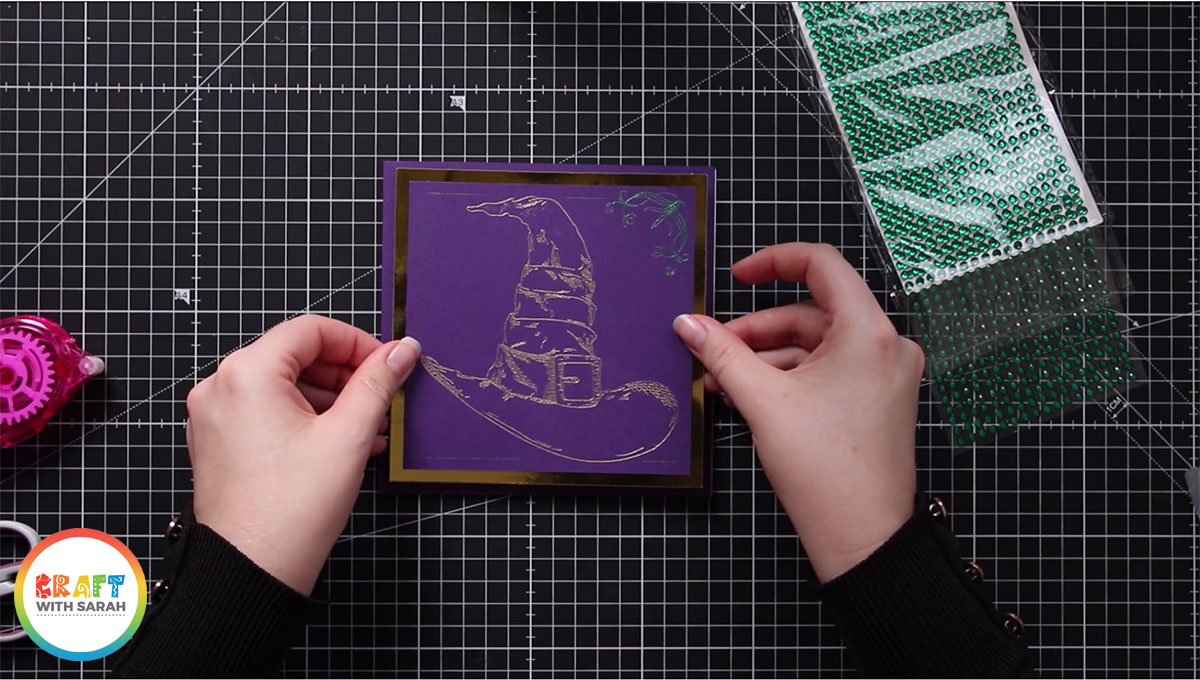
Step 3) Stick the gold mirror card onto your base card
Use 3D foam pads to attach the gold mirror card onto your card card.
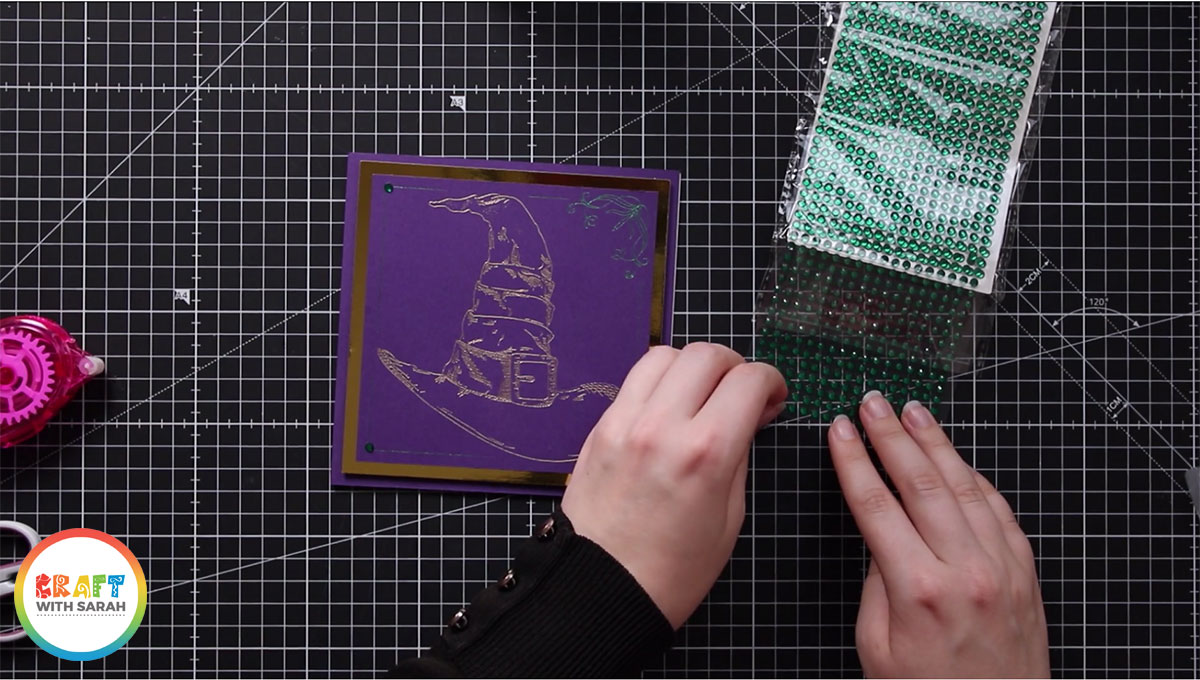
Step 4) Decorate with green gemstones
Add a green stick-on gemstone to the three corners of the border that we created in Design Space.
This helps to cover any little parts where the lines mat not be touching neatly, and it gives an extra sparkly effect!
That’s it – your super-shiny foiled card is now finished!
The Cricut foil looks lovely when it’s transferred onto card, especially if you use a darker card such as the purple from this project as it really helps the gold and other foil colours to show up.
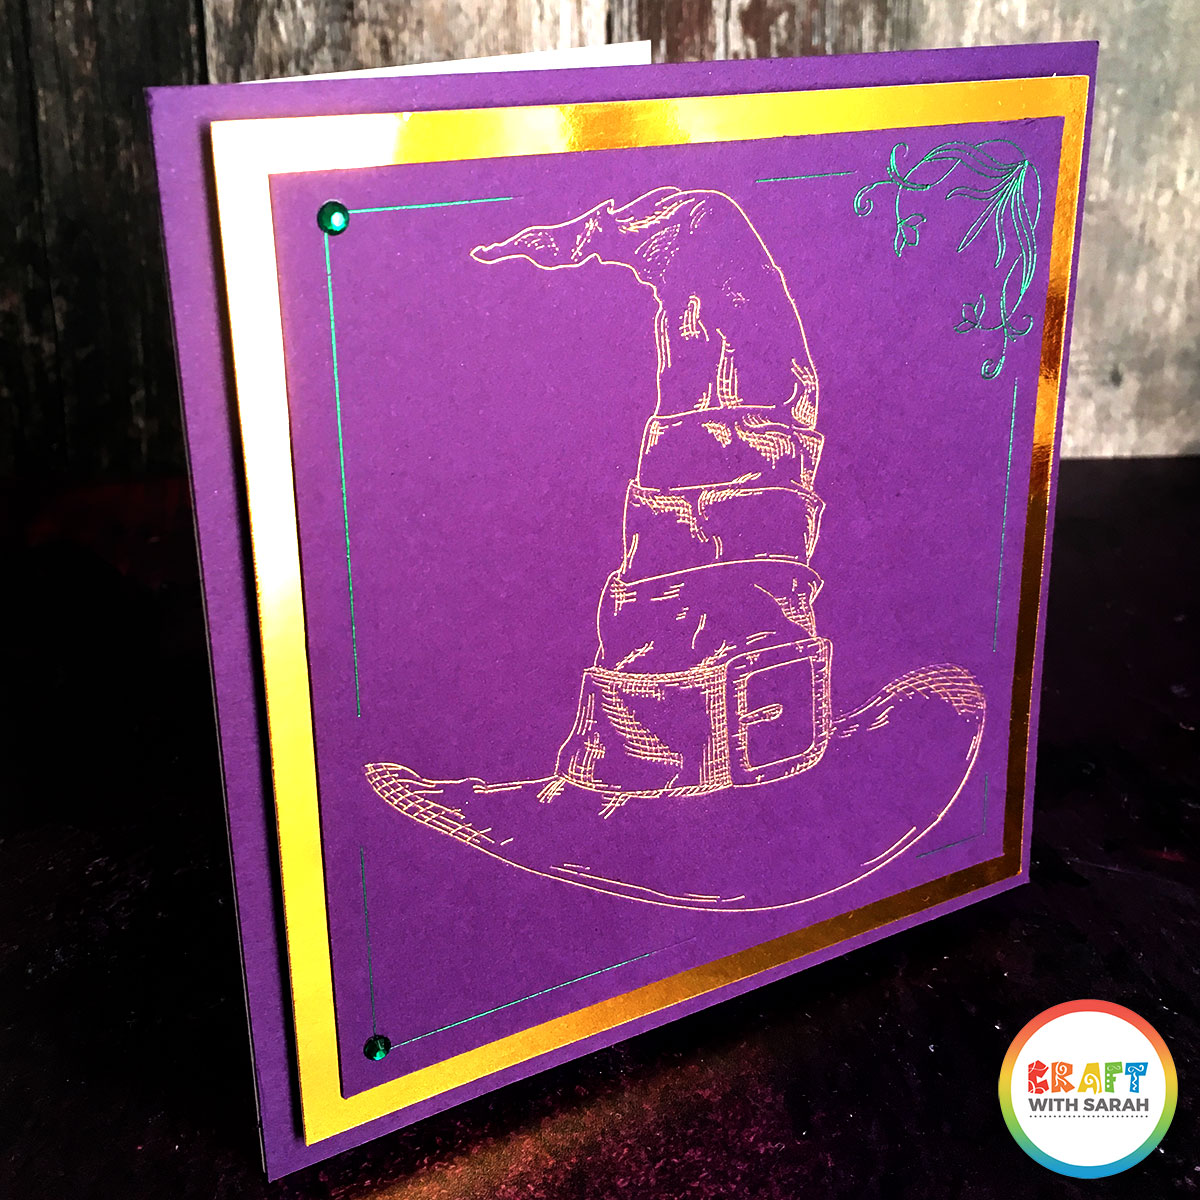
I hope you that enjoyed this tutorial on how to design your own handmade Halloween card and then foil it using Cricut’s foil transfer tool.
Happy crafting,
Sarah x
[cws_halloween2020]

