FREE Lantern SVGs 🐶🐱 Dog & Cat Slot-Together Lanterns
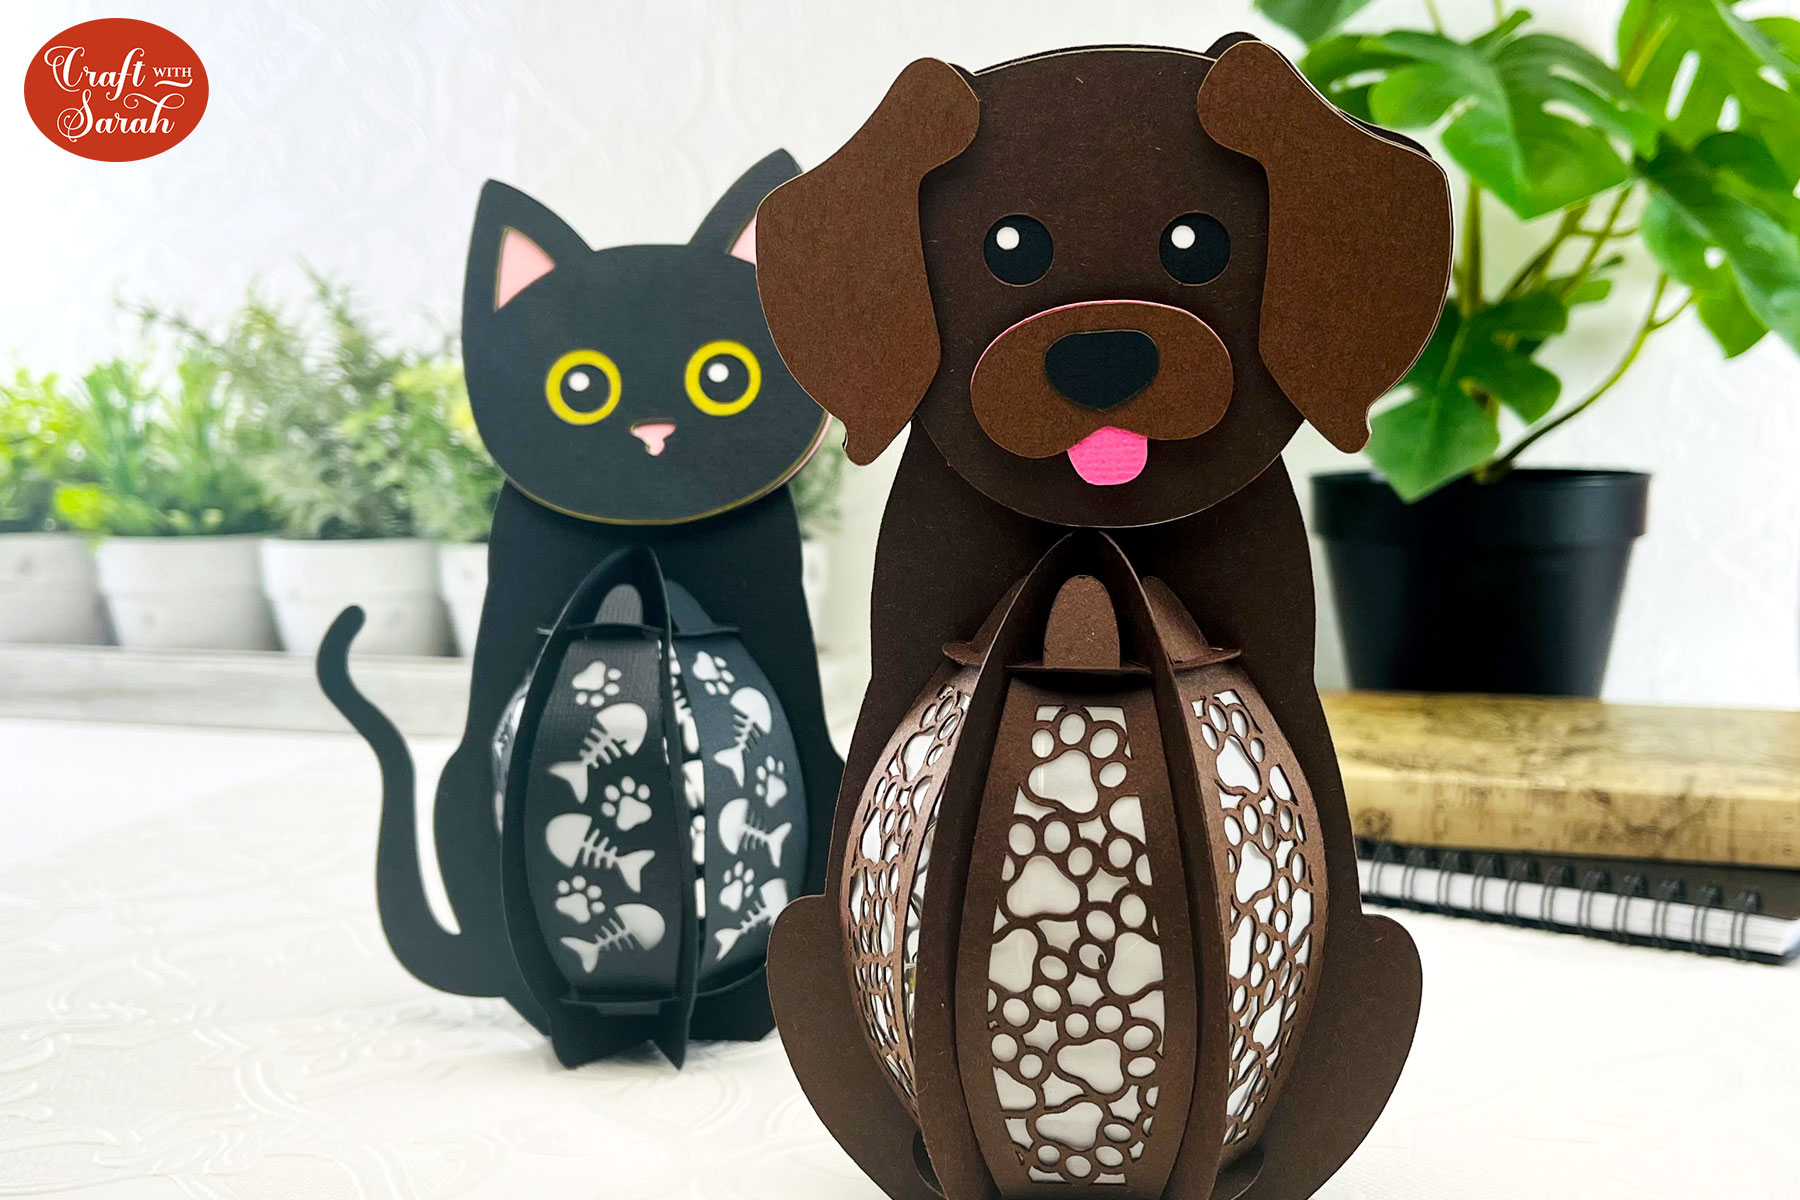
Make adorable animal themed slot-together lanterns with your Cricut machine!
These dog and cat luminary designs are freestanding and look beautiful when lit up with battery tealights, submersible lights or fairy lights.
See how to make 3D luminaries in this tutorial, including the best type of lights to use to illuminate them.
Both lanterns come in two versions: one with the patterns inside the lantern sides that you see in the photos, and one with the spaces left “empty” for you to add your own decorations. Here’s how to add your own patterns – or you could go one step further and add photos to the sides instead.
Video tutorial for dog and cat luminaries
Watch the video below to see how to make these light-up craft projects. Keep scrolling for a written tutorial.
Materials list for slot-together cat & dog lanterns
Here is a list of the materials that you will need to make this craft project.
Please note that some of the links included in this article are affiliate links, which means that if you click through and make a purchase I may receive a commission (at no additional cost to you). You can read my full disclosure at the bottom of the page.
- Cricut Machine
- Light blue Cricut cutting mat
- Coloured Card
- Craft glue (I like Bearly Art Glue and Collall All Purpose Glue)
- 3D foam pads
- Translucent vellum, tracing paper or similar
- Lights to go inside the lantern such as submersible lights, battery powered tea lights or fairy lights with small battery packs
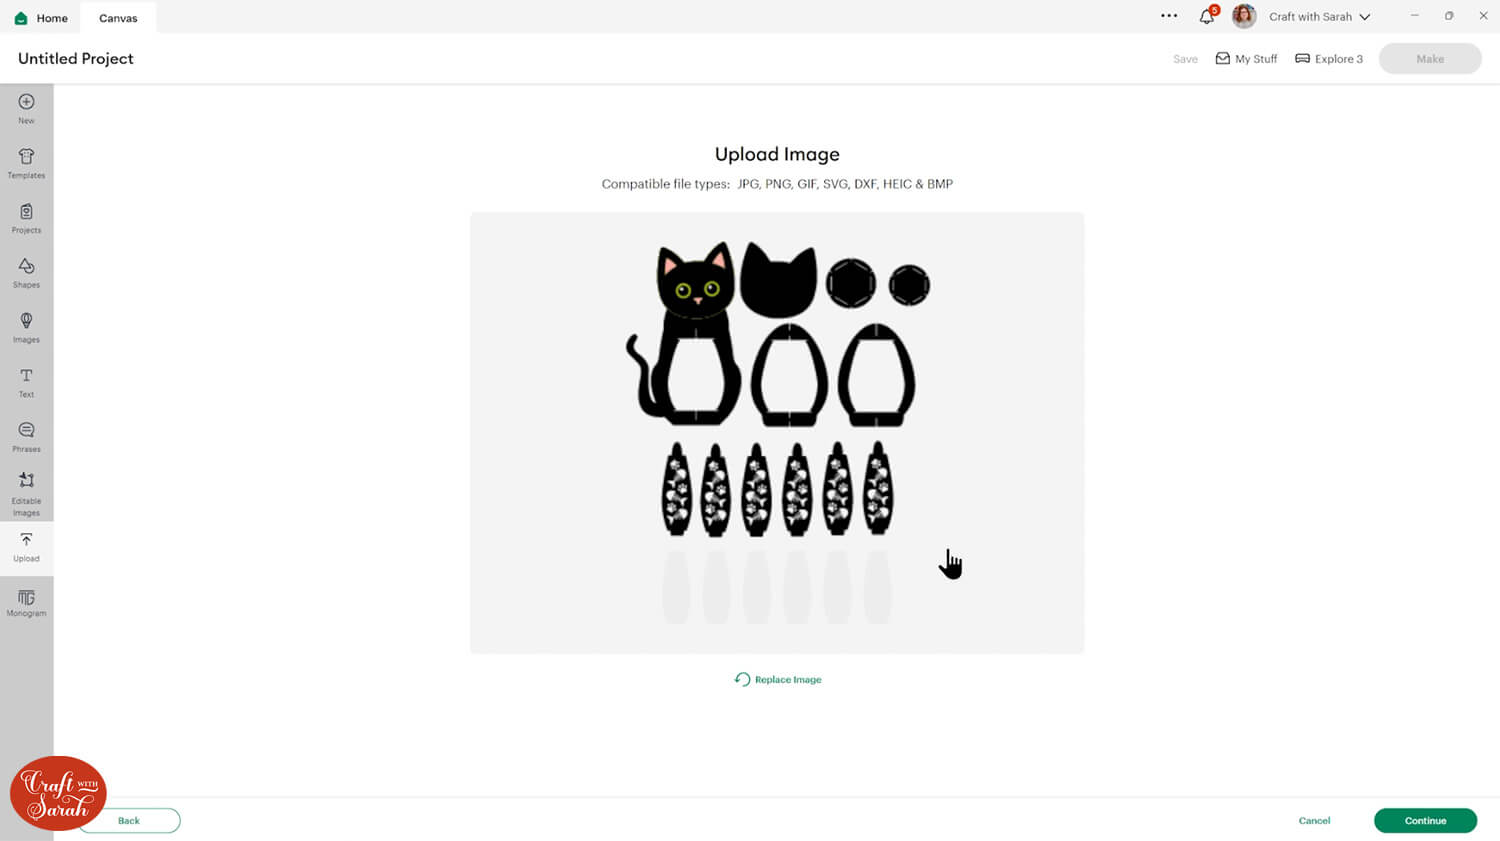
How to upload the SVG files
Download the free file using the box below and unzip the downloaded folder.
Download the Free Cutting File

Please login to your account to download this file.
TERMS OF USE:
You may sell finished, handmade physical craft items that you have made using this product but must not sell or share the digital files. Read full terms of use
Before you upload the SVG to Design Space, you need to unzip the download folder that it comes in.
- How to unzip a folder on Windows computer
- How to unzip a folder on a Mac
- How to unzip a folder on an iPad/iPhone
- How to unzip a folder on an Android device
Find the unzipped version of the download folder and select the folder called “SVG Files”.
Choose the version of the lantern that you want to upload.
The ones with the word “blank” in the filename come with empty sides to the lantern, so you could add your own patterns/decorations to them. Here’s how to do that.
Make sure you upload the files which start svg- in the filename!!
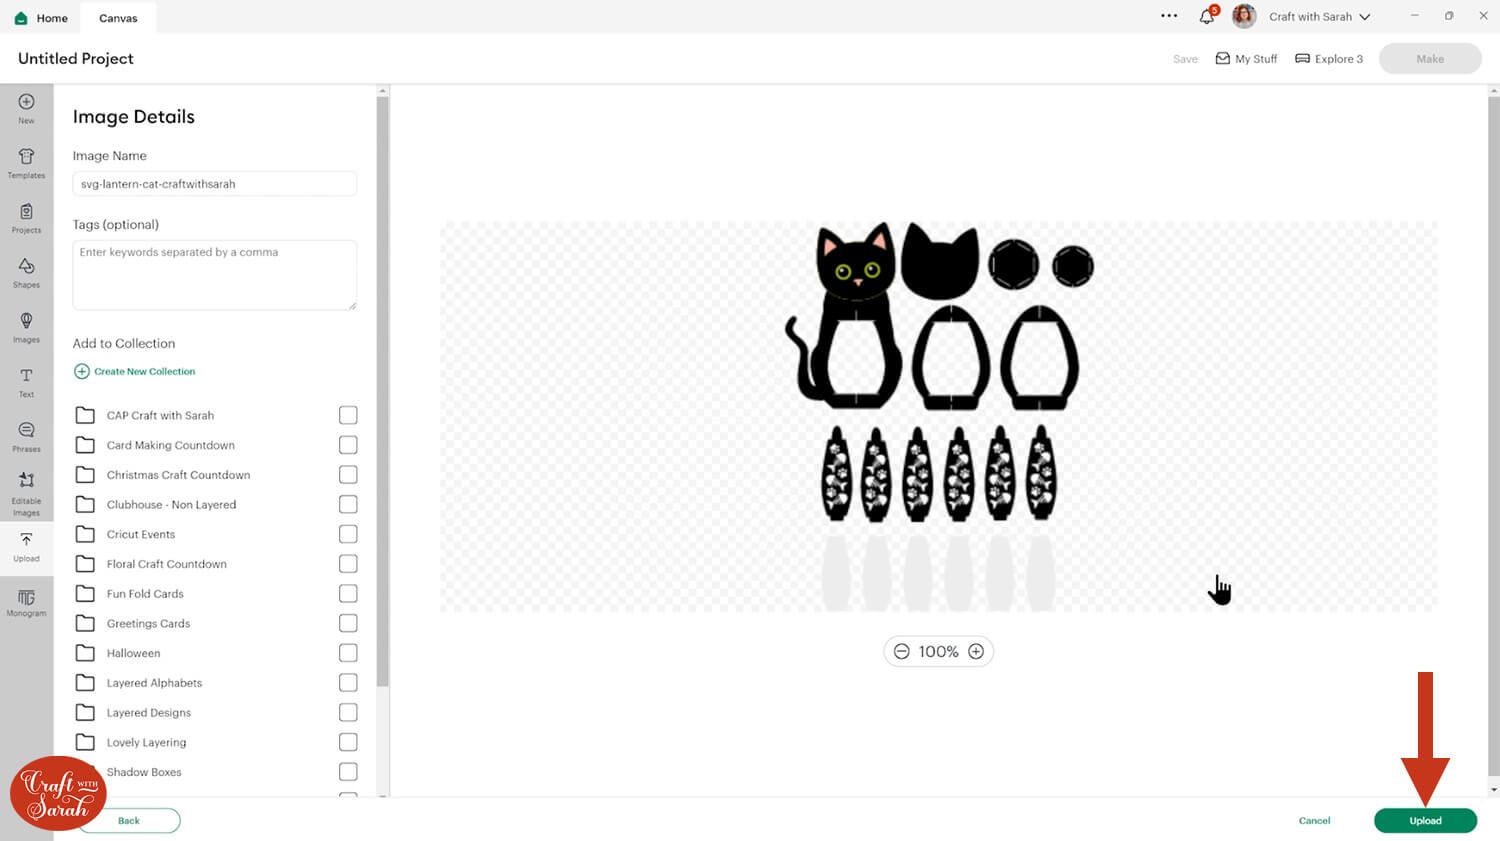
After you’ve chosen your preferred design, click “Continue”.
You don’t need to change anything on the next screen – just press “Upload” and the design will be added straight to your Canvas.
What lights work best inside the lanterns?
Never use a real flame/candle as your lantern will catch fire!!
Instead, choose battery powered lights.
As you are putting the light in an enclosed space with the walls made from cardstock, it is essential that you choose lights that do NOT get warm during use.
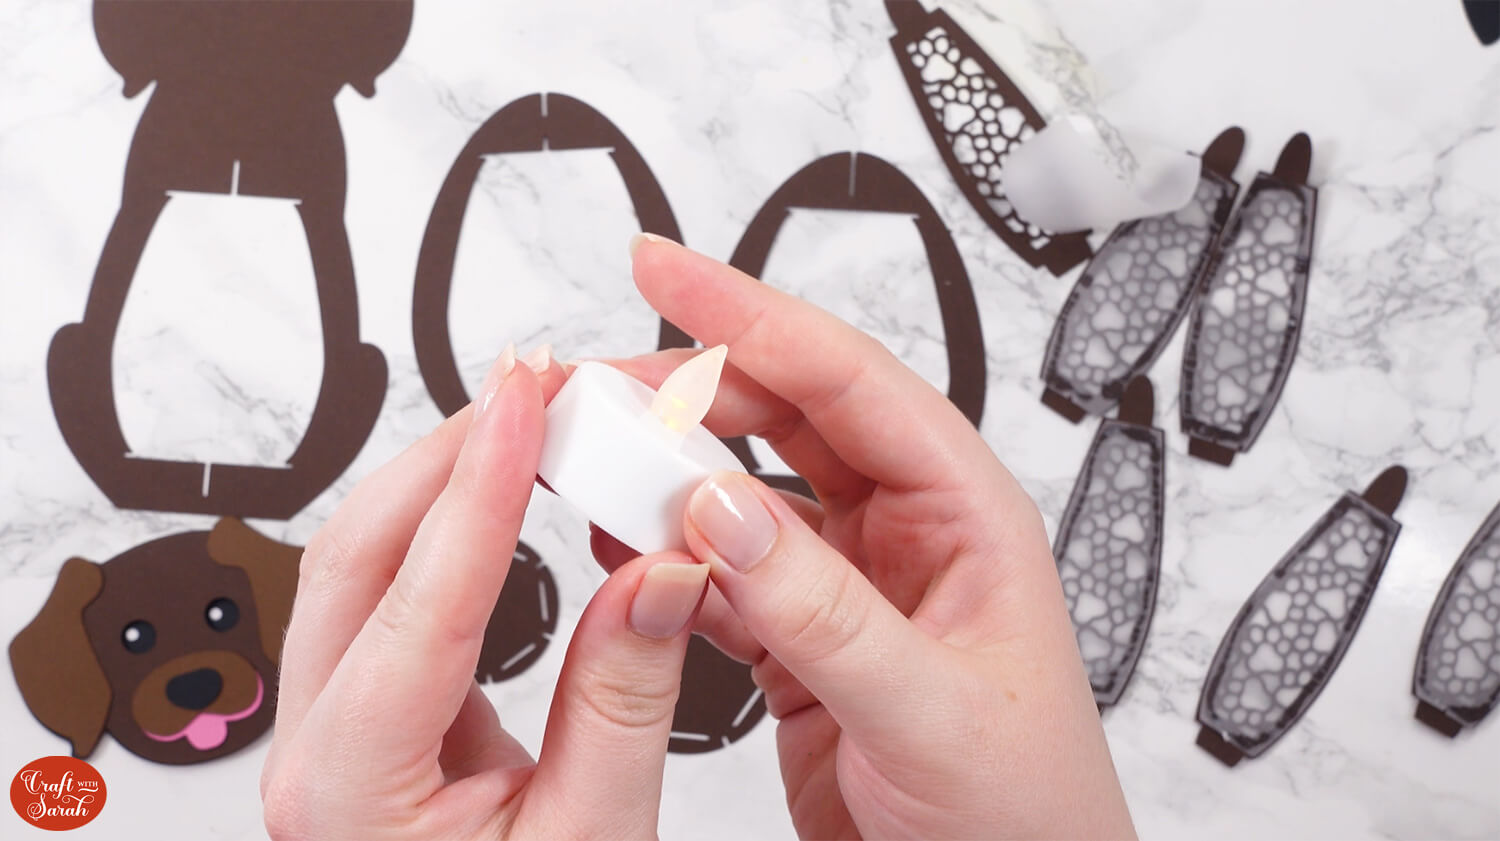
Option 1: Battery powered tea lights
The lanterns have been designed to perfectly fit a battery powered tealight inside. This is a nice option to add, especially if you choose one with a flickering effect.
However, they do not give off much light, so the other lighting options below may be more effective.
Find battery powered tea lights on Amazon
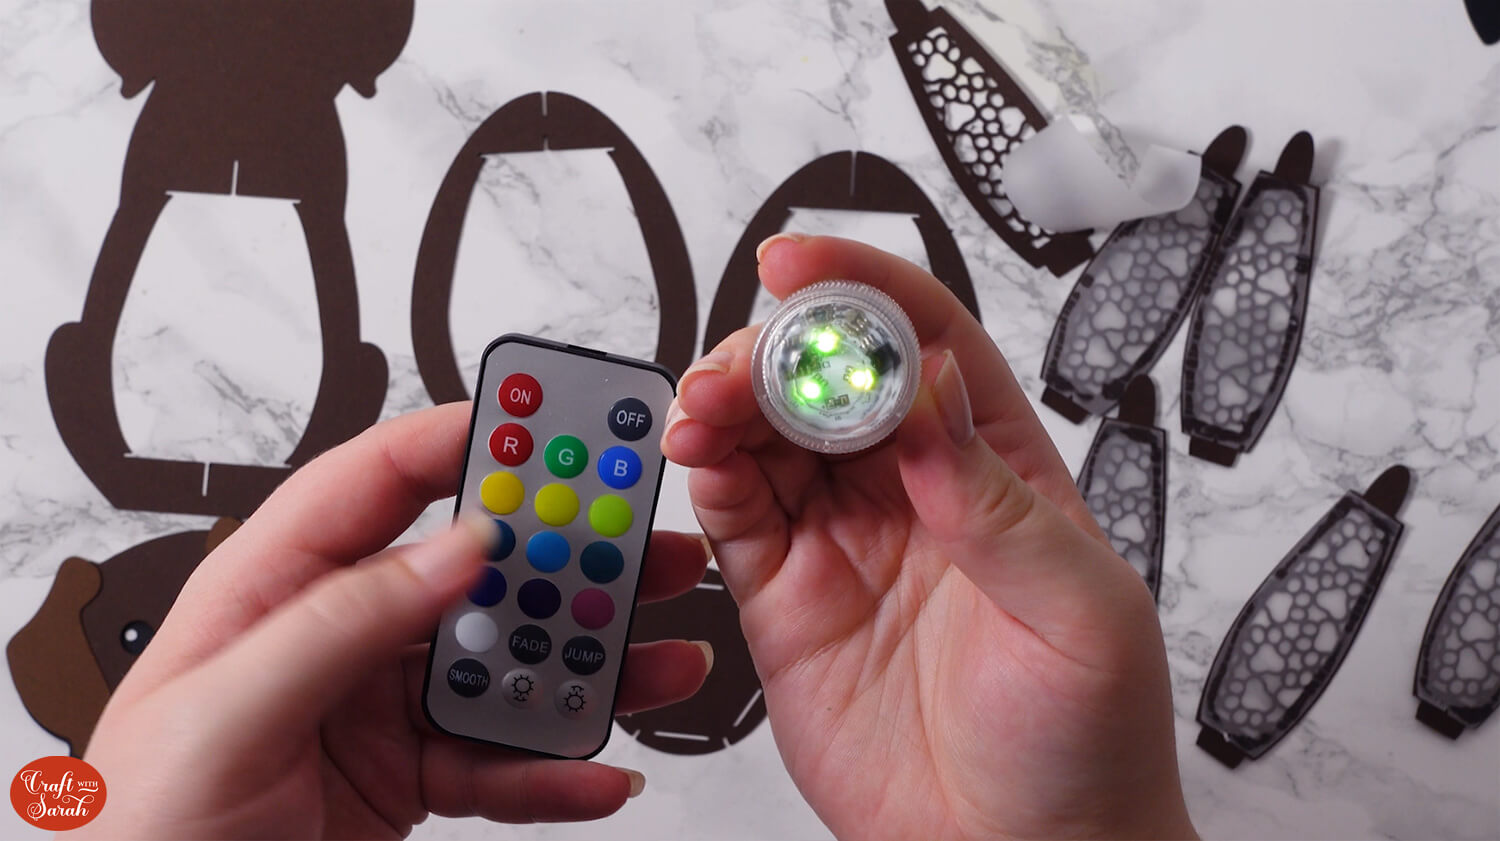
Option 2: Submersible LED lights
This is my favourite lighting option. These tiny little lights come with a remote control to change the colour. You can even make your own disco light show by having them flash or fade through all the different colours!
Find submersible lights on Amazon
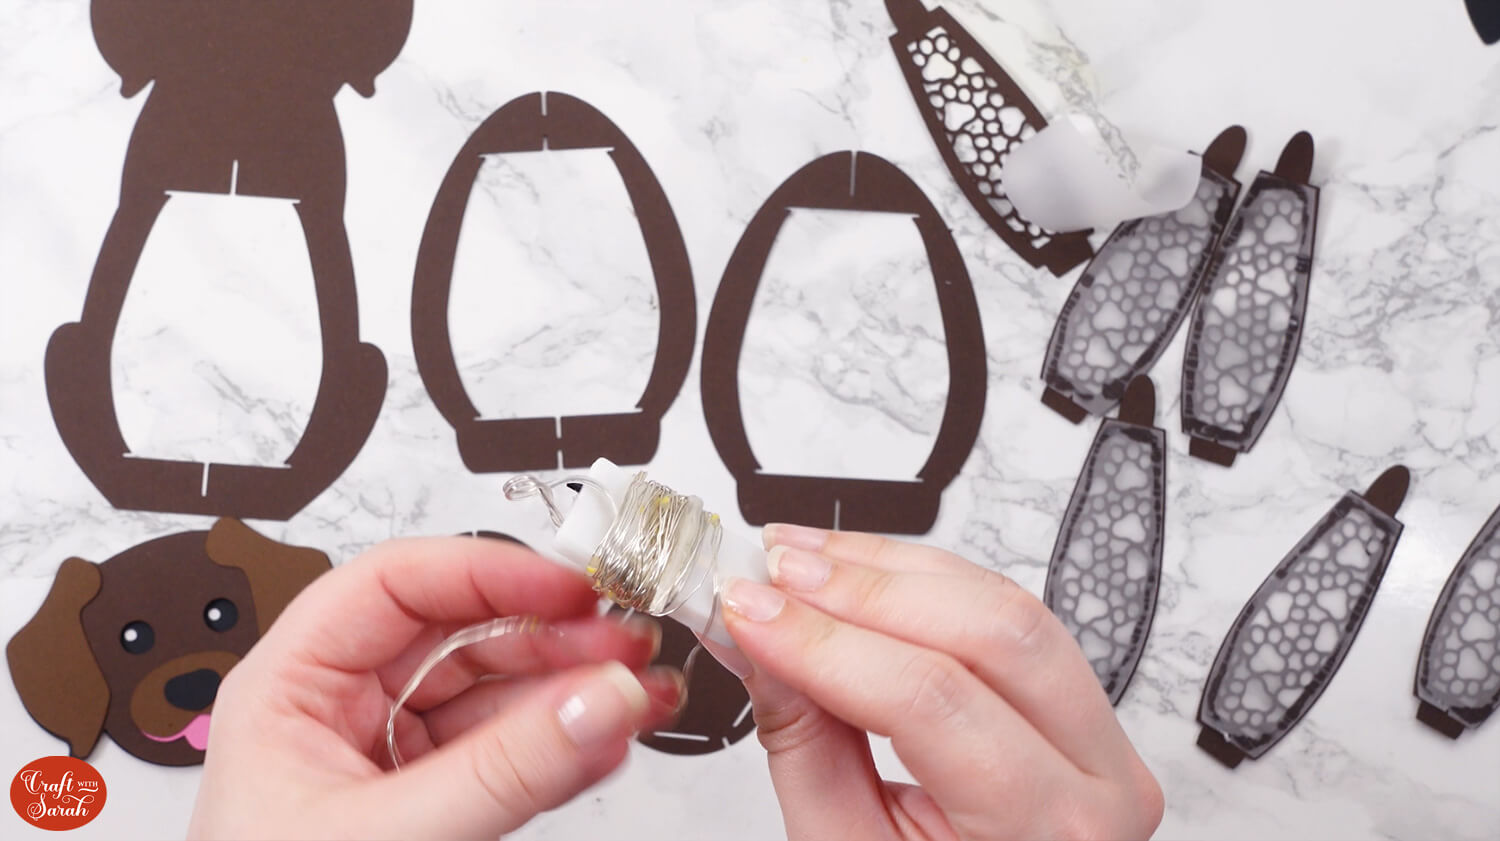
Option 3: Fairy lights
Putting a string of fairy lights inside the lanterns gives the brightest overall effect.
However, as they are quite large and take up lots of room, you can see the edges of the strings of lights when you look at the lanterns from certain angles, so it is perhaps not the neatest of options.
Choose lights with small battery packs and make sure you unravel/unwrap the lights from the battery pack before using them, for safety reasons.
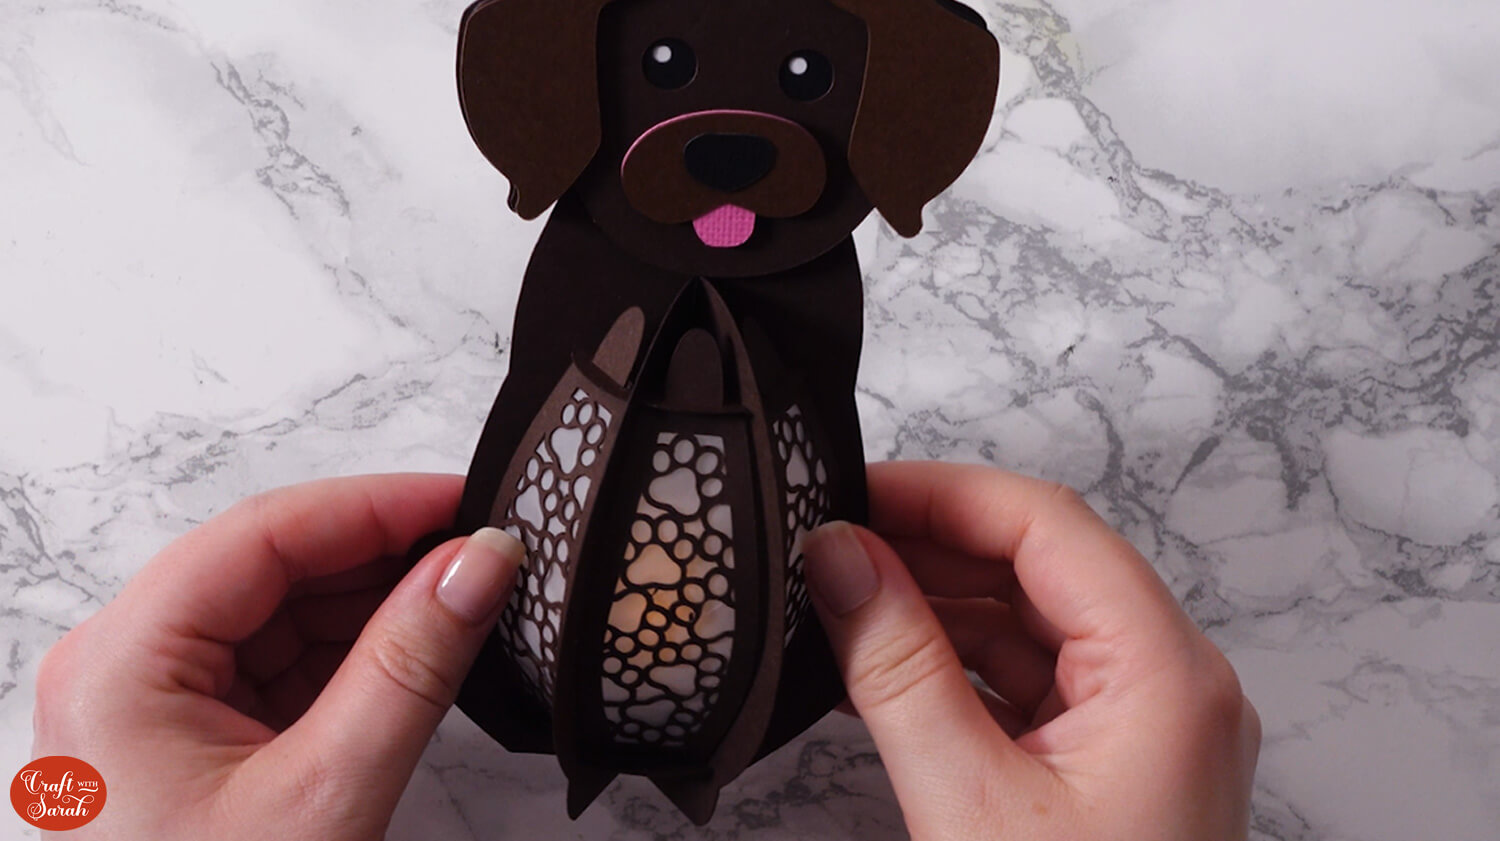
3D dog lantern instructions
Here’s how to make the dog version of these luminaries. Keep scrolling to find the cat version.
Step 1) Upload the SVG file into Design Space
The entire size of the dog lantern should be 10.75 inches wide and 15 inches tall (or near enough).
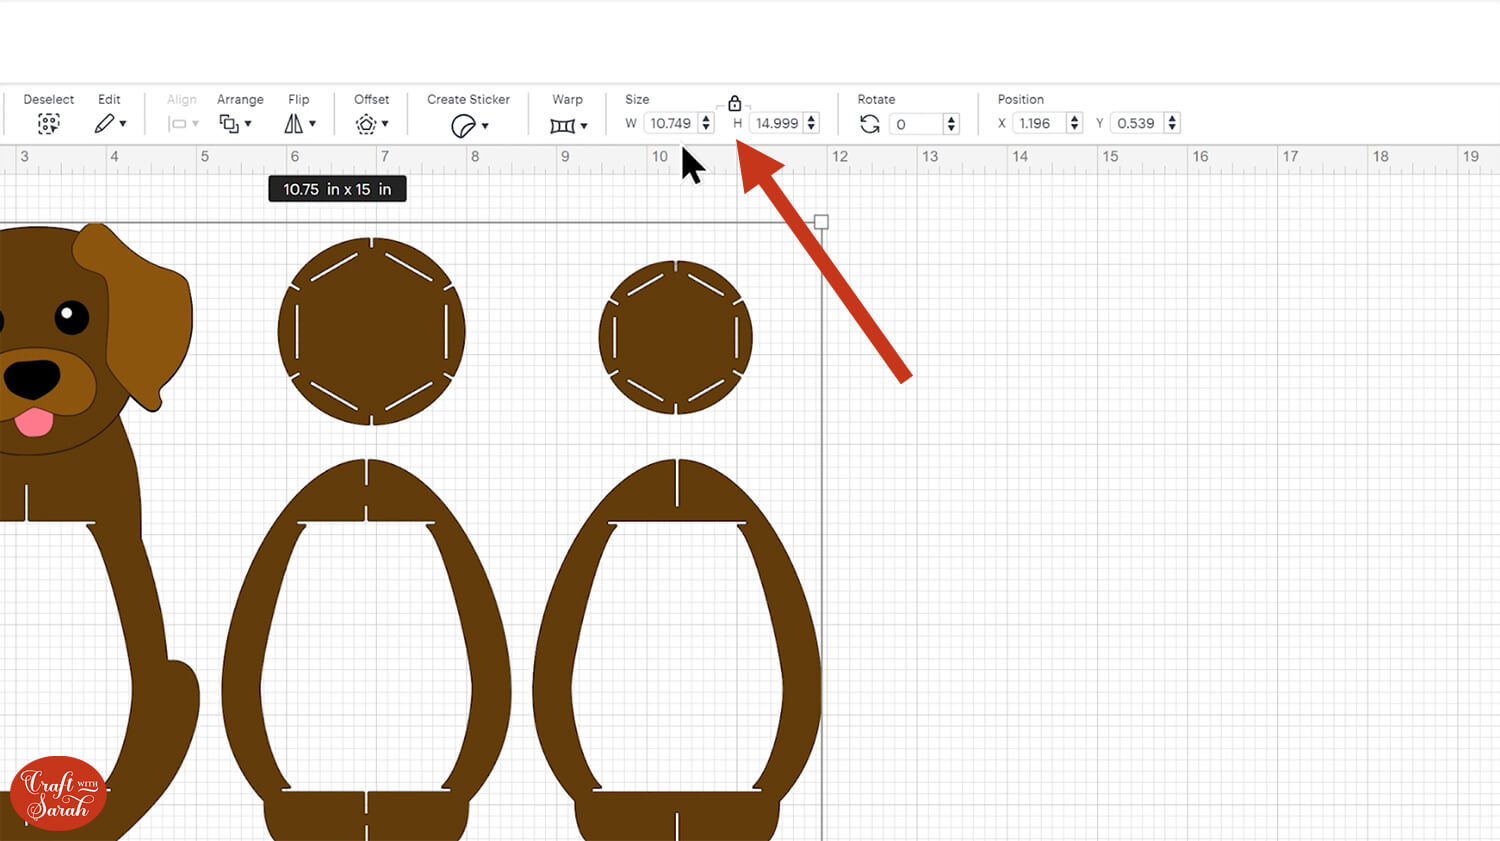
You don’t need to make any changes to the file in Design Space – it loads in all ready to cut!
Most of the design will be cut from cardstock, but there are some exceptions.
The off-white shapes that appear at the bottom of the file should be cut from a translucent material such as vellum, tracing paper or butcher paper.
If you don’t have anything semi-transparent then a full transparent material such as acetate or the cover of an old Cricut mat would work too, but it won’t be quite as effective as you will see the light mechanisms inside the lantern.
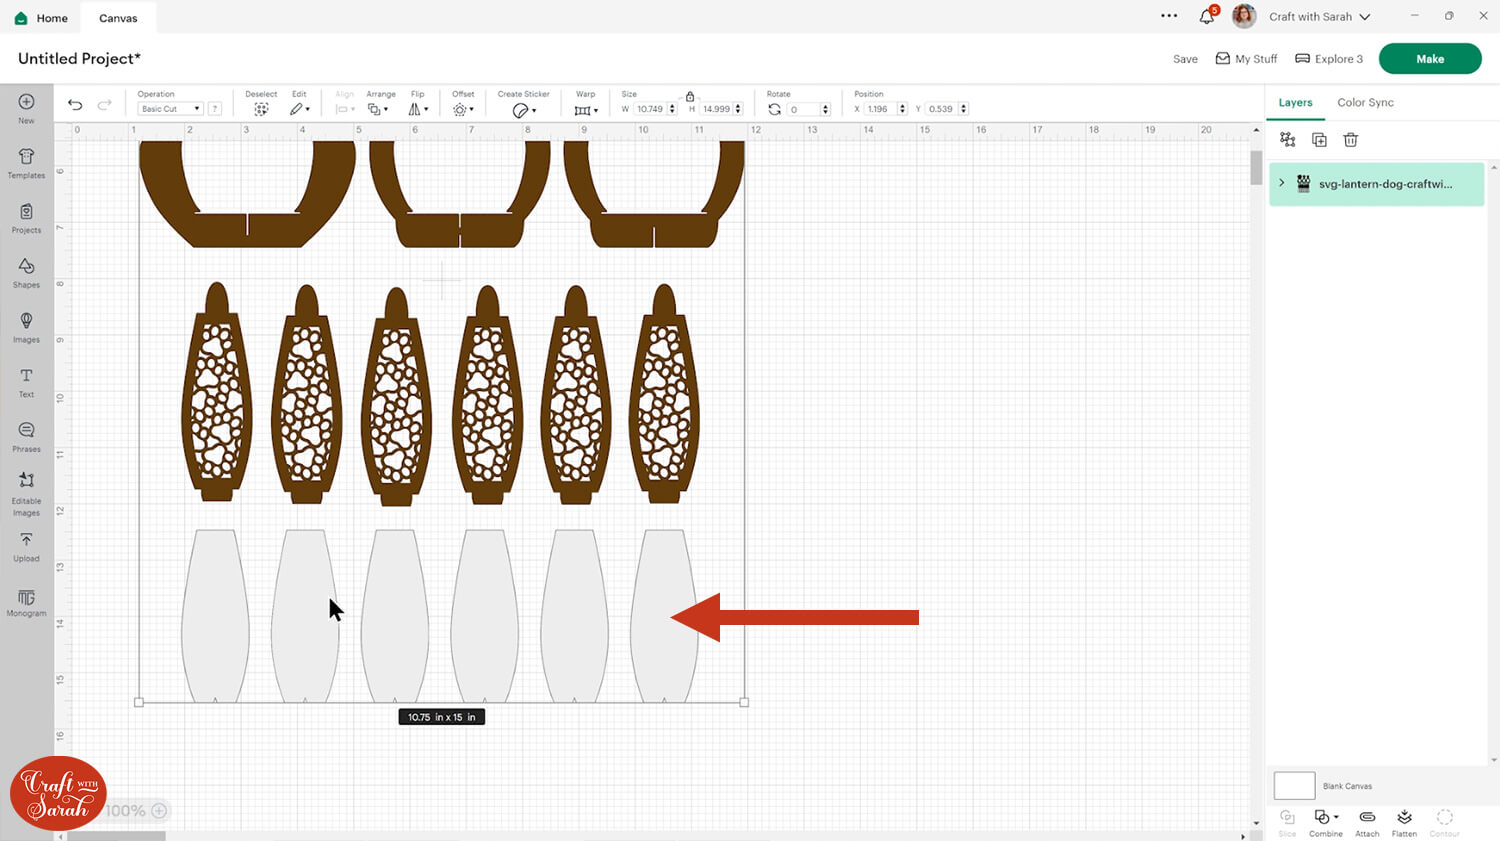
I used the “Light cardstock” setting to cut my tracing paper. Be careful when taking it off your Cricut mat as the tiny triangle cutouts along the bottoms can cause them to tear. It’s easier to remove them from the top side that doesn’t have the triangle cutouts.
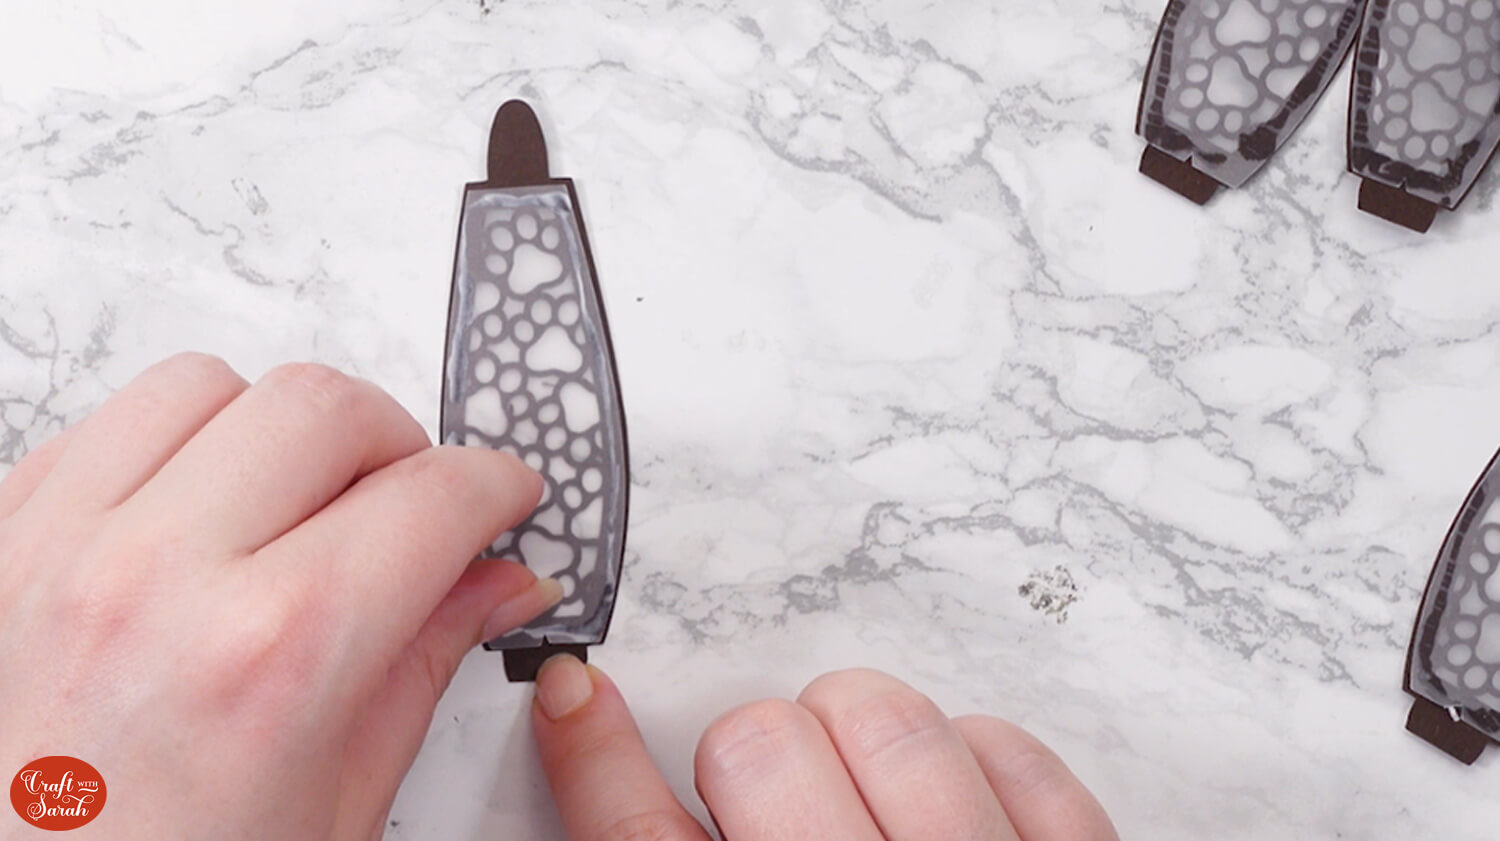
Step 2) Stick the window panels together
Turn the window panels upside down so you are looking at the bottom side.
Carefully add a small amount of glue around the edges and glue the vellum pieces to the backs. The side of the vellum with a tiny triangle cutout is the side to put along the bottom of the window panel (it’s slightly wider than the top).
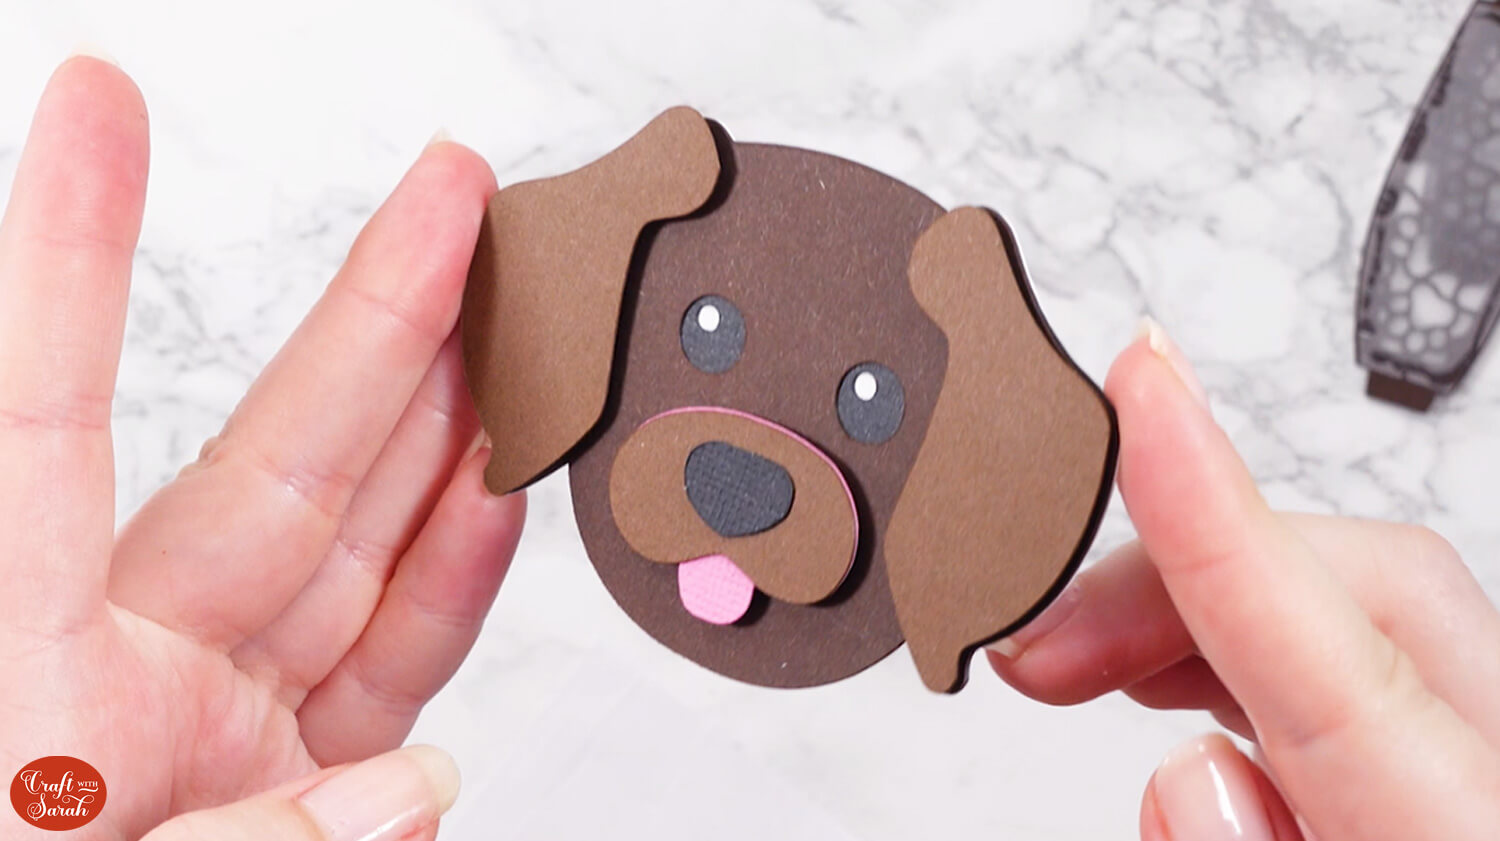
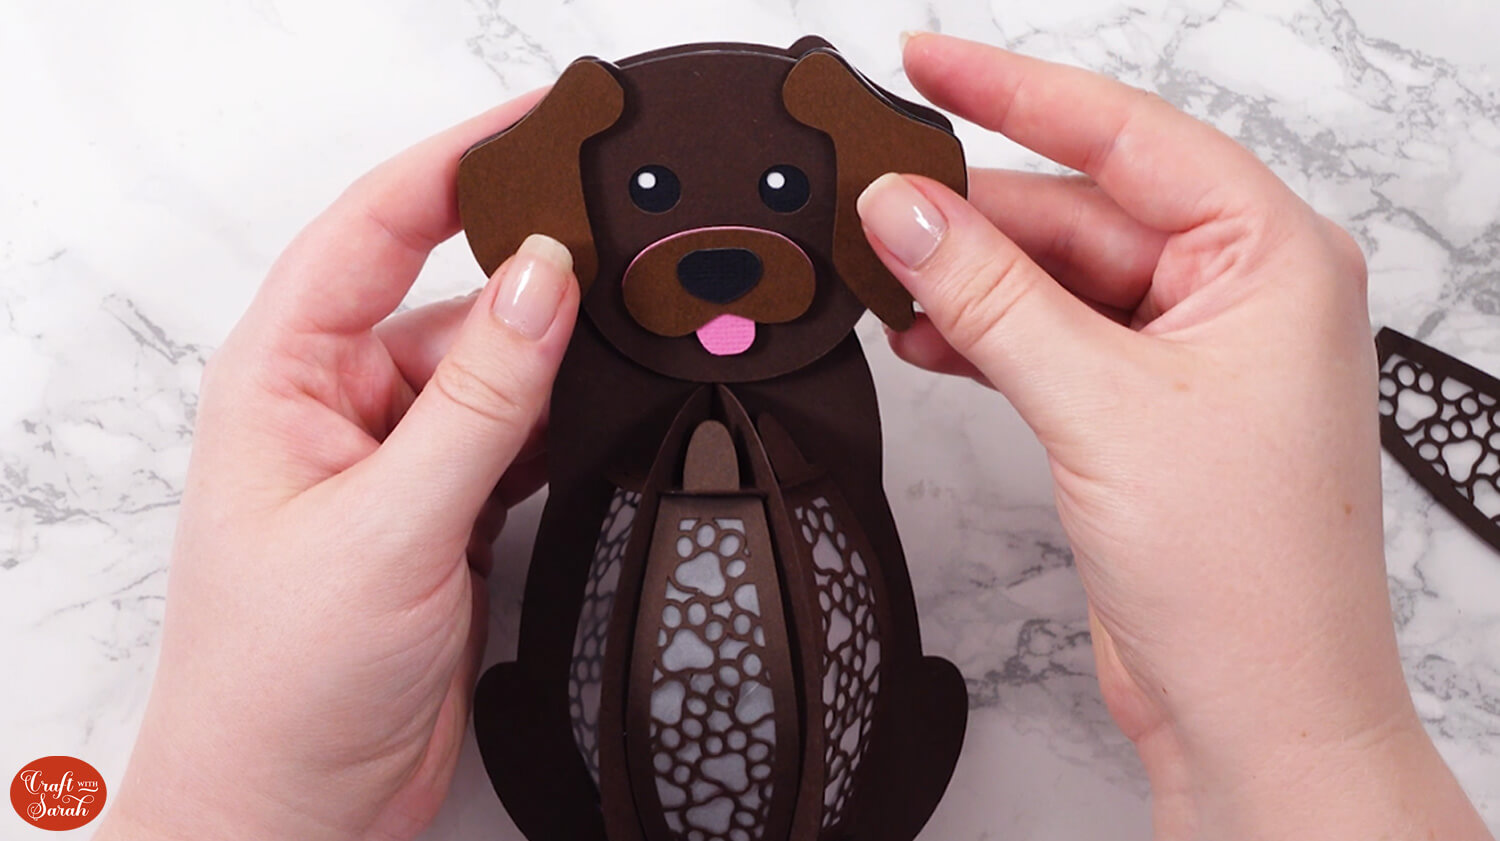
Step 3) Stick the dog head together
Glue the three “head shape” pieces to each other. The white goes on the bottom, then the black, then the brown.
Use foam squares/pads to add the ears and pink tongue pieces.
Glue on the brown muzzle piece and the black nose.
Step 4) Assemble the lantern frame
Place the large dog body piece in front of you so that the dog ear that is slightly lower down than the other one is on the LEFT.
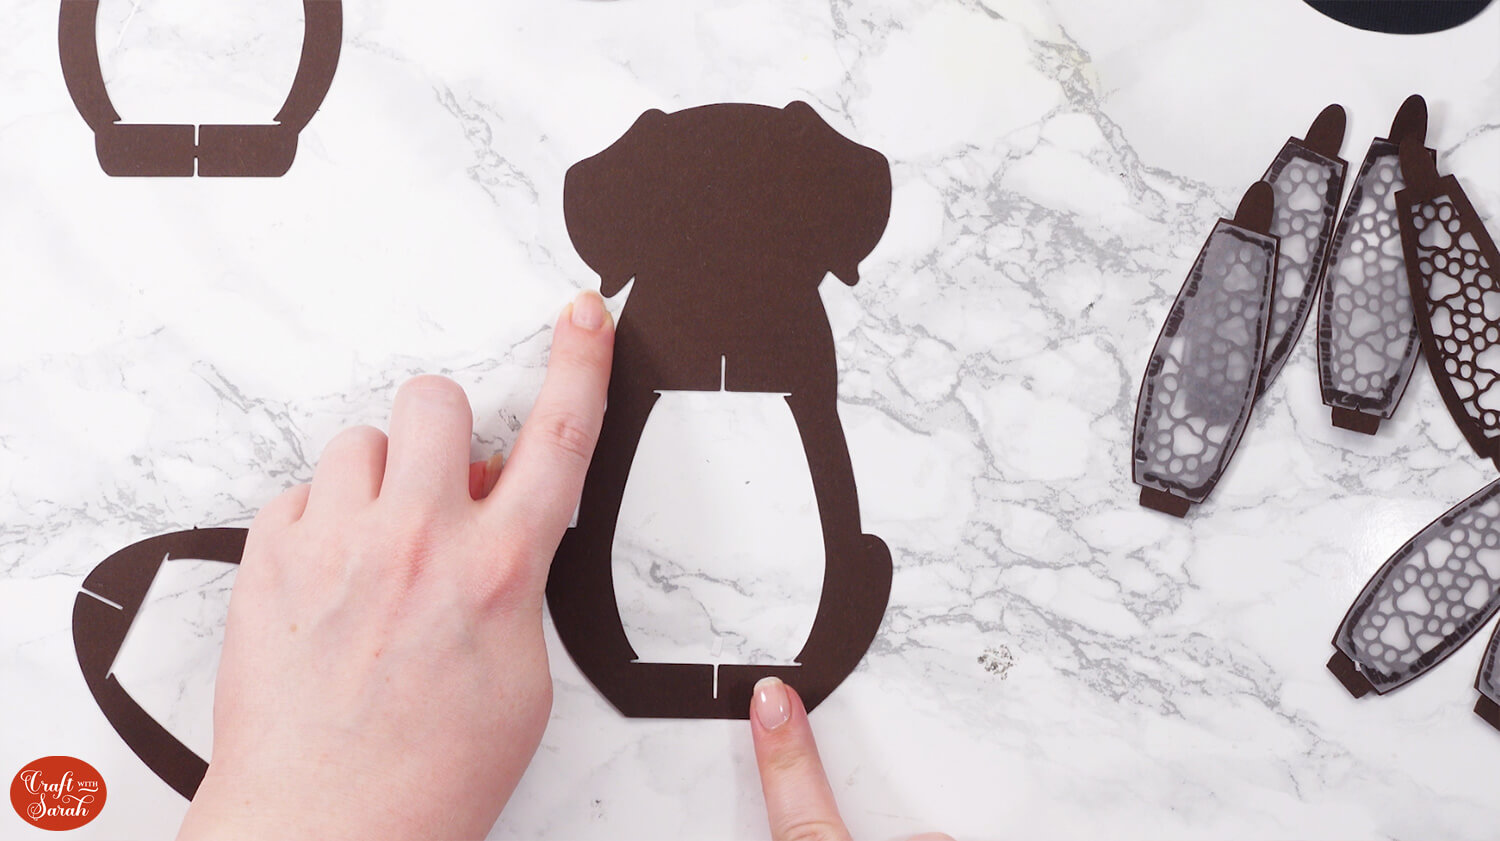
Select the lantern structure piece that has two little cutouts along the top and bottom.
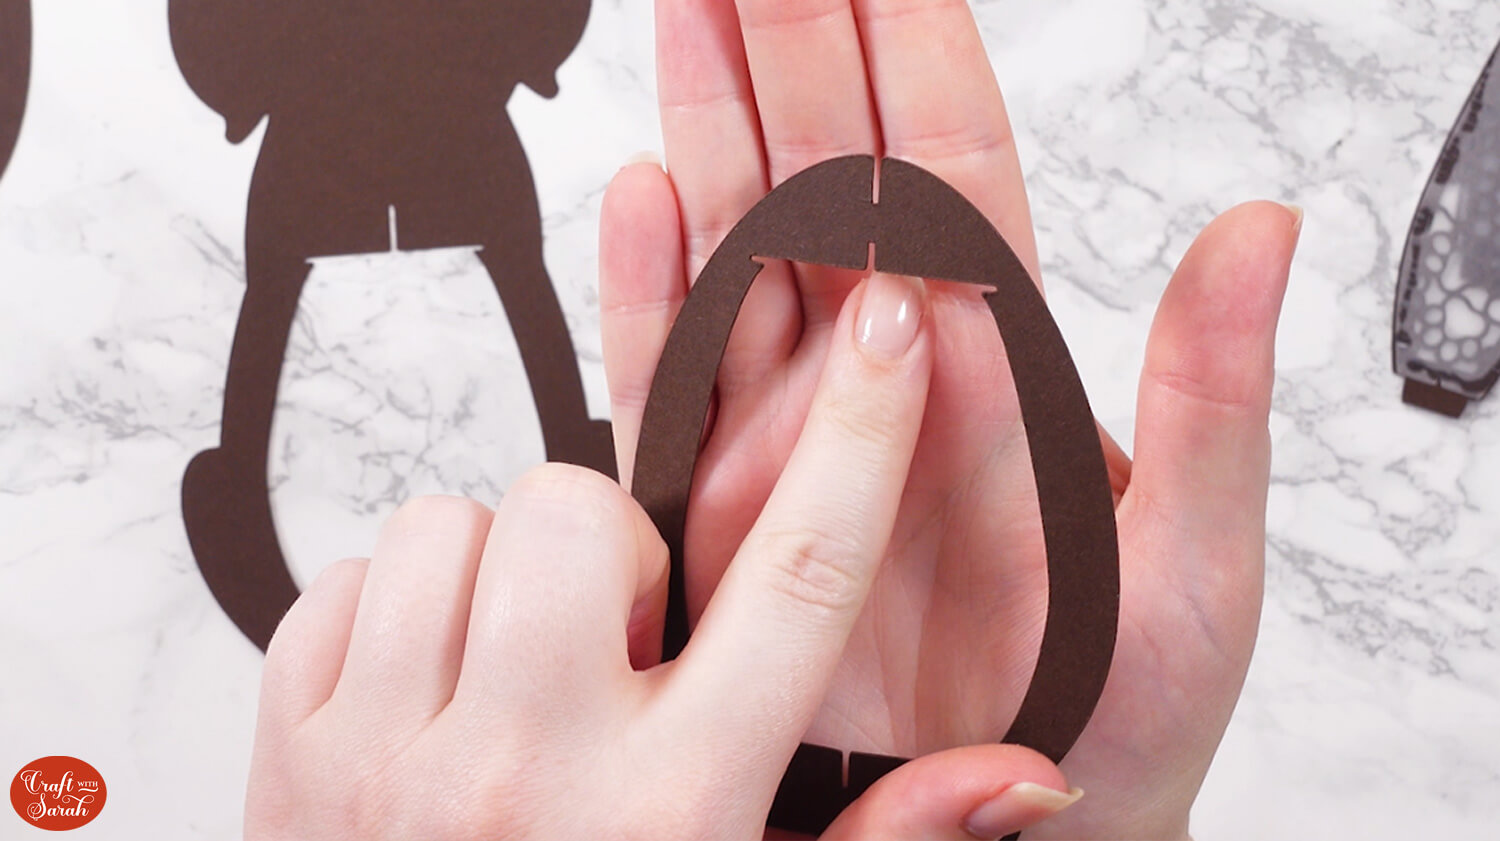
Slot this piece into the dog body piece.
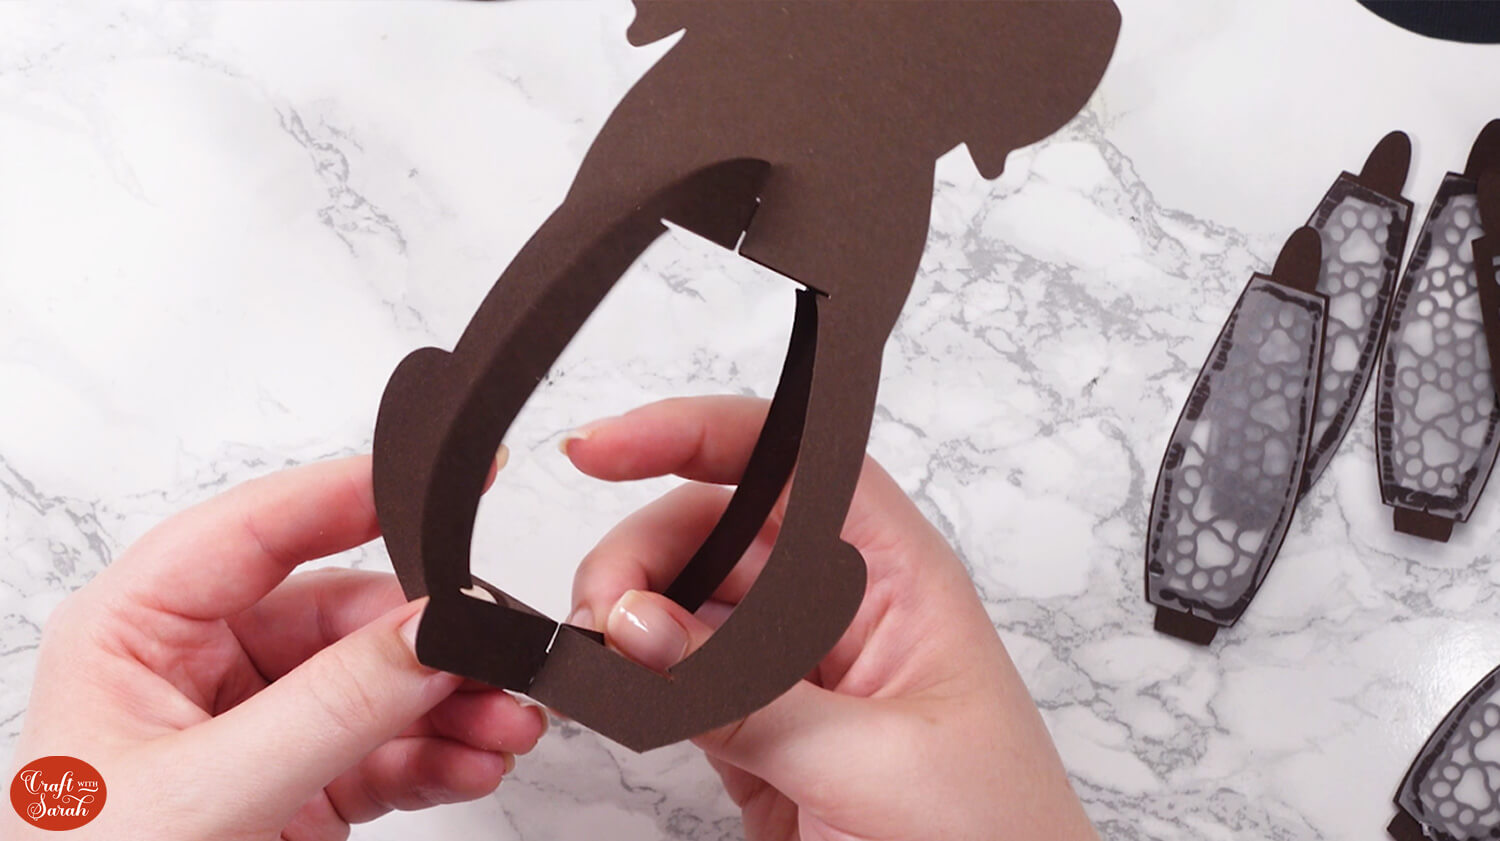
Hold those two pieces flat against each other and slide the third lantern structure piece into the middle.
You’ll now have a six-sided structure.
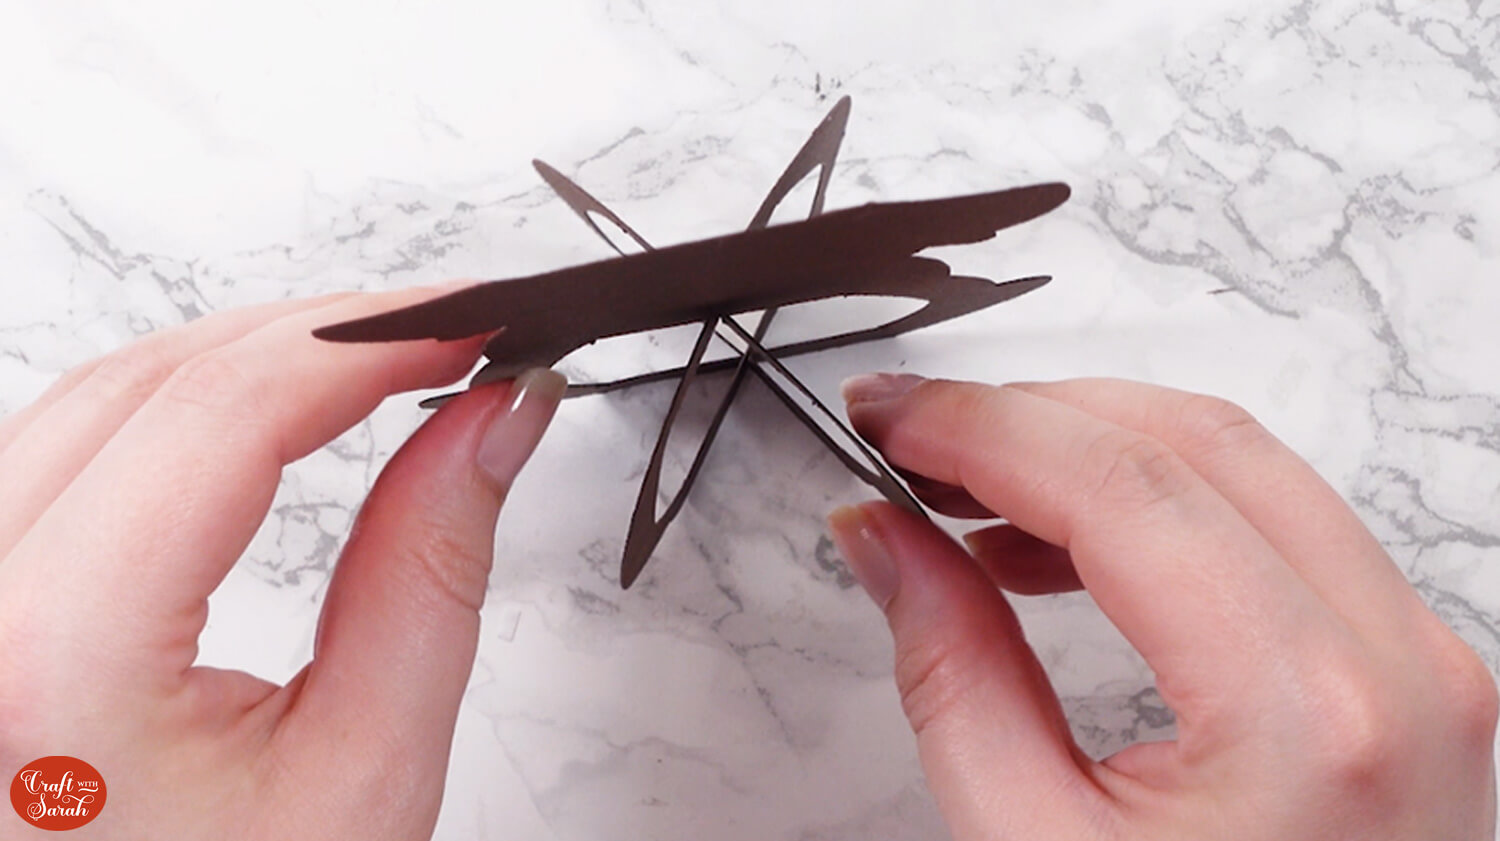
Take the largest of the two circles and slot it into the bottom of the lantern structure.
The small slits in the side of the circle will so into the slits in the bottom of the lantern.
This part can be a bit fiddly, so go slowly and be careful not to tear the cardstock.
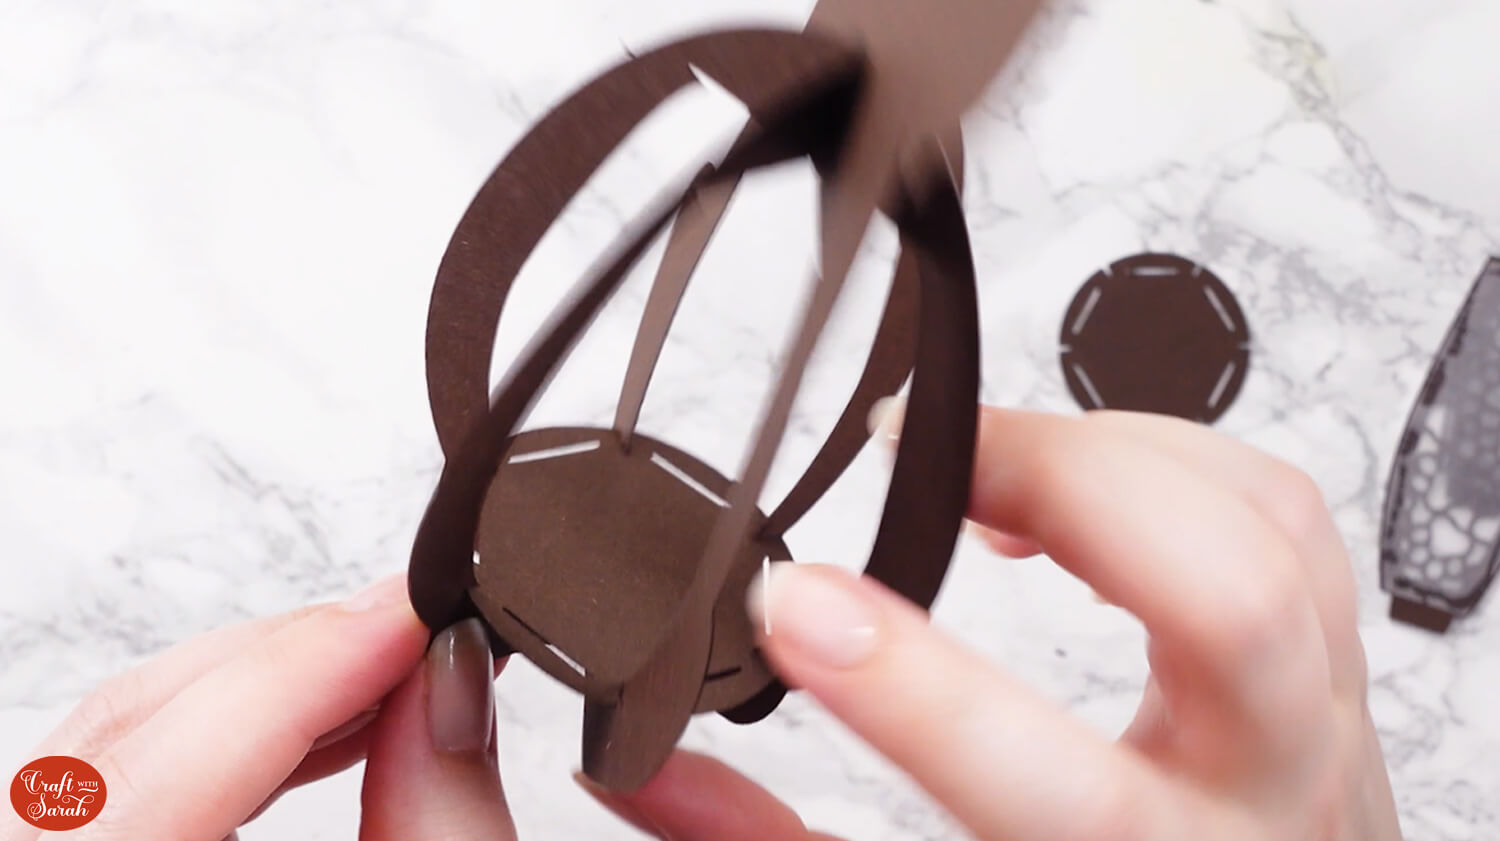
Slot the smaller circle into the top of the lantern structure.
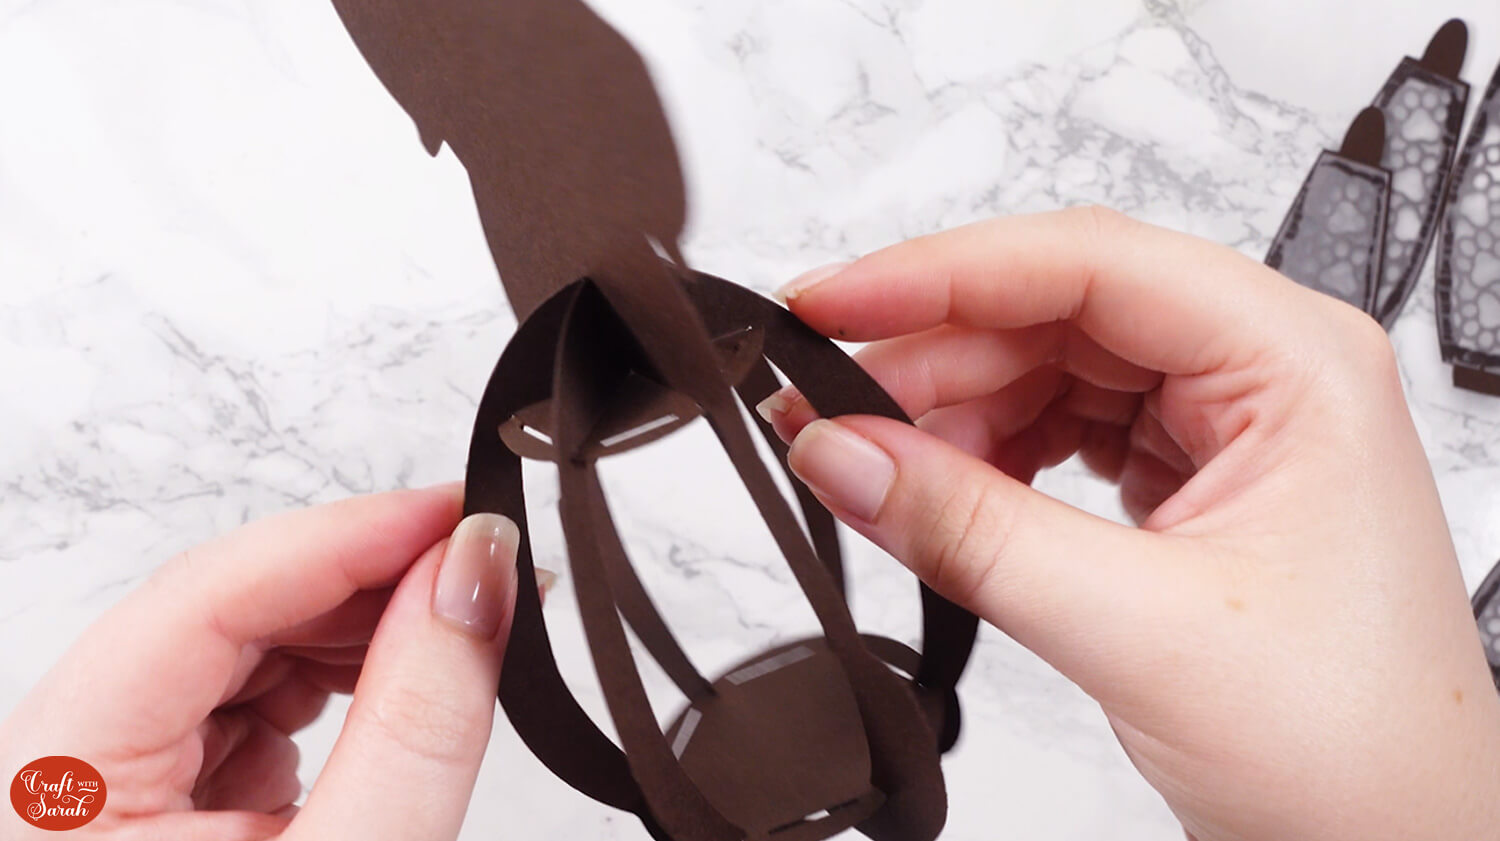
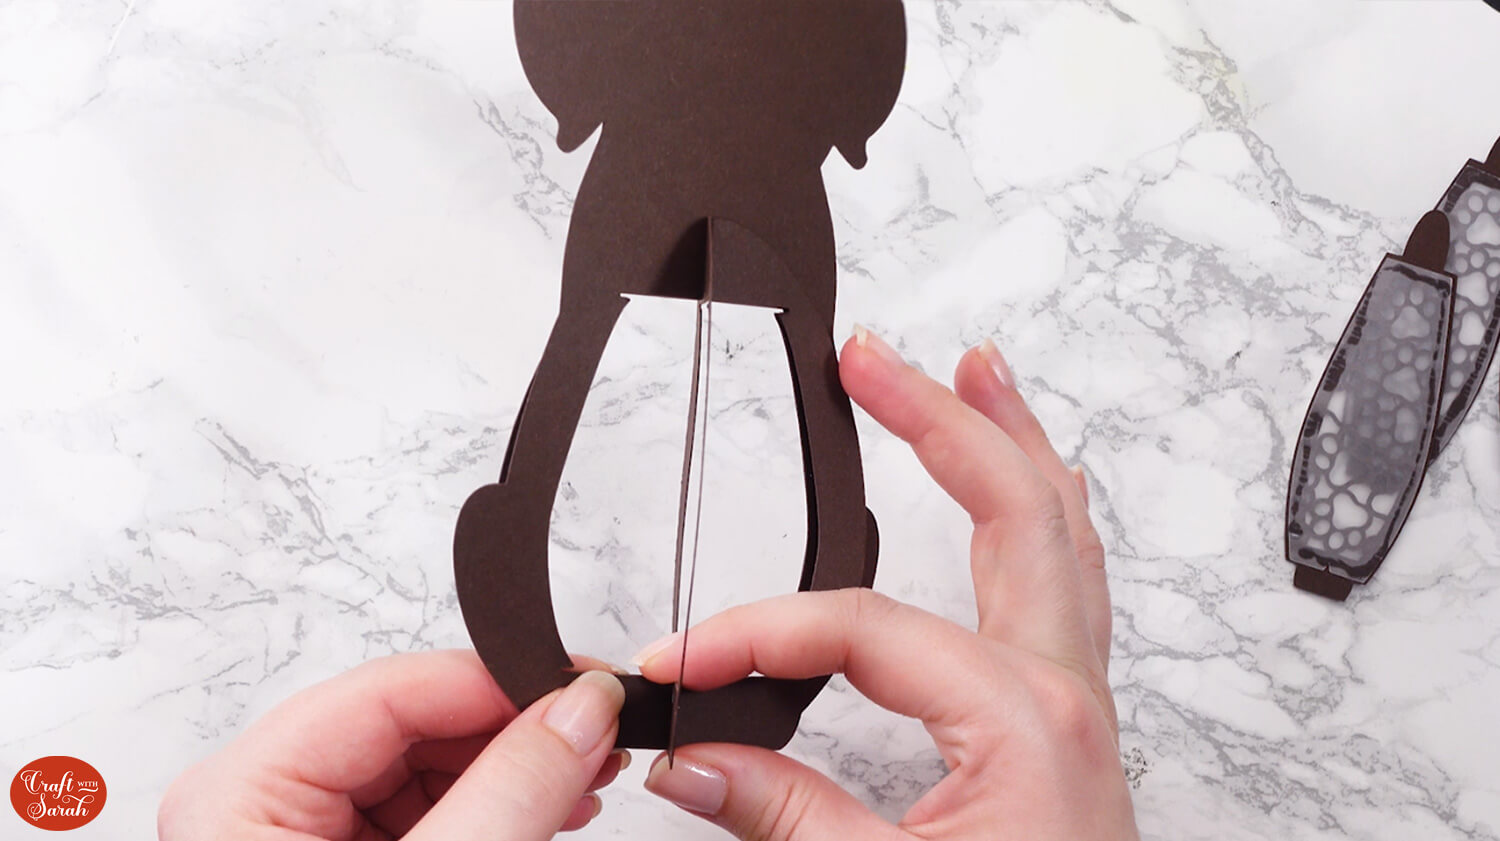
Step 5) Finish the lantern
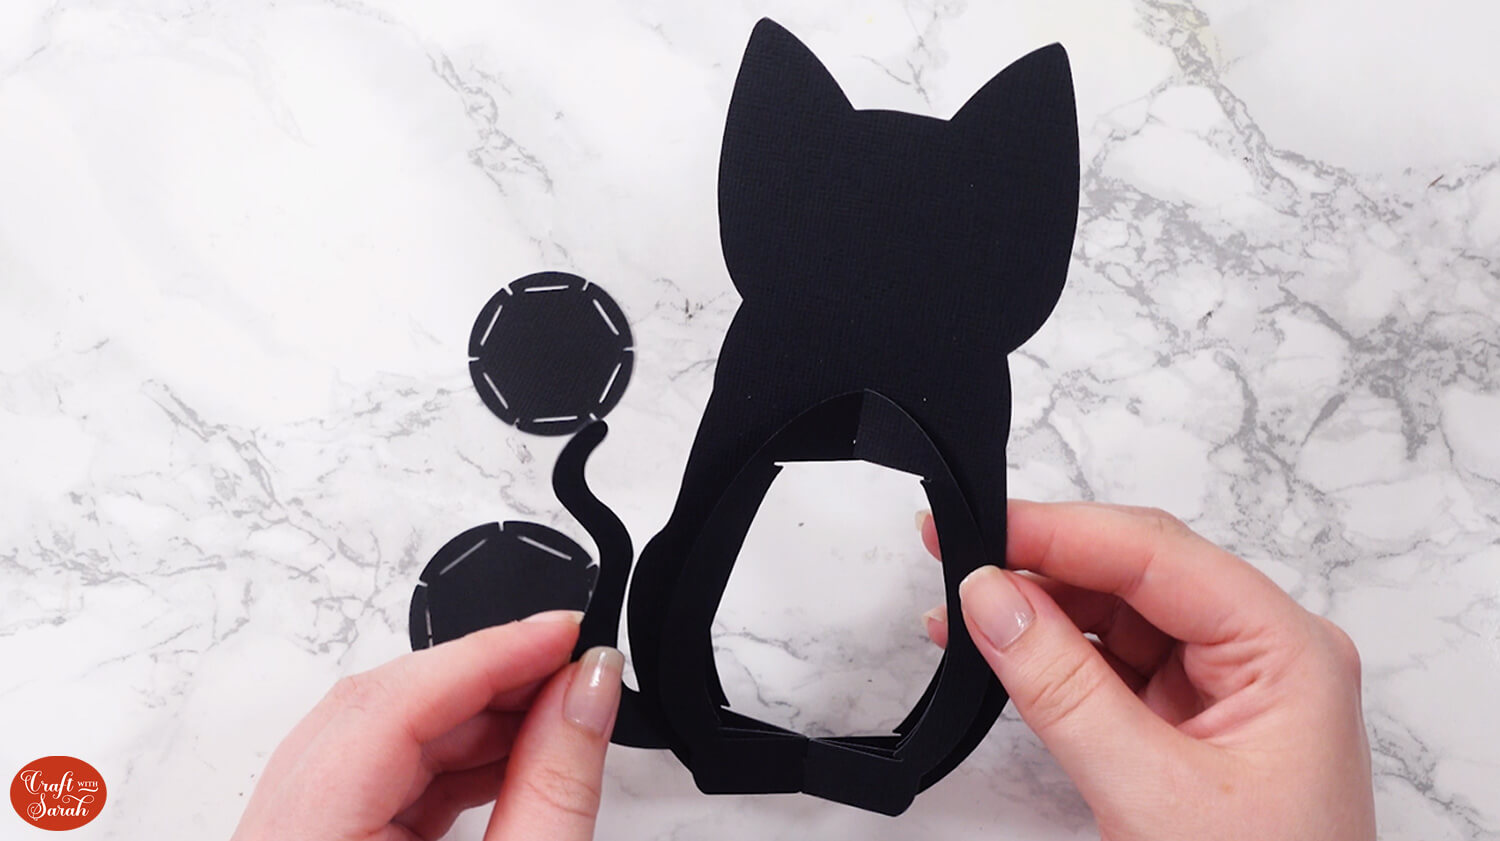
Slot five of the six side panels into the lantern.
The rounded tabs go into the top of the lantern and the flat-edge tabs go into the bottom.
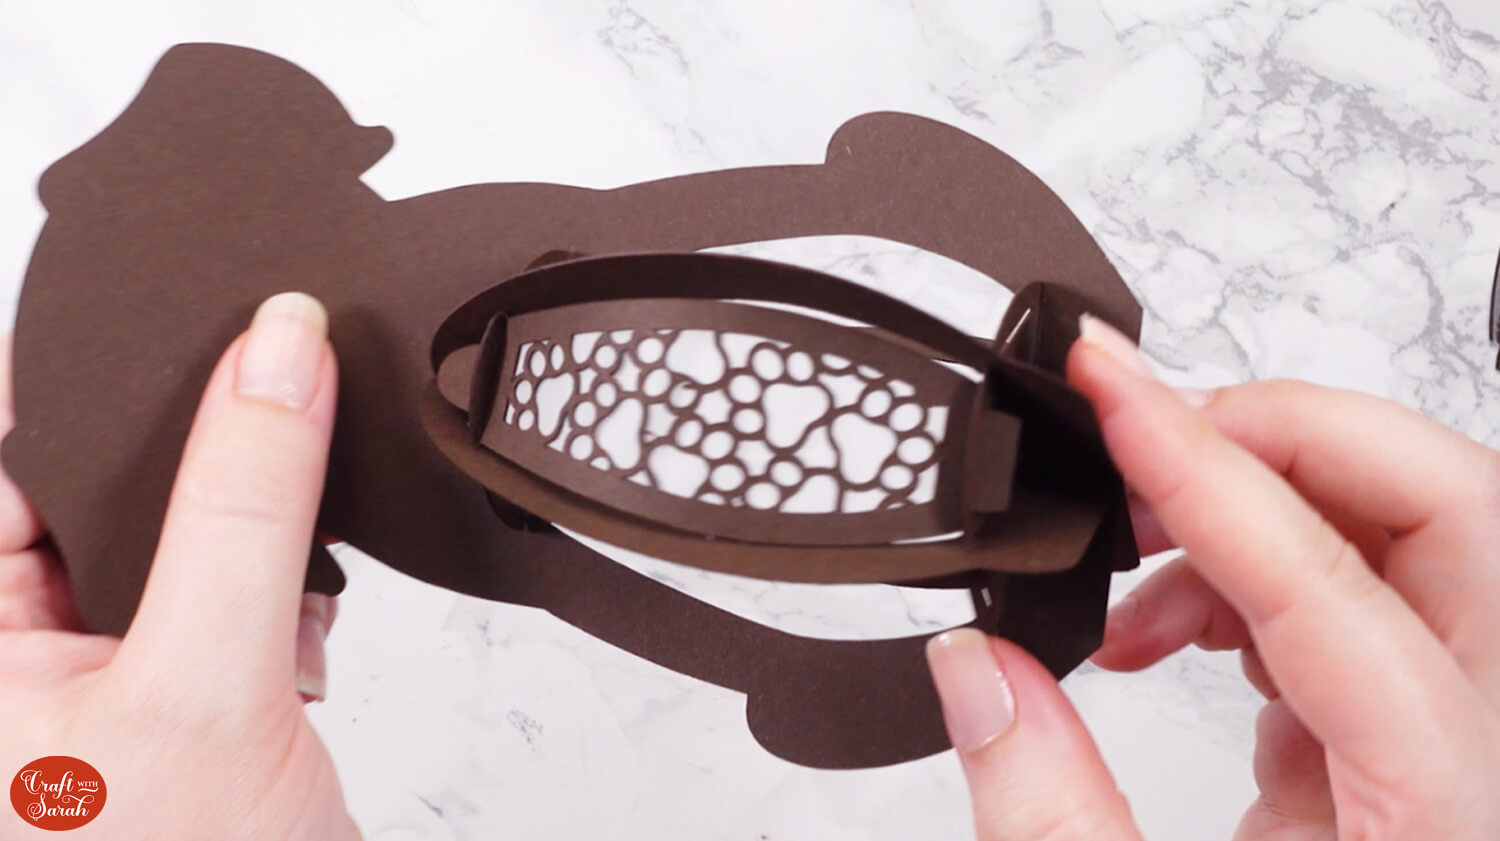
Use foam squares/pads to stick the head of the dog to the front of the lantern.
Add your light inside, turn it on, then put in the final side panel.
The side panels can easily be unhooked to turn the light off.
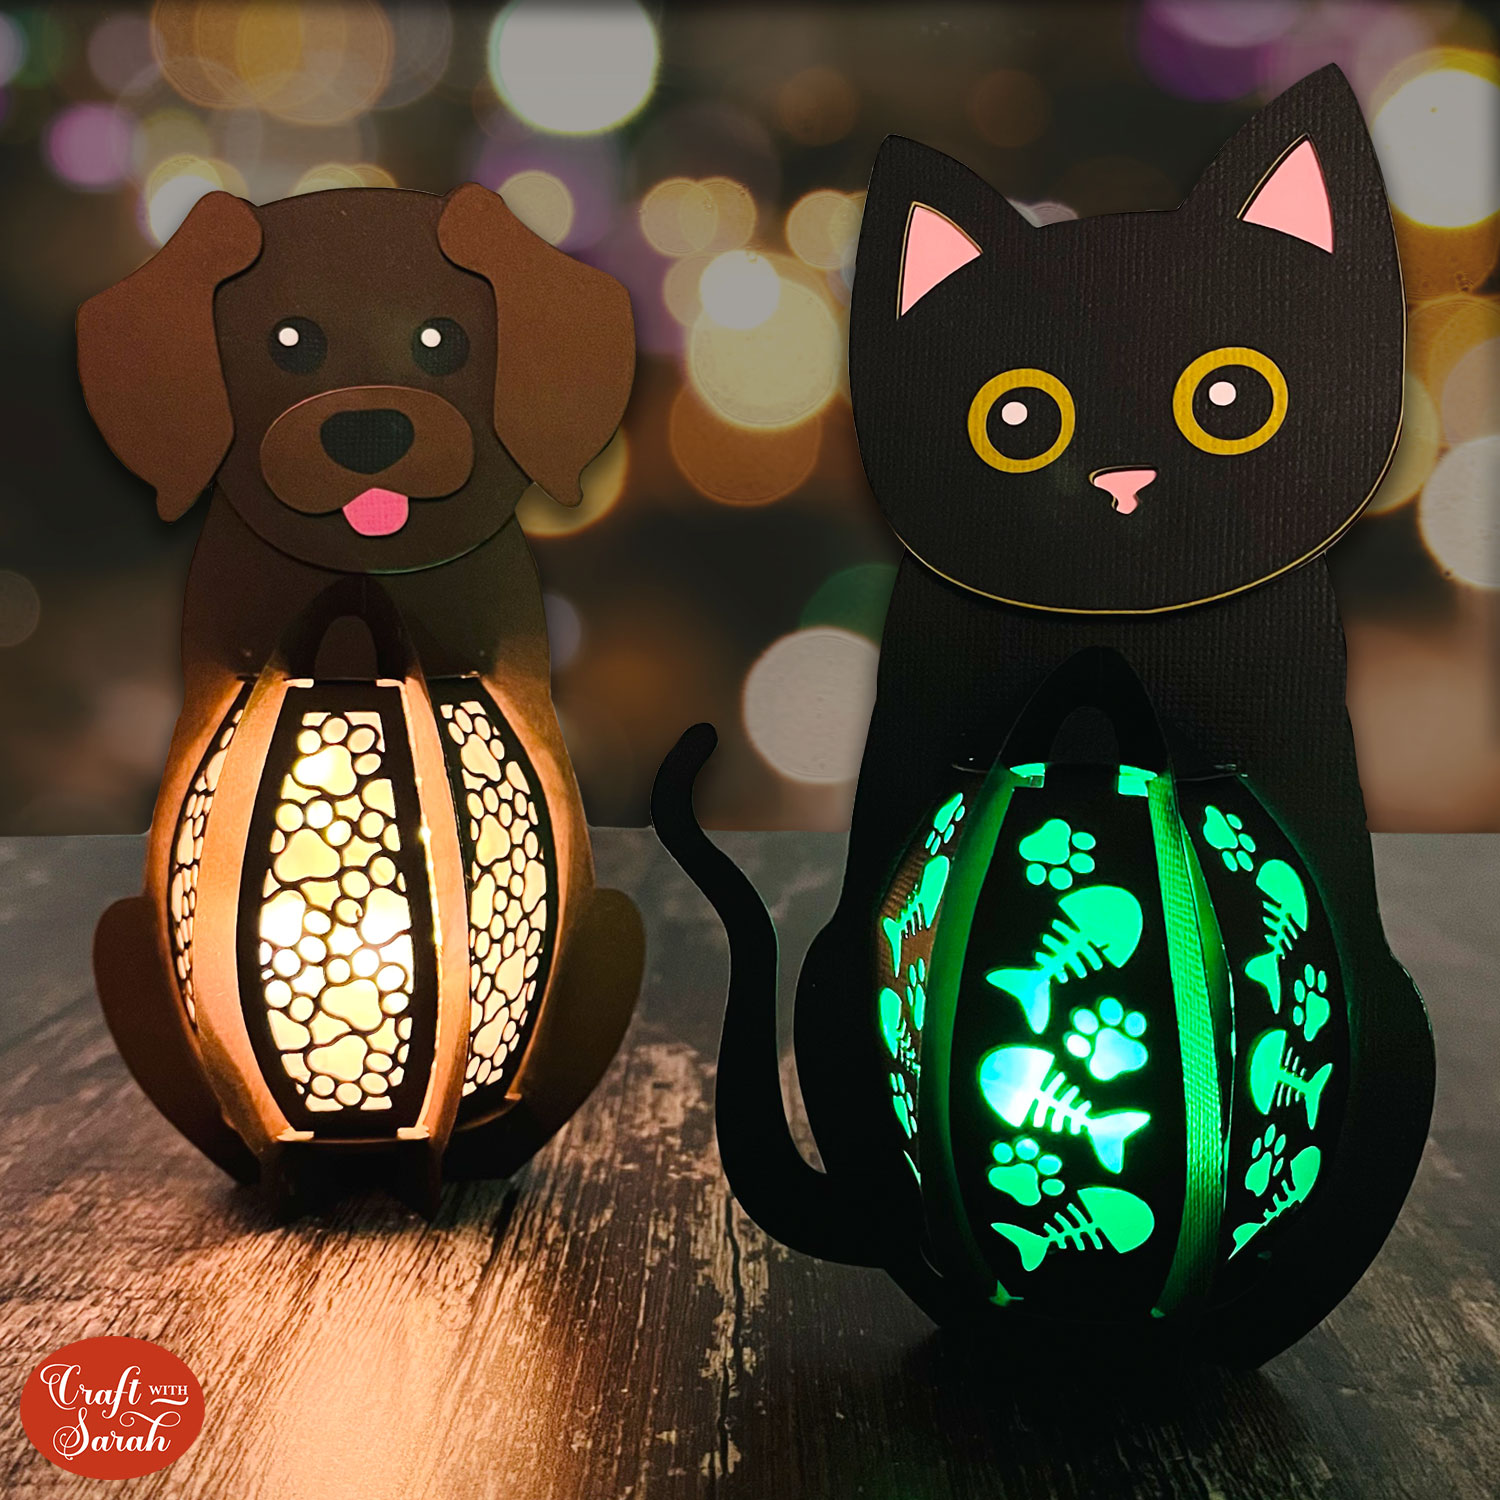
I added a battery powered tea light inside the dog. It looked much better in “real life” than it did on camera as sadly my camera was struggling to pick up on the light glowing inside.
3D cat lantern instructions
Here’s how to make the cat version of these luminaries.
Step 1) Upload the SVG file into Design Space
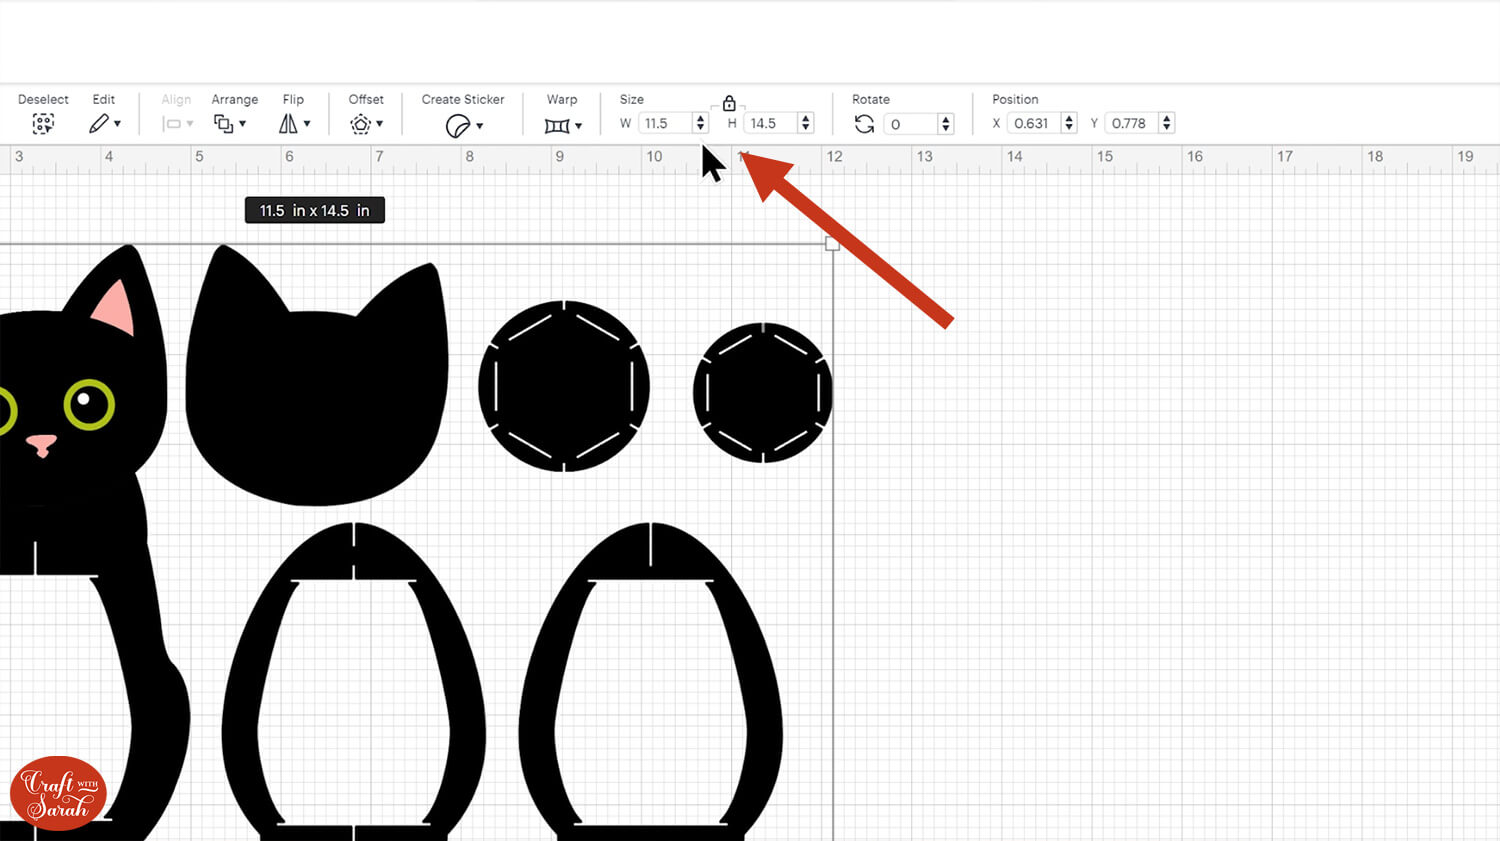
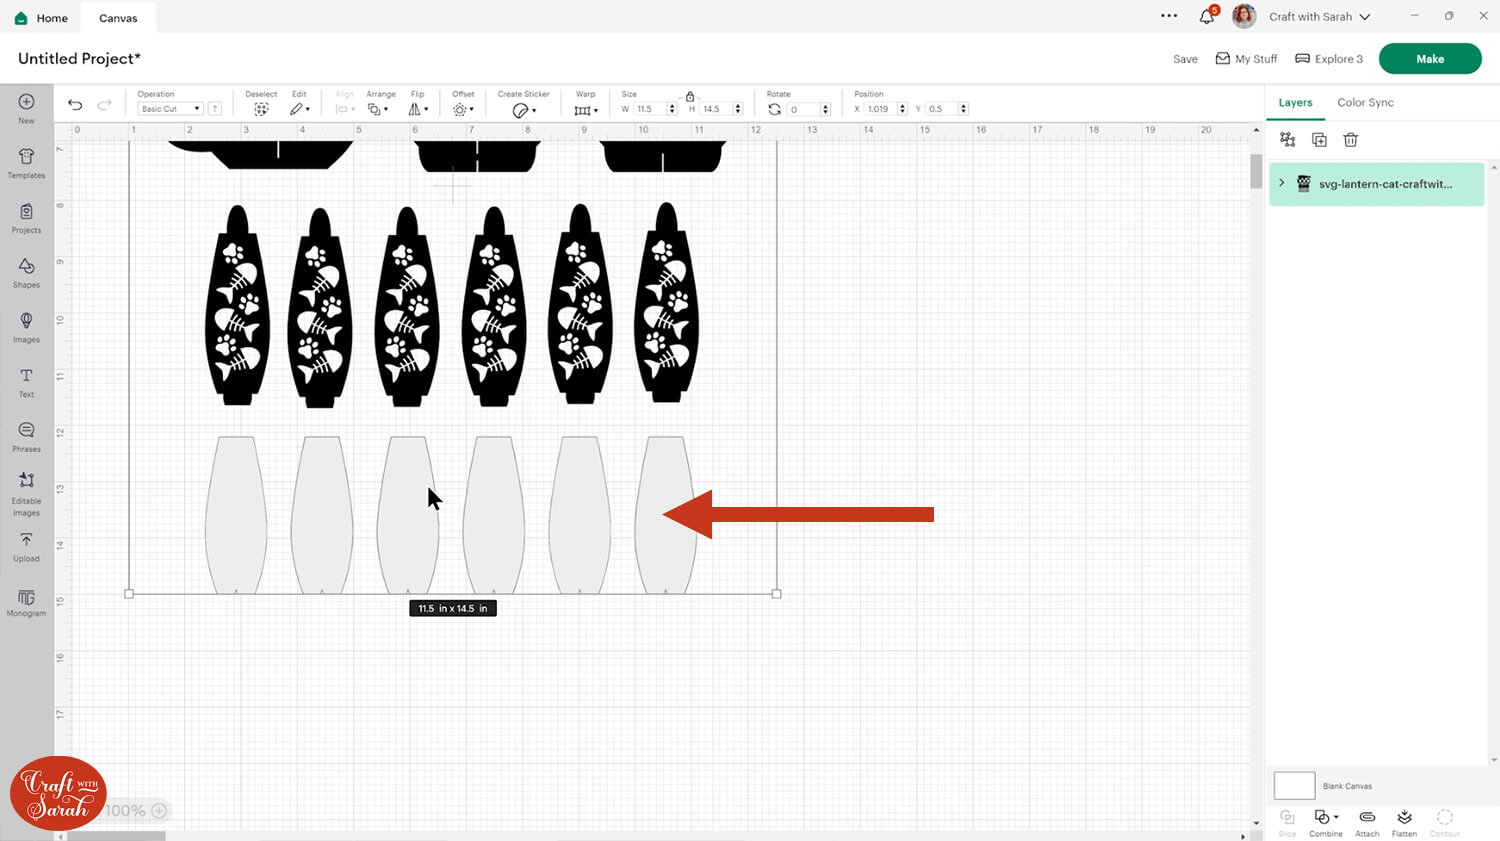
The entire size of the cat lantern should be 11.5 inches wide and 14.5 inches tall.
You don’t need to make any changes to the file in Design Space – it loads in all ready to cut!
Most of the design will be cut from cardstock, but there are some exceptions.
The off-white shapes that appear at the bottom of the file should be cut from a translucent material such as vellum, tracing paper or butcher paper.
If you don’t have anything semi-transparent then a full transparent material such as acetate or the cover of an old Cricut mat would work too, but it won’t be quite as effective as you will see the light mechanisms inside the lantern.
I used the “Light cardstock” setting to cut my tracing paper. Be careful when taking it off your Cricut mat as the tiny triangle cutouts along the bottoms can cause them to tear. It’s easier to remove them from the top side that doesn’t have the triangle cutouts.
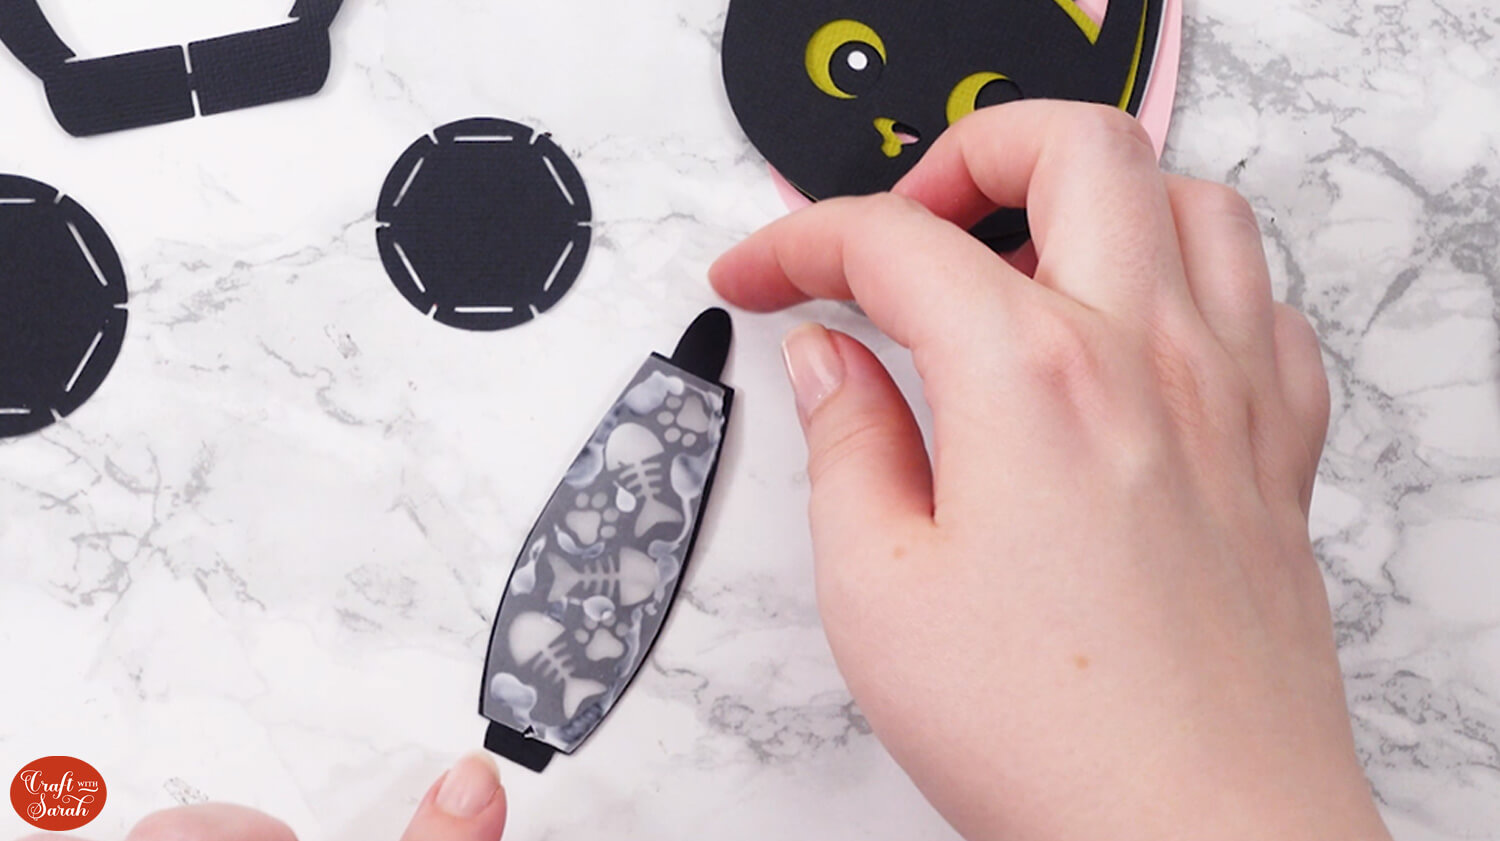
Step 2) Stick the window panels together
Turn the window panels upside down so you are looking at the bottom side.
Carefully add a small amount of glue around the edges and glue the vellum pieces to the backs. The side of the vellum with a tiny triangle cutout is the side to put along the bottom of the window panel (it’s slightly wider than the top).
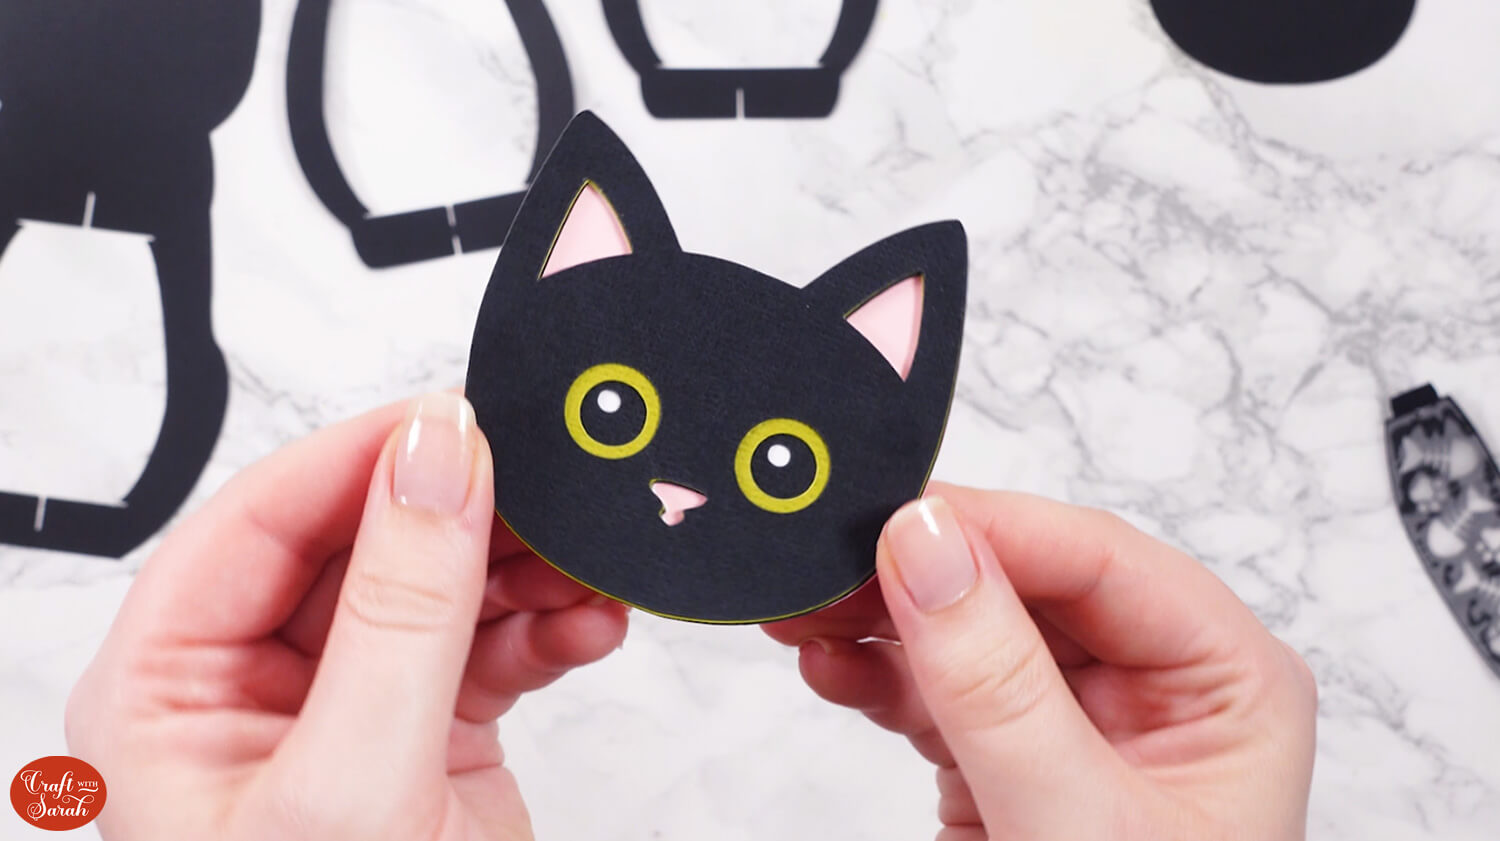
Step 3) Stick the cat head together
Glue the “head shape” pieces to each other.
The pink piece goes at the bottom, then the white piece, then the black piece with the smallest circle eye cutouts, then the green piece and finally the black piece with the larger circle eye cutouts.
You will have one black head piece left over that doesn’t have any cutouts on it. This will be used towards the end of the lantern assembly, so leave it to one side for now.
Step 4) Assemble the lantern frame
Place the large cat body piece in front of you so that the tail is on the LEFT.
Select the lantern structure piece that has two little cutouts along the top and bottom.
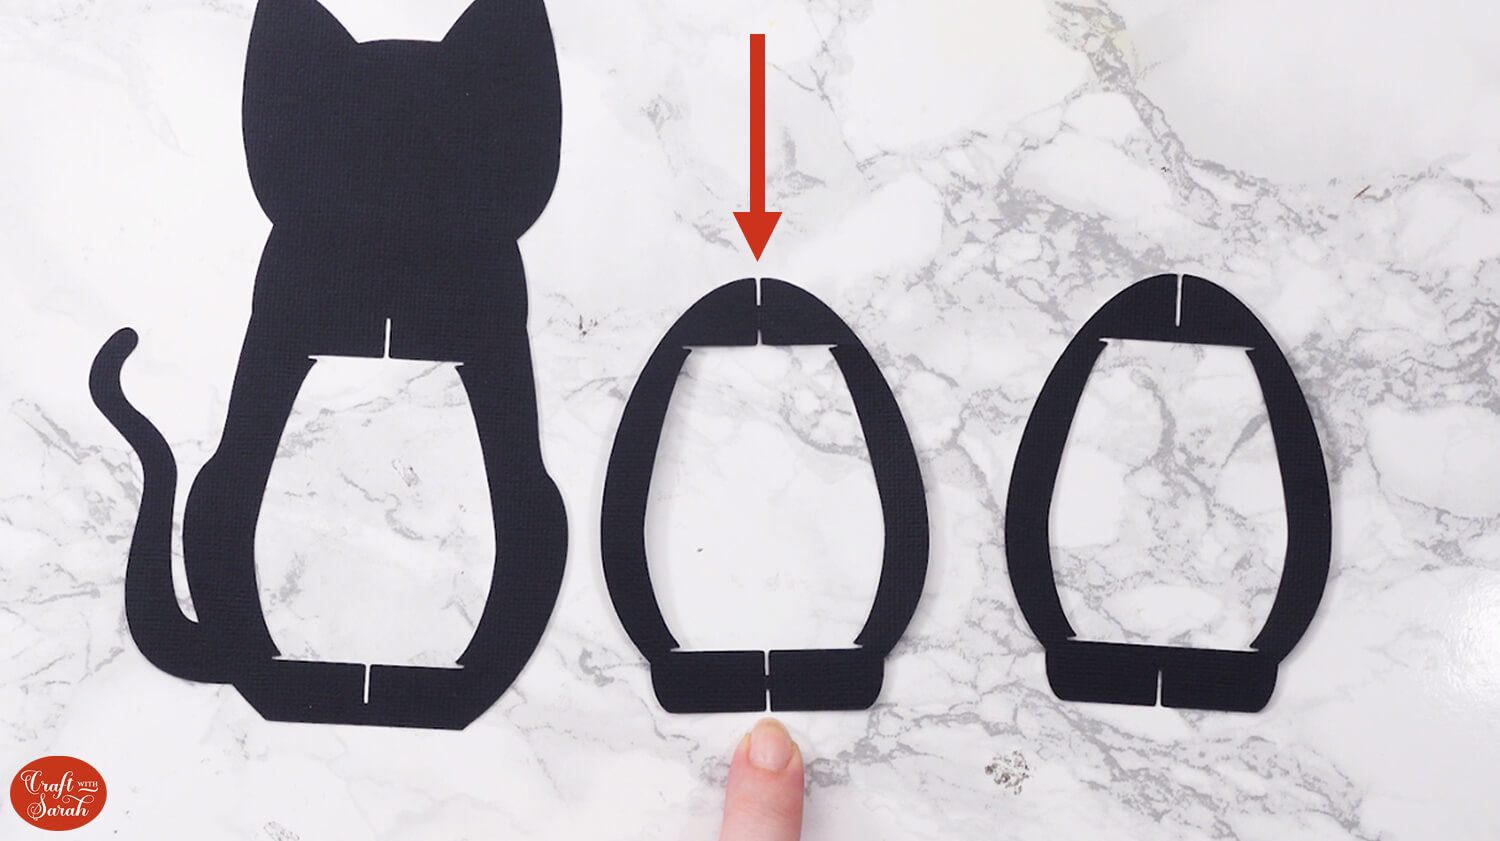
Slot this piece into the cat body piece.

Hold those two pieces flat against each other and slide the third lantern structure piece into the middle.
You’ll now have a six-sided structure.
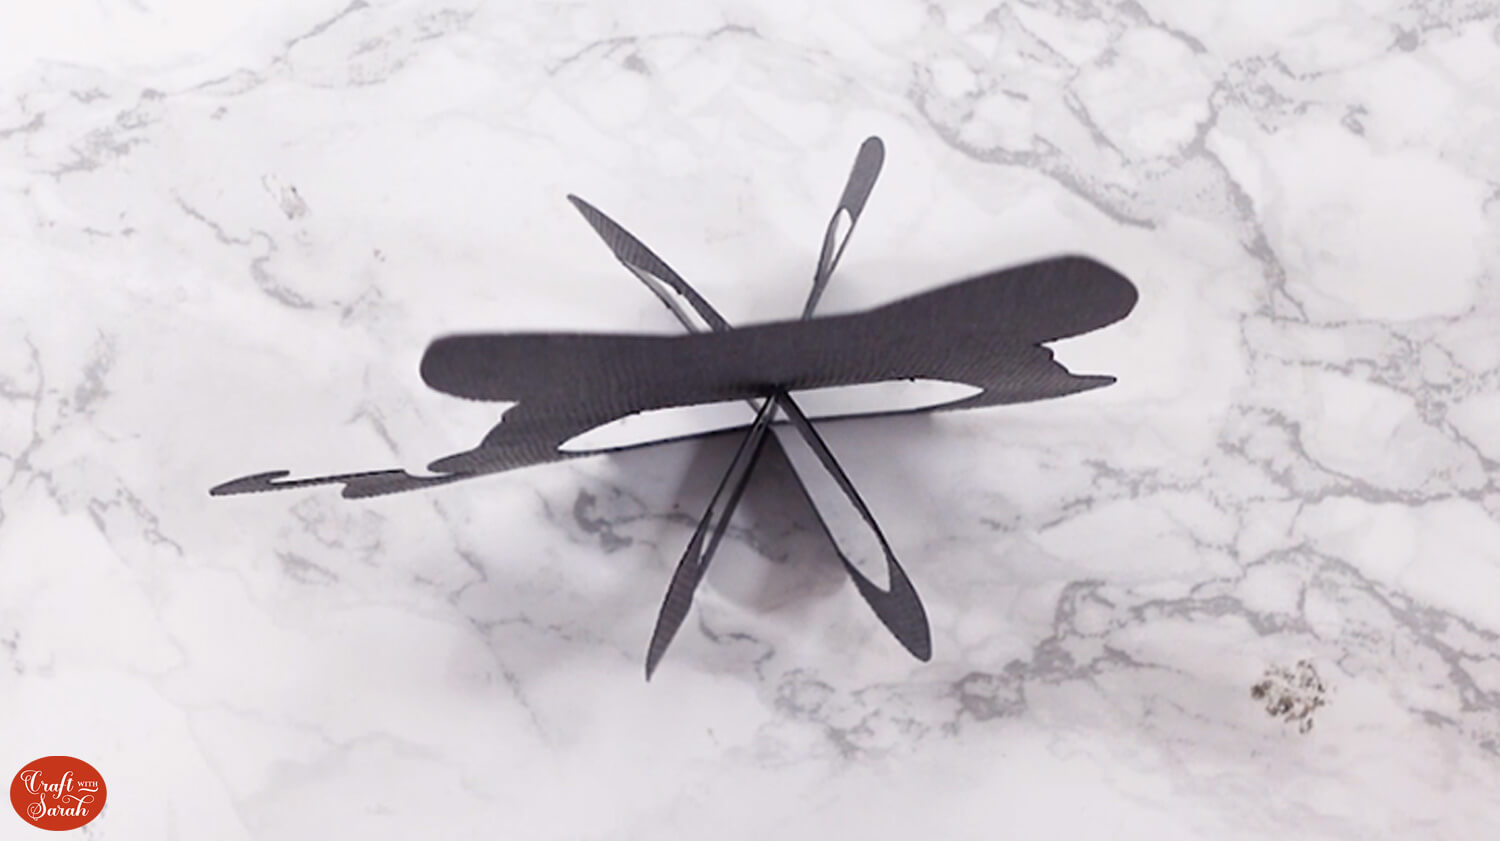
Take the largest of the two circles and slot it into the bottom of the lantern structure.
The small slits in the side of the circle will so into the slits in the bottom of the lantern.
This part can be a bit fiddly, so go slowly and be careful not to tear the cardstock.
Slot the smaller circle into the top of the lantern structure.
I forgot to take photos of these steps, but scroll up to the dog version to see those pictures as it is the same process.
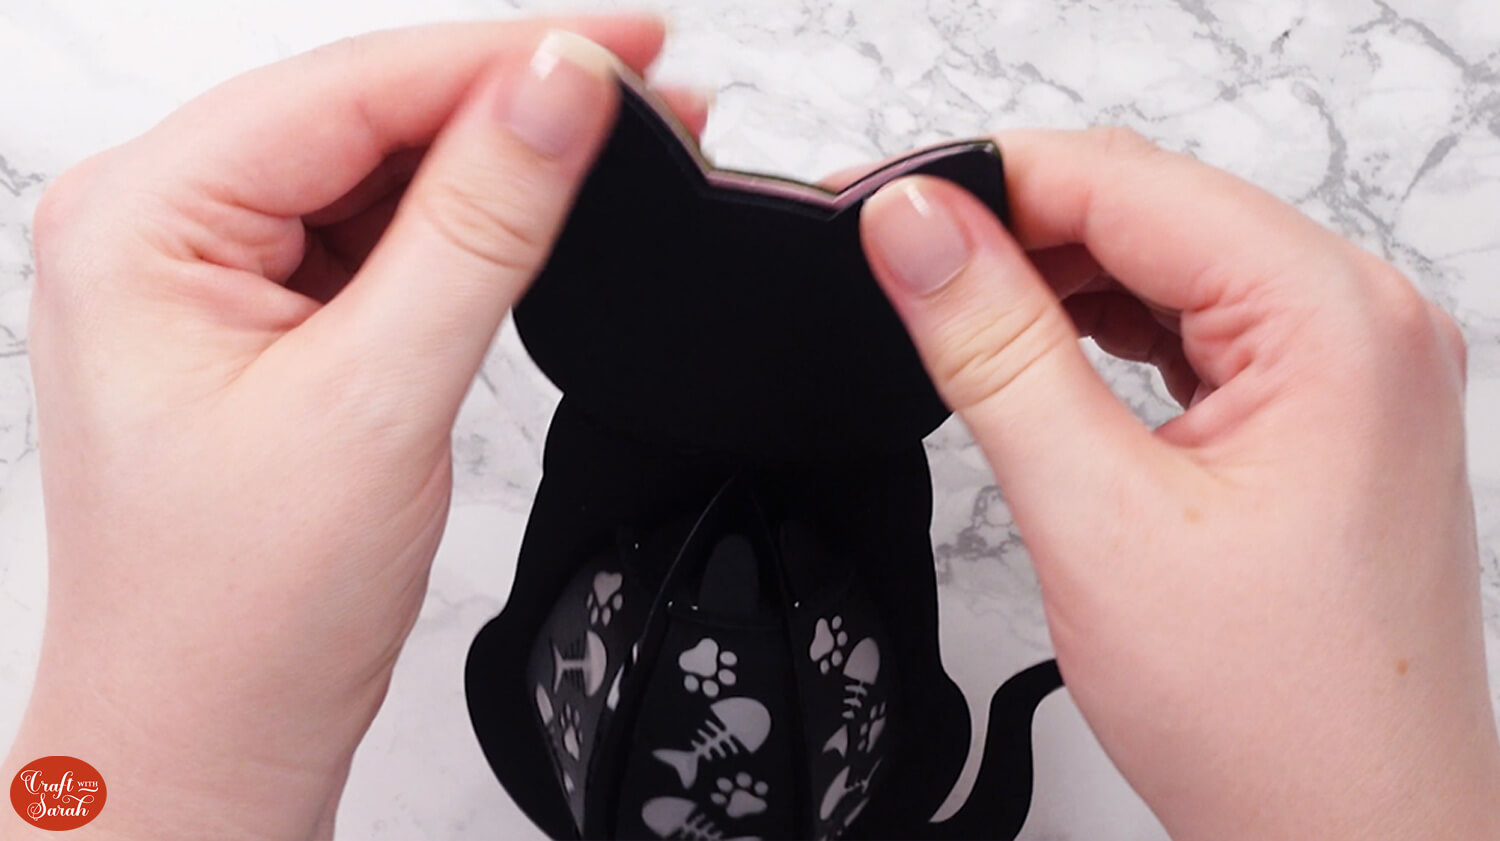
Step 5) Finish the lantern
Slot five of the six side panels into the lantern.
The rounded tabs go into the top of the lantern and the flat-edge tabs go into the bottom.

Use foam squares/pads to stick the head of the cat to the front of the lantern.
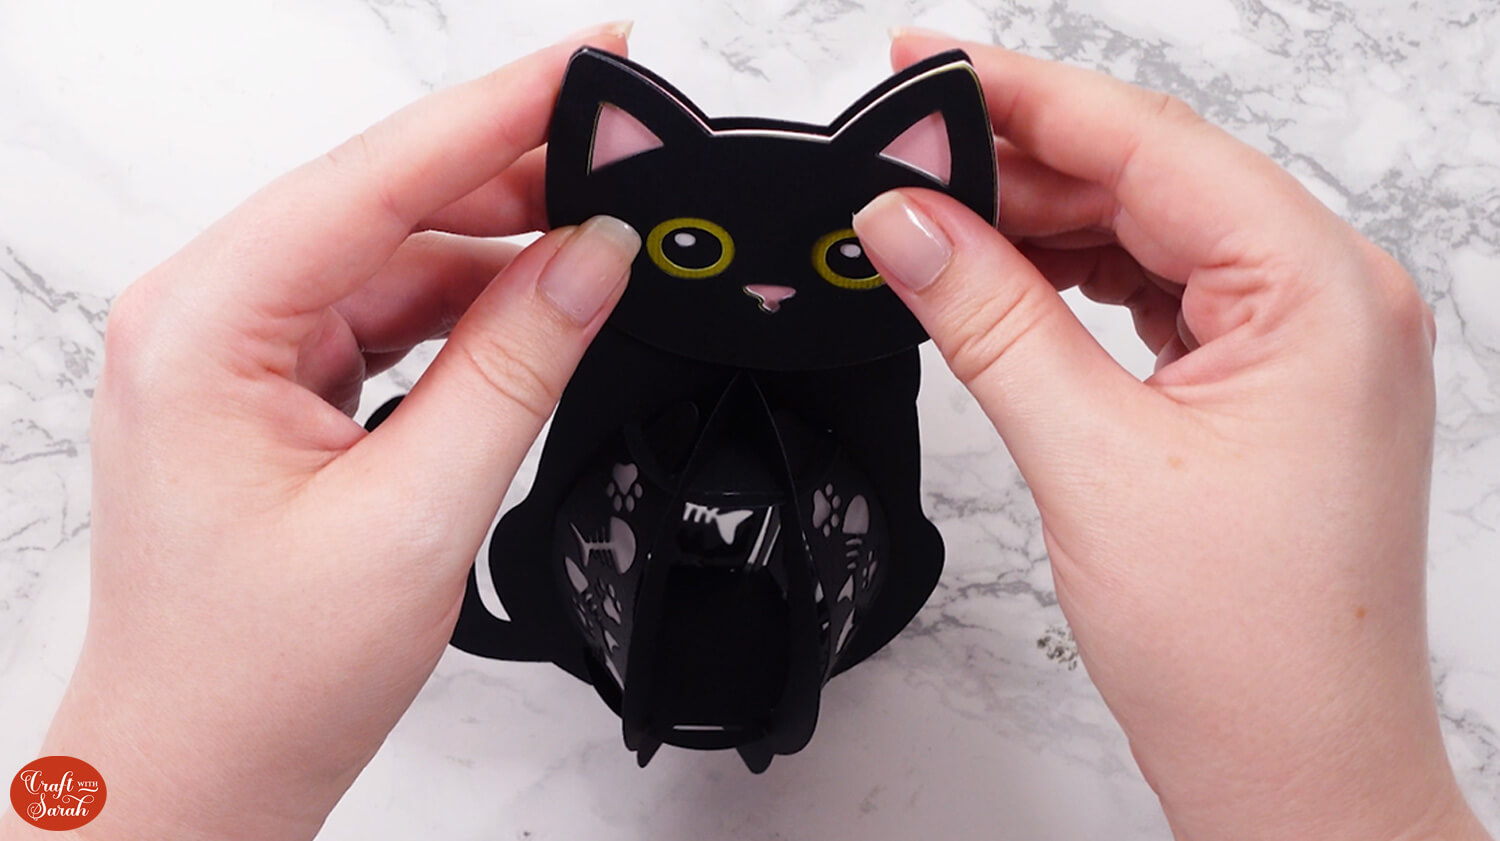
To give the head more stability, use more foam squares to stick the solid black face shape to the BACK of the lantern.
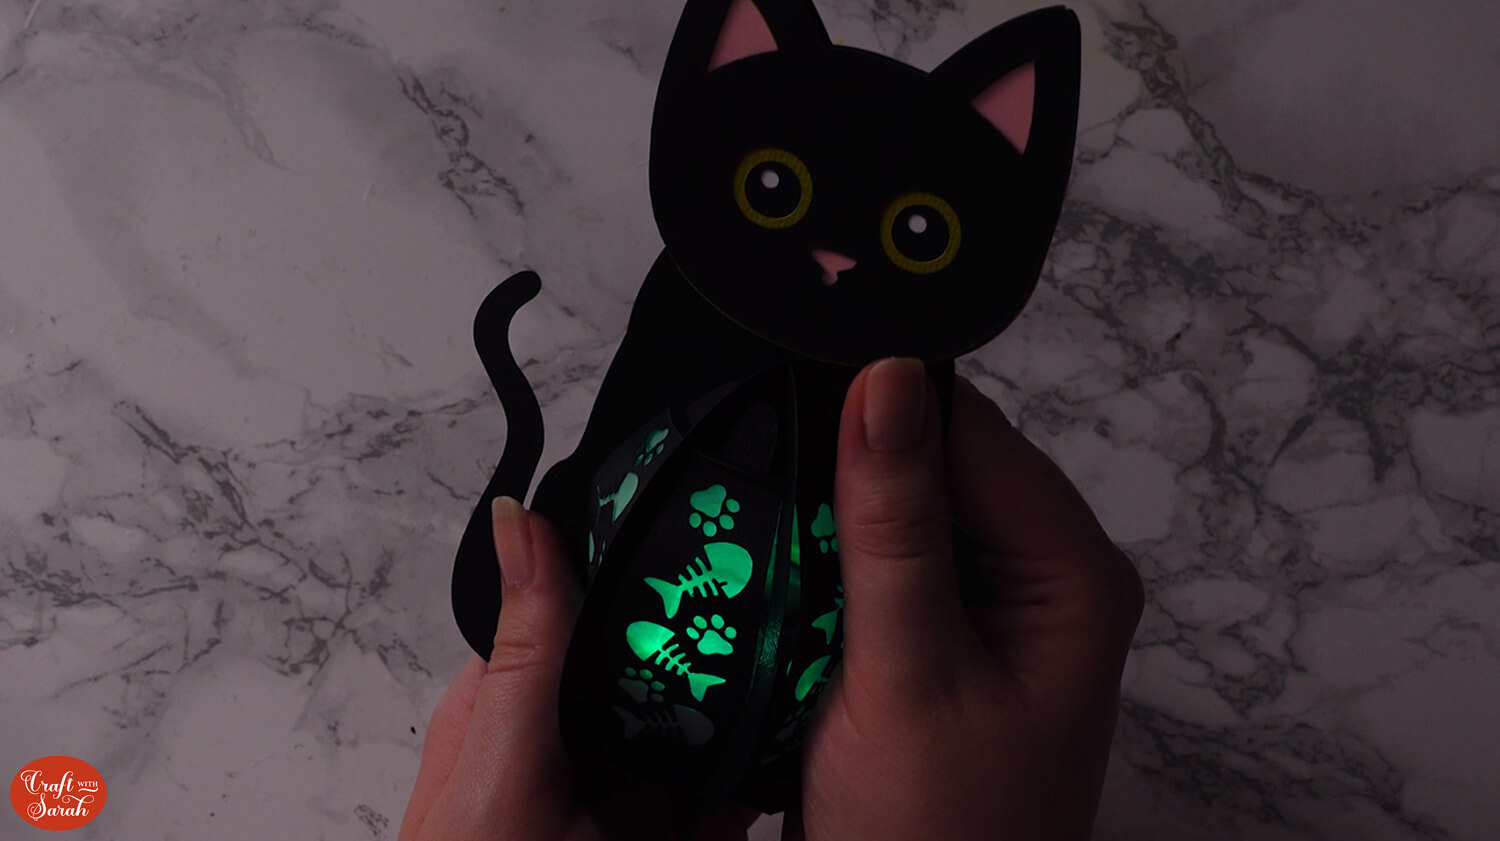
Add your light inside, turn it on, then put in the final side panel.
The side panels can easily be unhooked to turn the light off.
This is how the cat lantern looked with a submersible light inside, switched to the green colour. My camera didn’t pick up how bright it was in real life!
Free 3D slot-together SVGs
If you like these dog and cat Cricut lanterns, you may want to check out these other FREE slot-together designs:
- Christmas ornaments/baubles
- Easter bunny
- Easter chicks
- Easter egg decorations
- Snowman
- Thanksgiving turkey
- Winter village lantern
I’m working on some additional lantern designs at the moment, including this snowy owl. It’s still in “prototype” mode at the moment which is why it’s all cut out from white cardstock. This is how I test my files to make sure they go together correctly before I use my “proper” cardstock to cut them.
What do you think? I love how it’s looking so far! It will be released as a free design in the next few days.
I’m also working on various dog and cat breeds and additional birds too.

Love layered SVGs? Check out my other free layered SVG files
Happy crafting,
Sarah x

