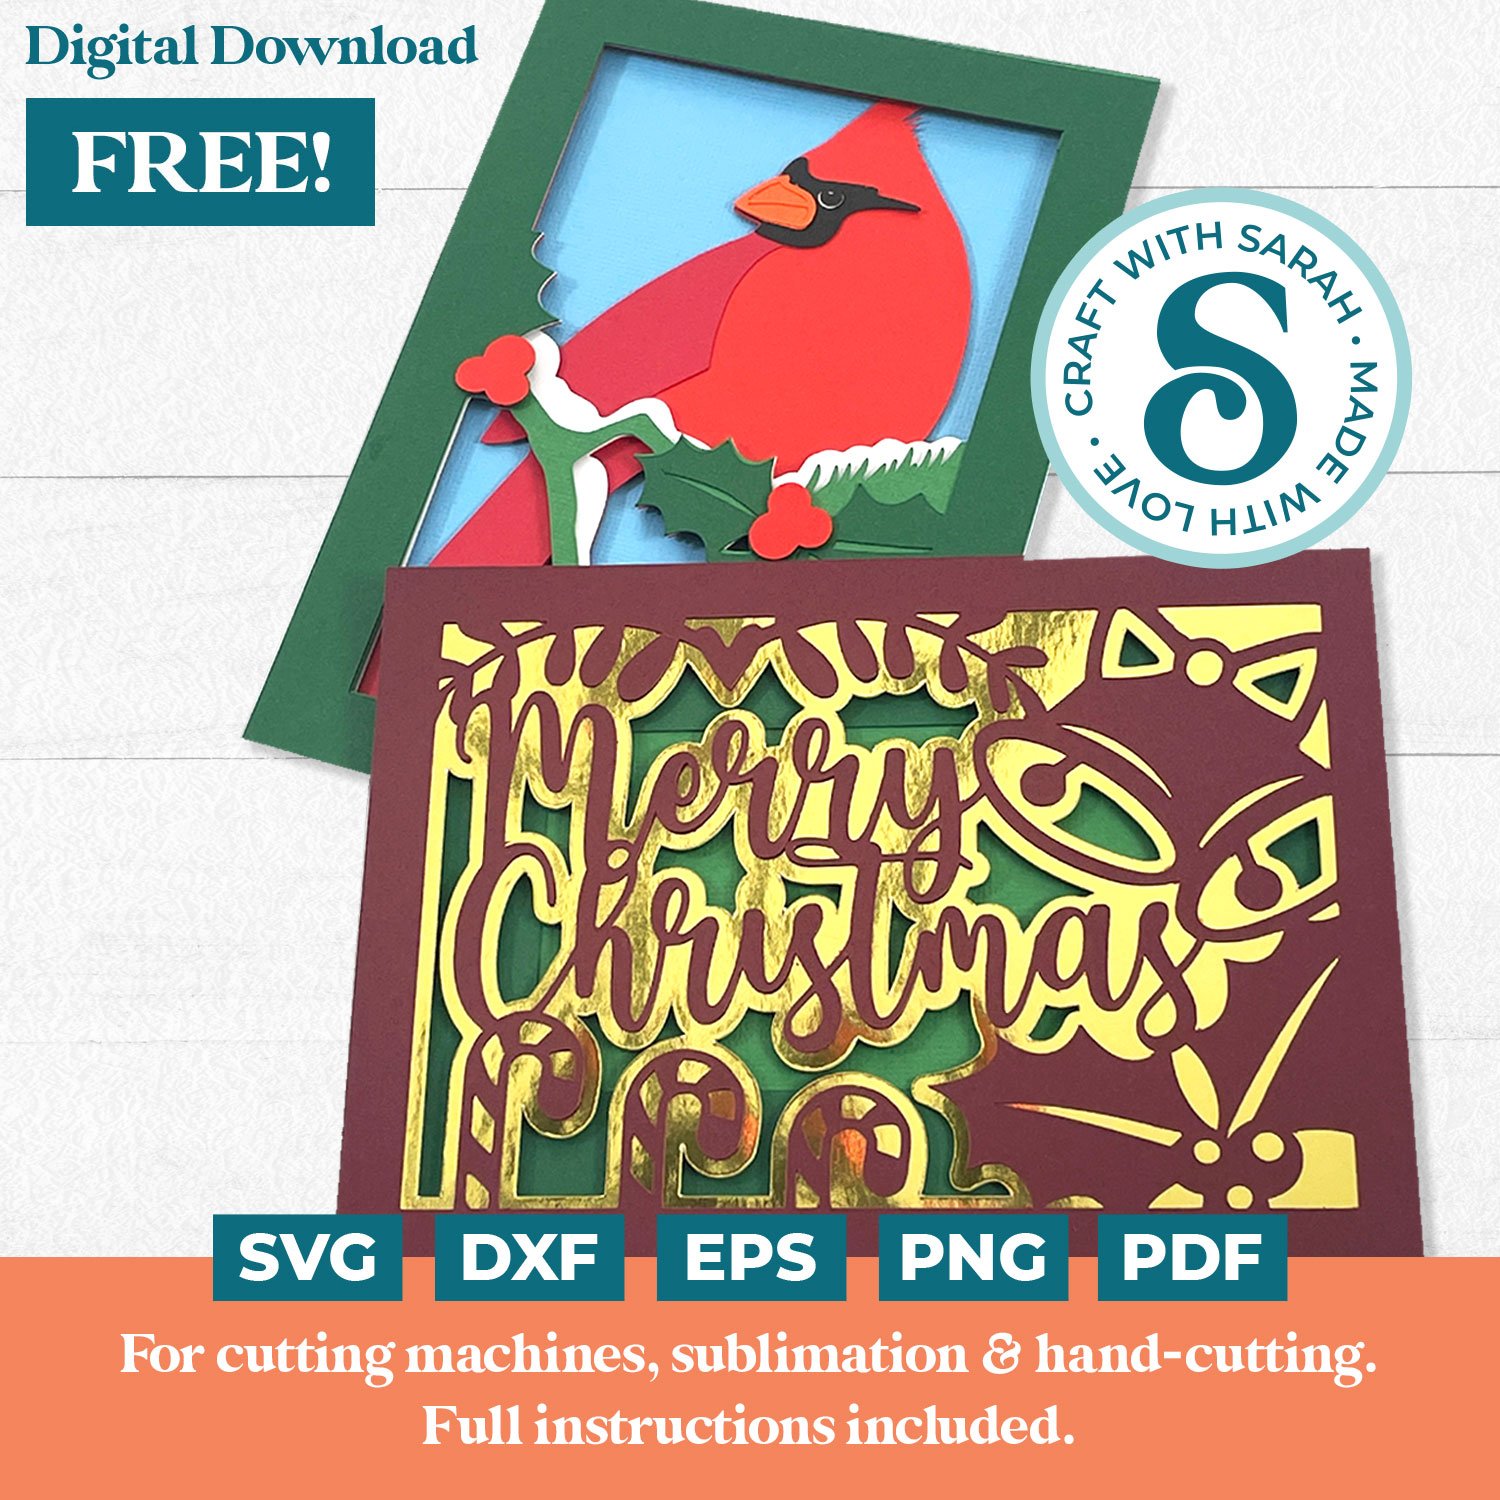
Cricut Christmas Cards with Layers 🎅 2 Free Card Making SVGs!
Get a head-start on your handmade Cricut Christmas cards with these two layered card designs.
Welcome to the second free Christmas craft in my Christmas in July mini series for paper crafters. Throughout July I’m sharing some of my favourite Christmas crafts from previous years on my Facebook page and in my email newsletter, as well as releasing lots of new free Christmas SVGs too!
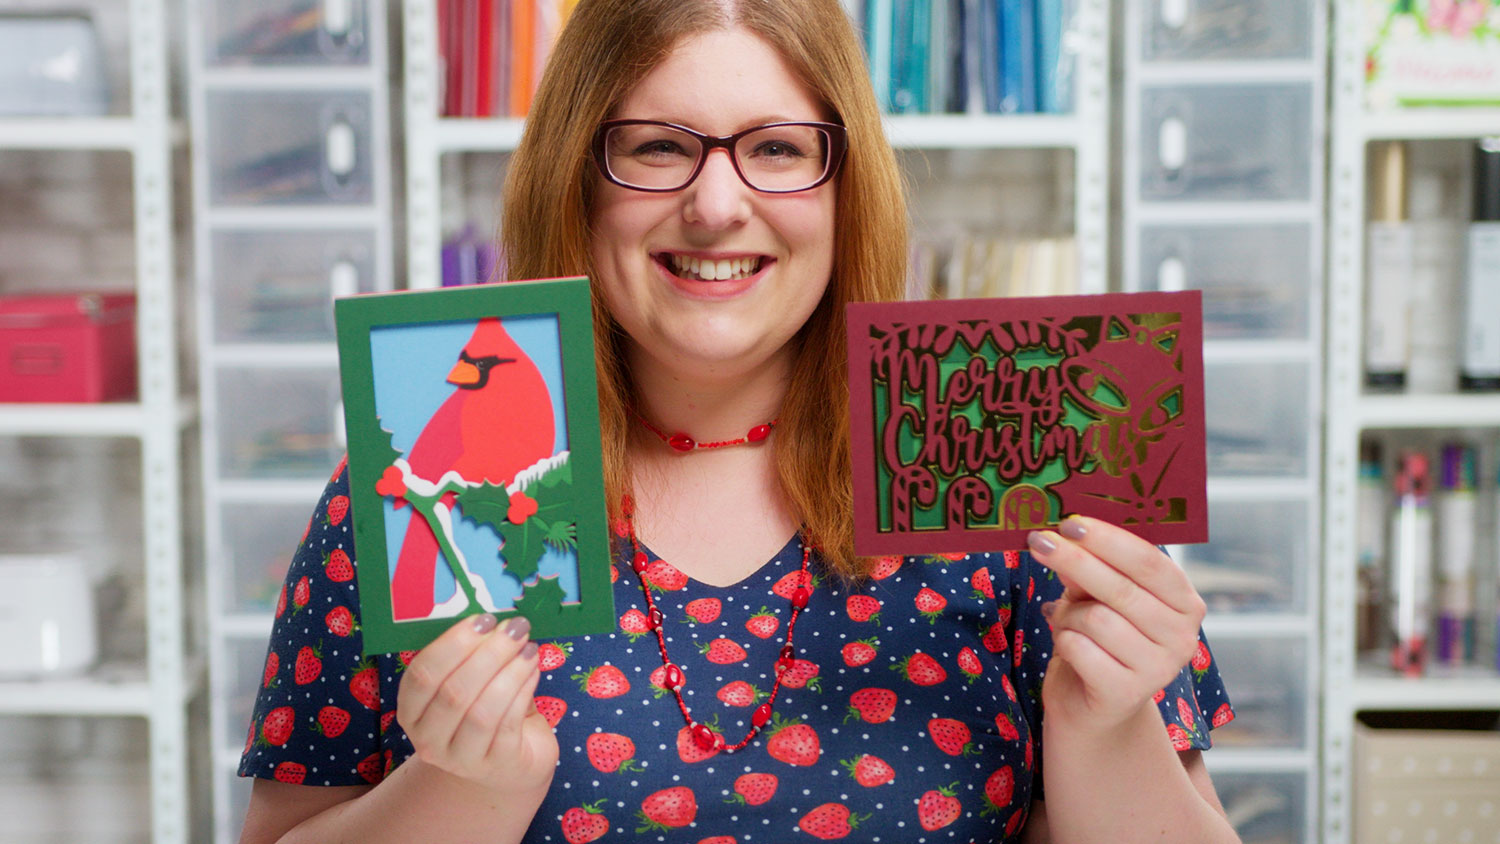
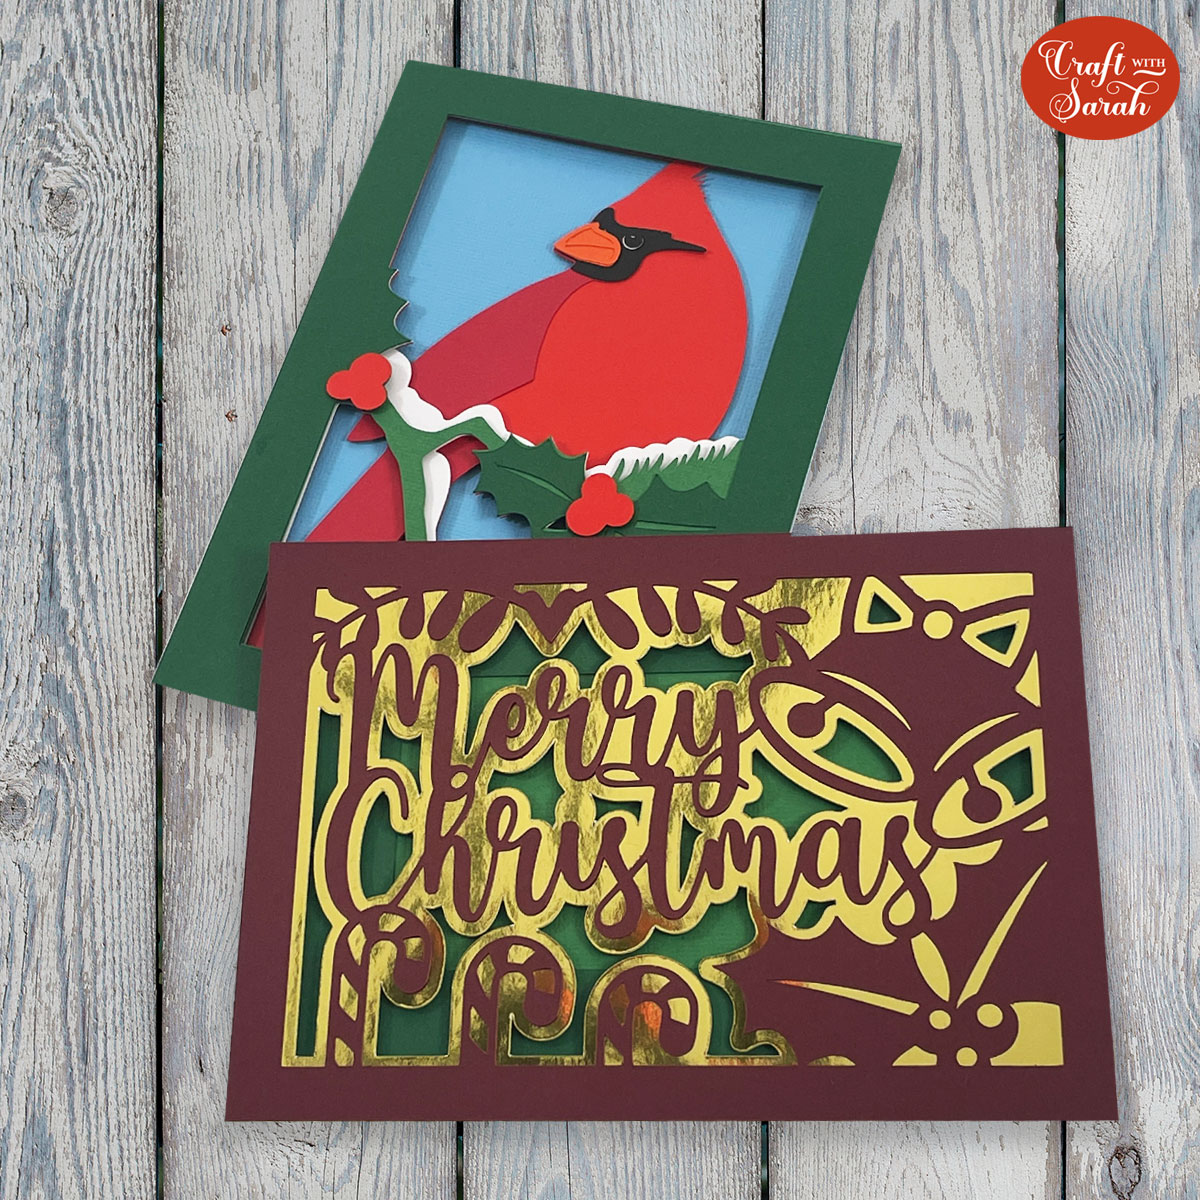
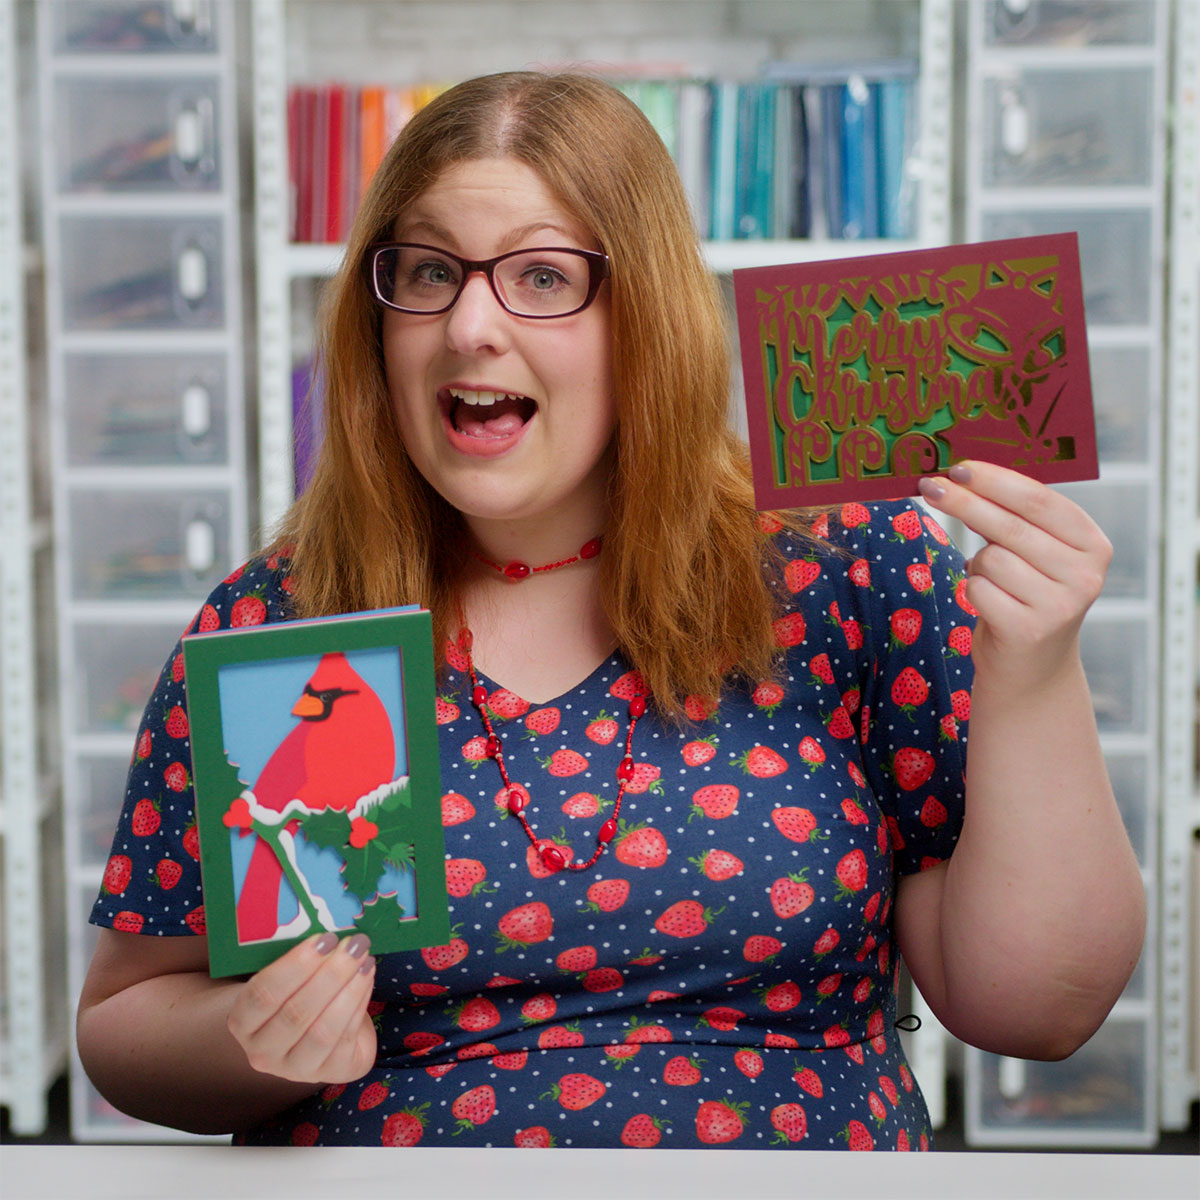
In this tutorial, we’re making two layered Christmas cards.
The first is a beautiful cardinal design. Out of the two cards, this is the one with the most layers so it’s a little bit more complex to make than the other one, but still pretty straightforward even if you’re brand new to Cricut crafting.
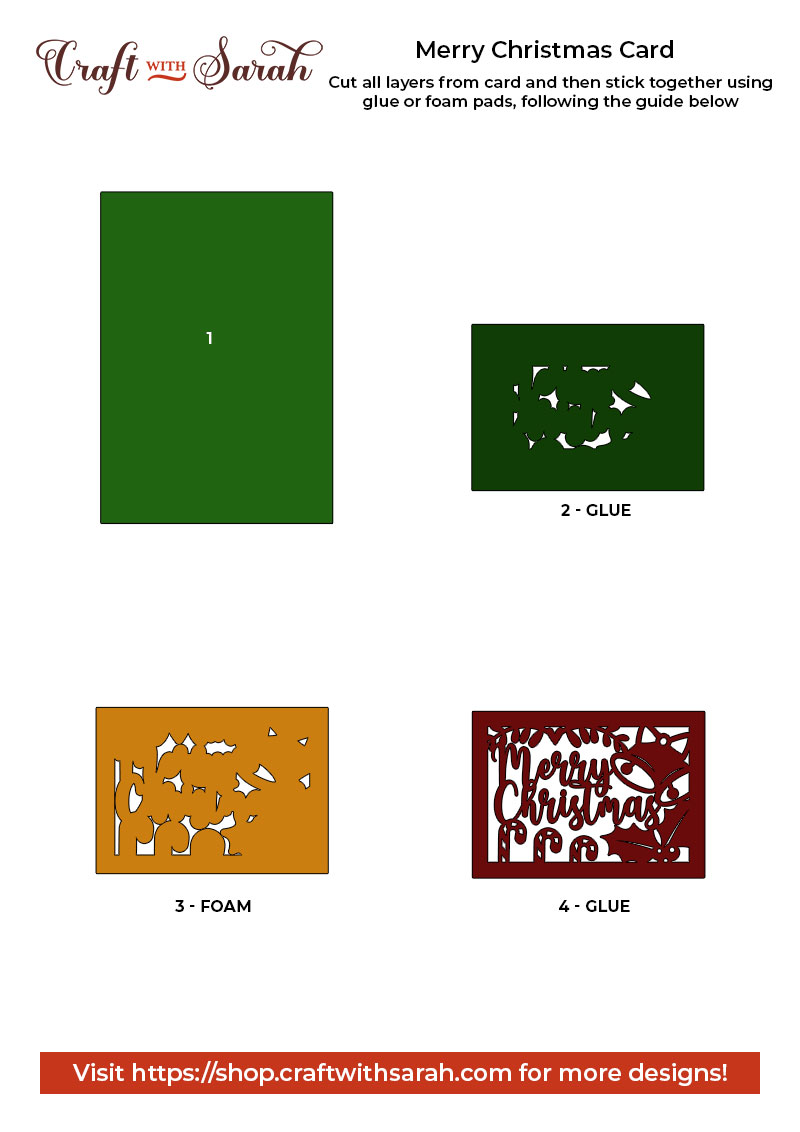
The second design is a Merry Christmas card which has a few less layers but it still looks lovely, especially when made with mirror or glitter cardstock for a little bit of extra festive sparkle!
Layered Christmas cards materials
Here is a list of the materials that I used to make these Christmas cards.
Please note that some of the links included in this article are affiliate links, which means that if you click through and make a purchase I may receive a commission (at no additional cost to you). You can read my full disclosure at the bottom of the page.
- Cricut machine
- Light blue Cricut cutting mat
- Coloured Card (I use 160-240gsm weight of card)
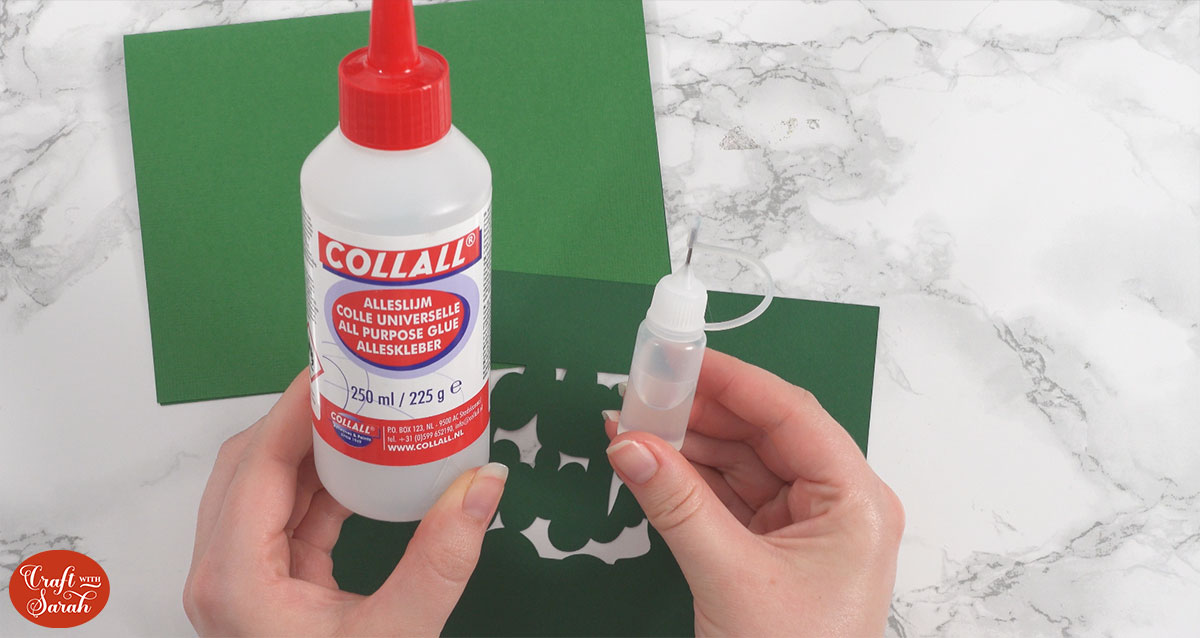
- Collall All Purpose Glue
- Needle Tip Applicator Bottle
- 3D foam pads
Video tutorial for layered Christmas cards
Watch the video below to see how to make both of the Christmas card SVGs provided a little bit further down on the page. Keep scrolling for a written tutorial.
Layered Cricut Christmas cards assembly instructions
Here’s how to make your very own DIY Christmas cards using a Cricut machine!
Step 1) Download the free file & unzip the downloaded folder
Download the Free Cutting File
Please login to your account to download this file.
TERMS OF USE:
You may sell finished, handmade physical craft items that you have made using this product but must not sell or share the digital files. Read full terms of use
Before you upload the SVGs to Design Space, you need to unzip the download folder that they come in.
- How to unzip a folder on Windows computer
- How to unzip a folder on a Mac
- How to unzip a folder on an iPad/iPhone
- How to unzip a folder on an Android device
Step 2) Upload the SVG files into Design Space
Open up Cricut Design Space and upload the file called SVG_Cardinal_Card_CraftWithSarah.svg and SVG_Merry_Christmas_Card_CraftWithSarah.svg
Make sure you upload the files which start SVG_ in the filename!!
I’m going to use the cardinal card for the next part of this tutorial, but the steps work exactly the same if you are making the “Merry Christmas” card.
This is how it should look after you have uploaded one of the files:

After uploading, the design will show in your “Recently Uploaded Images”. Click on it and then press “Add to Canvas” to put it onto your Project.

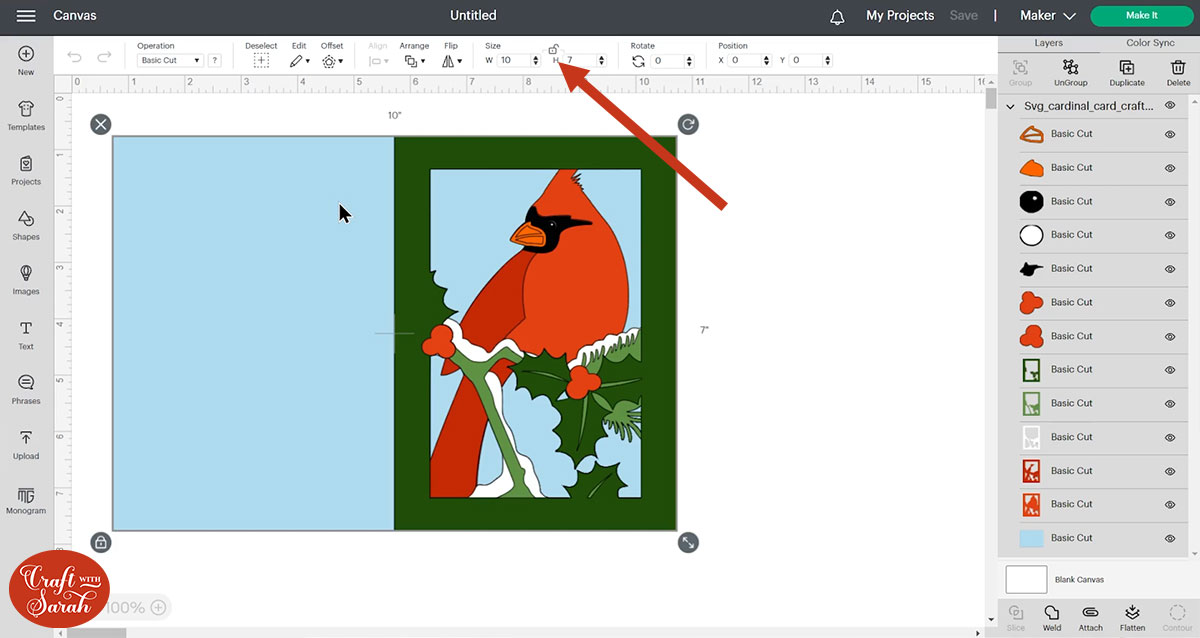
It should load in perfectly sized to make a 5×7 inch card but you can resize it if you want to.
To do this, click the design on your canvas and use the width/height boxes near the top of the screen to make it the size that you want to cut it.
Step 3) Add a score line (optional)
By default my SVG files do not come with score lines on the card as Design Space doesn’t automatically convert lines to score lines when you upload a SVG.
If you do want to add a score line to make the base card easier to fold, here’s how to do it.
First, click on the card design and then press ‘Ungroup’ at the top of the layers panel.

Scroll down to the bottom and then hide the base card by clicking the eye icon next to it.
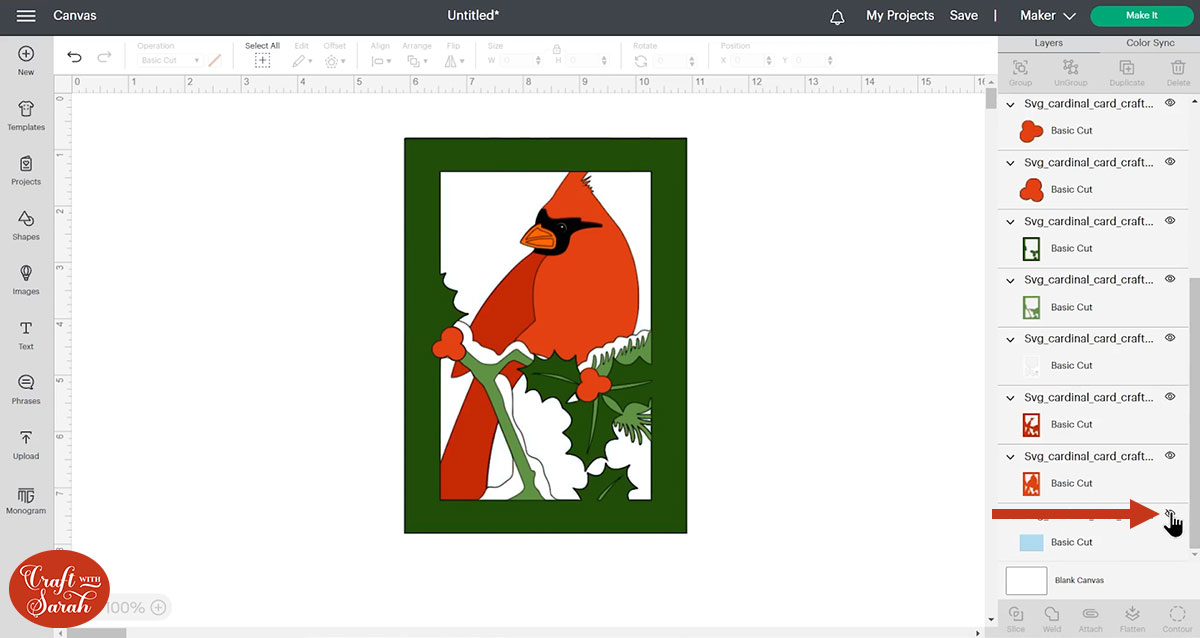
Press “Select All” to select all of the other layers and then Group them again.

We’re doing that so that we can just hide them in one click. After Grouping, click the eye icon next to the Group heading to hide all the layers.
Turn the base card layer back on by clicking the eye icon next to that one in the layers panel.
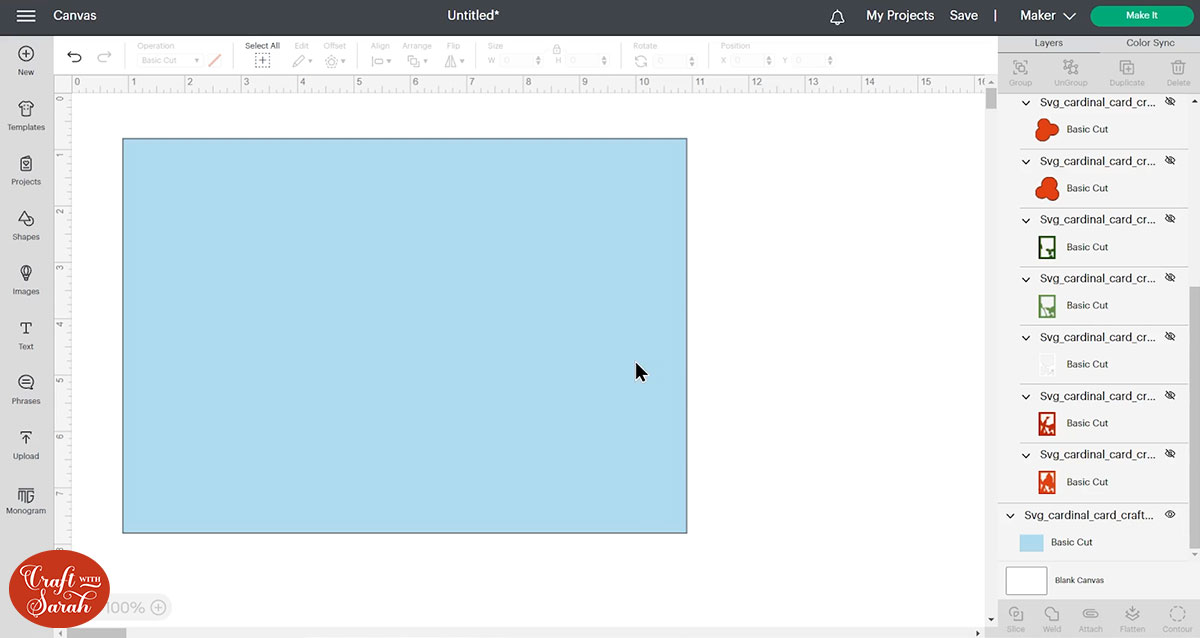
Go into “Shapes” and choose a score line. Make it the same height as the card so mine will be 7 inches.

If you’re doing the Merry Christmas card which is a landscape card, then you’ll need to rotate the score line and to do that, simply type 90 into that rotate box at the top and then press enter and it will rotate it to a horizontal line.
We need to move this score line so that it’s exactly down the middle of the base card.
Press “Select All” and then click “Align” and “Center”.
That score line is now correctly in the middle of the base card, however, we’re not quite finished yet because if we were to click “Make it” now, the Cricut would do that score line on a completely different piece of card than the one we actually want to do it on.
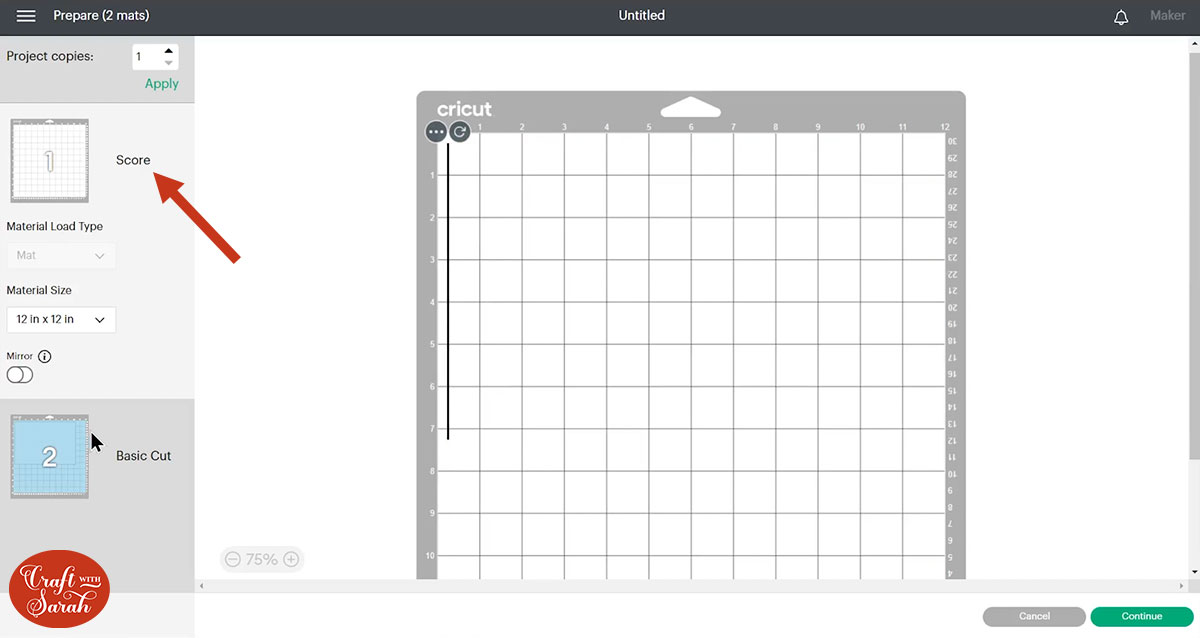
Let’s fix that. Press “Select All” again to get the base card and score line selected and then down the bottom of the layers panel, press “Attach”.

Attach is what tells the Cricut where we want it to do that score line, so now when you click “Make it”, the Cricut knows where to do the score line.
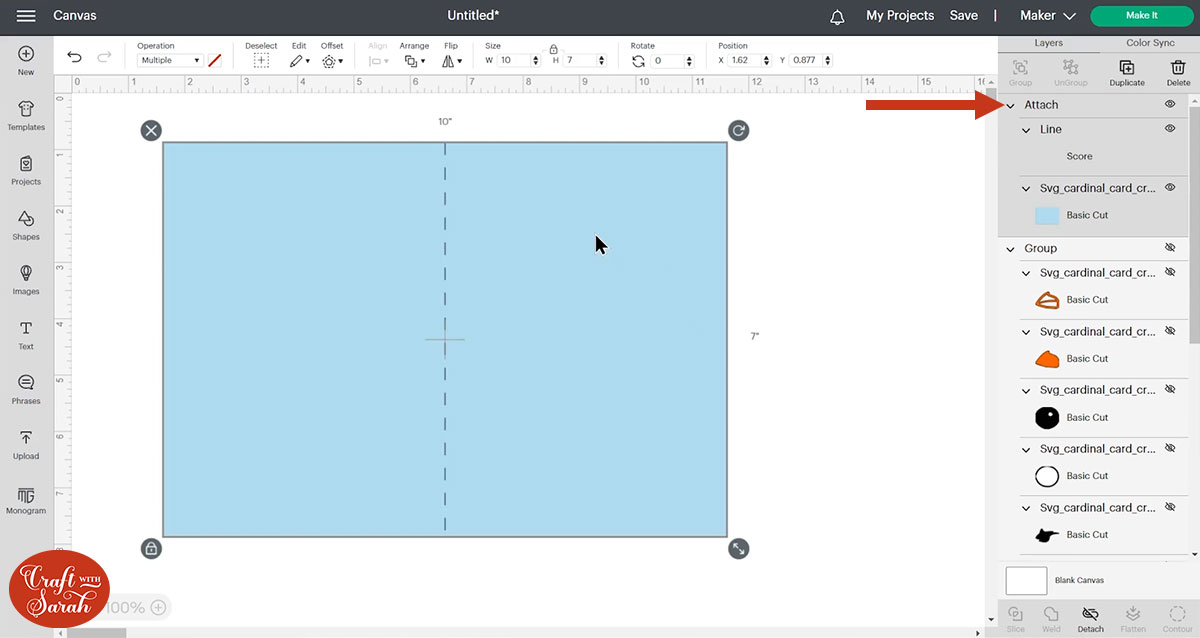
Turn the rest of the layers on again by clicking the eye next to the Group heading.
They might not be lined up on top of the base card any more. This doesn’t actually matter, but I like to move them back into position before cutting everything out, just to check I’m happy with the design and the colours.
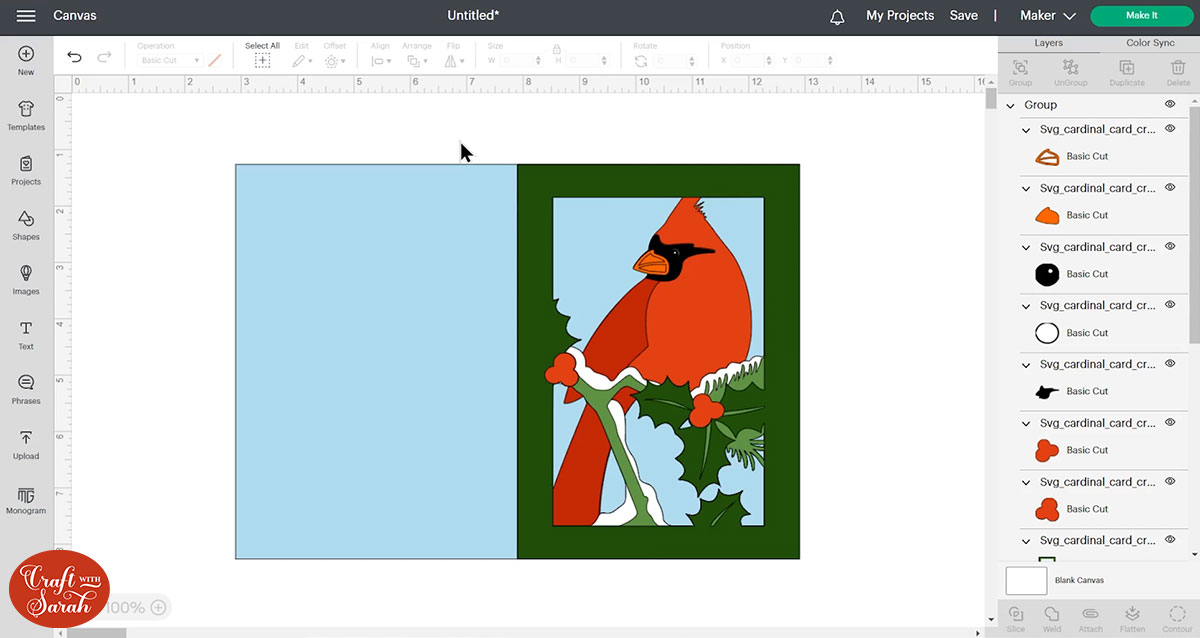
When you’re happy with how the card is looking in Design Space, click “Make It” and follow the instructions on-screen to cut out all the layers.
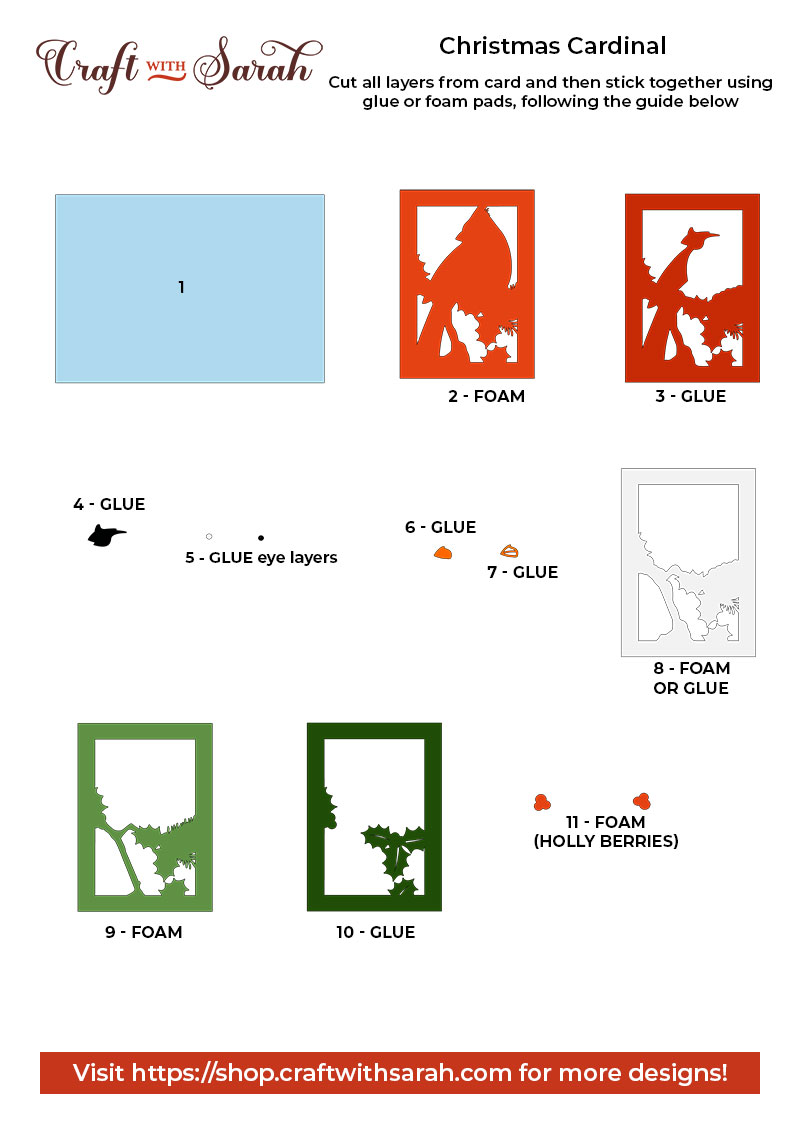
Step 4) Stick the layered Christmas cards together
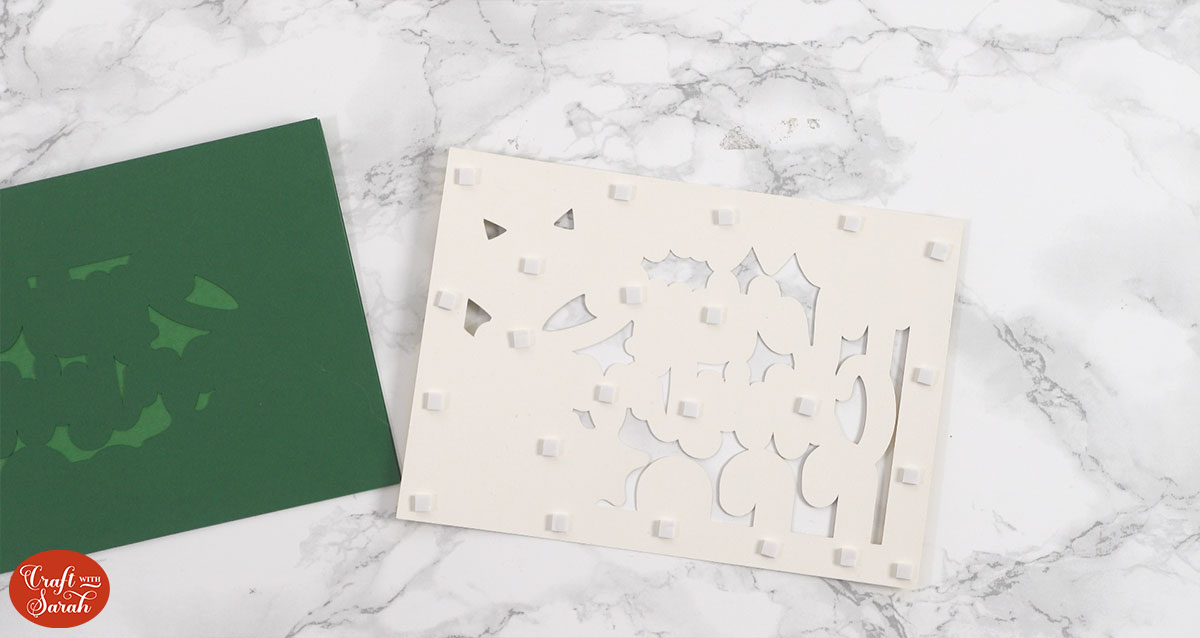
Use 3D foam pads and glue to stick the layers together.
Use this guides to see the order to stick the layers together in. High quality printable versions of the assembly guides are included in the folder when you download the cut files.
My favourite glue to use on papercraft projects is Collall All Purpose Glue.
It’s SO good because it doesn’t “warp” or bend the cardstock like some glues do. You can use as much of it as you want and the card stays perfect – and it dries perfectly clear too!
To make it even easier to apply glue to layered card projects, I highly recommend getting some of these needle tip applicator bottles to put the glue into.
The nozzles are REALLY tiny which makes them perfect for putting glue in the pieces of cardstock that make up this design.
The foam pads that I use are from “Dot & Dab”, but any foam squares will work. If yours are big then you may need to cut them smaller with scissors to fit inside the edges of the layers.
When adding the foam pads to the relevant layers, make sure you add some in the middle of the pieces of card so it give stability to the middles. If you don’t add any foam pads in the middles then it can “sag” under the weight of the other layers which doesn’t look as good.
Free Christmas card SVGs for Cricut cutting machines
After sticking all the pieces of card together, you’ll have a two wonderful layered Christmas cards all ready to be written inside and sent to your family or friends when it gets a little bit closer to Christmas time!
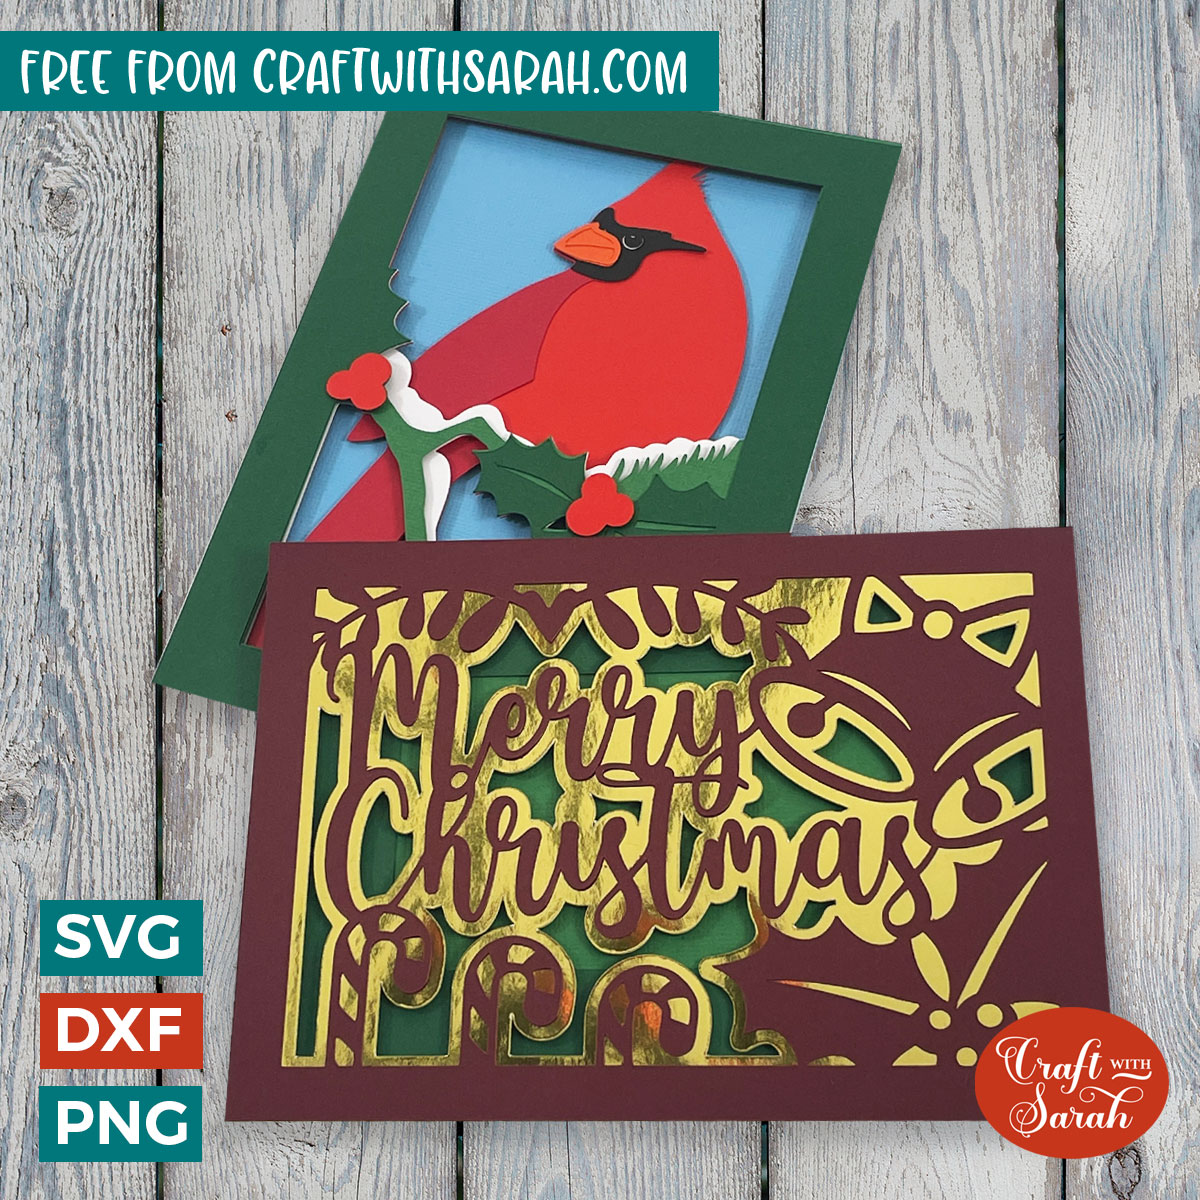
I hope that you enjoy these free Christmas card SVGs!
Happy crafting,
Sarah x

