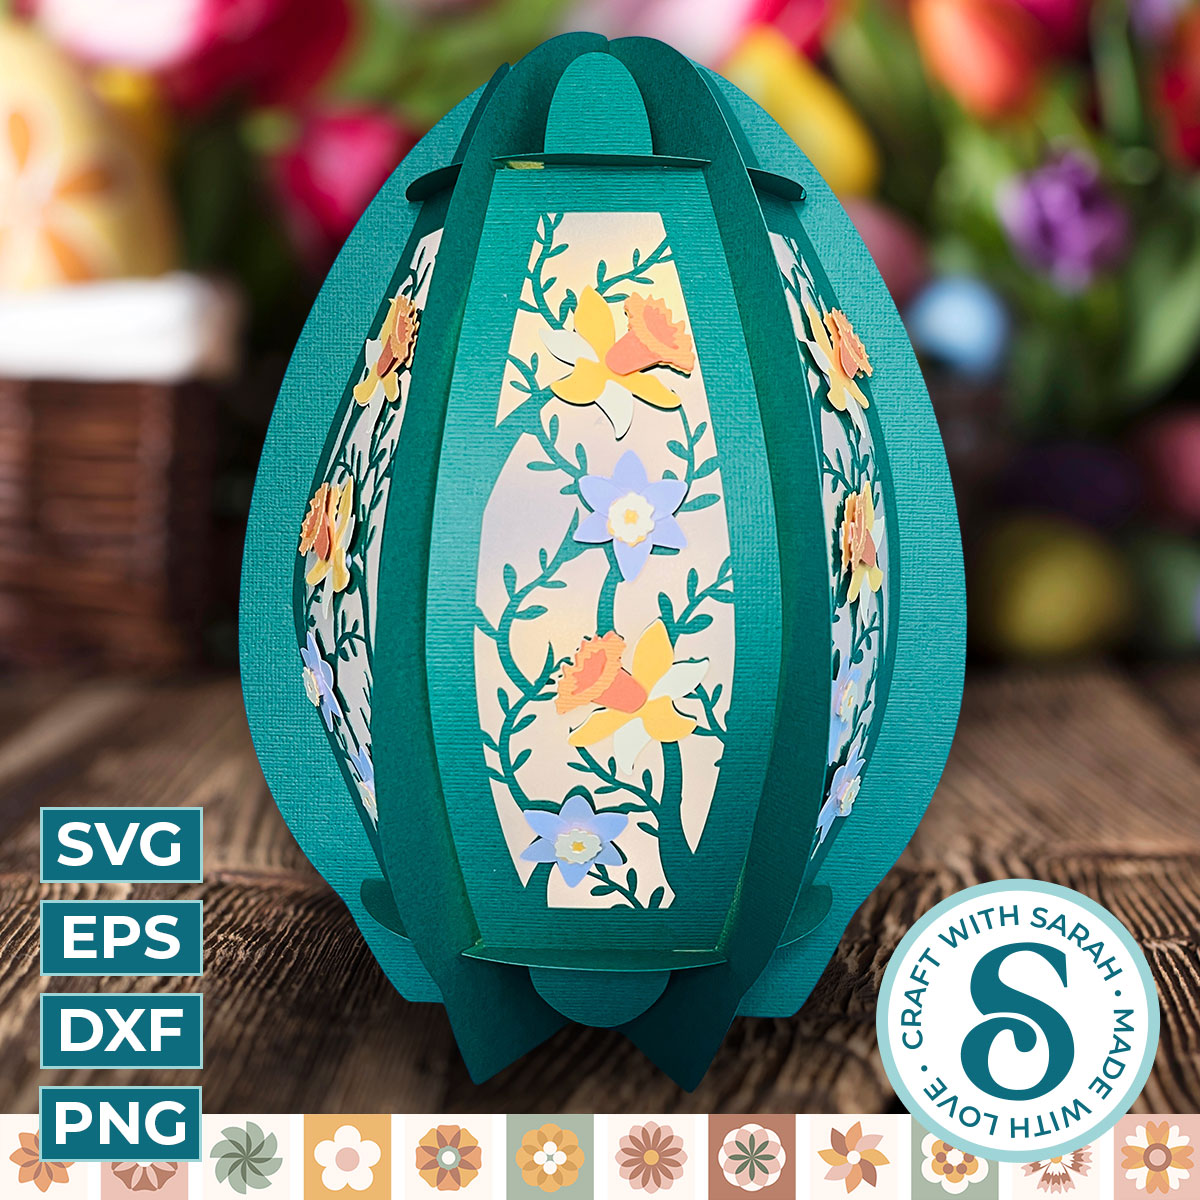
Easter Story 3D Egg Lantern (+ more designs)
Make a Easter centrepiece that stands out with this 3D egg lantern.
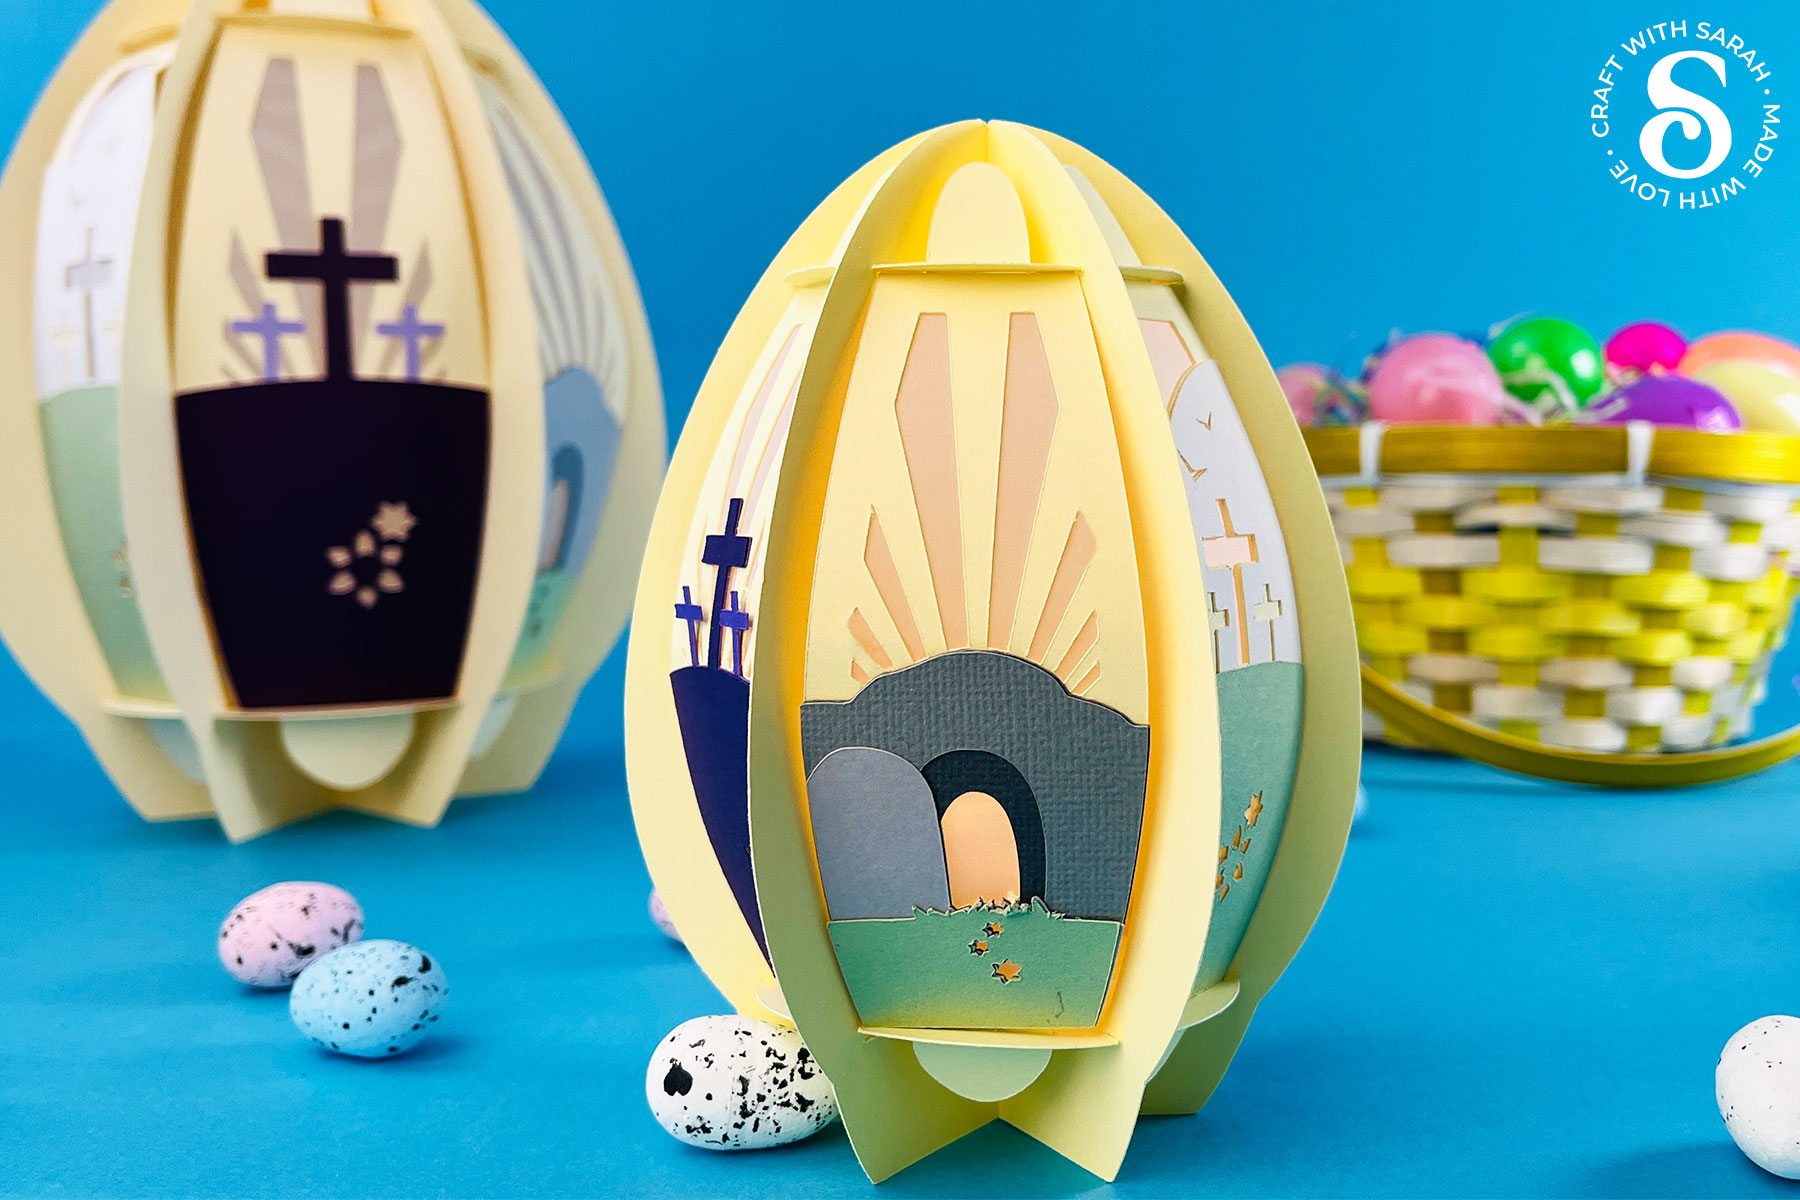
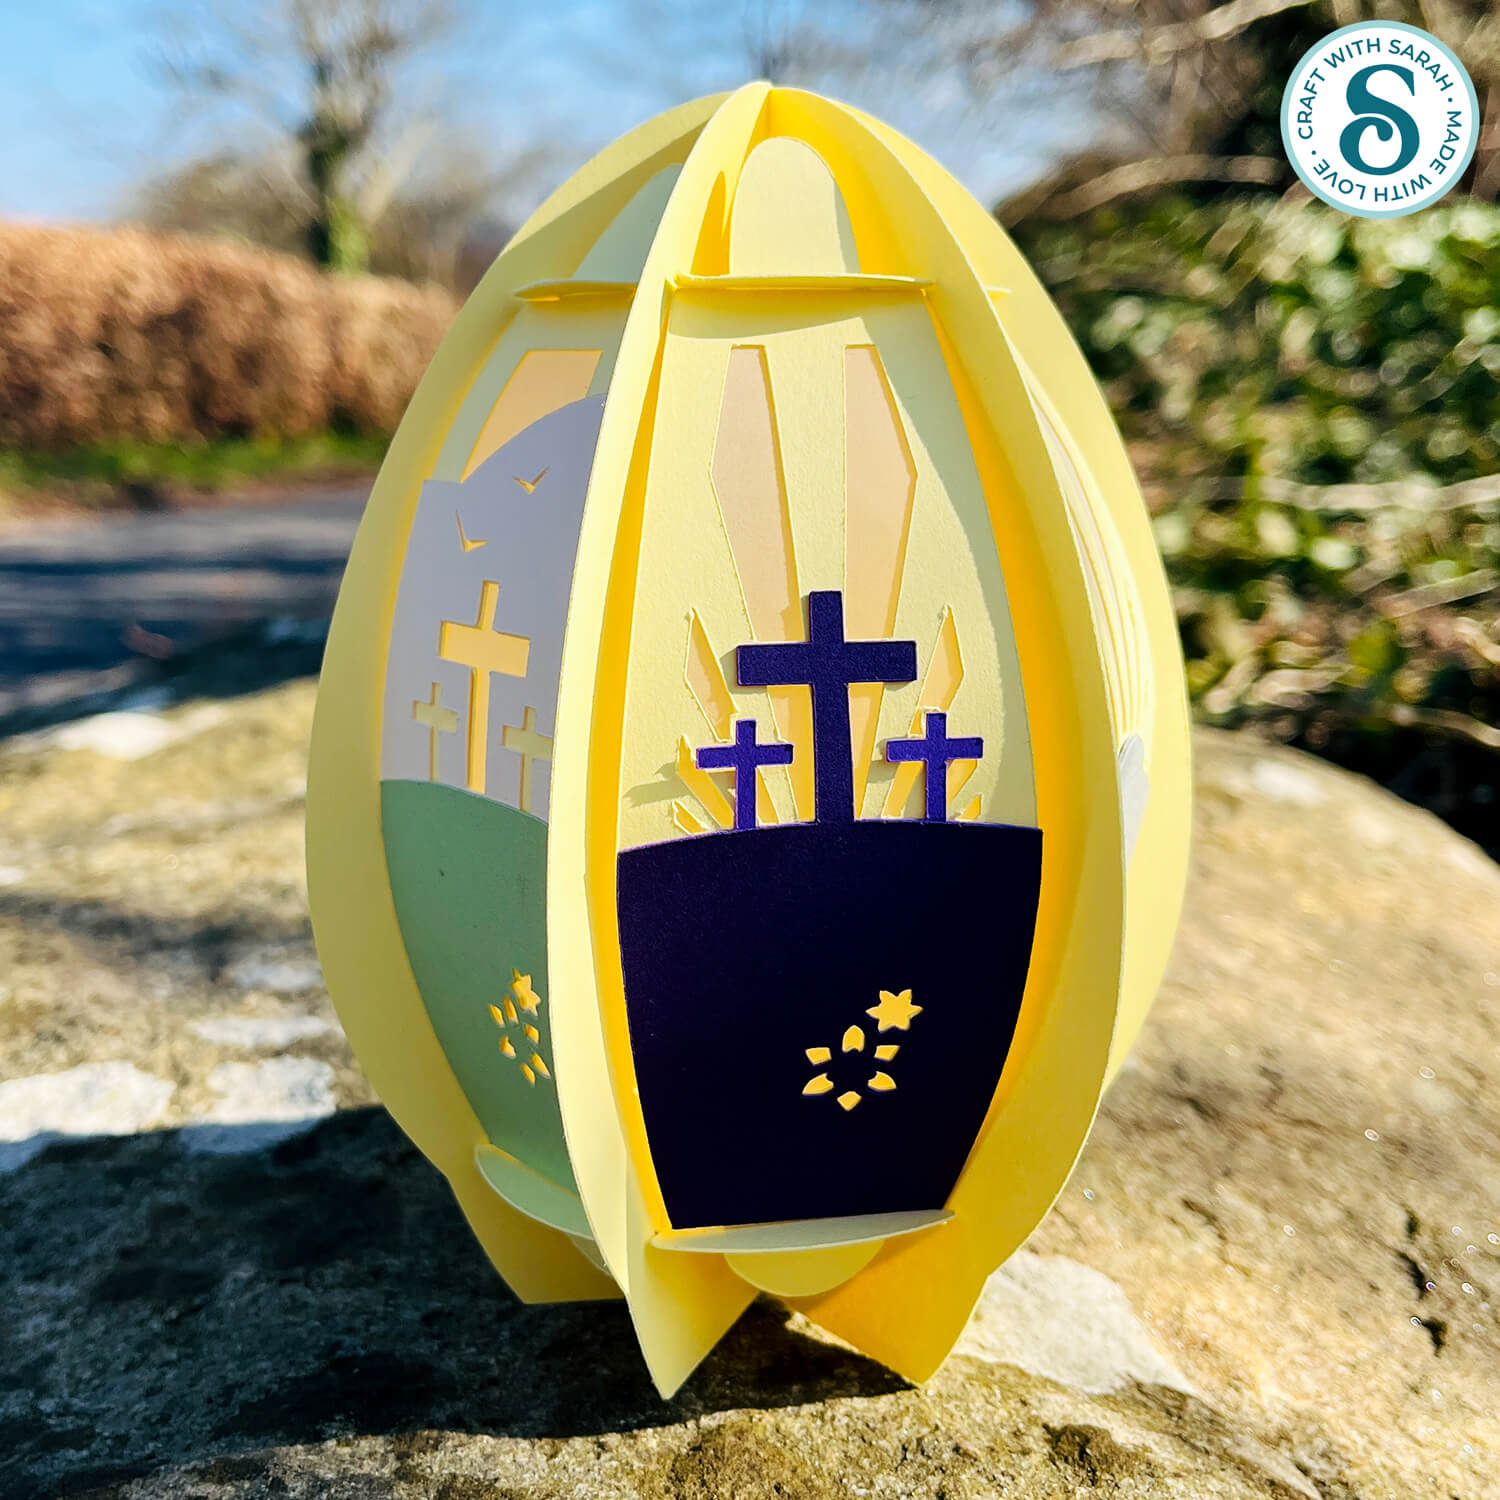
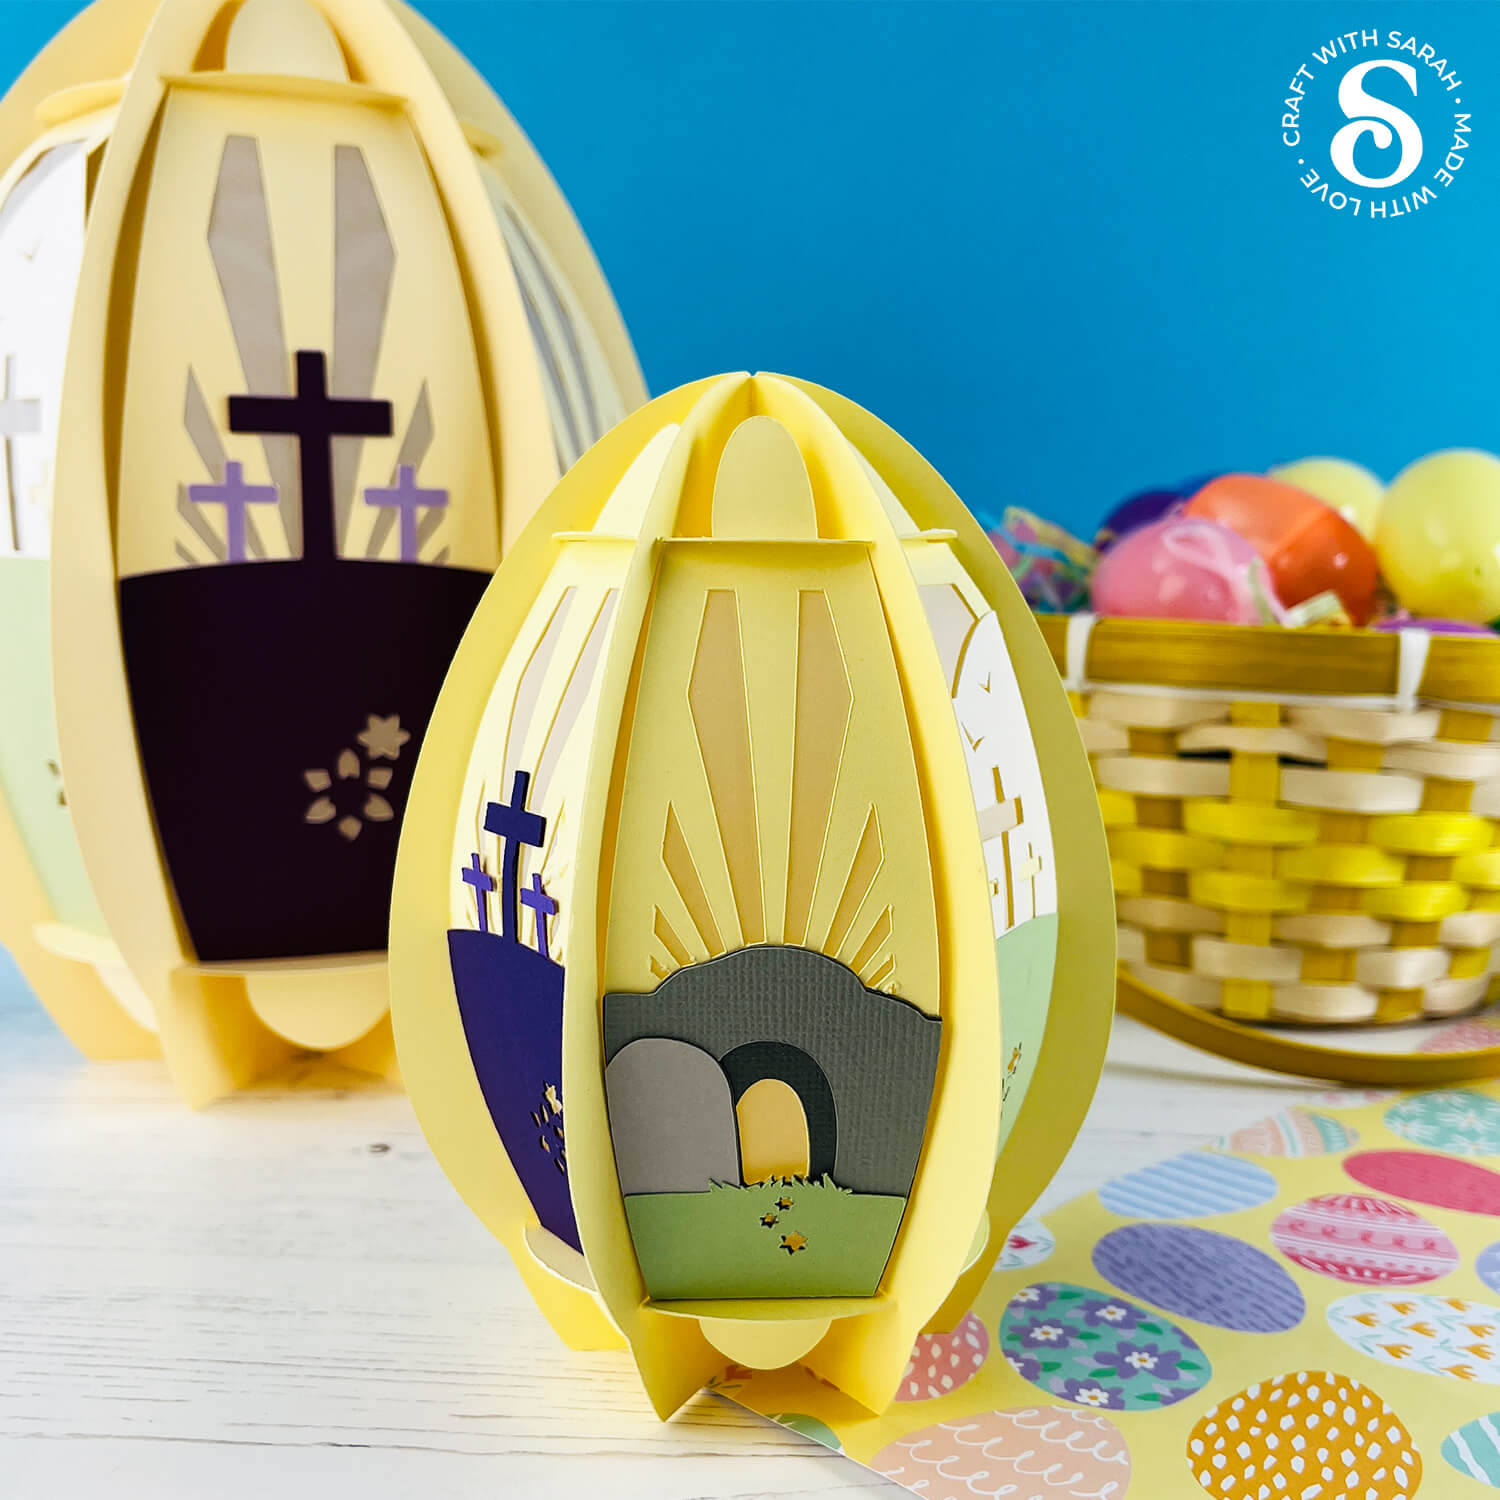
Are you looking for an impressive craft project to display in your home this Easter? Well, this giant light-up egg with the Easter story around the sides might be just what you need.
This 10-inch Easter egg lantern glows beautifully from the inside when diffused with vellum or tracing paper.
I’ll walk you through the steps to make make your own Easter egg lantern to display this spring.
NOTE: This tutorial shows how to make the free Easter story lantern but the steps are the same for ALL of my 3D egg lantern designs, so you can follow along no matter which egg you are making.
The egg structure goes together without glue, using a clever slot-together technique. It’s easy to take apart again to store flat for next year.
Whether you’re looking for a traditional egg lantern that tells the Easter story, or one that’s a little bit more contemporary, find lots of different Easter egg designs at the end of this tutorial.
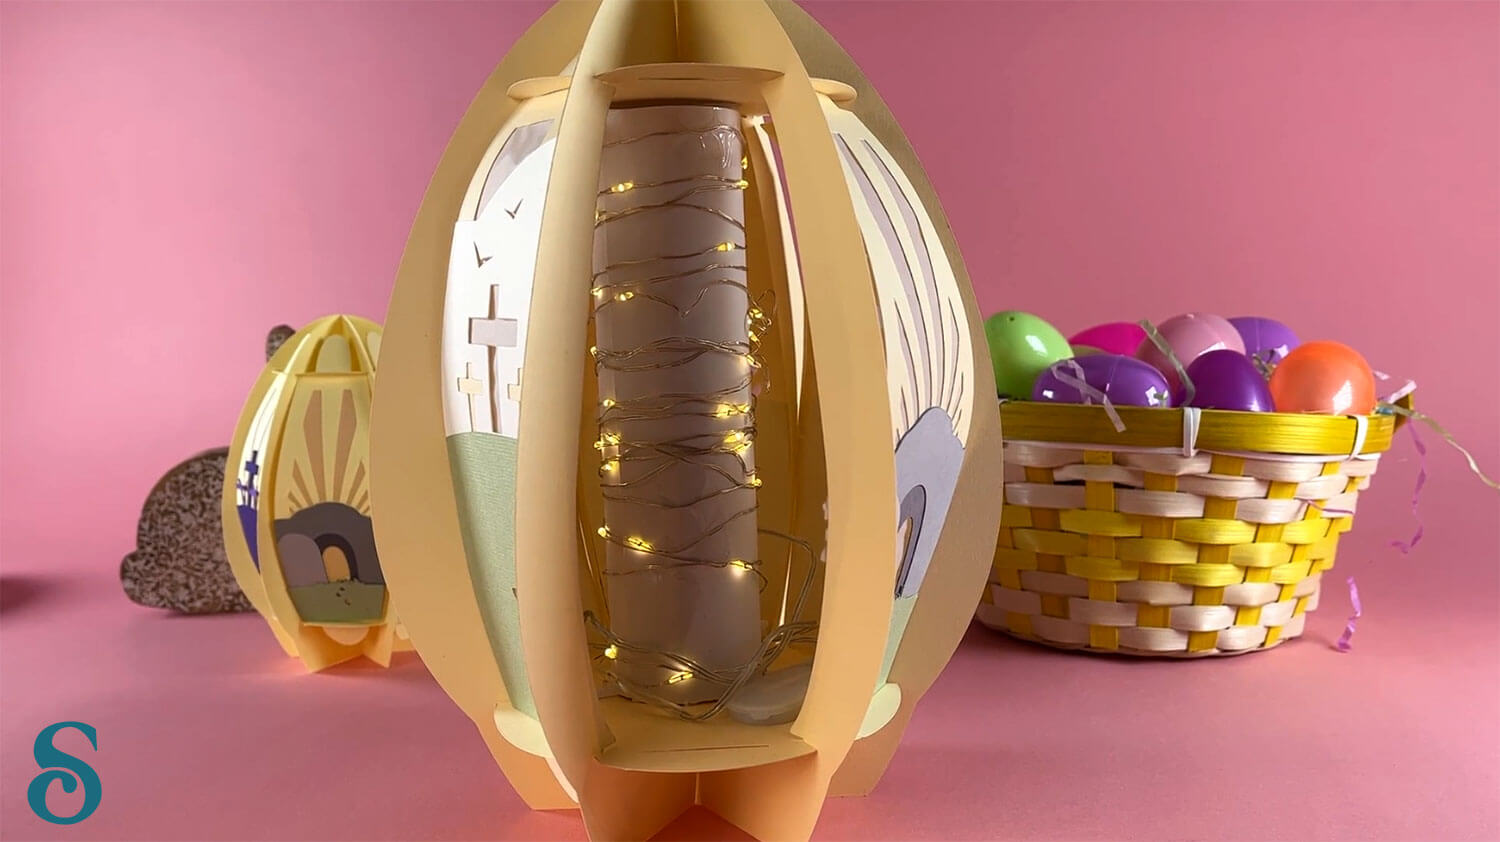
The template comes with an optional light tower stand to add inside the lantern to ensure the fairy lights fill the entire space.
Video tutorial for 3D egg lanterns
Watch the video below to see how to make this craft project. Keep scrolling for a written tutorial.
Materials list for 3D Easter egg lanterns
Here is a list of the materials that I used to make this project.
Please note that some of the links included in this article are affiliate links, which means that if you click through and make a purchase I may receive a commission (at no additional cost to you). You can read my full disclosure at the bottom of the page.
- Cricut Machine
- Light blue Cricut cutting mat
- Coloured Card
- Collall All Purpose Glue, Bearly Art Glue or similar
- Vellum / tracing paper
- Double-sided tape (optional)
- Paperclips/bulldog clips (optional – used to hold parts in place while glue is trying)
- Sticky tape (if making the light tower)
- Battery powered fairy lights (I used two sets)
How to make 3D Easter egg lanterns
Here’s how to make Easter egg craft projects using a Cricut machine.
Step 1) Download the free file & unzip the downloaded folder
Download the Free Cutting File

Please login to your account to download this file.
TERMS OF USE:
You may sell finished, handmade physical craft items that you have made using this product but must not sell or share the digital files. Read full terms of use
Before you upload the SVG to Design Space, you need to unzip the download folder that it comes in.
- How to unzip a folder on Windows computer
- How to unzip a folder on a Mac
- How to unzip a folder on an iPad/iPhone
- How to unzip a folder on an Android device
Step 2) Upload the SVG file into Design Space
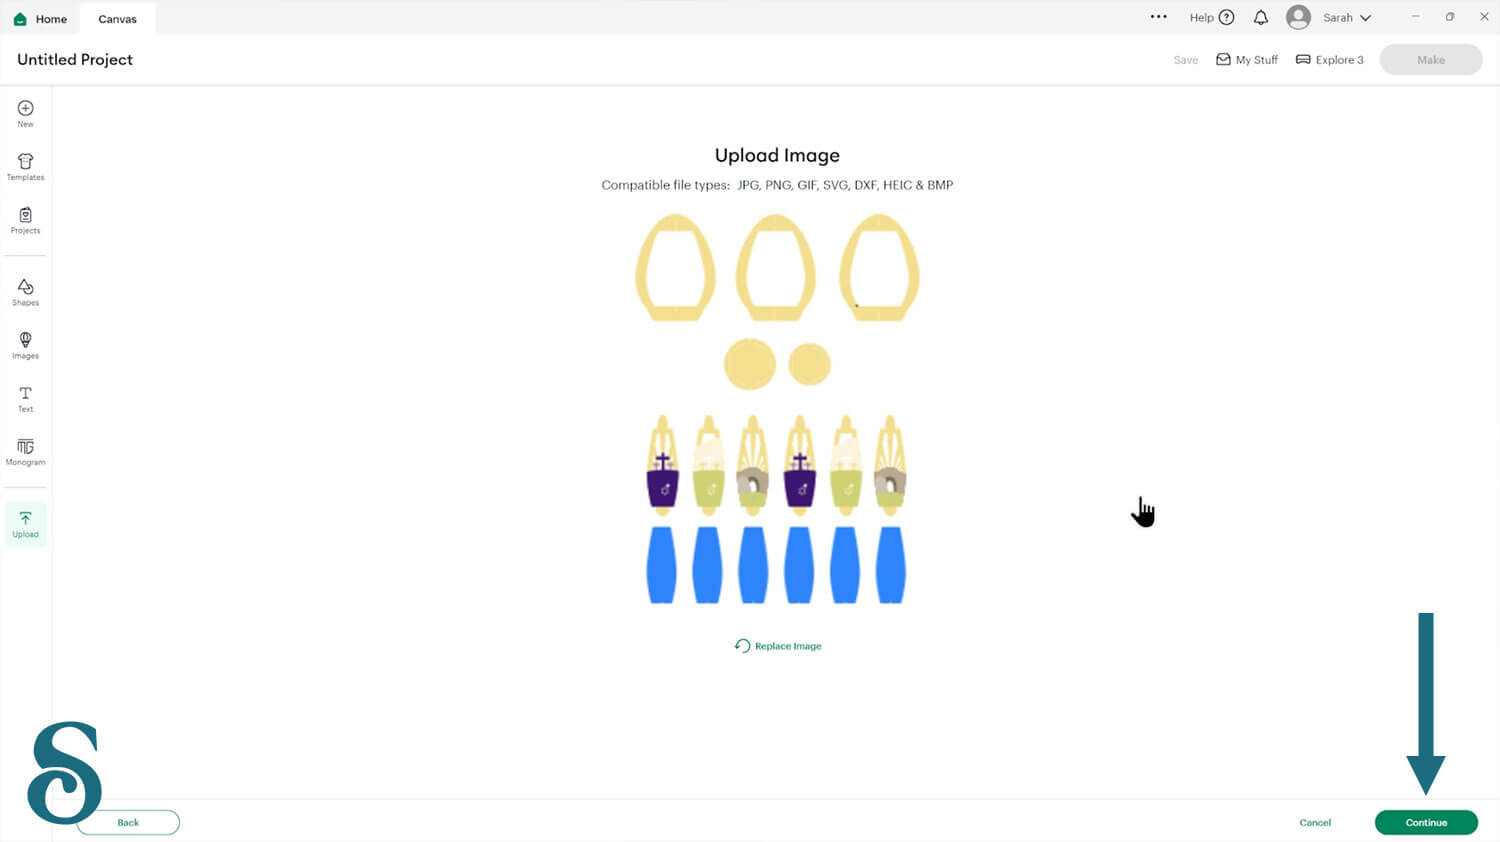
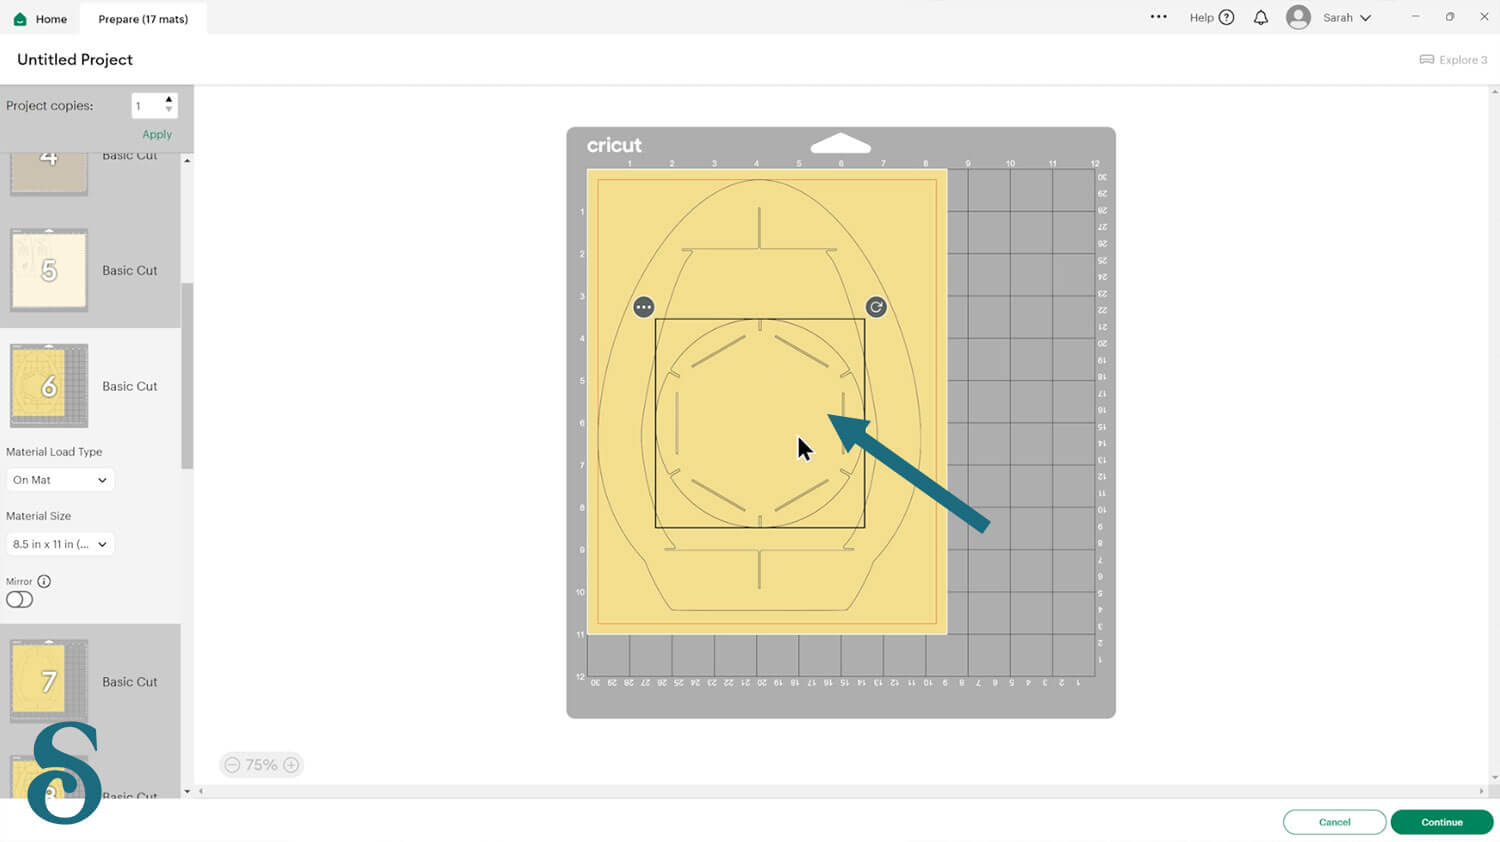
Open up Cricut Design Space and choose the file in the “01 Cricut Version” subfolder called svg-01-lantern-egg-easter-story-craftwithsarah.svg
Make sure you upload the file which starts svg- in the filename!!
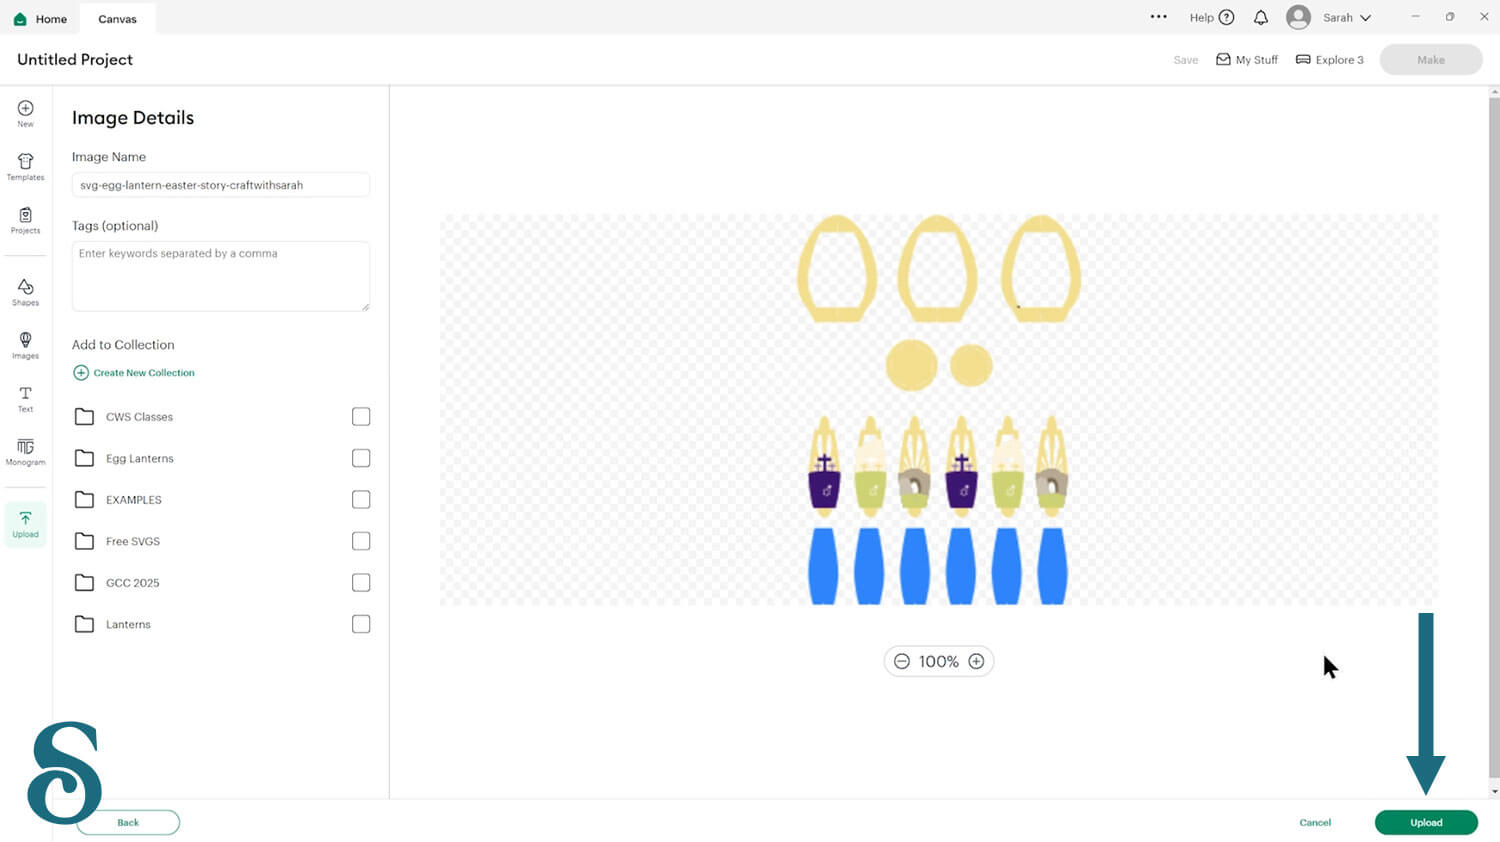
This is how it should look after you have selected the file:
Don’t worry if the image preview appears blurry – it’s a bug/glitch in Design Space at the moment.
Press “Upload” on the next screen.
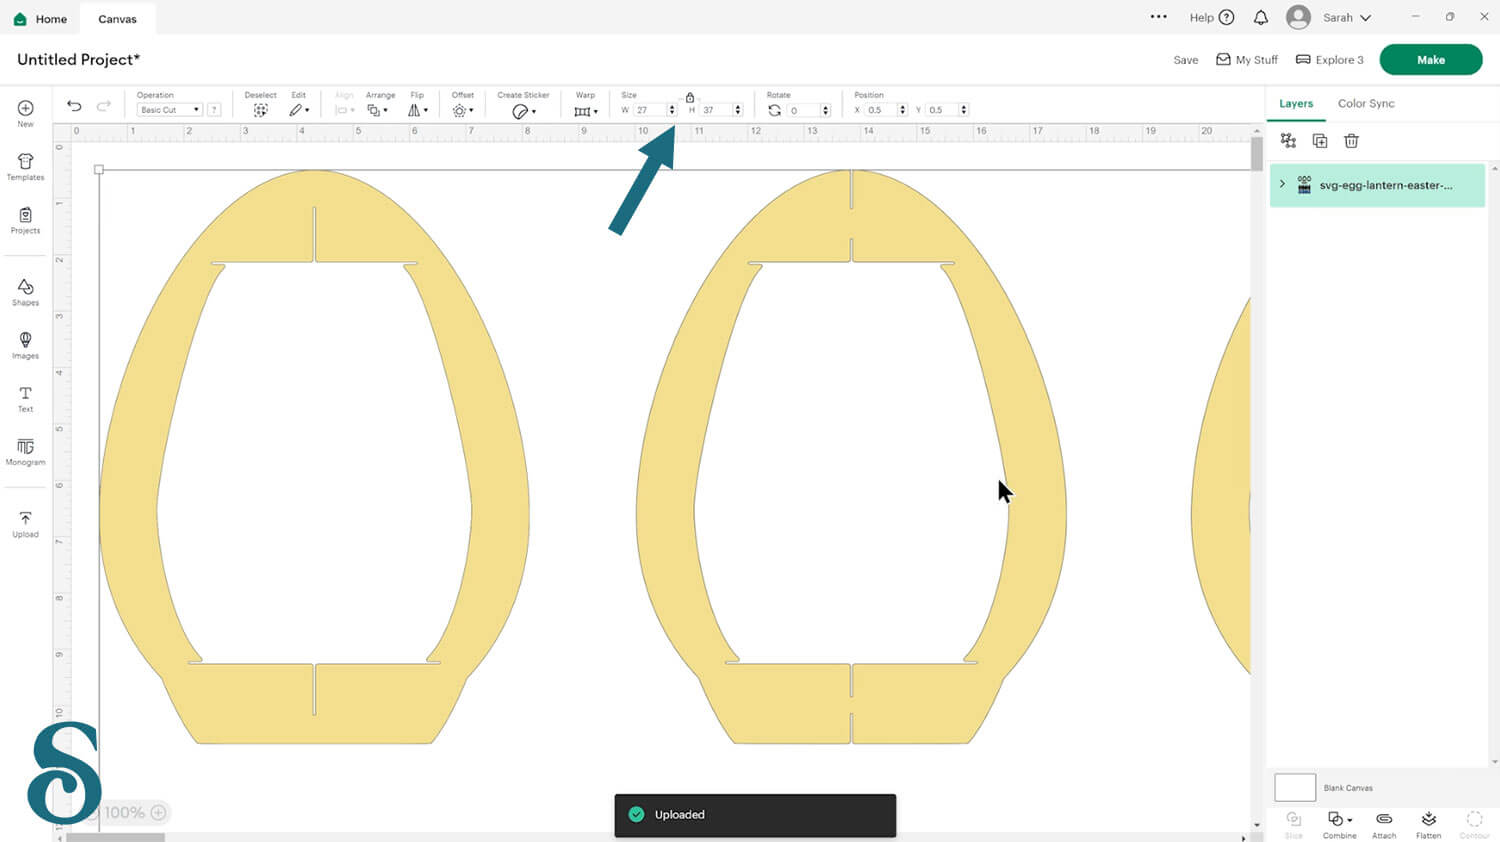
After uploading, the egg lantern design should be automatically inserted onto your Canvas.
If not, it will show under “Uploads” in your “Recently Uploaded Images”. Click on it and then press “Add to Canvas” to put it onto your Project.
The design should load in at 27 inches wide and 37 inches tall. That will make a finished lantern of just over 10 inches tall.
Keep reading to find out how to resize it larger or smaller.
As the lanterns are so large, we found when testing them that just putting fairy lights in the bottom meant that the light didn’t reach the top sections of each of the sides.
To solve this, we created an optional light tower to go inside.
It’s a cardstock tube (like the middle of kitchen roll/toilet roll) that slots inside the lantern that you can wrap your lights around to make it glows better.
If you would like to build this too, upload the SVG BEFORE you do any resizing.
Look in the “Light Tower (Optional)” subfolder and upload the file called svg-egg-lantern-light-tower-craftwithsarah.svg
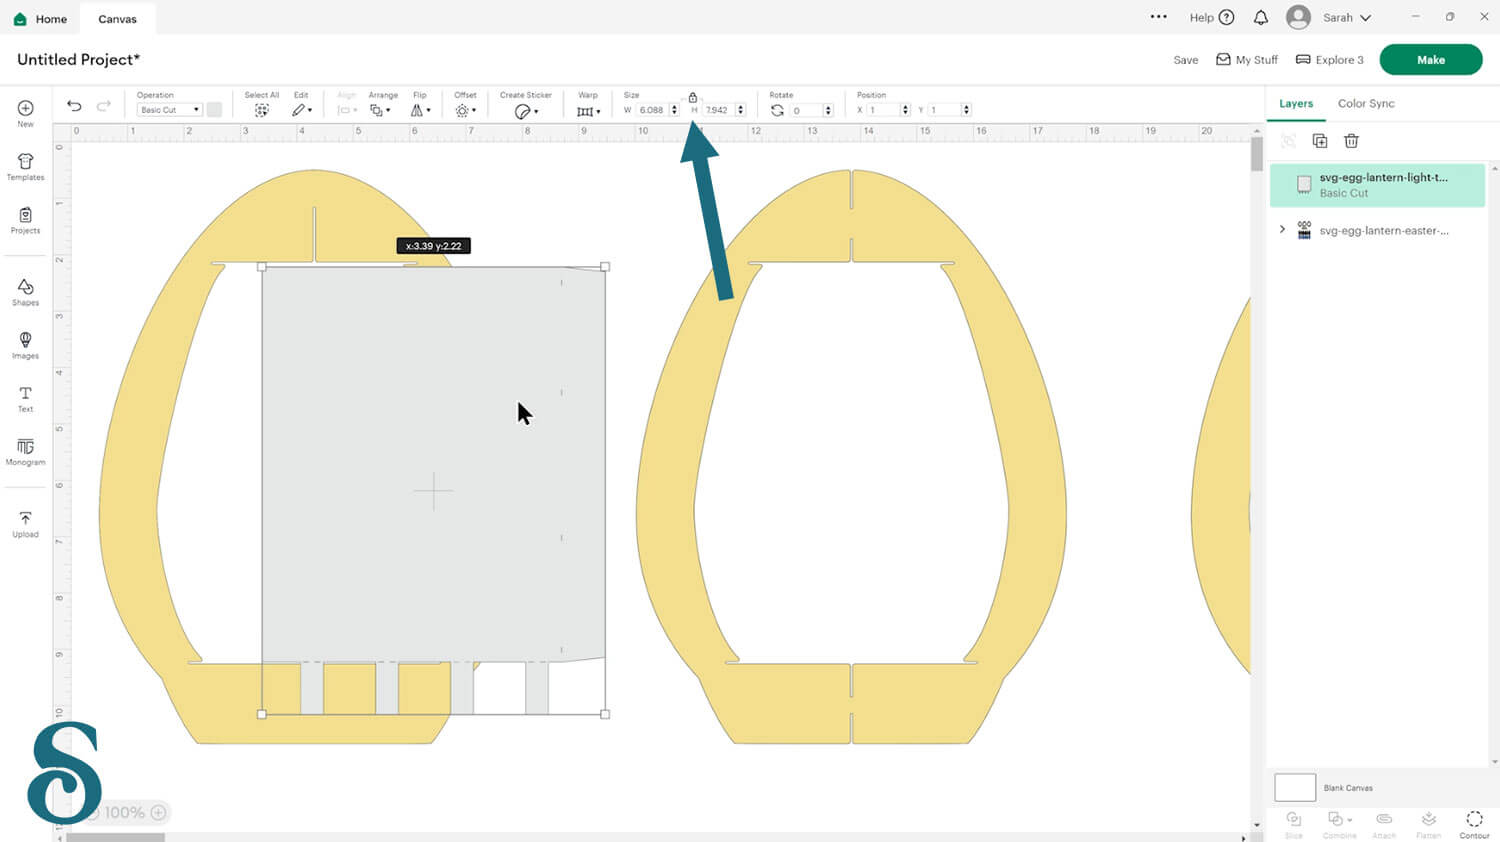
This should load in at the correct size, but check just to make sure: 6.088 inches wide and 7.942 inches tall.
Step 3) Resize the egg lantern (optional)
If you want to change the size—for example, to make it smaller or even larger, here’s how you can do that.
Zoom out a bit using the buttons on the bottom-left of the screen so everything’s a bit easier to see.
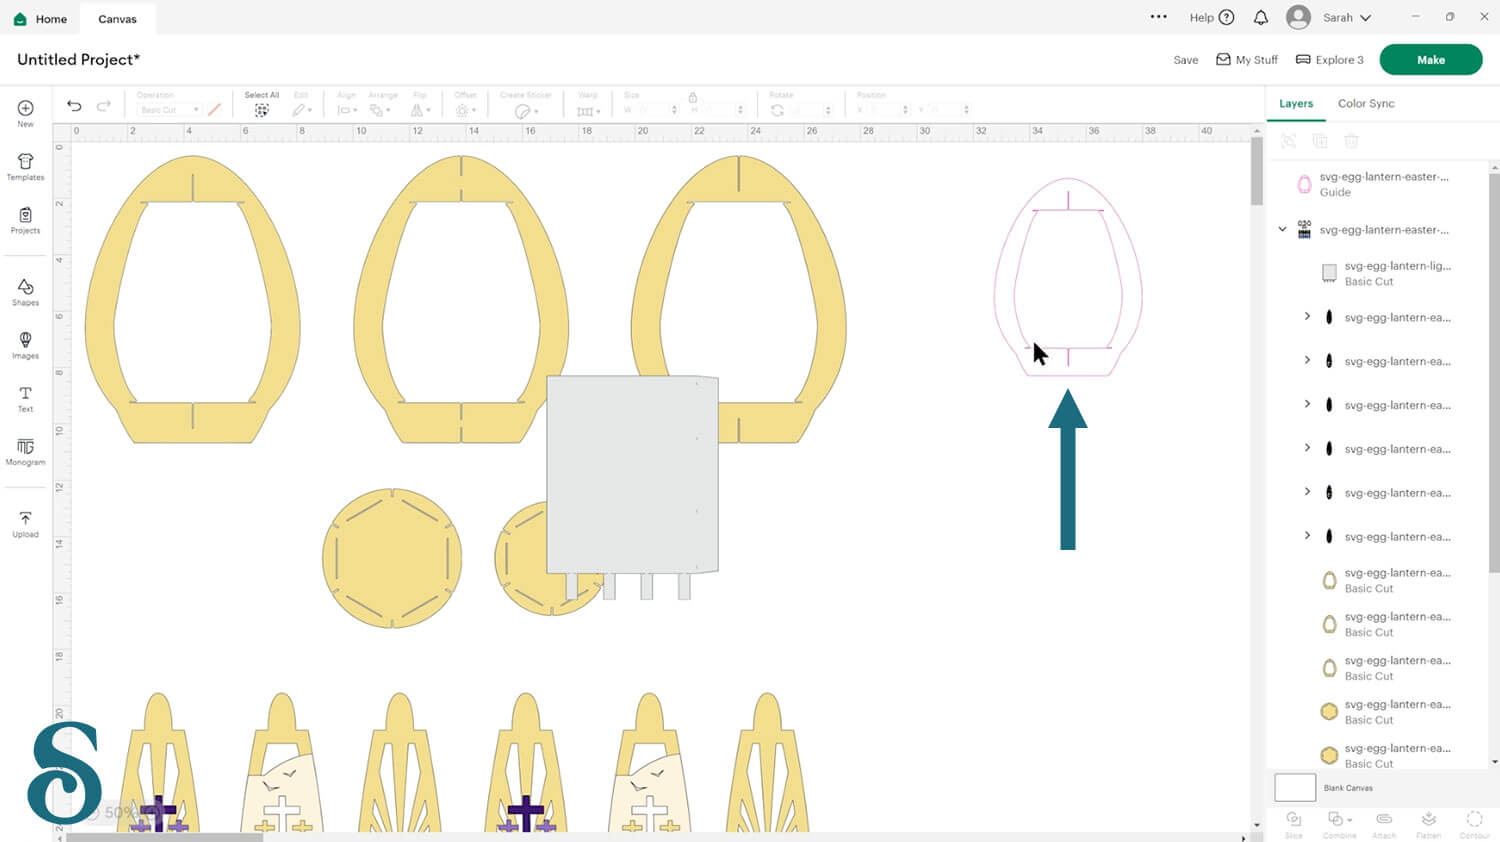
Look in the layers panel on the right of the screen. Click the arrow next to the egg lantern so that you can see the list of all the layers/pieces.
Click on one of the main egg structure pieces (in the layers panel – don’t click the main project area).
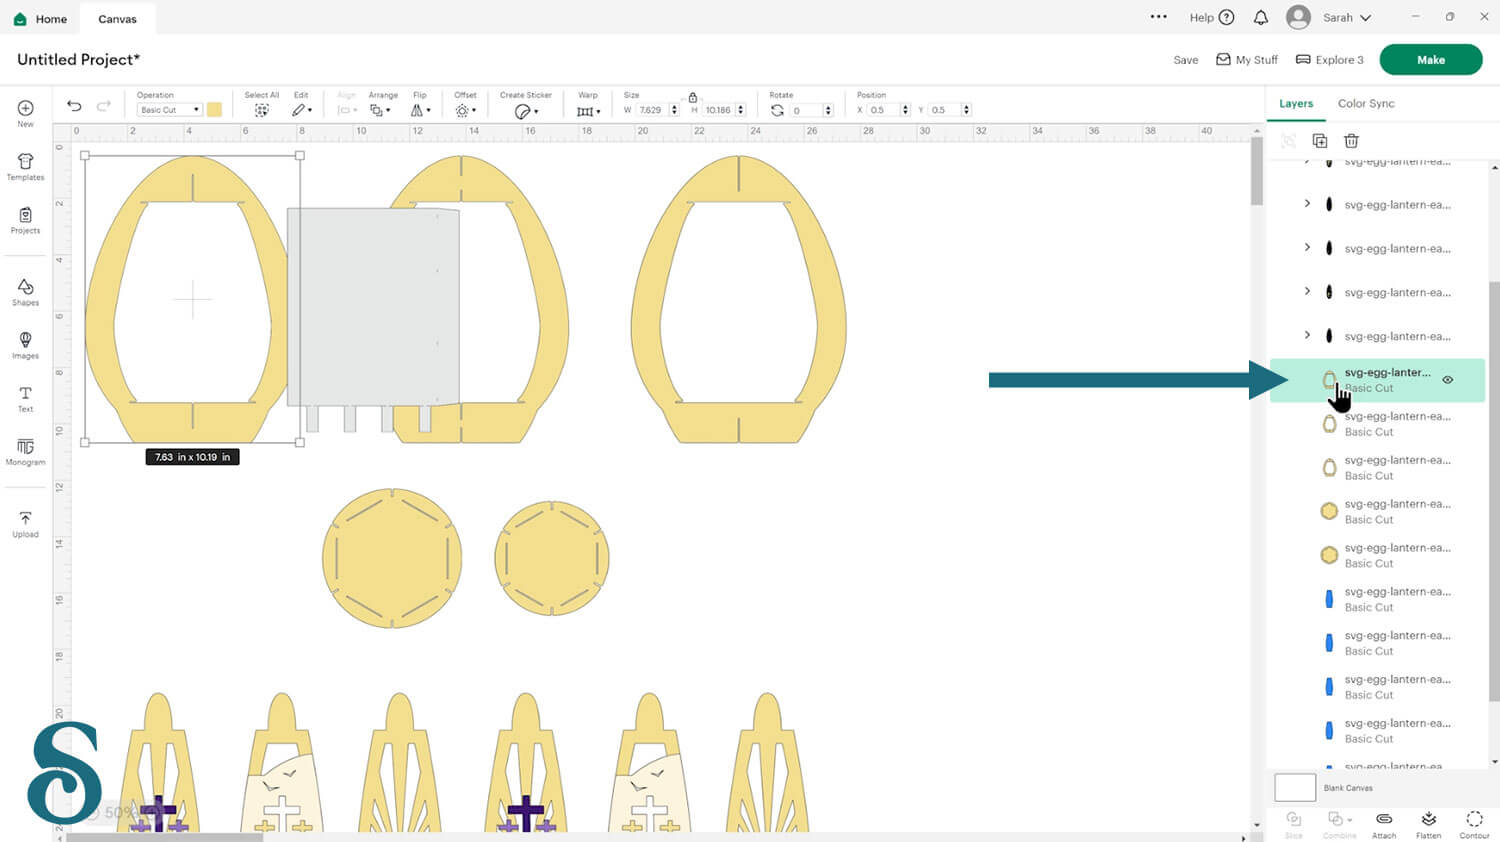
Press the “Duplicate” button at the top of the layers panel to make a copy.
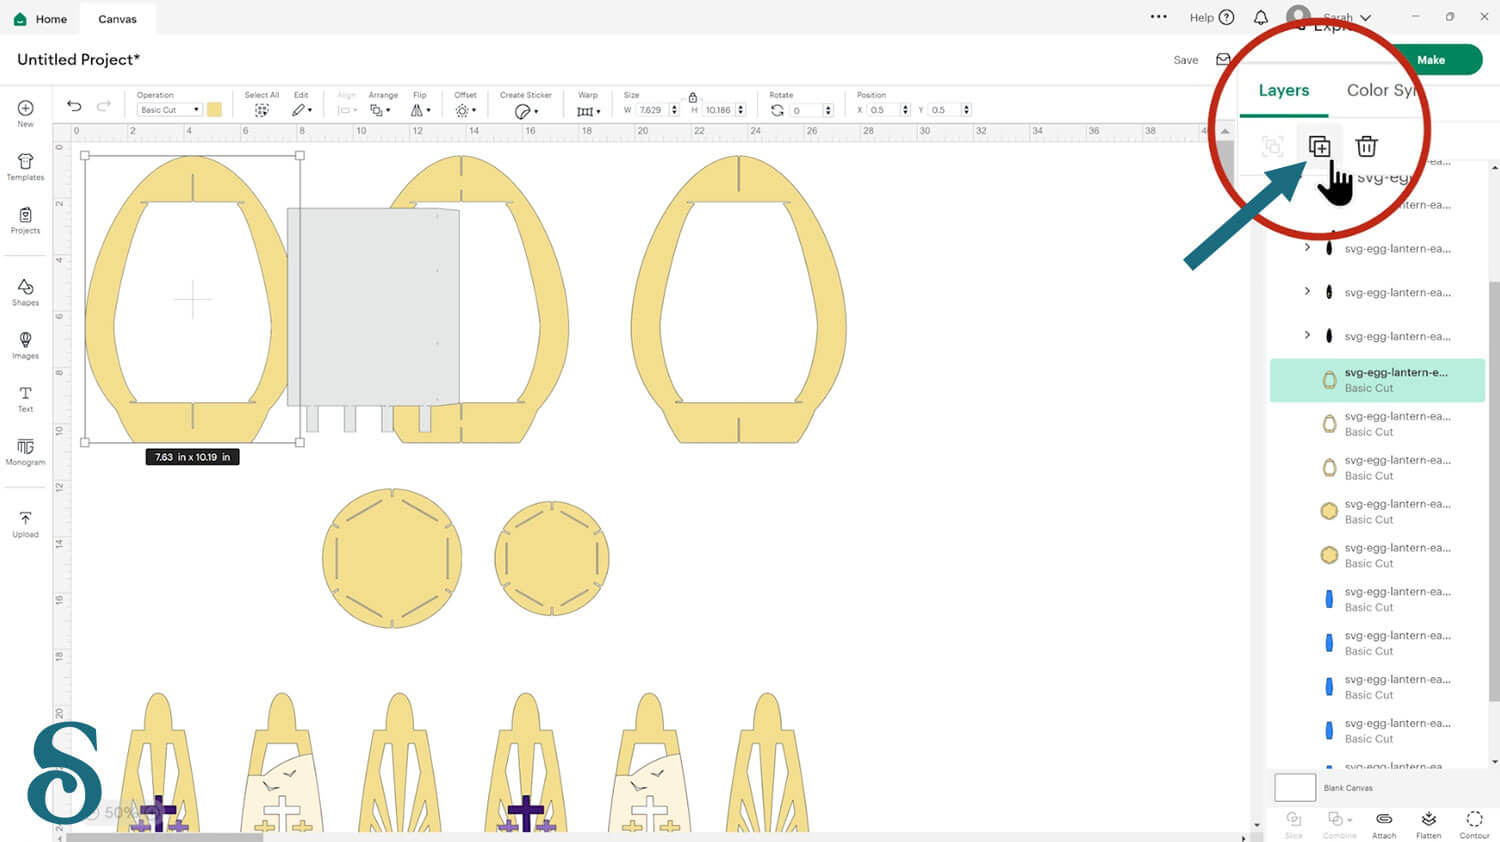
Move the copied version over to the side so it is out of the way.
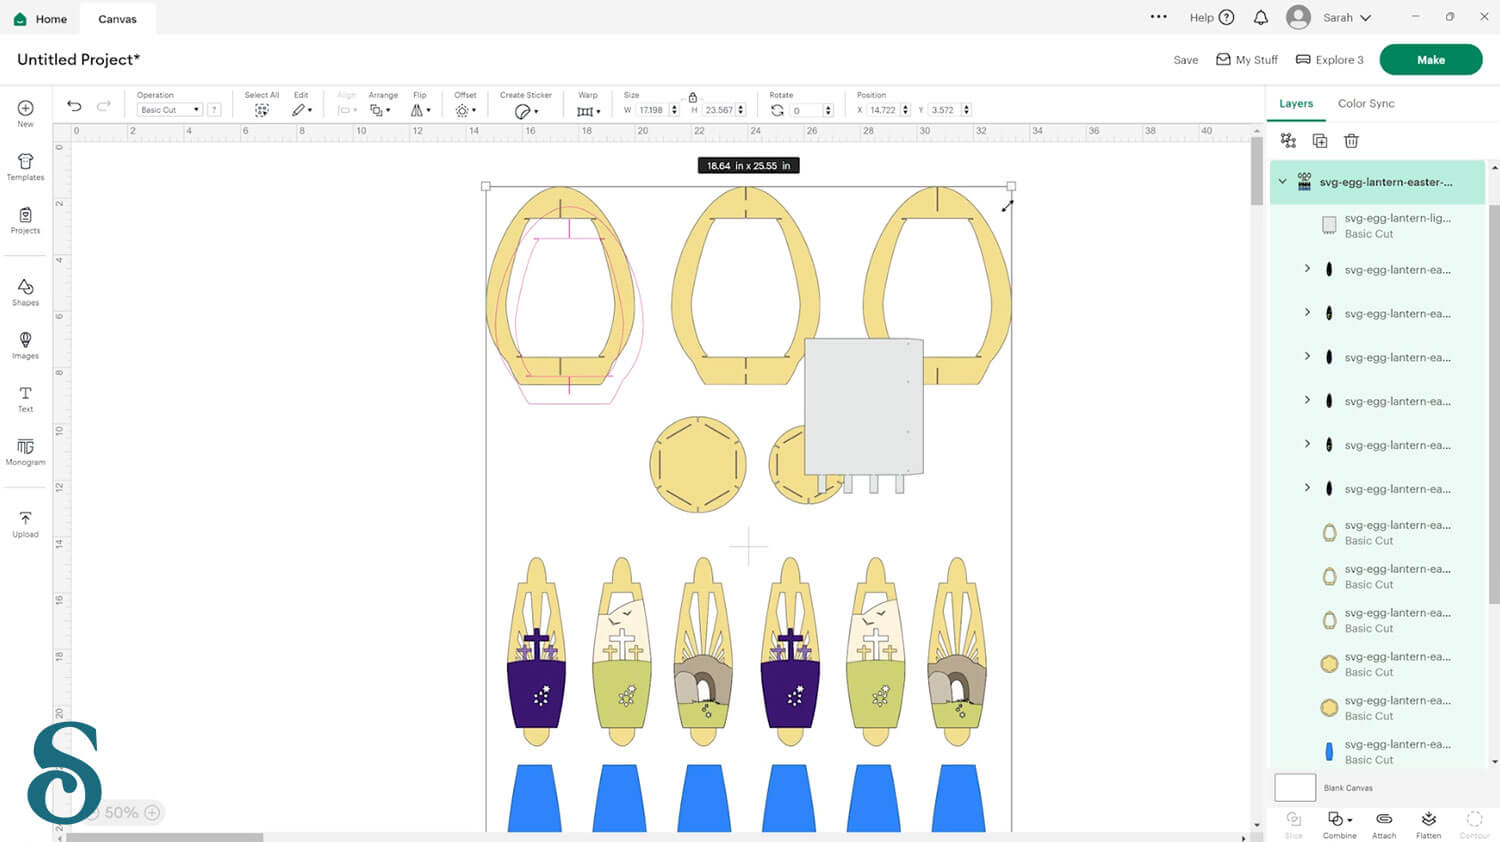
If you are making the light tower then drag it inside the group of the main lantern so that it will get resized at the same time as everything else.
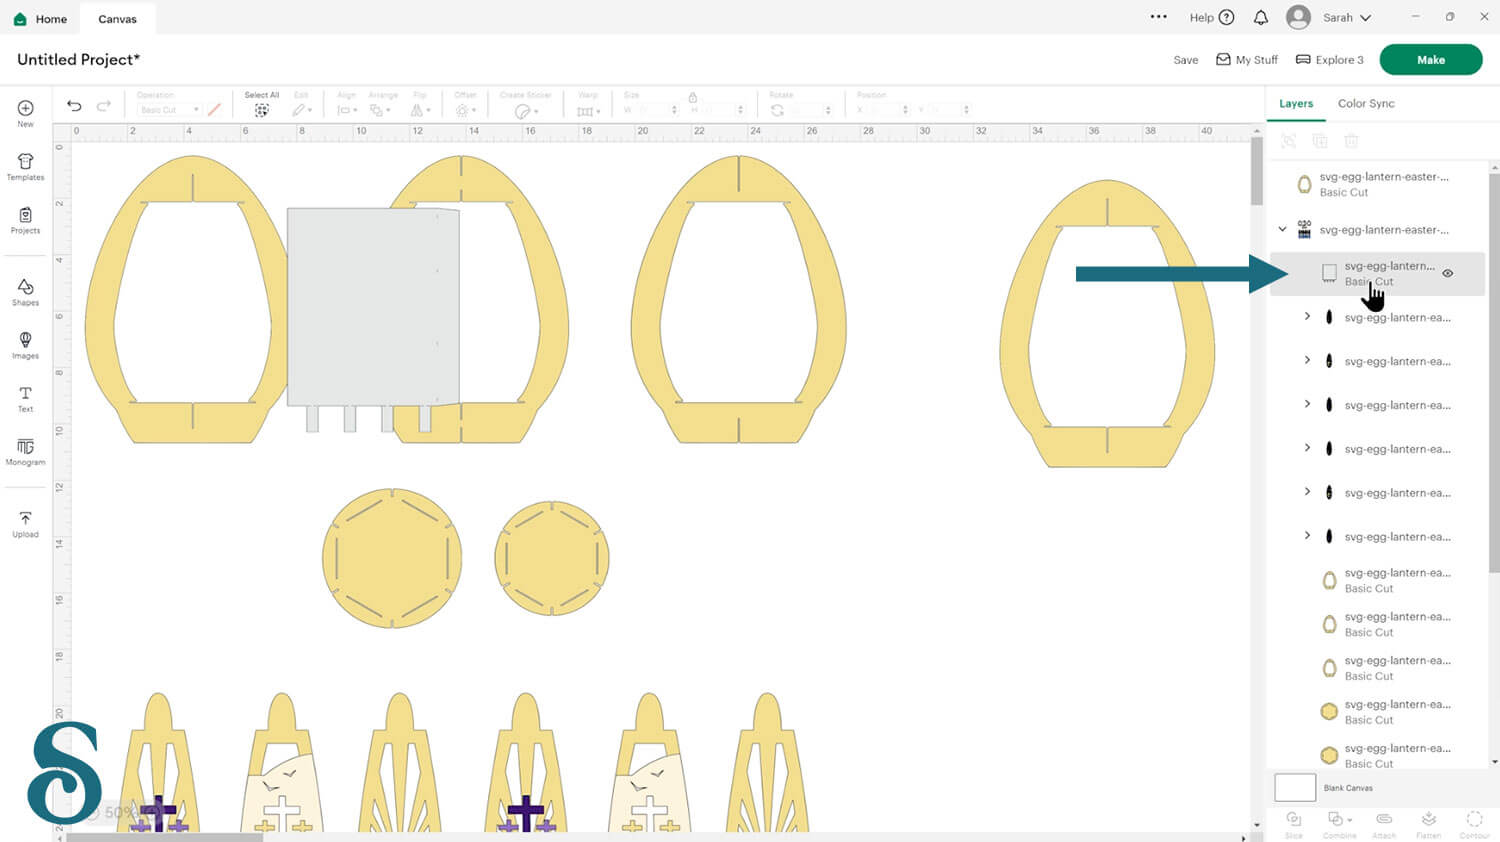
Resize the duplicated version of the lantern structure piece to the size you want your finished lantern to be. I am doing it to 7 inches.
With that layer still selected, go into the “Operations” dropdown menu and change it to “Guide”.
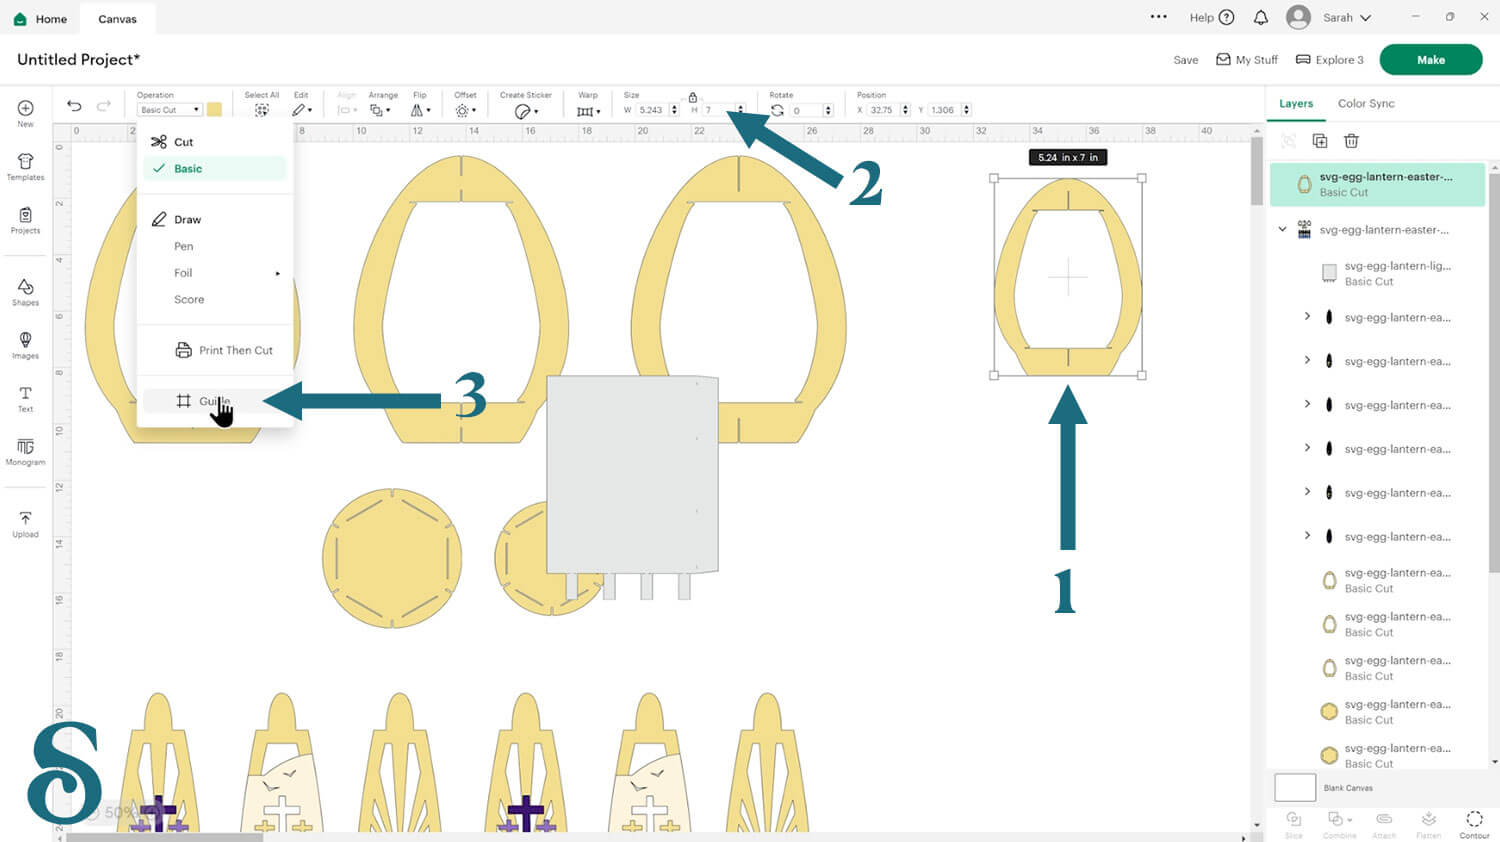
The layer will change in appearance to be a pink outline with a transparent middle.
Make sure the padlock icon above the width and the height box along the top of screen is closed. If your padlock is open, click to close it before resizing, otherwise the width/height will change out of proportion.
Click the main lantern group and drag one of the corners to start resizing it.
Keep resizing until one of the structure pieces perfectly matches the pink outline of the duplicated layer.

It might be easier to zoom in.
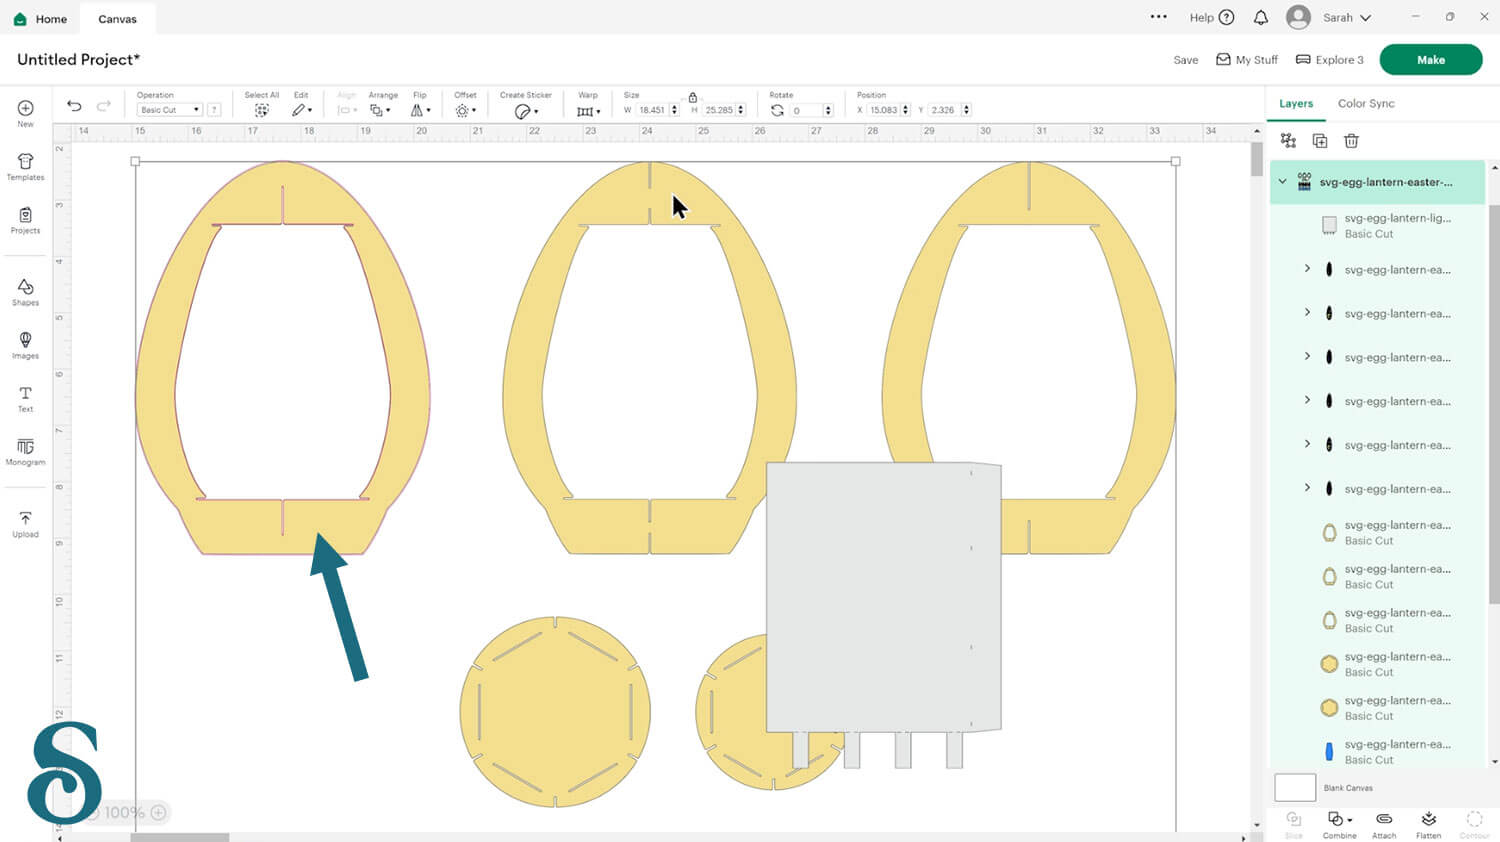
When you’re happy with the size, delete the guide layer.
Your Easter egg is now ready to cut!
Step 4) Cut the egg lantern
When you’re happy how the egg lantern SVG is looking in Design Space, click “Make” and follow the instructions on-screen to cut out all the layers.
The solid blue shapes should be cut from vellum/tracing paper.
If you don’t have any vellum or tracing paper, you could perhaps try cutting it from acetate. Although that is completely see-through, it will still help diffuse the light a little bit, but it does mean that you’ll see your lighting mechanism through the gaps.
Alternatively, if you don’t have acetate either, you could just delete these layers and have them all as open gaps in the side panels. But again, that does mean you’ll be able to see all of the lights that you put inside through the gaps.
Cut the light tower from white or pale coloured card for a better lighting effect.

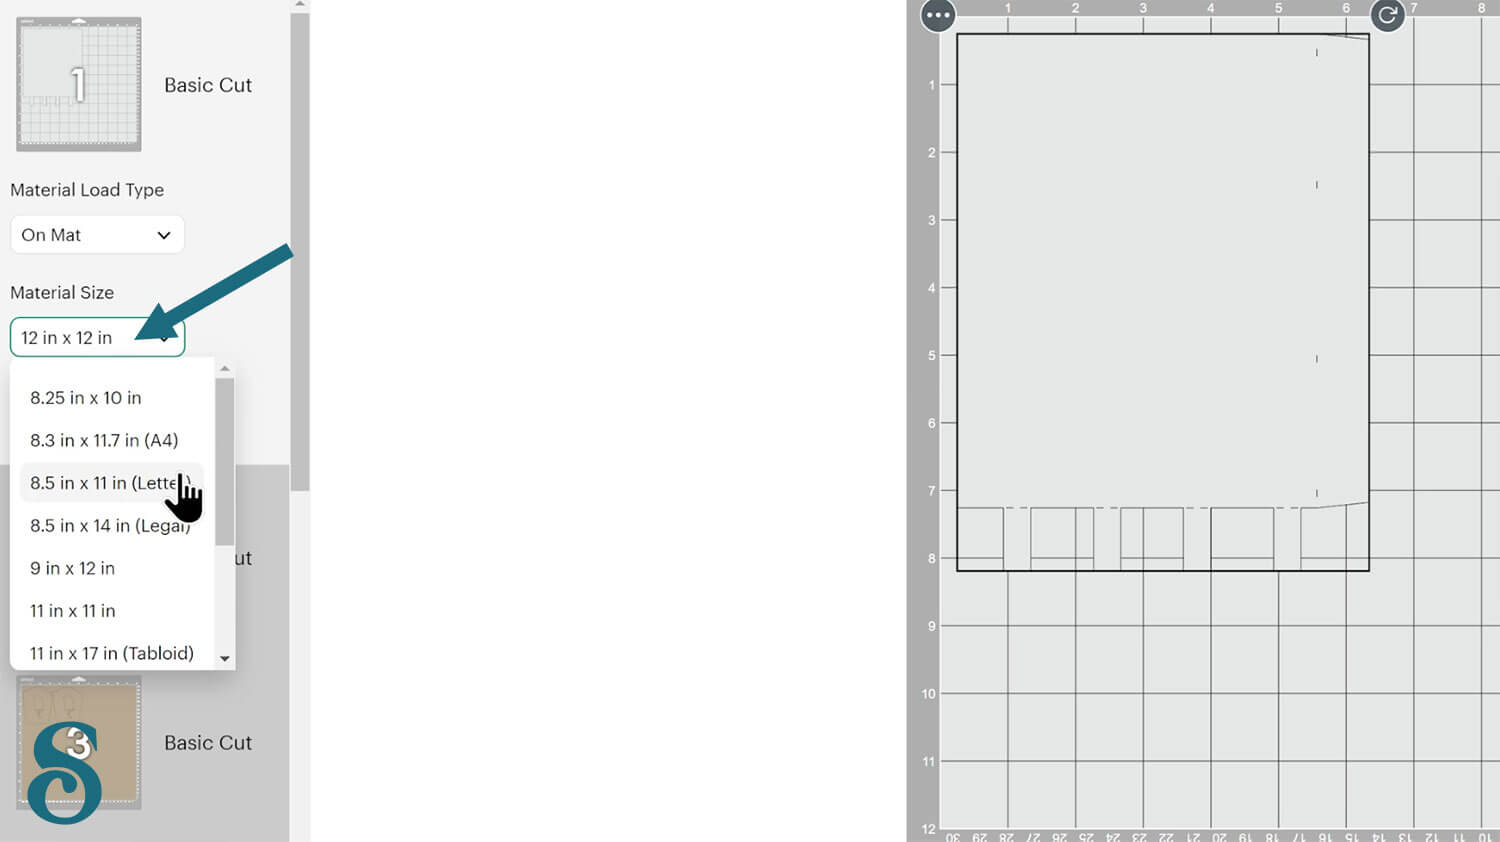
You can change the paper size with the dropdowns on the left of the screen. You need to change it for every colour.
You can drag-and-drop the pieces on the screen to move them about to take up less space on your cardstock.
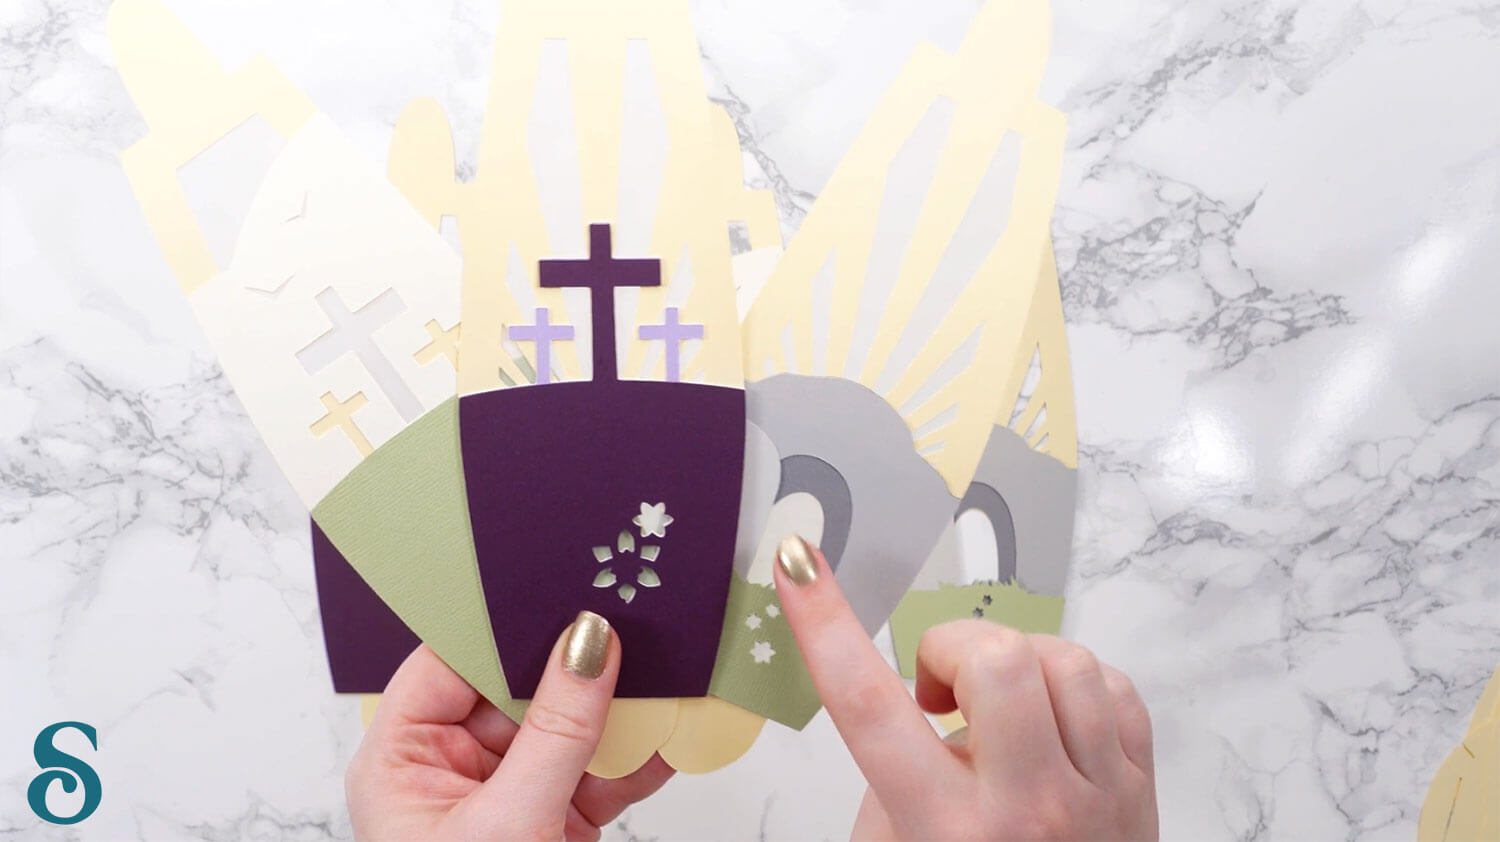
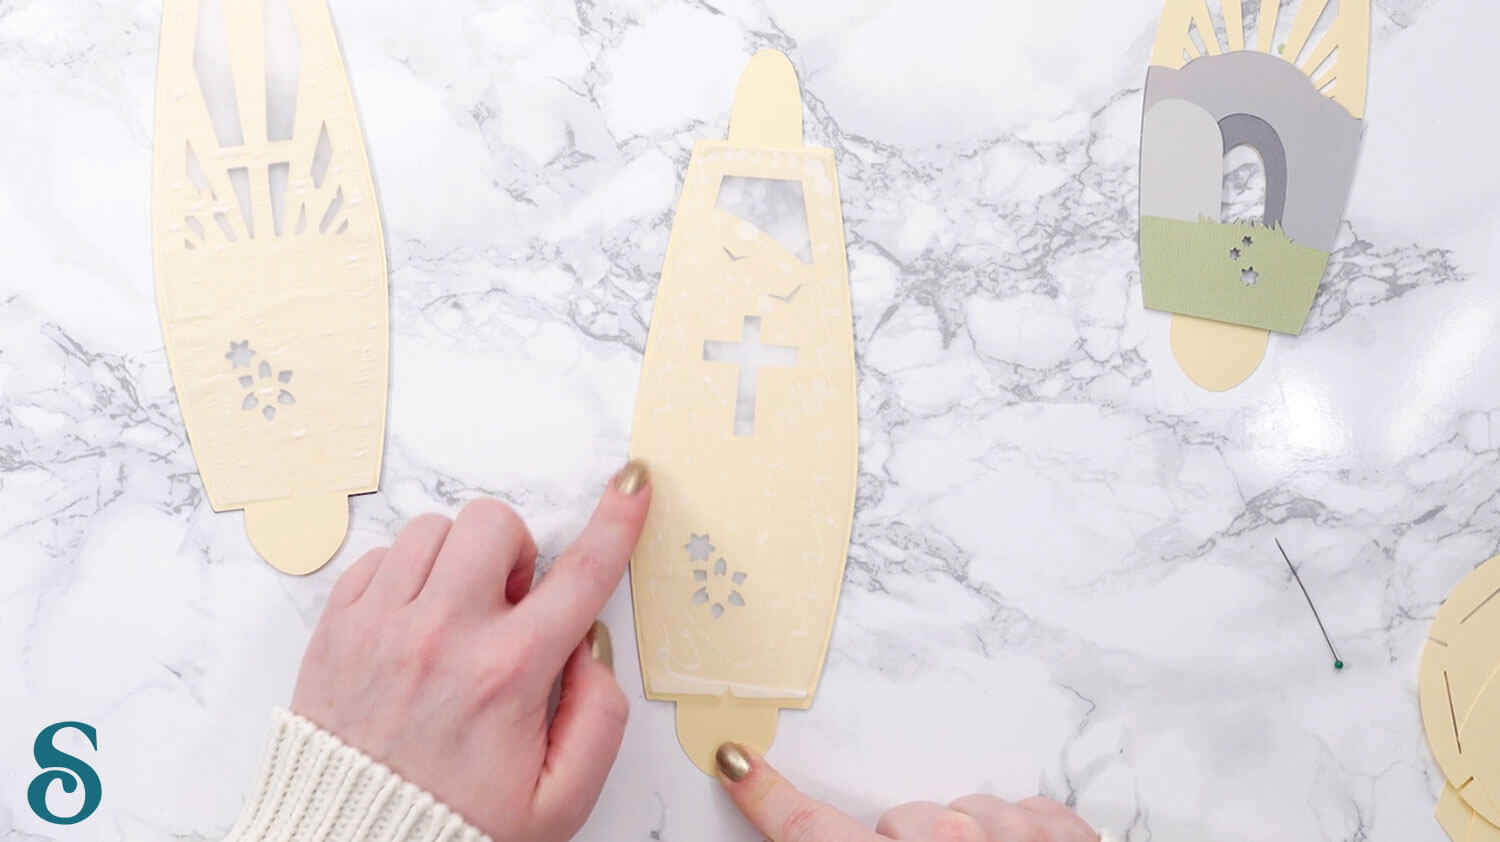
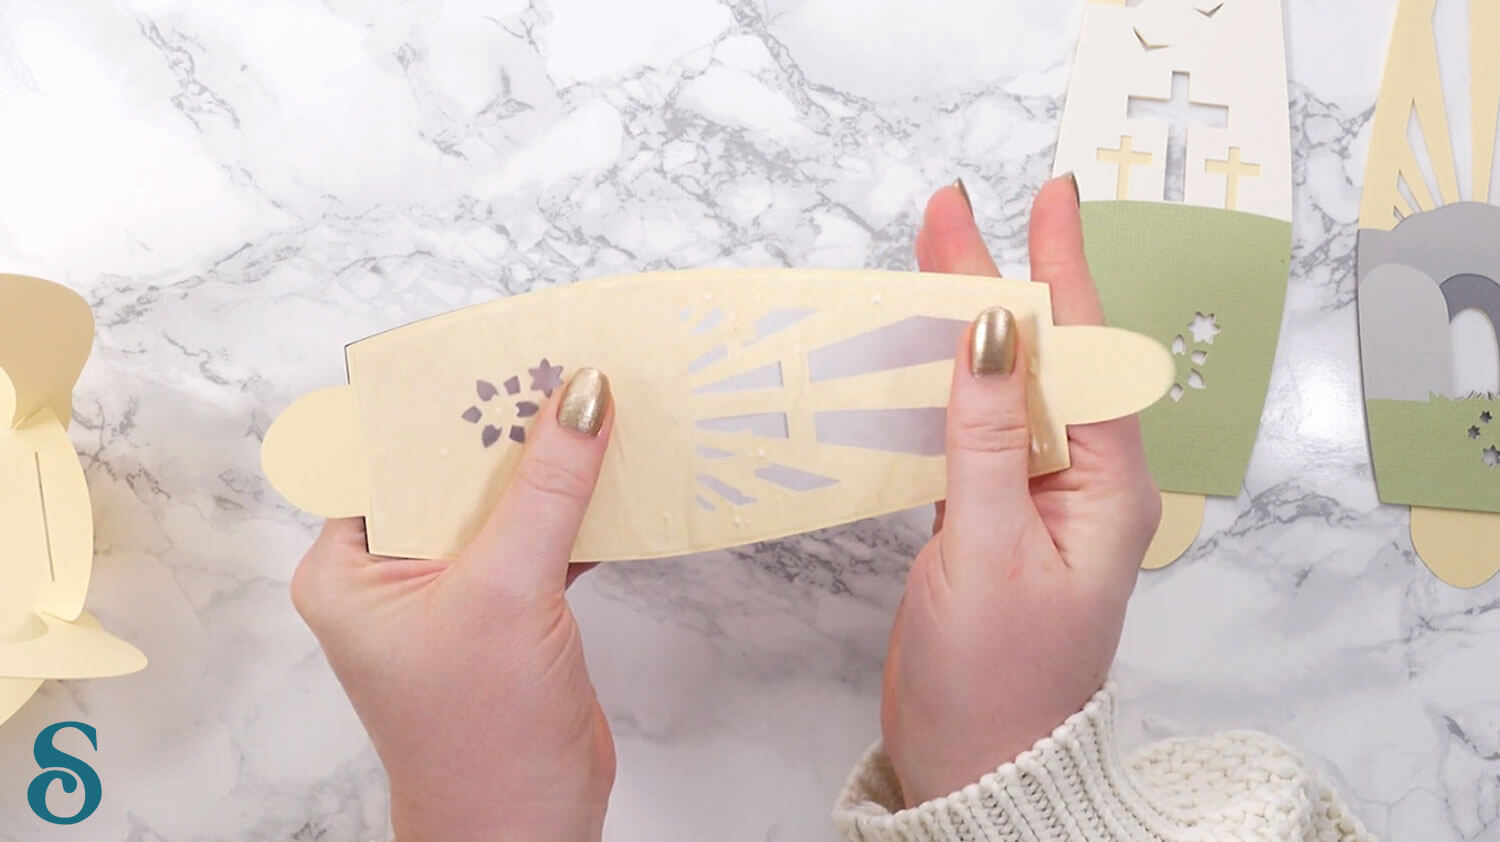
Step 5) Stick the side panels together
If you are making one of the lantern designs that has decorations on the side panels, stick all the pieces together now.
I glued all the pieces for the Easter story lantern together as there are quite a few pieces/colours and I didn’t want the sides to get too thick.
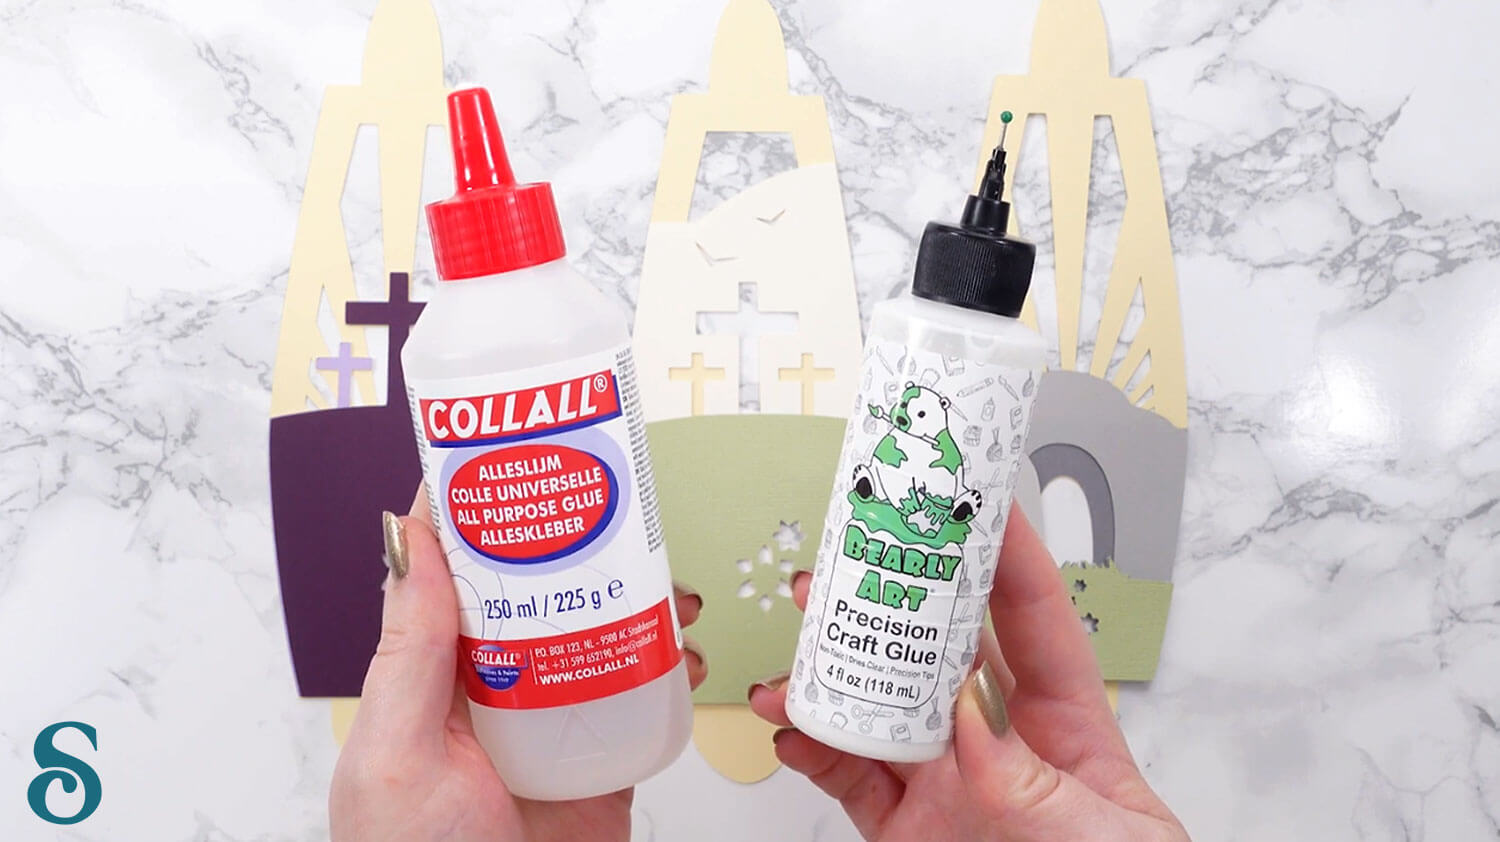
I used Bearly Art Glue to stick the project together.
It’s SO good because it doesn’t “warp” or bend the cardstock like some glues do. You can use as much of it as you want and the card stays perfect – and it dries perfectly clear too!
Collall All-Purpose Glue is another great one to use for cardstock, which is more readily available in the UK.
If you are making one of the lantern designs with smaller or fewer decorations on the sides then you may wish to use foam squares / foam pads to add some depth and dimension.
For example, on this daffodil egg lantern, the daffodil pieces are glued together then then I used foam squares to attach them to the green lantern side panels so that the flowers “pop out” a little bit from the sides.
Once all the side panel details are added, turn each side panel upside down and glue the vellum pieces to the back.
The side of the vellum with a little triangle cut out from it goes at the bottom.
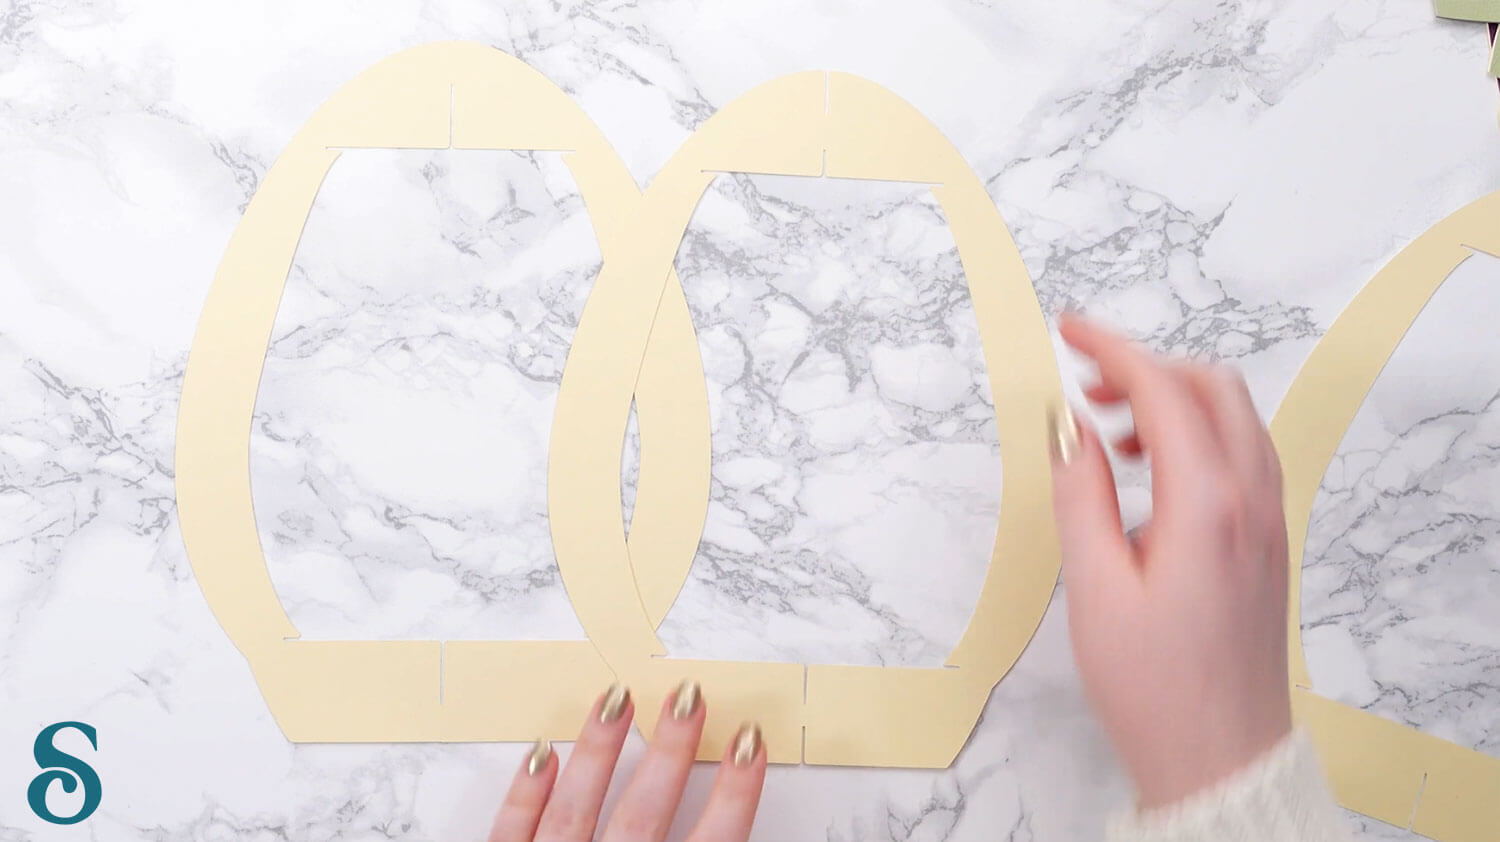
Step 6) Assembly the egg lantern structure
You should have three pieces of the main structure — the large egg-shaped pieces – and then two circles, one of which is larger than the other.
Select the two egg structure pieces that match the photo below.
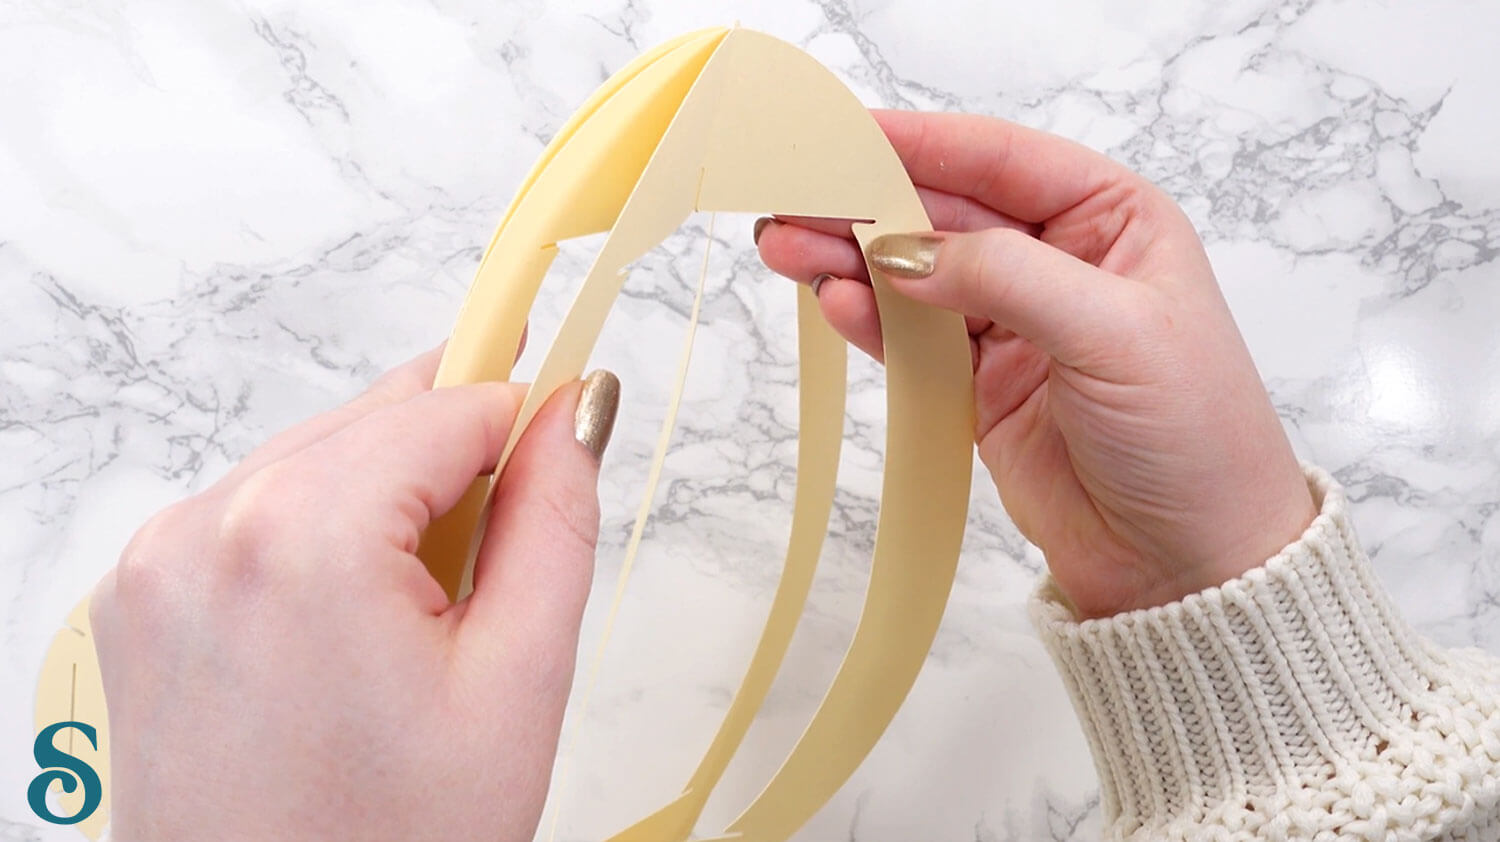
Slot Piece 2 into Piece 1. This will give you a four-sided shape that is freestanding.

Hold the two pieces flat against each other and slot in the third structure piece.

You will now have a six-sided shape that is freestanding.

Select the smaller circle.
The slits in the side will be pushed into the slits in the edges of the top of the egg structure.
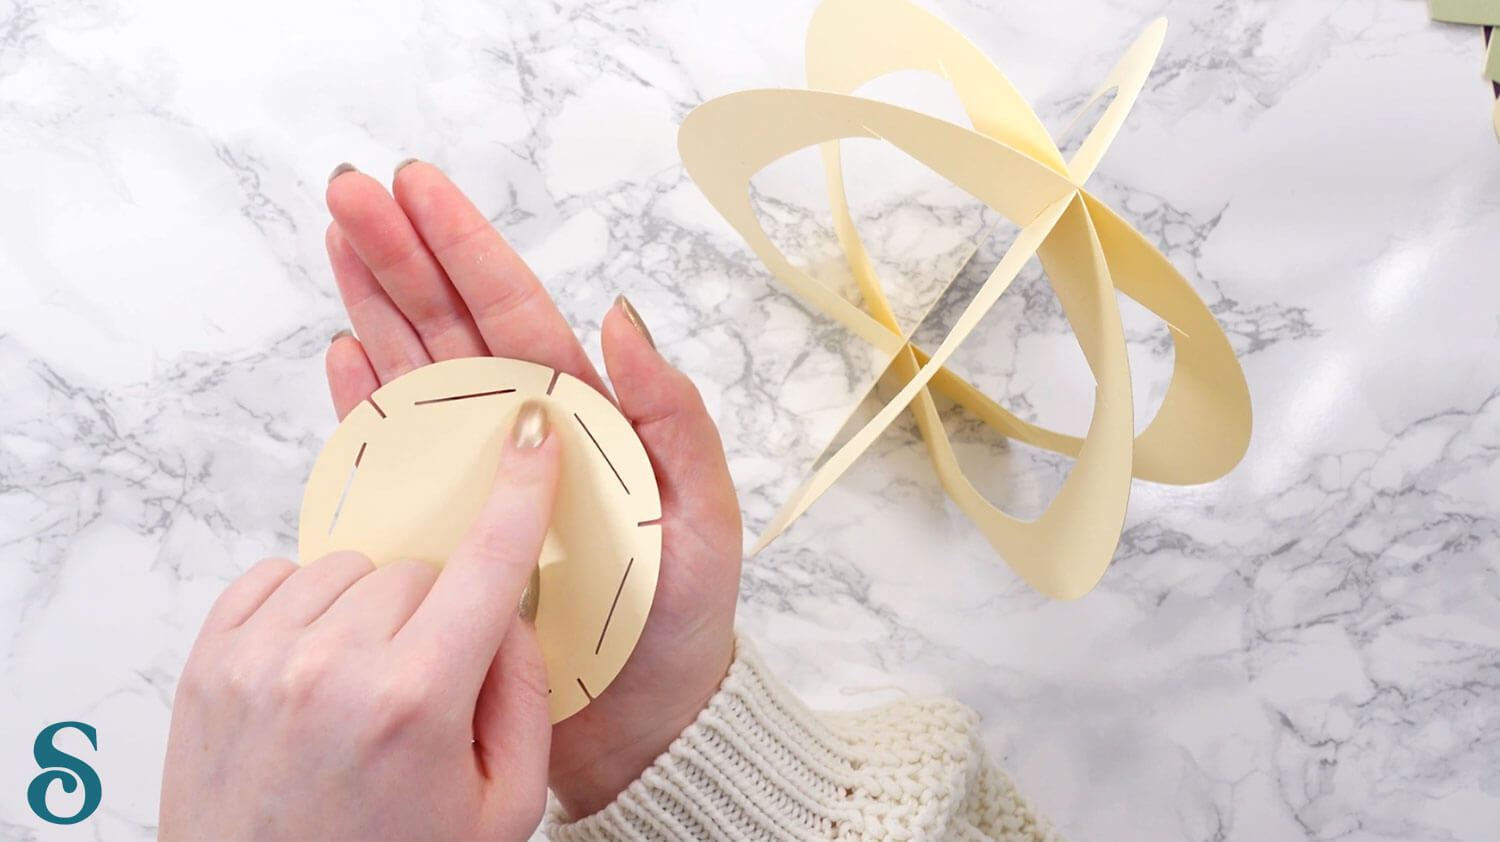
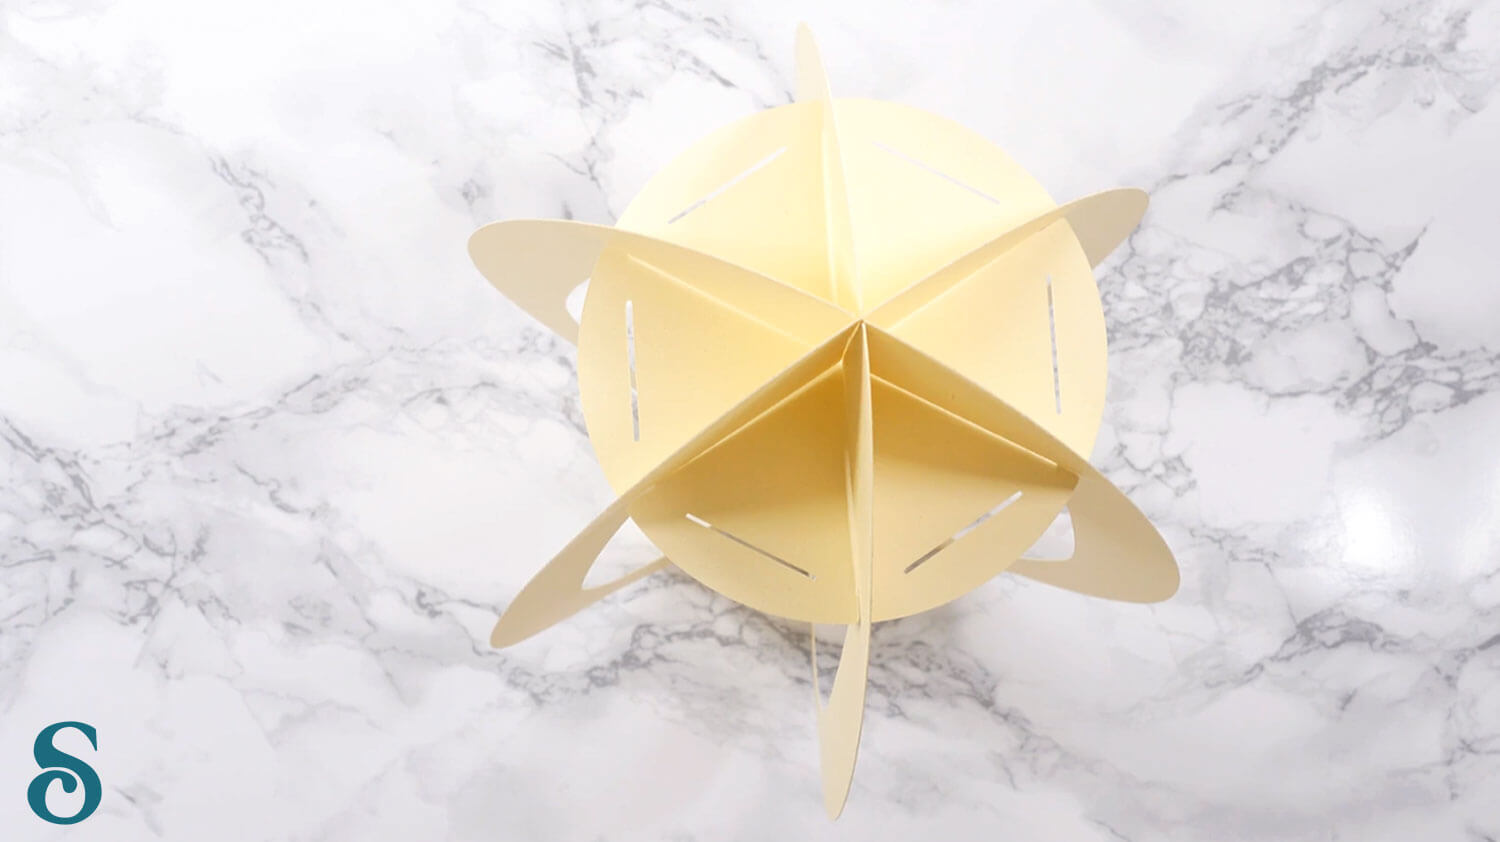
Repeat for the larger circle and put it into the bottom of the egg.
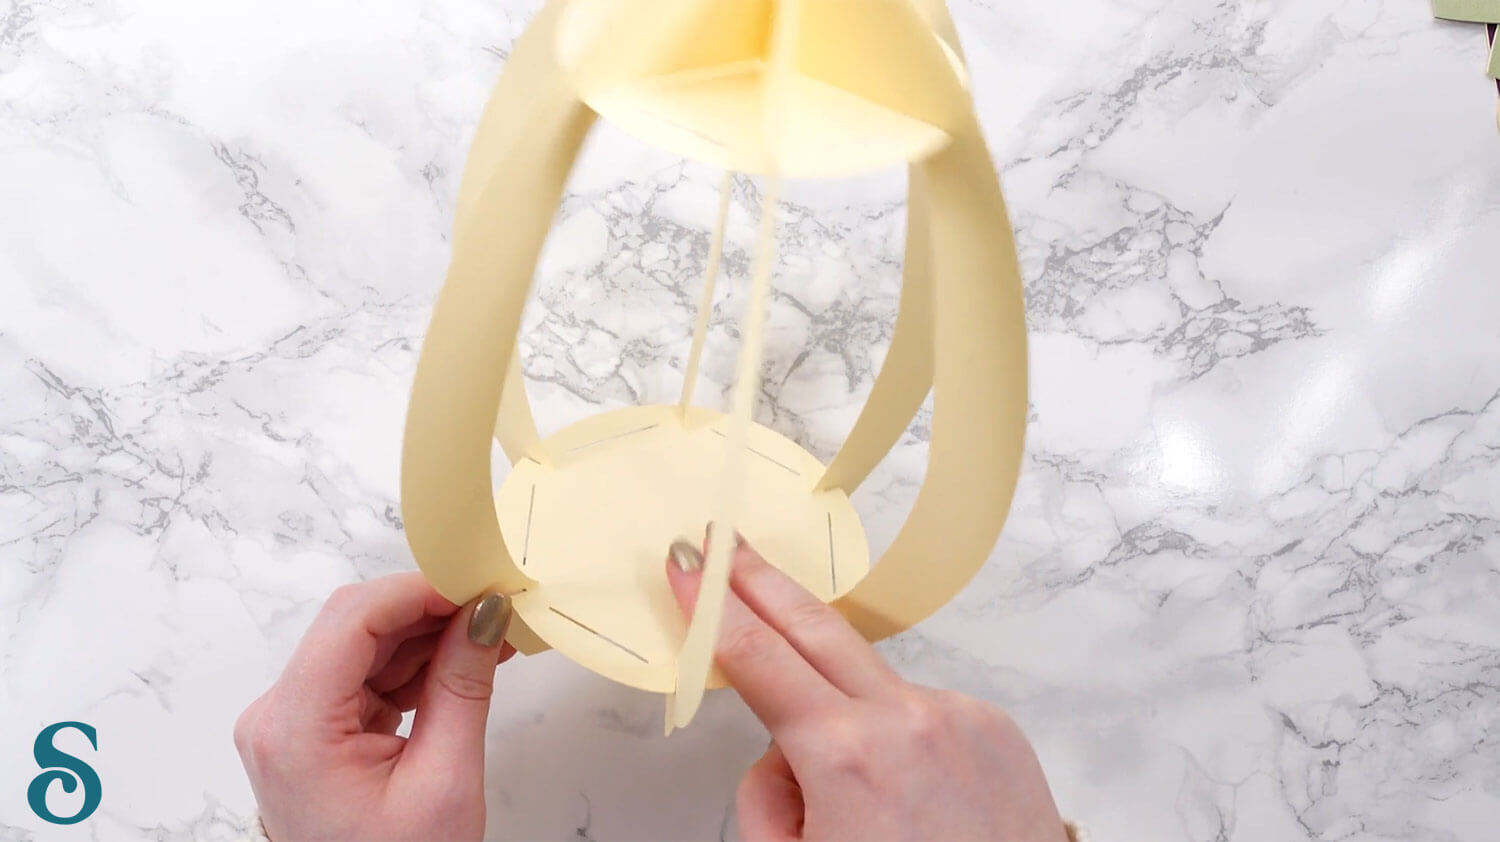
Step 7) Add 5 of the side panels
Add five of the side panels into the lantern by threading the tabs through the holes in the lantern structure.
You may wish to gently encourage them into a “curve” shape by running your fingers down them before they go into the lantern, but try not to add any bends/creases into the side panels.

If you are not using the light tower then add your lights inside now, then put the final side panel into place.
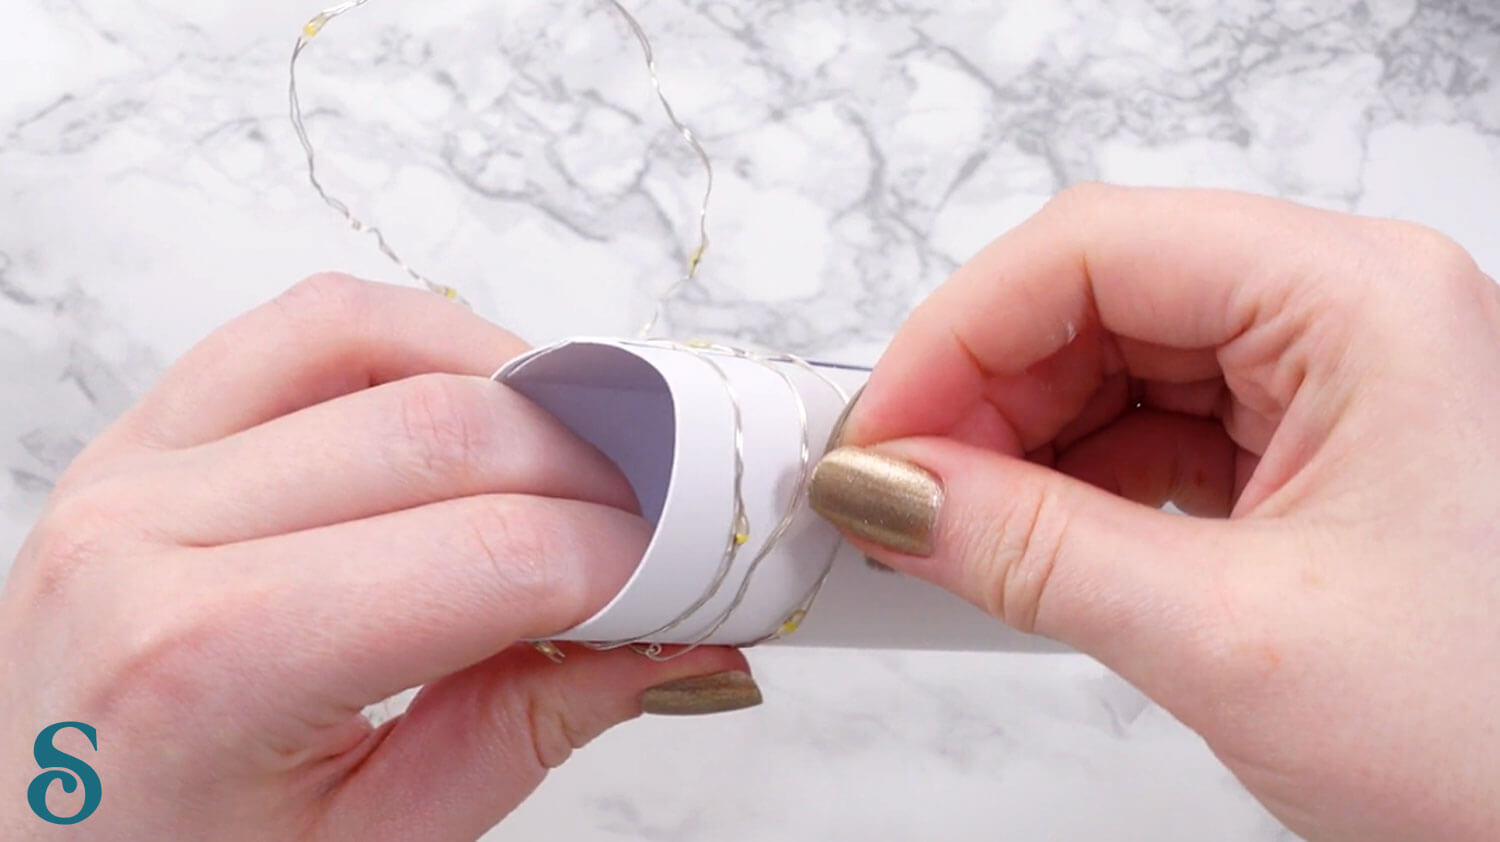
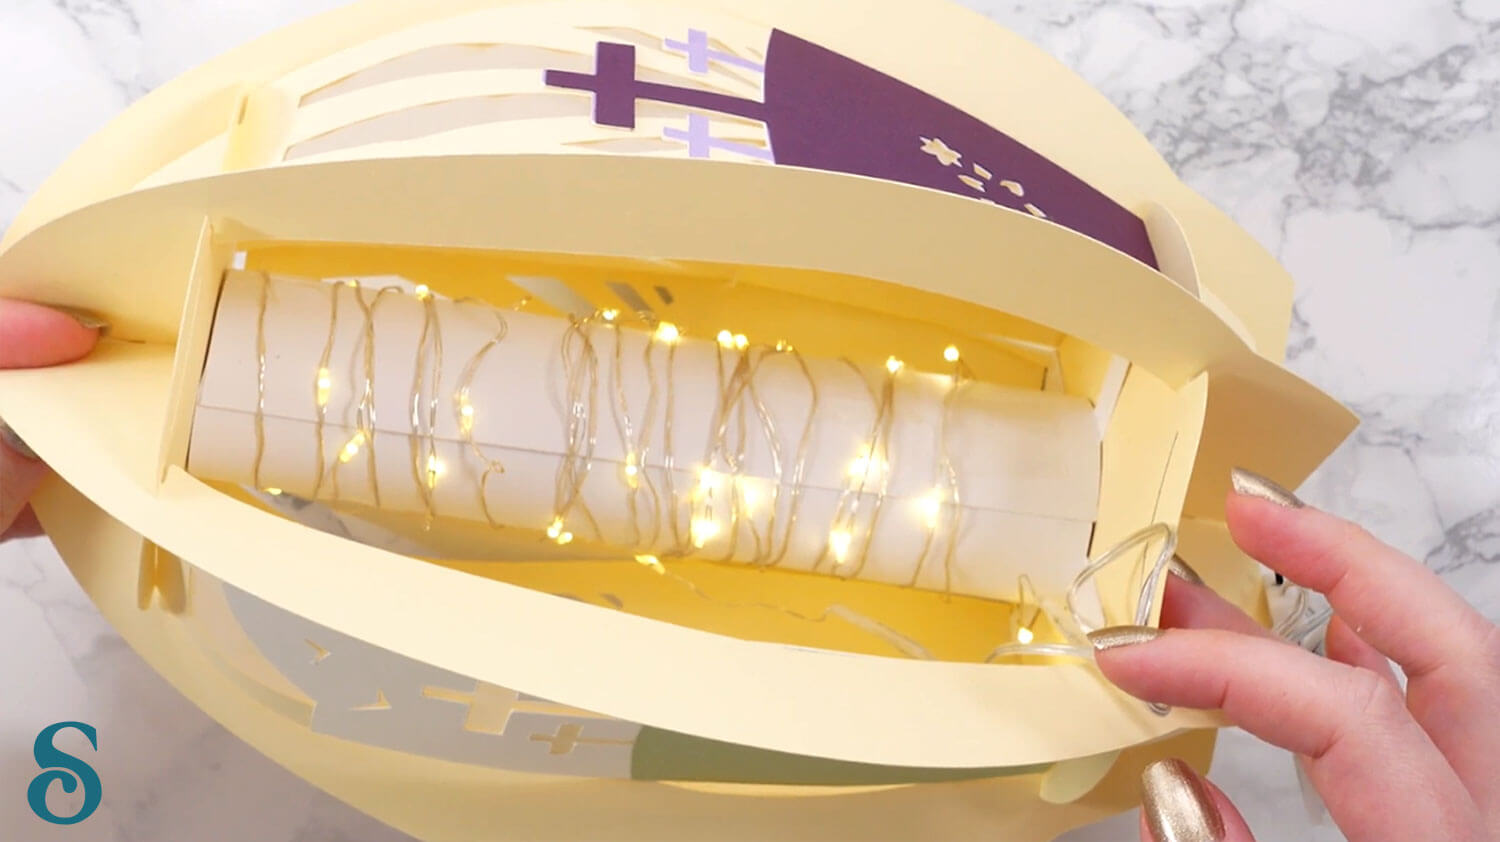
Step 8) Create the light tower
If you are using the optional light tower, here’s how to make it.
Take the light tower piece and locate the dashed lines.
Fold it inwards and roll it round to train the paper so that it will roll up.

Add double sided tape to the edge of the cardstock piece, up to where the dashed lines are.
Add some glue too, as it will be a better stick with a combination of tape and glue.

Roll into a tube and hold until the glue sticks, or use paperclips/bulldog clips to hold in place.

Once the glue is completely dry, fold out the four tabs along the bottom so that the tube can stand up.

Take your fairy lights and wrap them around the cylinder, using sticky tape to secure them.
I used two sets of fairy lights to give a better effect.
Don’t wrap the lights too tightly, in case they get warm. They should be a little bit loose around the tube.
Slide the tube into the egg so that the tabs sit along the bottom of the egg lantern.
It will hold itself in place – there’s no need to stick/glue it inside.
Slot the final side panel into the lantern, and you’re all finished!

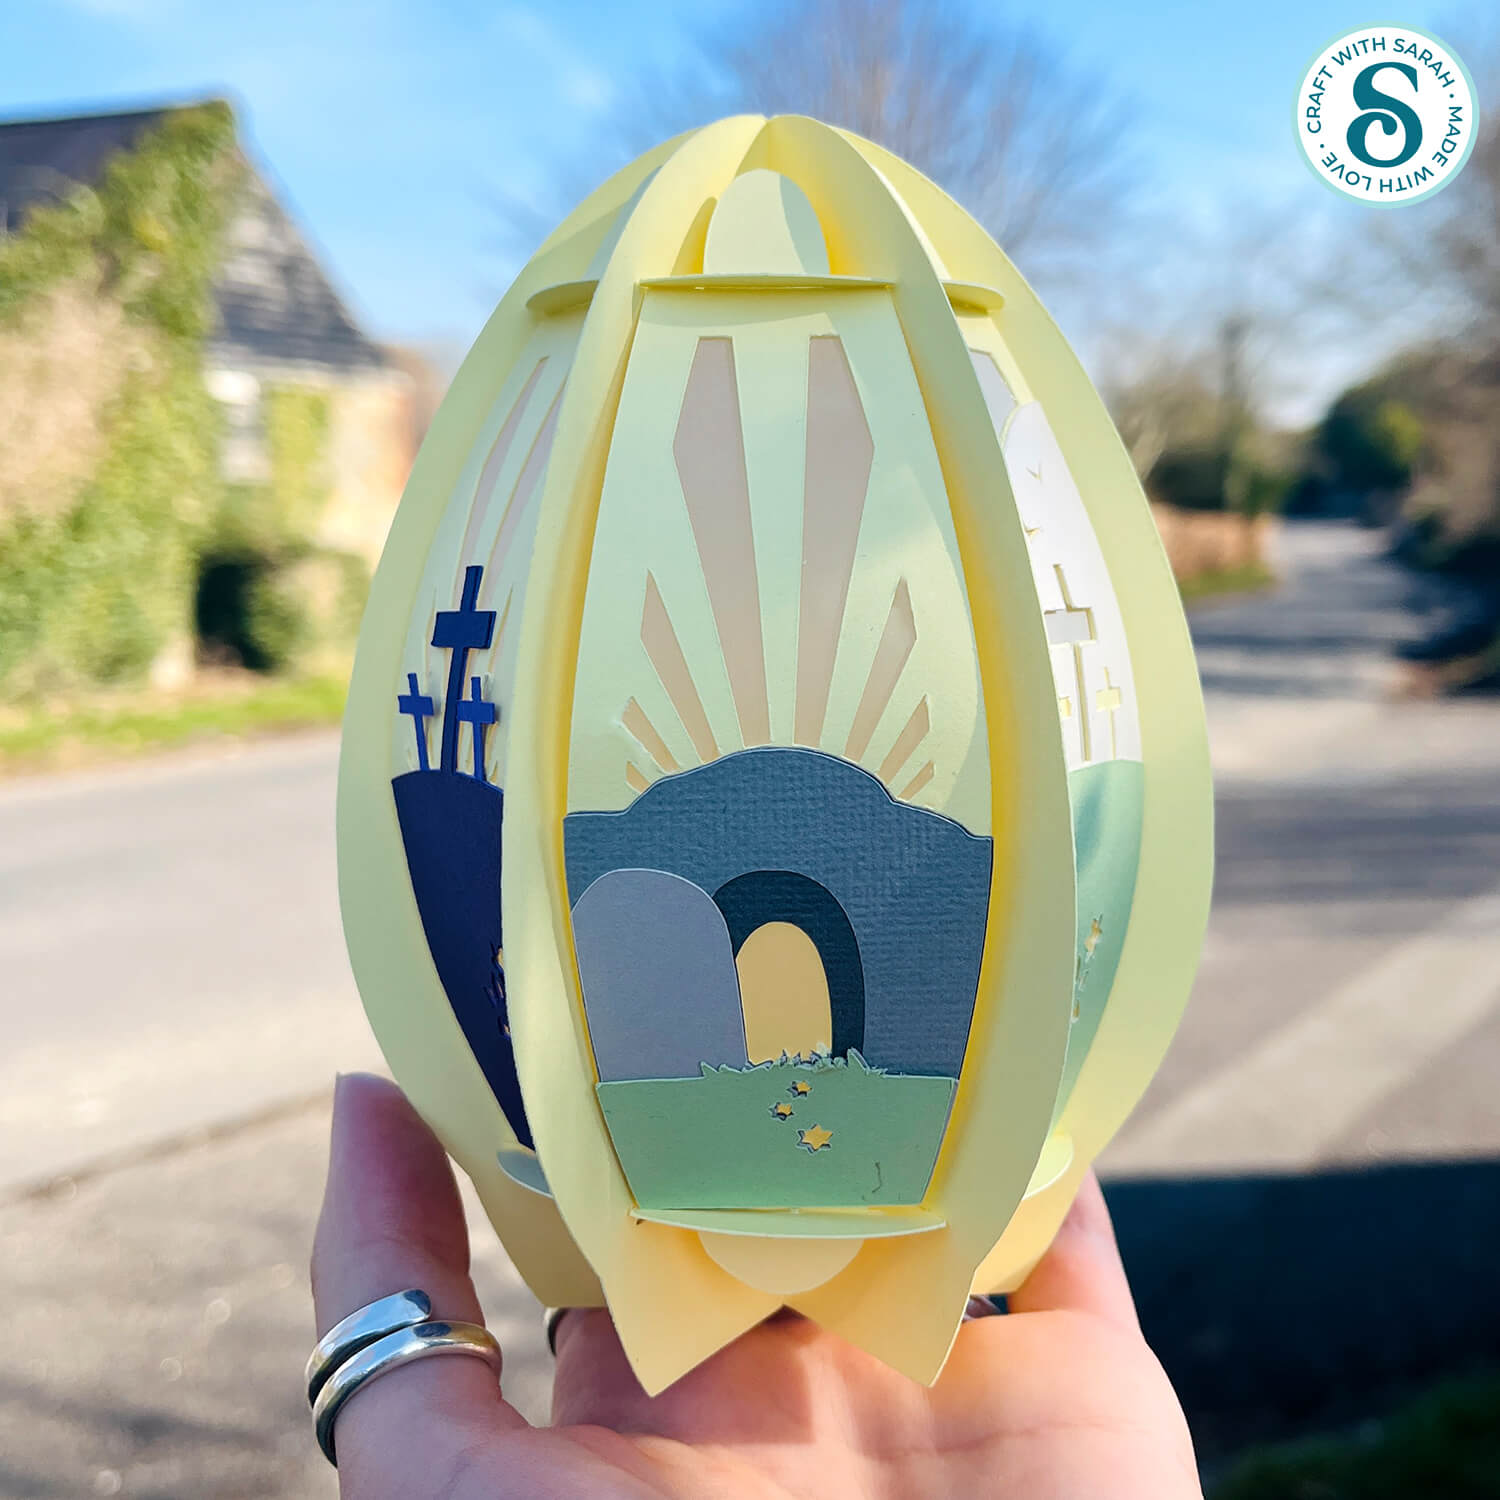
Light-up luminary for Easter
Now your Easter story lantern is complete!
I love the way it glows through the different shapes, especially the cave. It’s the perfect project for celebrating the Easter story.
Don’t forget to check out the other Easter egg lanterns that are available.
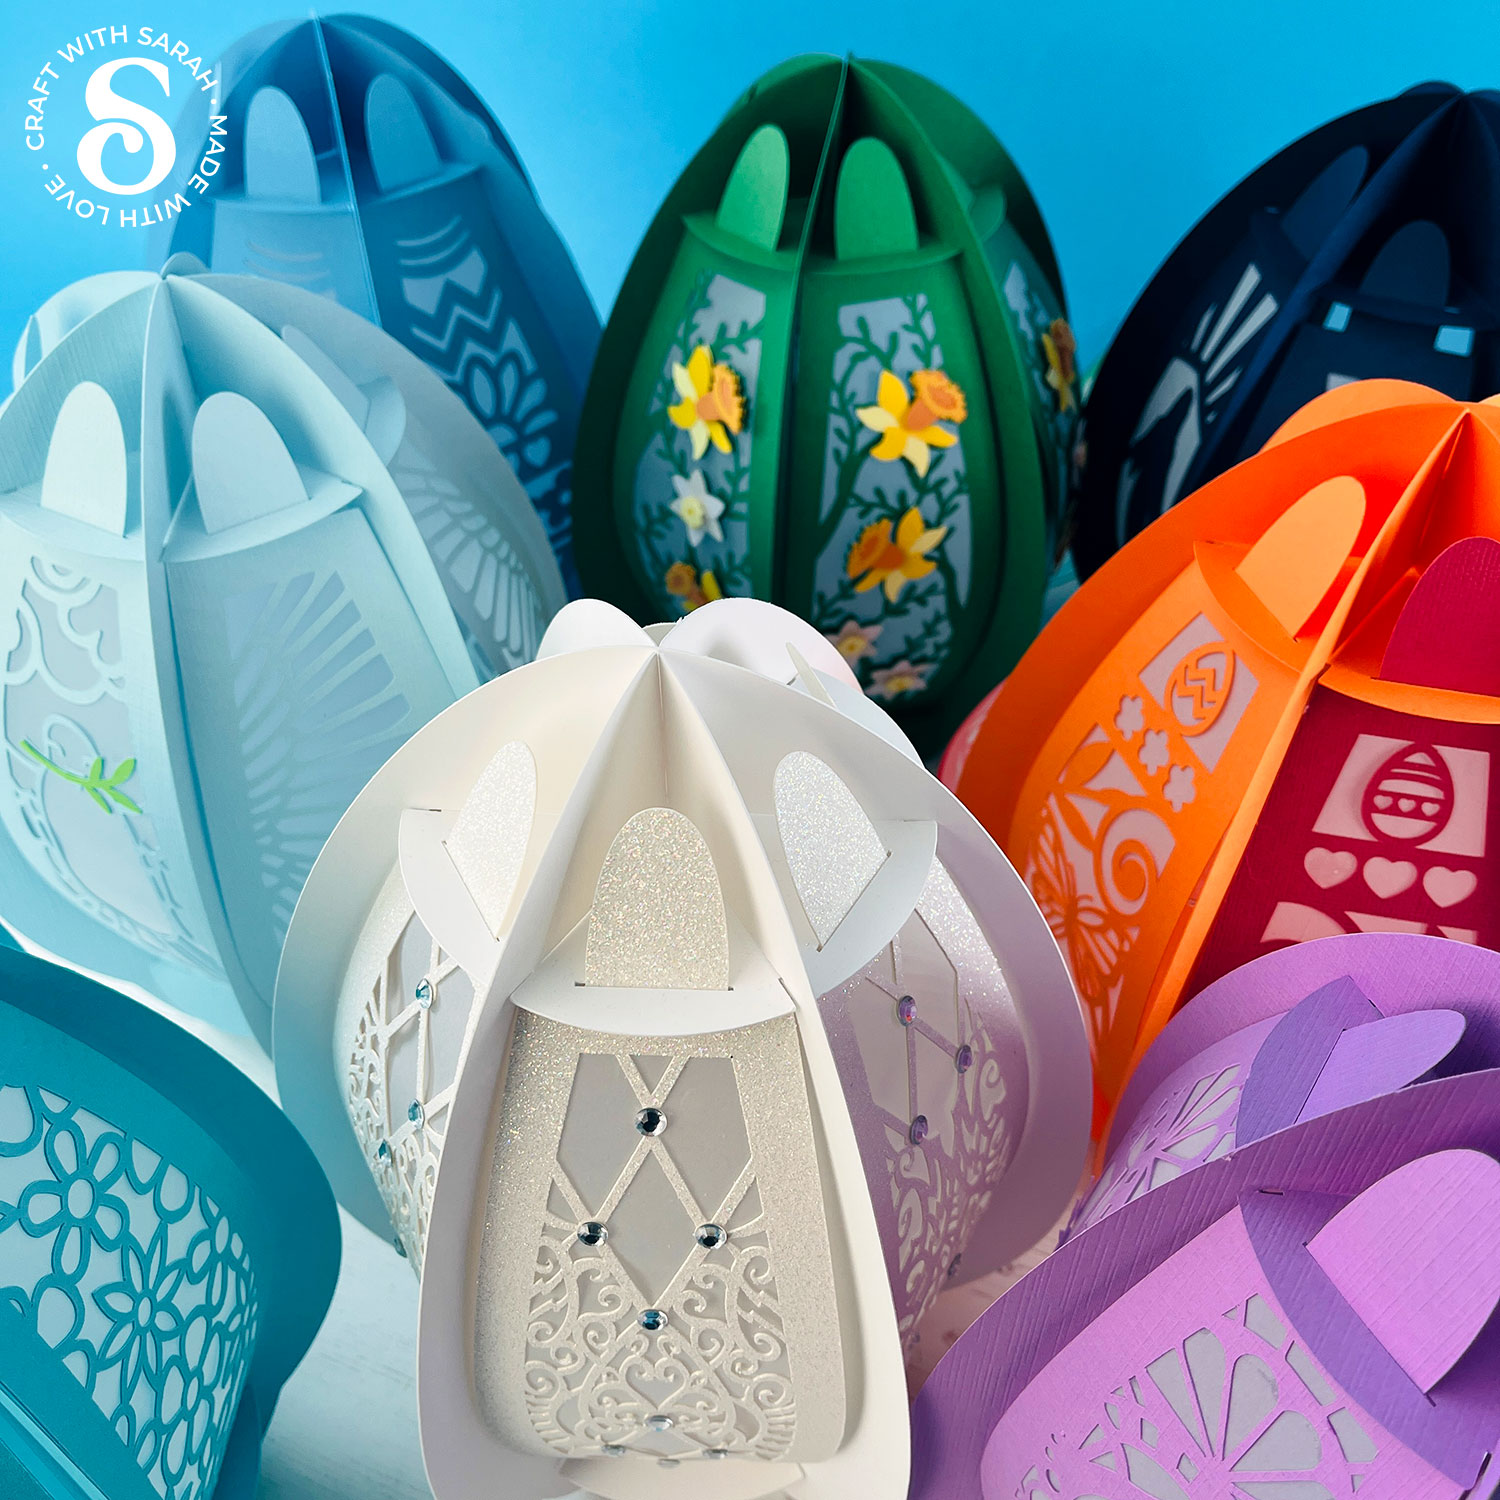
I had so much fun making the filigree egg with white glitter card and adding sticky gemstones on top. The glitter card makes it look like it’s glowing when the sun catches it, even if the fairy lights are turned off.
Happy crafting,
Sarah x

