CMC 2024 Day 08 ✂️ Word Ribbon Cards
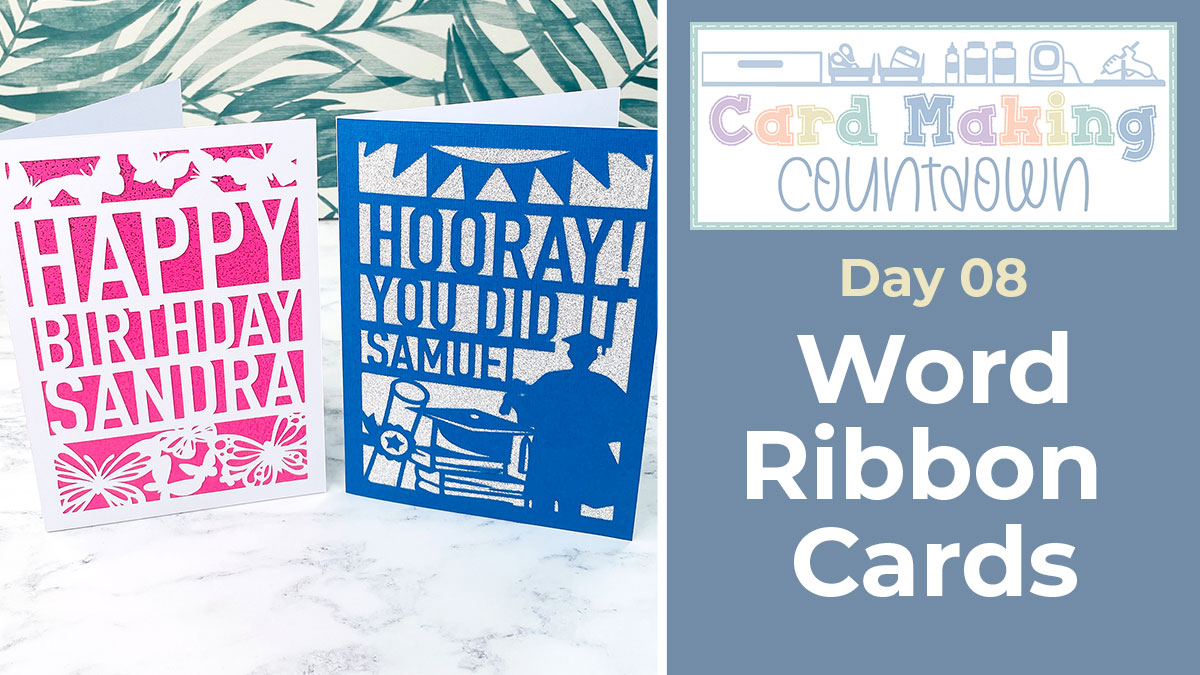
It’s Day 08 of the 2024 Card Making Countdown!
Hello and welcome to Day 8 of the Card Making Countdown, where I’m showing you how to make 10 different types of card with your Cricut machine in 10 days.
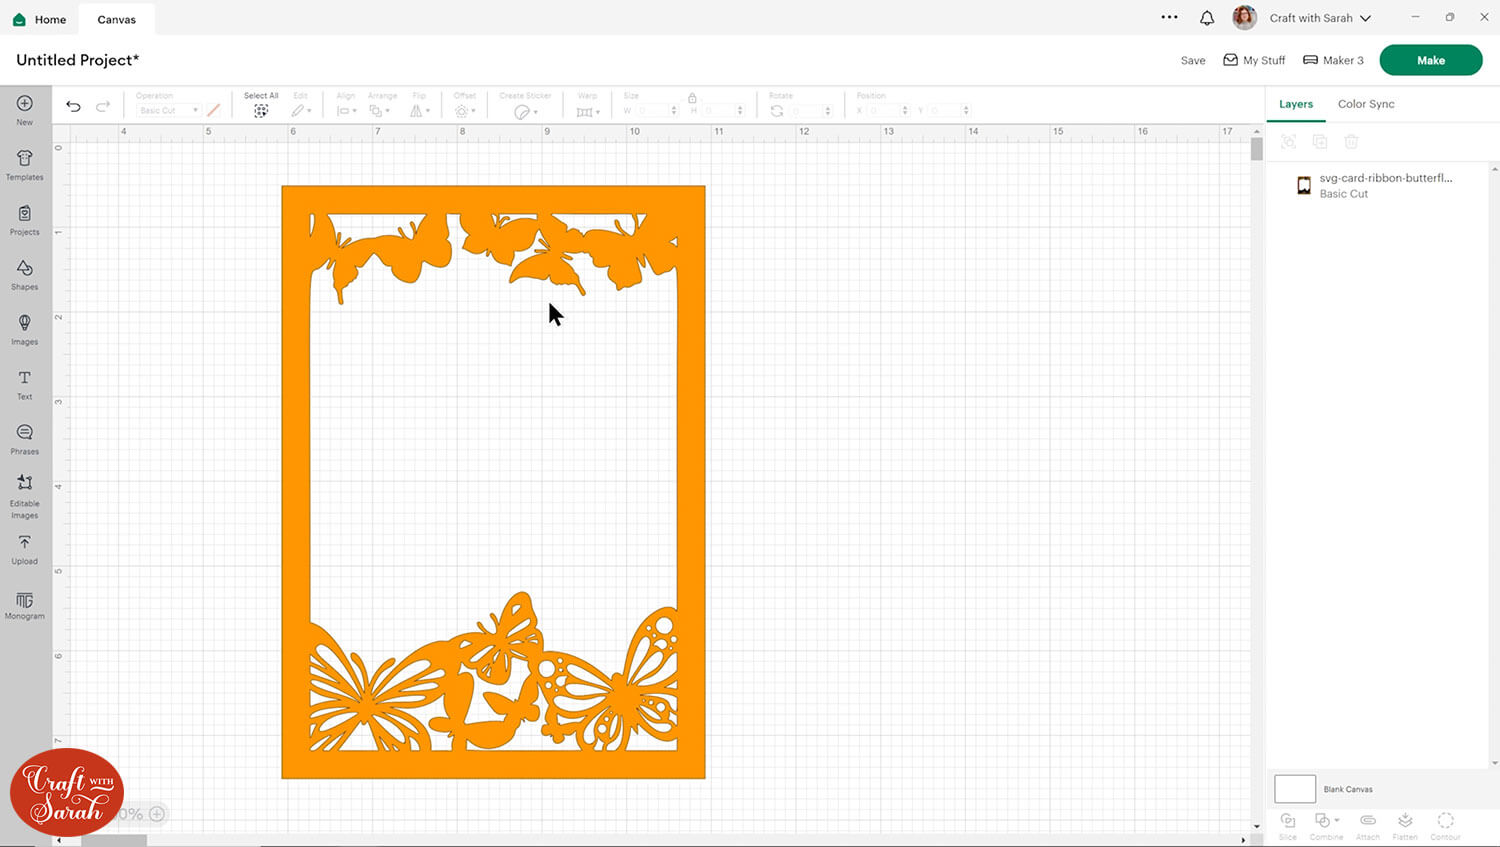
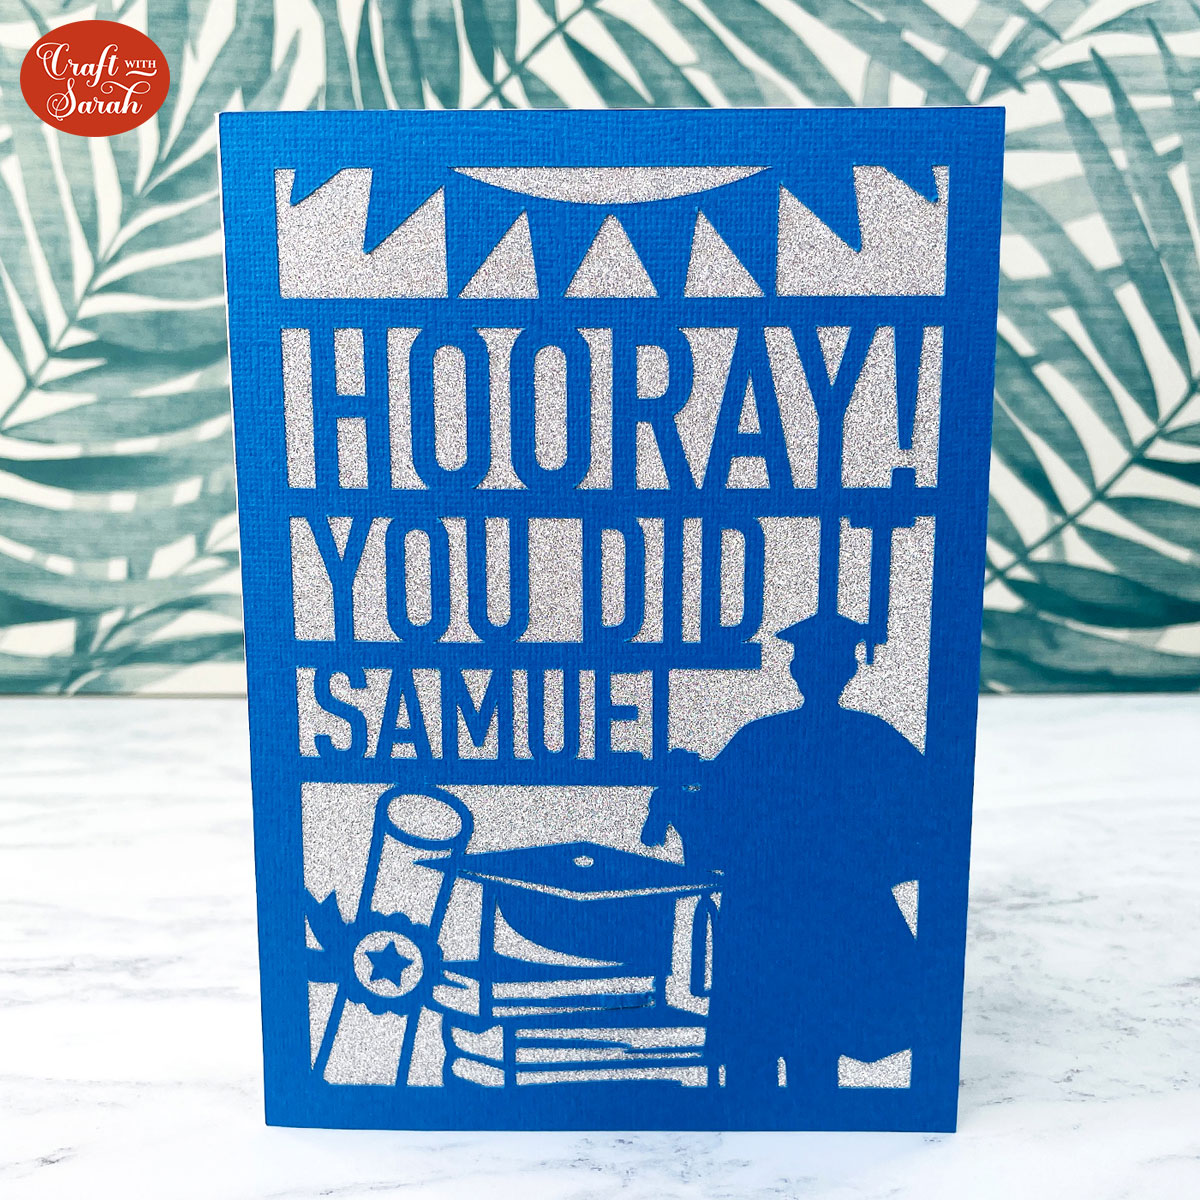
Today we’re making word ribbon cards! These word ribbon cards can be personalised for any occasion with both images and text! Choose from three pre-made designs, or create your own!
But remember, the three pre-made designs are only available for free for 24 hours, starting at 9am EDT on 8th June 2024.
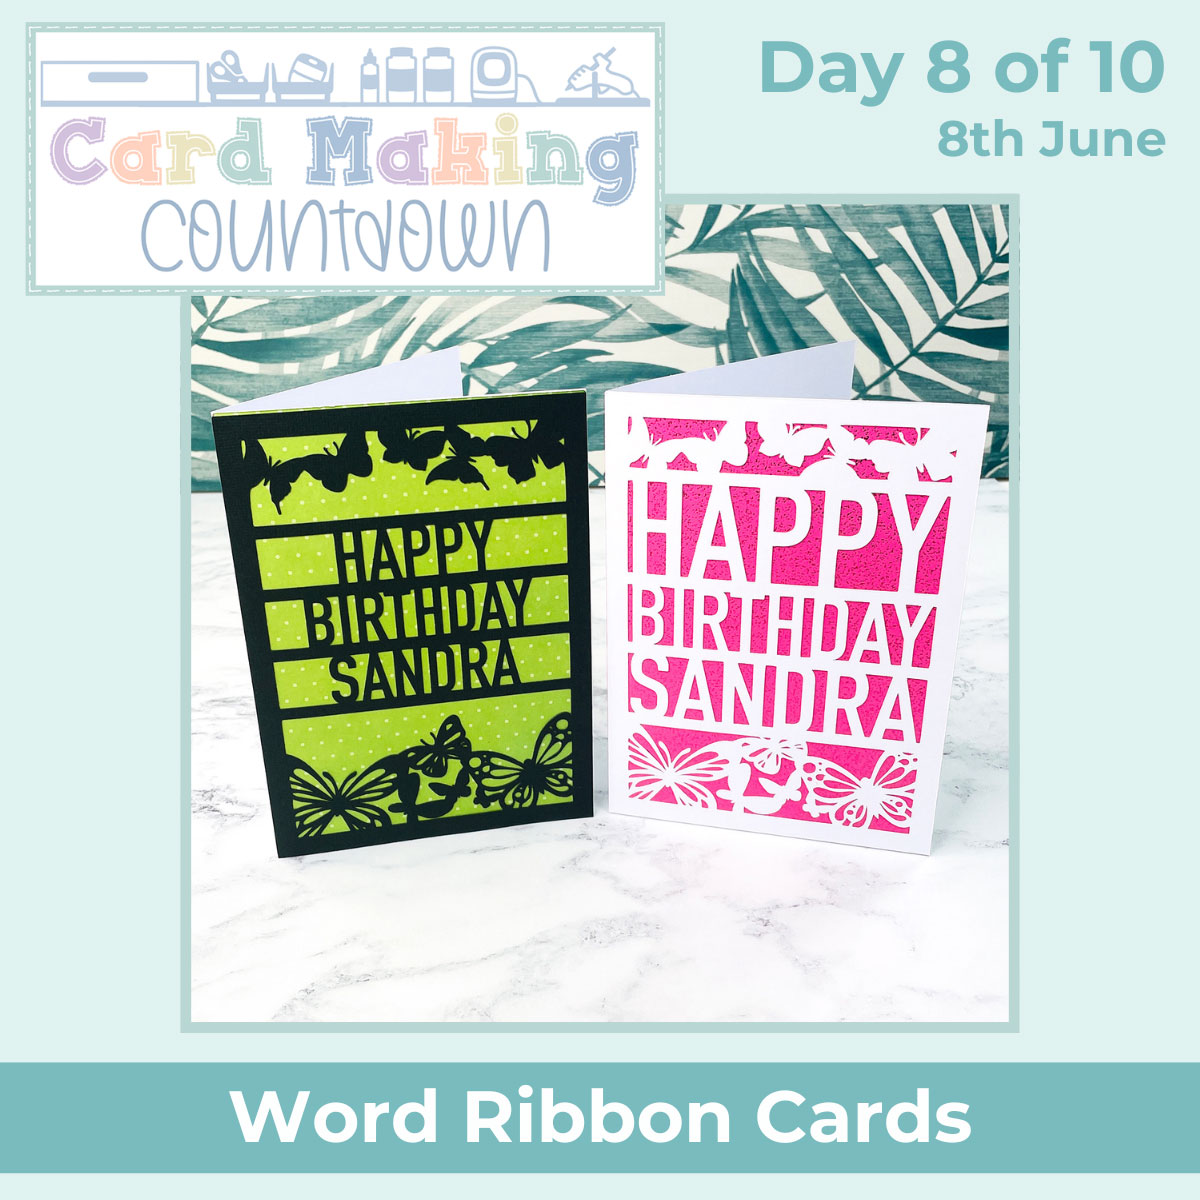
The pre-made designs have lots of space for you to add your own text to them. Add any greeting, sentiment, name or phrase!
I hope you enjoy these word ribbon cards, as well as the segment on how to make your own cards in this style using Cricut Design Space.
This Project was part of the Card Making Countdown 2024
Materials supply list
Here is a list of the materials that are required to make this project.
Please note that some of the links included in this article are affiliate links, which means that if you click through and make a purchase I may receive a commission (at no additional cost to you). You can read my full disclosure at the bottom of the page.
- Cricut machine
- Light blue Cricut cutting mat
- Cricut scoring wheel or scoring stylus (optional)
- Cardstock in 2-3 colours (I like using a glitter/holographic/metallic card for the backgrounds)
- Glue or double-side sticky tape (I like Bearly Art Glue and Collall brands of glue)
This project is suitable for the following types of Cricut machine: Explore Air 2, Explore Air 3, Maker, Maker 3, Joy Xtra and Joy.
Foundation learning
If you’re new to crafting with your Cricut, you may find the below links helpful.
They teach some of the skills mentioned throughout this tutorial.
- How to upload SVG files into Design Space
- How to score with a Cricut (even without scoring tools)
- Print then cut tutorial
- Design Space tools (Combine, Attach, Slice, Weld, Flatten, etc.)
- Pattern fill tutorial (for making backgrounds & cutting images to a specific shape/size)
- Free envelope SVGs that can be sized to fit any card
- How to write inside cards with Cricut pens
- How to cut layered designs at a small size
- Design Space tips & tricks
- Cricut pens tutorial
Video tutorial for word ribbon cards
Watch the video below to see how to make word ribbon cards with a Cricut machine.
The first part of the video shows how to use the card templates that are included as part of today’s project.
The second part of the video shows how to design your OWN word ribbon cards from scratch within Cricut Design Space.
If you prefer to read rather than watch, keep scrolling!
PART ONE: Cricut word ribbon cards using pre-made templates
Here’s how to make your very own word ribbon cards with a Cricut machine, using the three templates from today’s Countdown project.
Scroll further down this page for how to design your own word ribbon cards.
Step 1) Download the file(s) & upload to Design Space
Download the files using the box below.
Purchase the File(s)
This cut file is available as part of the Instant Access Bundle.
Or, purchase this design individually here
Before you upload the files to Design Space, you need to unzip the download folder that they come in.
- How to unzip a folder on Windows computer
- How to unzip a folder on a Mac
- How to unzip a folder on an iPad/iPhone
- How to unzip a folder on an Android device
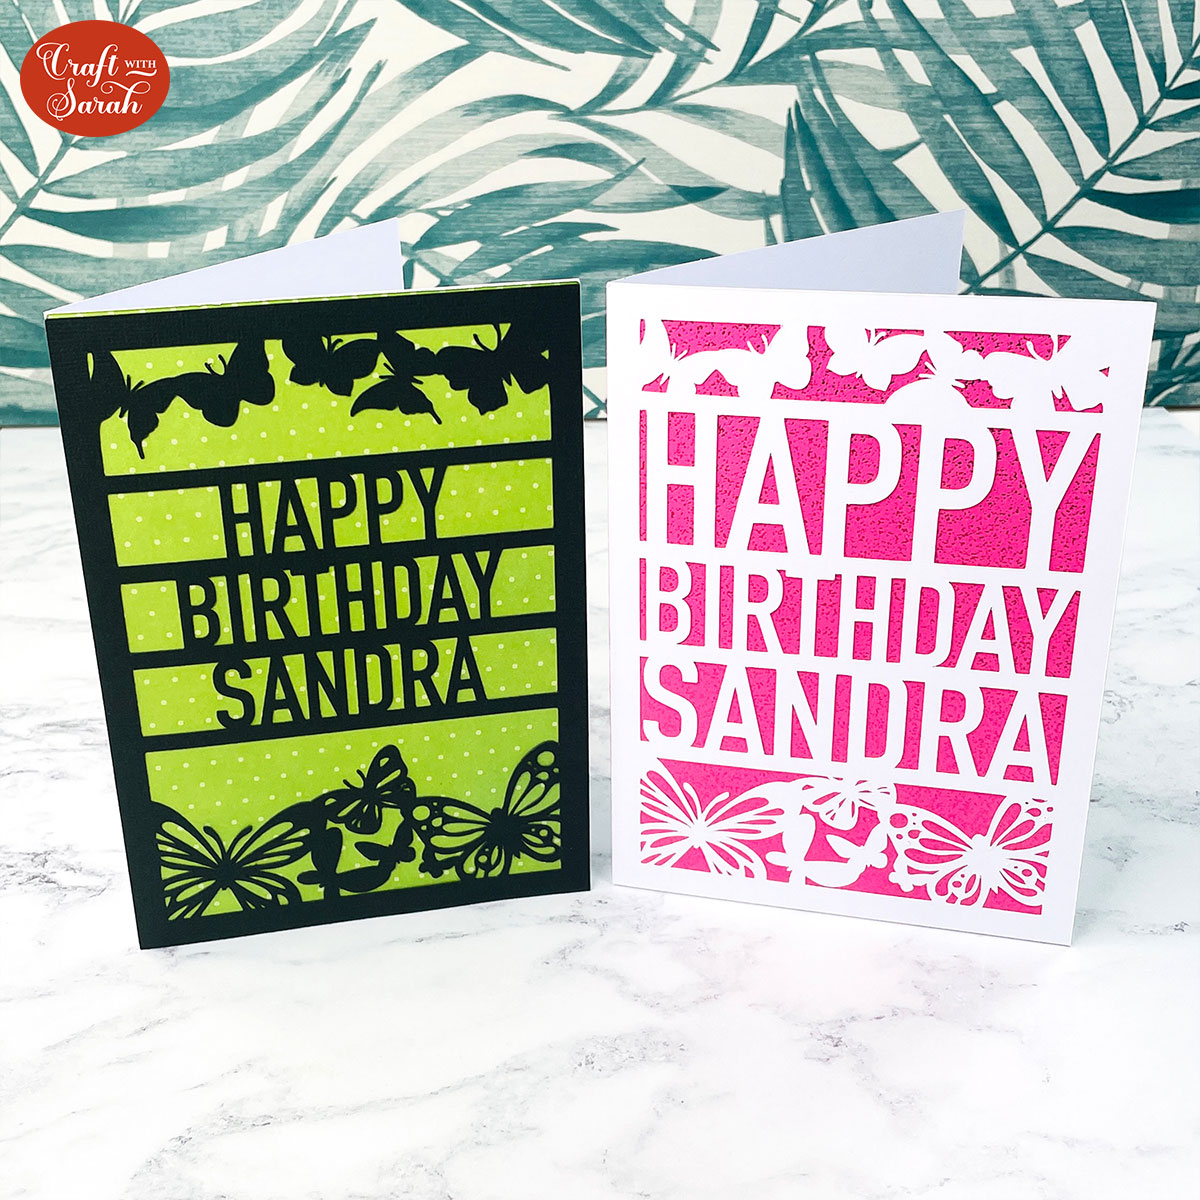
The download folder contains three different word ribbon card templates: a birthday design, butterfly design and Christmas design.
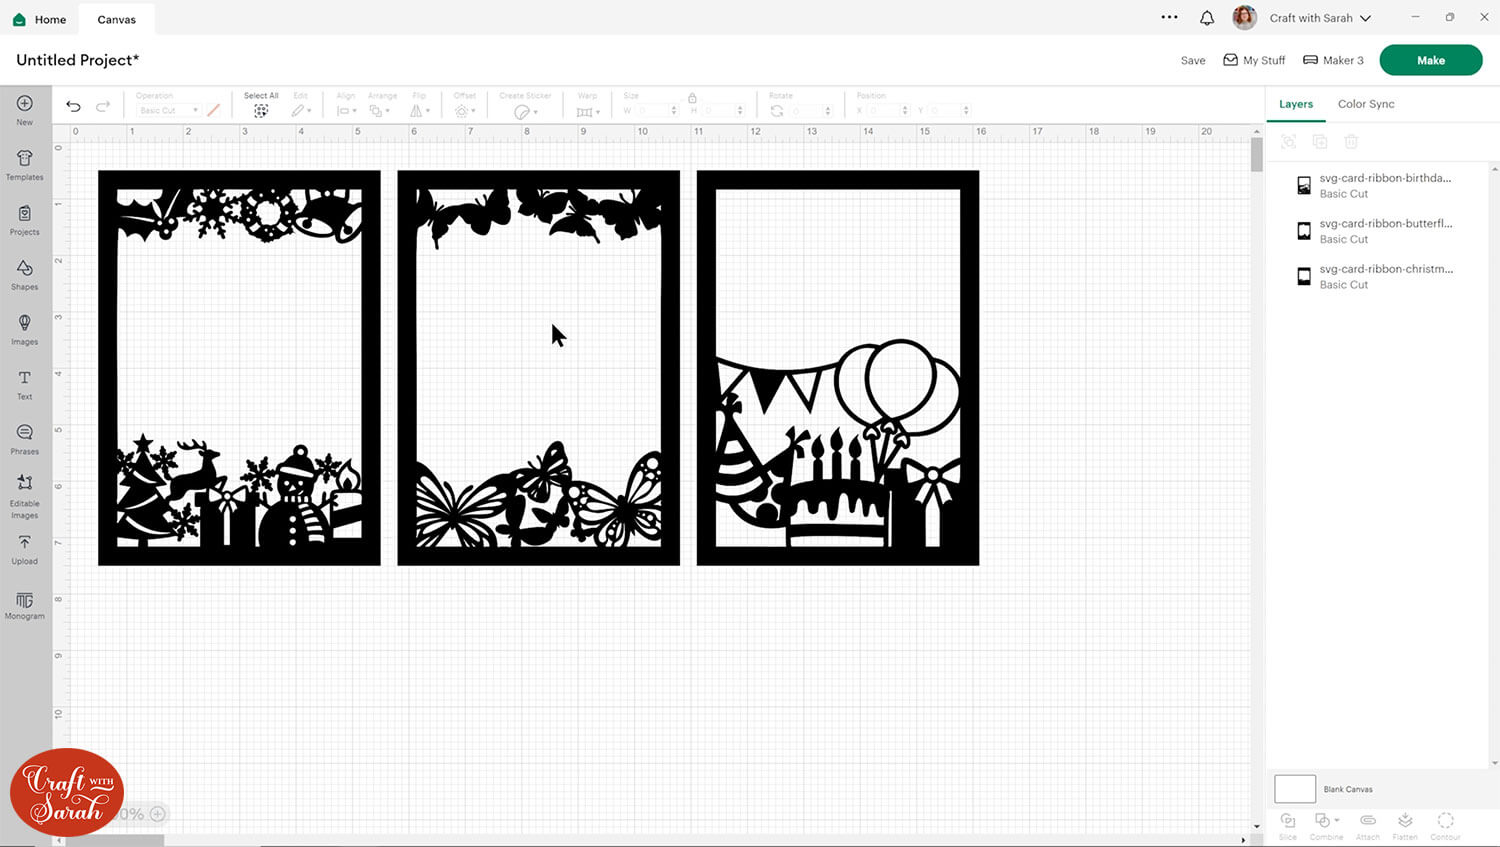
Choose your preferred template and upload the SVG file into Cricut Design Space.
TIP: Make sure you upload the files which start svg- in the filename. Not sure how? Here’s how to upload SVG files into Cricut Design Space.
I’m using the butterfly design for this tutorial, but the steps are the same for all of them.
Step 2) Personalise the template
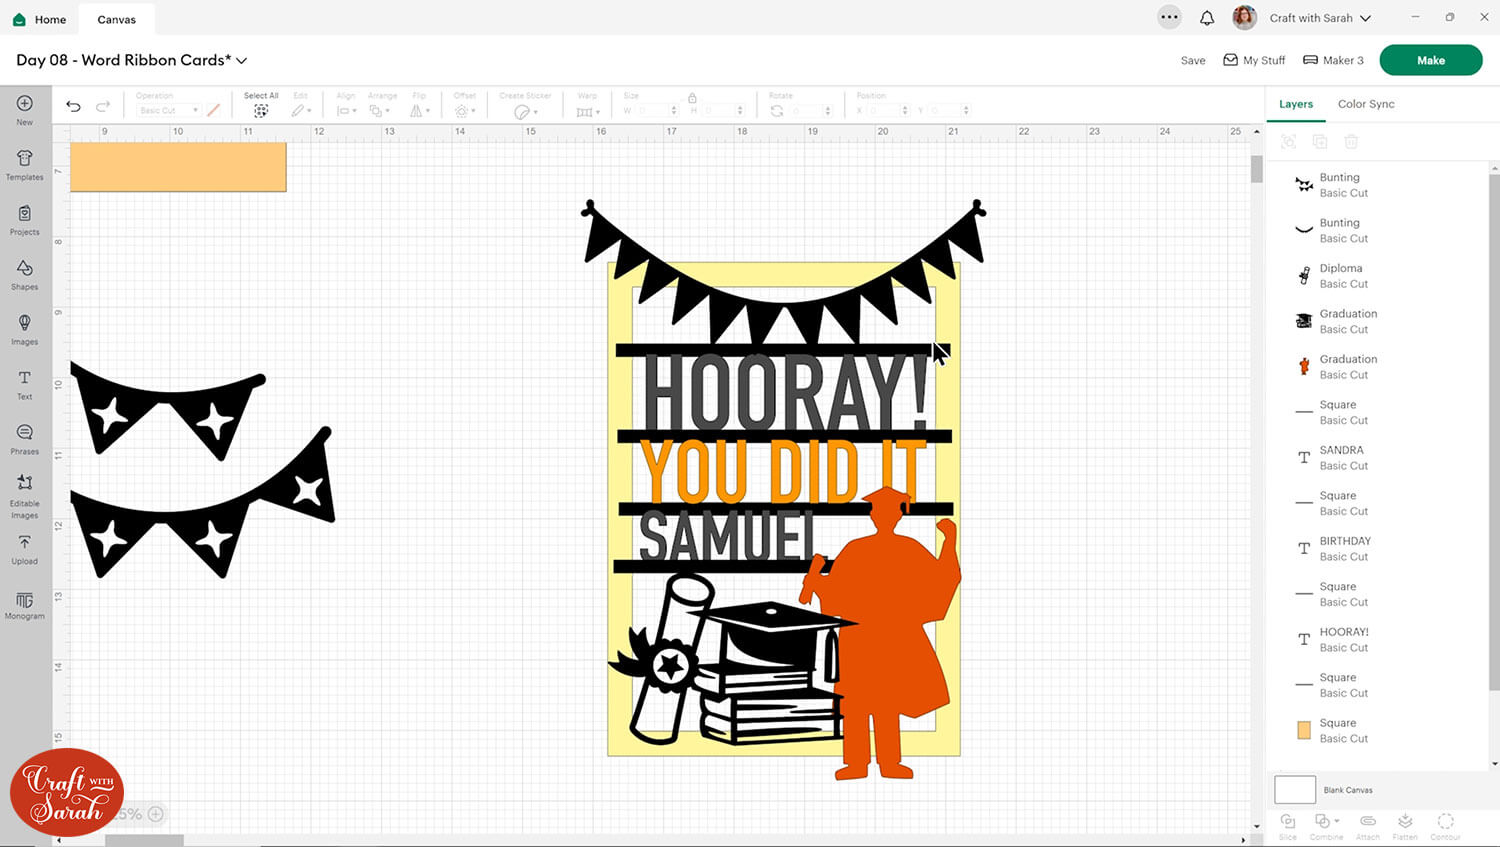
I’ve created the templates without the lines that separate the words so that you can add your own in. This gives you the option of adding as many lines of text as you want.
You might be doing something simple, maybe “Happy Birthday” which would require two rows, or you might want to put quite a lot of writing in, in which case you’d need to break it up into more rows.
Make it a little bit easier to see by changing the colour because then you can see the outline of all of the different shapes.
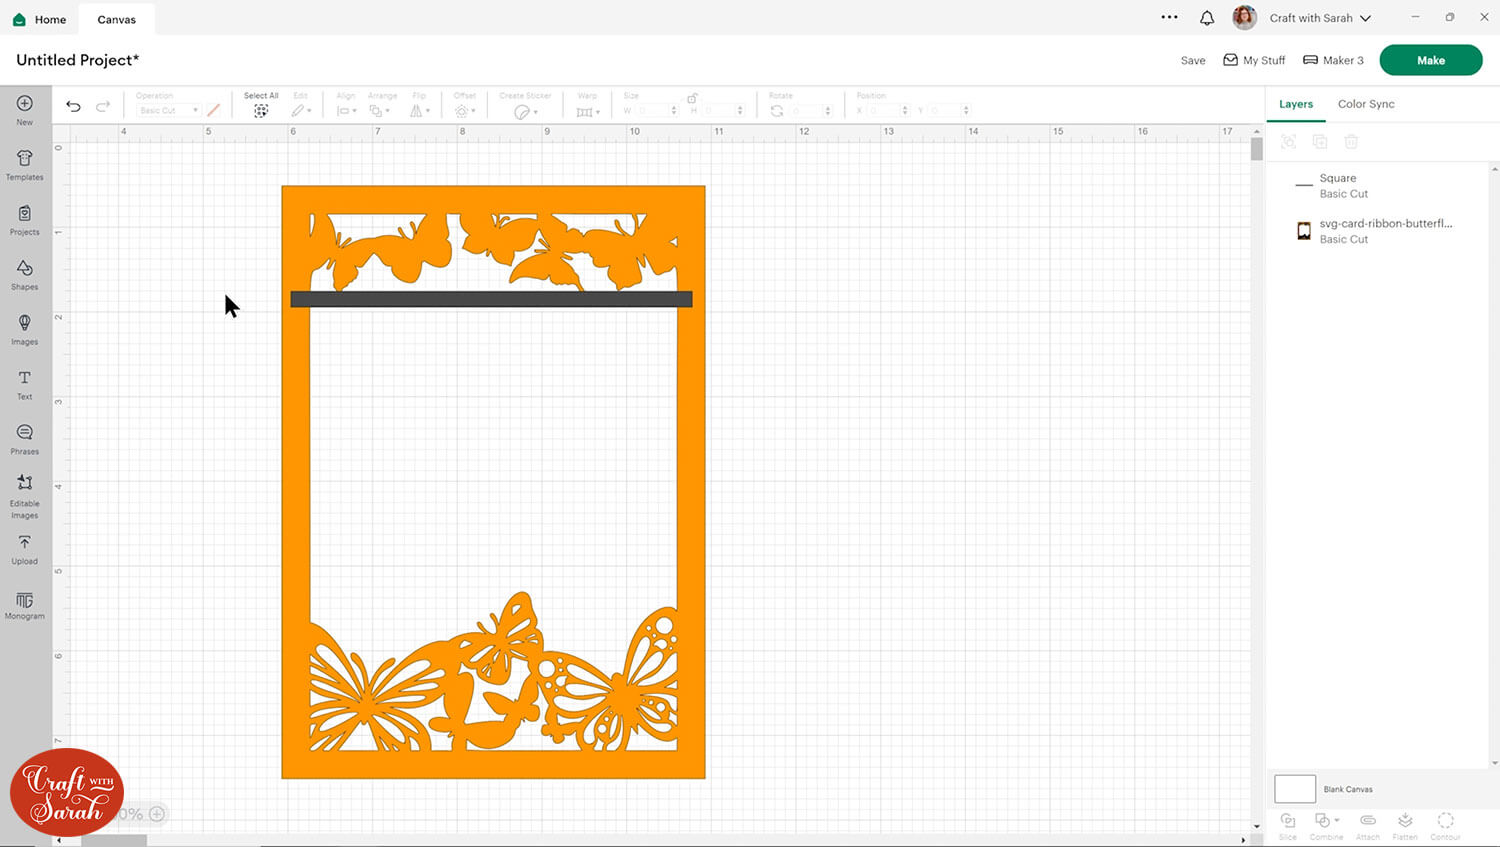
Now let’s make the rectangles to create the rows.
Click “Shapes” and choose a square. Untick the padlock icon above the width/height boxes and make a long, thin rectangle.
Just remember you don’t want to go too thin or it’ll get hard for the Cricut to cut.
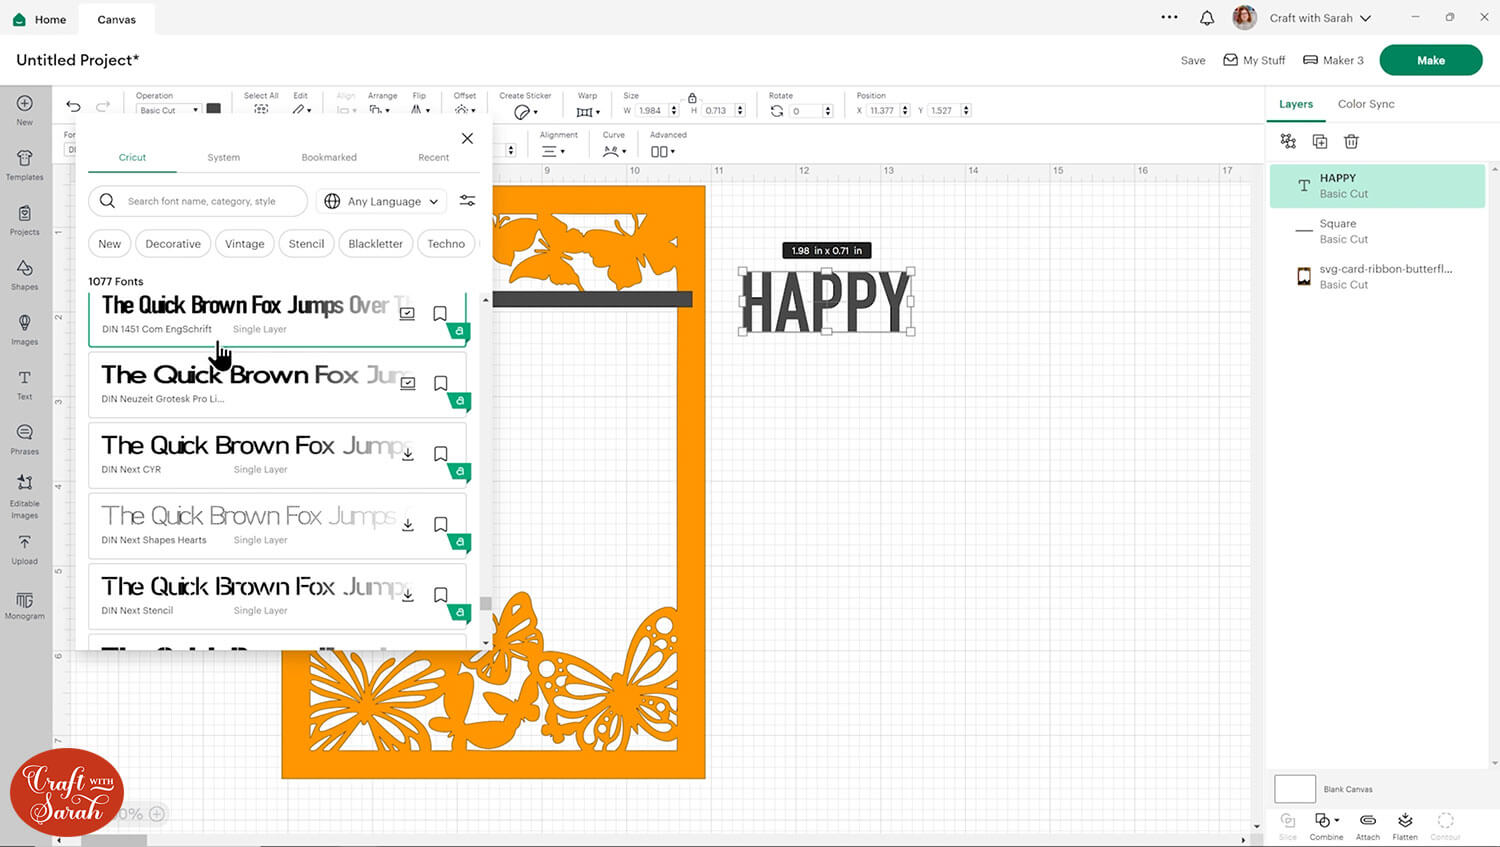
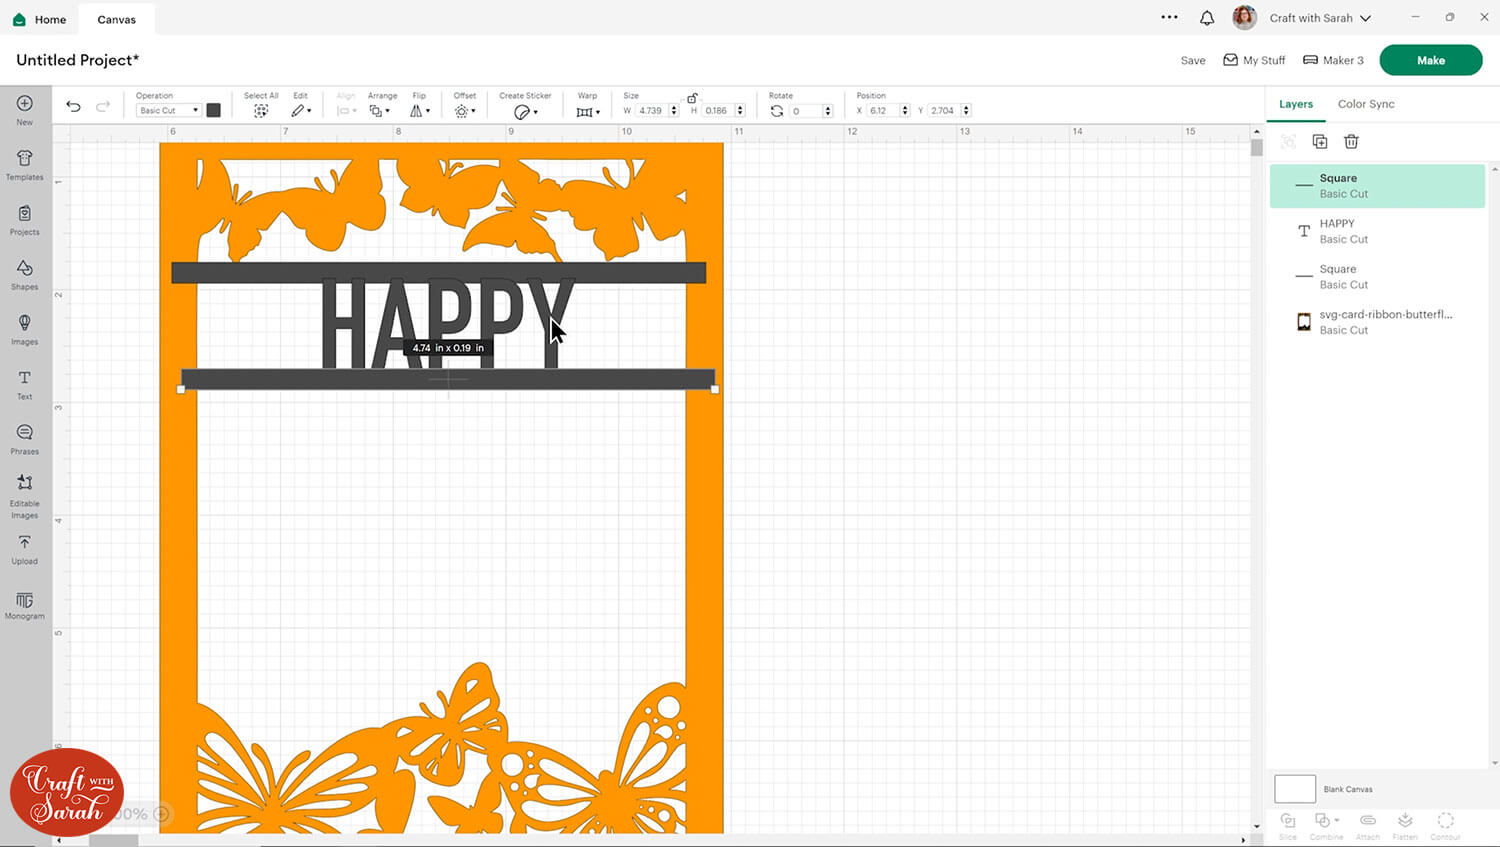
Click “Text” and type out the first word (or line of text) that you wish to include on the card.
It works best to use capital letters because then you know everything’s going to line up on the top and the bottom.
As we are cutting from cardstock, we need a thick font. Try to stay away from script font or calligraphy fonts and choose something big and bold instead.
I chose a Cricut Access font called DIN 1451 Com Engschrift.
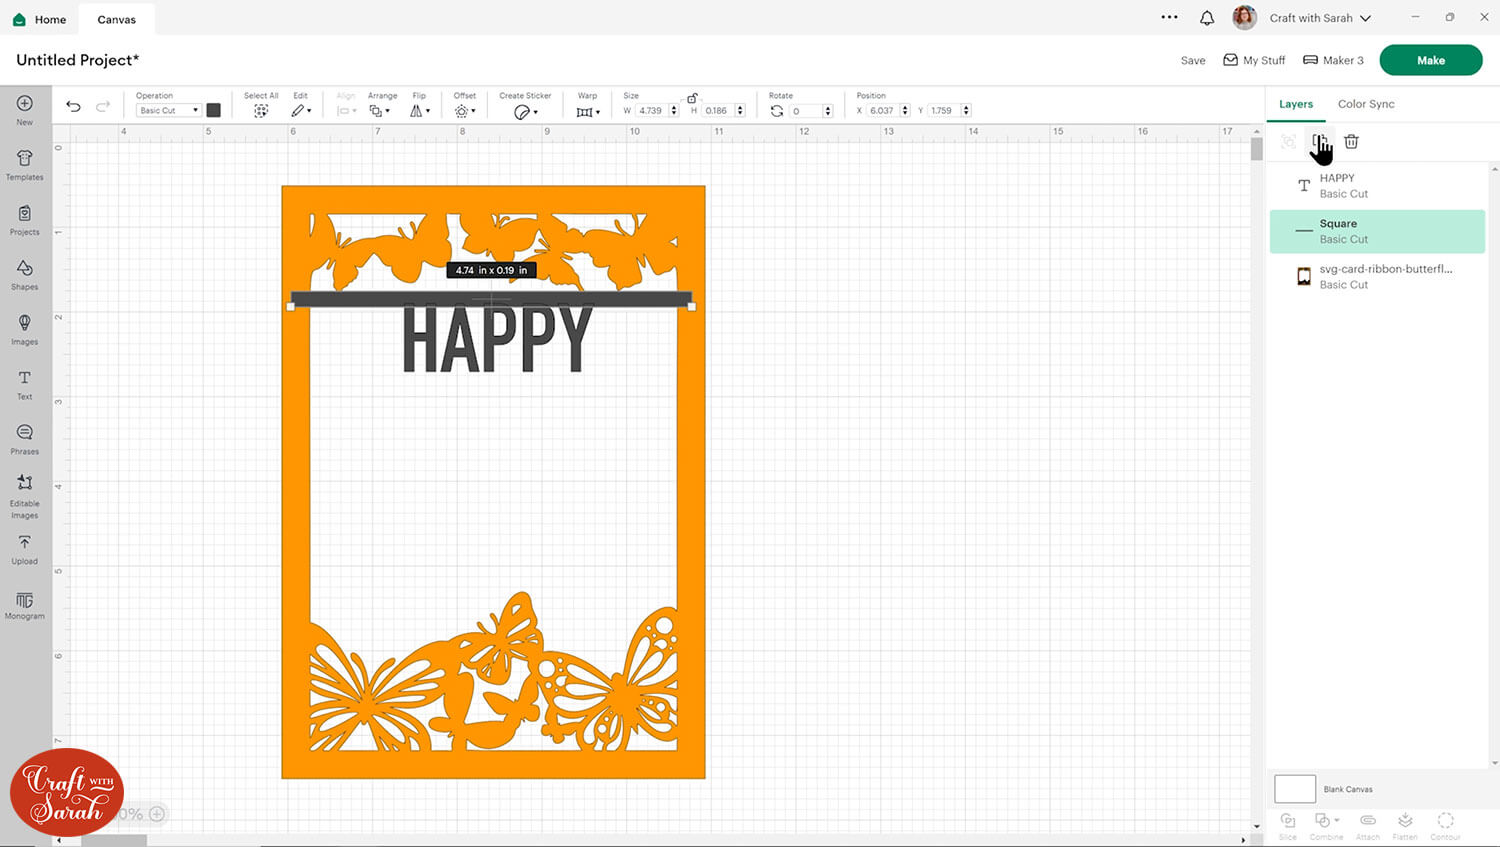
Now put your text in position. I’m not worrying too much about getting it right in the middle now I just want to get the basic layout in place.
Overlap the text slightly onto the rectangle so that they are touching.
Duplicate the rectangle.
Place this underneath the text, so it’s just touching the bottom of the writing.
Duplicate the text for the next line so you know everything will be the same size. Type out your next word and put it roughly in place.
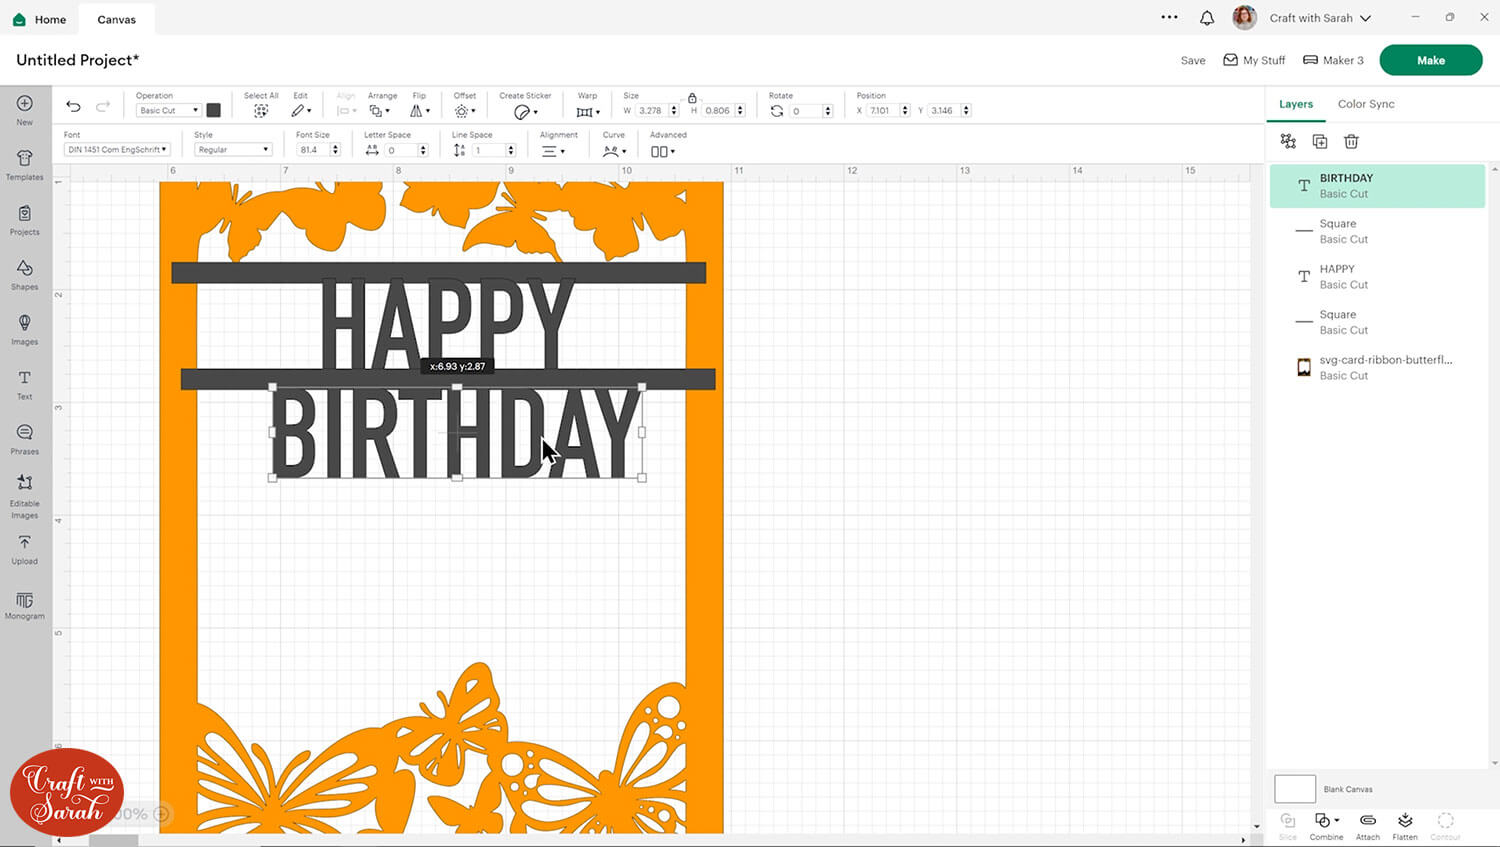
Repeat these steps until that you have all your words typed out with the rectangles. Make sure there is a rectangle at the bottom of the final line of text.
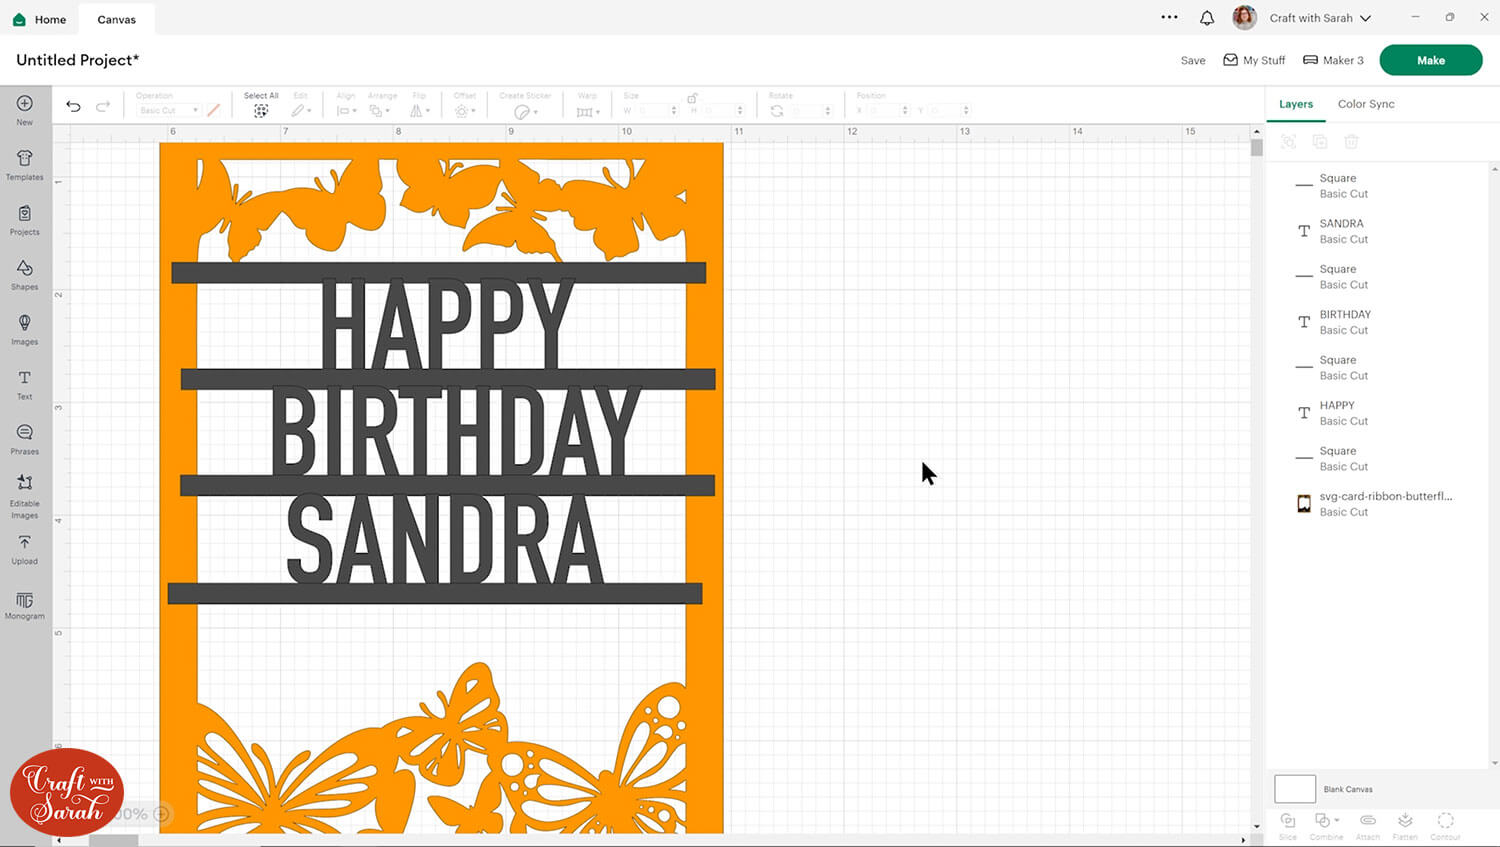
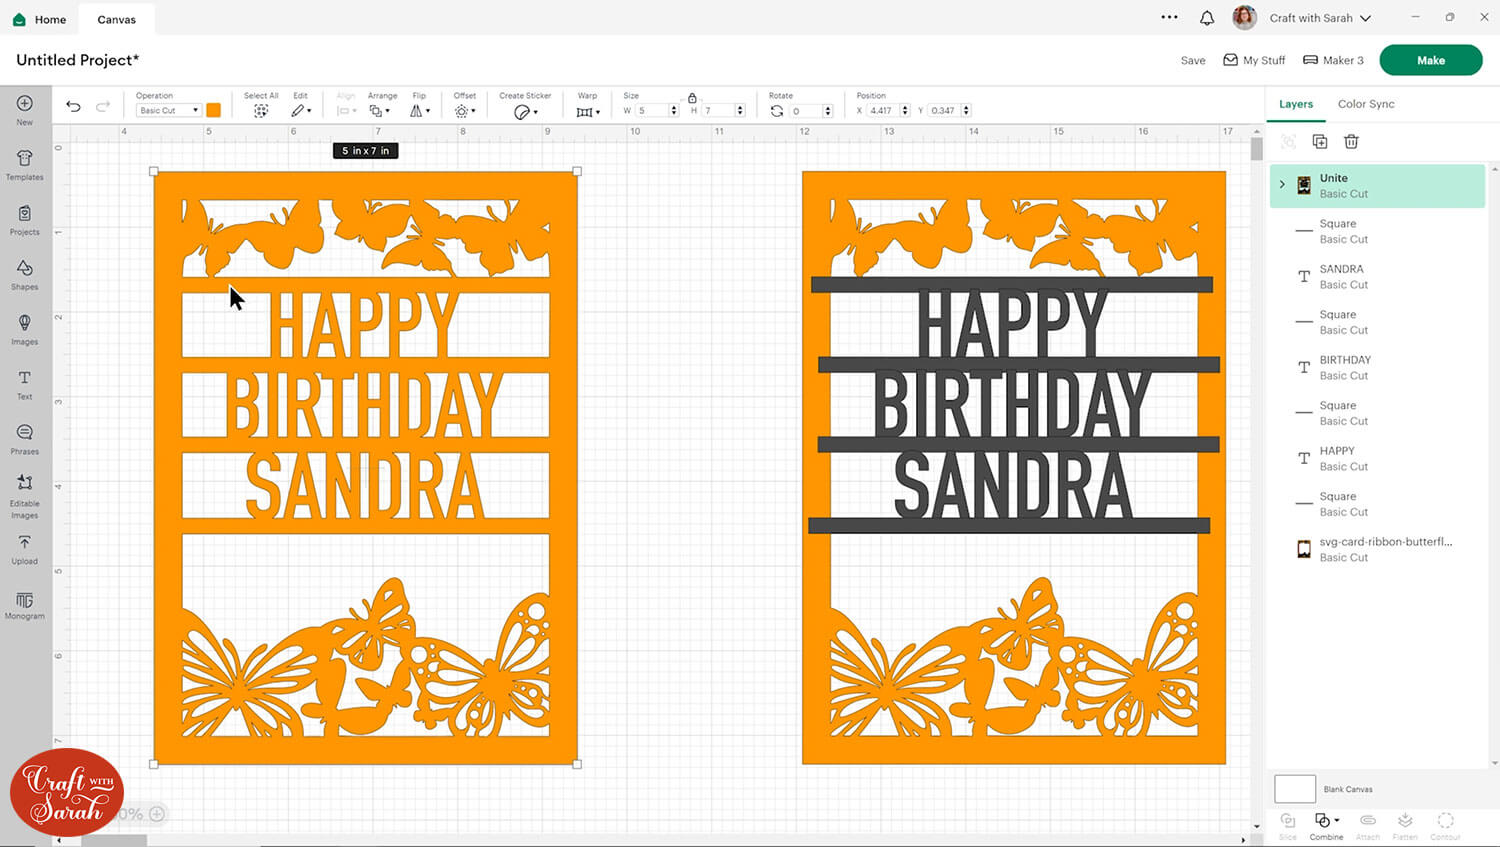
When you’re happy with the text, select all your text layers and the main background image and press “Align > Center Horizontally” to put the words in the exact center of the base card.
I’m going to show two ways of sizing the text. To try both methods, select everything and duplicate it to make a copy of the card. We’ll edit that one later to make the other version.
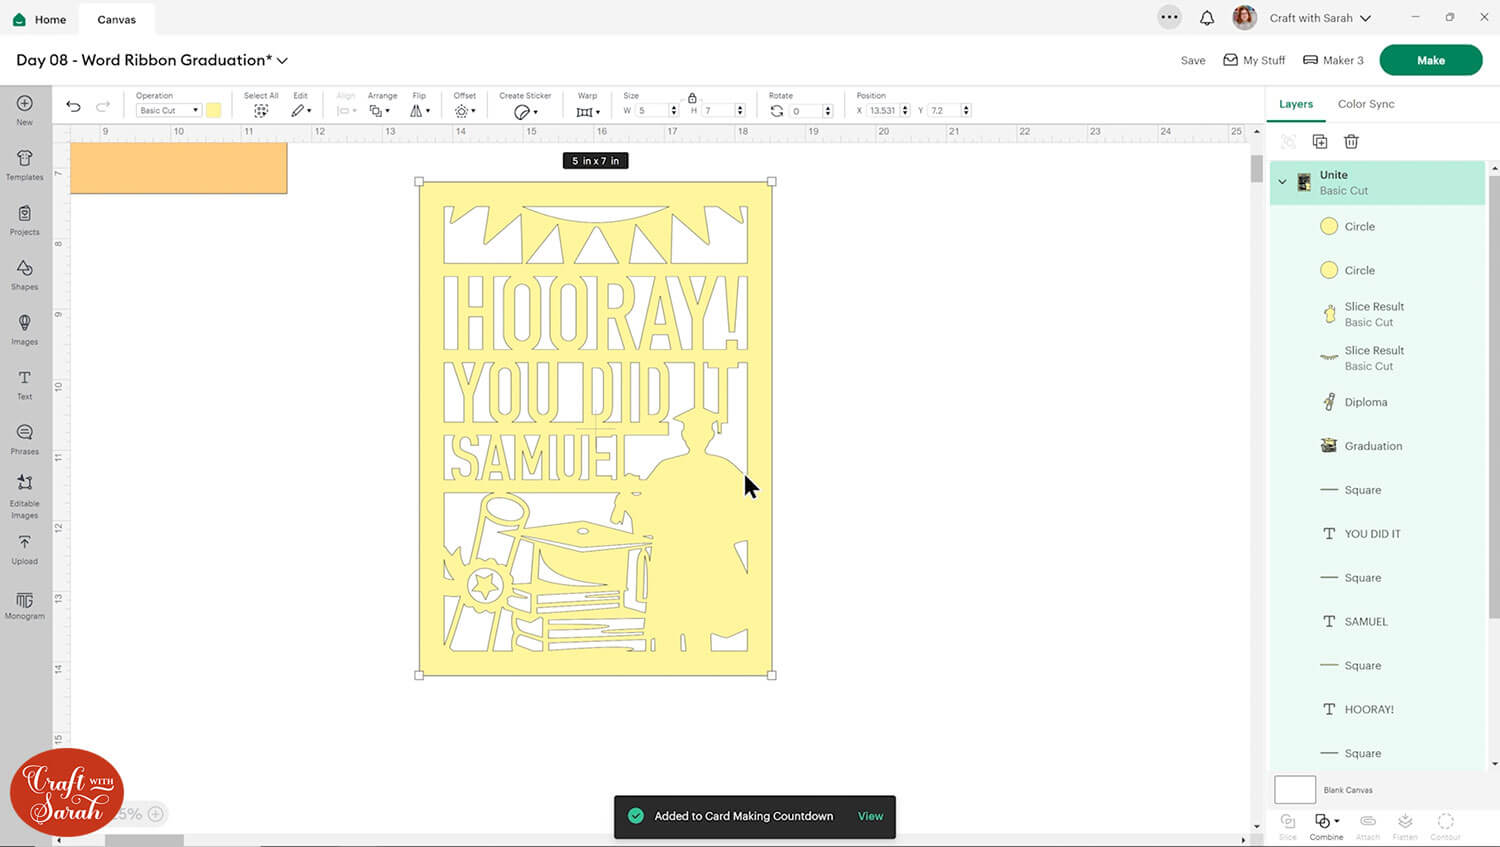
Select everything on the card you were working on (not the copy) and go “Combine > Unite”. We are using unite so that we can still move the pieces about rather than using Weld where it would be permanent.
Have a look at your united layer and check that all the text is touching the rectangles at the top and bottom. This is important, as if there are gaps then it will not cut as one connected piece of card.
If there was anything you wanted to change, look in the layers panel and click the little arrow where it says Unite. Within there you can select a layer and move it. When you click away it will redo the unite in the new position.
That’s the first style of text done, with all the words the exact same text size.
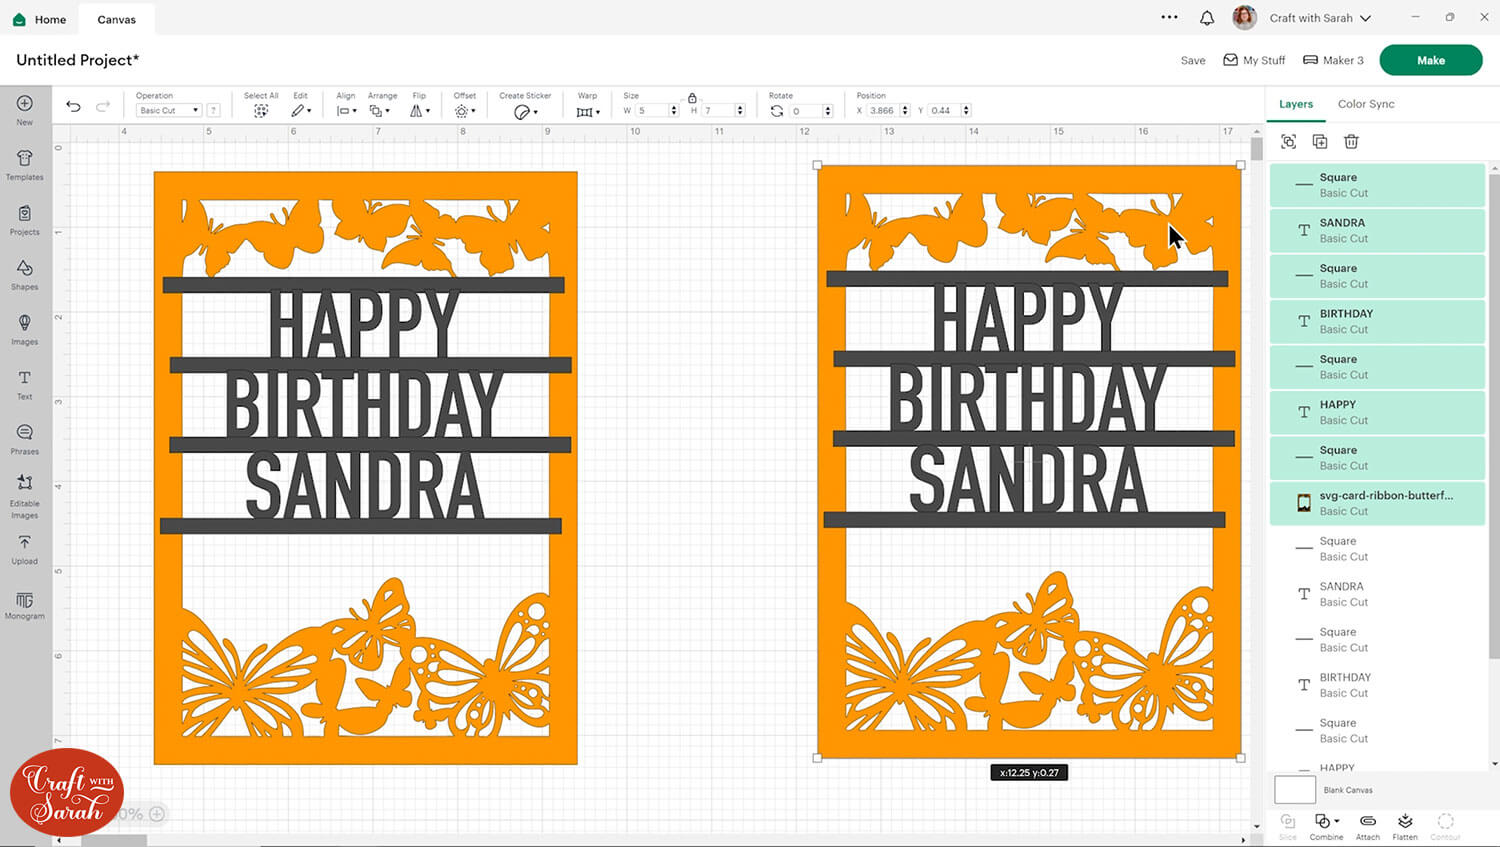
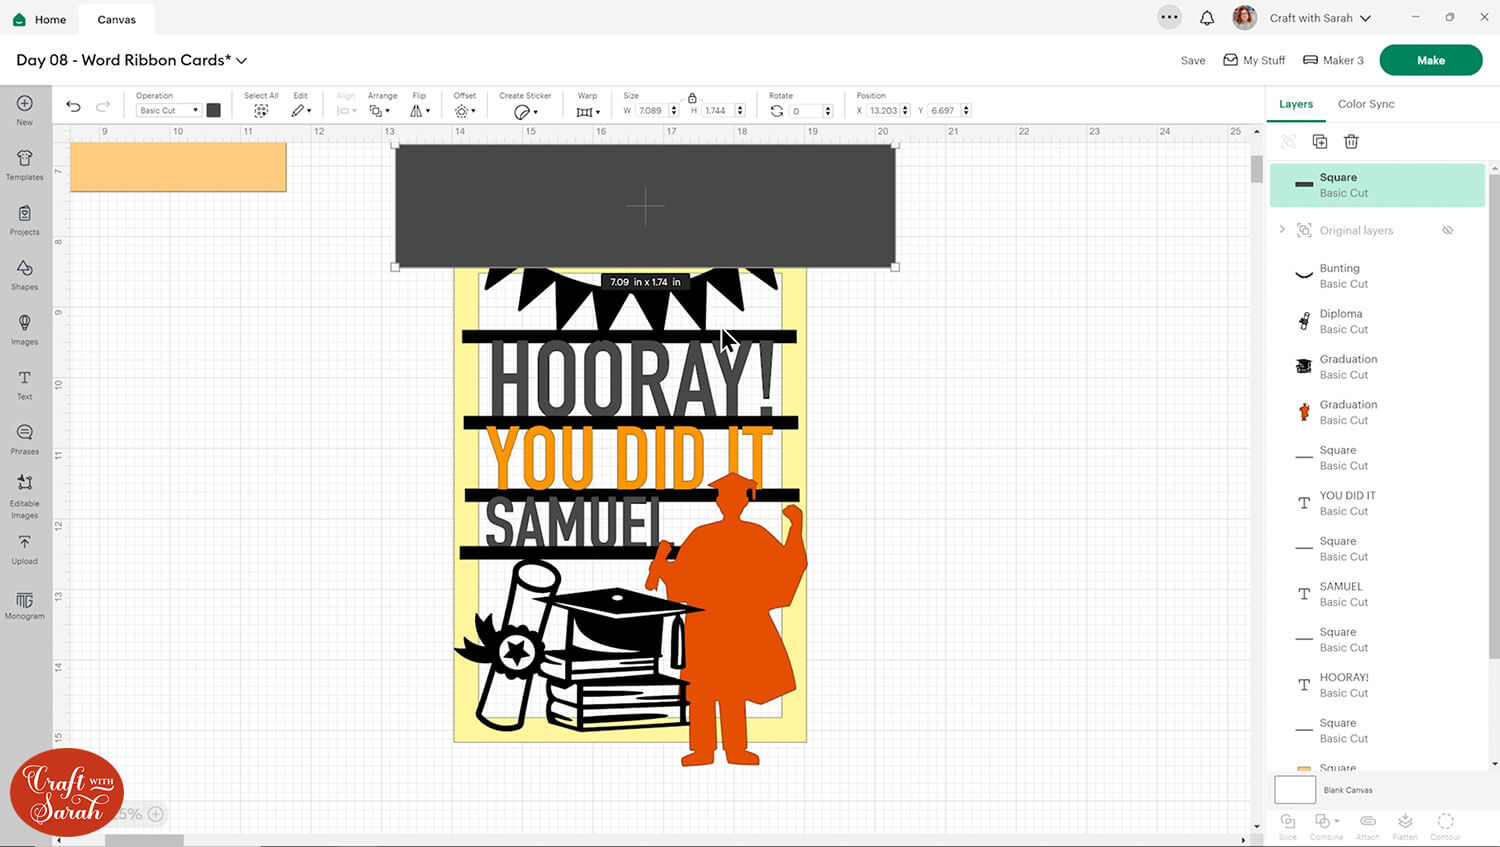
Now I’ll show you how you can fill each line with different sized text, using the copy we made earlier. I prefer this second style as it fills the space better and gives more of a visual impact.
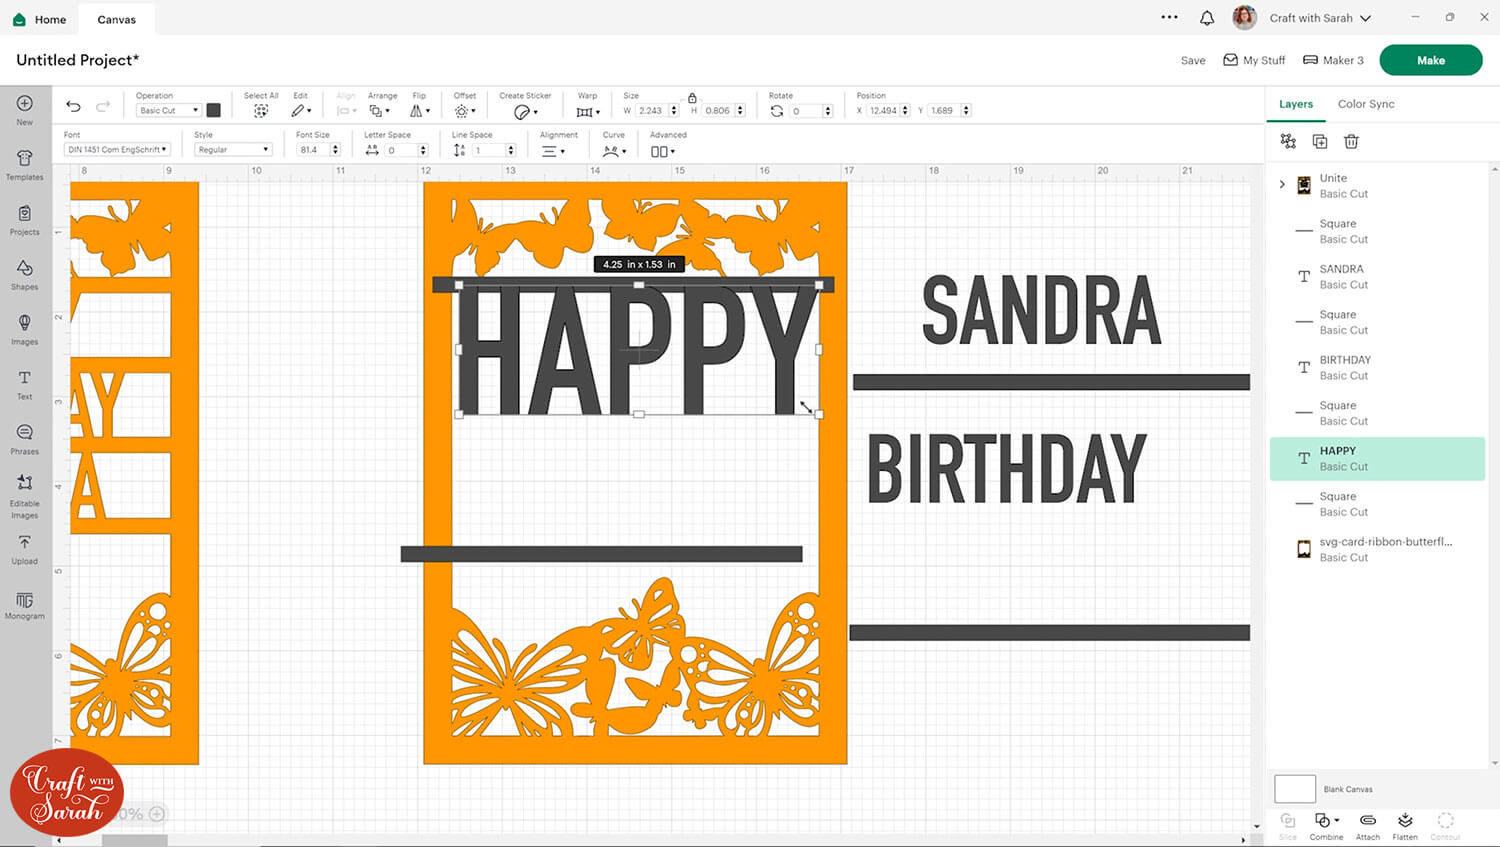
Move the text and rectangles off to one side and start again with the first line of text. Make it larger, so it uses the whole space – but don’t touch it right up against the left and right sides of the frame as that makes it a little difficult to read.
Repeat this for the other words.

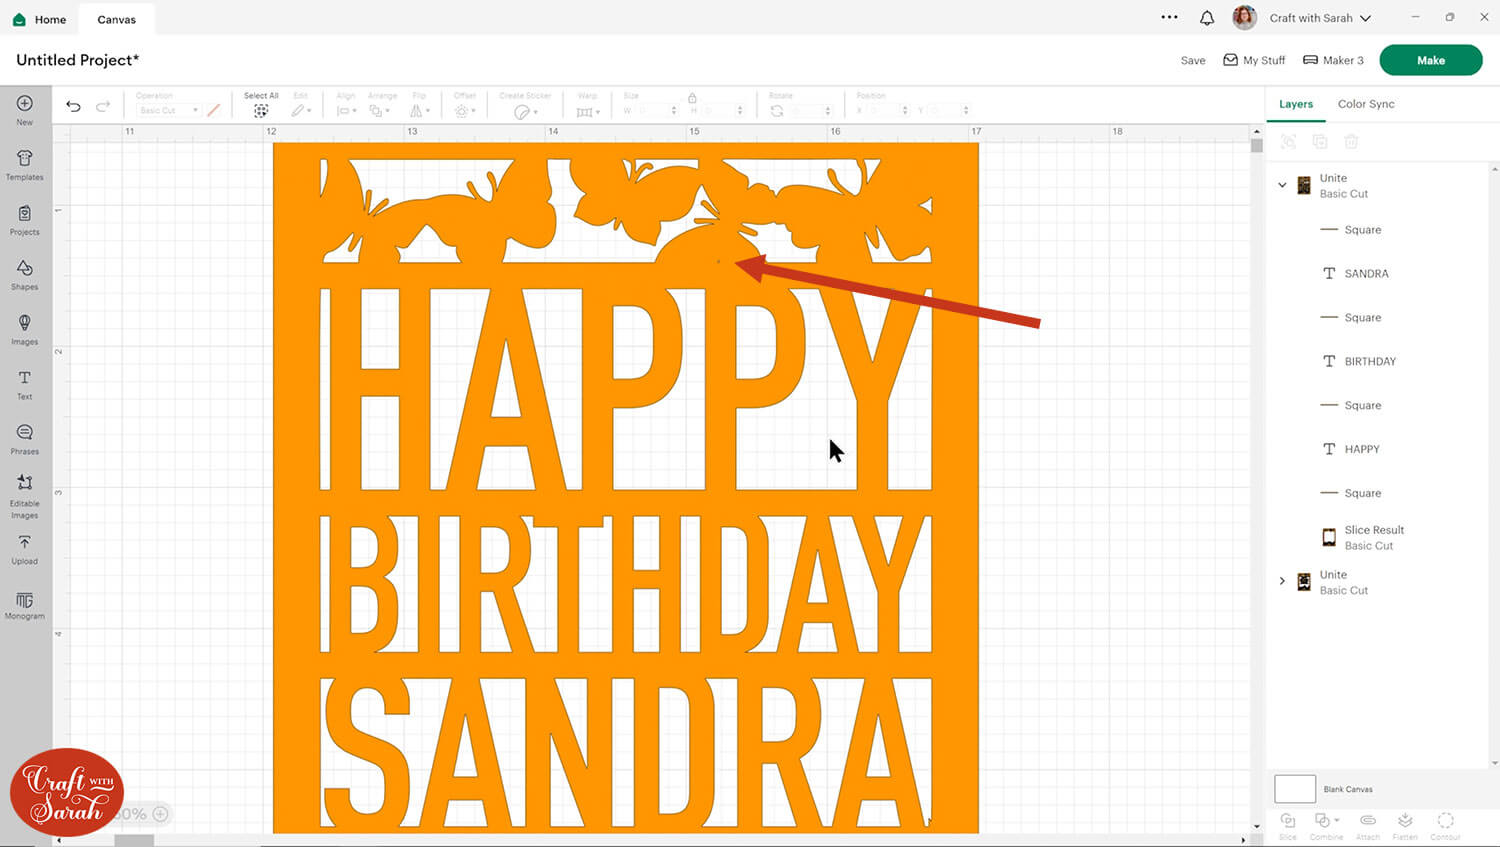
I’m happy with the text, but some of the butterflies are poking through the words which looks a little messy.
To fix this, draw a square over all the parts of the background that are overlapping the words.
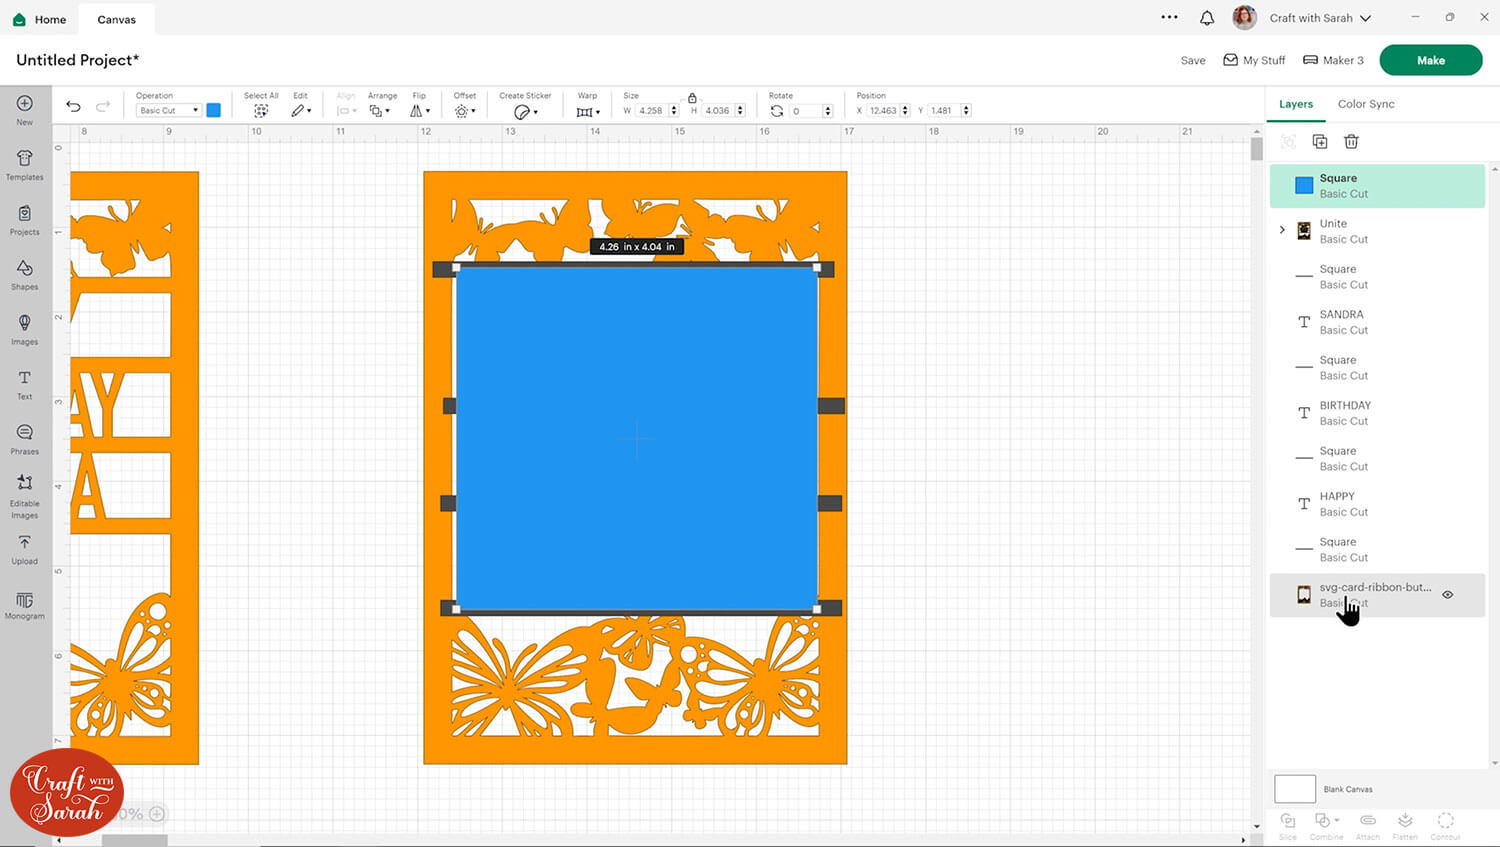
Select the square and the background layer and press “Slice”.
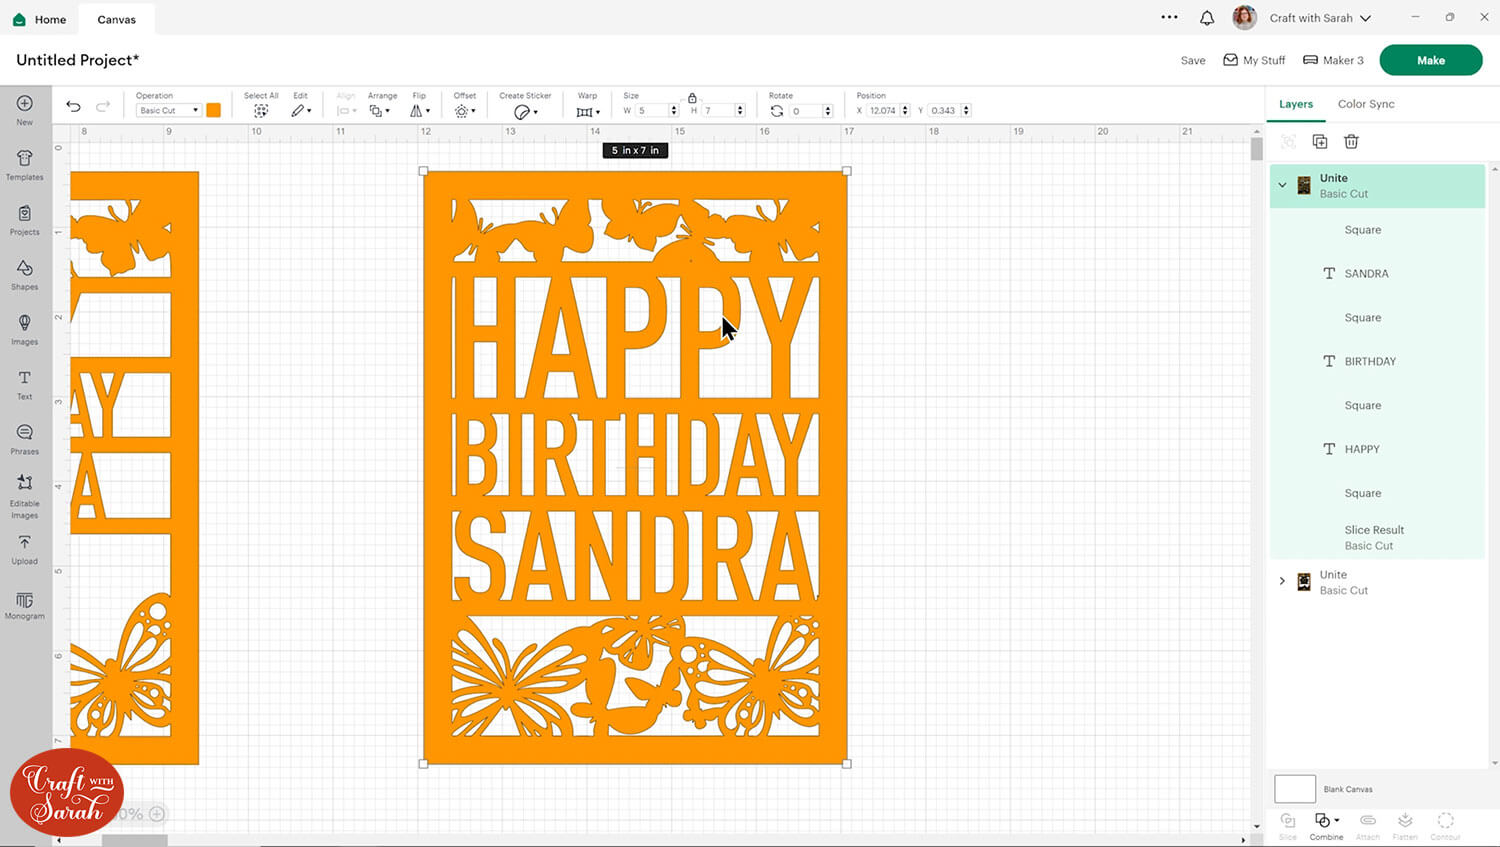
Delete the excess pieces and you should be left with something like this once all the layers are back in position.

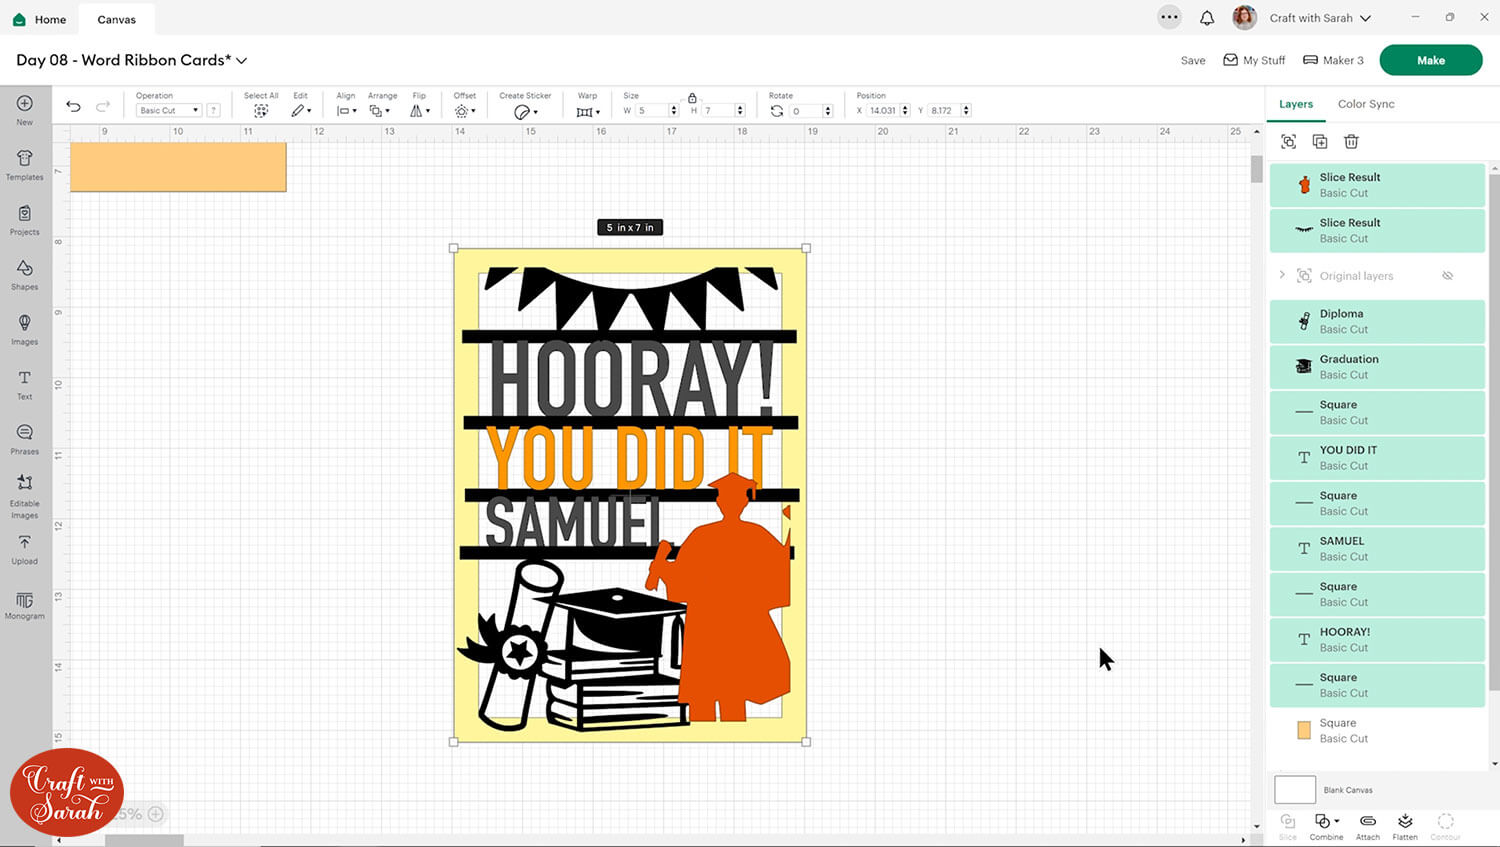
Once again, you will need to position the text in the center by selecting it and the background. Then press Align > Center Horizontally.
Then select everything and press Combine > Unite.
You may find a few tiny gaps in your background that will need removing.
Once you’re definitely happy with the layout (if you’re not sure, you could make a copy) click the design and go Combine > Merge Layers which will then allow you to use the Contour tool.
Contour out any of the little gaps.
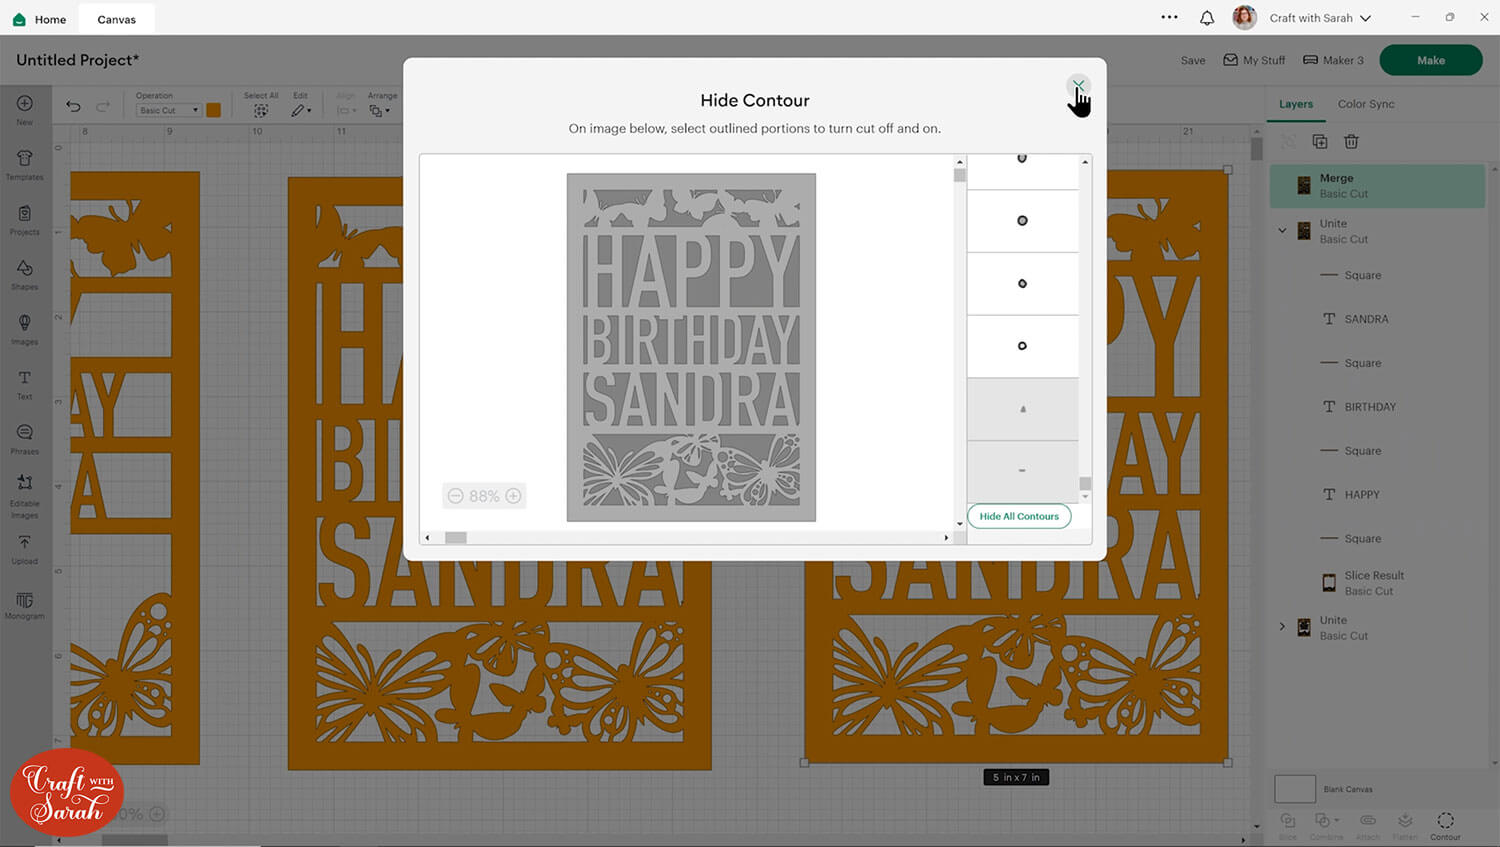
You can also fill in any gaps that don’t show up in the Contour window by selecting a shape and placing it over the hole as seen in the image below.
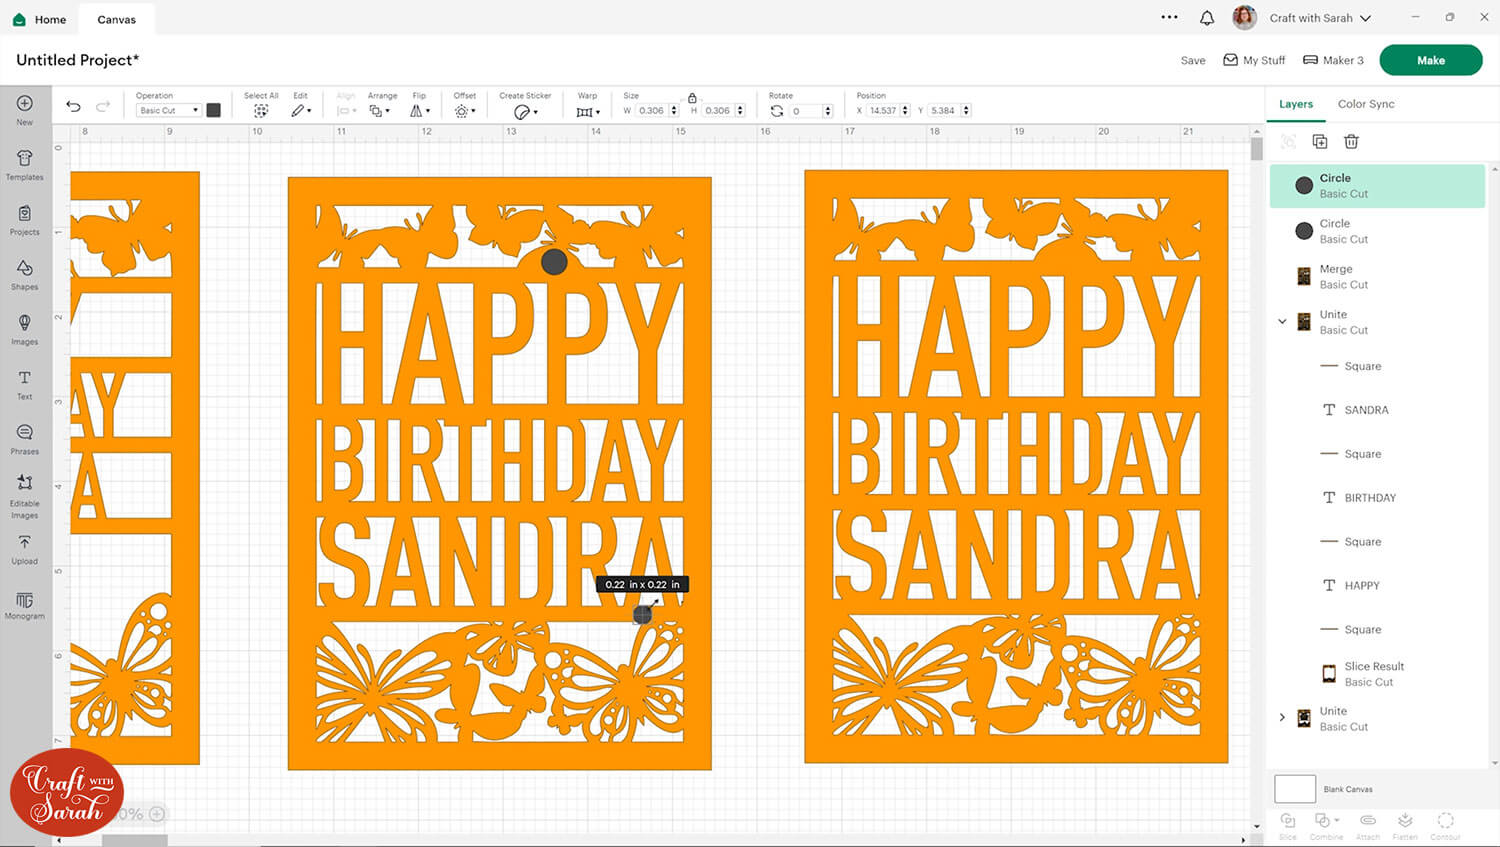
Then “Combine > Unite” these with the base layer to join them to the base card and fill the gaps.
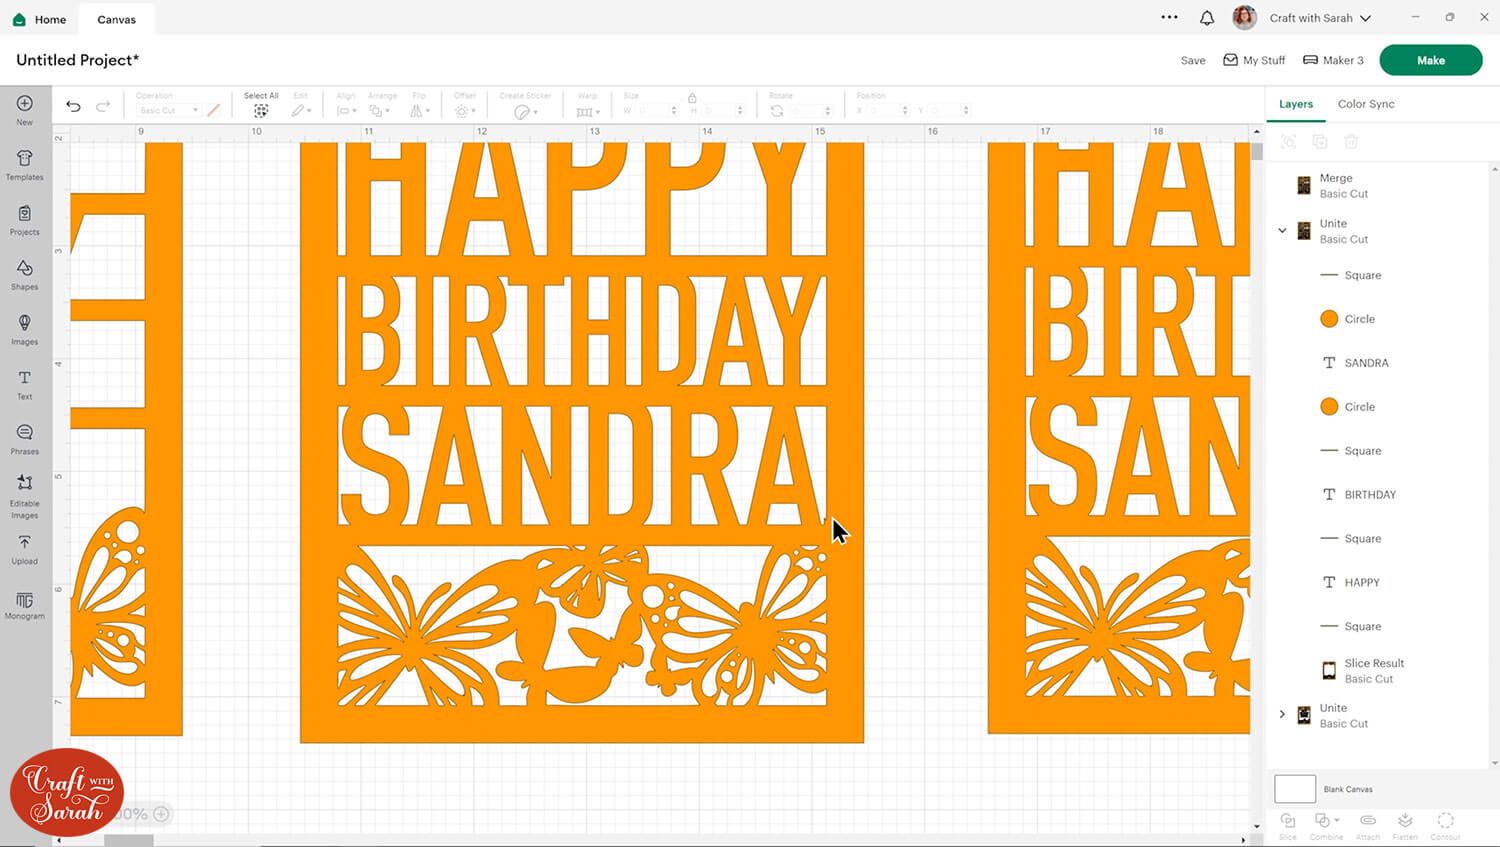
Here’s a look at the two different versions, side-by-side.

Step 3) Create the base card
You can either use a pre-made 5×7 inch card blank or create one in Design Space.
To make one in Design Space, create a square and resize it to 10 inches wide and 7 inches tall.
Add a score line and make it 7 inches.
Select the score line and the base card and press “Align > Align Center” to put the score line in the middle of the card.
With both layers still selected, press “Attach” to join the score line to the base card.
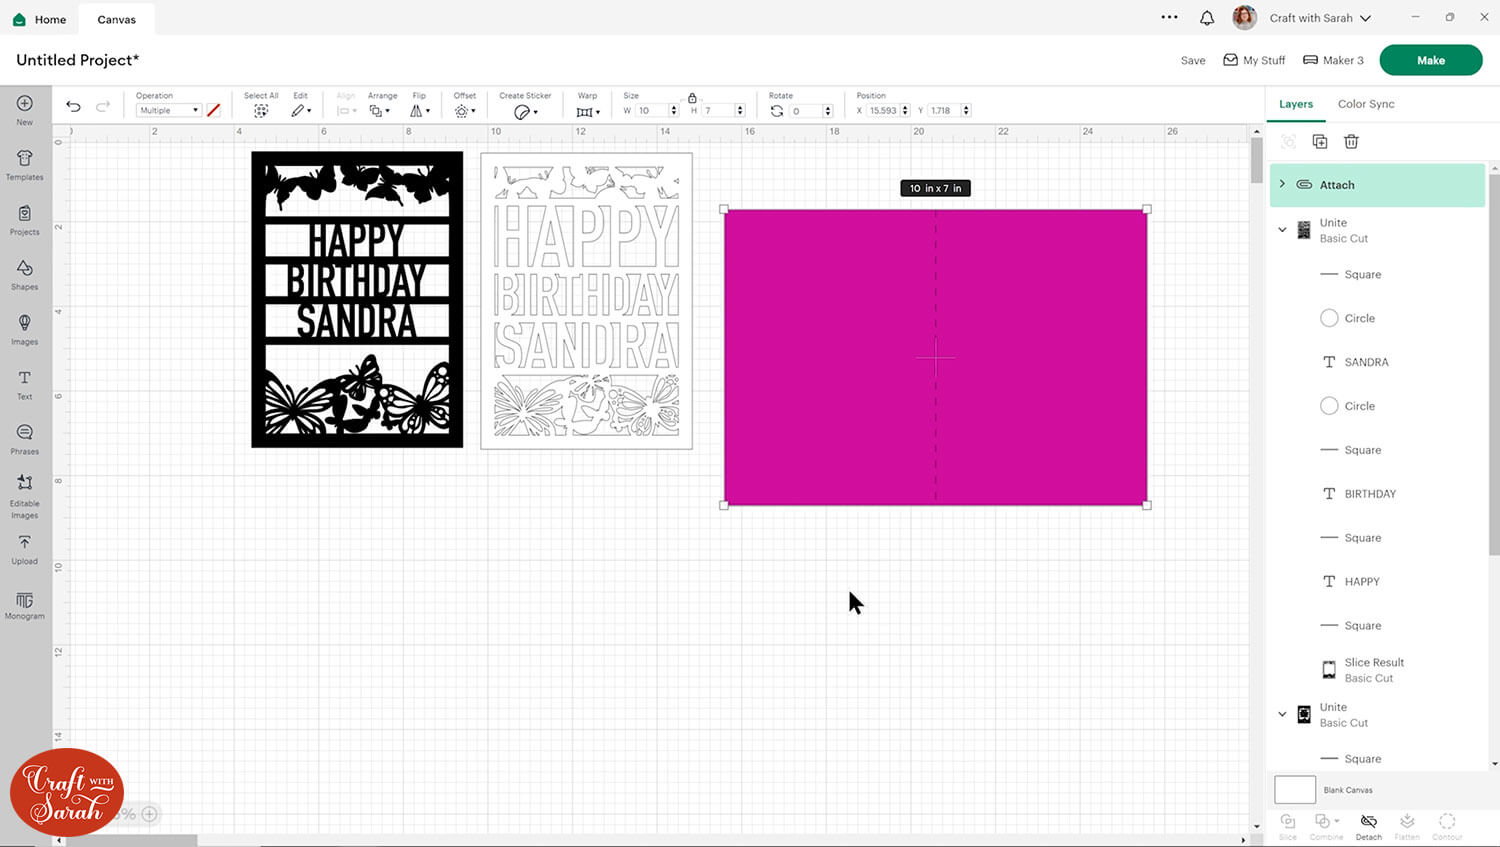
You can either place the word ribbon cutout straight onto the base card, or add a 5×7 inch rectangle behind it for a pop of colour.
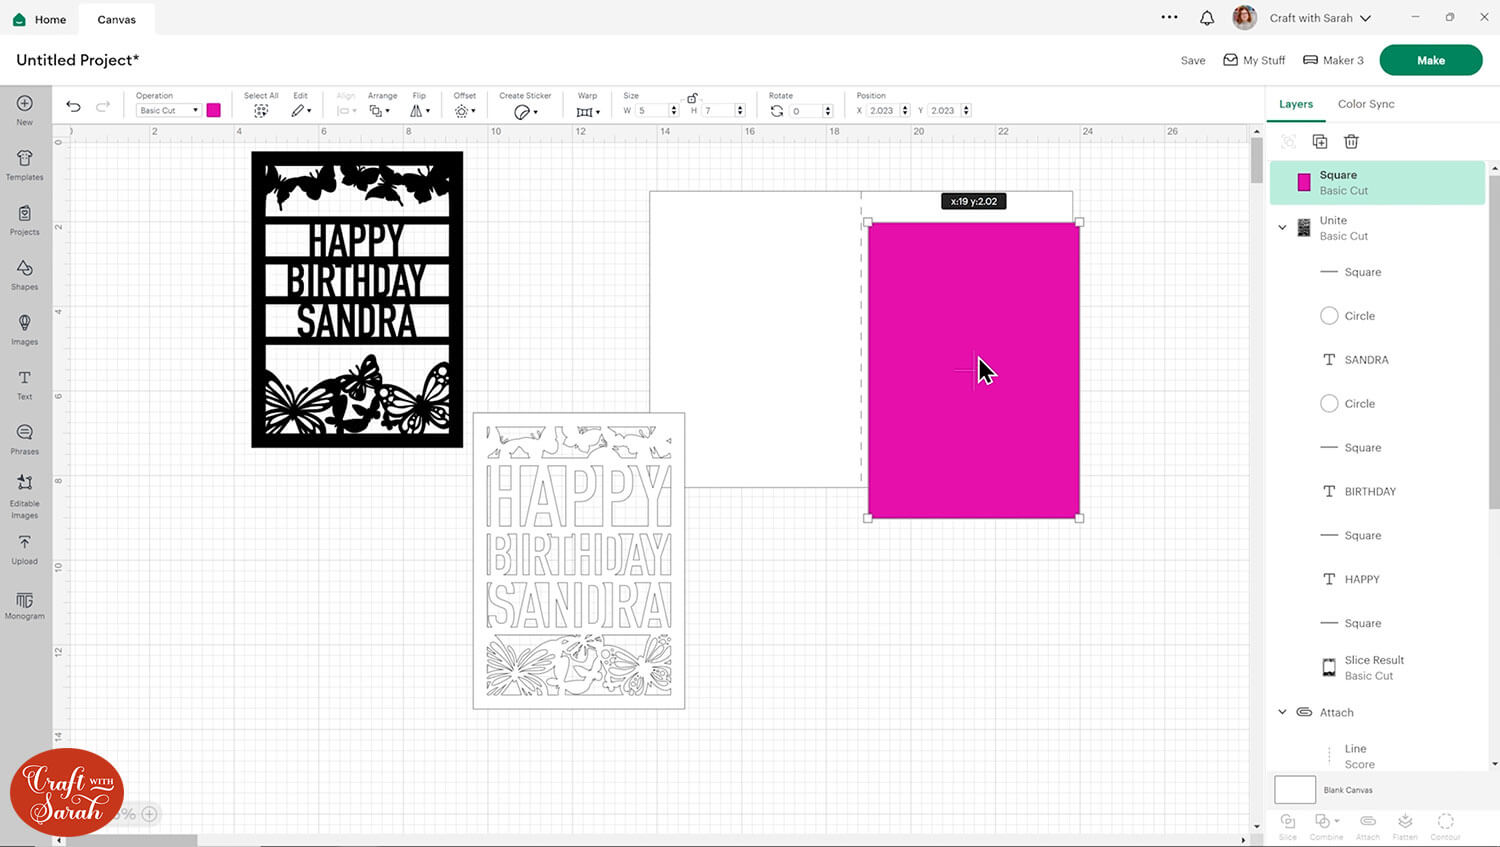
Step 4) Cut the card and stick it together
Save your project in Design Space, click “Make” and follow the steps to get everything cut out from cardstock.
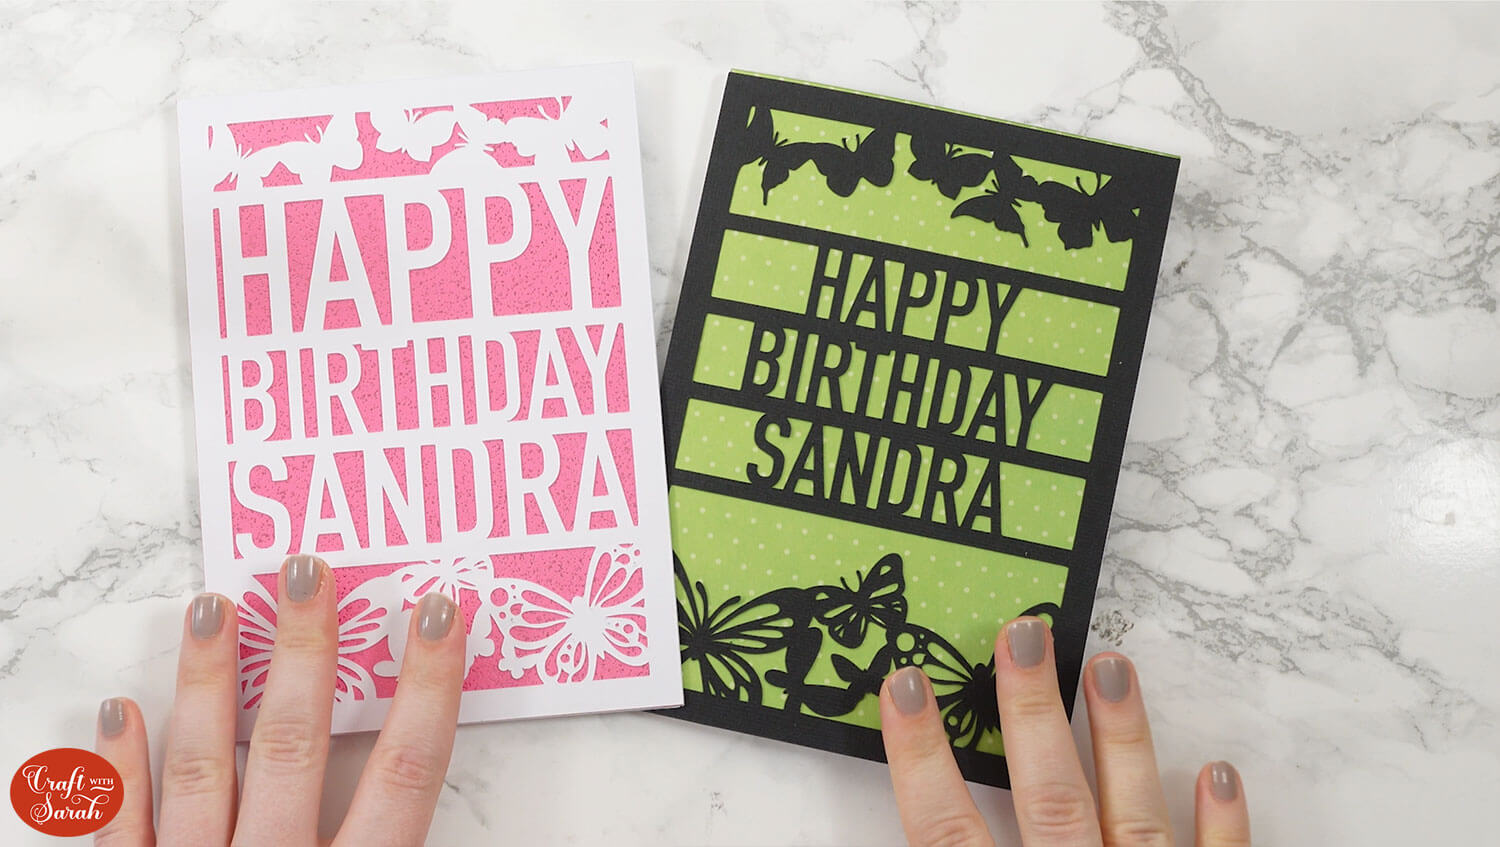
Experiment with different colours to see which you think stands out best.
I love a bit of holographic or glitter card behind the wording.
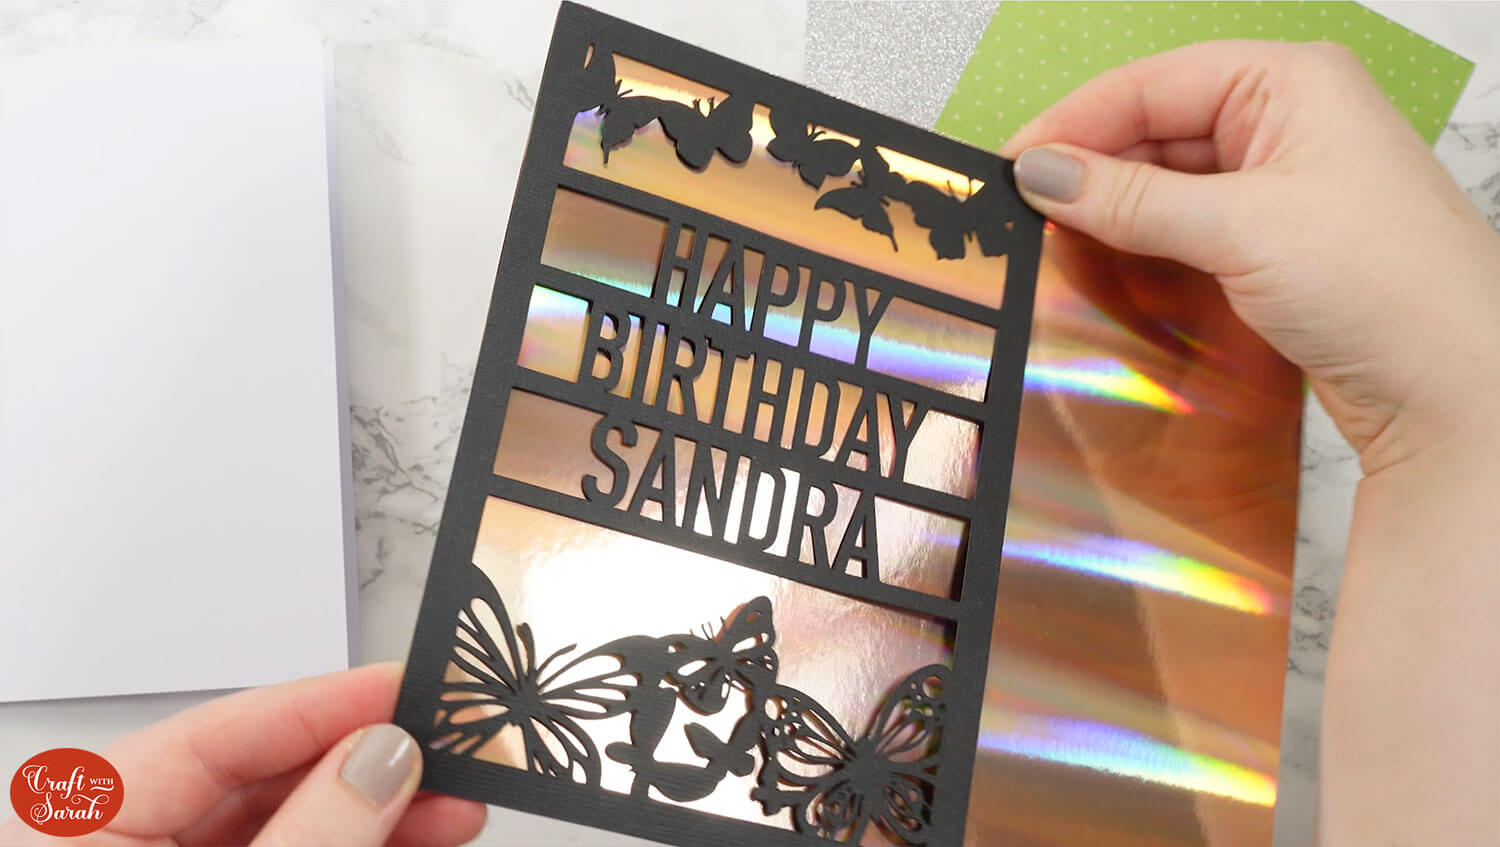
If you choose patterned paper, keep it quite a subtle pattern so it doesn’t make the text hard to read.
Glue the pieces of the card together. It’s as easy as that!
PART TWO: How to design custom word ribbon cards
This next section is on how to design your own word ribbon cards, from beginning to end, in Cricut Design Space.
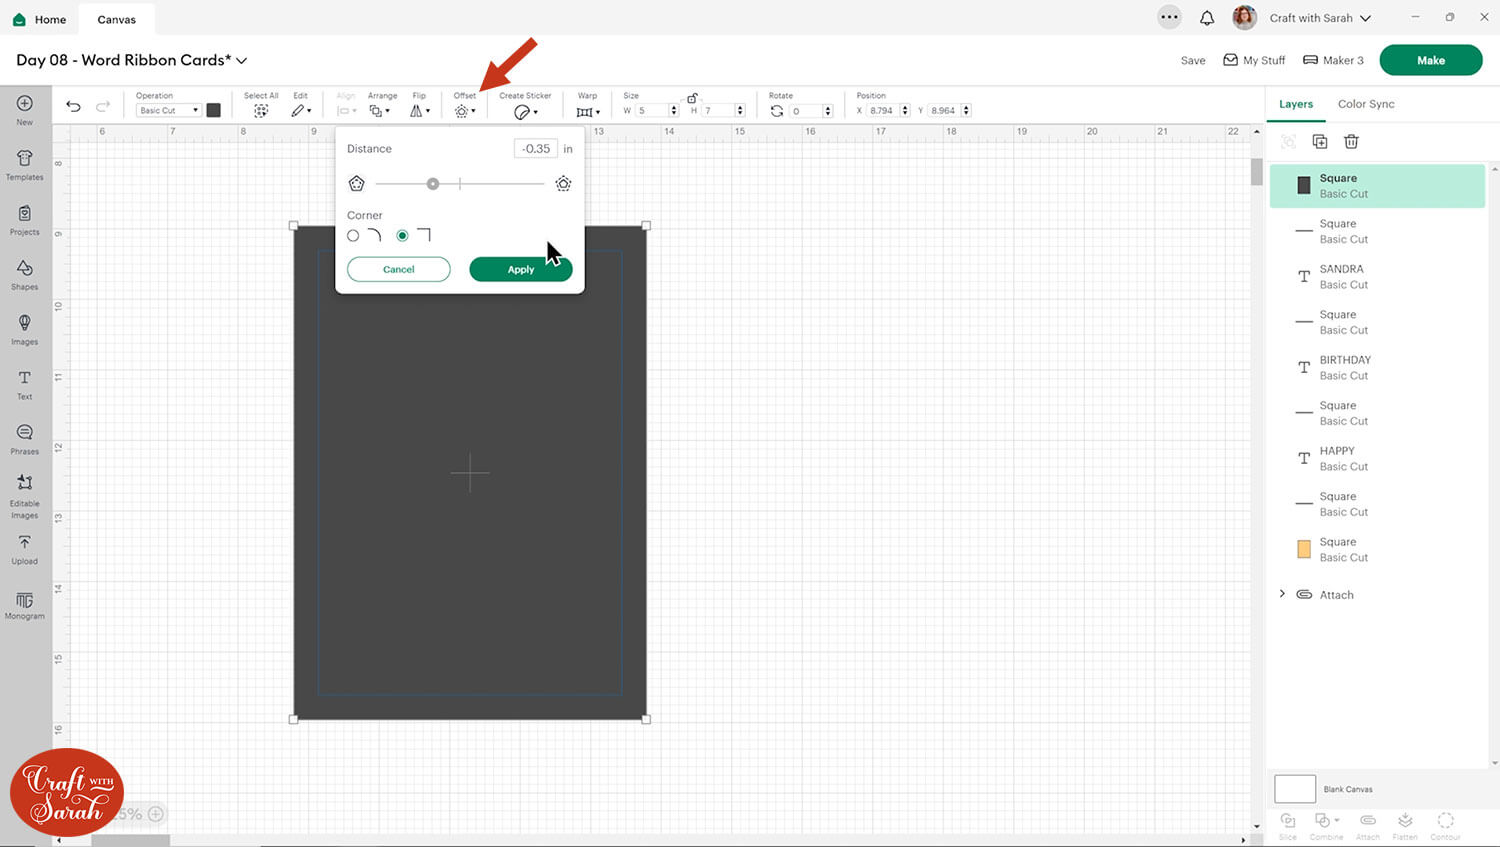
Step 1) Create the frame for the card
Click “Shapes” and choose a square. This will be the front of the card so I made mine 5×7 inches but you can make yours whatever size you wish.

To add the border around the outside, go into “Offset” and drag the scale down so that it is a negative offset. Tick the pointed corner option.
My offset was 0.35.
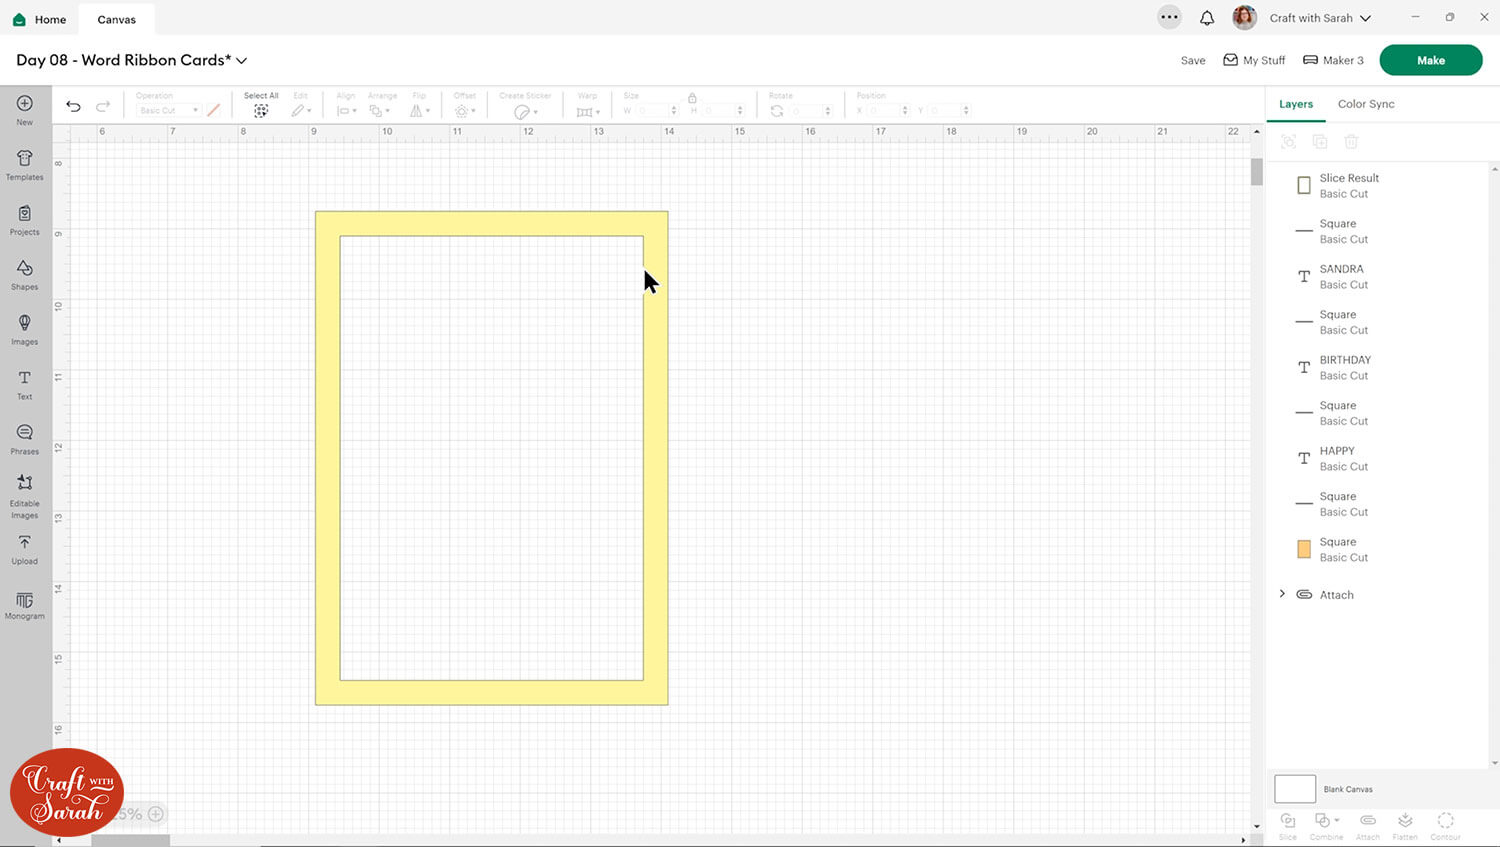
Select both of the rectangles and press Slice. Delete the excess and that will leave you with a frame.
I changed my border to a light colour so that it’s easier to work with when adding the images in the next step.
Step 2) Choose your images and start the layout
I used Cricut Access to look for thick, one-colour images for the card. You could upload SVGs if you don’t have Cricut Access.
You want to look for either pure silhouettes or images with thick lines. You also need to make sure that all the elements in the image are touching so that they will cut from cardstock in one piece.
I selected a range of images which I added to my canvas so that I could play around and see what would look nice on my card.
Make sure the images overlap into the yellow border. Don’t worry if it goes outside the frame – we’ll fix that at the end.
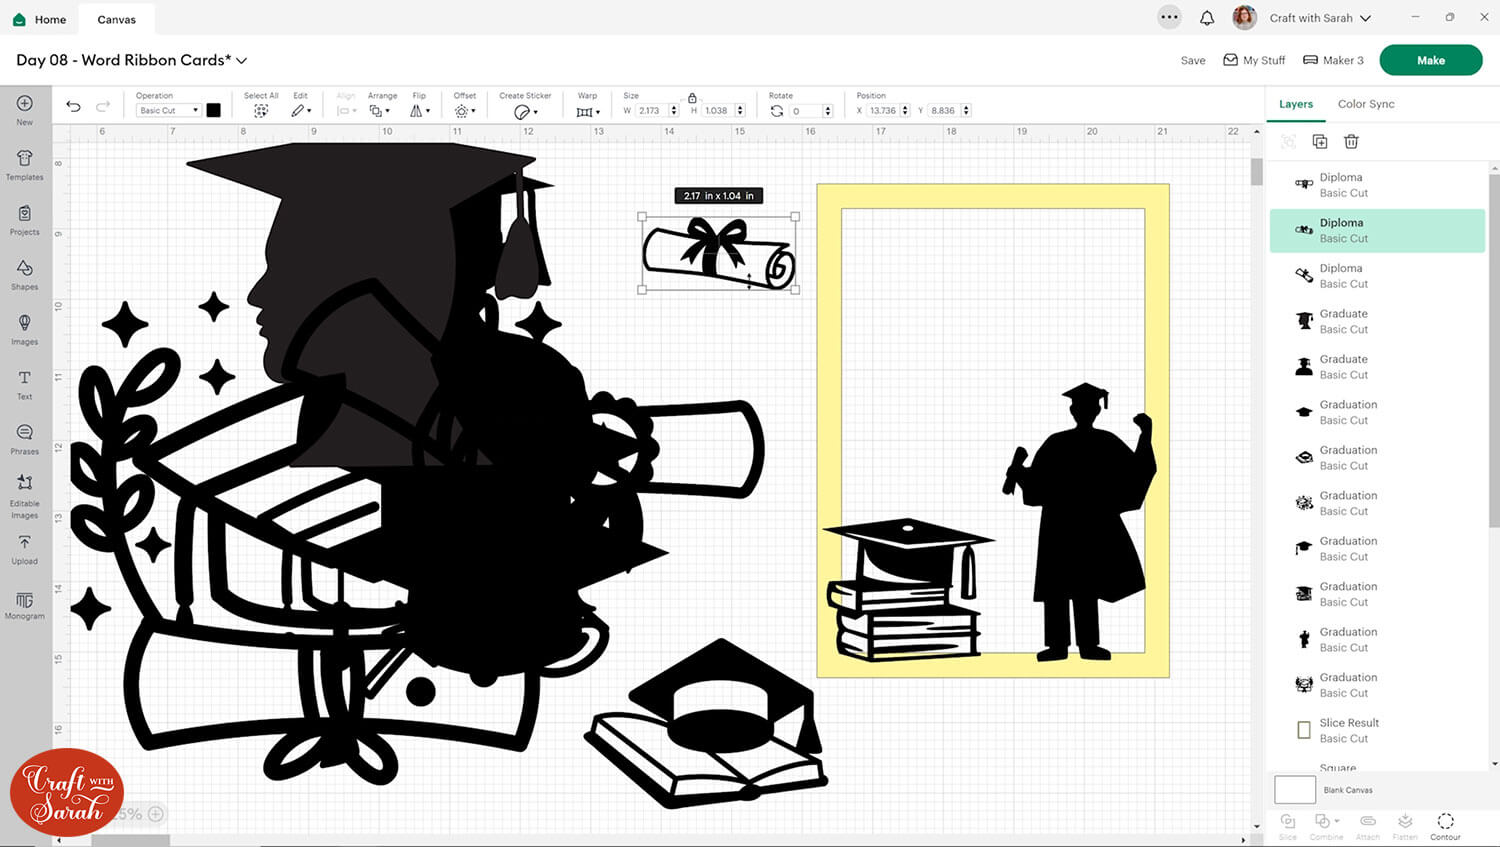
I continued to position my images in different places to see what looked best.
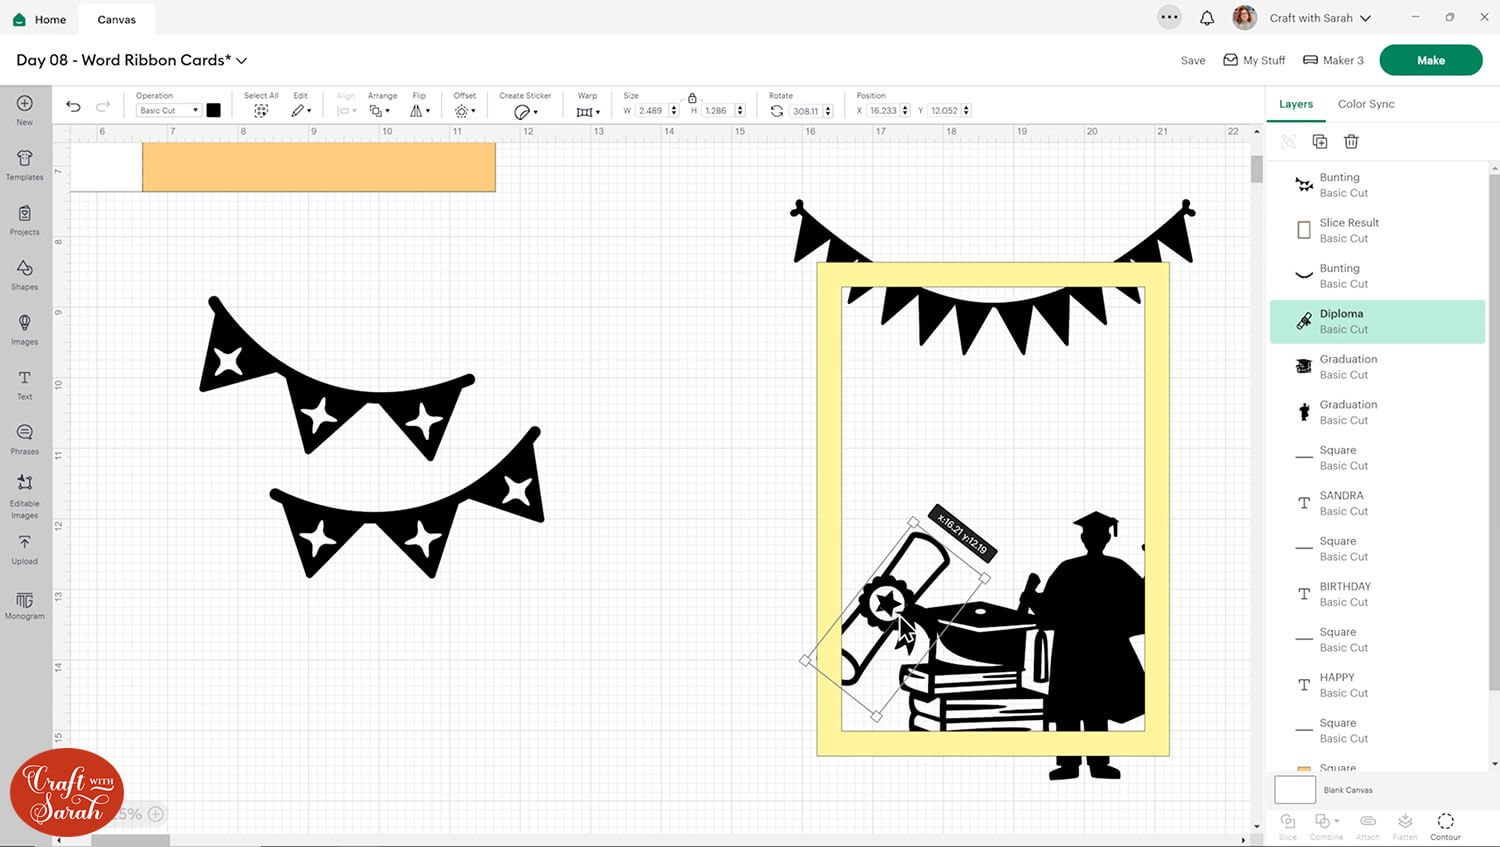
Step 3) Add the words and ribbons
When you’re happy with the rough outline of the card design, add the ribbons (rectangles) and wording.
It’s ok to tweak the design of the card as you’re going, when you get a better idea of how the space will be filled.
Step 4) Finish the card design
Now it’s time to cut off anything that’s going over the edge of the frame.
Do this one layer/image at a time.
Place a rectangle over the overlap of an image.
Slice the rectangle from the image and delete the excess. Repeat this for any other layers that are going outside the frame.
Select everything and “Combine > Unite” to join all the pieces together.
If there are small gaps to fill in, you can either drag shapes over them and drag the shapes into the “Unite” group, or Weld the design together and then use Contour to remove small gaps.
I didn’t like how the ribbon looked where it was going through the graduate’s head, so I resized it to stop before it reached the image.
Create a base card if needed, then Save and get everything cut out.
Step 5) Glue the layers together
These are the EASIEST cards to stick together once they are cut! Simply glue the pieces to the card and that’s it – done!
Personalized word ribbon cards to make with a Cricut
I hope you enjoyed this tutorial on how to make word ribbon cards with custom greetings on them.

Don’t forget to check back tomorrow for the next Card Making Countdown project.
Happy crafting,
Sarah x

