CCC 2024 Day 05: Watercolor Cards
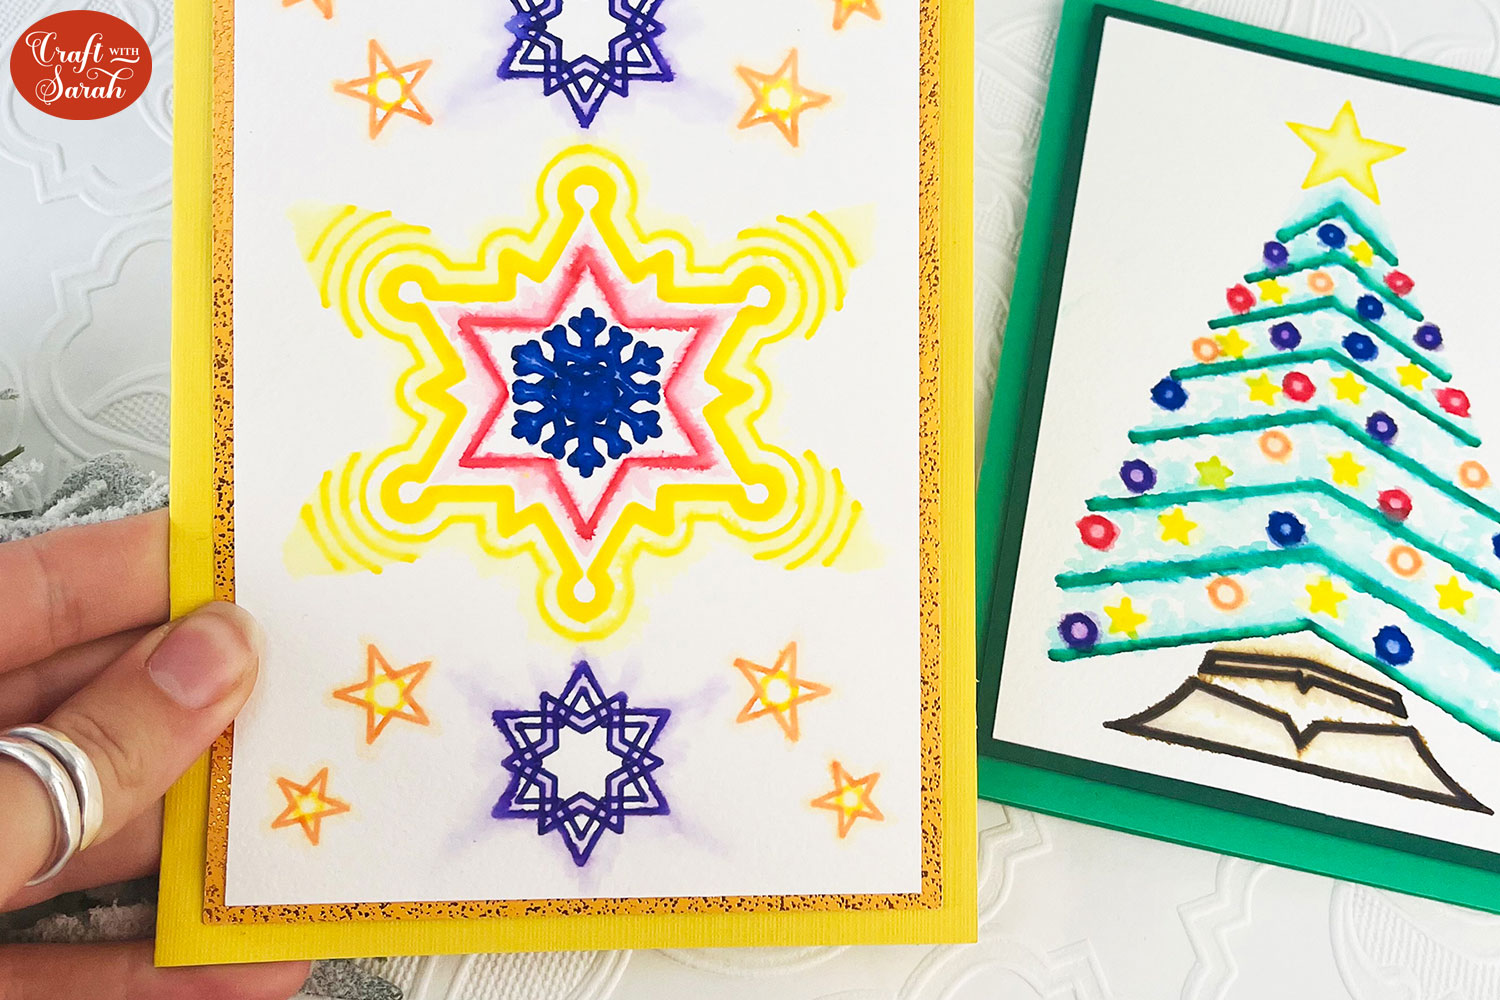
Welcome to day five of the 2024 Christmas Craft Countdown, where I’m sharing 20 festive themed Cricut papercraft projects in 20 days.
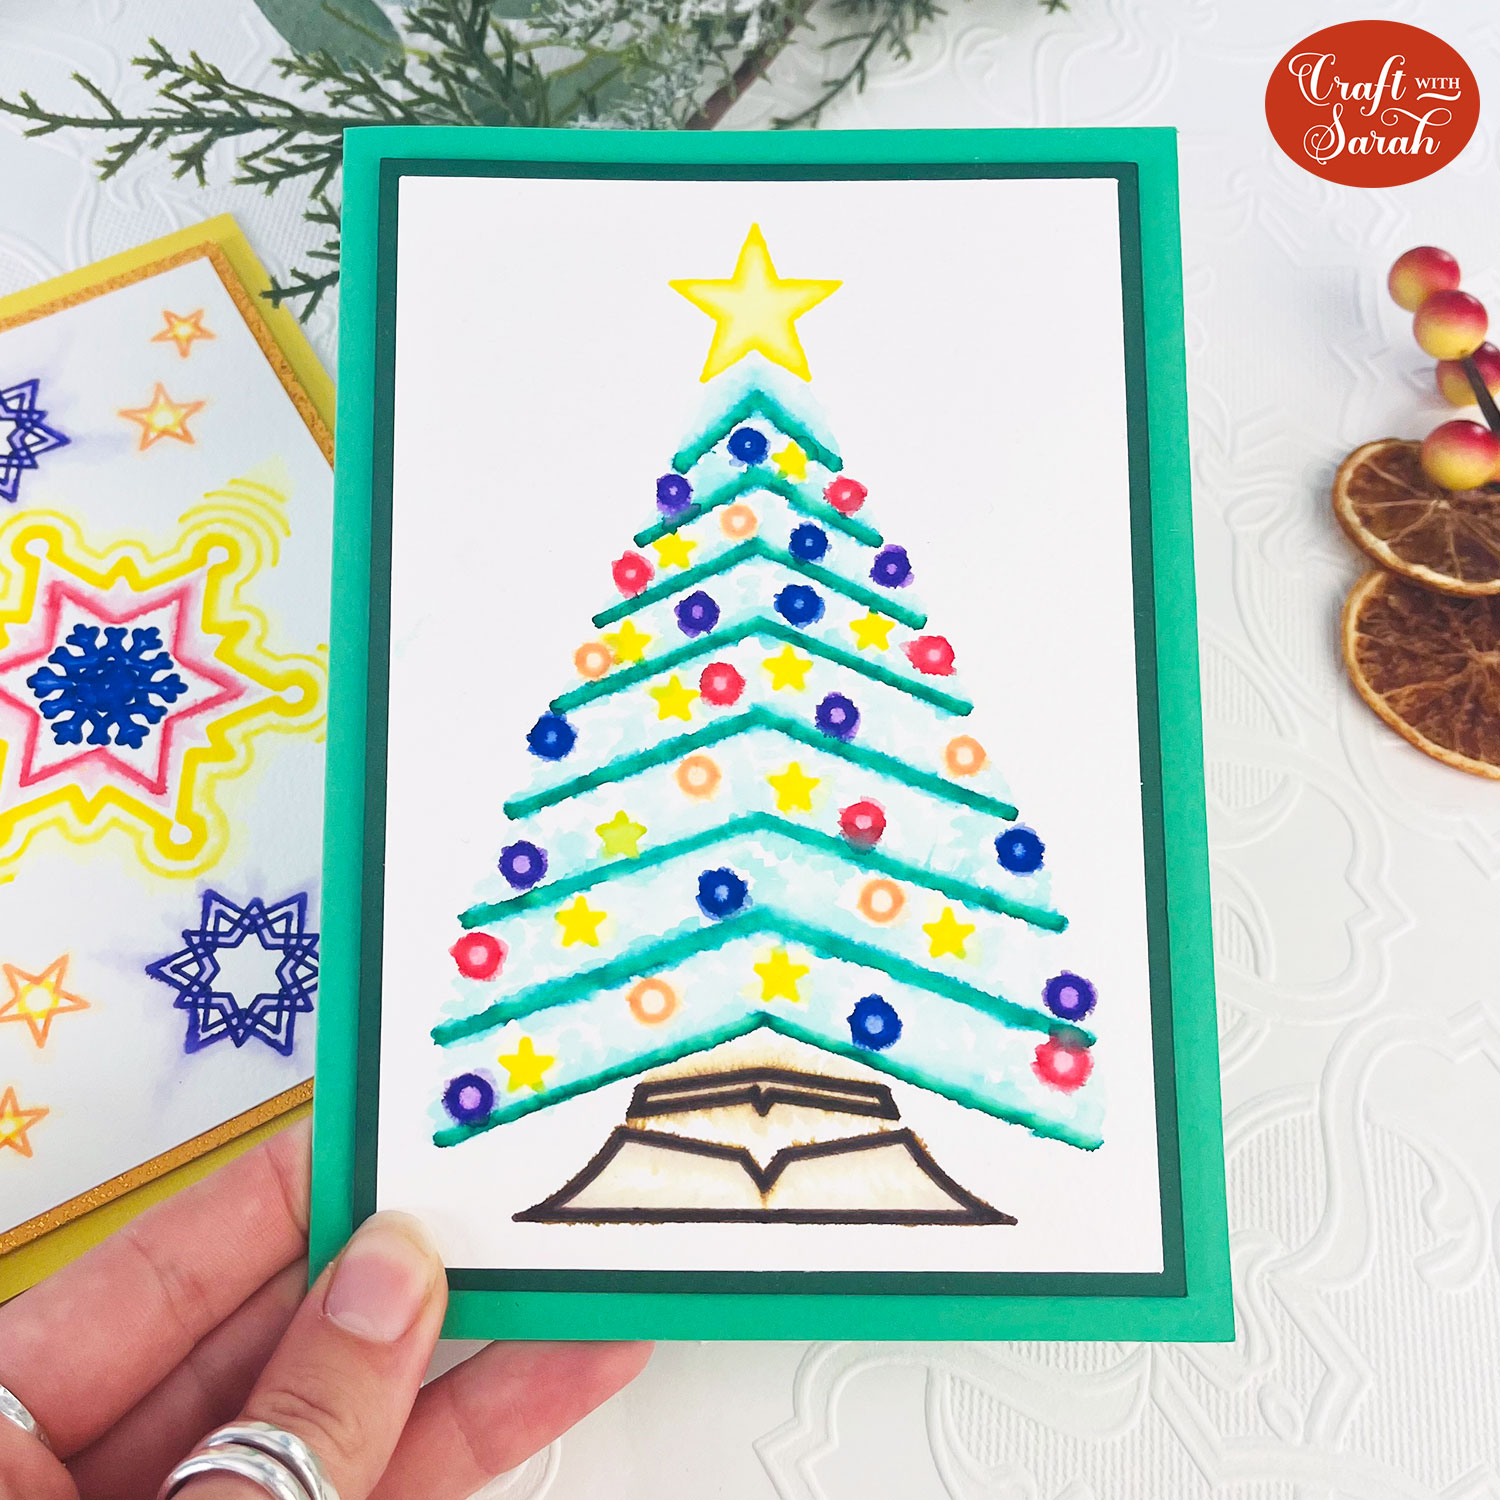
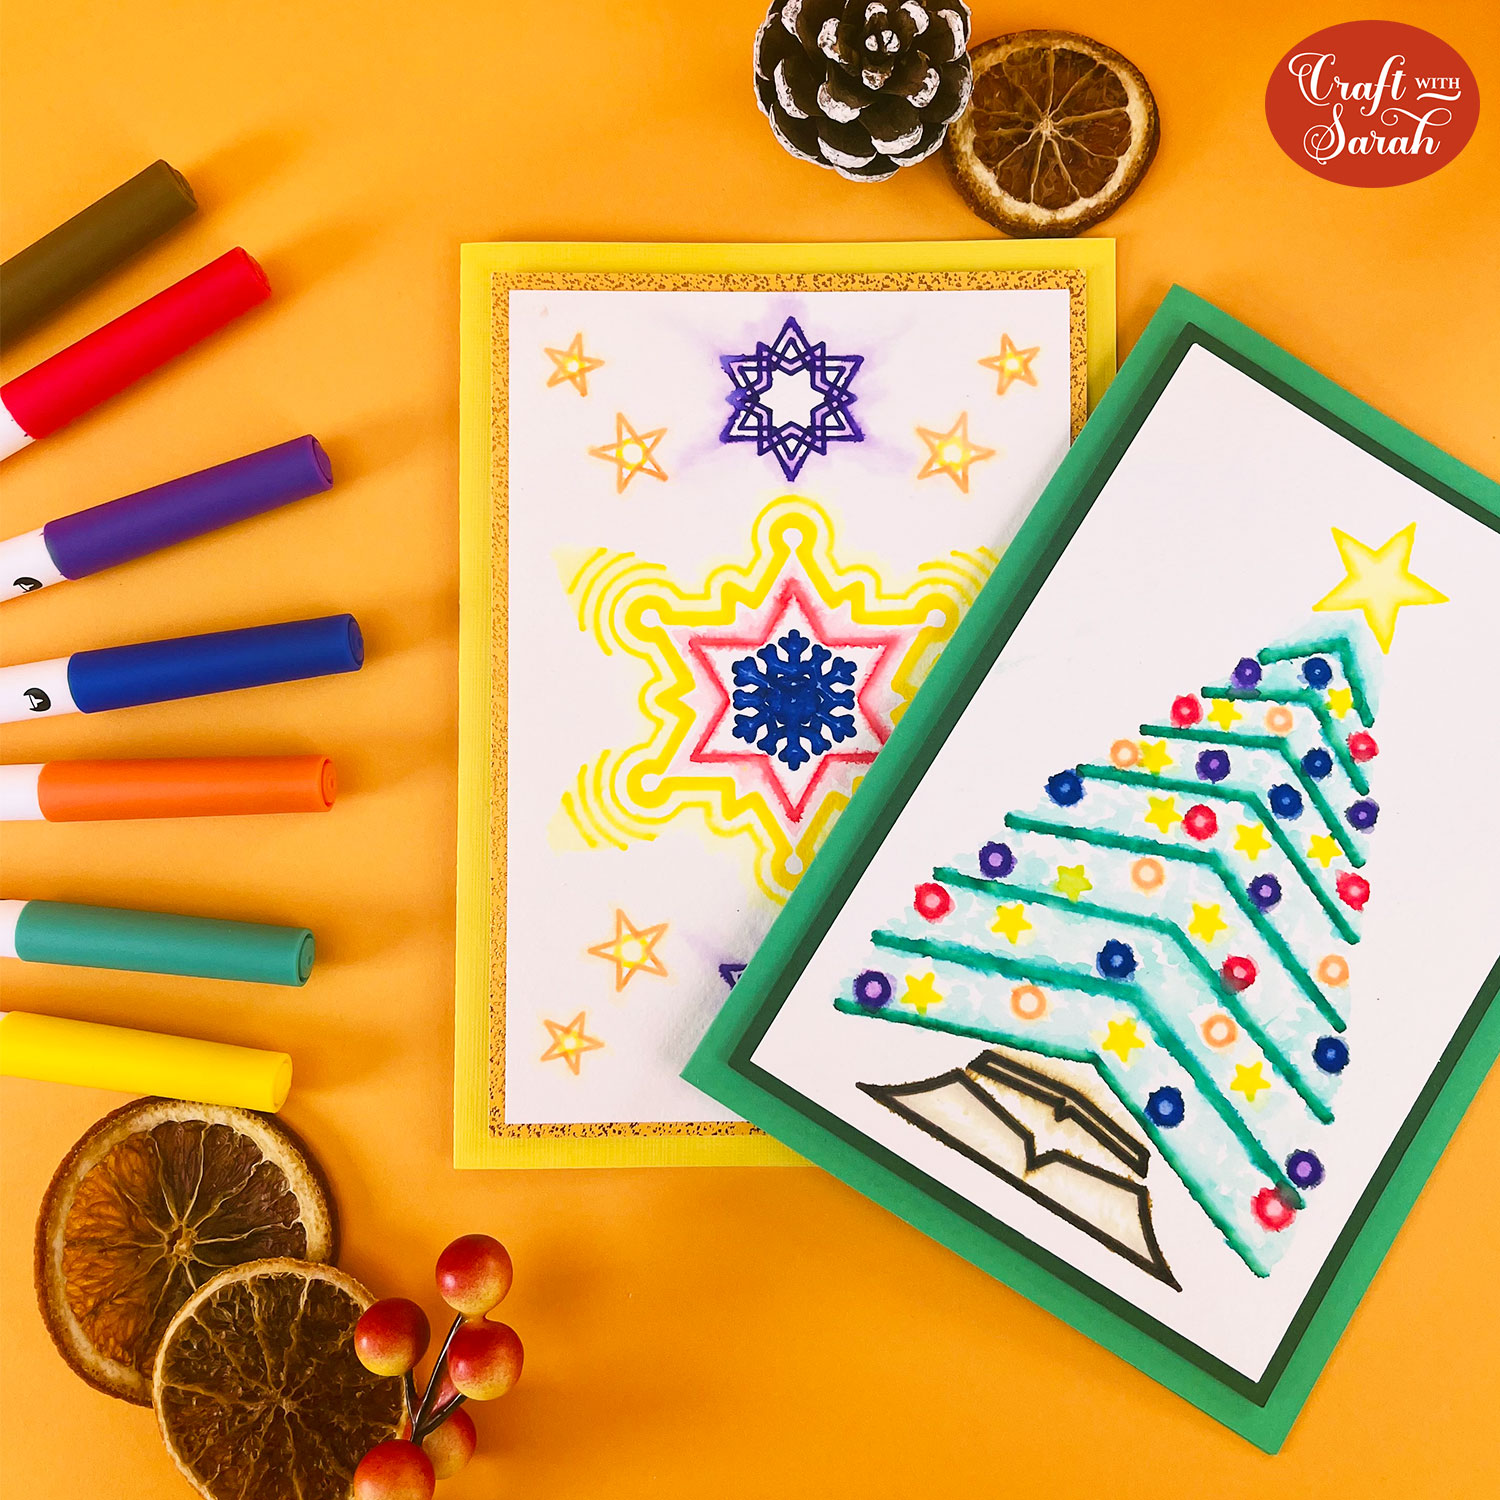
Create unique holiday cards this year with Cricut’s watercolor pens, using two simple designs: a stars and snowflake card and a Christmas tree card.
This tutorial shows you how to use your Cricut to draw and add watercolor effects for a polished, hand-painted look.
Both designs are easy to customize with different color choices or metallic accents for extra shine.
Follow along to set up your Cricut, add watercolor, and assemble your cards.
By the end, you’ll have a pair of handmade Christmas cards that combine simple techniques with a standout look for the holiday season.
This Project was part of the Christmas Craft Countdown 2024
Materials supply list
Here is a list of the materials that I used to make this project.
Please note that some of the links included in this article are affiliate links, which means that if you click through and make a purchase I may receive a commission (at no additional cost to you). You can read my full disclosure at the bottom of the page.
- Cricut machine
- Light blue Cricut cutting mat
- Cricut watercolor pens
- Watercolor paper
- Colored Card
- Glue (I like Bearly Art Glue and Collall)
- 3D foam pads
- Cricut scoring stylus or wheel (optional)
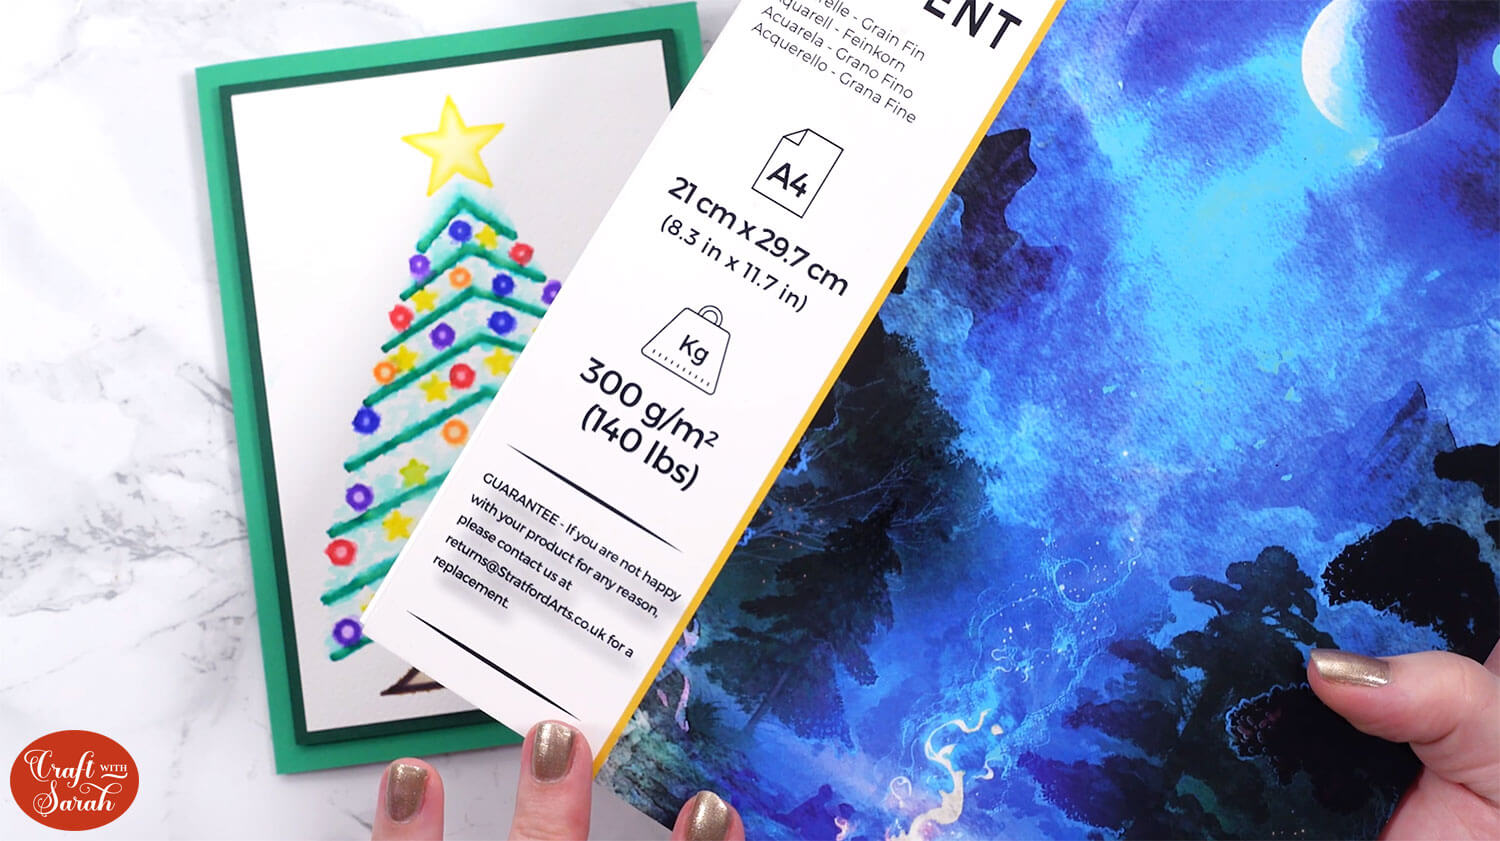
This is what my pack of watercolor paper looks like. Thicker paper (e.g. 300gsm / 140lb) will work best as it will help to absorb the water to stop the card from buckling or warping when it gets wet.
This project is suitable for the following types of Cricut machine: Explore Air 2, Explore Air 3, Maker, Maker 3, Venture, Joy Xtra and Joy. You will need to make the design smaller to cut on the original Joy.
Foundation learning
If you're new to crafting with your Cricut, you may find the below links helpful.
They teach some of the skills mentioned throughout this tutorial.
- How to upload SVG files into Design Space
- How to make 3D layered Cricut projects
- The BEST way to frame papercraft projects
- How to mount multiple designs in the same frame with magic guides
- How to score with a Cricut (even without scoring tools)
- Print then cut tutorial
- Design Space tools (Combine, Attach, Slice, Weld, Flatten, etc.)
- Pattern fill tutorial (for making backgrounds & cutting images to a specific shape/size)
- Free envelope SVGs that can be sized to fit any card
- How to write inside cards with Cricut pens
- How to cut layered designs at a small size
- Design Space tips & tricks
- Cricut pens tutorial
Video tutorial
Watch the video below to see how to make this project. Keep scrolling for a written tutorial.
Written tutorial (with photos!)
Here’s how to make Christmas cards using Cricut watercolor pens.
Step 1) Download the cutting file & upload to Design Space
Download the files using the box below.
Purchase the File(s)
This cut file is available as part of the Instant Access Bundle.
Or, purchase this design individually here
Before you upload the SVGs to Design Space, you need to unzip the download folder that they come in.
- How to unzip a folder on Windows computer
- How to unzip a folder on a Mac
- How to unzip a folder on an iPad/iPhone
- How to unzip a folder on an Android device
After unzipping, upload the SVG files into Cricut Design Space. These are the files that starts svg- in the filename.
Not sure how to do this? Here’s how to upload SVGs to Cricut Design Space. Make sure you upload the file which starts svg- in the filename!
Each card design comes in as a separate SVG file, so you’ll need to upload each one individually if you want to make both of them.
Don’t worry if the designs look a little “weird” during the upload process. Design Space doesn’t understand that we will be drawing the images, so we will need to format them on the next step.
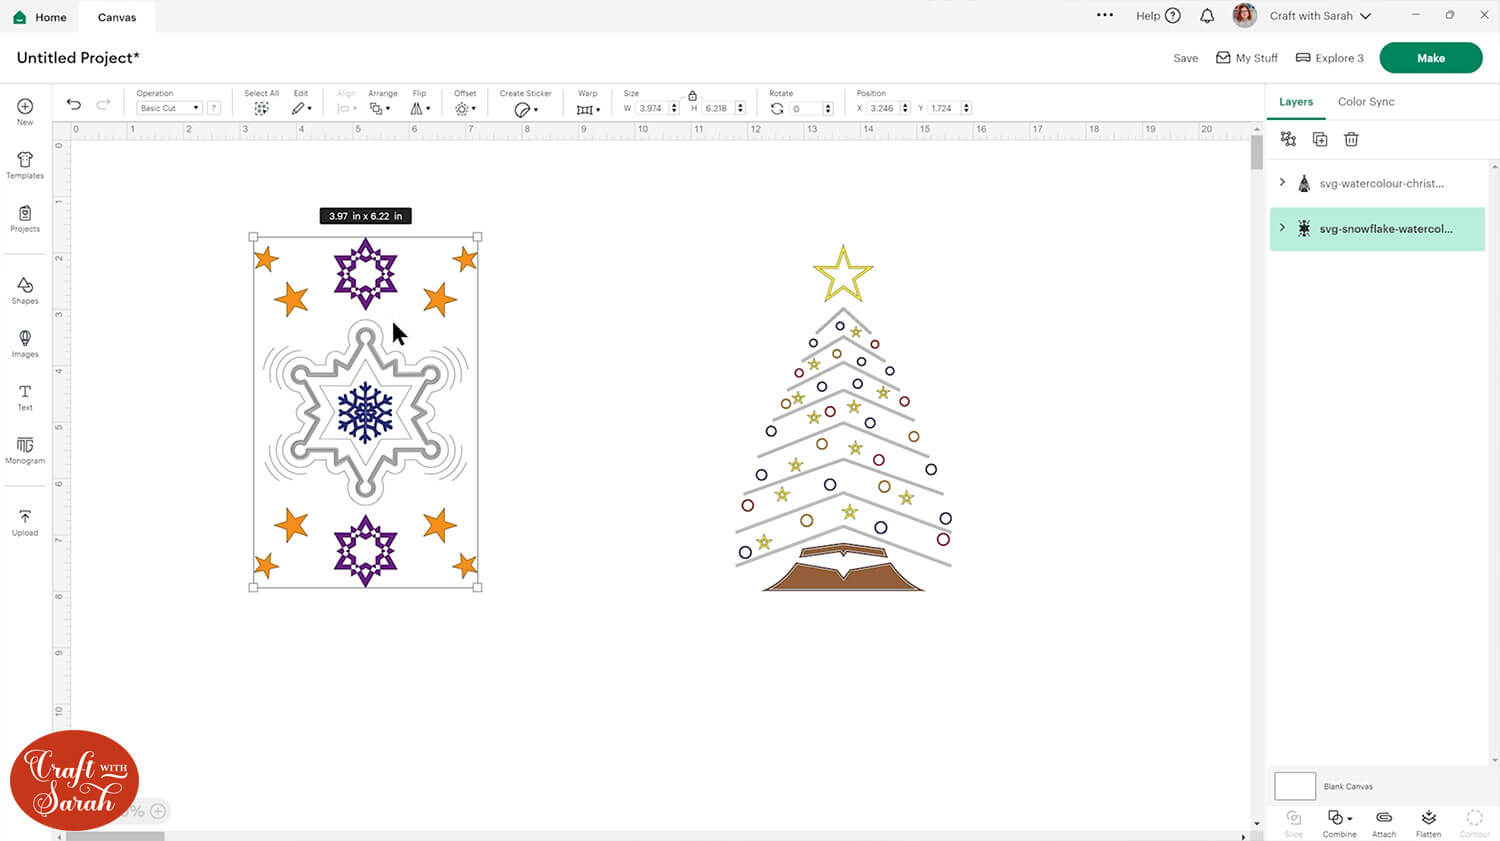
Step 2) Format the watercolor images
We need to “tell” Design Space that we want the Cricut to draw the lines of the images with the watercolor pens.
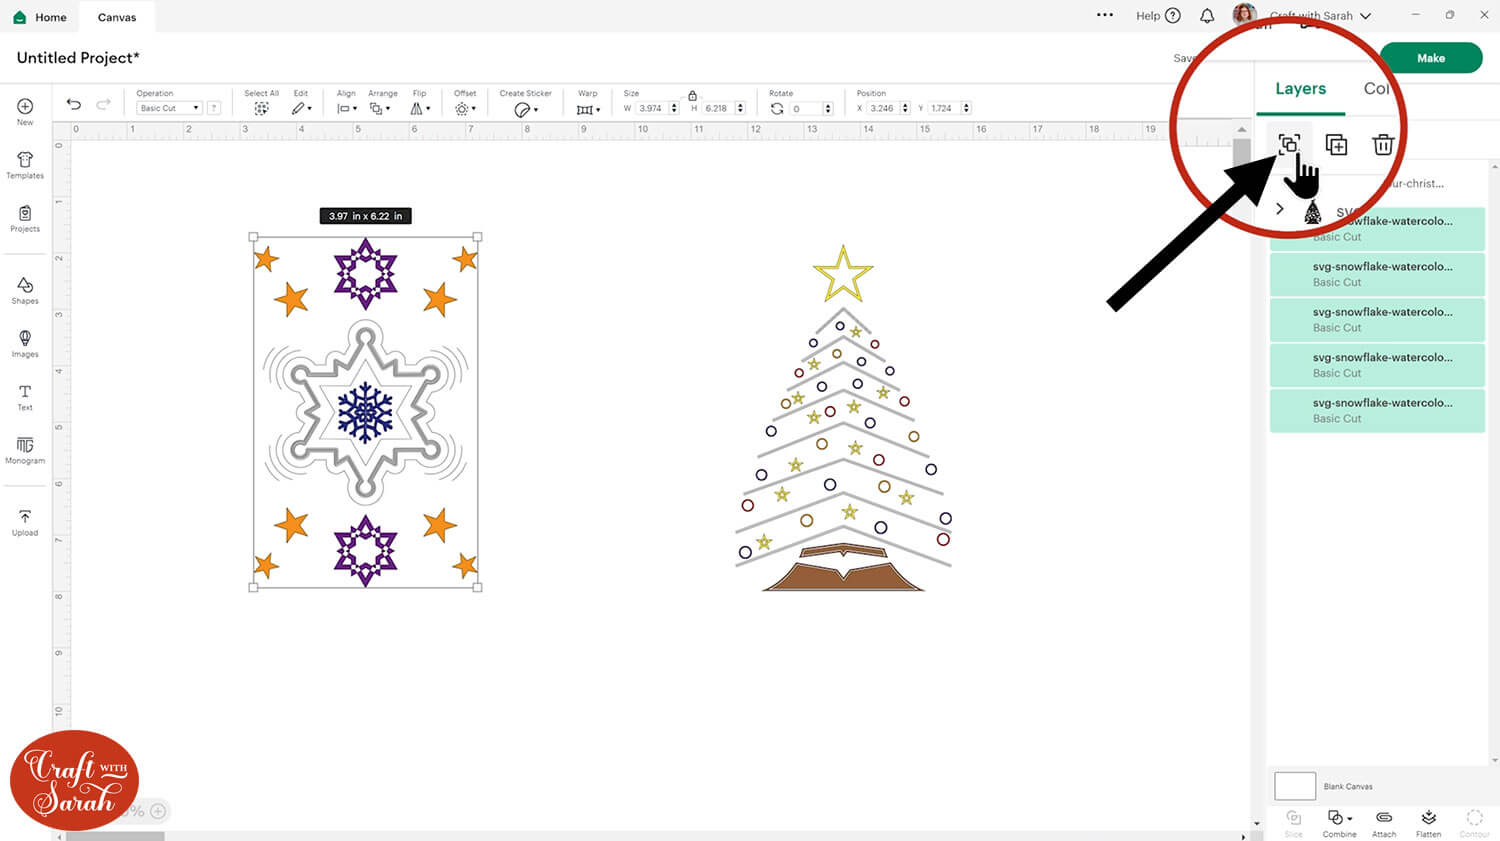
First, click the stars design and separate the layers by pressing the “Ungroup” button at the top of the layers panel.
Click onto the first layer in the design which is the yellow stars. You can tell what color this layer is supposed to be by looking at the color box along the top menu.
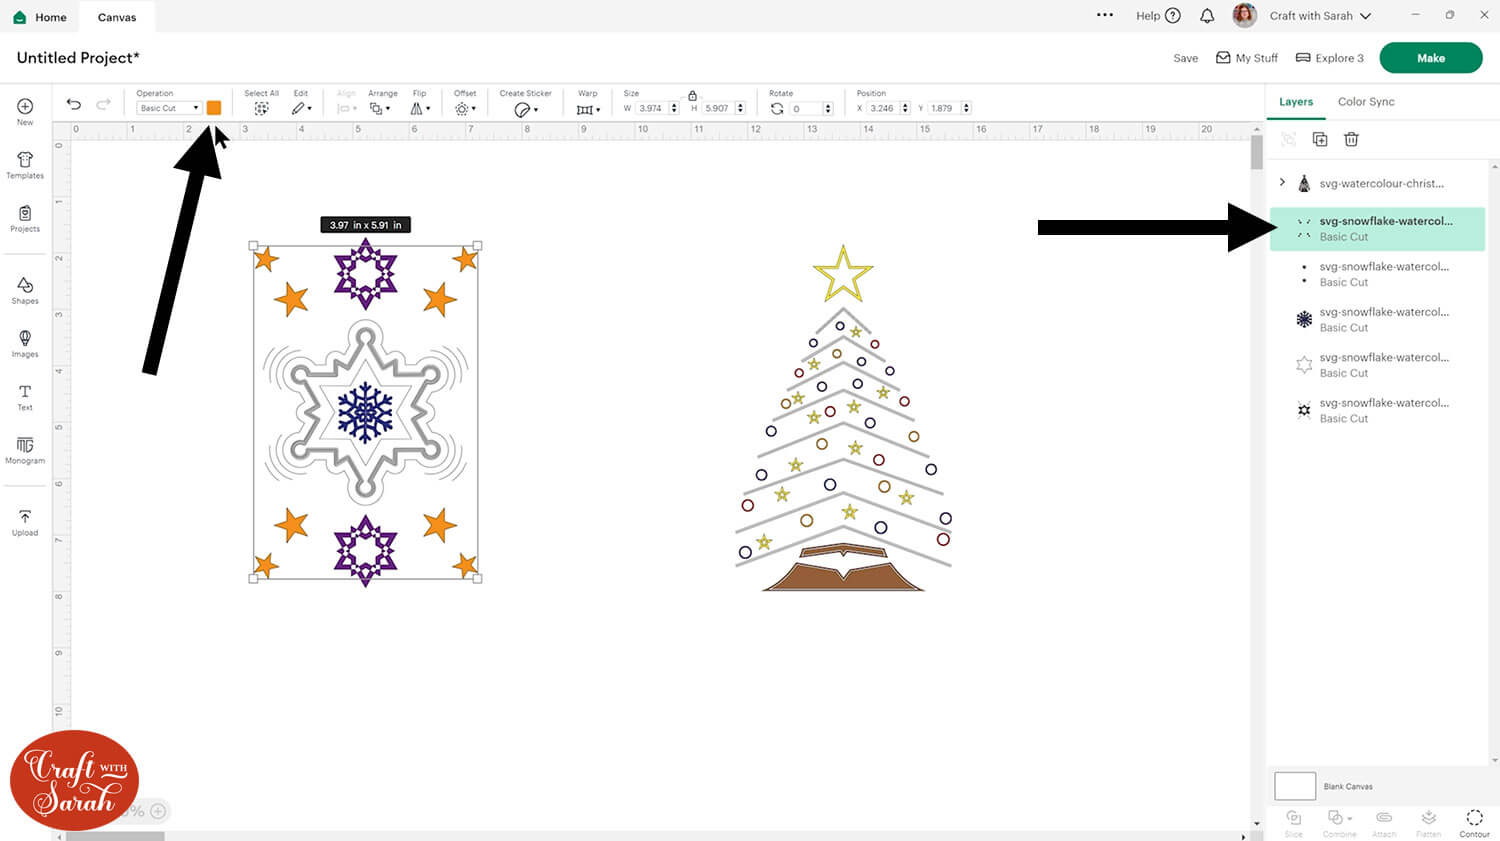
Change this layer to “Pen” under the “Operations” dropdown.
Click into the pen color box (next to the topdown) and change it to “M – Marker (1mm)”.
Scroll all the way down to the bottom of the list of pens and it will show the watercolor marker pens.
Choose the color that matches the original color of the layer that you clicked. In this case, it’s yellow.
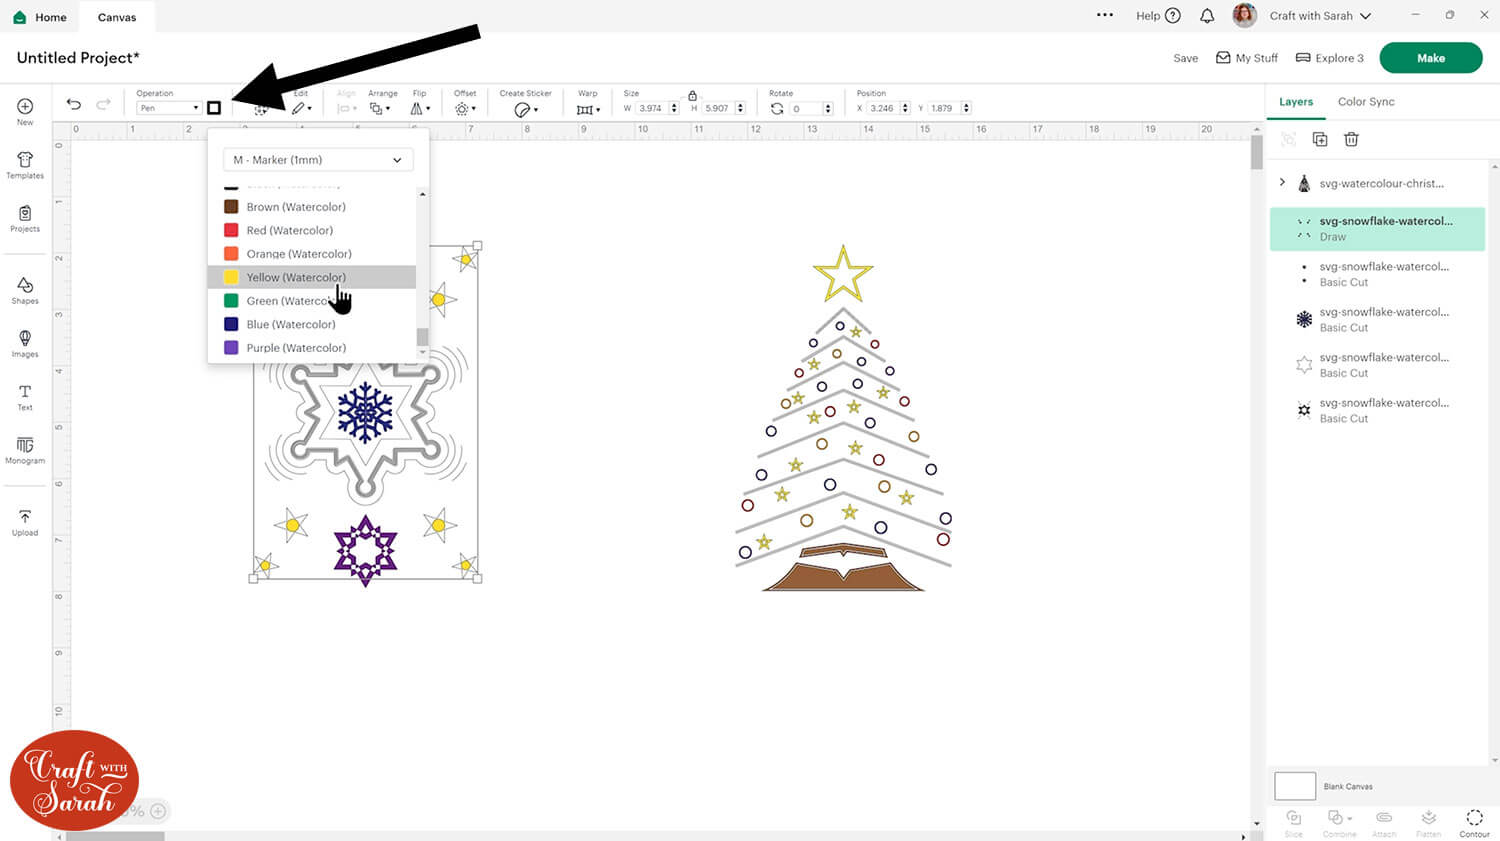
Repeat this for all the other colors in the star design, then do the same for the Christmas tree.
After finishing, select all the Christmas tree layers and “Group” them.
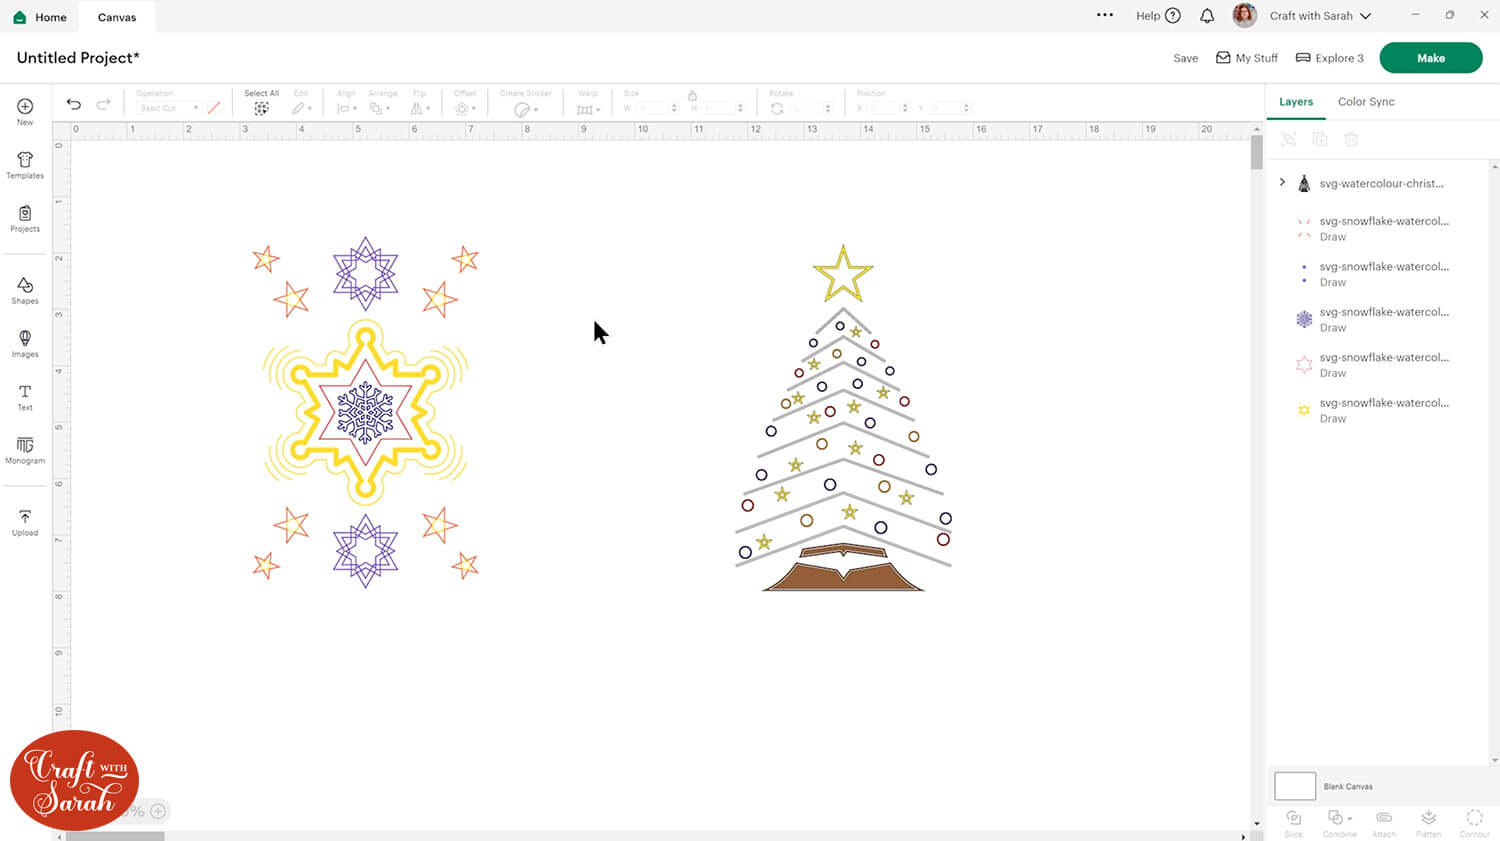
Then, select all the star layers and “Group” them (separately to the tree as we will be using each one on a separate card).
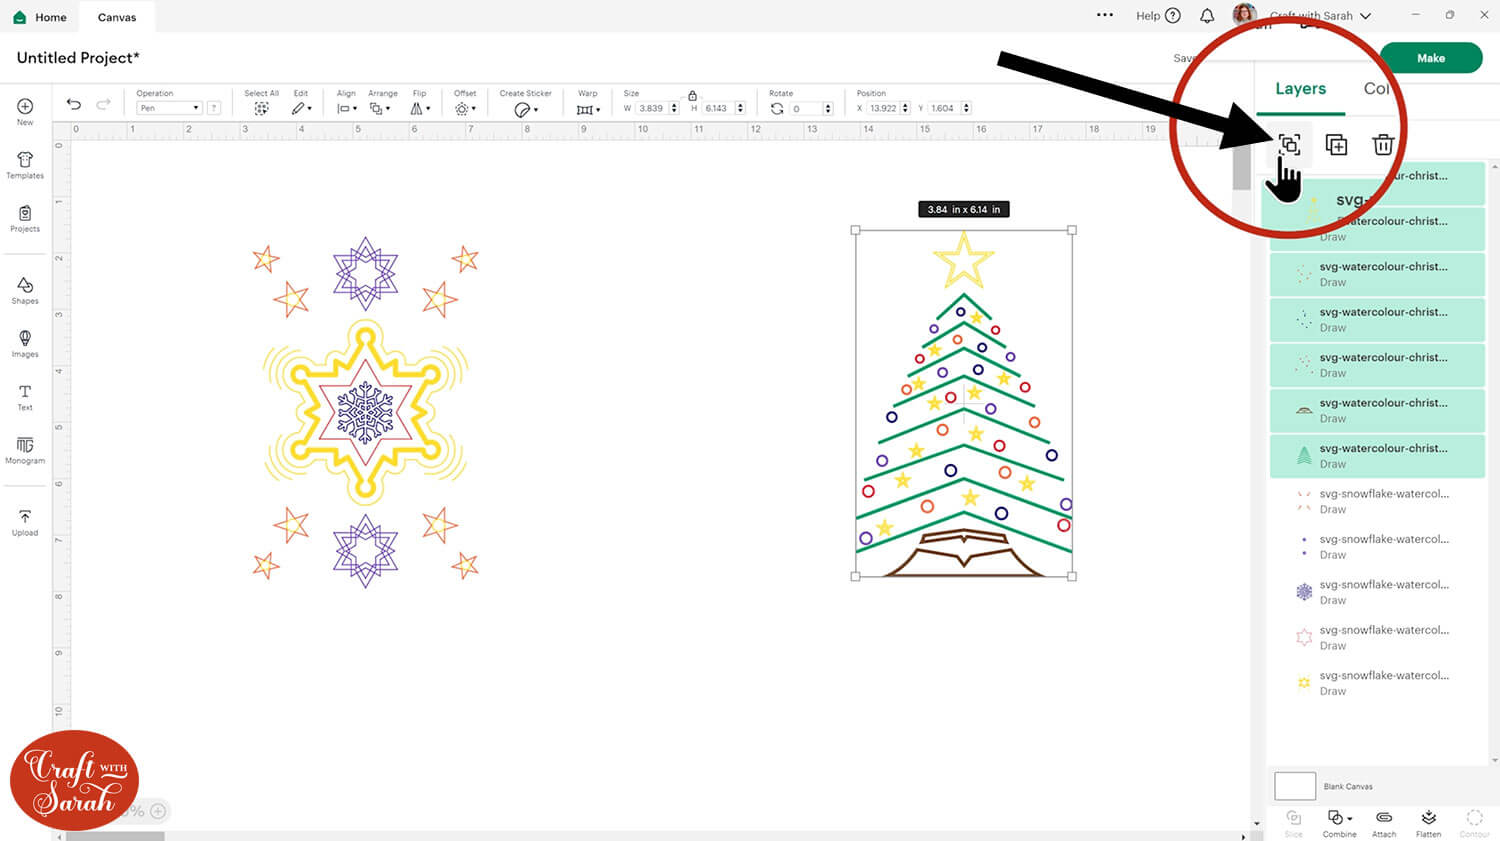
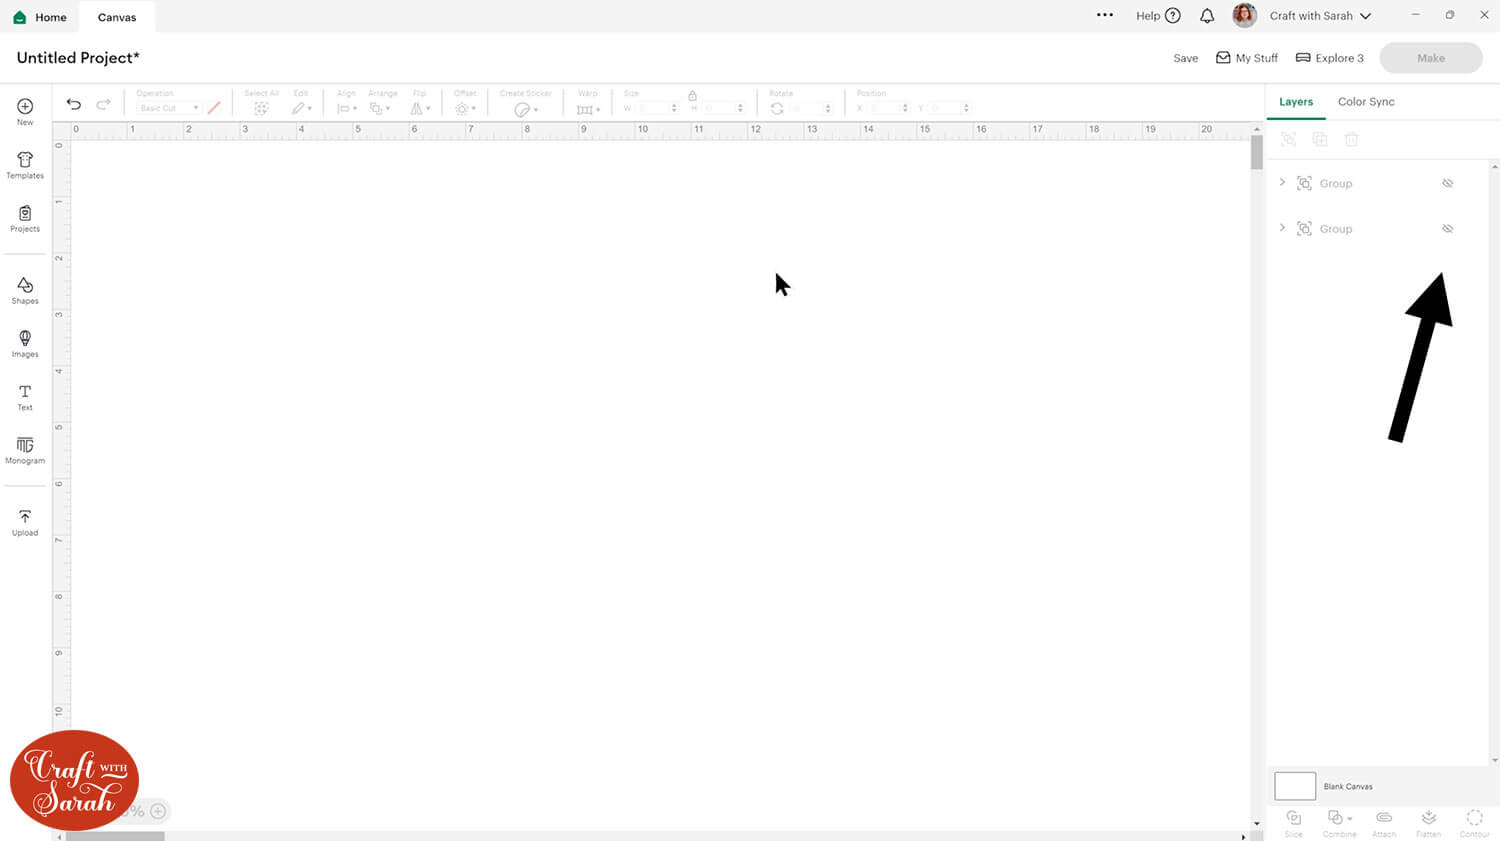
Hover your mouse over the Group names in the layers panel and click the eye icon that appears to temporarily hide the images from the screen.
This is so that we have lots of space to make our greetings card templates.
Step 3) Create the greetings cards
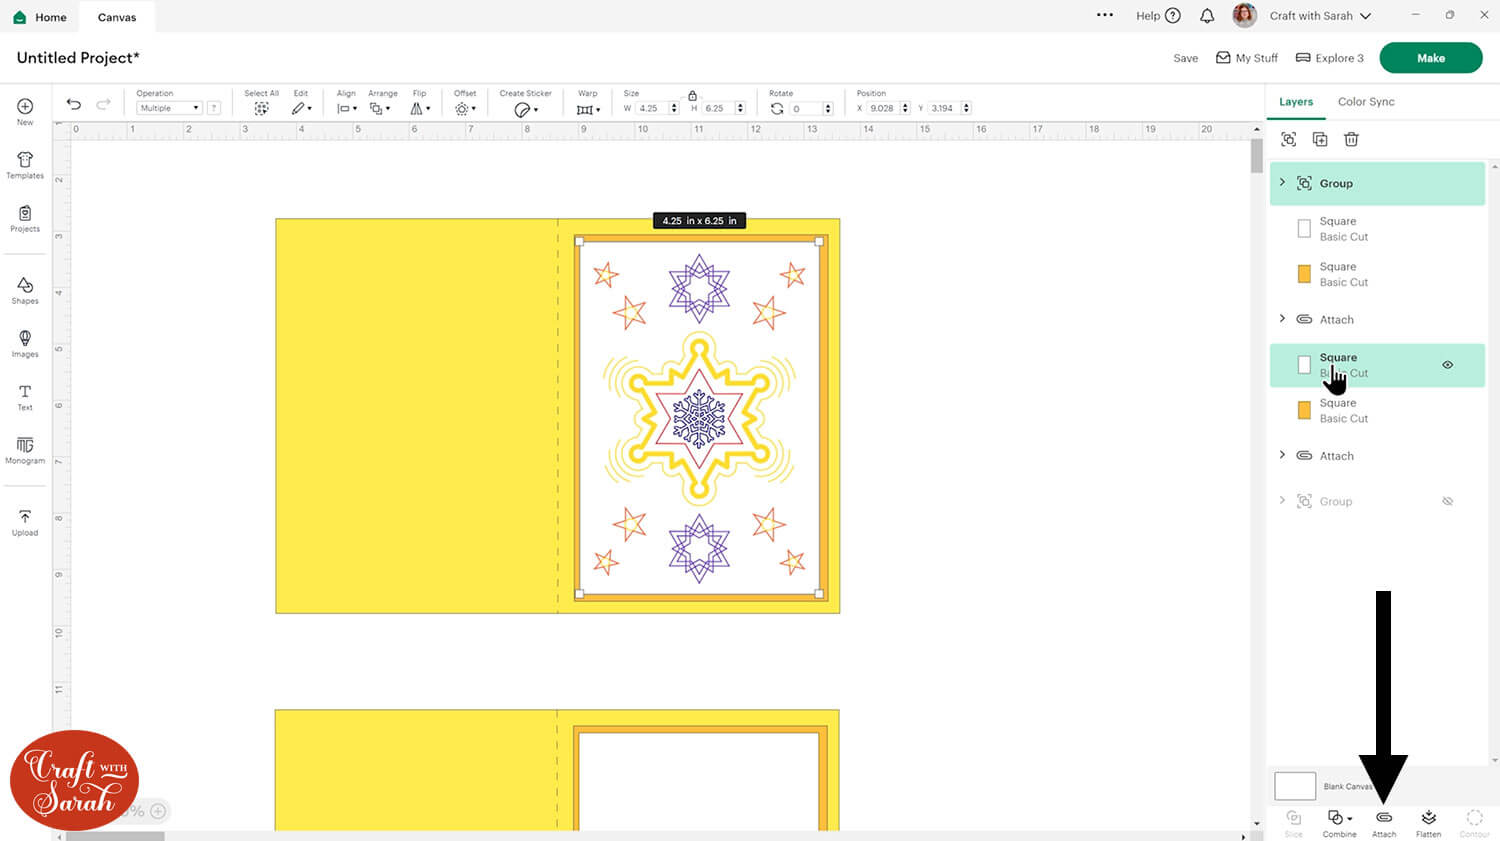
Click “Shapes” and choose a square.
Make it the size that you want your final card to be. I am making a 5×7 inch card so my base rectangle is 10 inches wide and 7 inches tall.
Make it a color to match the watercolor design. This is for my stars card, so a yellow color fits well.
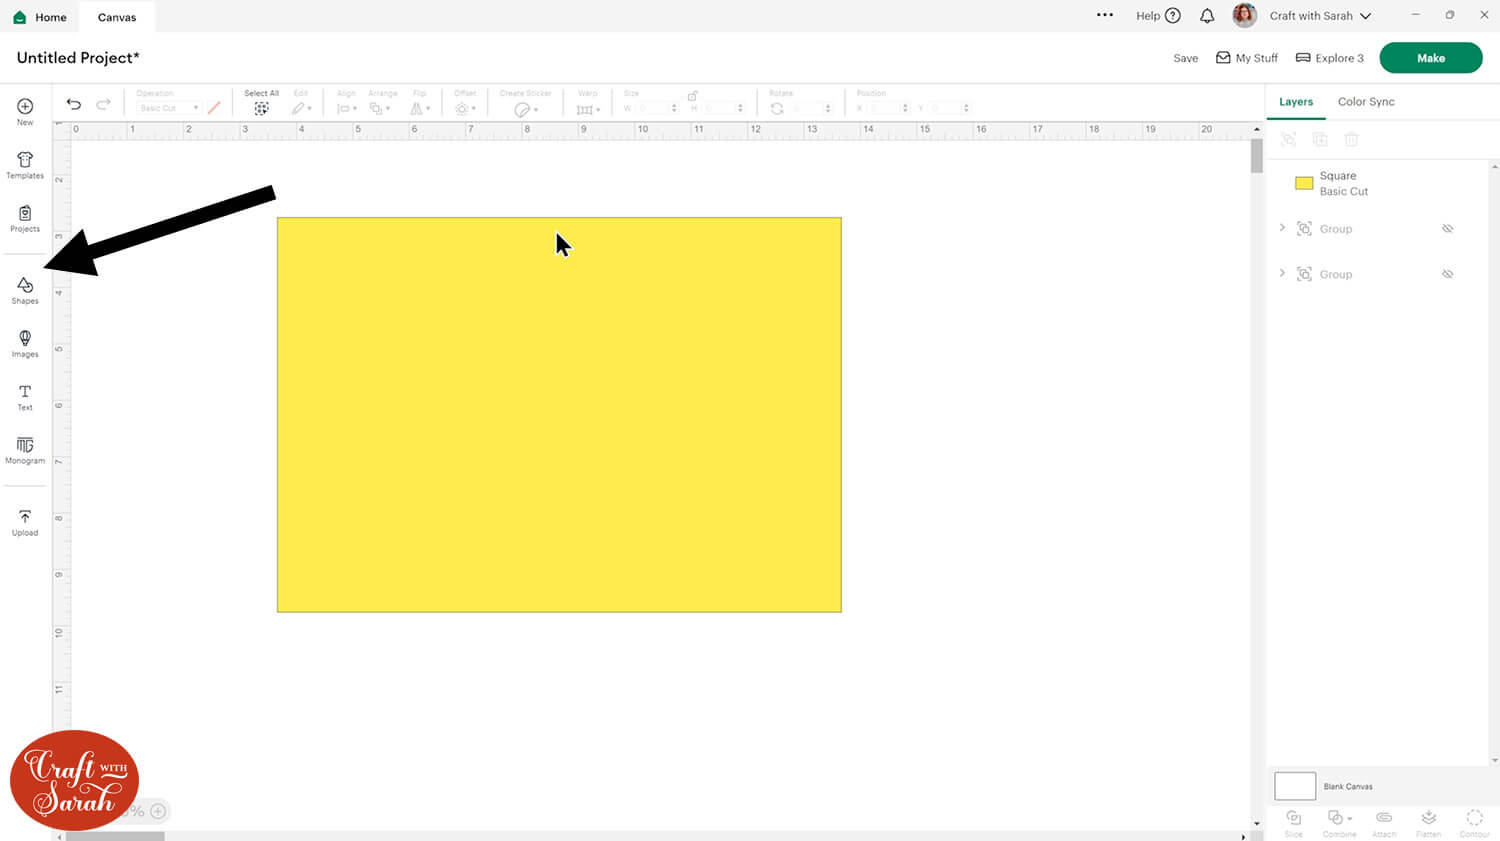
If you have a scoring tool or scoring wheel for your Cricut machine, it’s a good idea to add a score line to the middle of the base card to make it easier to fold in the correct place.
Click “Shapes” and insert a Score Line. Make it 7 inches tall.
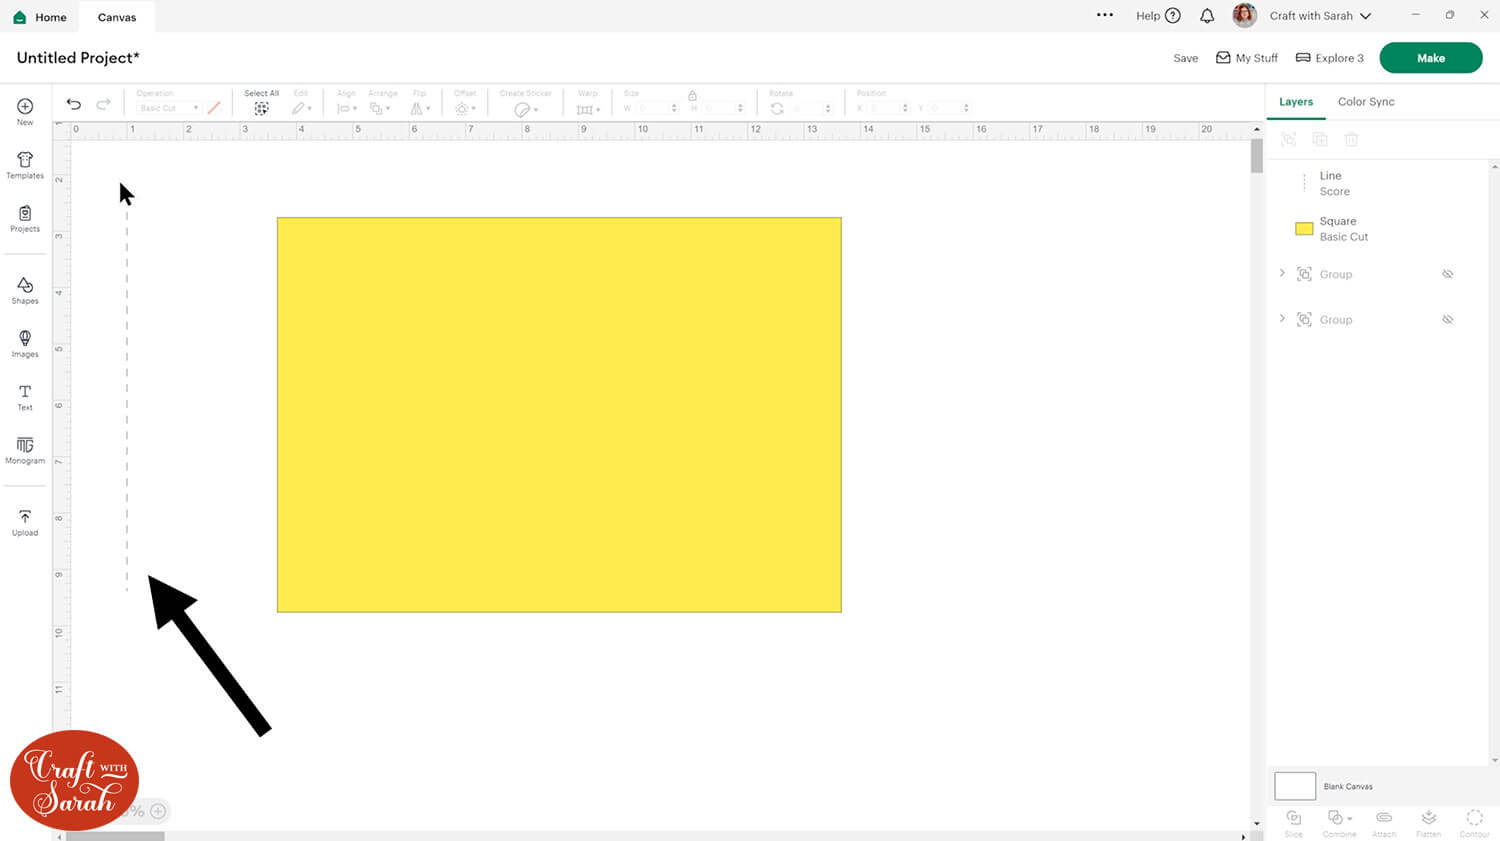
Select the score line and the base card, then click “Align” and “Center” to put the score line exactly in the middle of the card.
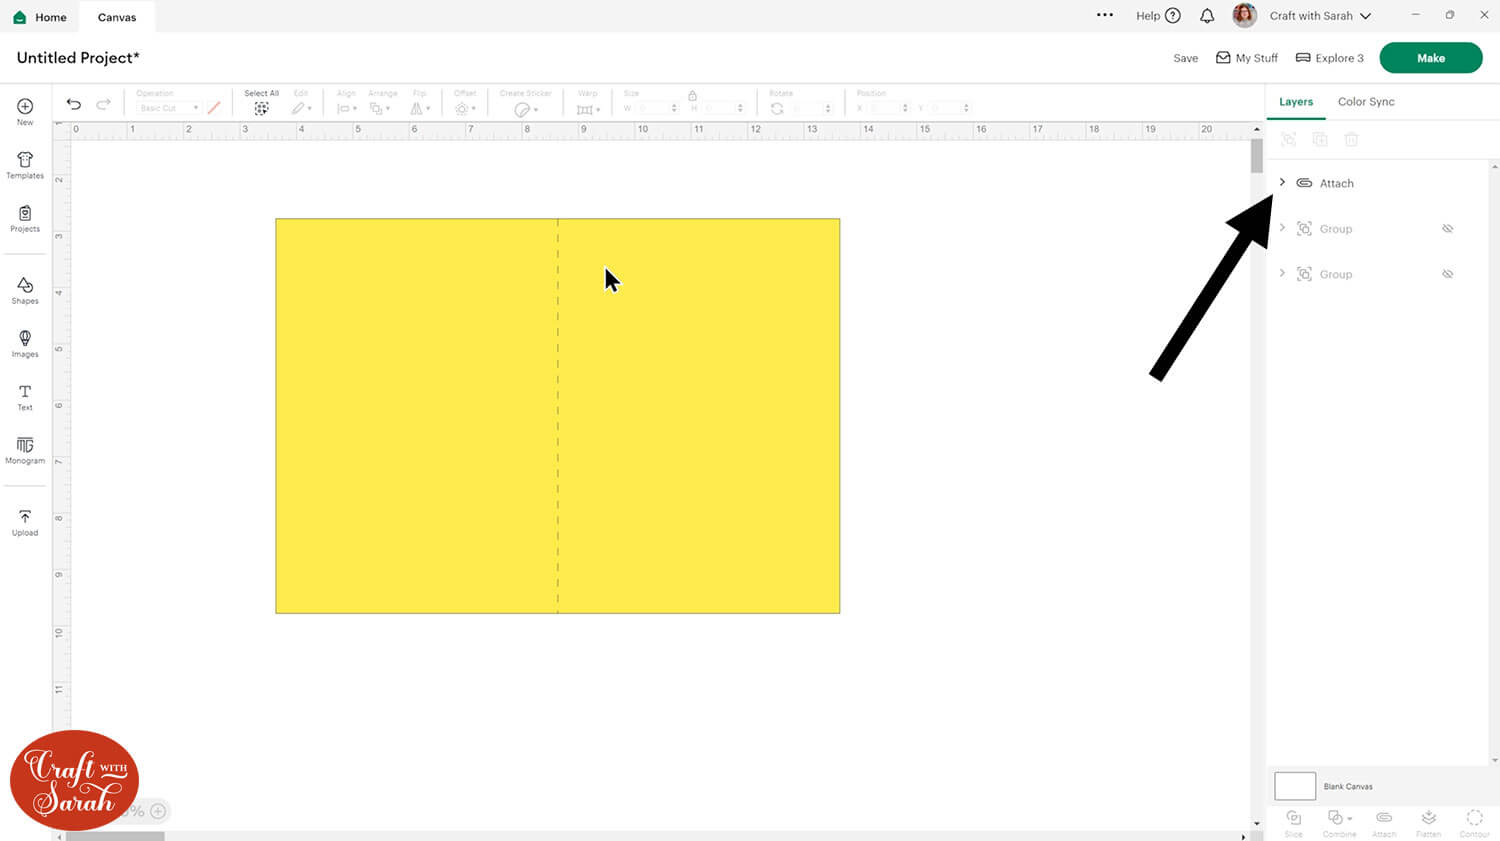
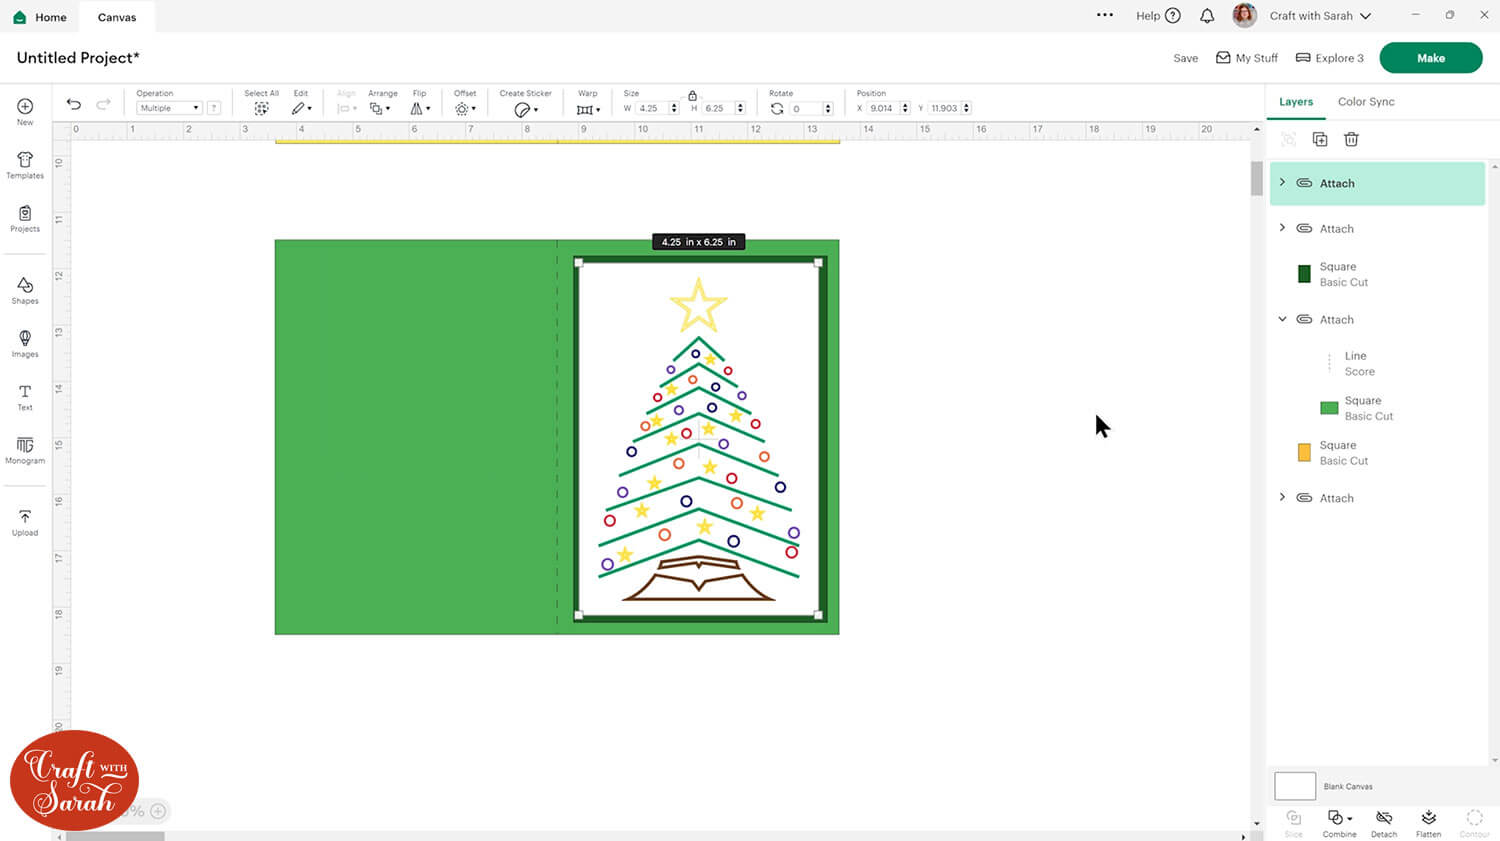
Select the score line and the base card, then press “Attach” at the bottom of the layers panel.
Attach is what tells the Cricut that we want it to do the score line down the middle of the base card.
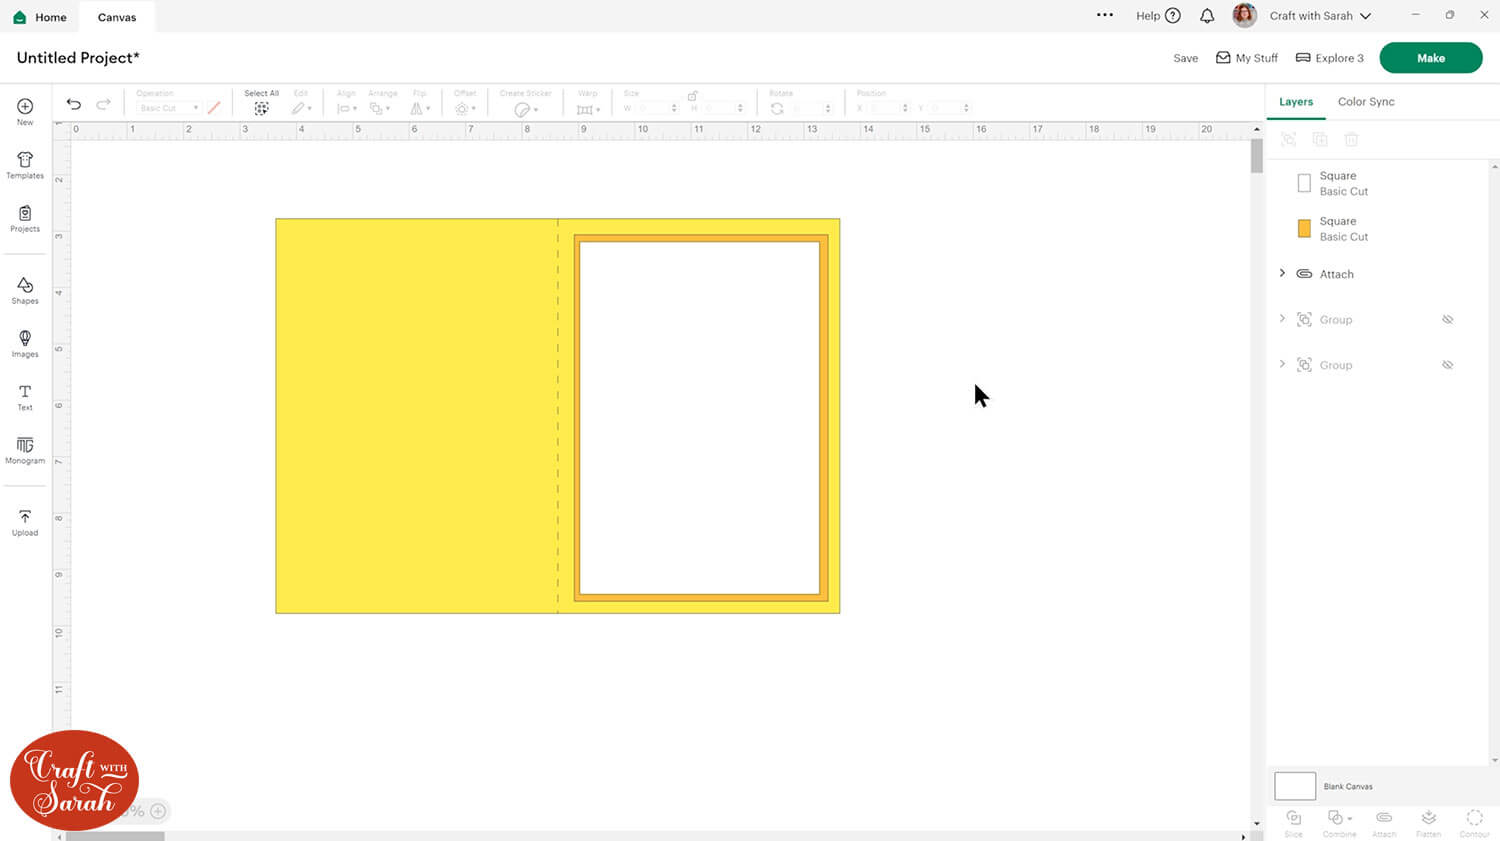
Go back to “Shapes” and insert another square. Size it to be a little smaller than your card front. Mine is 6.5 inches tall and 4.5 inches wide.
Make it a color slightly darker than the base card.
“Duplicate” the new rectangle and make it white. Change the size to be a little smaller. Mine is 6.25 inches tall and 4.25 inches wide.
This white rectangle is the one that the Cricut will draw on.
If you are making both cards, Duplicate the base card.
Turn the stars image back on by hovering over the Group in the layers panel and clicking the eye icon.
Move it to the top by clicking the stars and then “Arrange > Send to Front”.
Position the stars image over the white rectangle and size it to fit. Select the stars image and the white rectangle and press “Align > Center” to put the image exactly in the middle.
With both the stars image and the white rectangle still selected, press “Attach” to join them togther.
Repeat this for the Christmas tree card.
Step 4) Cut and draw the greetings cards
When you’re happy with how the project is looking in Design Space, save your project and then click “Make” and follow the instructions on-screen to cut out all the pieces.
Your watercolor images should be showing “on top” of the white rectangles, like this:
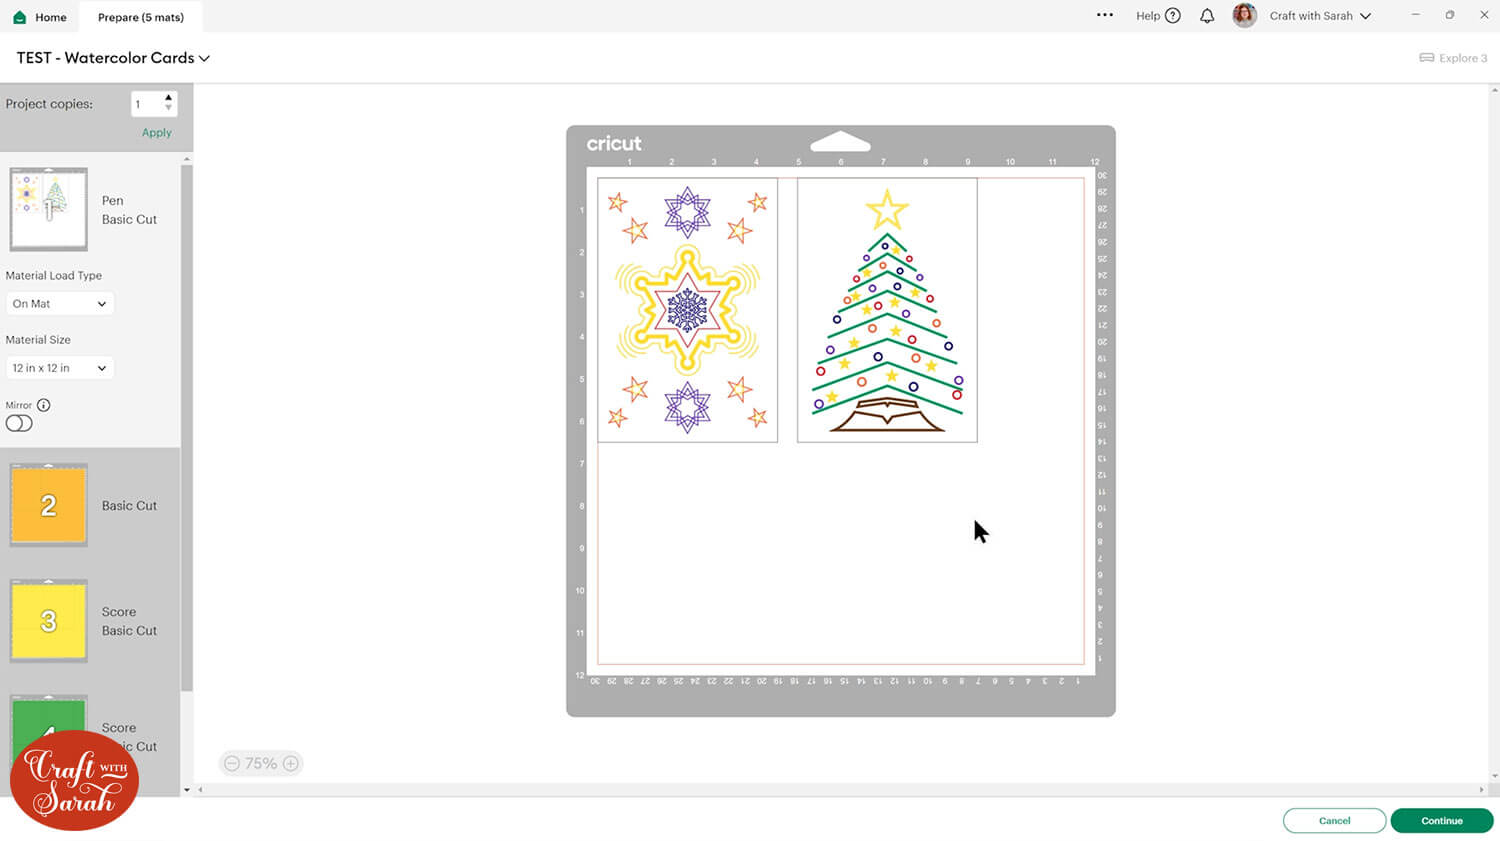
To change the paper size, go into the dropdowns over on the left side of the screen and choose the paper size that you want to use. You need to change it for every single color.
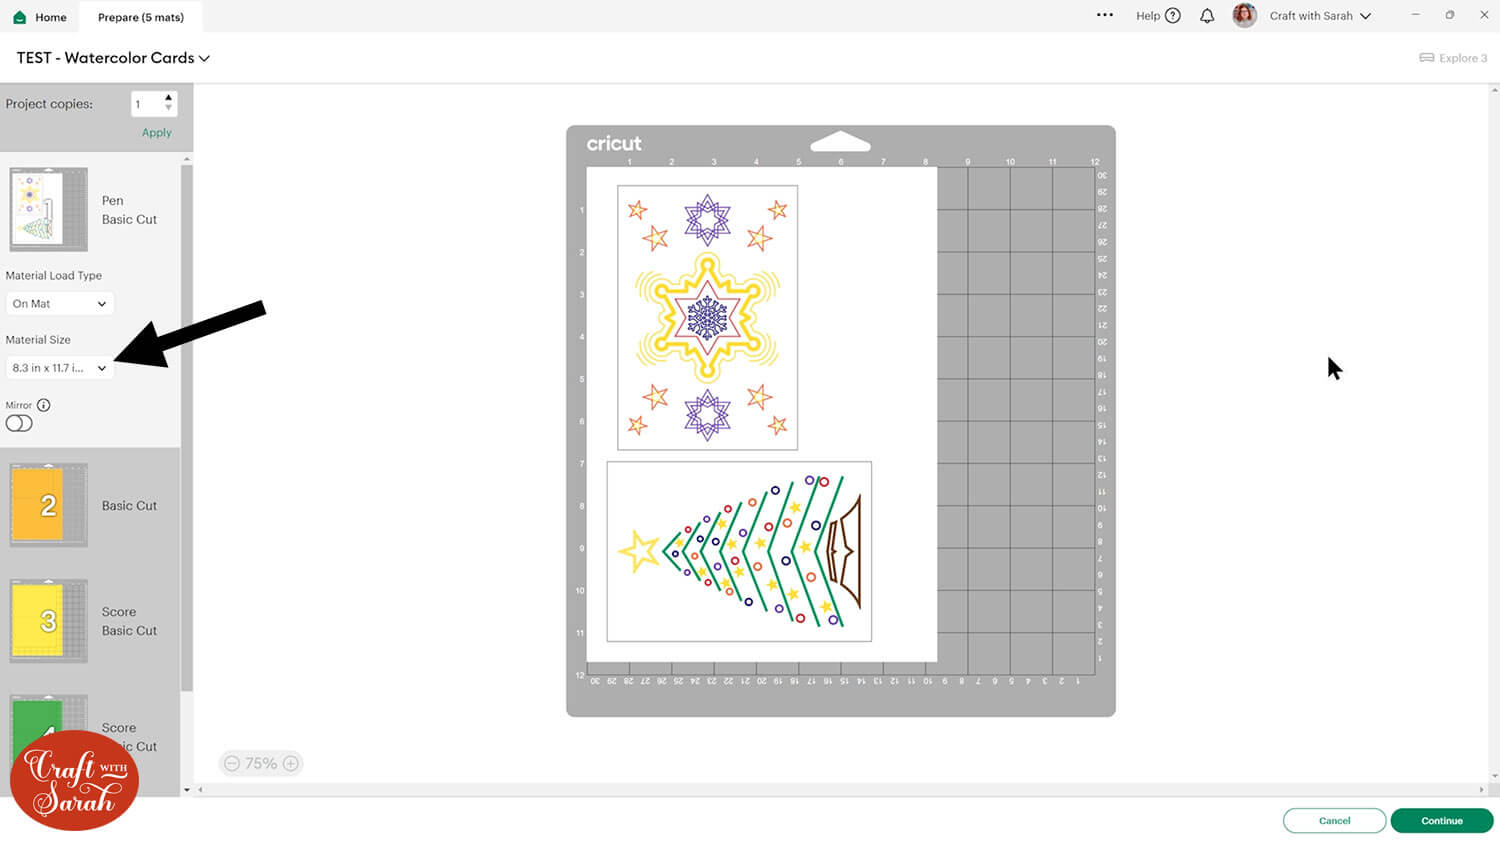
To save space on your cardstock, you can move things around by clicking and dragging. Make sure when you’re moving things about that nothing overlaps because otherwise, it won’t cut out properly.
TIP: New to cutting cardstock with a Cricut? Check out this in-depth tutorial which goes through every step of the process, including tips for getting the best quality cuts from your Cricut.
As my watercolor paper is thick, I used the “Kraft Board” setting to cut it out.
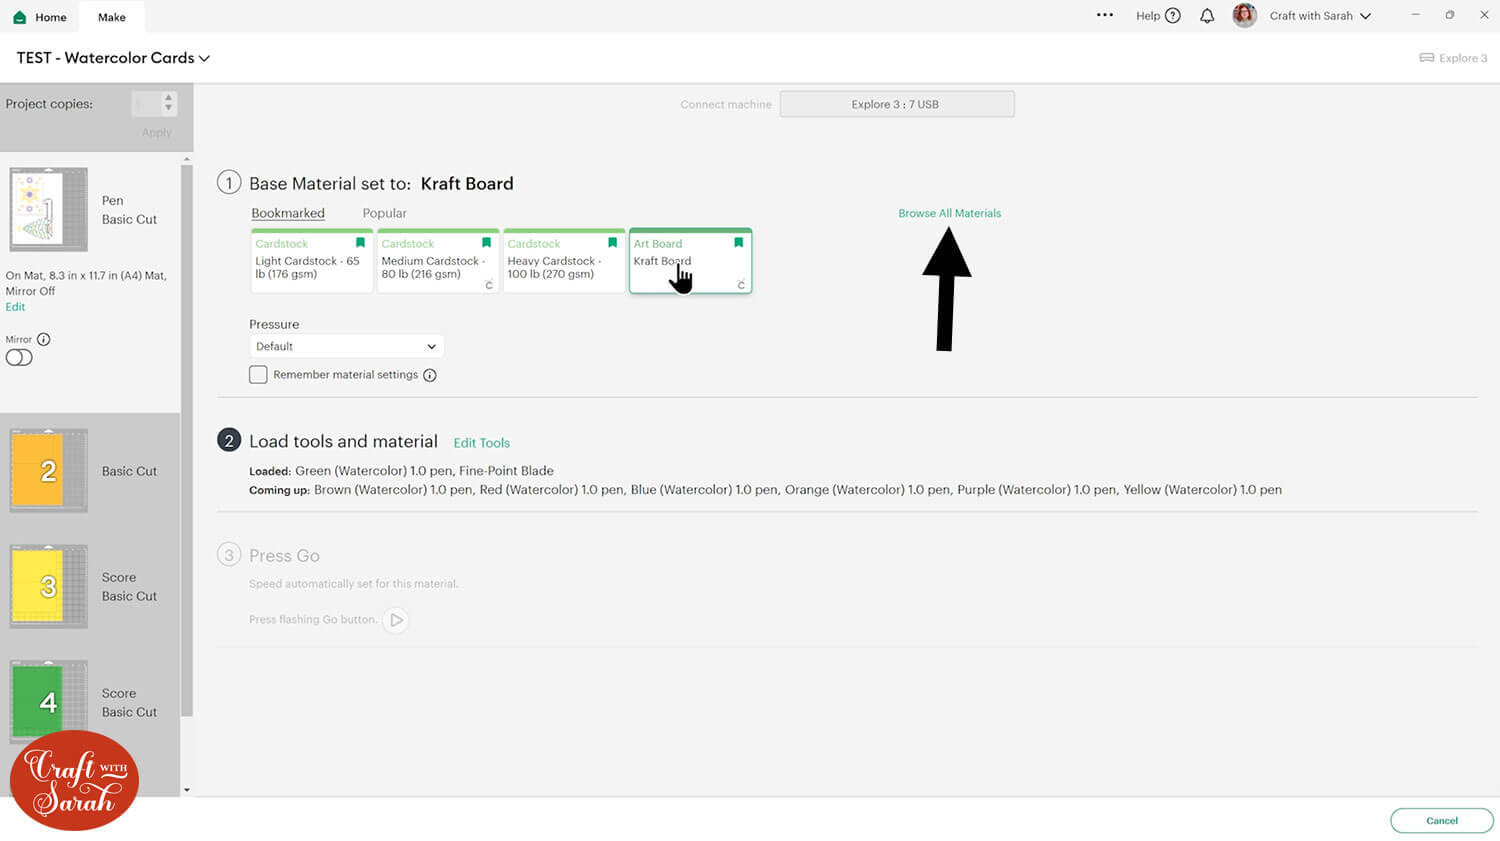
Design Space tells you which pen to load first. Make note of the color it tells you to put in your machine. For me, it wanted the green pen first.
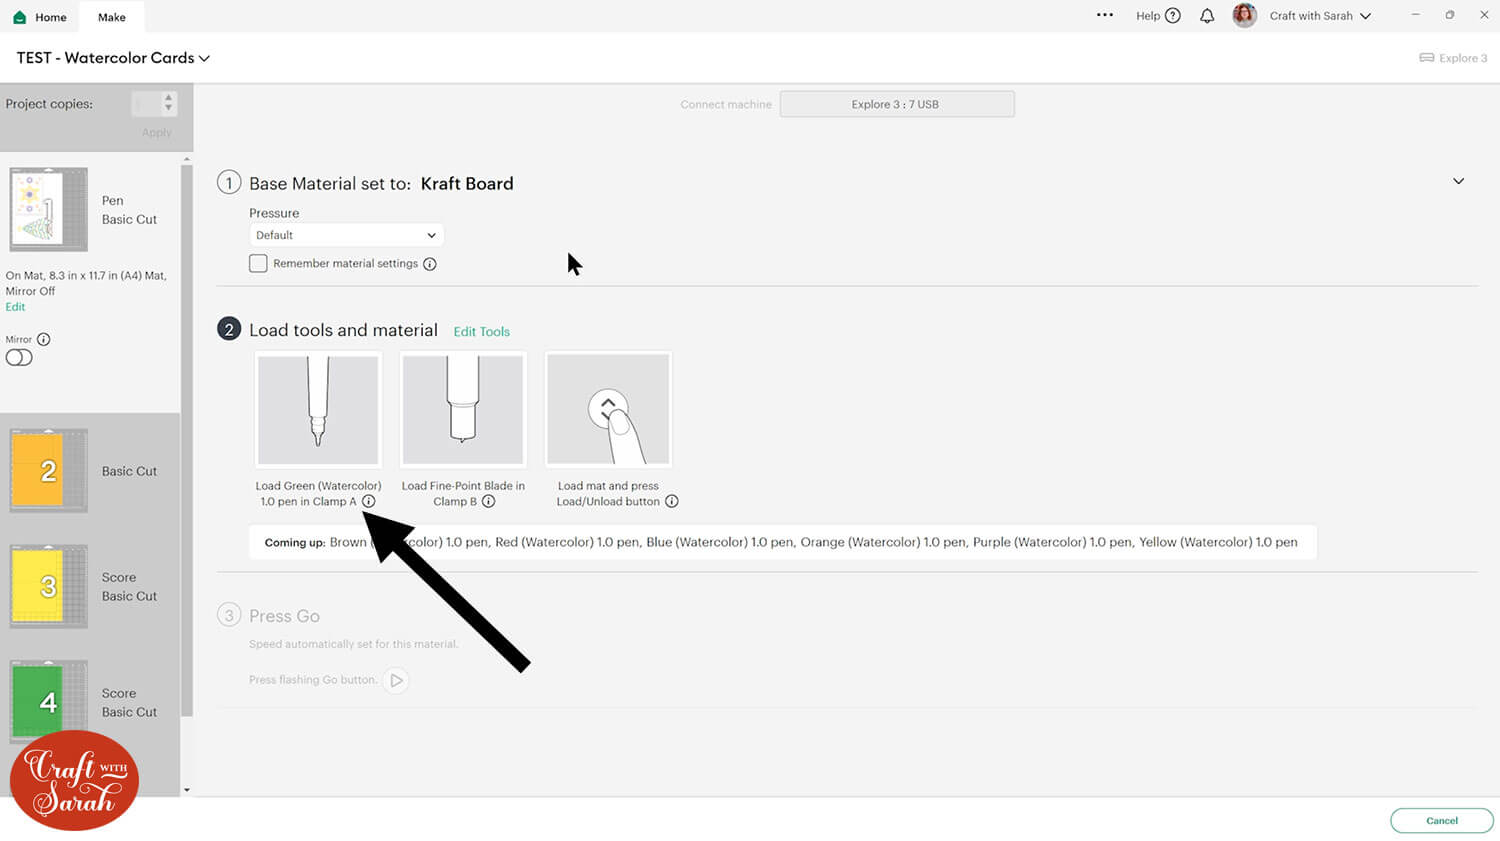
Load the correct color of pen into the “A” clamp in your Cricut, then load your mat.
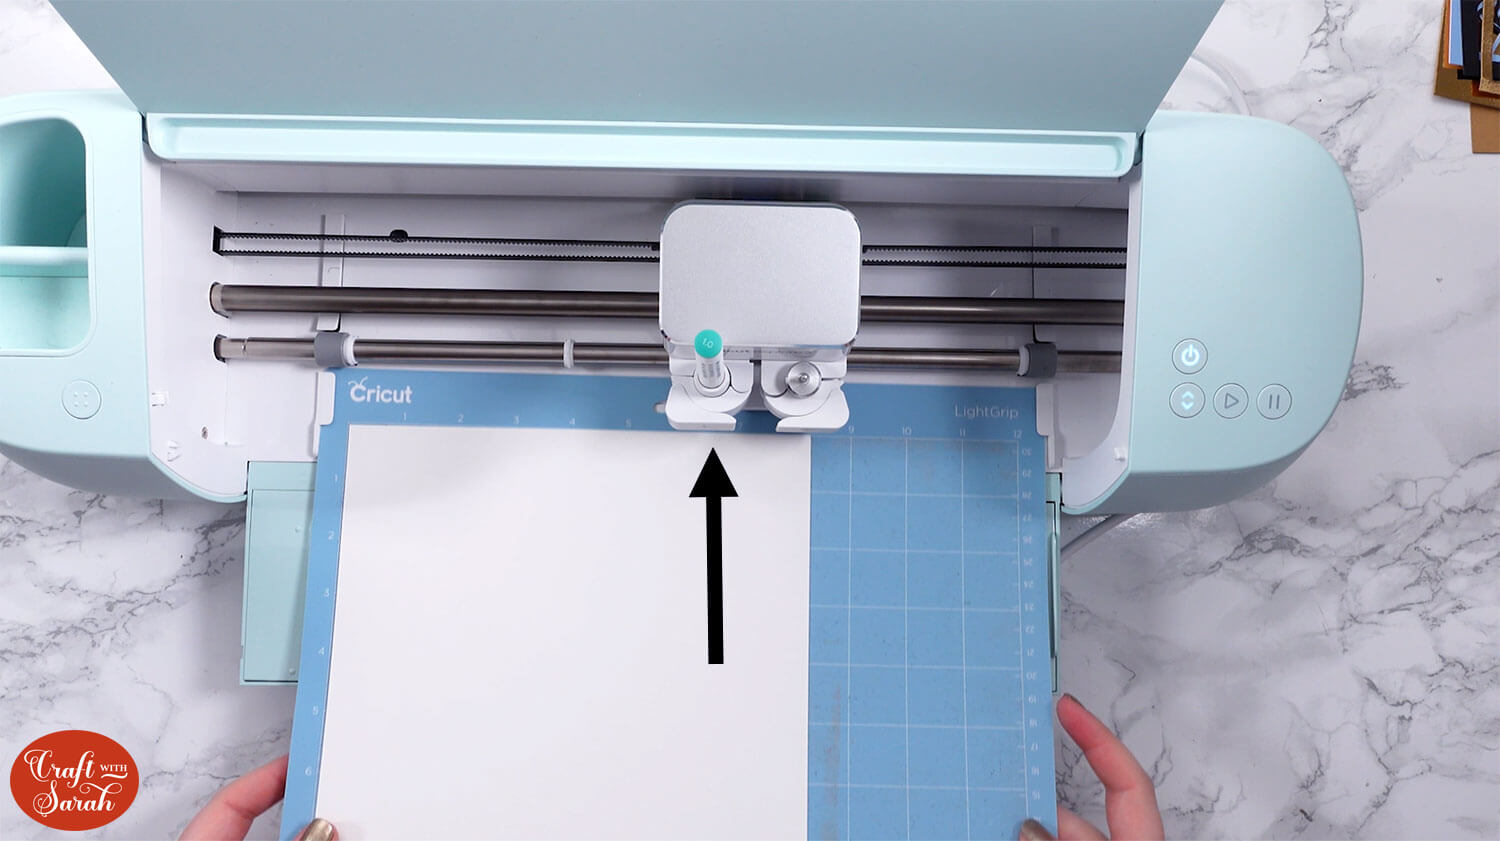
The Cricut will then do all the draw lines in that color. Don’t worry if it looks like it’s doing the same lines more than once – that is intentional to get a better watercolor effect.
IMPORTANT – if you have problems with your Cricut disconnecting or throwing errors during the drawing process and you are using Bluetooth to connect to your Cricut, try using the USB cable instead. This seems to be a bit more reliable when doing complex drawing projects.
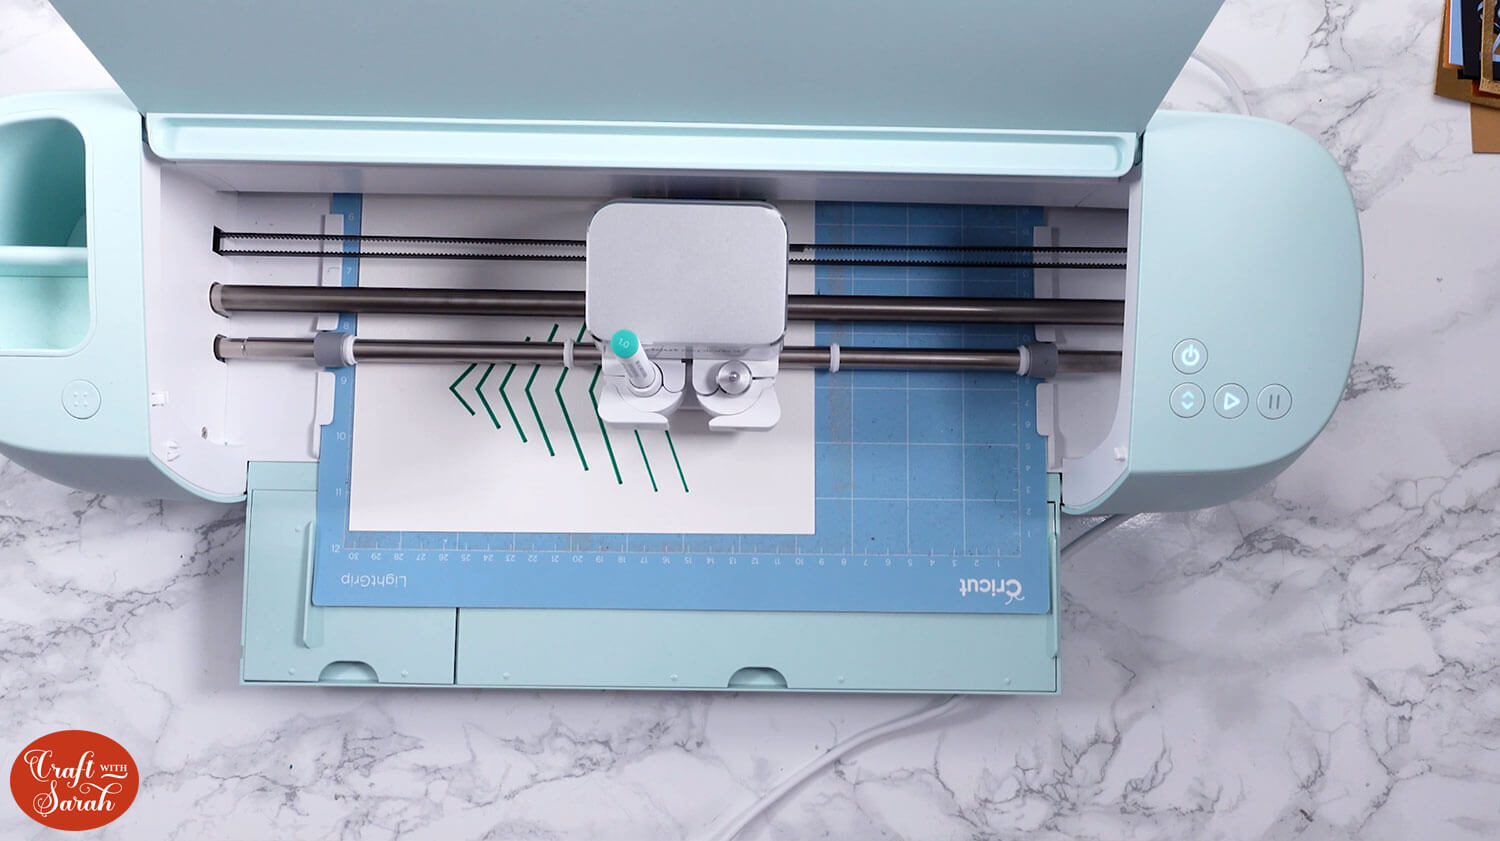
Once all the lines in that color are finished, the screen will update in Design Space to tell you which color pen to add next.
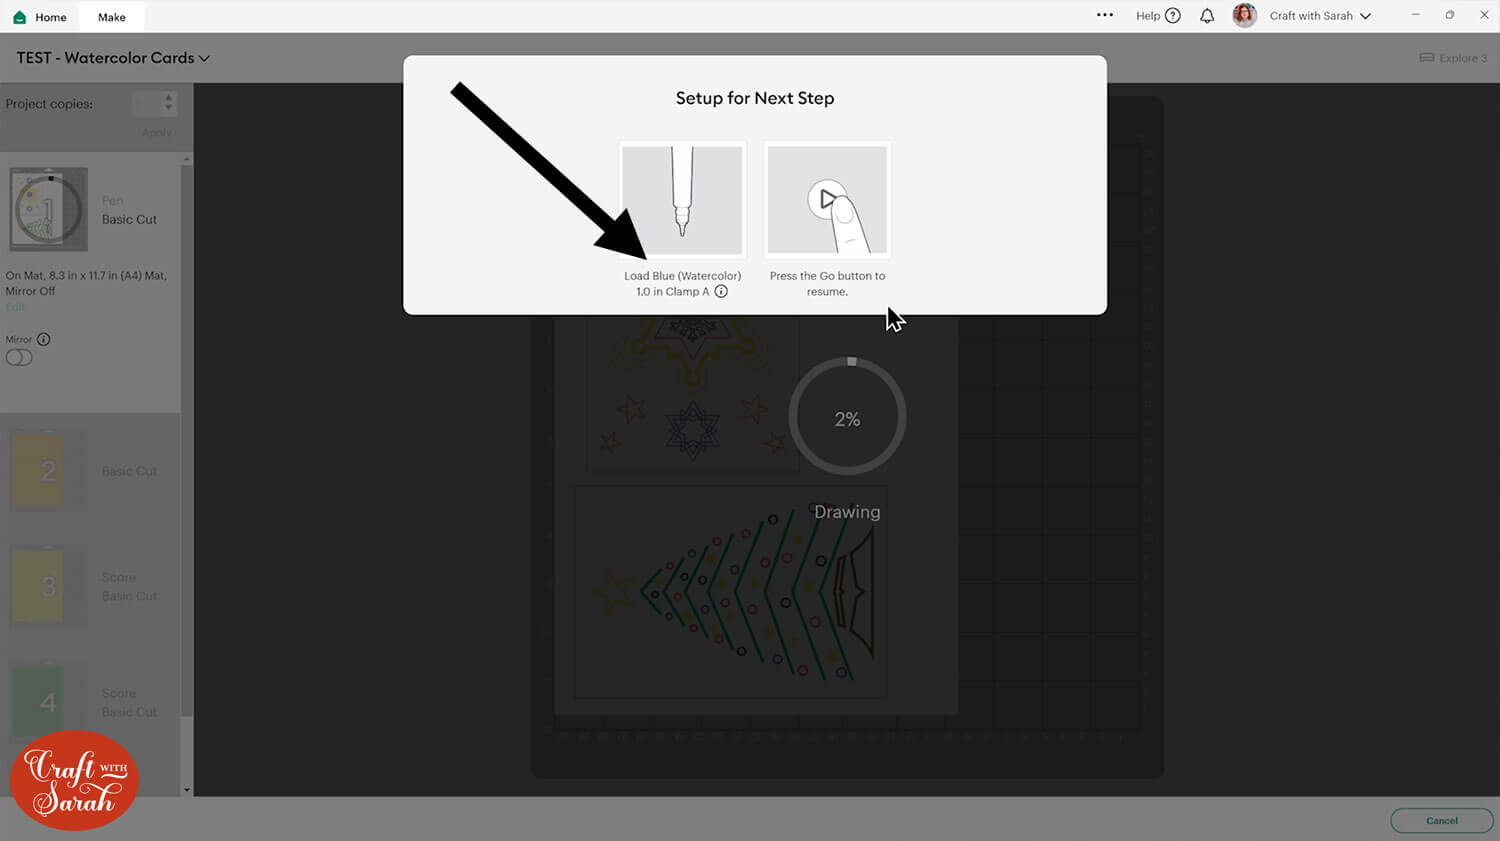
IMPORTANT – Do not eject your mat!! If you do, you’ll have to start again from the beginning on a new sheet of watercolor paper.
Load the new color of pen into the machine and then press the “Go” button to continue the drawing process.
Keep following the on-screen instructions until everything has been drawn and cut.
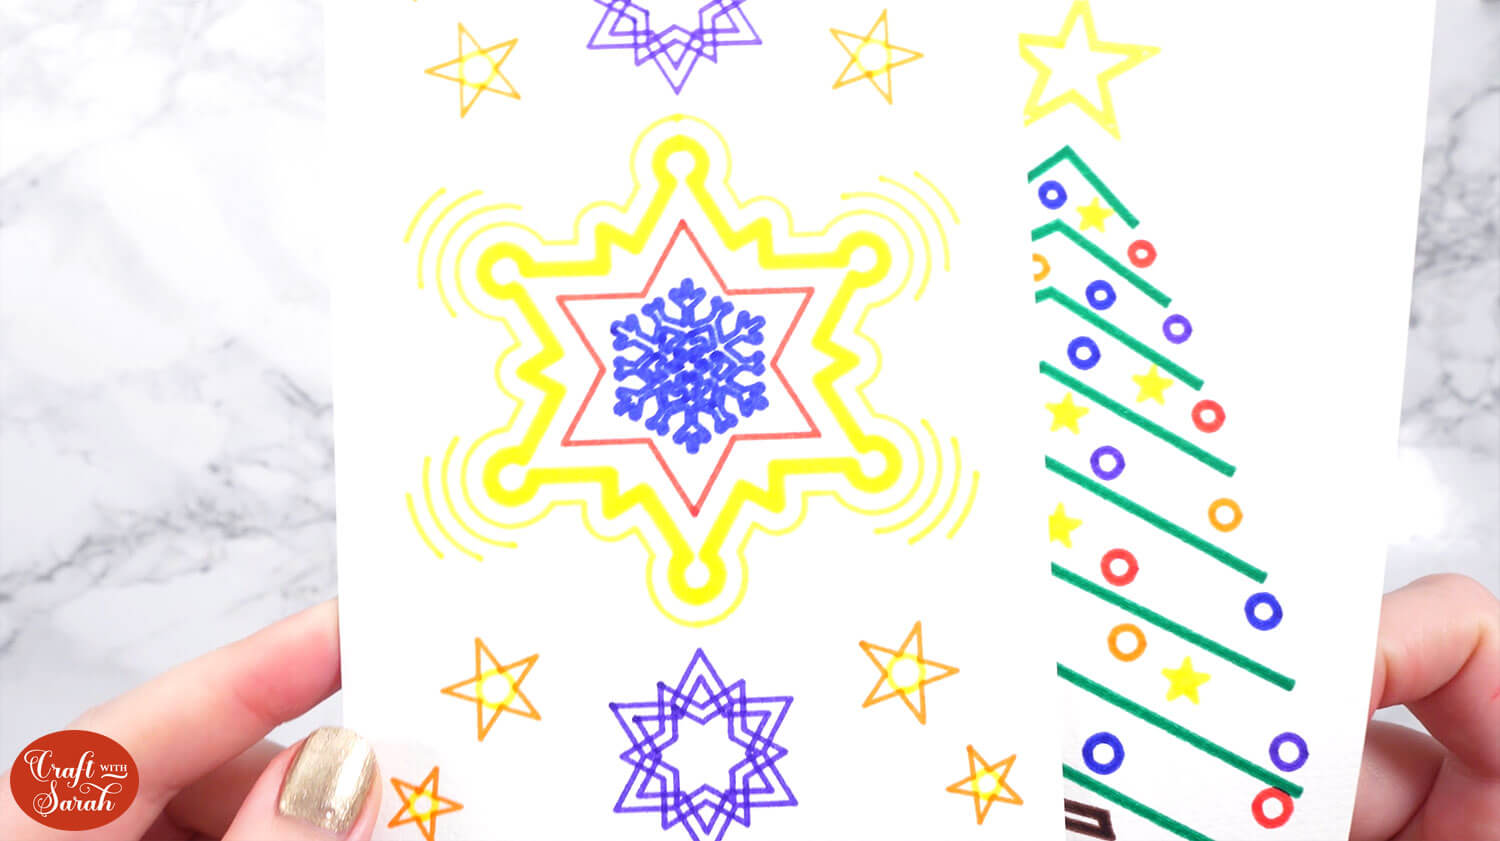
Step 5) Do the watercolor painting
Now it’s time to get creative!
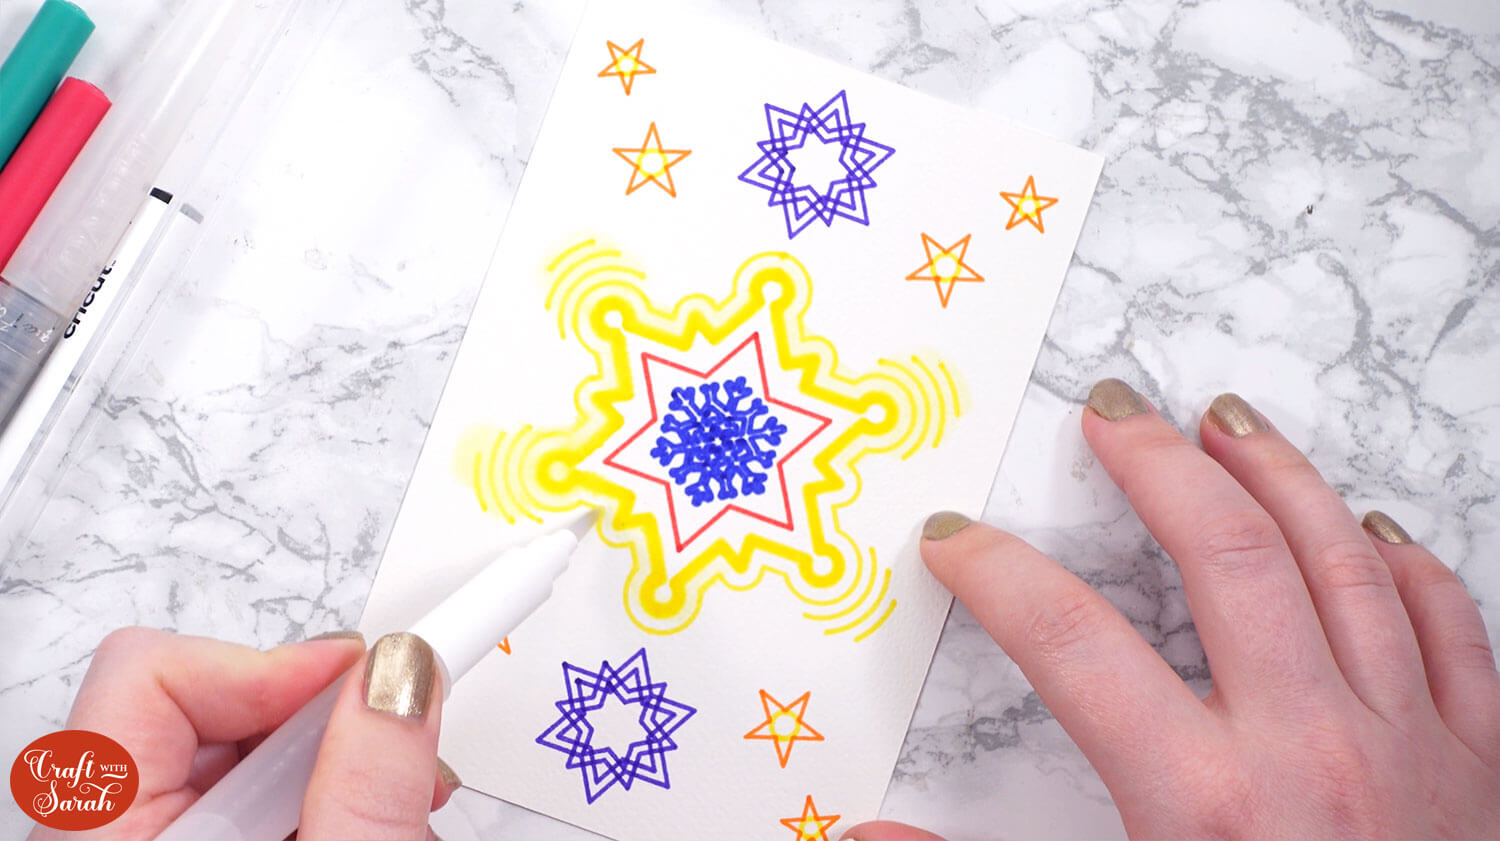
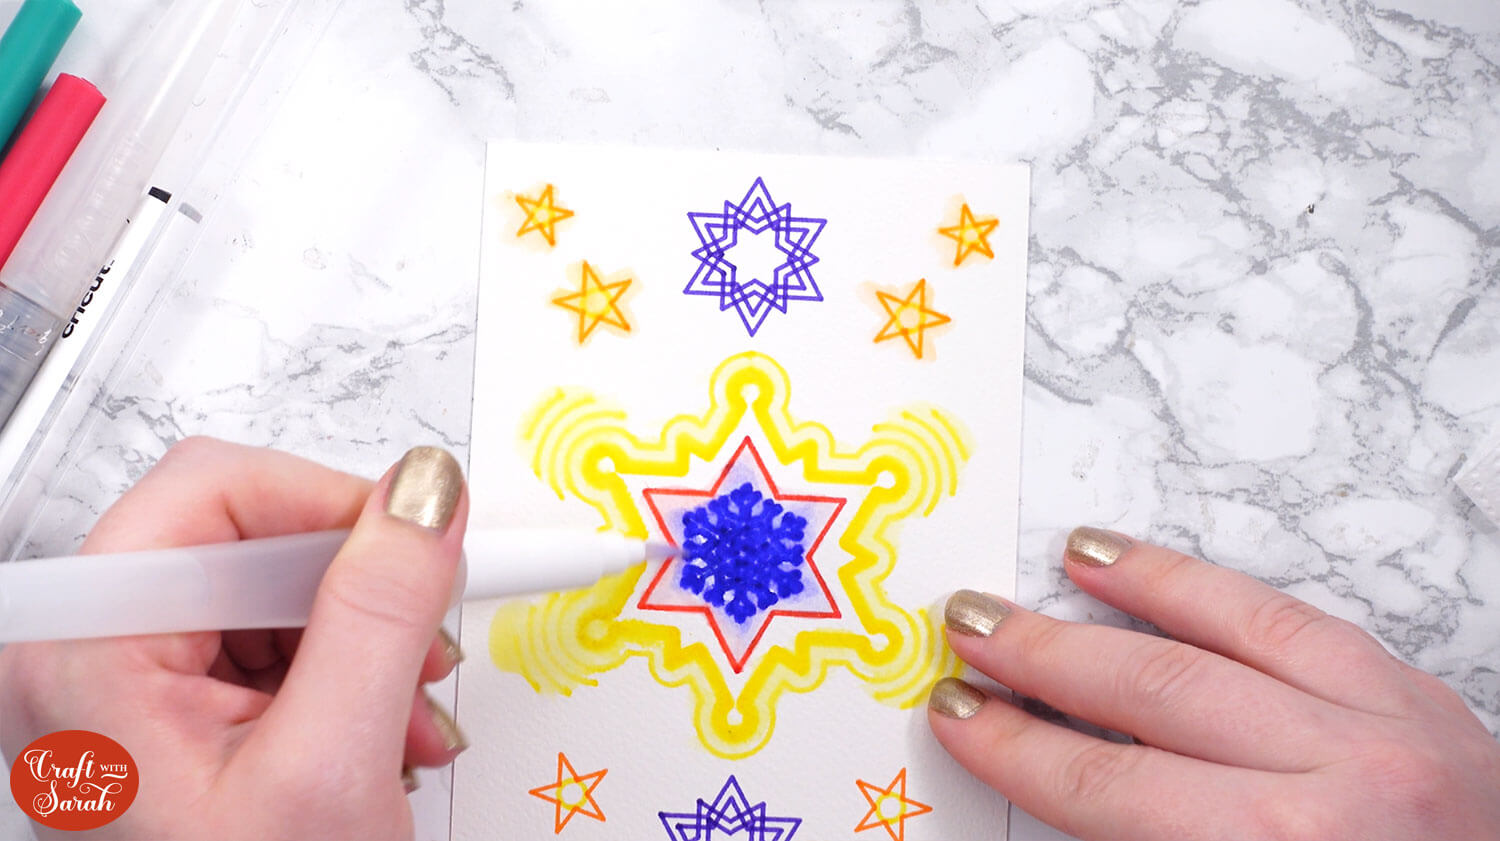
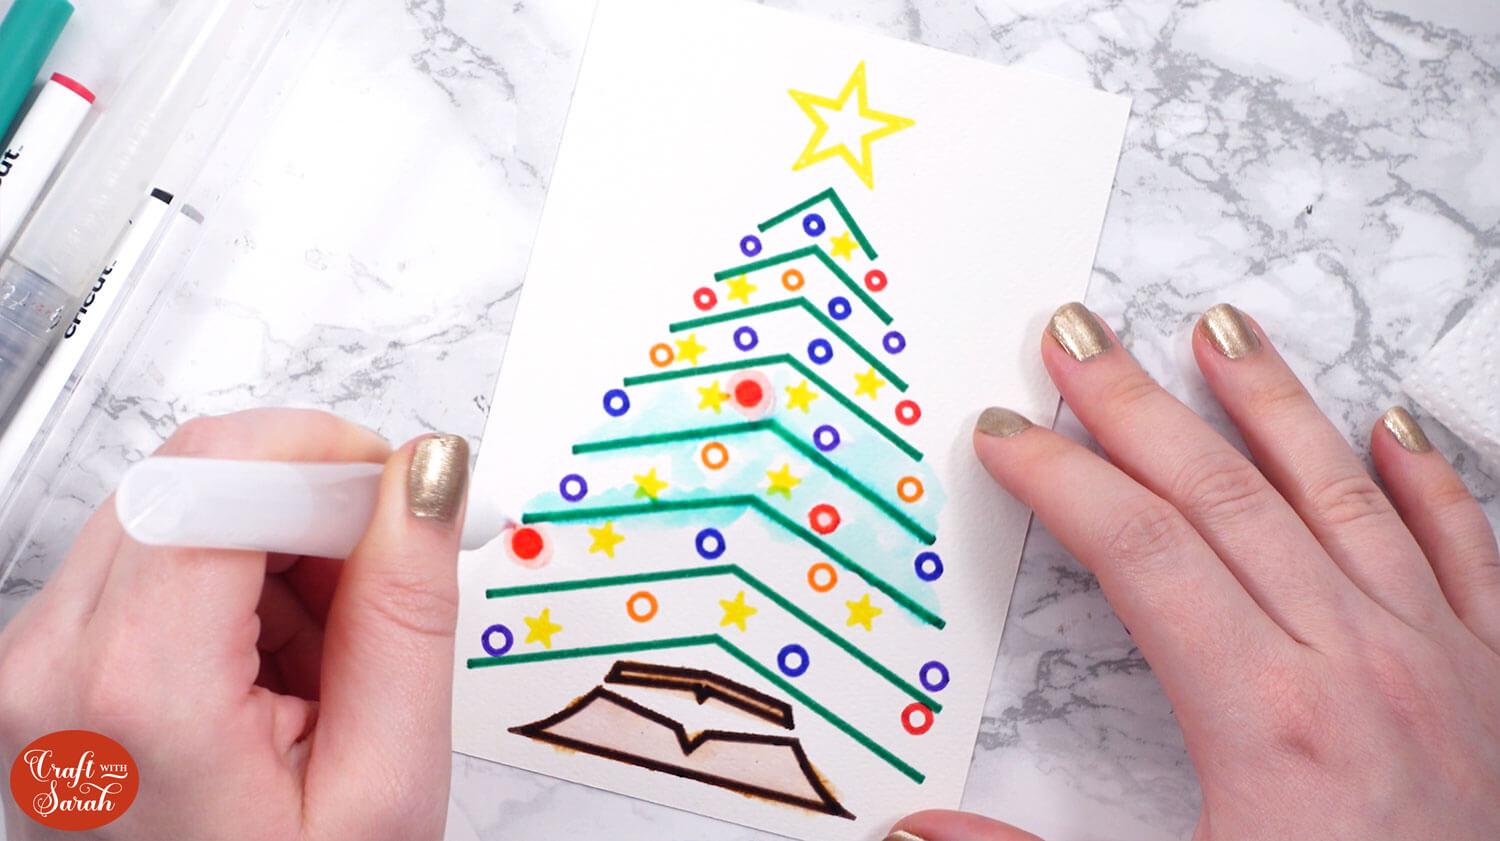
The Cricut watercolor pens come with a waterbrush in the pack. Fill it with water to make a paintbrush.
Using warm (not hot!) water can help the marker colors to “bleed” a bit more, for a more vibrant paint effect.
If you are new to using the markers, try drawing some shapes on a scrap of card to practice using the waterbrush.
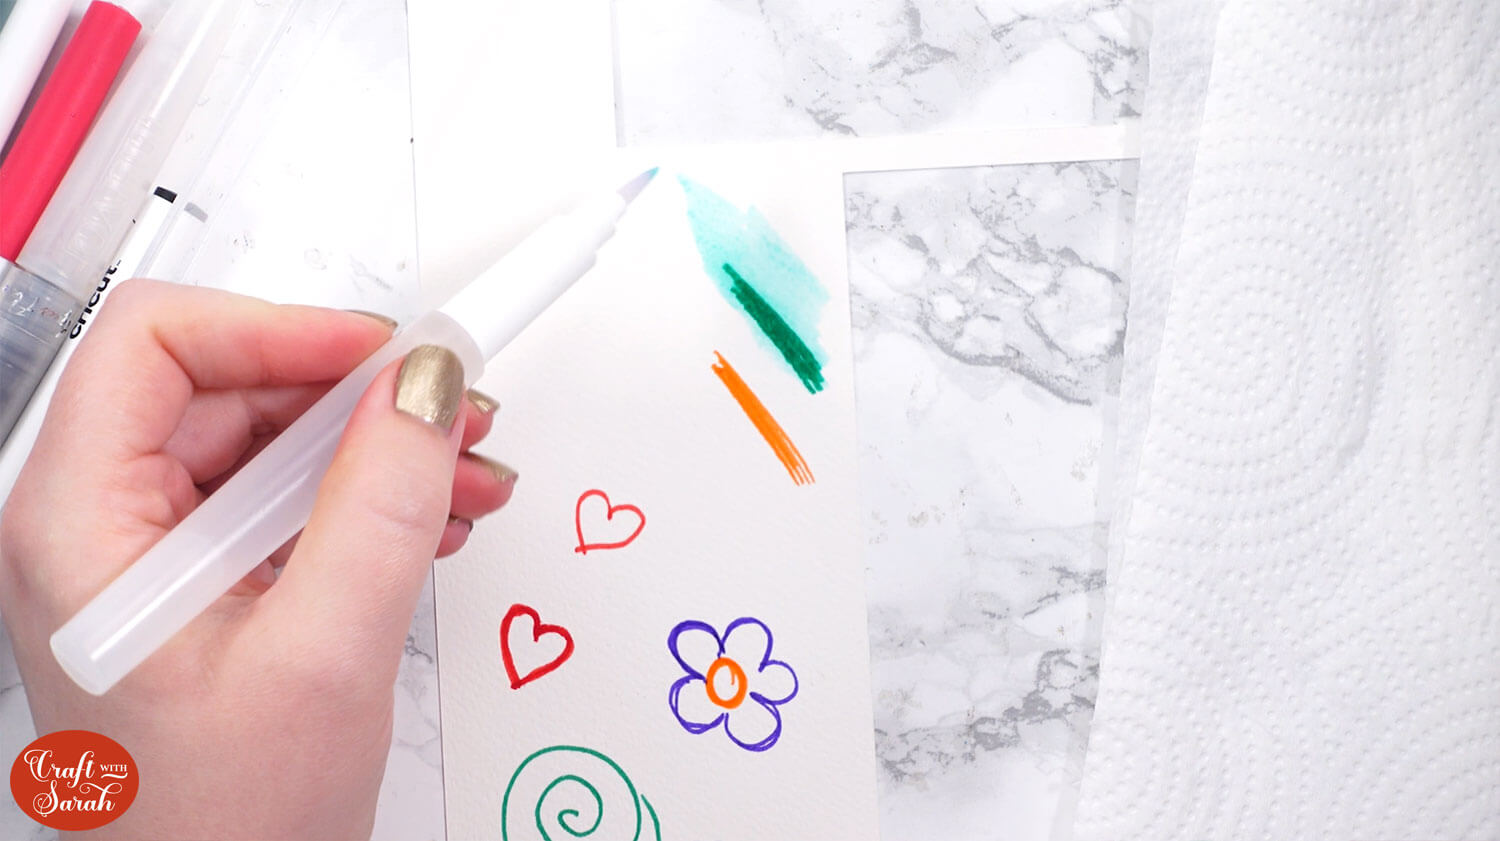
You will probably notice that some colors blend better than others.
Clean your brush in between colors by wiping it on some kitchen roll until the water runs clear.
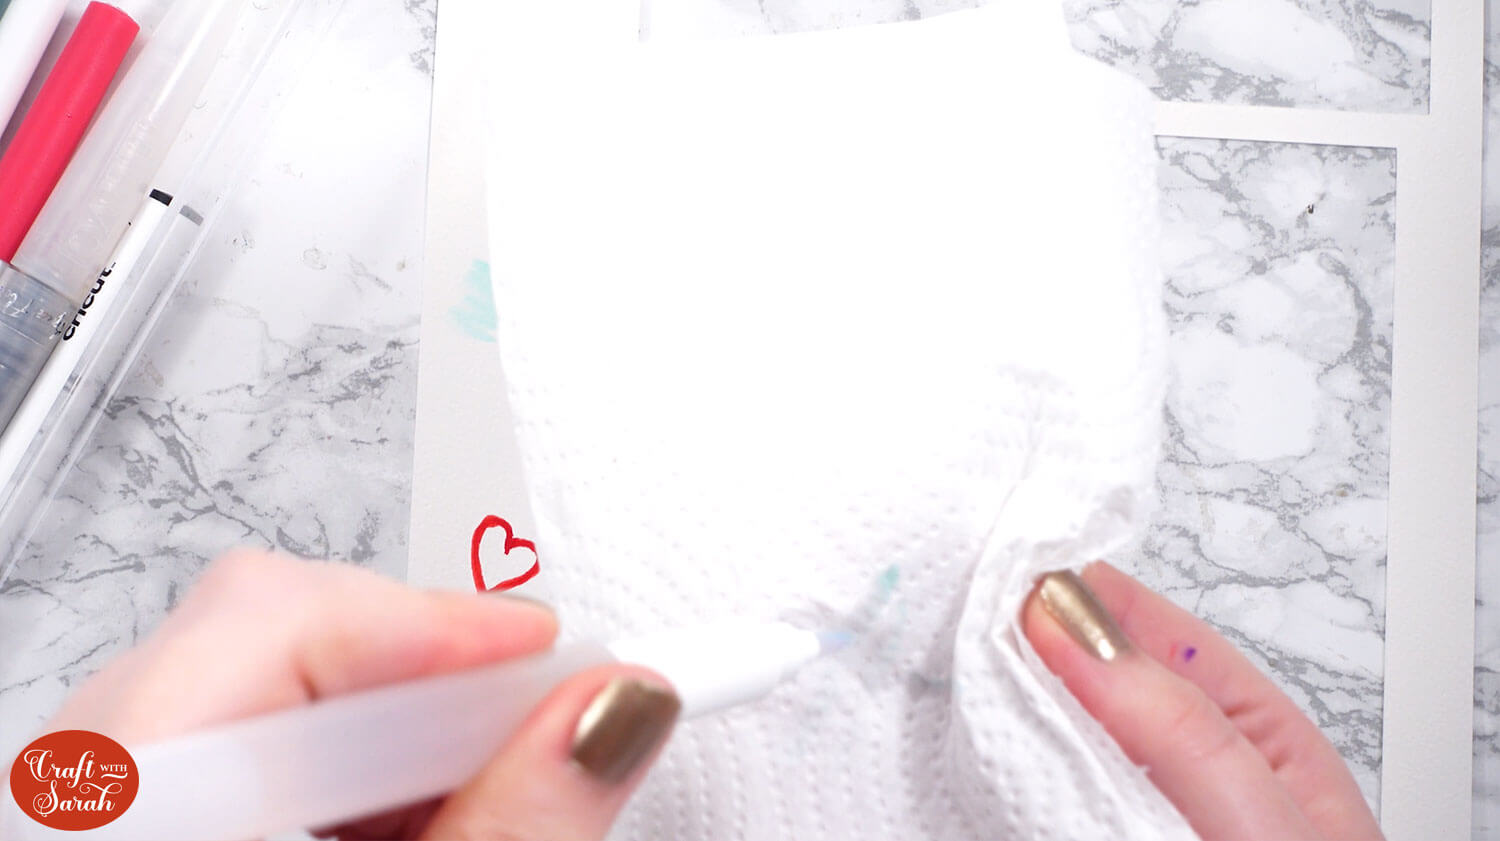
Working from light-to-dark colors, blend out all the lines in the design using your waterbrush.
Step 6) Stick the cards together
When the watercolor images are completely dry, you can add them to the cards.
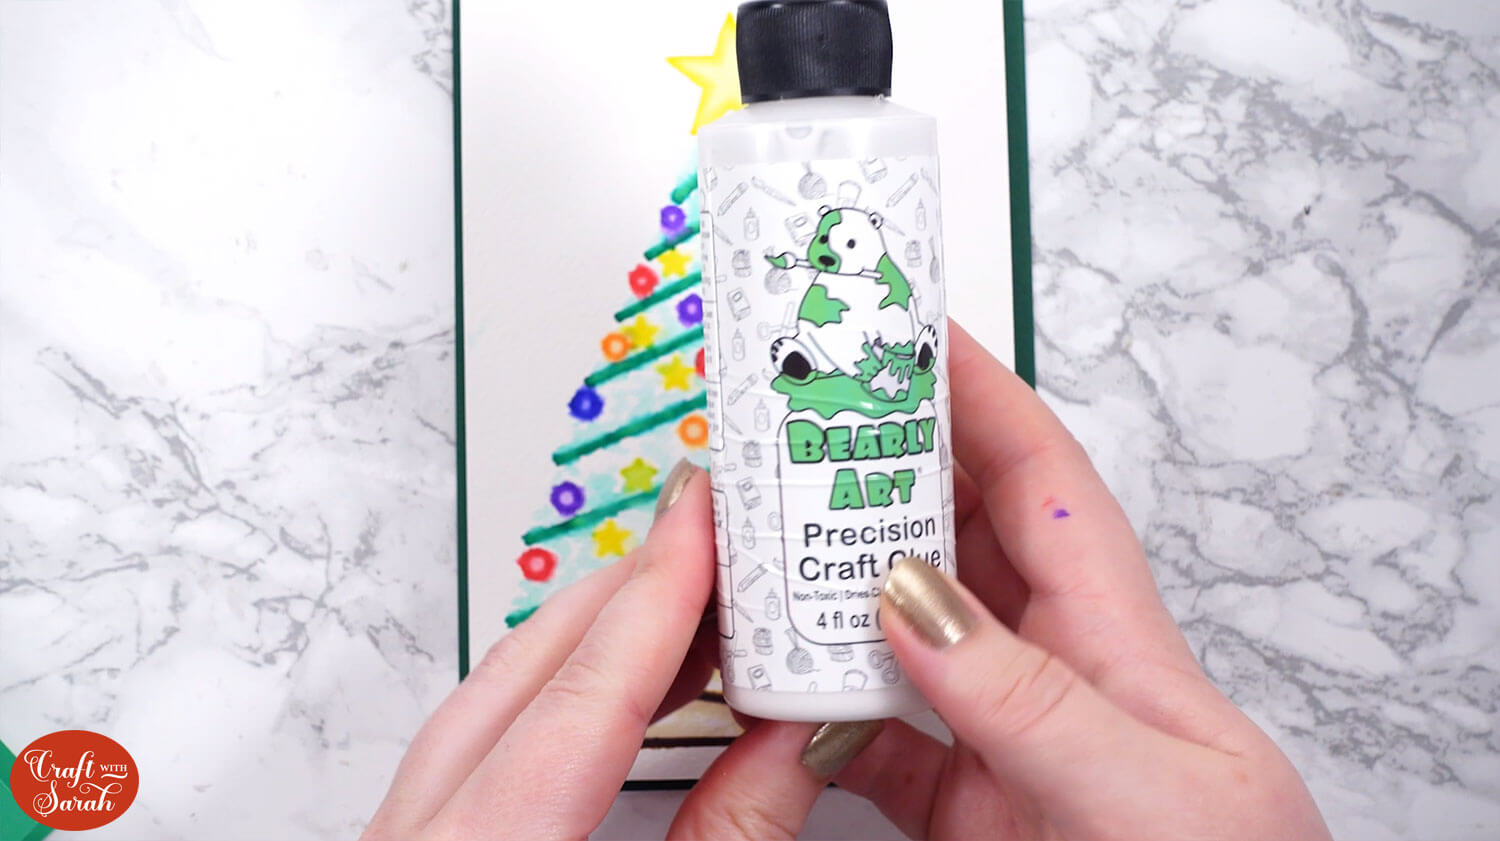
My favourite glues to use on papercraft projects are Bearly Art Glue and Collall All Purpose Glue.
These are great because they don’t “warp” or bend the cardstock like some glues do. You can use as much of it as you want and the card stays perfect – and it dries perfectly clear too!
Bearly Art Glue comes with a tiny nozzle to make it easy to apply glue to small areas of card. The Collall glue doesn’t come with this, so it’s easiest to decant it into needle tip applicator bottles so that you have more control.
Fold the base cards in half down the score line.
Glue the watercolor paper to the darker rectangle pieces.
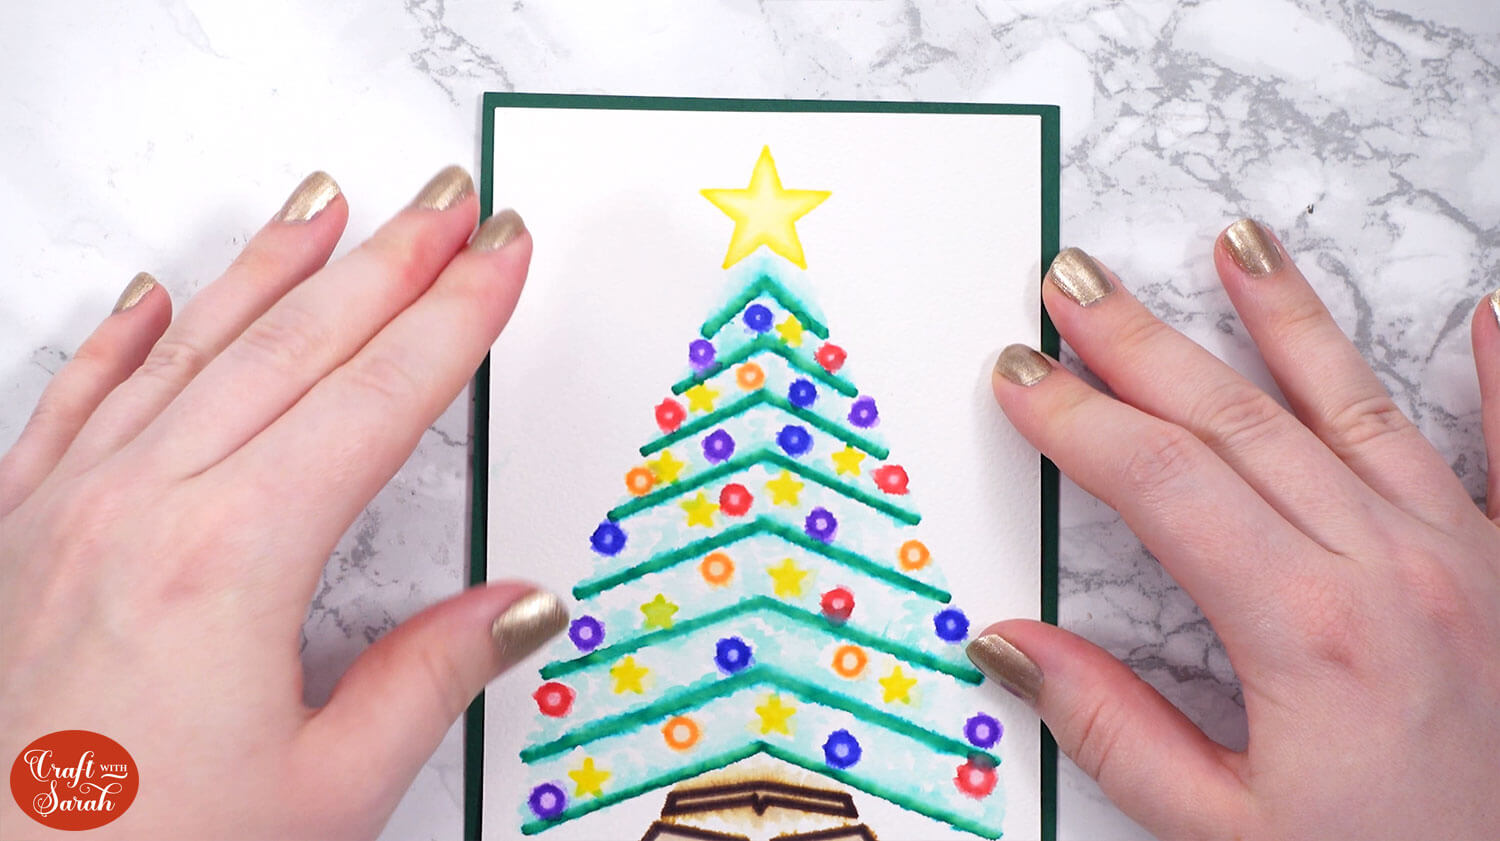
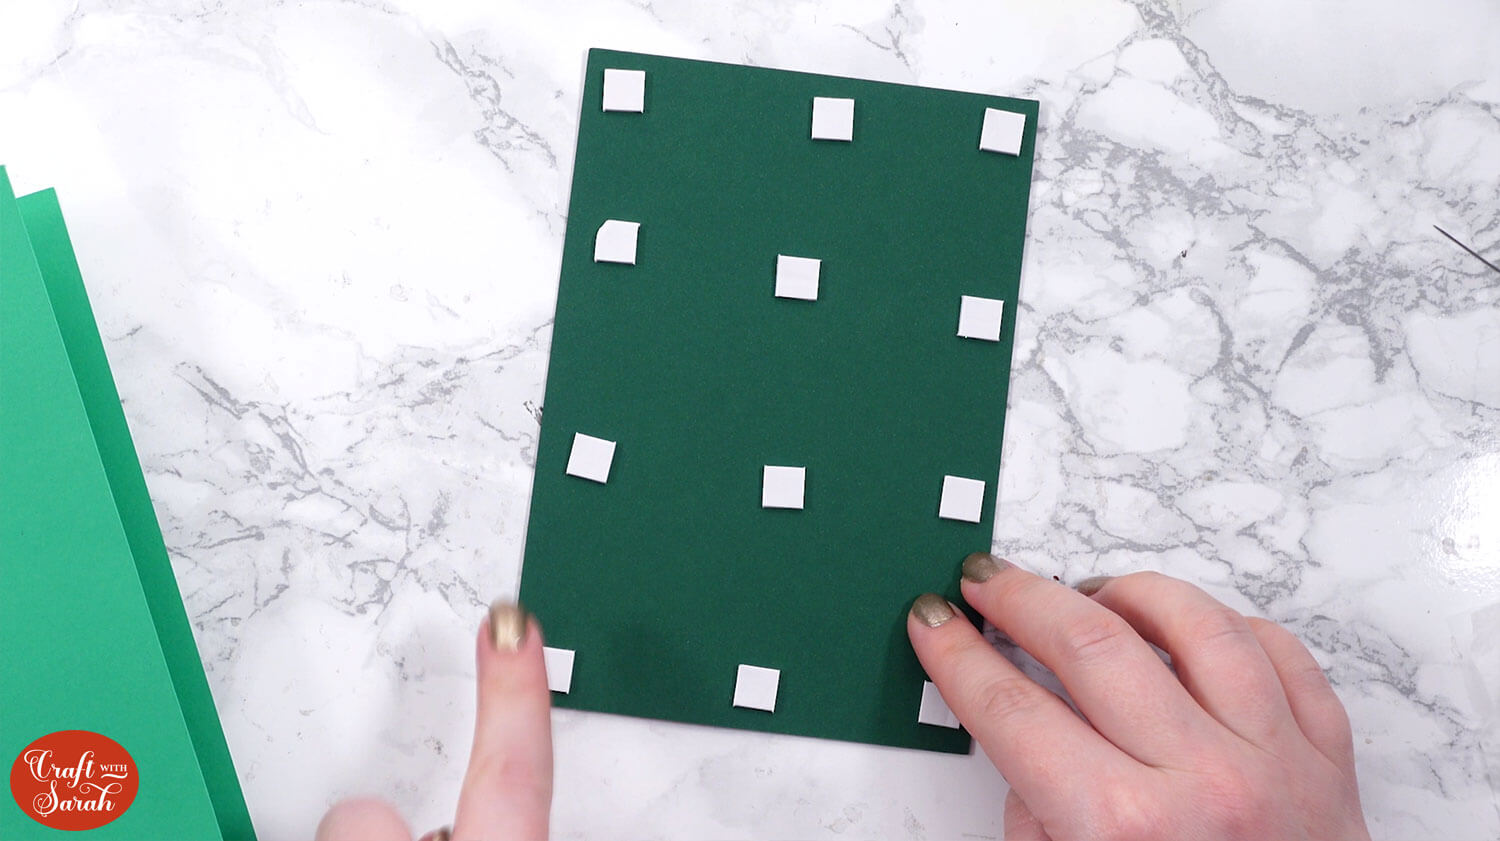
Use foam squares to stick the larger rectangle to the front of your card.
The foam pads that I use are from “Dot & Dab”, but any foam squares will work. Make sure you add some in the middles of the pieces of card so it gives stability to the middles.
If you don’t add any foam pads in the middles then it can “sag” under the weight of the other layers which doesn’t look as good.
And that’s it – your handmade watercolor cards are finished!
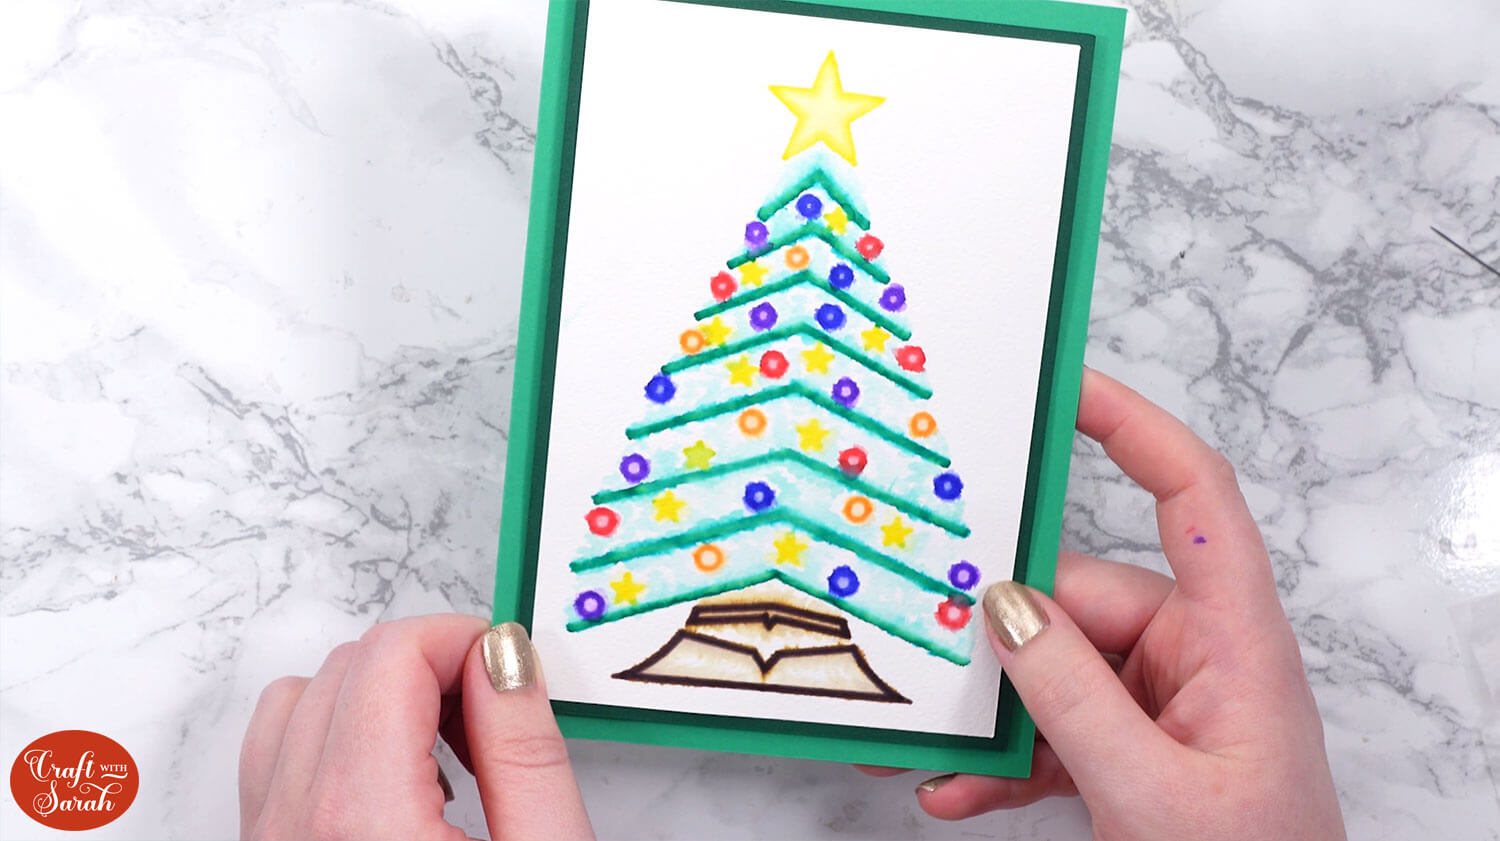
Card making with Cricut watercolor pens
With your watercolor Christmas cards complete, you now have a set of festive, handmade greetings ready to send out.
These 5×7-inch cards fit perfectly in standard envelopes, or if you want to add a personal touch, you can make custom envelopes with my free envelope SVG templates.

Cricut watercolor pens are a little bit of an “acquired taste” and they may not appear to everyone. However, I like to experiment with new materials and tools in my Craft Countdown events, and hadn’t done watercolor images before in any previous event, so I thought it was about time I gave them a try.
I enjoyed the process of painting them (and I always love watching the Cricut draw!), but I definitely prefer my usual “layered cardstock” cards. I think that perhaps I need a little bit more practice to get better effects and to get the most out of the watercolor pens. Maybe that’s a skill to work on in 2025!
Happy crafting,
Sarah x

