CCC 2024 Day 01: Santa in Chimney Advent Calendar
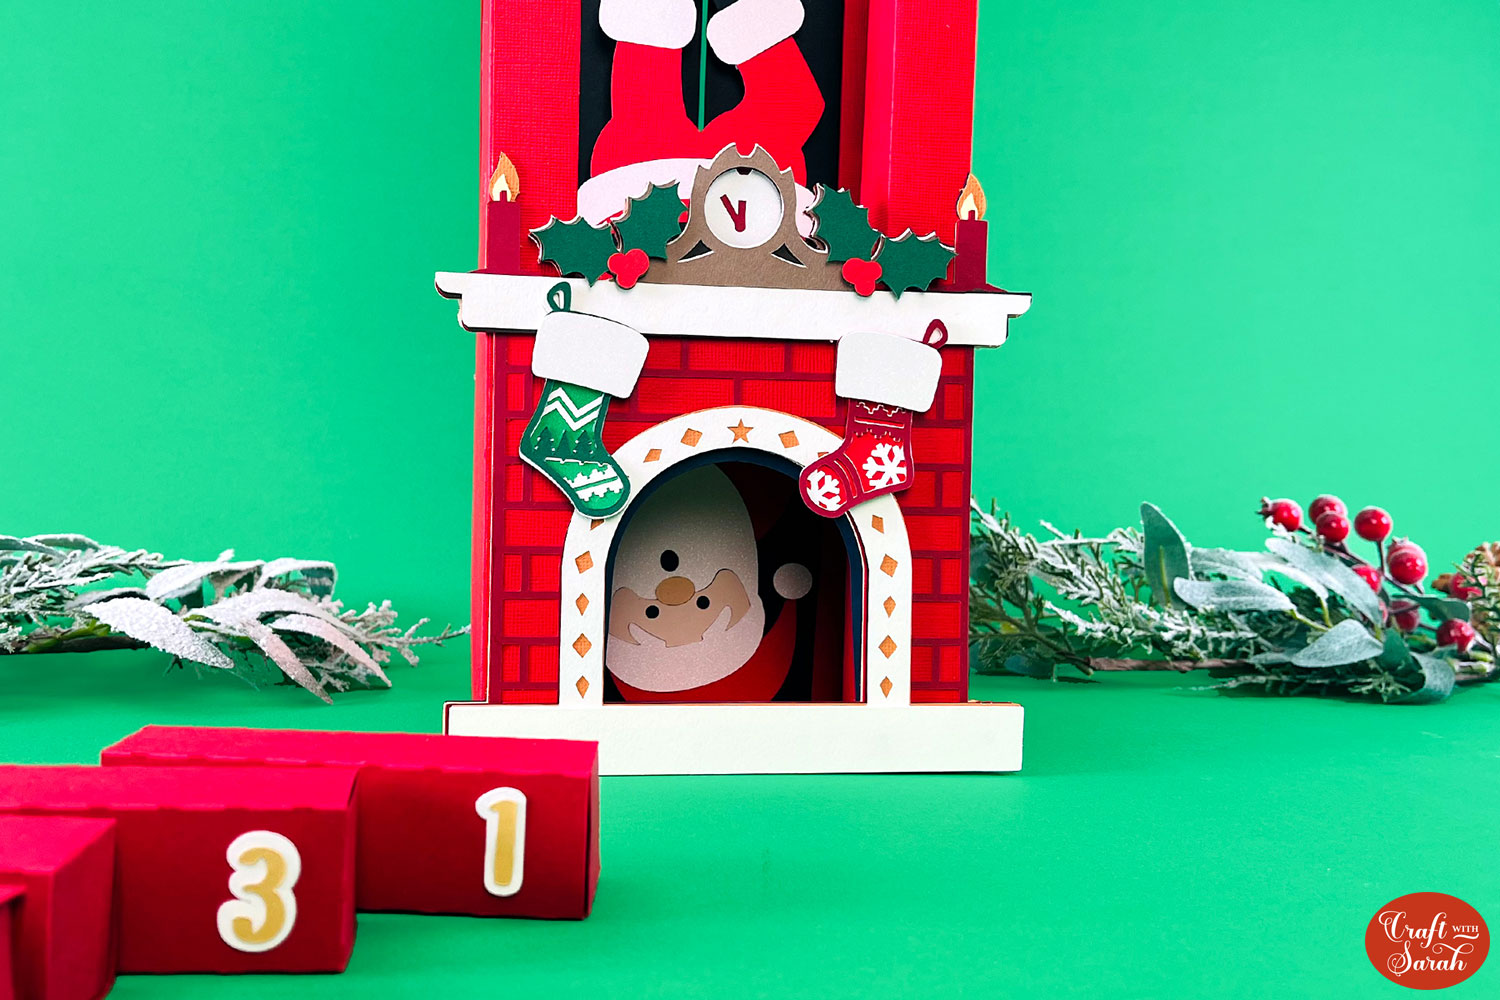
Welcome to day one of the 2024 Christmas Craft Countdown, where I’m sharing 20 festive themed Cricut papercraft projects in 20 days.
We’re starting the Countdown with something BIG!
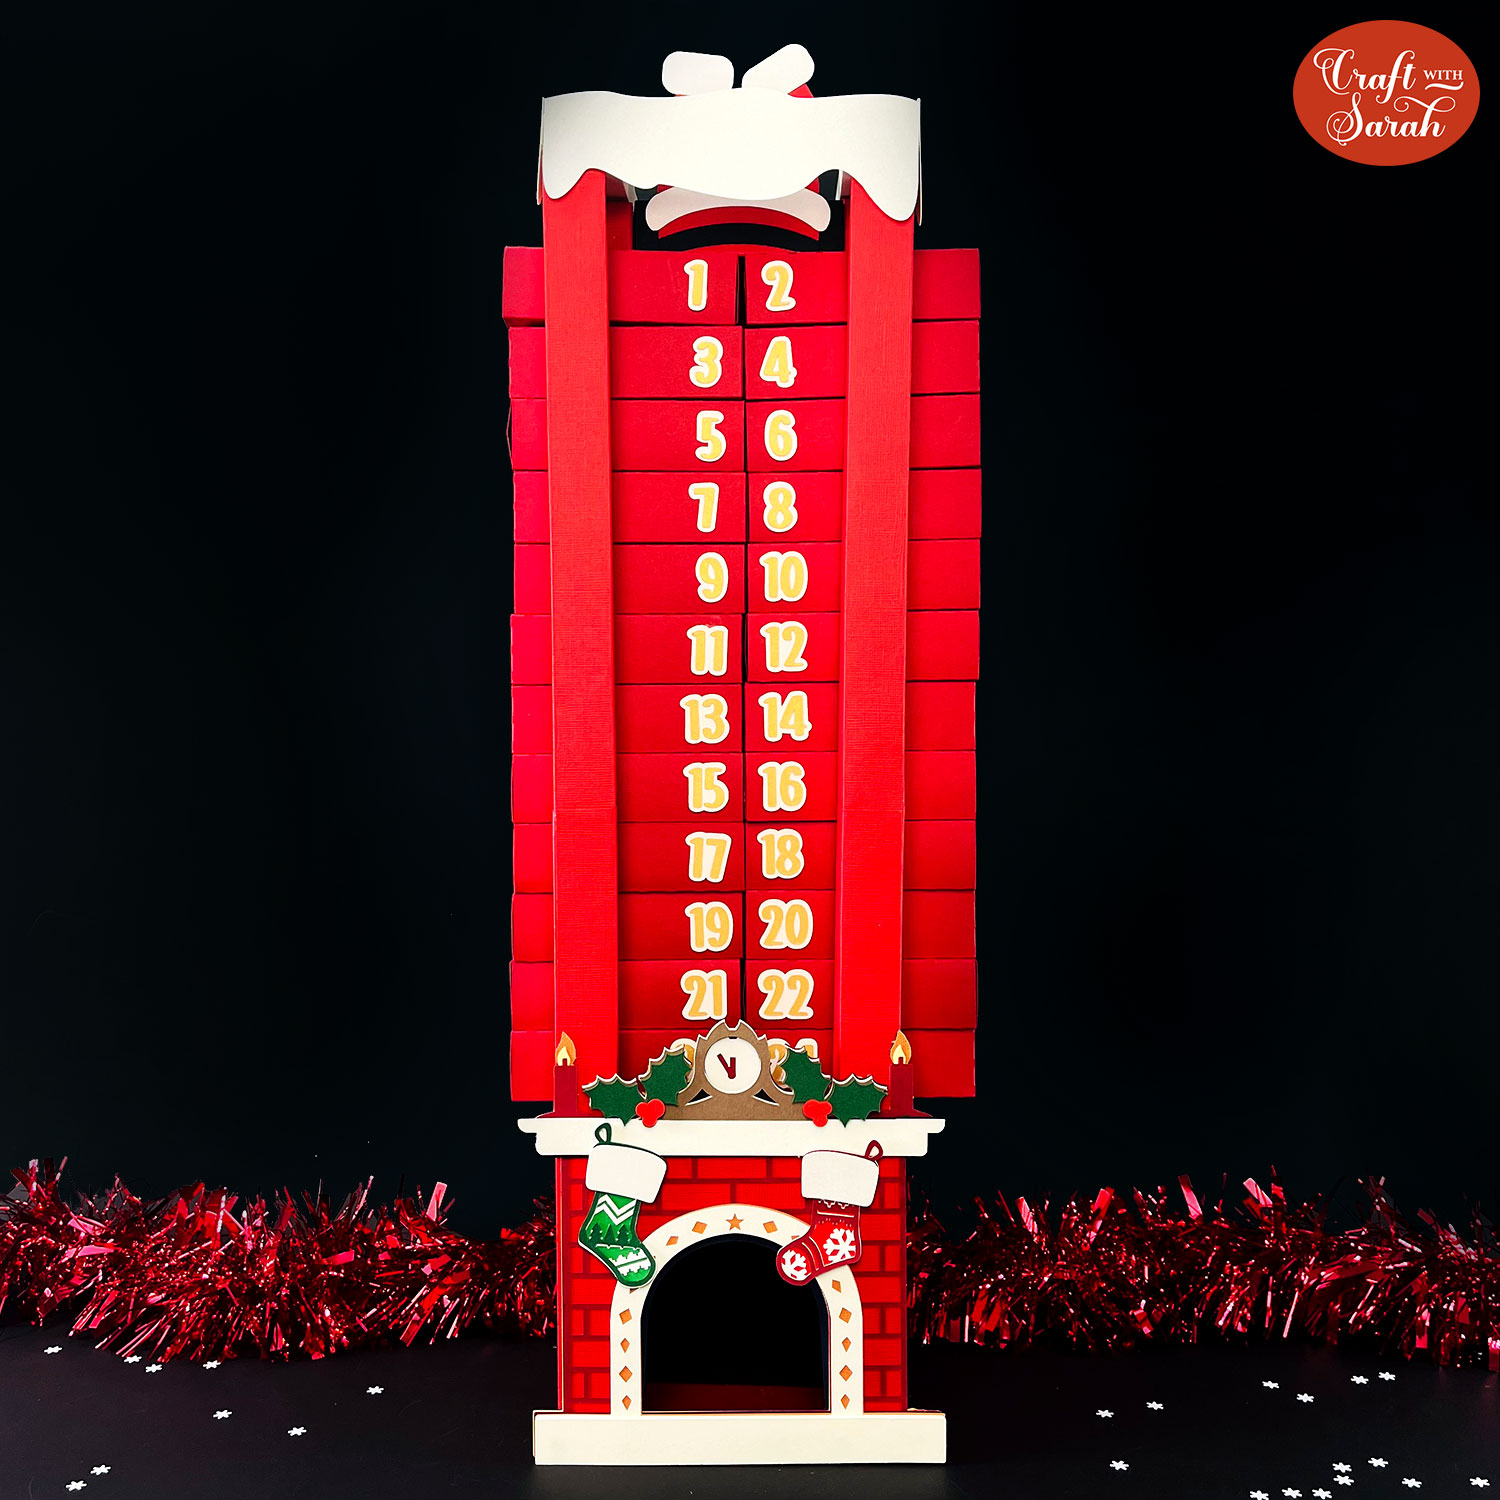
Make an absolute showstopper of a craft project with this detailed 3D advent calendar craft project.
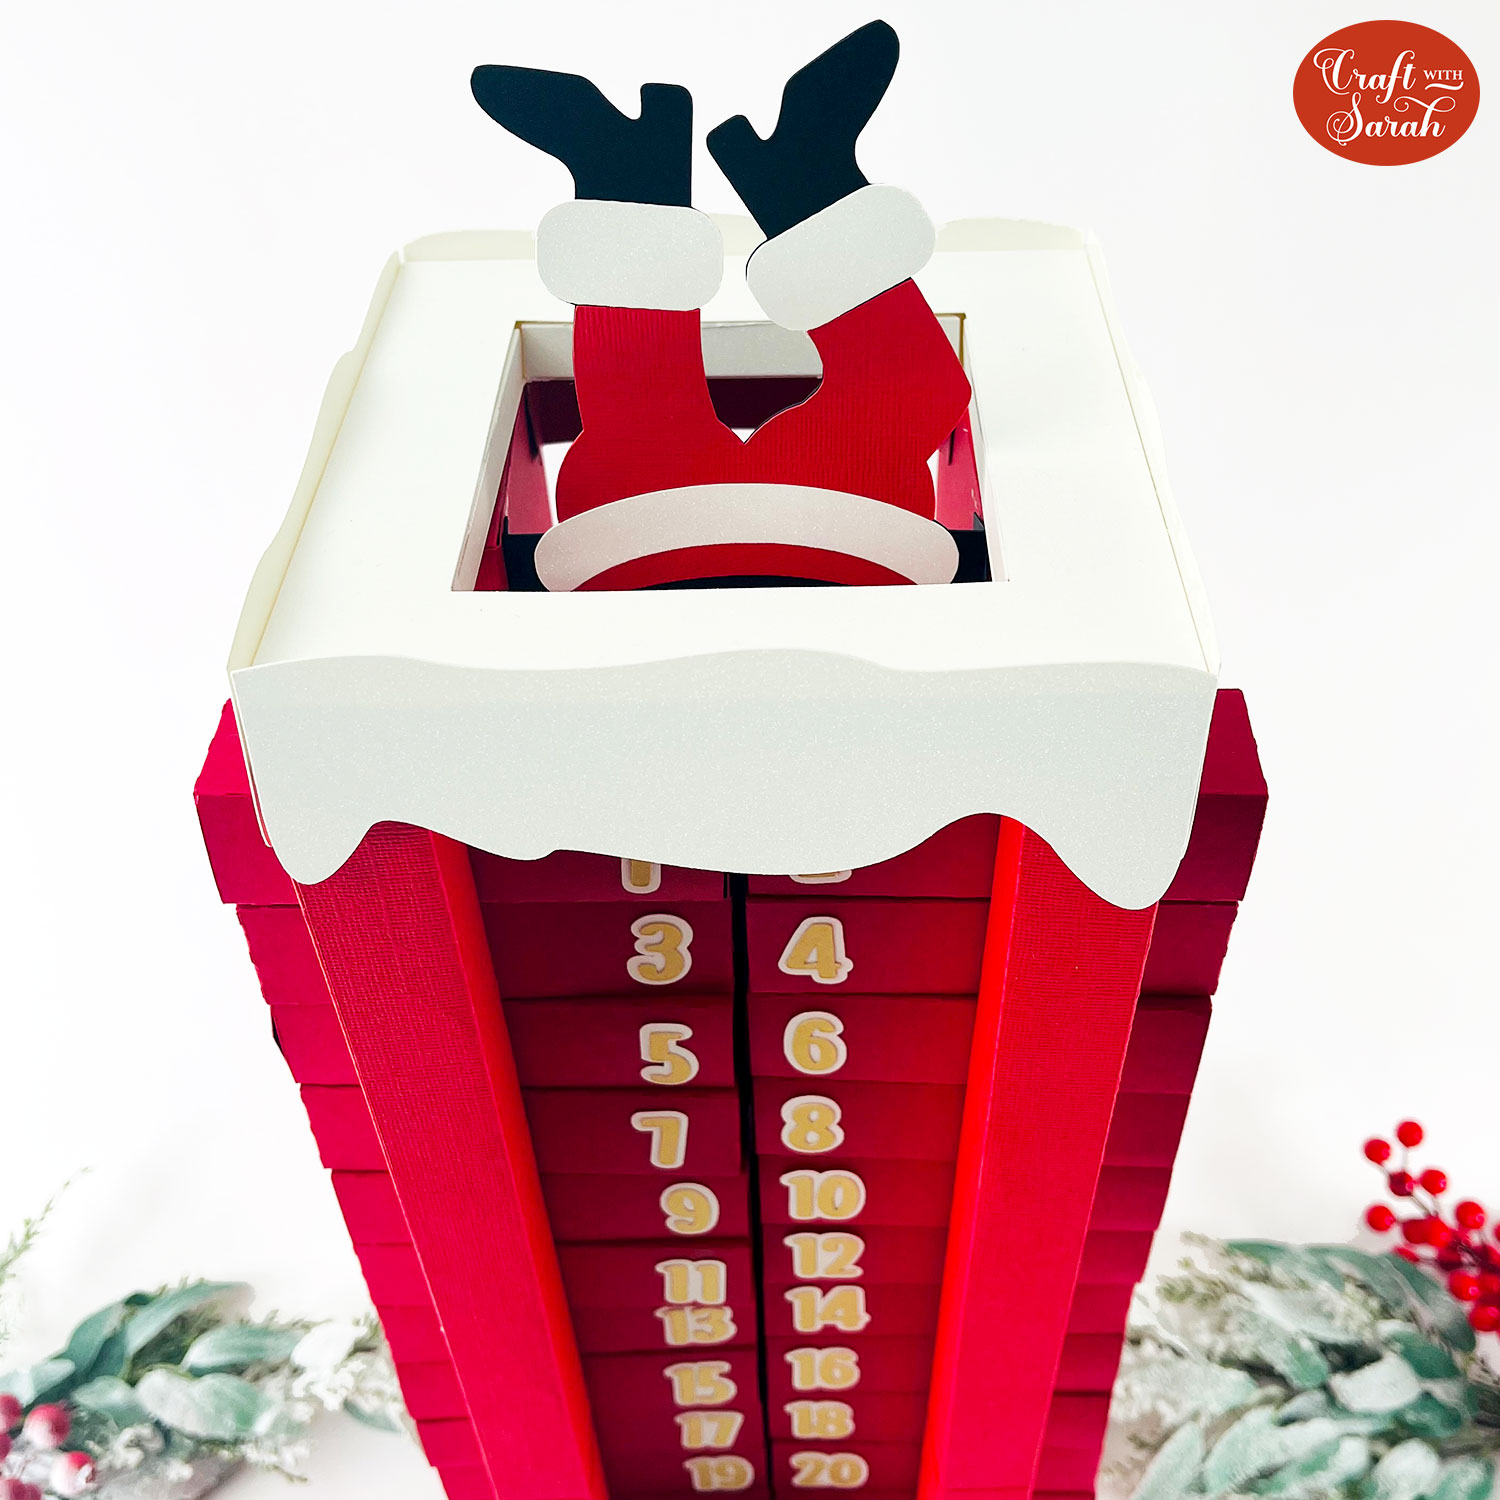
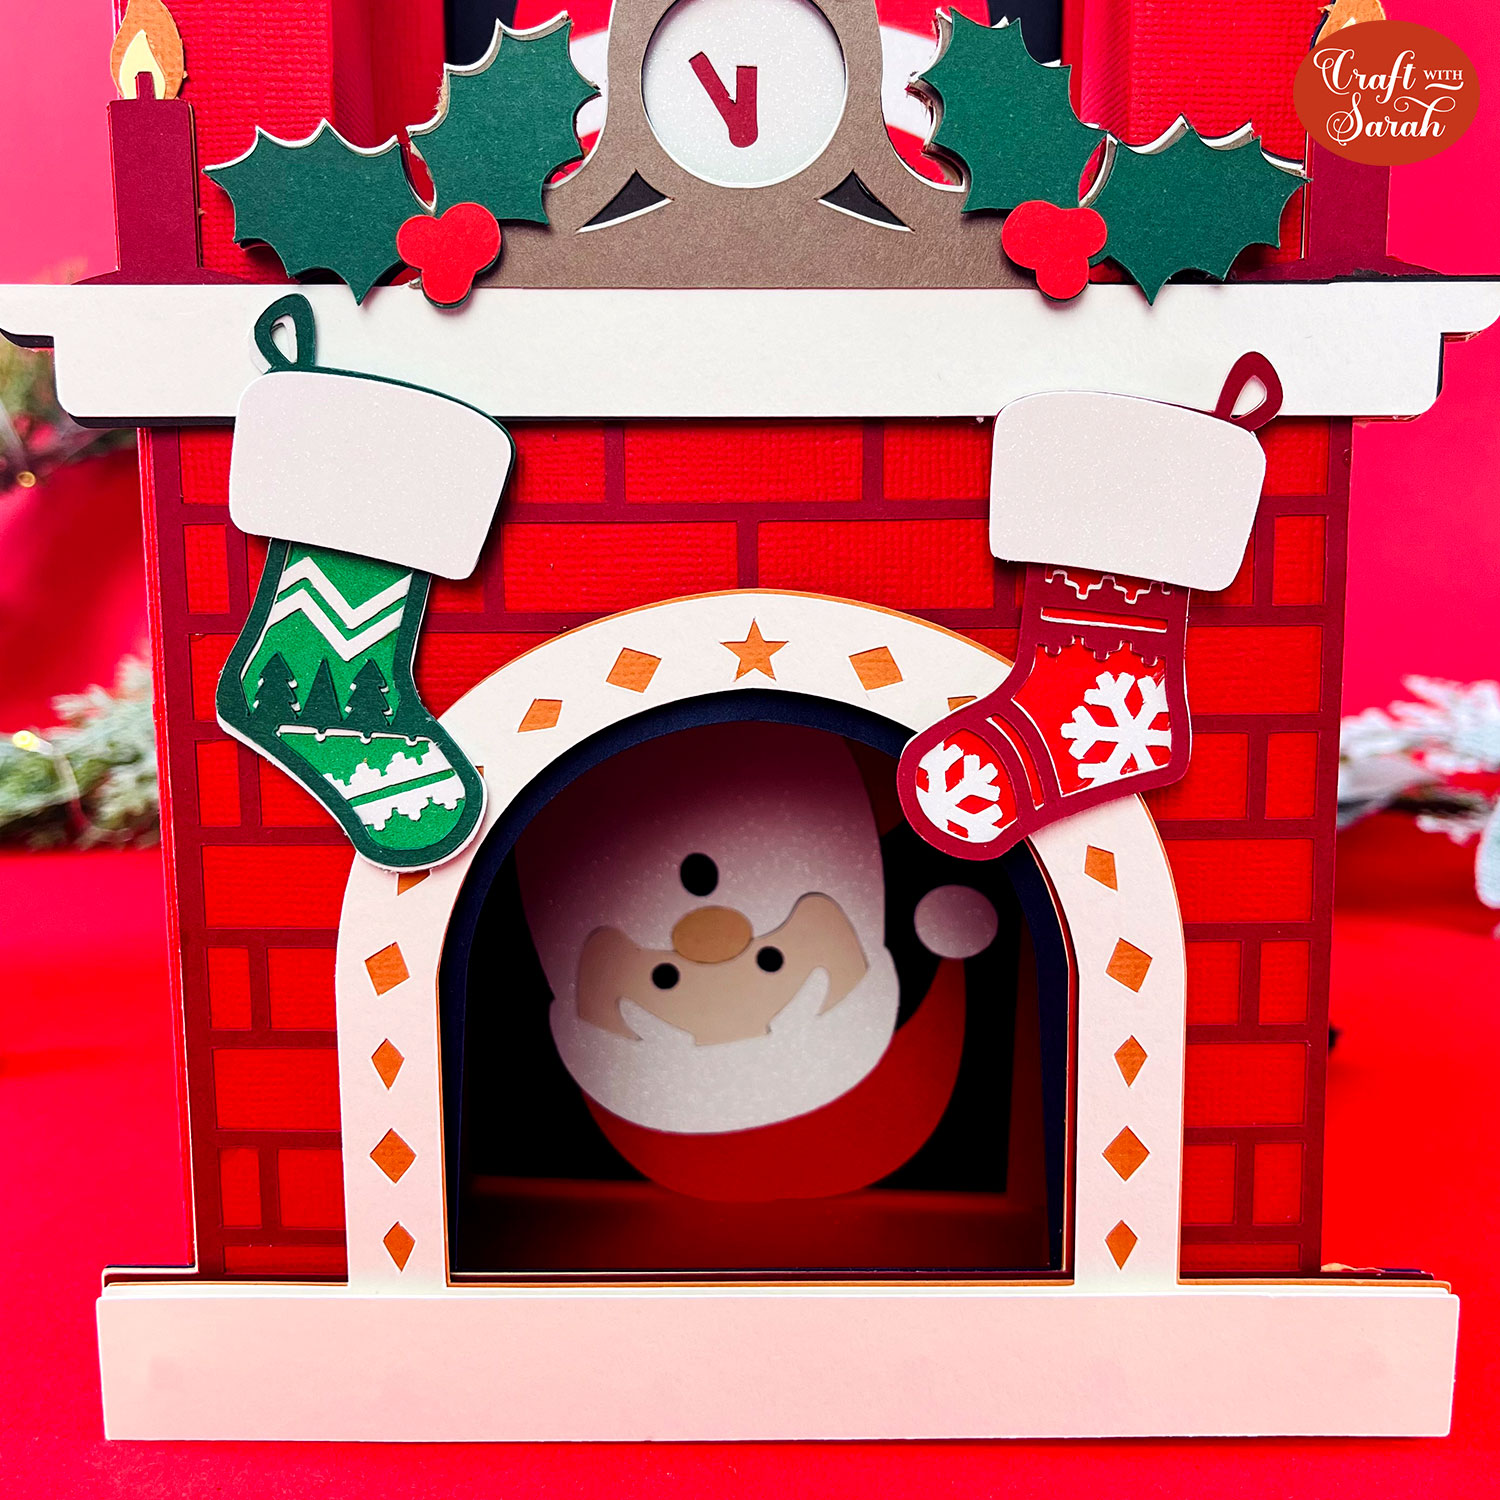
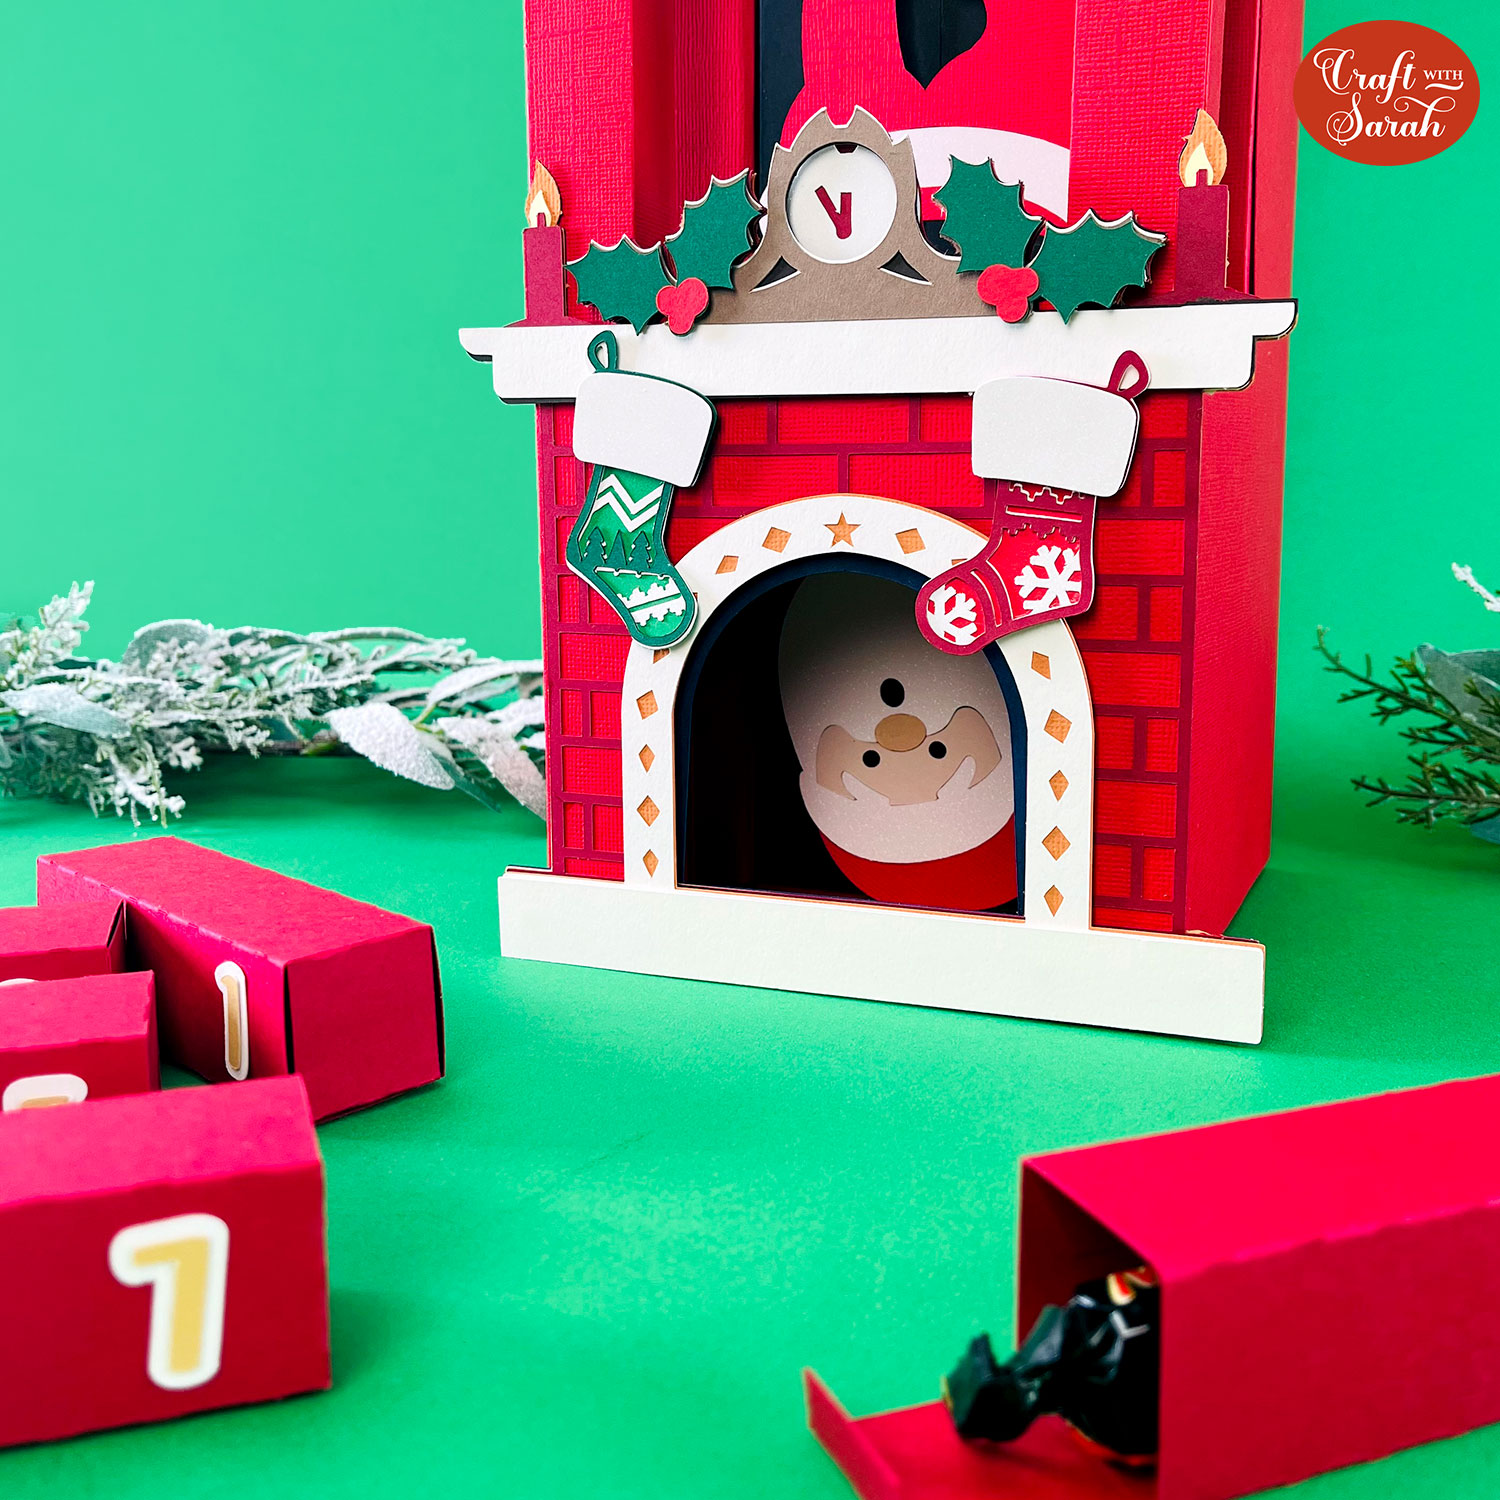
Remove a box each day during Advent to enjoy the chocolates or candy inside and watch Santa fall down the chimney as the boxes are removed. On Christmas Eve, when the final box is removed, Santa’s face will magically appear in the bottom of the fireplace.
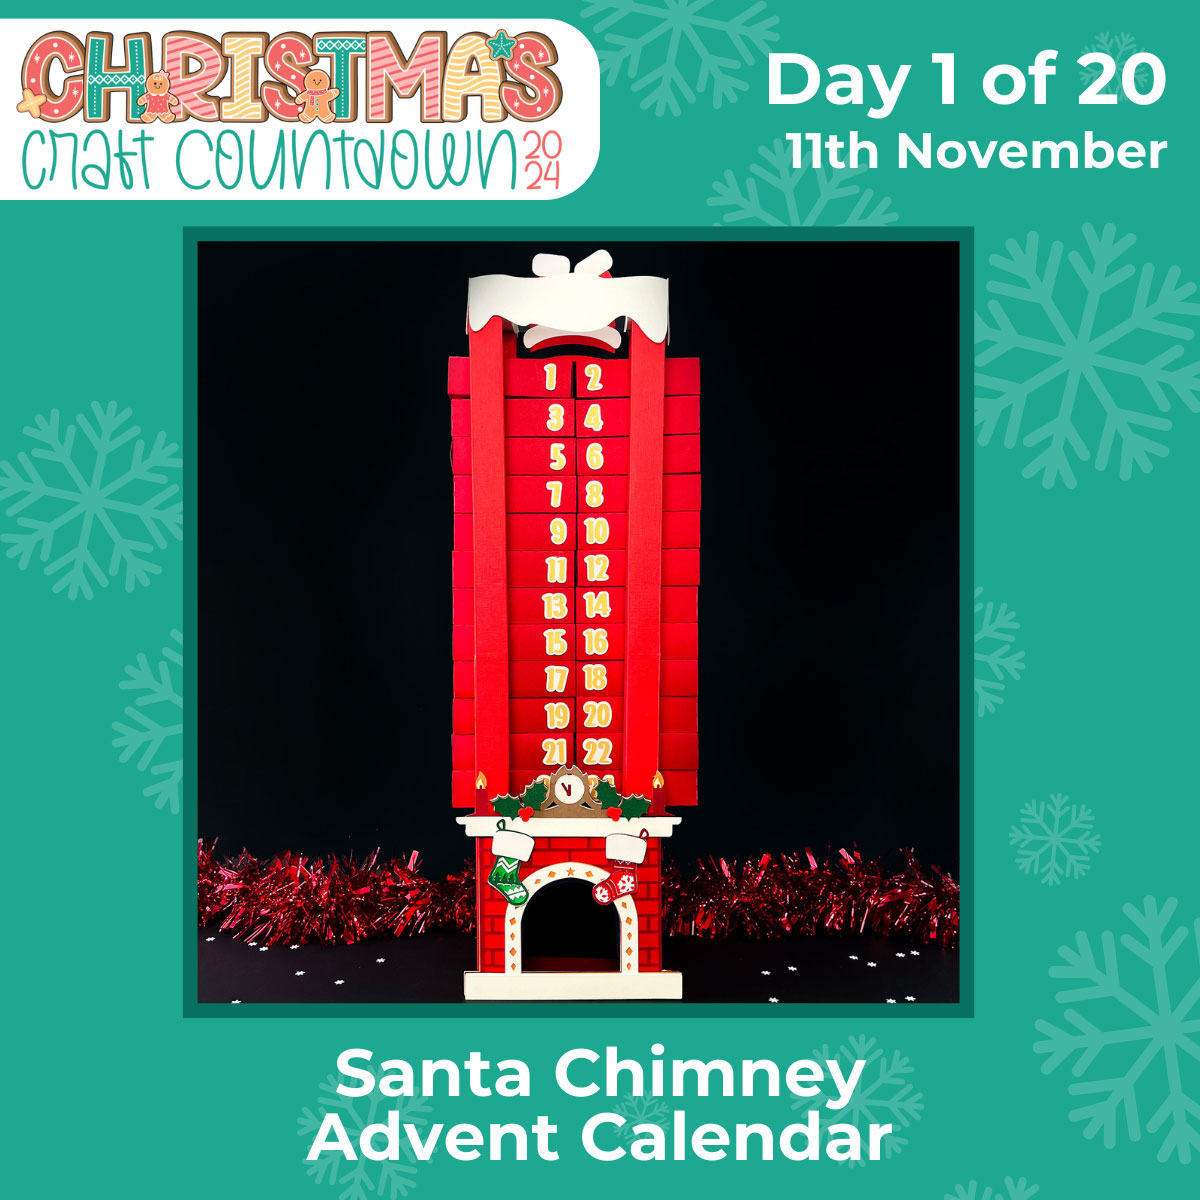
This is definitely a time consuming project (it took me five hours to put together!) but it’s absolutely worth it. Your advent calendar will be the envy of all your friends!
The chimney measures approximately 24 inches tall when finished. You will need 12×12 cardstock to make it, but it can all be cut on the regular 12×12 inch cutting mats on a Cricut Explore Air 2, Explore Air 3, Maker or Maker 3.
You can cut the project on a Cricut Joy Xtra by making it smaller, but that will limit the type of chocolates/candy that you can add into the boxes. This project is not suitable for the original Cricut Joy.
A scoring stylus or wheel is strongly recommended for this project. If you don’t have one, check out this tutorial on how to score with a Cricut without a scoring too.
This Project was part of the Christmas Craft Countdown 2024
Materials supply list
Here is a list of the materials that I used to make this project.
Please note that some of the links included in this article are affiliate links, which means that if you click through and make a purchase I may receive a commission (at no additional cost to you). You can read my full disclosure at the bottom of the page.
- Cricut machine
- Light blue Cricut cutting mat
- Cricut scoring wheel or scoring stylus
- Coloured card
- Glue (I like Bearly Art Glue and Collall) and/or double-sided tape
- Brayer tool (optional but helpful)
- Chocolates to go inside the boxes
- 3D foam squares
This project is suitable for the following types of Cricut machine: Explore Air 2, Explore Air 3, Maker, Maker 3 and Venture. You could make it smaller to cut with the Joy Xtra but it is too large to make with the original Joy.
Foundation learning
If you're new to crafting with your Cricut, you may find the below links helpful.
They teach some of the skills mentioned throughout this tutorial.
- How to upload SVG files into Design Space
- How to make 3D layered Cricut projects
- The BEST way to frame papercraft projects
- How to mount multiple designs in the same frame with magic guides
- How to score with a Cricut (even without scoring tools)
- Print then cut tutorial
- Design Space tools (Combine, Attach, Slice, Weld, Flatten, etc.)
- Pattern fill tutorial (for making backgrounds & cutting images to a specific shape/size)
- Free envelope SVGs that can be sized to fit any card
- How to write inside cards with Cricut pens
- How to cut layered designs at a small size
- Design Space tips & tricks
- Cricut pens tutorial
Video tutorial
Watch the video below to see how to make this project. Keep scrolling for a written tutorial.
Written tutorial (with photos!)
Here’s how to make a Santa Claus advent calendar papercraft using a Cricut machine.
Step 1) Download the cutting file & upload to Design Space
Download the files using the box below.
Purchase the File(s)
This cut file is available as part of the Instant Access Bundle.
Or, purchase this design individually here
Before you upload the SVG to Design Space, you need to unzip the download folder that it comes in.
- How to unzip a folder on Windows computer
- How to unzip a folder on a Mac
- How to unzip a folder on an iPad/iPhone
- How to unzip a folder on an Android device
After unzipping, upload the SVG file into Cricut Design Space. This is the file which starts svg- in the filename.
Not sure how to do this? Here’s how to upload SVGs to Cricut Design Space. Make sure you upload the file which starts svg- in the filename!
Step 2) Size the design
At the time of writing this tutorial (early October 2024), there has been a change to Design Space whereby it is automatically resizing large SVGs down to a maximum of 12 inches tall. This means that the advent calendar will load in much too small, so you will need to resize it.
The whole design should be sized to 65 inches wide and 100 inches tall. There is a pink rectangle on the design that lists out those sizes to make it easy to remember.
UPDATE: October 27th 2024: It looks like the resizing issue is no longer present in Design Space and therefore the design should load in correctly, but please check the size and fix if needed.
Click the design on your canvas and use the width/height boxes near the top of the screen to make it the size that you want to cut.
TIP: Make sure the padlock icon above the width/height boxes is CLOSED before you resize. If it appears “open”, click it with your mouse to close it.

After the size has been corrected, separate the layers by pressing the “Ungroup” button at the top of the layers panel.

Click the pink rectangle layer and then click the trash can icon (or press the delete key on your keyboard) to remove it.

Step 3) Format the score lines
Design Space doesn’t automatically understand that we want to score some of the layers instead of cutting them, so we need to tell it what to do.
If you are making this project with a Cricut Joy Xtra, or if you don’t have a scoring tool, here is a tutorial on how you can still score with those type of machines.
You don’t need to change anything on the 24 treat boxes. For those, I have used little dashed cut lines instead of score lines. These are already set up for the Cricut to cut the dashed lines.

However, this wasn’t suitable for the main chimney structure or other parts of the design as it weakens the card too much with all the dashes.
Instead, the other pieces need scoring.
If you look in the layers panel, you will see that many of the pieces in this design have a little arrow/chevron symbol to the left of them in the layers panel. This means that they are part of a Group.
Click one of the groups and press the arrow to open up the layers.
Each group consists of two layers: a solid shape at the bottom and a single-line layer on top.
Click the single line layer in the group that you have opened.

Change it to “Score” using the Operations dropdown menu.

Click to select the group (of 2 layers) and press “Attach”. Attach is what tells the Cricut where to do the scoring.

Repeat this for all of the layers in the design that need score lines.
There are quite a few, so be patient and work through them carefully to make sure none are missed.
Save the project when you are done!
Step 4) Cut out all the layers
When you’re happy with how the project is looking in Design Space, click “Make” and follow the instructions on-screen to cut out all the pieces.
To change the paper size, go into the dropdowns over on the left side of the screen and choose the paper size that you want to use. You need to change it for every single colour.

Some pieces require 12×12 cardstock, so those ones will not let you change to a smaller paper size.
To save space on your cardstock, you can move things around by clicking and dragging. Make sure when you’re moving things about that nothing overlaps because otherwise, it won’t cut out properly.

TIP: New to cutting cardstock with a Cricut? Check out this in-depth tutorial which goes through every step of the process, including tips for getting the best quality cuts from your Cricut.
Step 5) Make the treat boxes
First, we’ll make up the 24 treat boxes.

Fold along all of the lines created by the little dashed cuts. Fold everything in the same direction.

Use double-sided tape or glue to attach the “tab” end of the central section to the inside of the opposite side, to turn it into a box shape.

Tape or glue one of the tabs on the “sides” to the box in place.

Add your chocolate, sweet or other treat inside the box, then seal it up.
Glue the white and gold layers of the number to the front of the box.
Odd numbers (1, 3, 5, etc) should go on the RIGHT of the box.
Even numbers (2, 4, 6, etc) should go on the LEFT of the box.
I recommend laying out all your numbers before you start sticking them to make sure they are all in the correct places.

Repeat for all of the treat boxes.
Step 6) Stick Santa together
Collect all the pieces of the Santa image.
Lay out all the coloured pieces on top of the black outline piece.

Once they are all laid in the correct place, glue them on, one at a time.
The pieces don’t overlap – they press up against each other to stop Santa from getting too thick to be able to slide down the chimney.

Take the two matching rounded-rectangle pieces and fold along the score lines.

Glue the middles of each piece together.

Glue this to the back of Santa, lining it up between the two small vertical cut lines in the black Santa piece.

Take the rounded-square piece and fold along the score line.

Glue the shorter half of the square to the front of Santa, lining it up along the cut lines in the red tummy piece. This forms a “shelf” on Santa’s tummy to balance him on top of the treat boxes.


Take the square piece with two score lines and fold along both.
Glue this to the top of the “shelf” so that it is on the side of the shelf closest to Santa’s feet.
It forms a sort of “triangle” shape to give stability.

Step 7) Build the three main chimney structure pieces
Separate out the large red pieces into two piles: one with circle cutouts in them and one with square cutouts. Each pile should have 7 pieces in it.
These will make the left and right sides of the chimney.
The pieces are “opposite” to each other, so it’s important that they are sorted correctly so that you don’t stick the wrong pieces together.

Select the two long black pieces with the slits down the middle.
The piece with the two tabs on the end goes at the bottom, with the tops facing upwards.

Glue the second black piece on top of the tabs. It’s important to get it stuck the correct way, as if the tabs are in front then they will cause Santa to “jam” as he is sliding down the chimney.
Keep the edges and slit in the middle as straight as possible.

Turn the piece upside down and fold all the score lines inwards.
Go over the folds with a brayer tool or similar to get really crisp, strong folds.

Next we are going to build up the sides of the chimney. This is the shape we are aiming for:


I am showing the “square hole” pieces for this tutorial. When you make the “circle hole” side, it’s the same process but all the pieces are mirror images of each other.
Draw yourself a guide on a piece of paper that shows a 4cm line. It’s essential that the pieces of the structure are exactly 4cm apart. This guide line will ensure that we stick it correctly.

Take the three pieces shown in the image below and glue them together along the tabs. Put the tabs underneath the top piece.
Use your 4cm guide to make sure the gaps are correct.


Glue the other matching width pieces together.
Look at the score lines on each piece when sticking them together. Keep them lined up where the two pieces meet.


Take one of each of the following pieces and fold along all the score lines. I will refer to these as “lid” pieces.


To make the next steps easier to see, I have stuck a “front” and “back” label on the main structural piece of the project so you can tell which way around it is facing at each point. You may wish to do similar for your project.
With the back facing upwards, fold inwards along all the score lines.

Turn the other two pieces upside down and fold inwards along their score lines tool.

Open everything out flat.
Glue one of the tabs of each of the two little “lid” pieces to their matching sized structure piece, at the top on the back.

With the front facing upwards, go all the way down the right-side tab with a glue, double-sided tape or a combination. I used a combination as I find this gives the best stick.

Stick the thinnest structure piece along this tab, taking great care to accurately line up along the score line.

Repeat on the left side for the wider piece.

With the back side facing upwards, fold the thinner side into a box shape and glue together.

Repeat for the wider box.

Fold in the tabs on the “lid” pieces.

Glue them to the inside of the boxes.
You may need to hold them in place whilst the glue dries, to stop them coming undone.

Repeat these steps for the red pieces with the circle cutouts.

Step 8) Build the fireplace structure
Gather the pieces for the fireplace structure.

Fold all the score lines.

Stick the long tabbed pieces to the back of one of the fireplace shapes.


Stick the long thin piece along the top.

Fold the corners together and glue/tape along the tabs. We are basically making a “box” shape.


Glue the other fireplace shape on top.

This shape will be added later, so leave it to one side for now:

Step 9) Build the chimney
Take your two main red structure pieces and put them this way, with the “circle cutout” piece on the left and the “square cutout” piece on the right.

Glue one of the tabs of the black piece along the right-edge of the larger rectangle of the “circle cutout” piece.

Add glue or tape to the top black tab.

Stick the “square cutout” on top.
This is the trickiest part of the whole build, as the pieces are very large and it is awkward to hold in place.

There are two long, thin rectangles with little tabs on each end.

Glue one to the bottom-back of the chimney to help hold the sides in the correct position.

Glue the other piece to the top-back of the chimney.

Add glue to one of the sides of the fireplace shape.

Slide the fireplace shape inside the main structure. Hold it to the front of the structure – i.e. the further side from the black.
You need to make sure it sticks right up against the front of the chimney structure so that there is a gap at the back between the fireplace piece and the black piece.
This gap is what allows Santa to fall down the chimney.


Fold each of the tabs in and stick them to the top of the fireplace shape.

Glue this piece on top to cover those tabs:


This large square piece of card with two thin tabs along the edge is for the base of the chimney:

Glue it to the bottom of the chimney structure.
One of the tabs will be “loose” along the front. This will be used to stick the decorative fireplace.

Step 10) Add the snow on top of the chimney
Phew, you can start to relax now as the hardest parts of the build are done!
Gather the white snow pieces.

Fold the sides of the largest piece inwards. They fold right in on themselves to make self-contained “sides” for the snowy roof.


Glue the square “window” shape to the top.

Glue the snow drift pieces to the sides, make sure to overlap the top of the square a little on each side.
There are two designs of snow. Put the same designs on opposite sides to each other.

The snowy roof slides onto the chimney without needing any glue.

Step 11) Stick the decorative fireplace together
Stick the pieces of the decorative fireplace together with a combination of glue and foam squares, using the assembly guide below.
A high-quality version of the assembly guide is included in your download folder.

Step 12: Finishing touches
Add glue to the surround of the fireplace.

Stick the decorative fireplace on top.

Push the back tabs on Santa together so that they fit through the slit in the black part of the chimney, then open them up once they are through to hold him in place.

His head should be facing the bottom of the chimney and his feet should face the top.

You might find that the bottle of the hat “catches” on the inside of the fireplace when you are trying to pull him up to the top of the chimney. Carefully slide your fingers into the chimney to untangle him.
Place all the treat boxes into the chimney, with 23 and 24 on the bottom and 1 and 2 on the very top. Make sure you get your numbers in the right order!
Keep sliding Santa up the chimney as you add the boxes until he rests on top of the 1 and 2 boxes.
Your Santa chimney advent calendar is now finished, hooray!
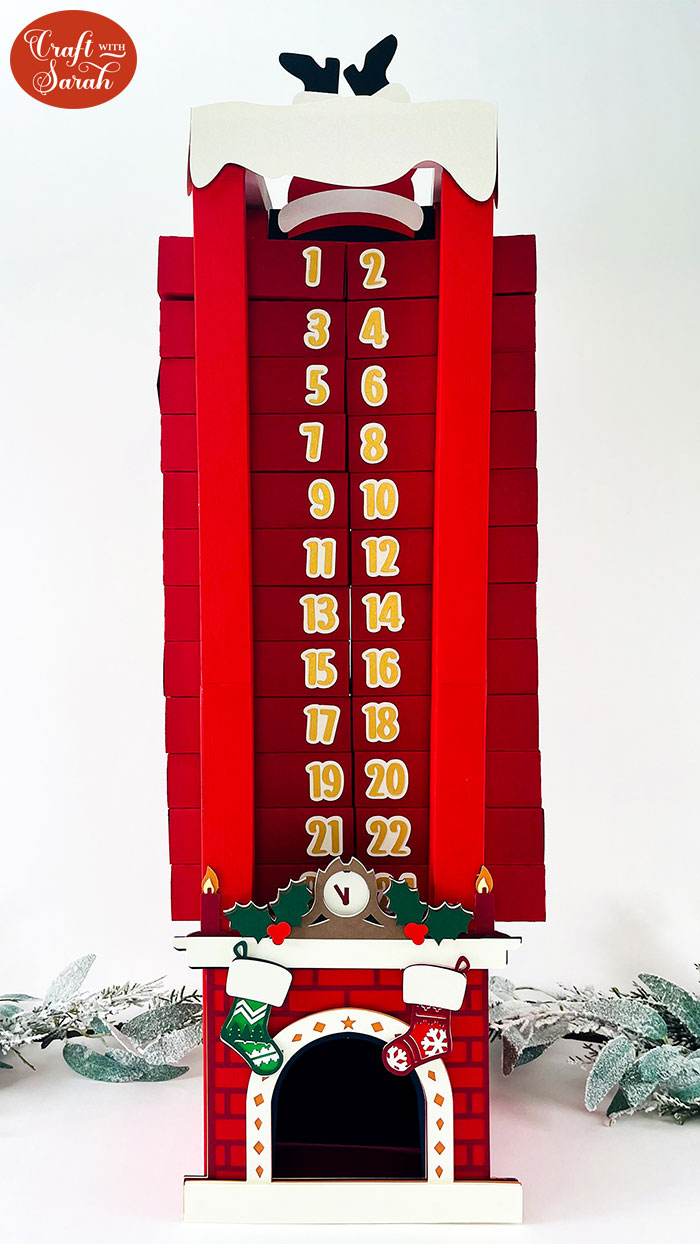
3D advent calendar craft project
Well done if you made it to the end of this tutorial. It was certainly a long one!
I absolutely love this advent calendar, especially the cheeky Santa face that appears in the bottom of the fireplace on Christmas Eve.
If you make it, I’d love to see a photo posted in my Facebook group!
Happy crafting,
Sarah x

