HCC 2024 Day 20: Popout Pumpkin Card
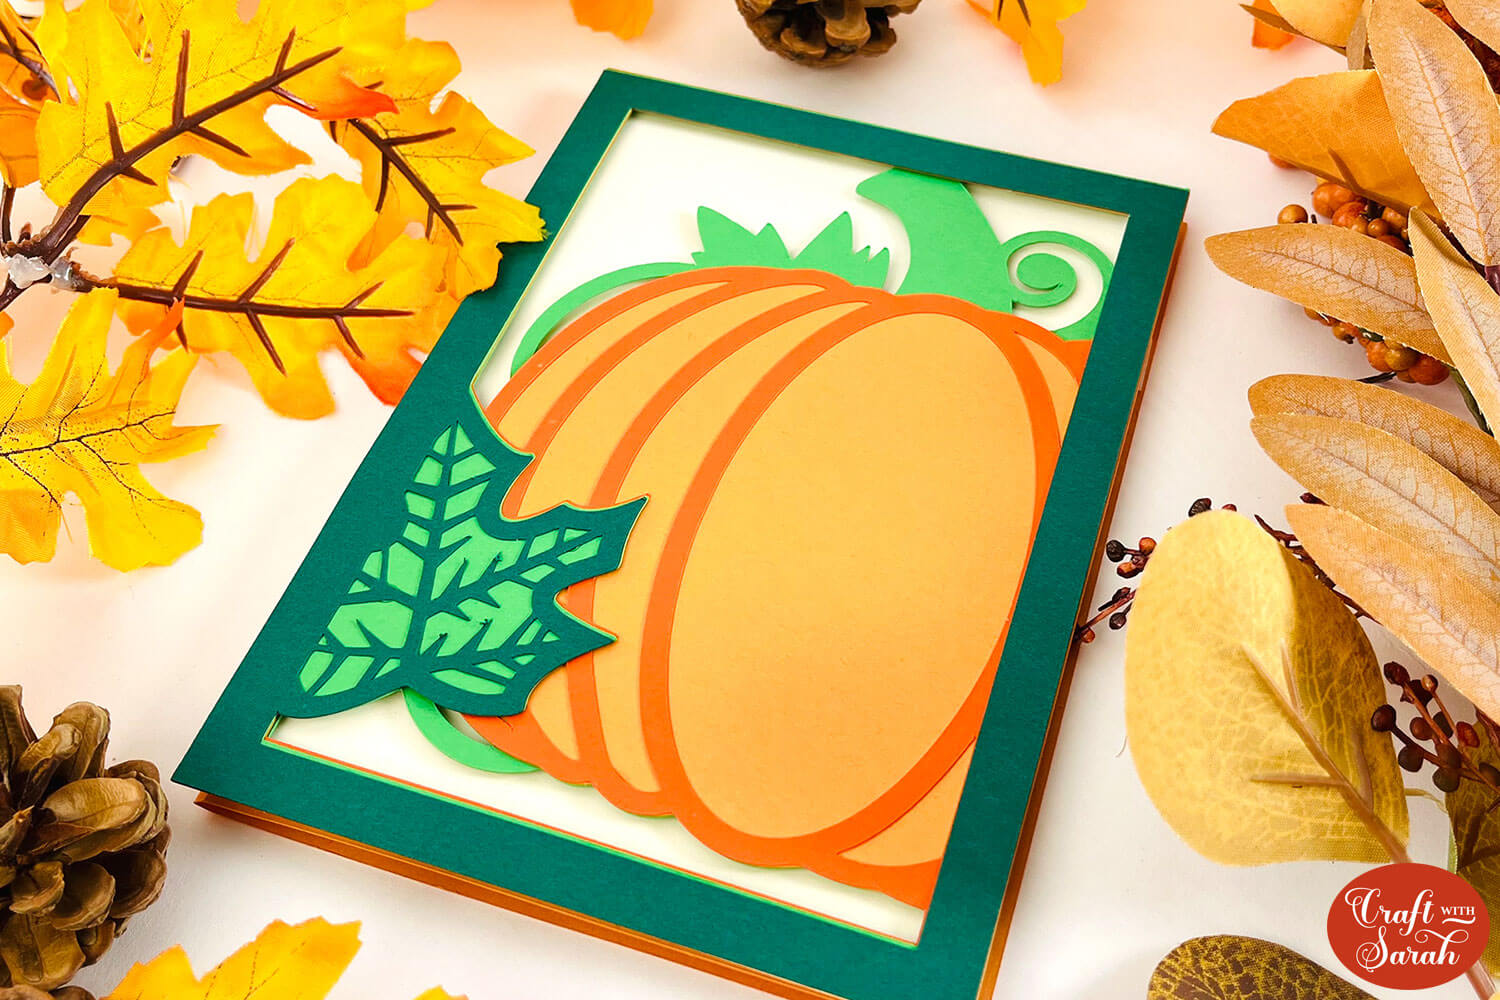
Welcome to day twenty of the 2024 Halloween Craft Countdown, where I’ve been sharing 20 spooky themed Cricut papercraft projects over the last 20 days.
Today’s project has some POP to it!
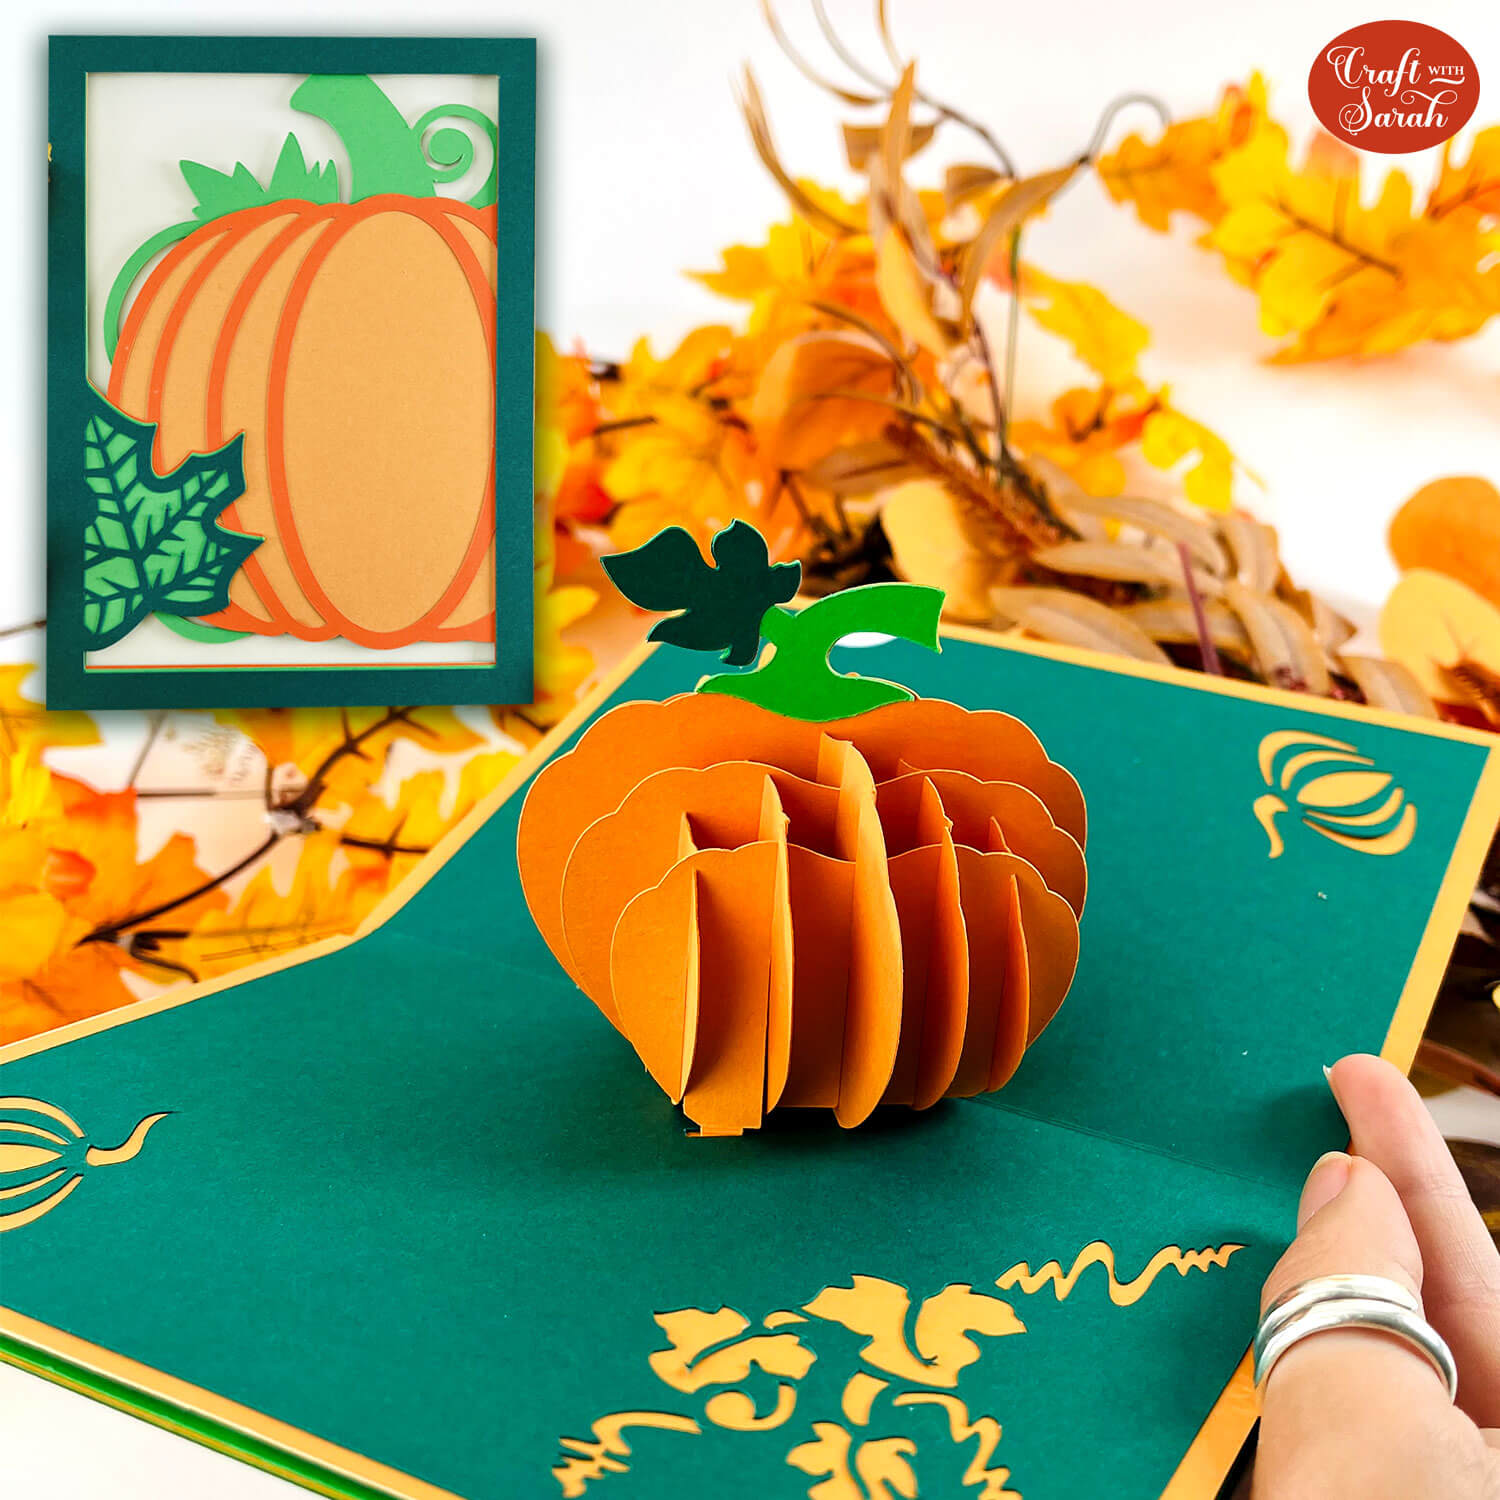
Make a DIY popout card with a wonderfully warm autumnal feel.
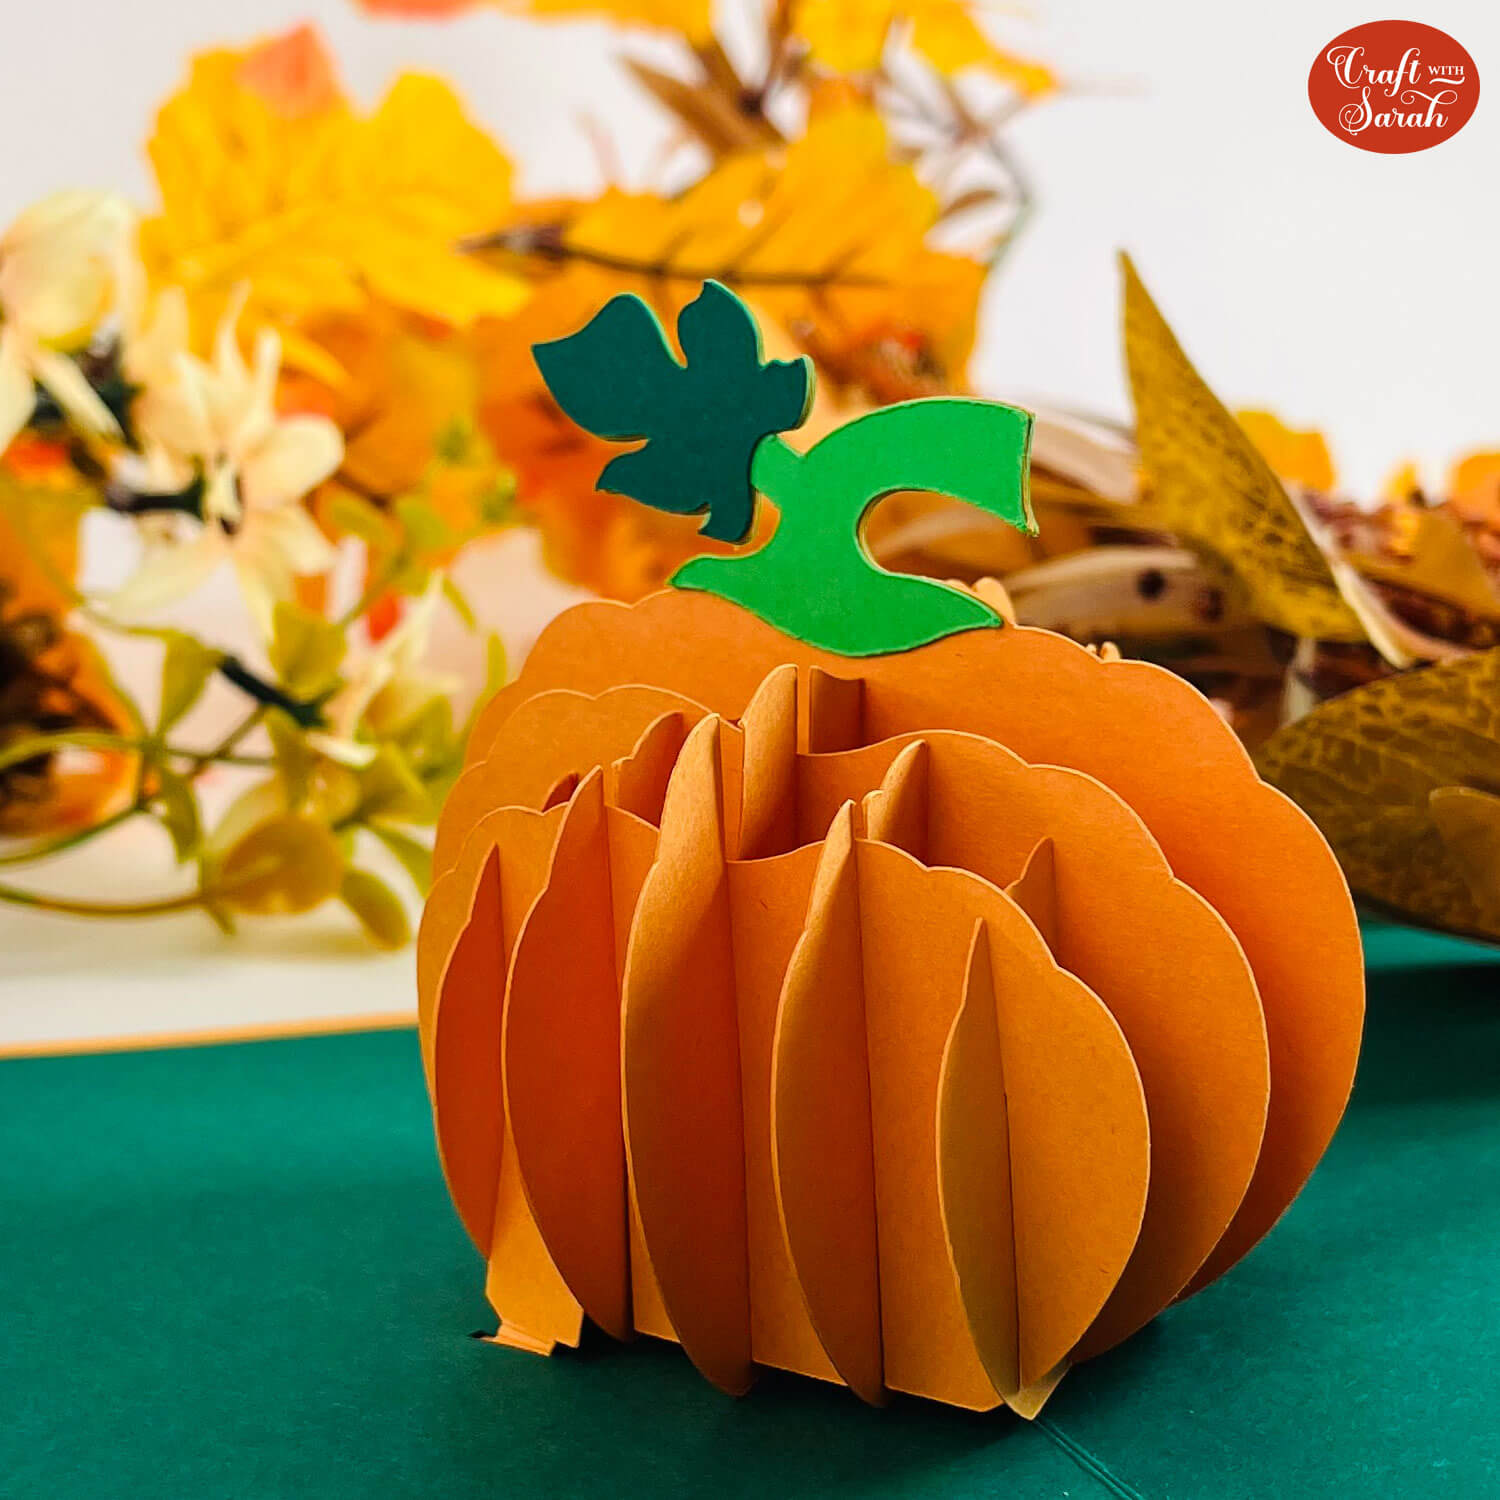
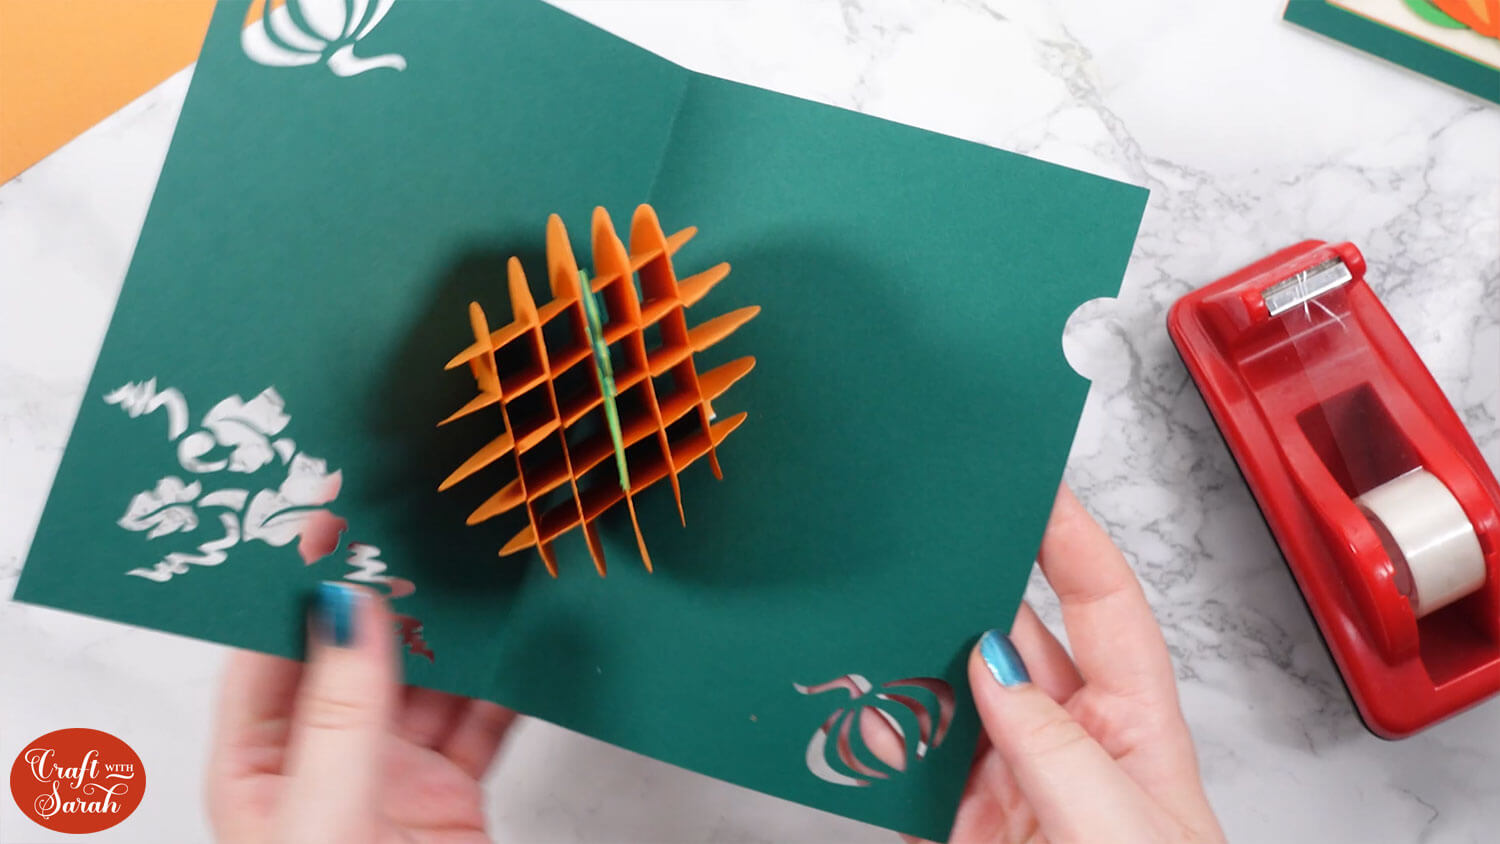
The card opens to show a slot-together pop up pumpkin and there’s a hidden pull-out message panel so that you have space to write your message.
This cut file makes a 5×7 inch card so you can use any 5×7 inch envelope or make your own with this envelope tutorial.
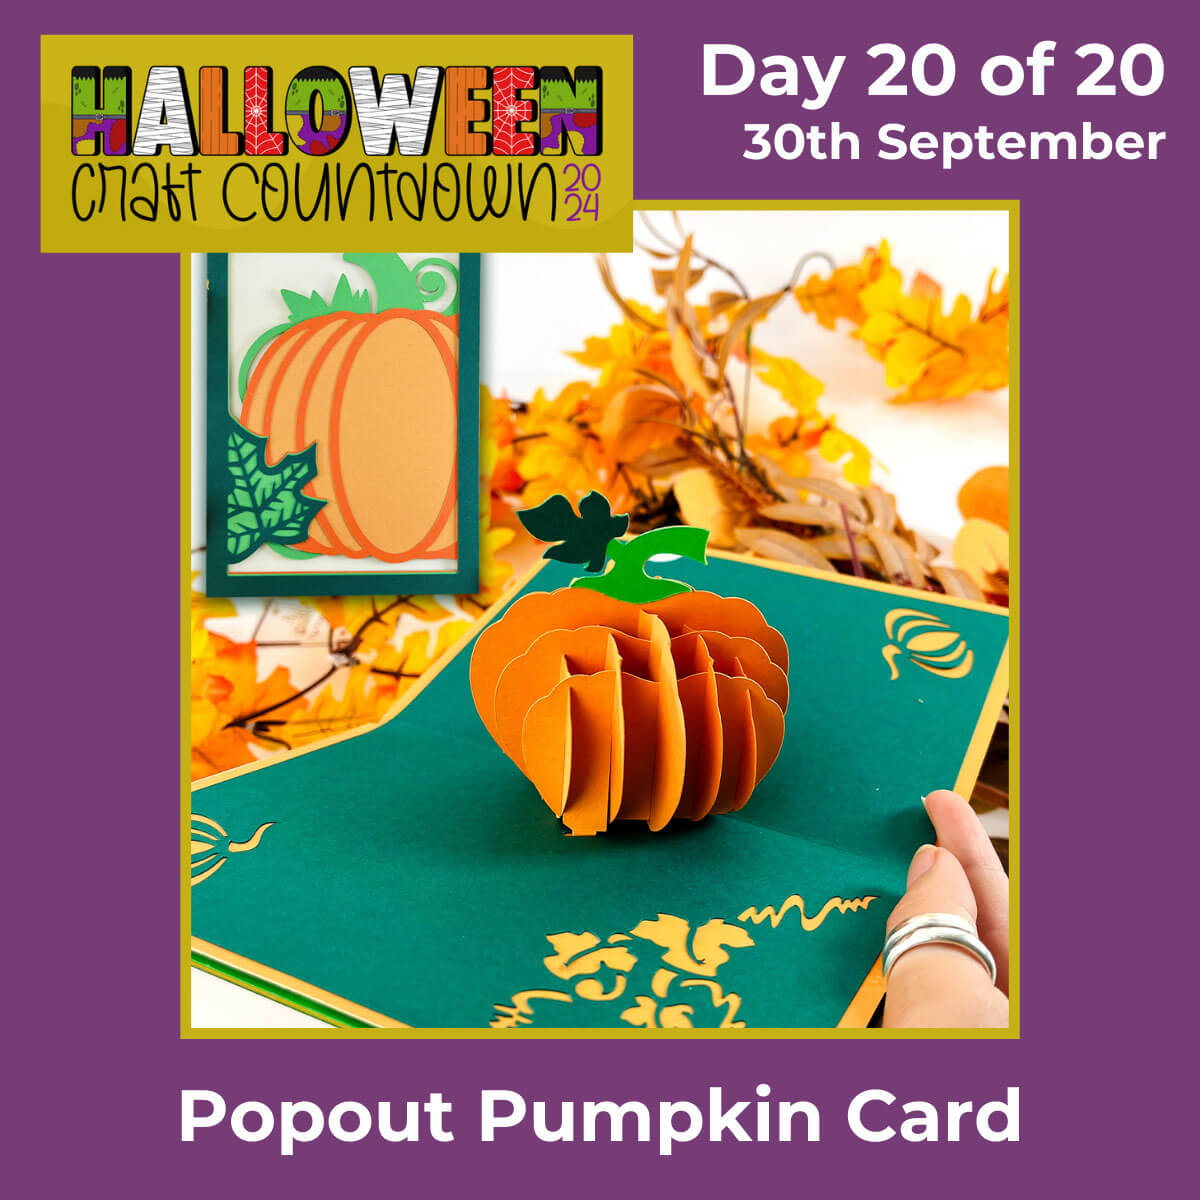
This Project was part of the Halloween Craft Countdown 2024
Materials supply list
Here is a list of the materials that I used to make this project.
Please note that some of the links included in this article are affiliate links, which means that if you click through and make a purchase I may receive a commission (at no additional cost to you). You can read my full disclosure at the bottom of the page.
- Cricut machine
- Light blue Cricut cutting mat
- Cricut scoring wheel or Cricut scoring stylus
- Coloured card
- Bearly Art Glue, Collall All Purpose glue or similar
- Needle tip applicator bottle (optional)
- Foam squares/foam pads
- Sticky tape
This project is suitable for the following types of Cricut machine: Explore Air 2, Explore Air 3, Maker, Maker 3, Venture and Joy Xtra. It CAN be cut with the Cricut Joy (blue machine) BUT you will need to modify the file first and cut some of the pieces by hand. More information on this is included further down this page.
Foundation learning
If you're new to crafting with your Cricut, you may find the below links helpful.
They teach some of the skills mentioned throughout this tutorial.
- How to upload SVG files into Design Space
- How to make 3D layered Cricut projects
- The BEST way to frame papercraft projects
- How to mount multiple designs in the same frame with magic guides
- How to score with a Cricut (even without scoring tools)
- Print then cut tutorial
- Design Space tools (Combine, Attach, Slice, Weld, Flatten, etc.)
- Pattern fill tutorial (for making backgrounds & cutting images to a specific shape/size)
- Free envelope SVGs that can be sized to fit any card
- How to write inside cards with Cricut pens
- How to cut layered designs at a small size
- Design Space tips & tricks
- Cricut pens tutorial
Video tutorial
Watch the video below to see how to make this project. Keep scrolling for a written tutorial.
Written tutorial (with photos!)
Here’s how to make your very own pumpkin popout card using a Cricut machine!
Step 1) Download the cutting file(s) & unzip the downloaded folder
Download the files using the box below.
Purchase the File(s)
This cut file is available as part of the Instant Access Bundle.
Or, purchase this design individually here
Before you upload the SVG to Design Space, you need to unzip the download folder that it comes in.
- How to unzip a folder on Windows computer
- How to unzip a folder on a Mac
- How to unzip a folder on an iPad/iPhone
- How to unzip a folder on an Android device
After unzipping, upload the SVG file into Cricut Design Space. This is the file which starts svg- in the filename.
Not sure how to do this? Here’s how to upload SVGs to Cricut Design Space. Make sure you upload the file which starts svg- in the filename!
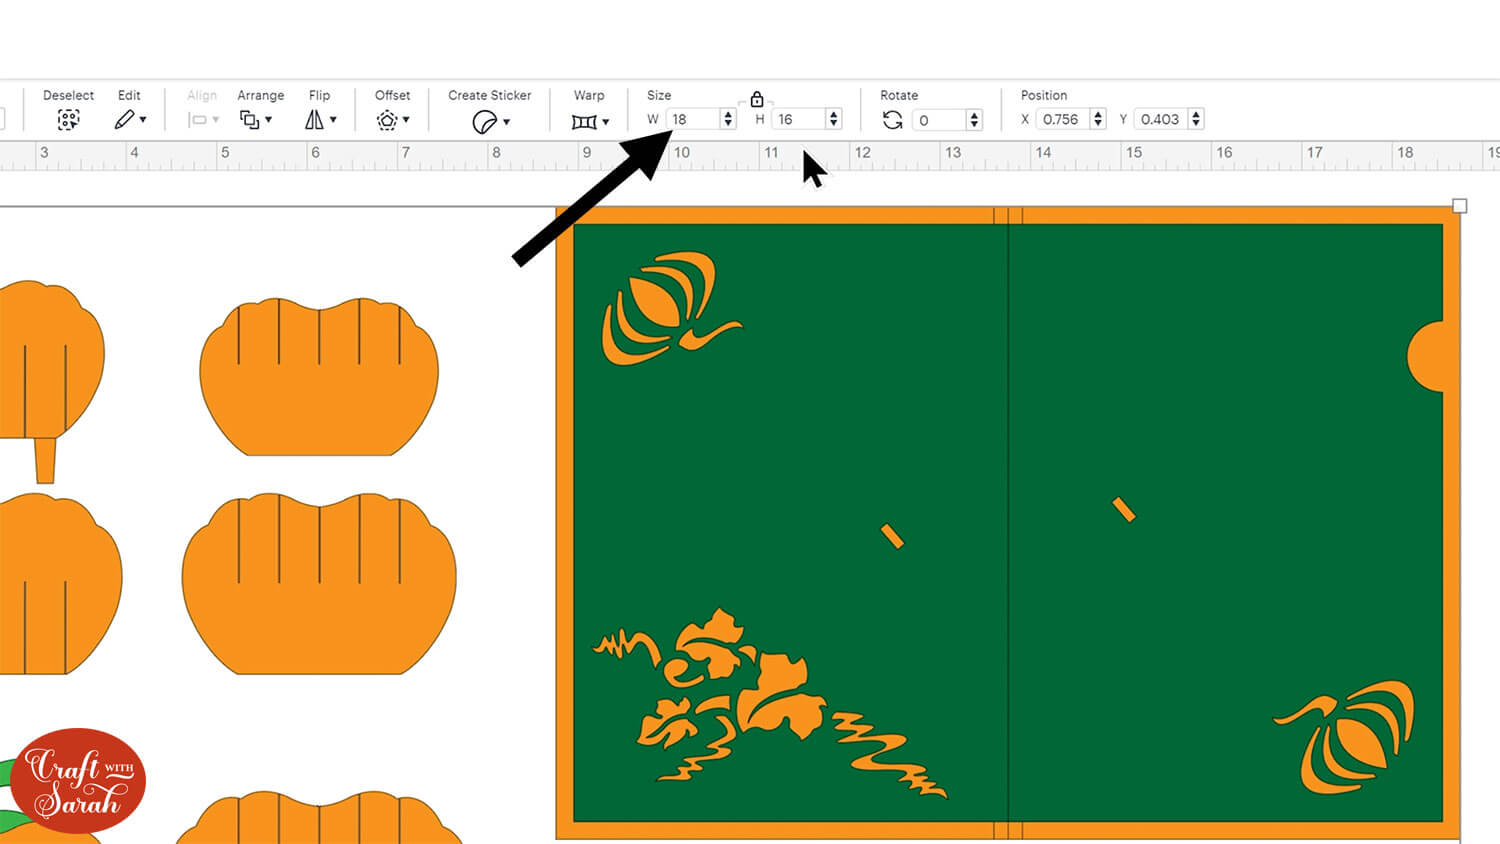
The design should load in at 18 inches wide and 16 inches tall which will make a 5×7 inch card when everything is finished.
Change the design to that size if yours doesn’t match.
Want to make this on the Cricut Joy? Resize the whole design to 16 inches wide. Hand-cut the largest two pieces of card using a paper trimmer, scissors or a craft knife and delete those layers from the Design Space project. The rest of the card can then be cut on the Cricut Joy.
Step 2) Format the score lines
Some of the pieces of the card have score lines to make it easier to put together.
If you don’t have a scoring stylus or scoring wheel for your Cricut machine (or if you are using the Cricut Joy Xtra), you can delete the score lines.
However, if you do have one, here’s how to format them so that your Cricut knows to score them.
First, click the whole design and then press the Ungroup button at the top of the layers panel to separate out all those layers.

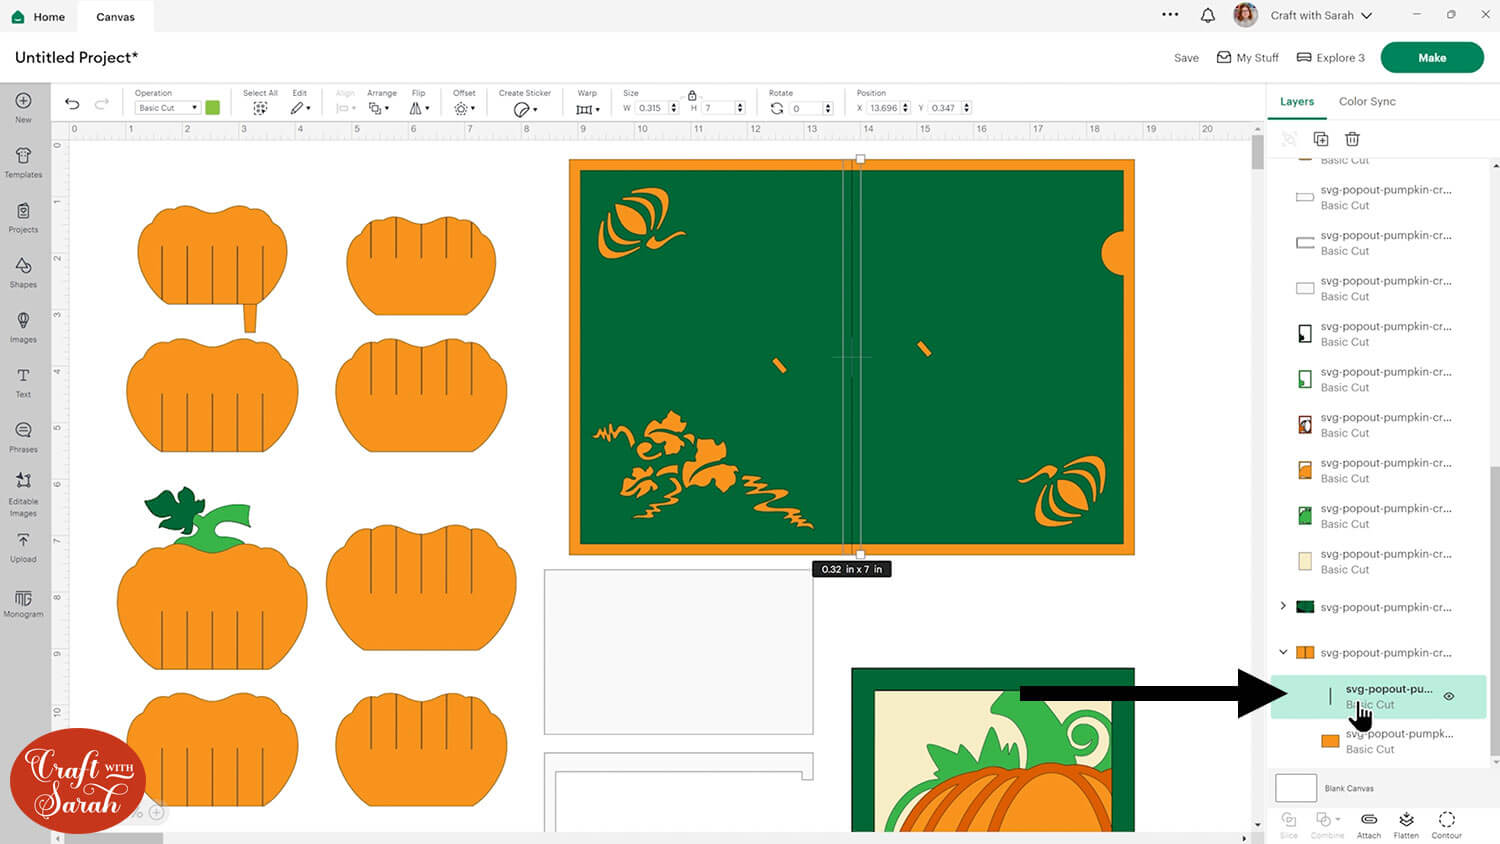
Click away to deselect everything and look down the layers panel until you find the main greetings card layer.
If the group is appearing closed, click the little arrow on the left-side to open it up to see the different layers.
Click the vertical line layer.
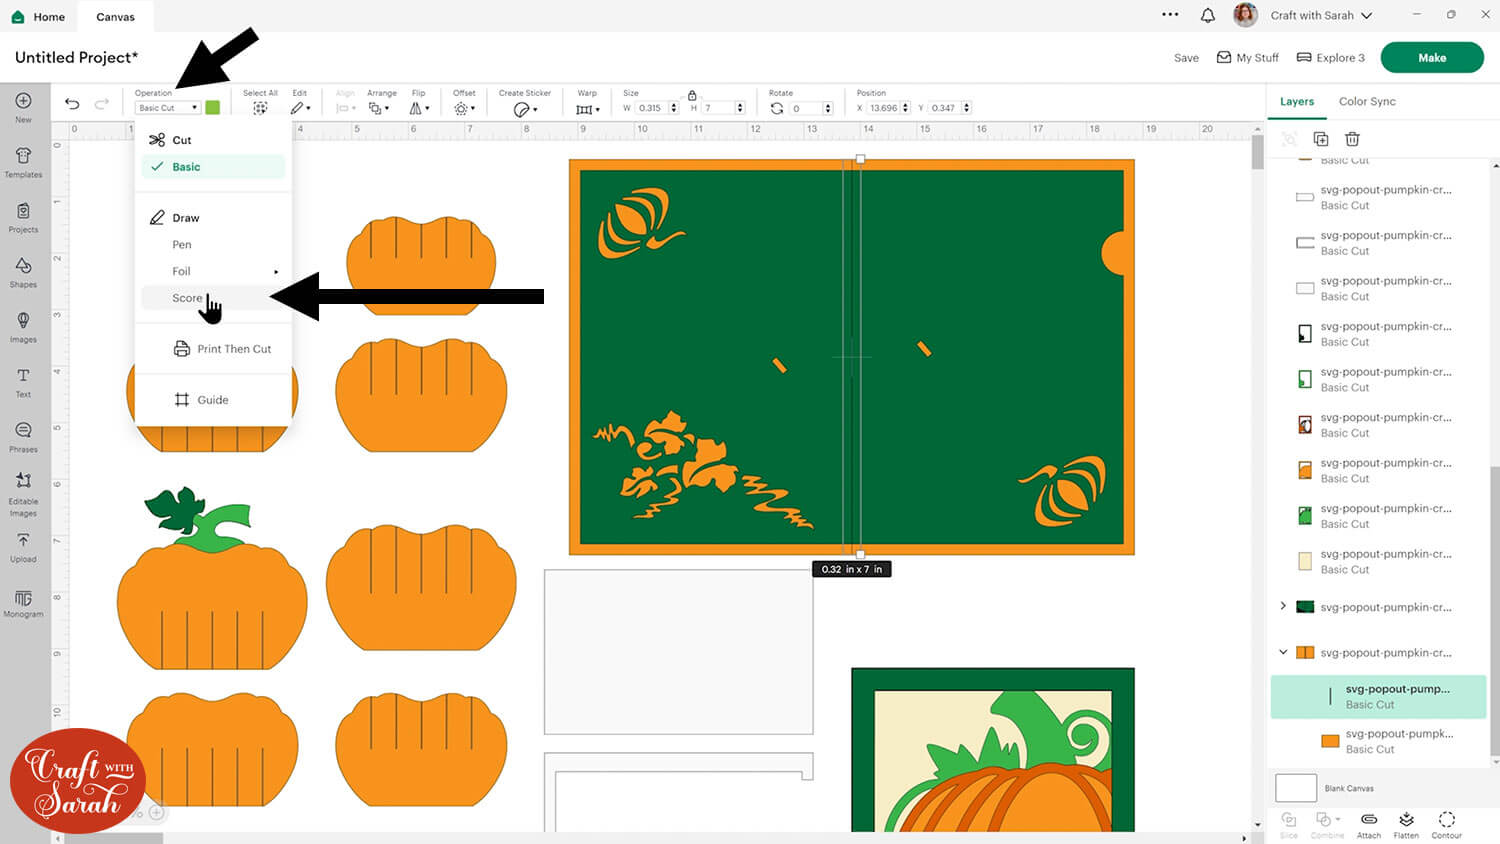
Change the layer to “Score” using the Operations dropdown.
We need to do one more thing to it which is to tell the Cricut we actually want it to do those score lines on that rectangle.
Click to select the whole group that contains the score line and the base card pieces. Down the bottom of the layers panel, press Attach.
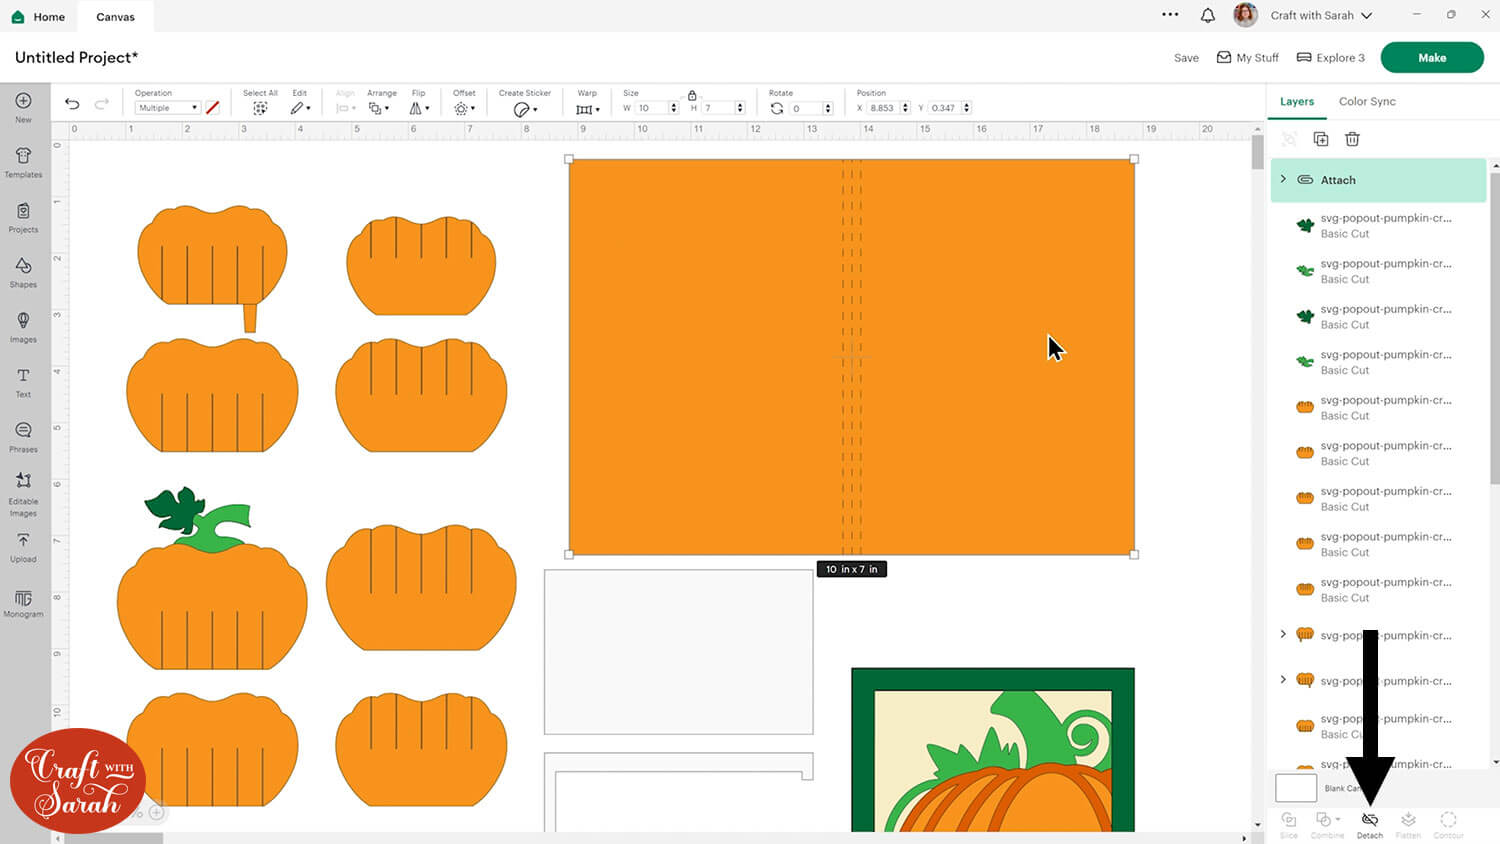
Click the card and press “Arrange > Send to Back” to move it back behind the inner section with the pumpkin cutouts.
Your layers panel should now look like this:
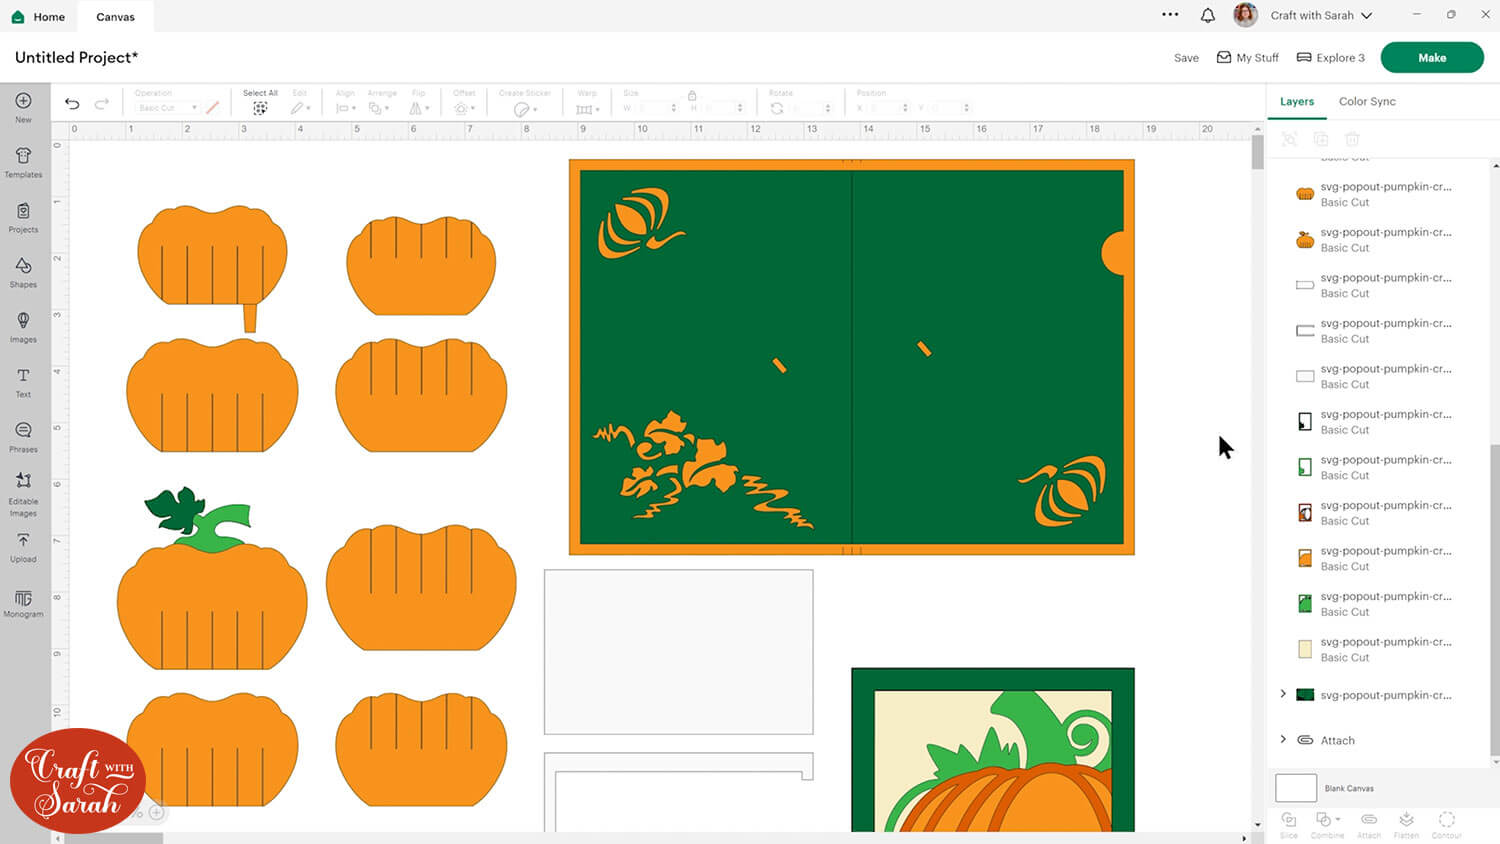
There are three more score lines to change: a vertical line on the green greetings card base and horizontal lines on two of the popup pumpkin pieces.
Complete the same steps for the remaining score layers.
TIP: If you don’t have a scoring wheel or stylus for your Cricut then click the single-line layers and hit the trash can to delete them instead. It will be a little bit trickier to put together without score lines because you will have to fold it manually in the correct places. Or, check out these alternative ways to score with a Cricut.
Step 3) Cut the project from cardstock
Now is a good time to save your project so that you don’t have to do the formatting all over again.
When you’re happy with how everything is looking, click “Make” and follow the on-screen instructions to get everything cut out from your cardstock.
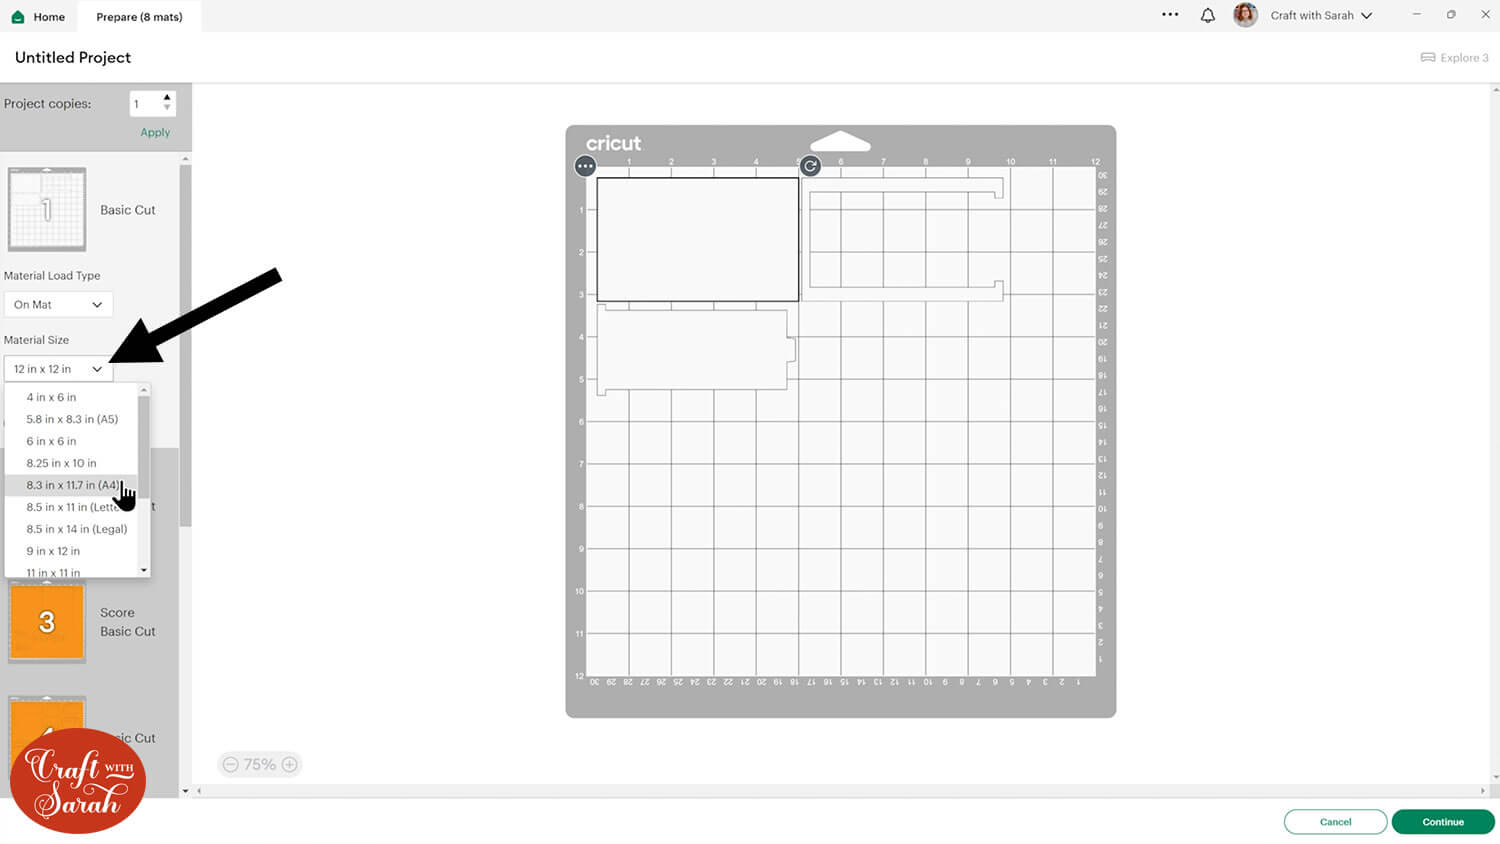
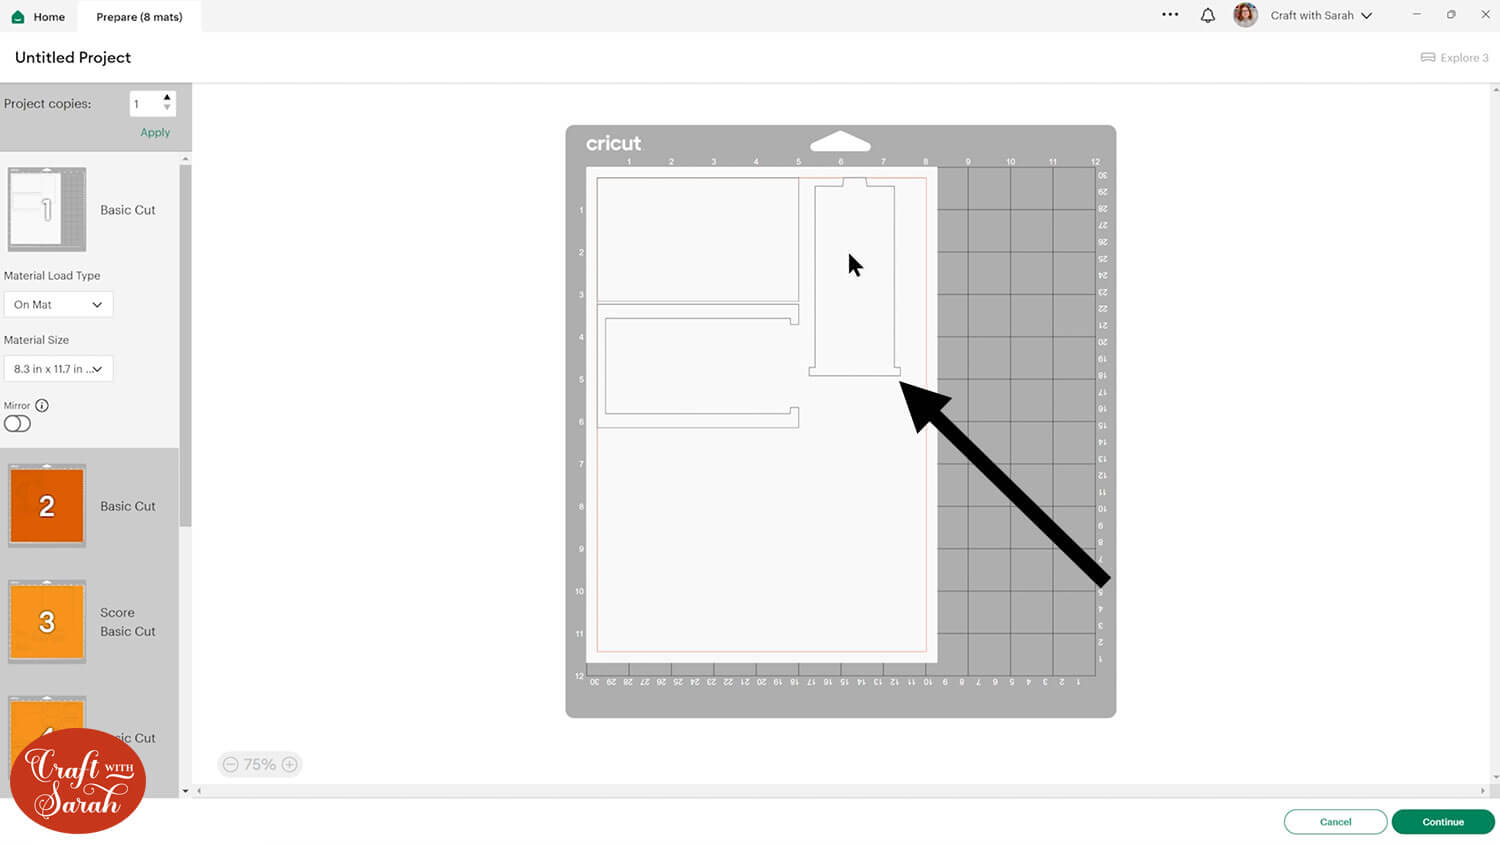
Make sure when you’re moving things about that nothing overlaps, otherwise it won’t cut out properly.
To change the paper size, go into the dropdowns over on the left side of the screen and choose the paper size that you want to use. You need to change it for every single colour.
TIP: New to cutting cardstock with a Cricut? Check out this in-depth tutorial which goes through every step of the process, including tips for getting the best quality cuts from your Cricut.
Step 4) Stick the card front together
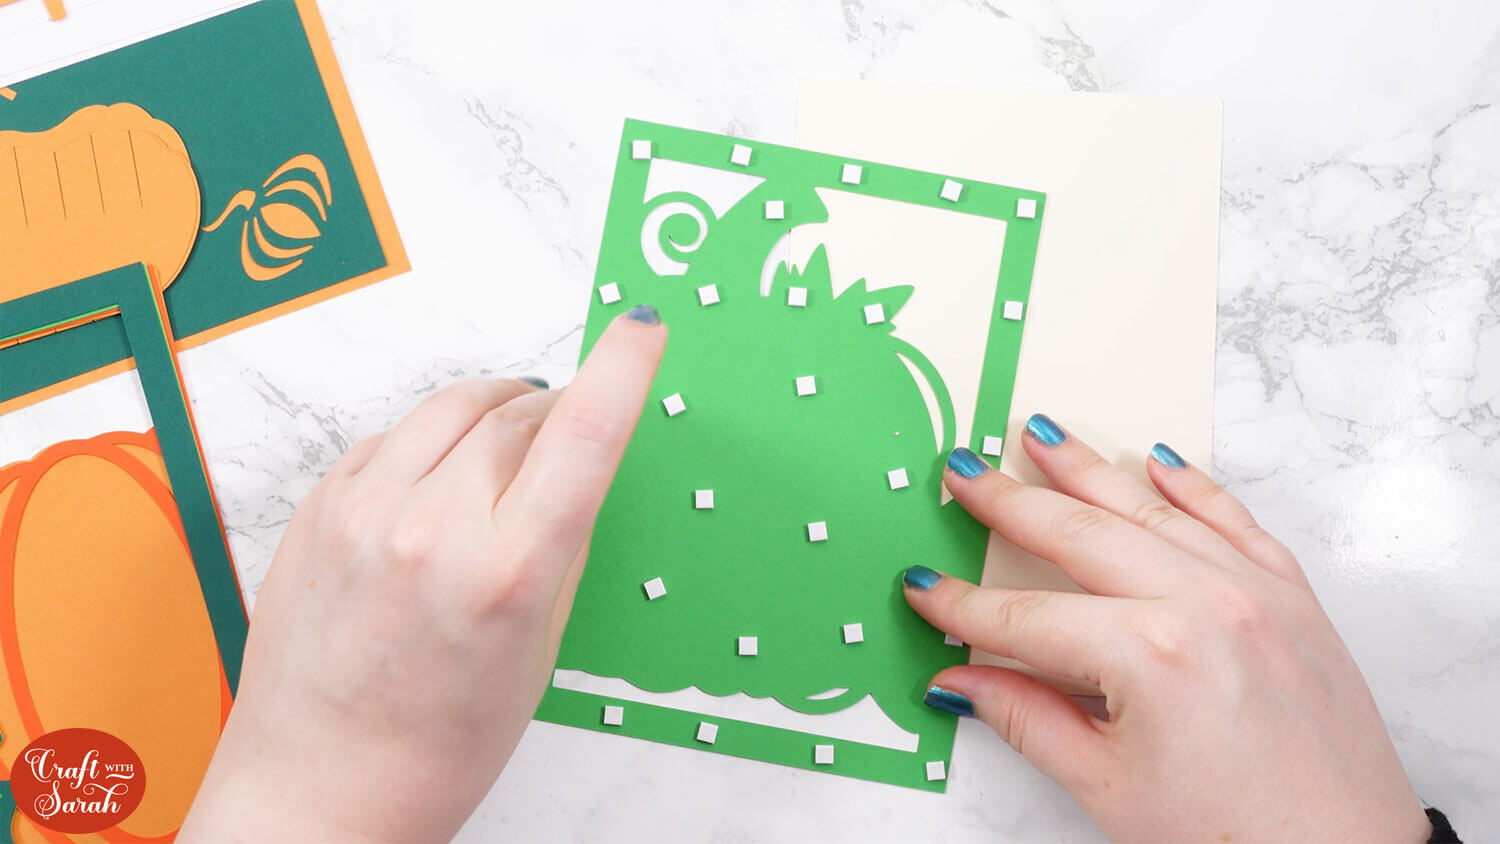
Stick together the pieces that make up the front of the card with a mixture of foam squares and glue, as shown on the assembly guide below.
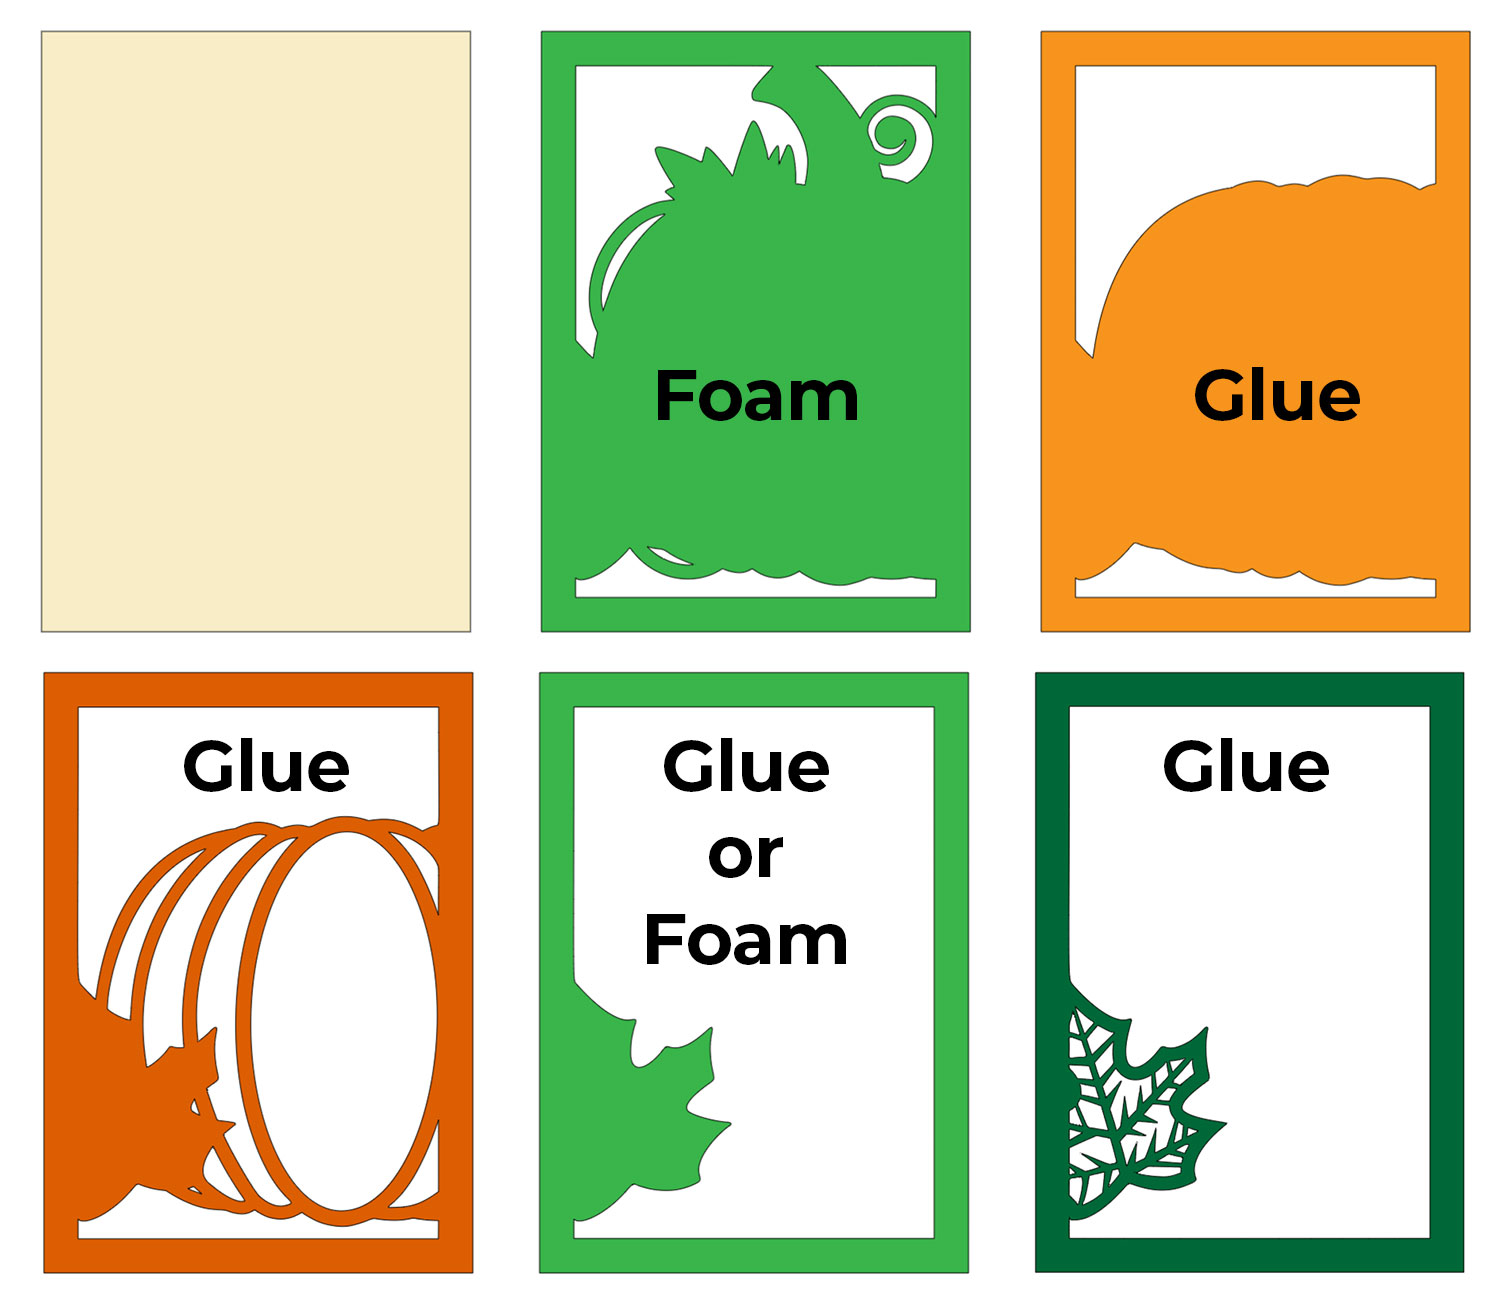
When you’re adding foam squares to the larger pieces of card, make sure you put some in the middle of the card as well as around the edge. If you don’t put any in the middle, there is nothing to hold the card flat so it might bow downwards without them.
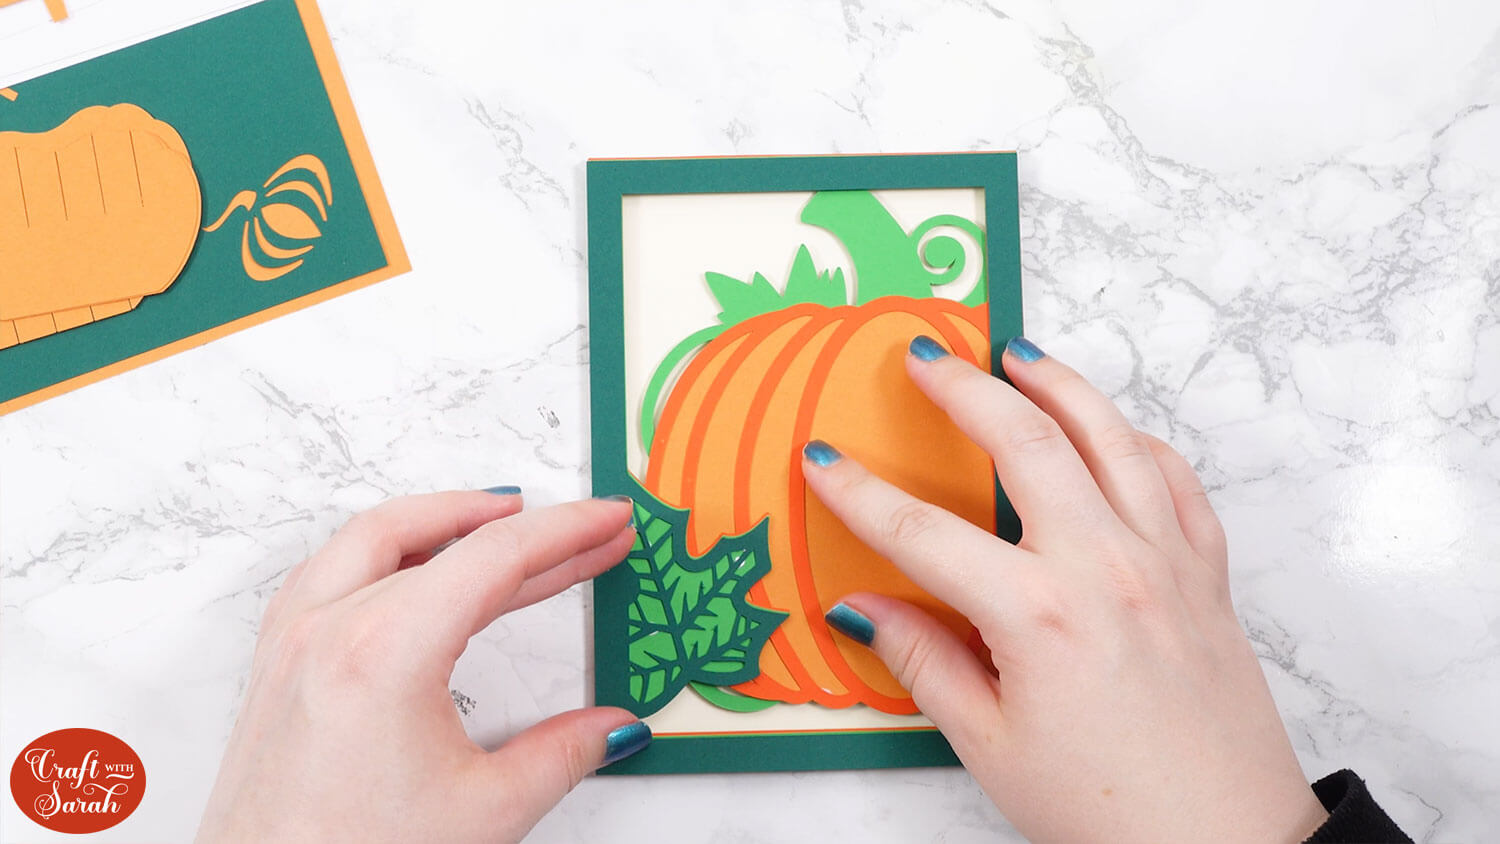
Here’s how it looks when finished:
Step 5) Assemble the popout mechanism
Next we will put the popout mechanism together.
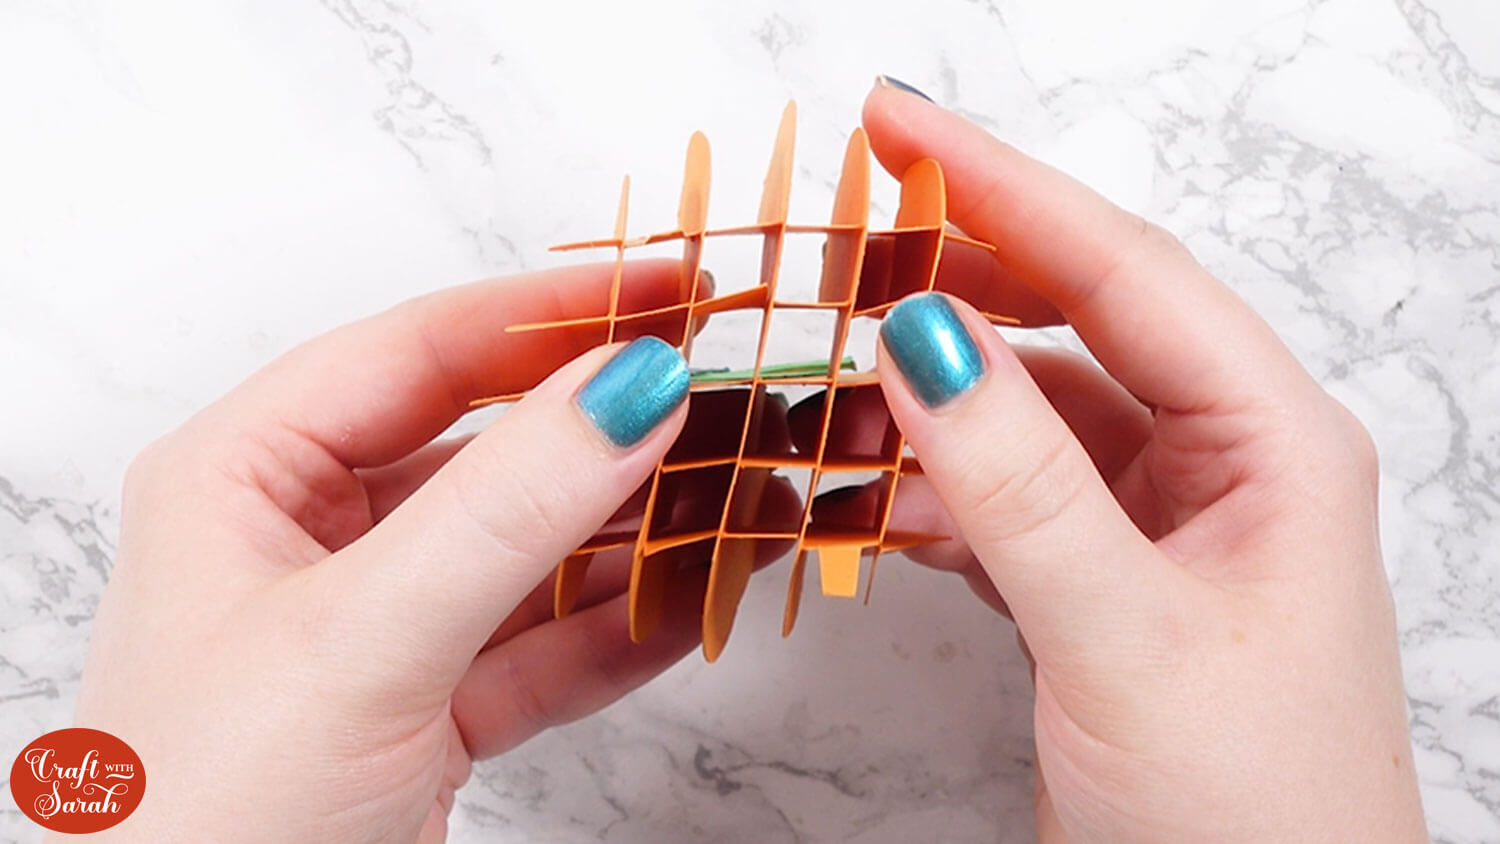
Although it looks complicated with the pumpkin shapes, it’s a simple “grid” which will be made by slotting the orange pieces together.
First, glue the leaf pieces to the front and back of the middle pumpkin piece.
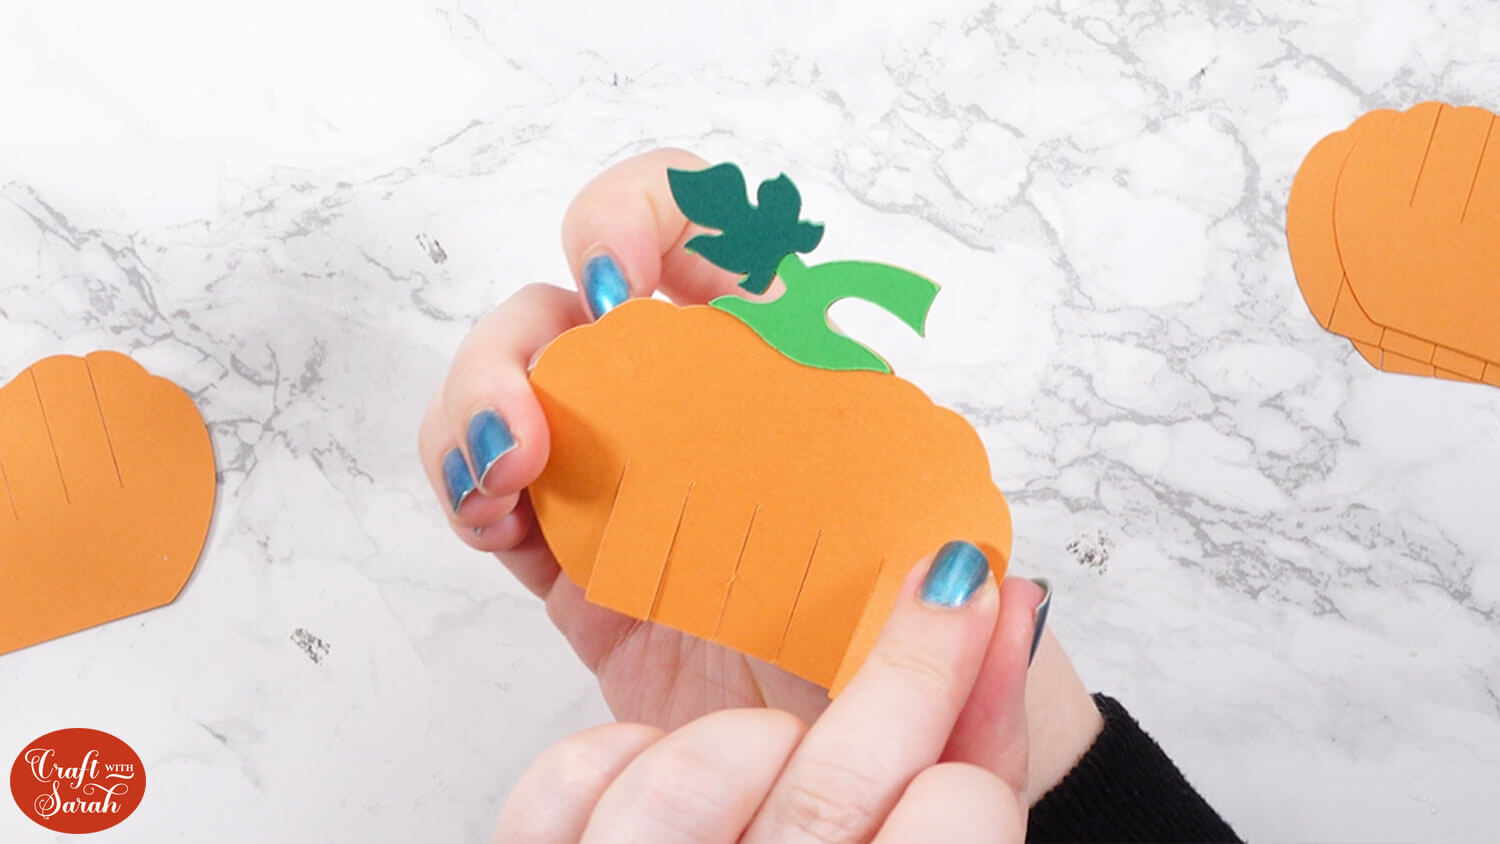
Put the pumpkin pieces into size order. There are two copies of each sized piece.
Take the largest pumpkin that has slits going down from the TOP.
Slide it in to the middle slot in the pumpkin piece with the green top.
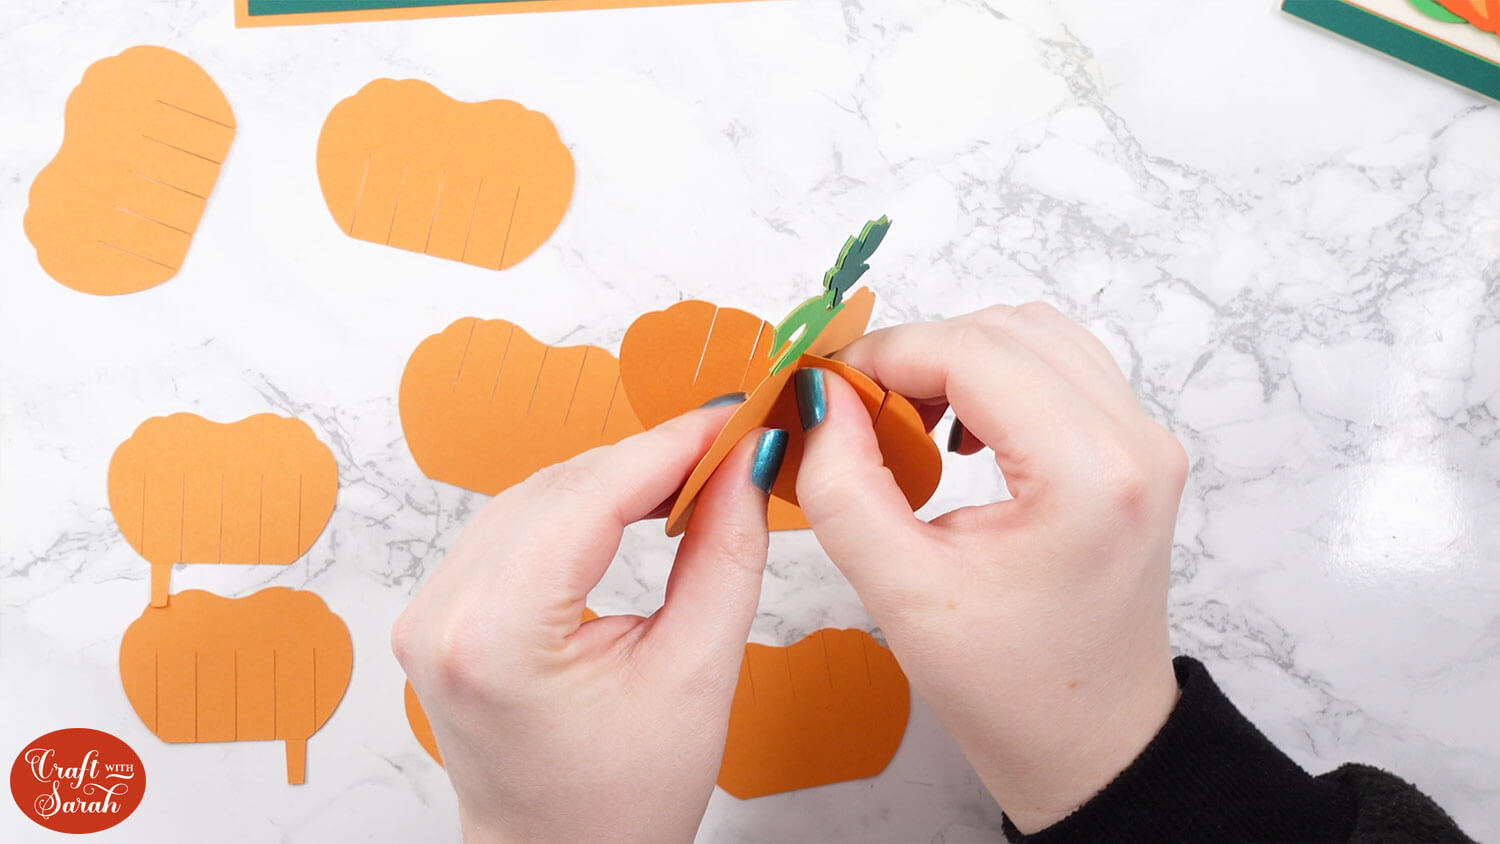
Take the two pumpkins in the next size down and slot one in on the left of the piece you just added, and the second on the other side.
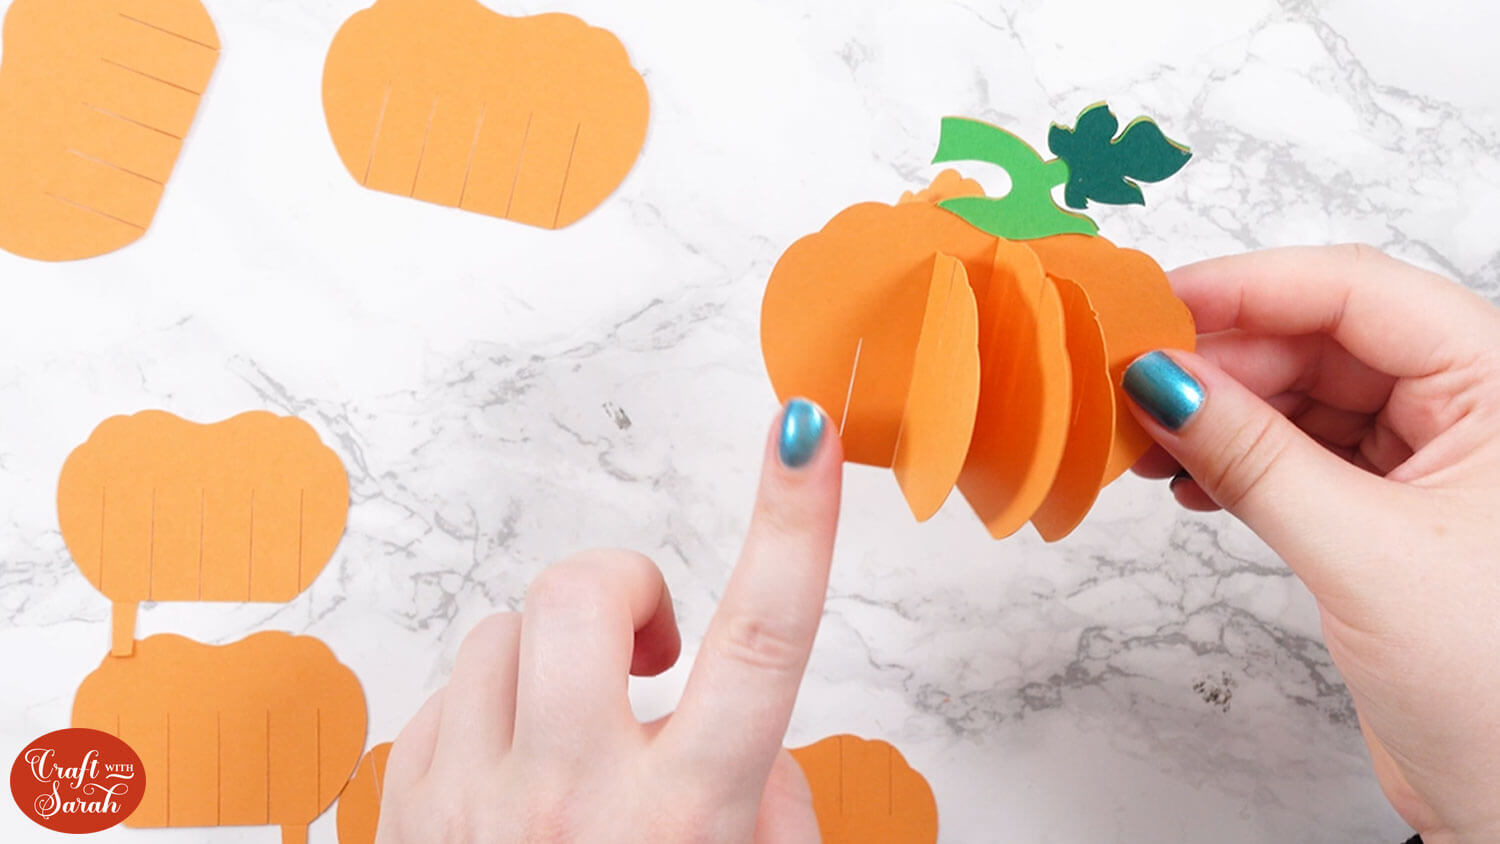
Select the next sized pumpkins and slot one in each side of the existing pumpkin shapes. These will go in the last remaining slits of the original pumpkin/leaf piece.
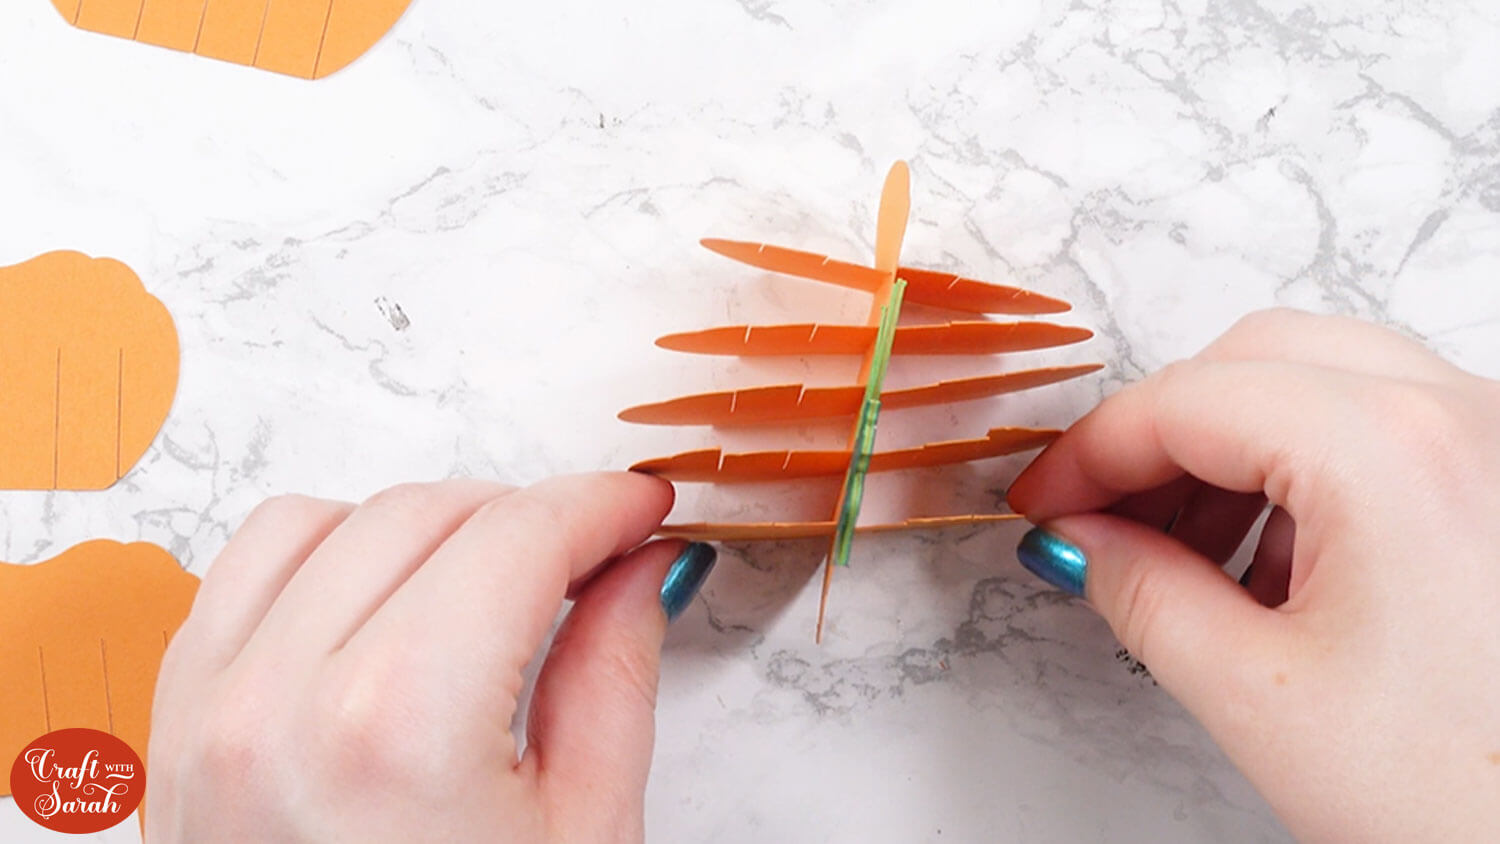
Now we are going to add stability by placing the remaining pumpkin shapes in the opposite direction to what we have already put together.
Take the two pumpkins that do NOT have the rectangular tabs on the bottom and thread one on each side of the original pumpkin/leaf piece.
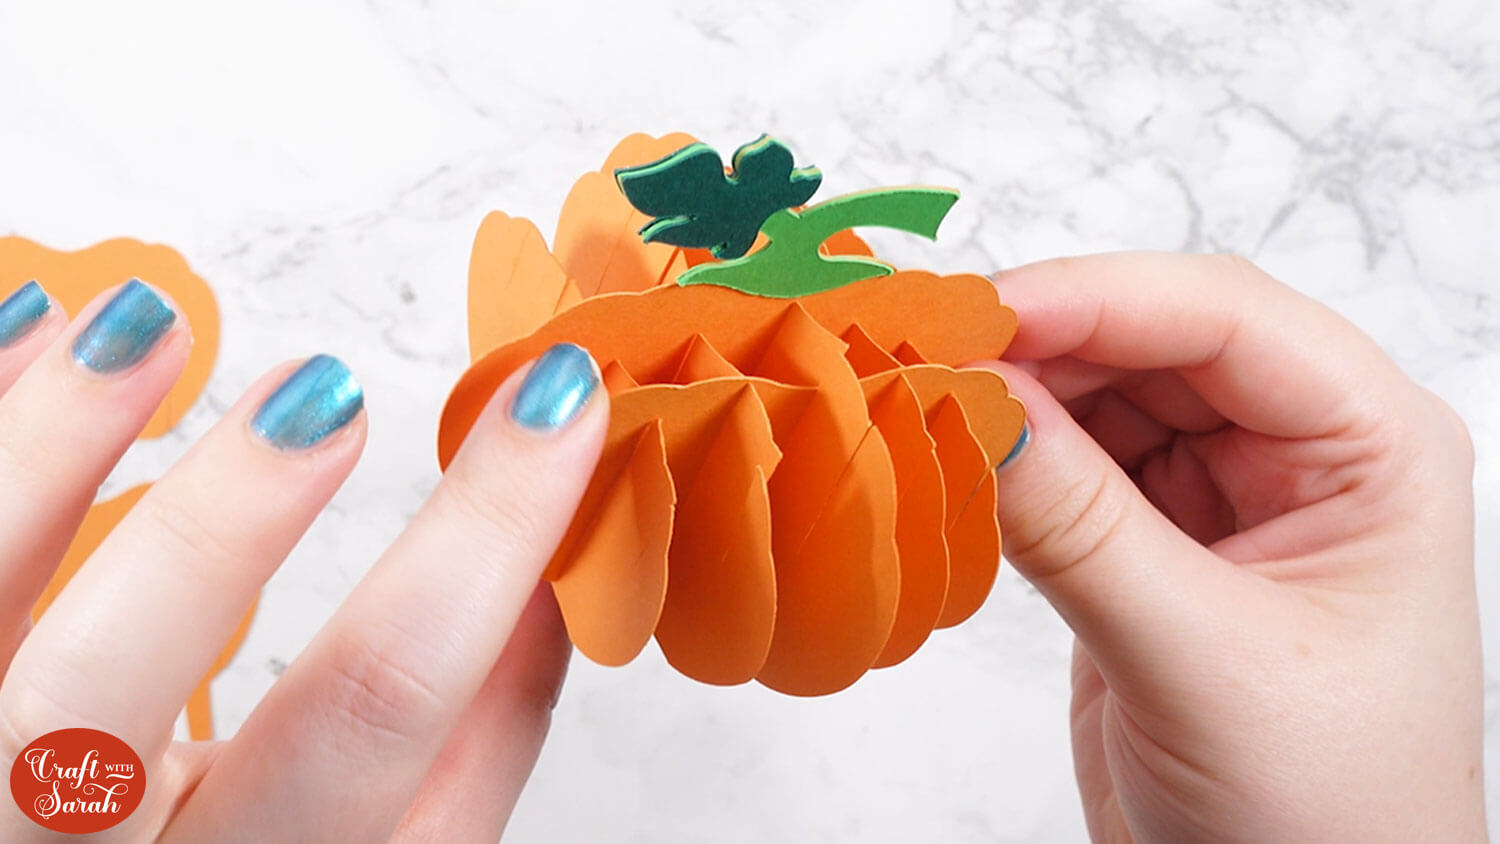
Repeat with the other side.
Take one of the pumpkin pieces with the tabs on the bottom. Hold it so that the tab is on the LEFT and fold the tab upwards towards you.
Thread this onto your popout so that the tab remains on the LEFT side.
This is very important – if you do not get the tabs the correct way around then the popup will not open and close with your card.
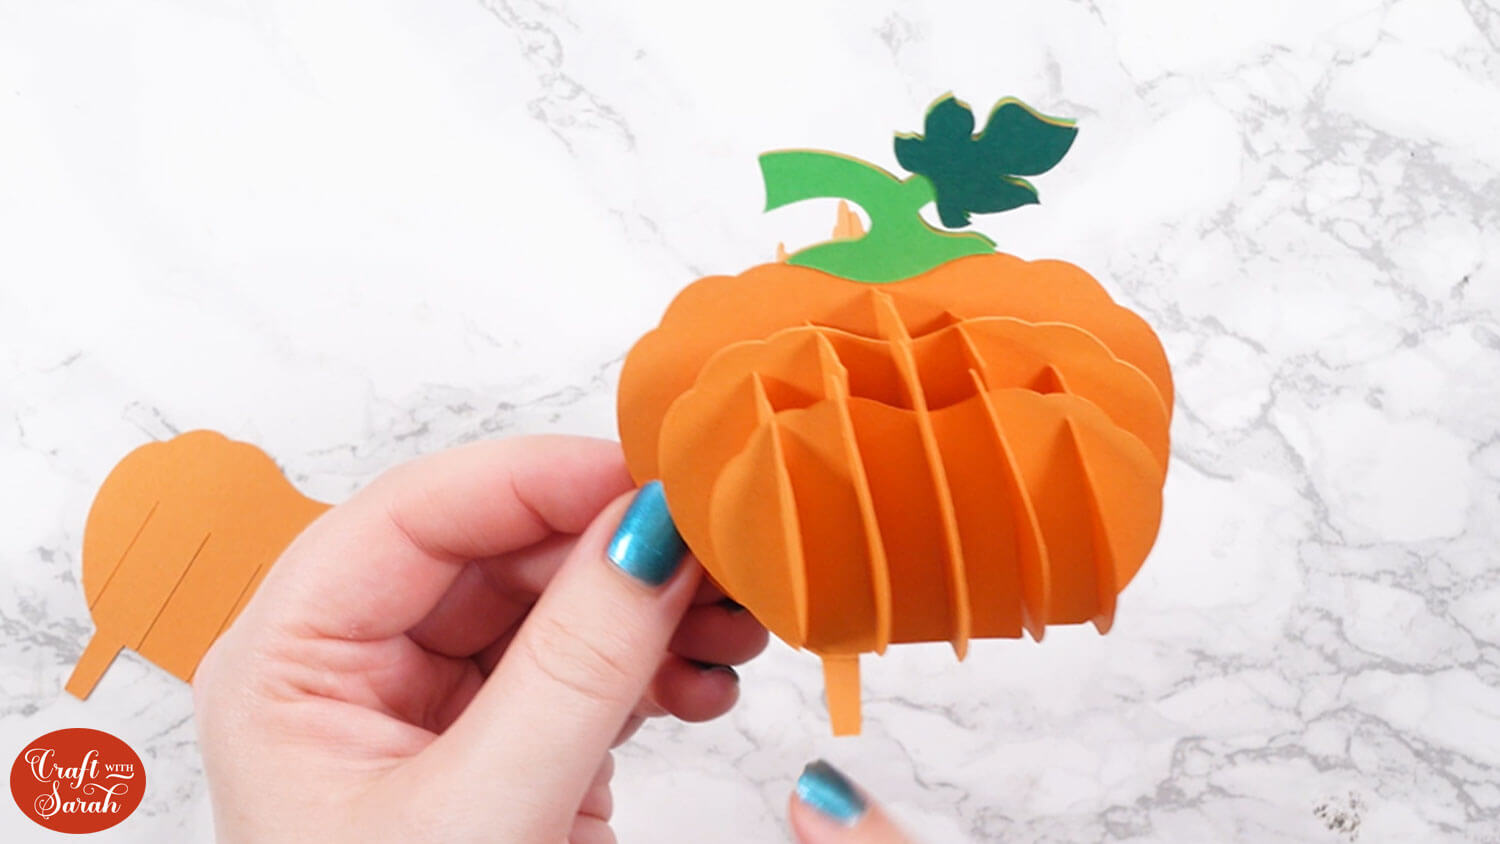
Turn the popup around and place in the remaining piece. Again, the tab must be on the LEFT.
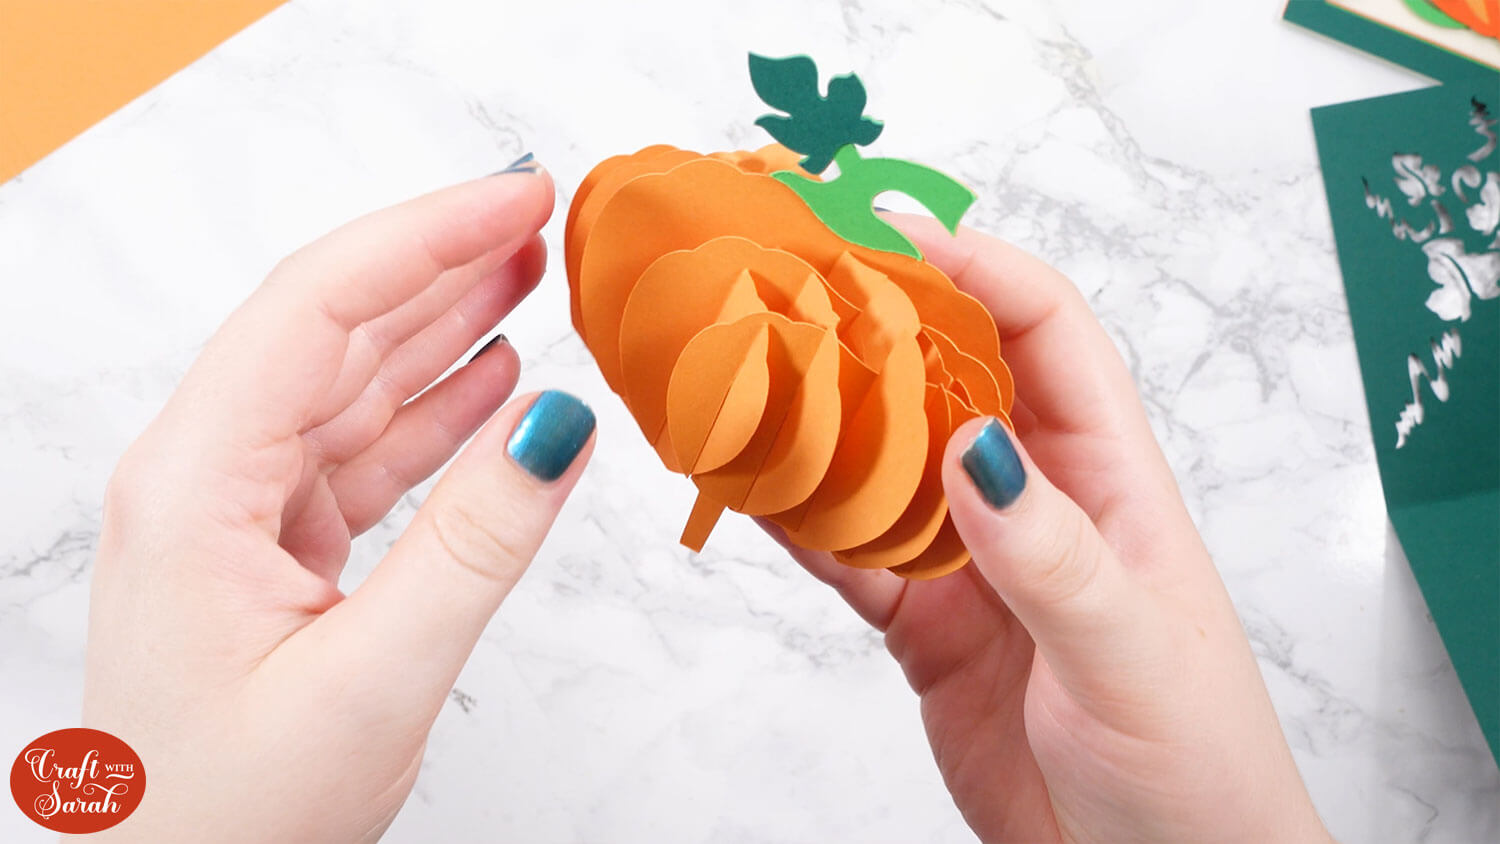
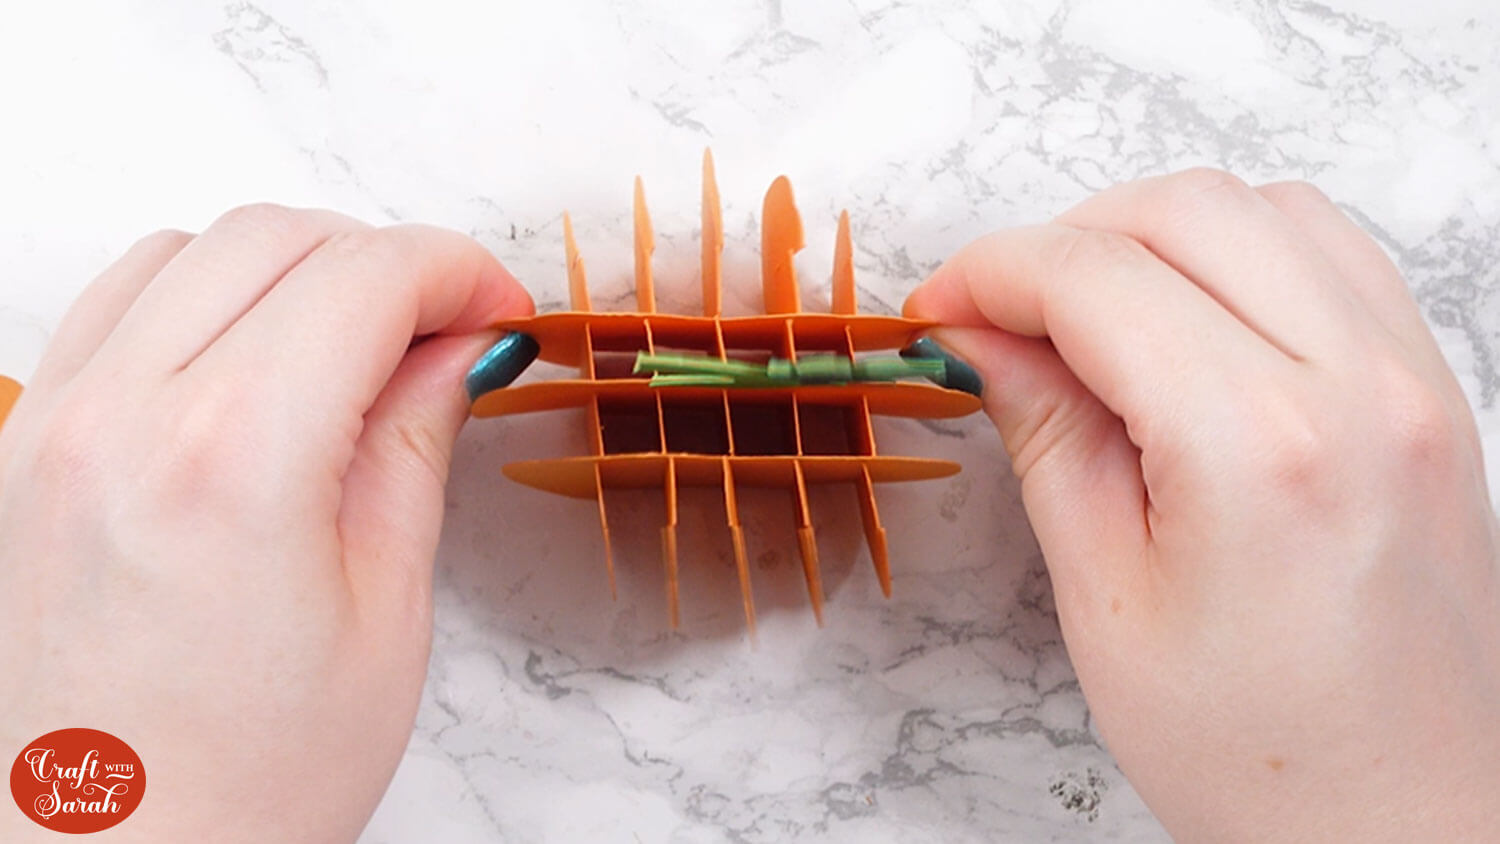
Give the popout effect a try by gently closing up the grid. It should fold in on itself to become flat.
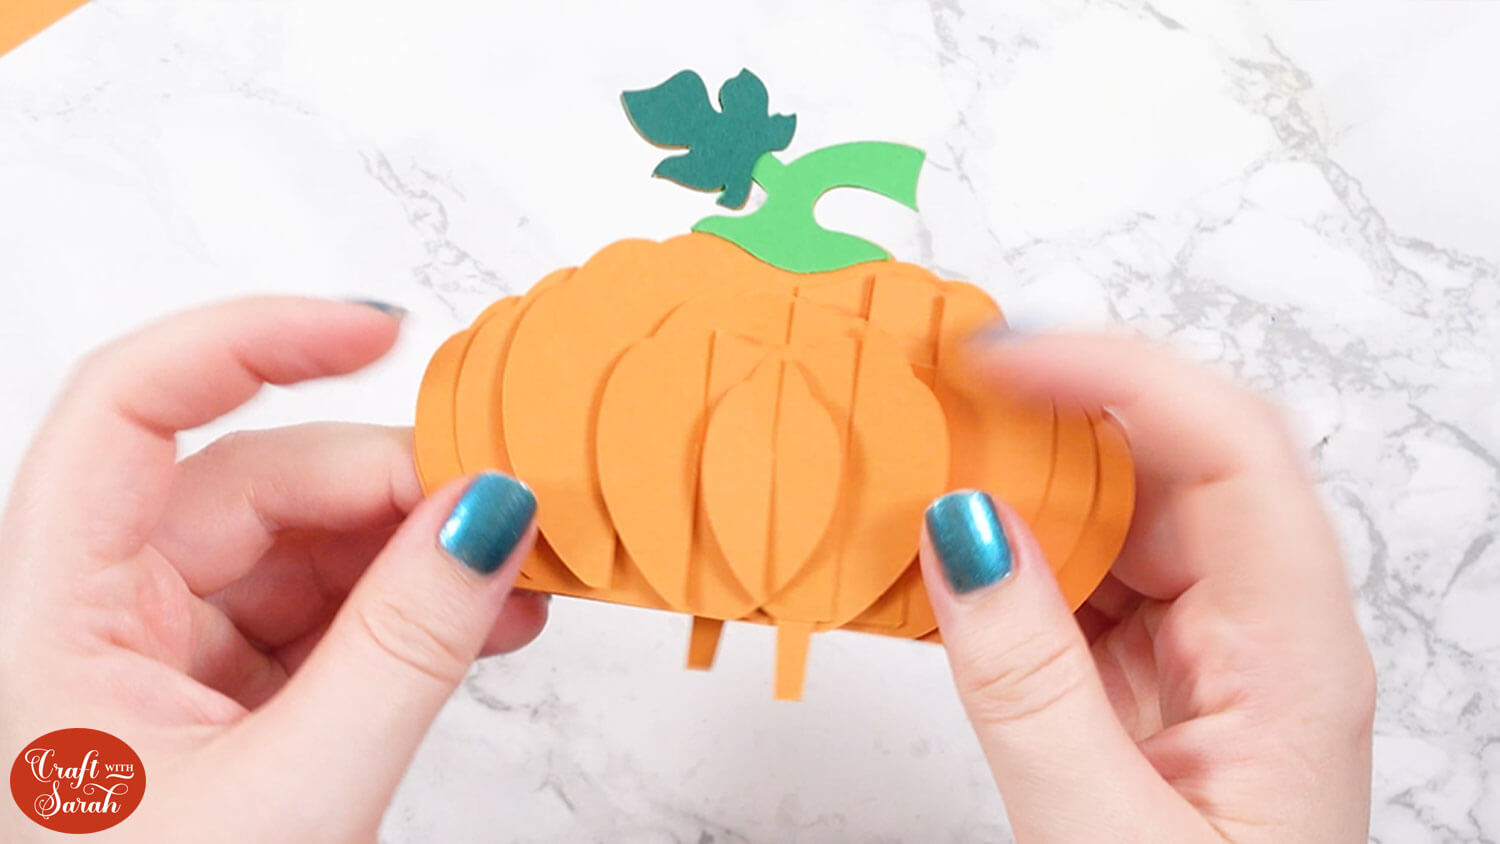
Push out the sides to open up the popout effect. Here’s how it looks from the bottom:
Step 6) Attach the pieces together
Take the green card and fold it down the middle. Place it on your work surface so that the cut out for the hidden message panel is on the right.
You will see the two cut outs which are where the tabs on the popout mechanism will go through.
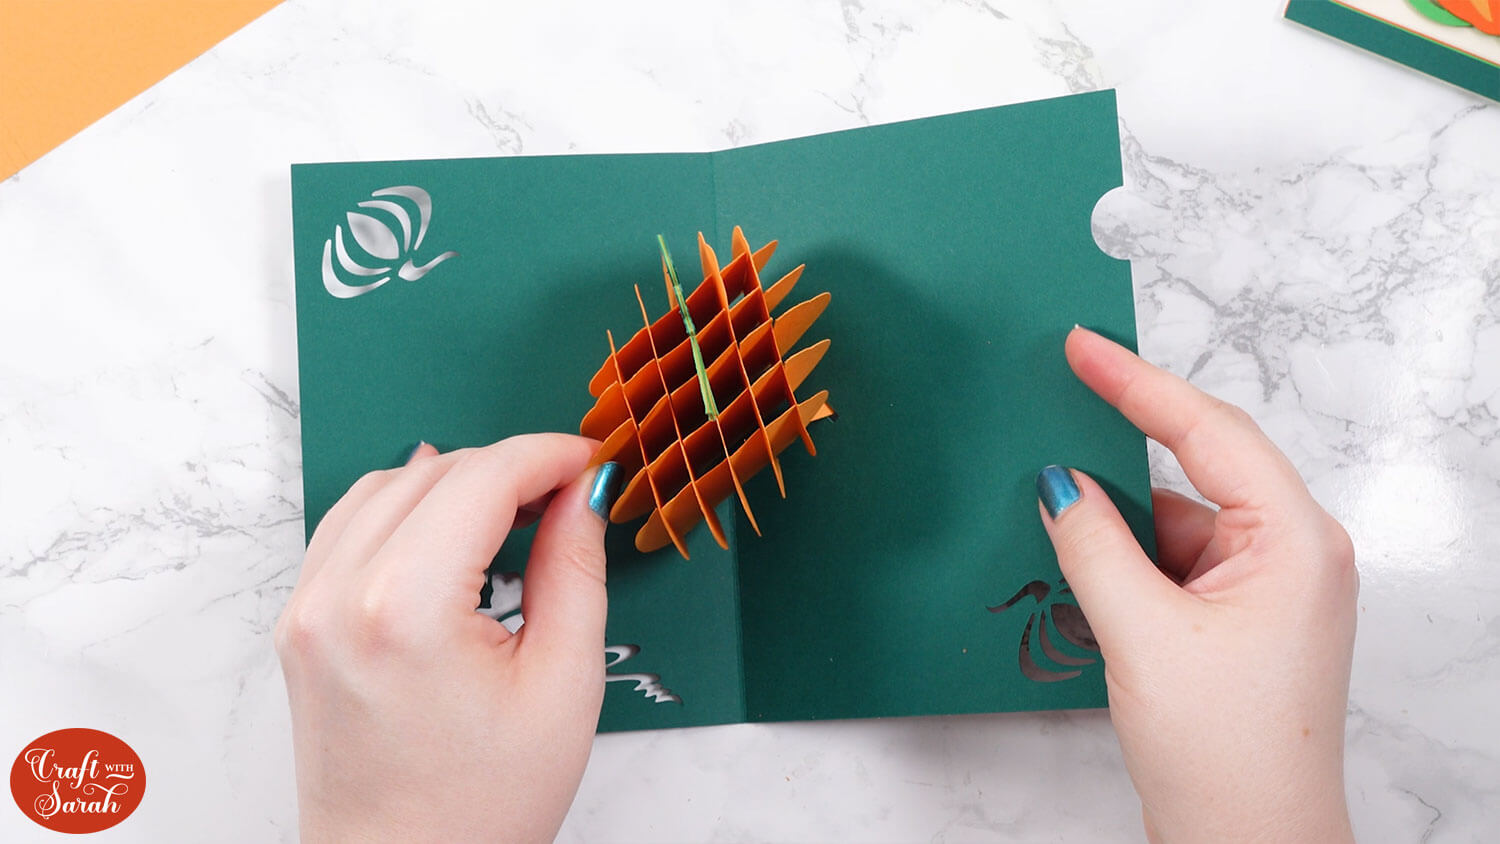
Place the pumpkin inside so that the left side has the tab on the top left of the card.
Thread the tab through the hole.
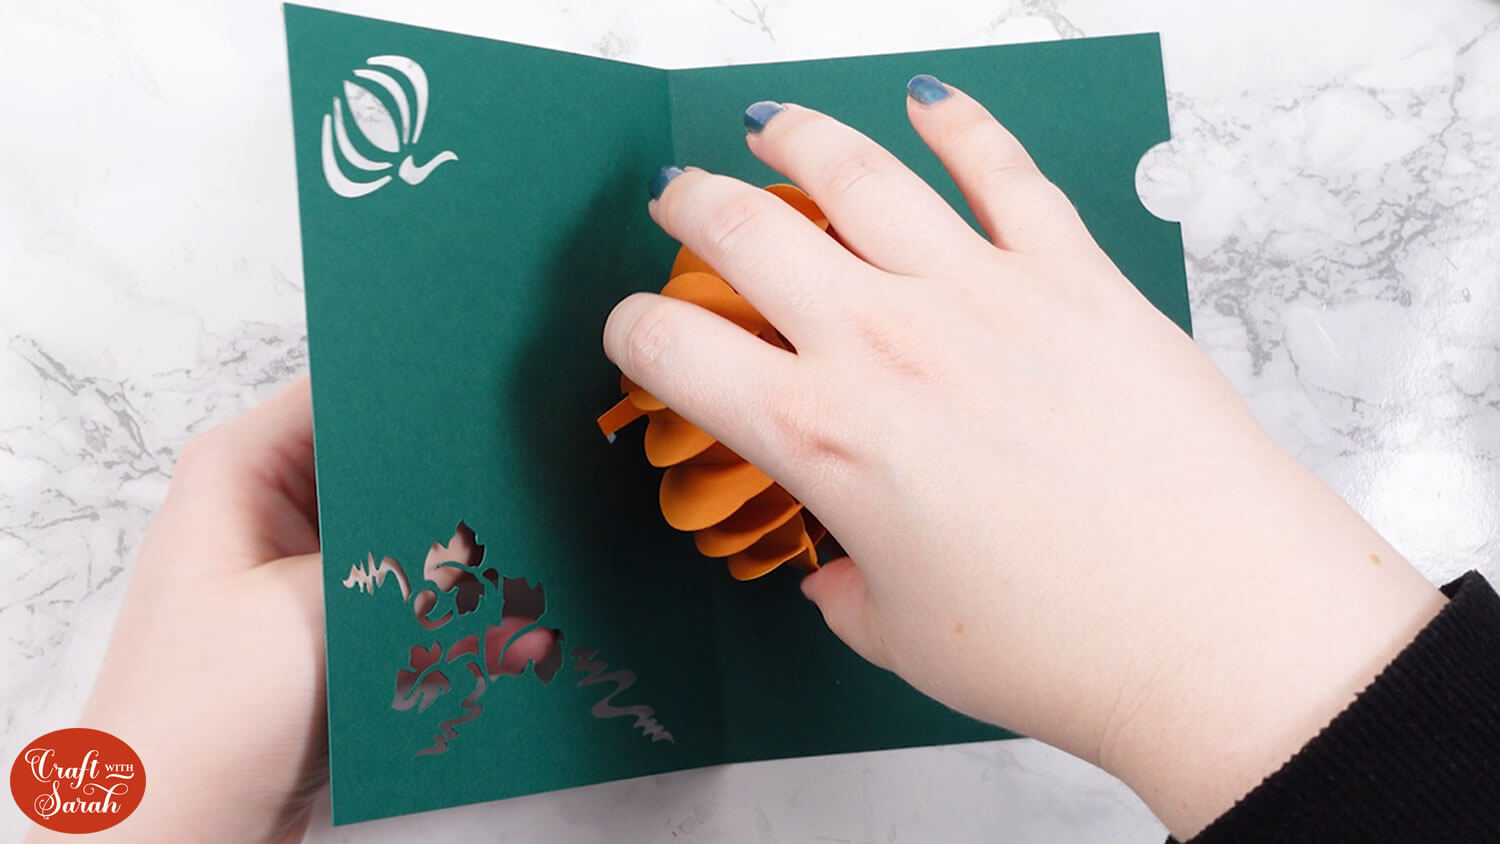
It is important to get these the right way around so that the popout mechanism works.
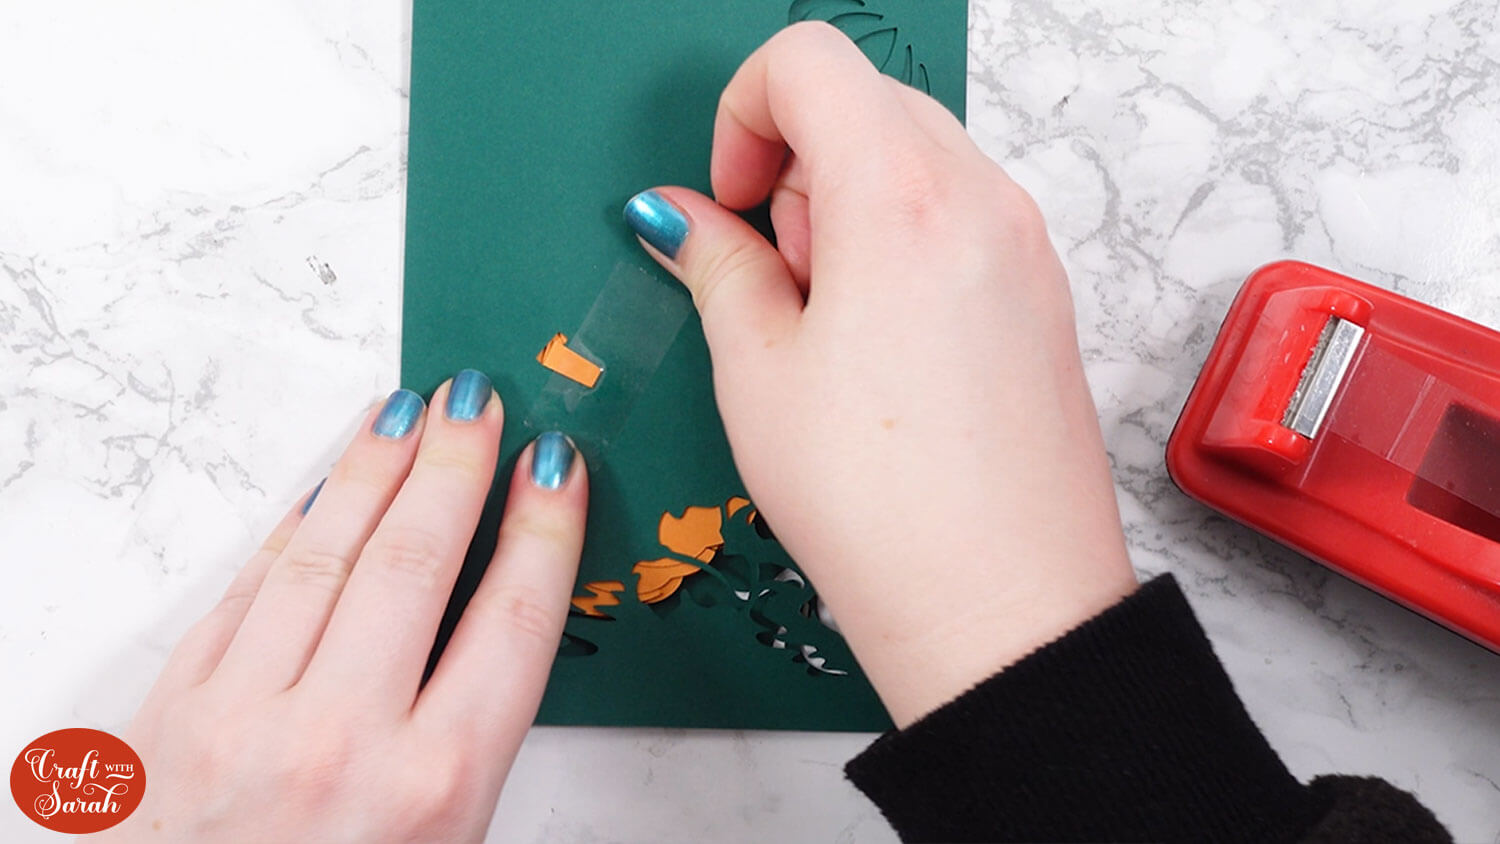
Secure the tab on the other side using tape. The tab should be pointing in a bottom-right direction.
Do the same for the back tab and secure it using sticky tape. Make sure this tab is pointing in a top-left direction.
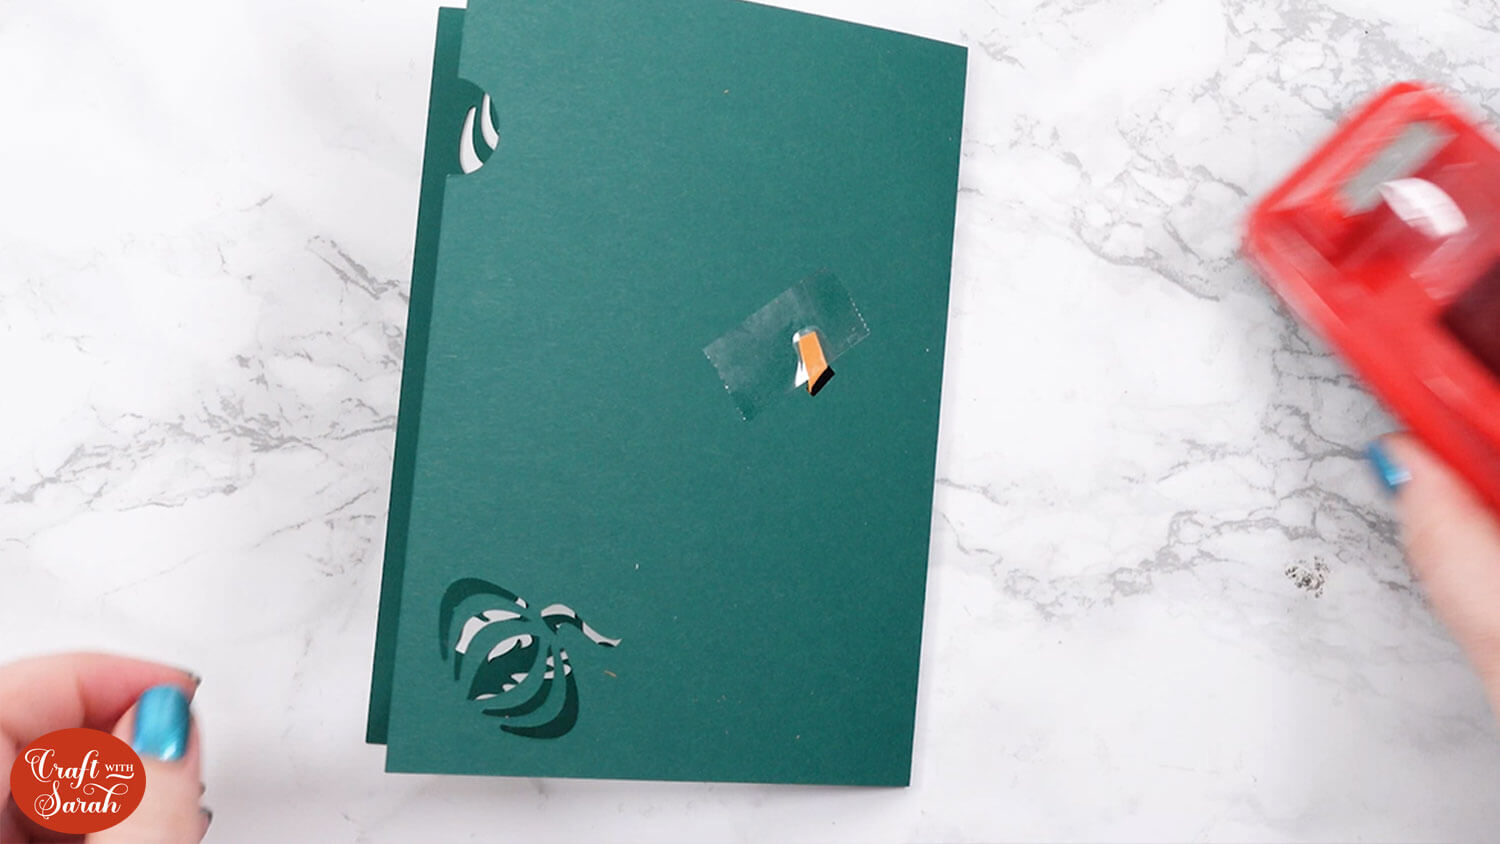
Now your popout should be secure! Make sure the card can open and close freely.
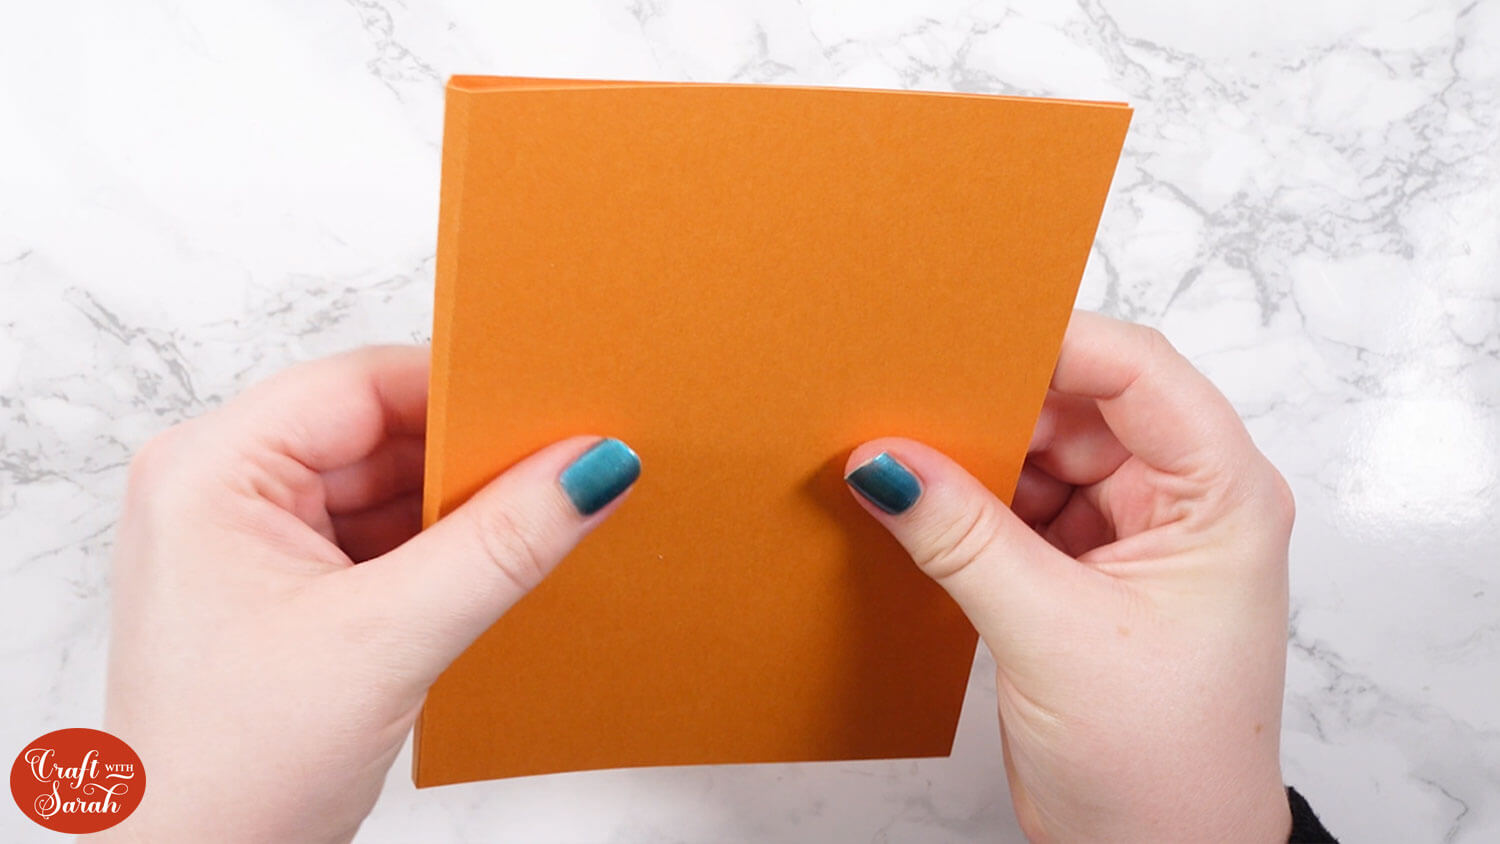
Take the orange outer card piece which has three score lines in the middle. Fold the middle scoreline and then the other two so that it looks like this.
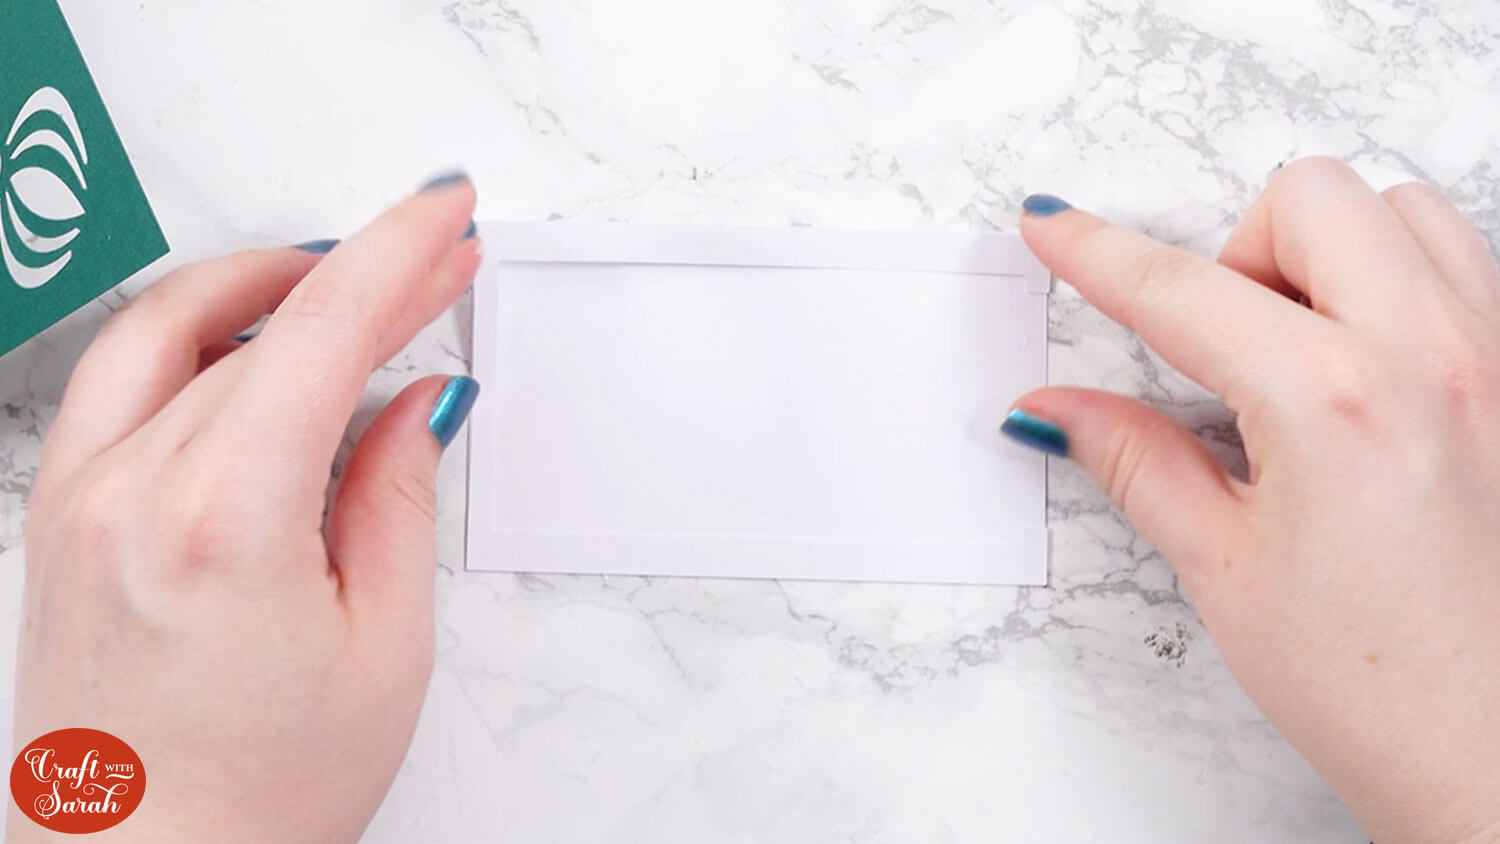
Gather the three white hidden message panel pieces.
Take the plain rectangular piece and add glue to the back of the edge piece which has the rectangle cut out.
Line it up and stick it down onto the rectangle. This will keep the hidden message panel secure.
Next, select the message panel and place the pull out section inside. Glue around the edge piece but do not glue the message tab itself.
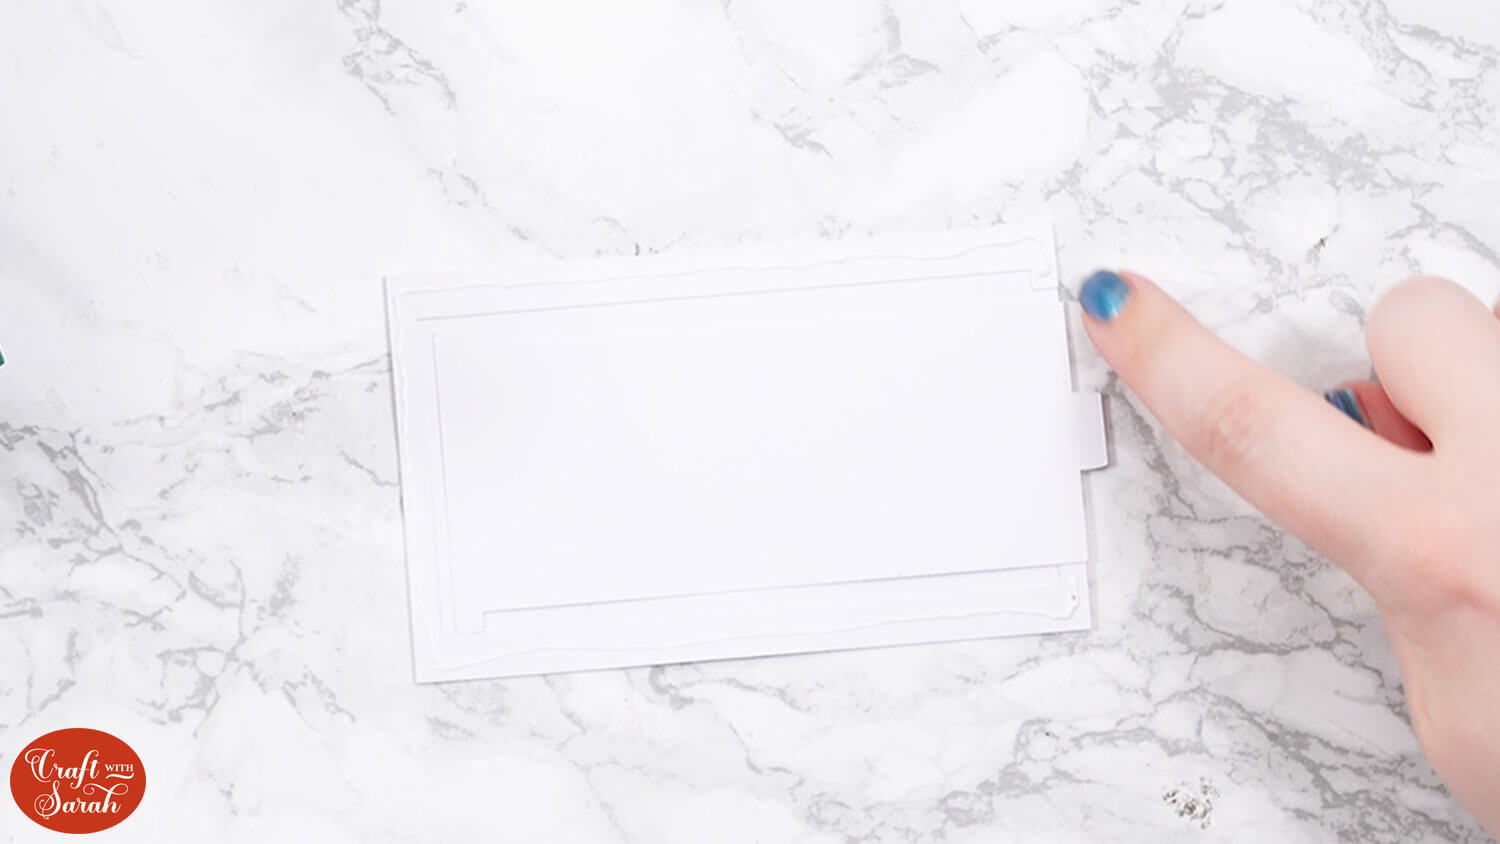
Stick it to the back of the green card section so that the pull-out tab on the white piece fits in the oval cutout on the right side of the card.
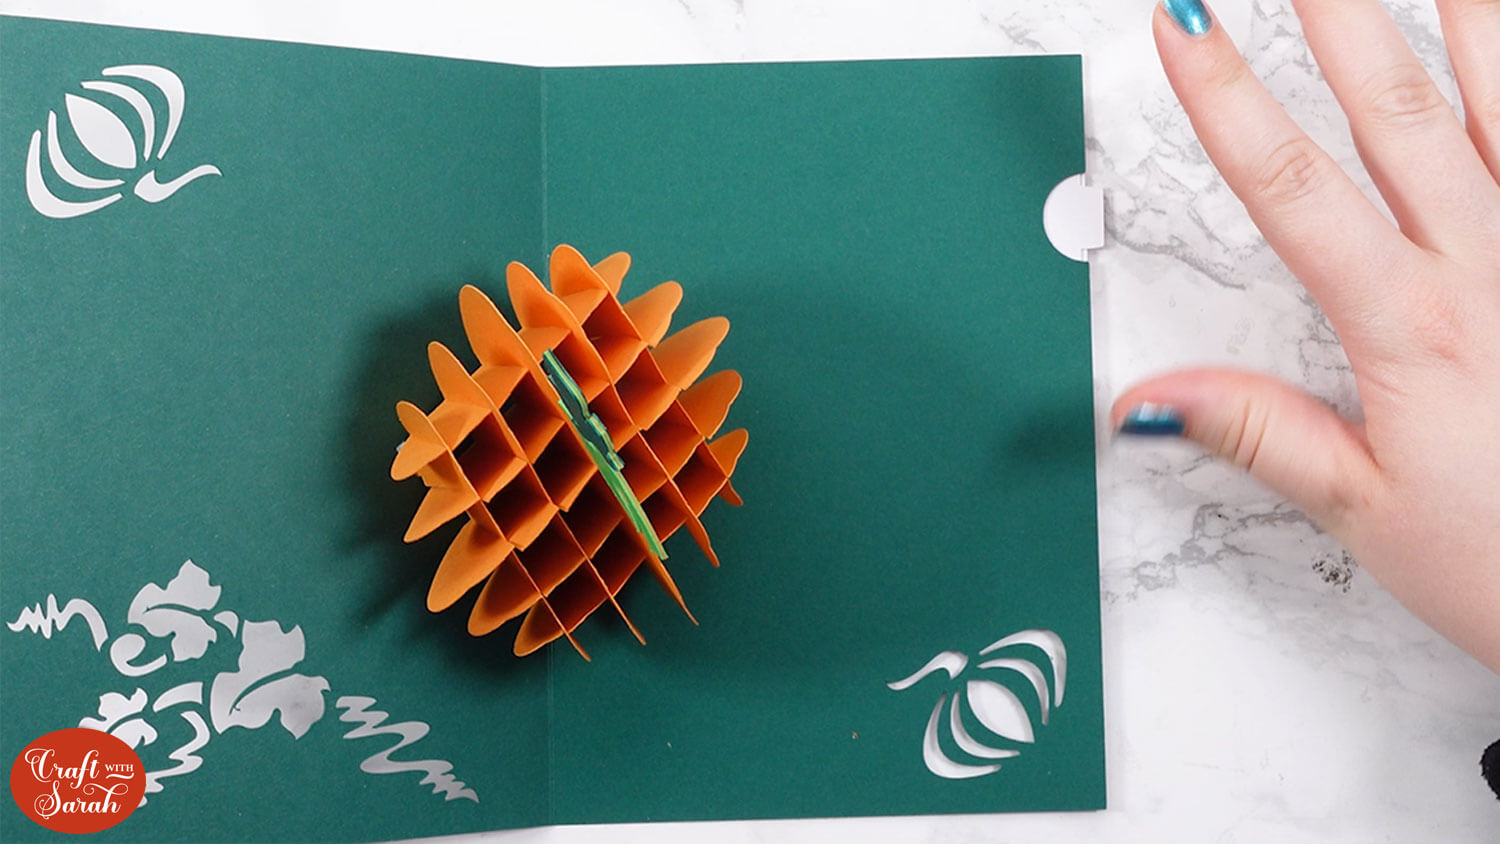
Allow it to dry and then check that the message panel pulls out.
Add glue to the back of the popout card, but only on one side.
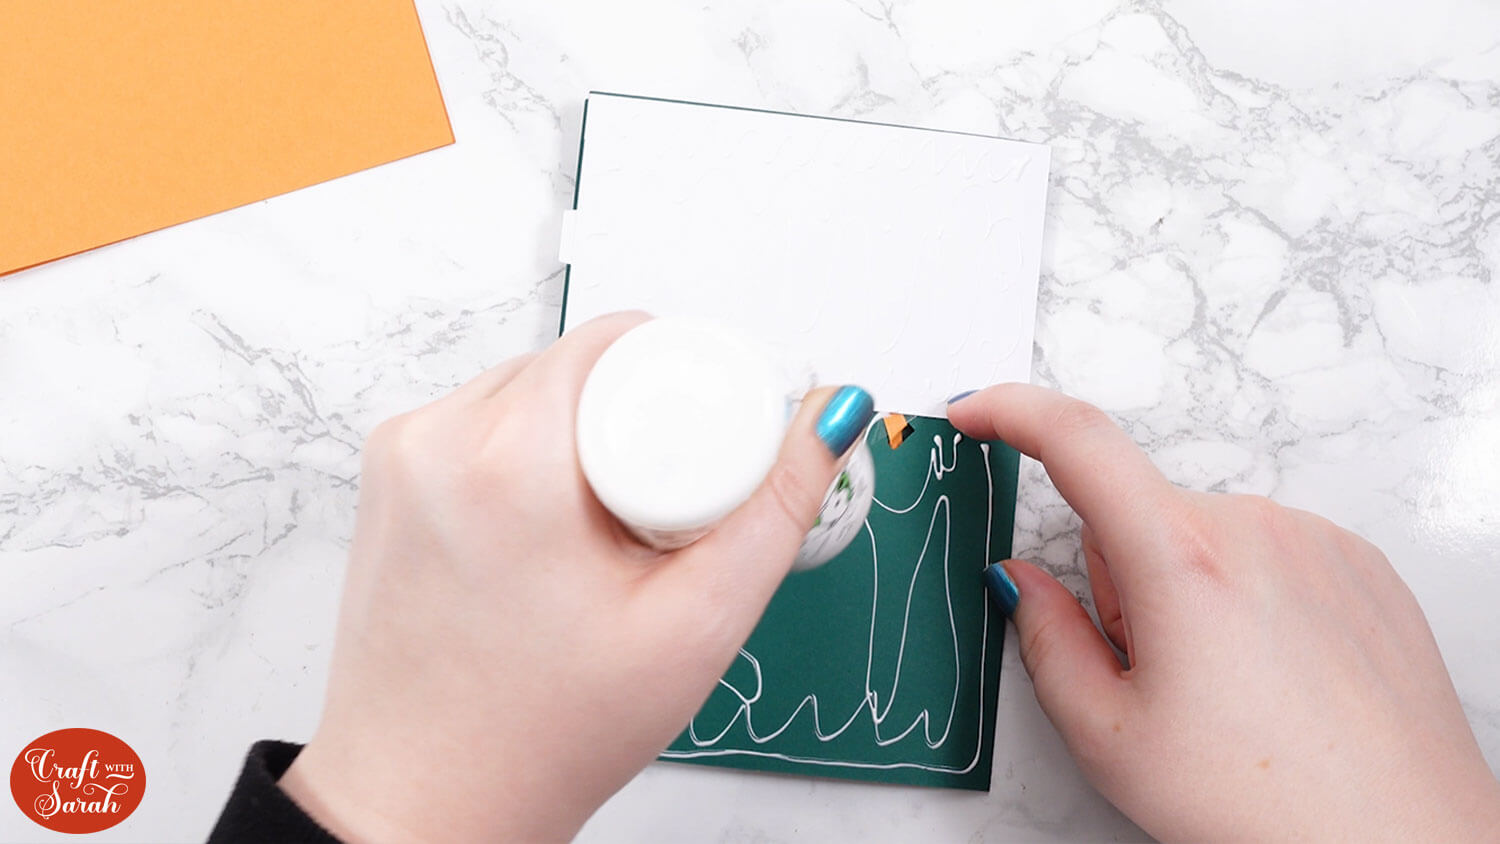
Place it inside the orange card and line it up along the score lines.
Make sure it is central.
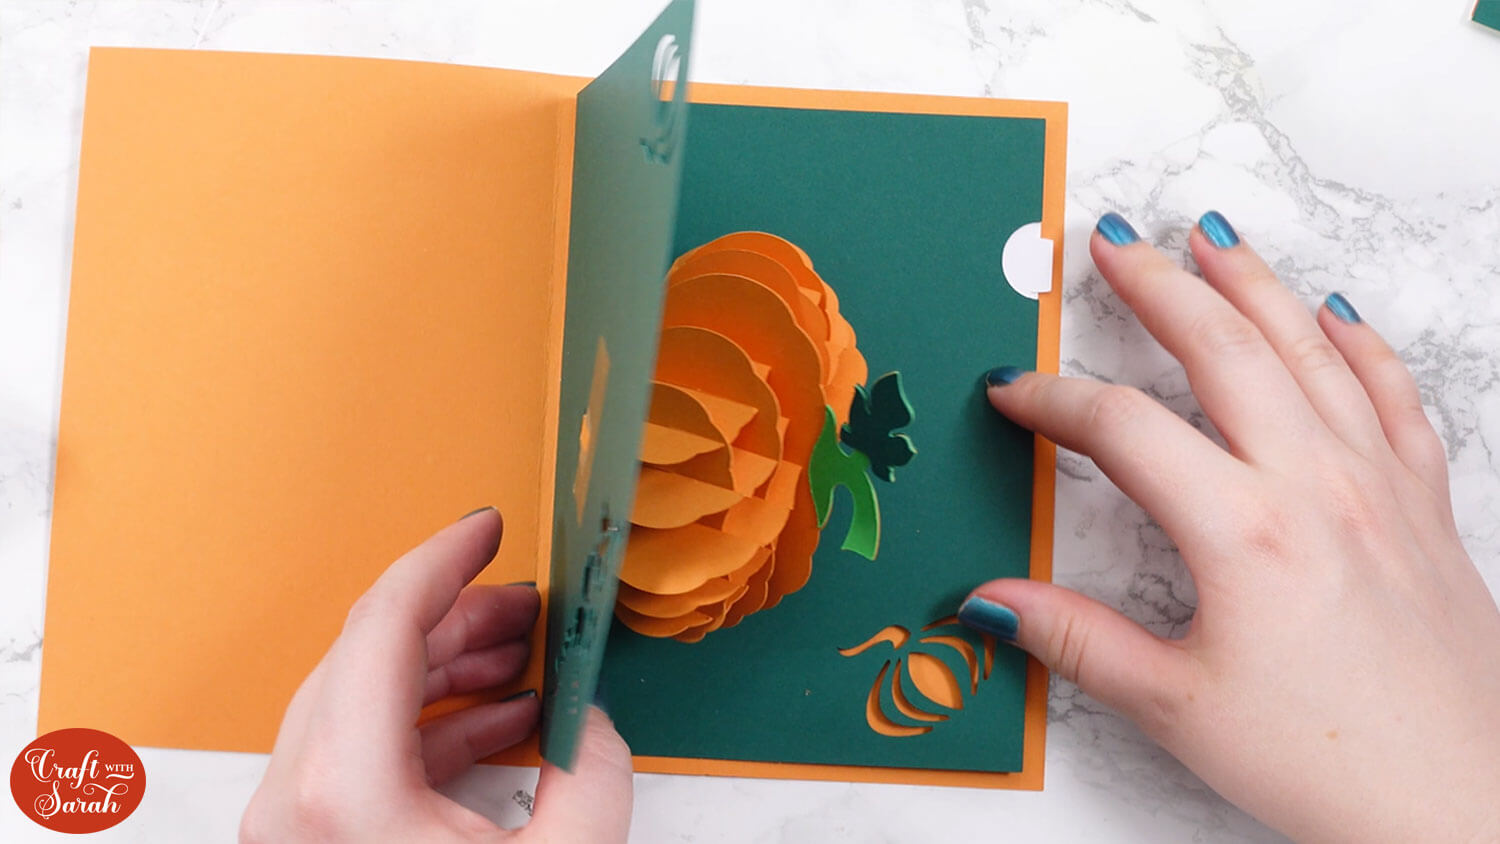
Close the card up and press it together so that the glue sticks.
Open the card up and add glue to the other side.
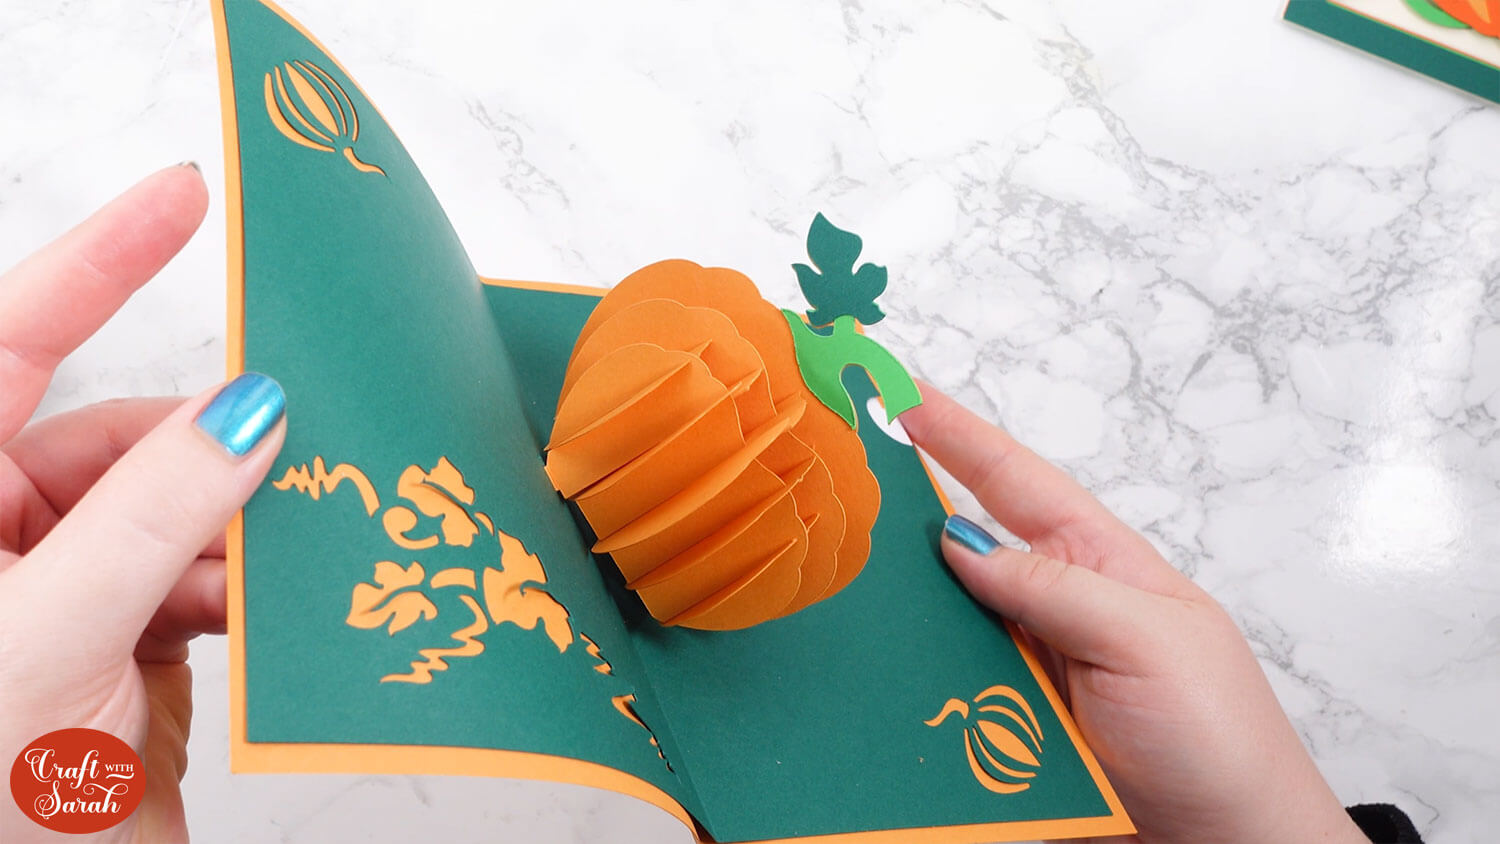
Close the card and press it all over to get the glue to stick, then open it up again before the glue dries so you can check the inside.
You should have an even amount of the orange colour showing all the way around the edge.
Add a generous amount of glue the back of the 5×7 inch card front and stick it to the front of your card.
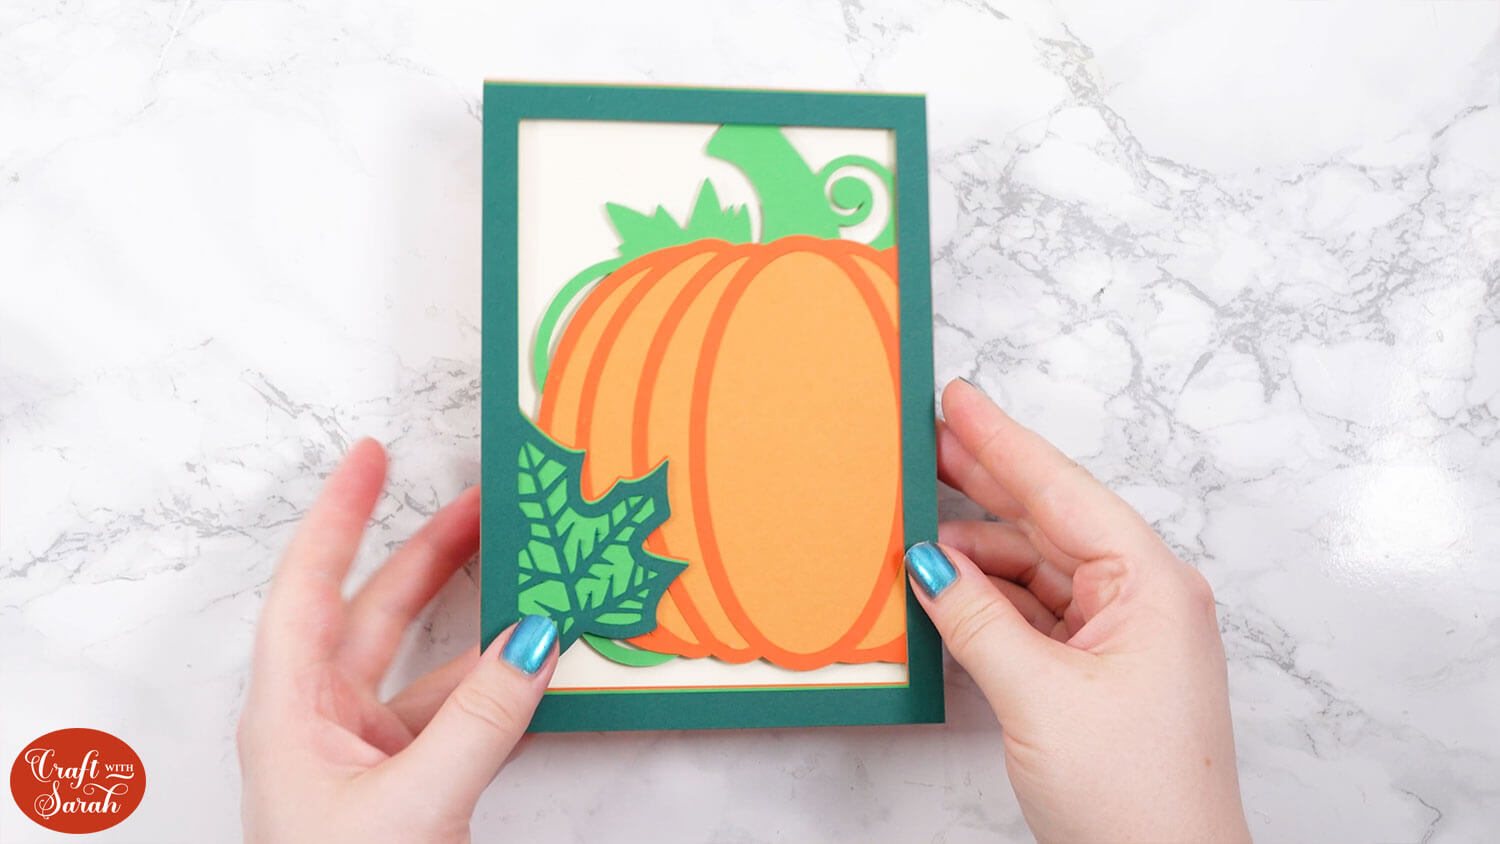
And there we have it! Your pumpkin popout card is finished!
Need an envelope? Here’s how to make a 5×7 inch envelope.
Popout pumpkin card for Fall
I hope you enjoy making this popout card. It’s so clever and the front is beautiful too.
I love how impressive this card is once it’s finished. It will be such a lovely surprise for whoever opens it up!
Love this pop up card and want MORE to add to your collection? Check out these other popout card cut files.
Happy crafting,
Sarah x

