HCC 2024 Day 17: Light-Up Potion Bottles
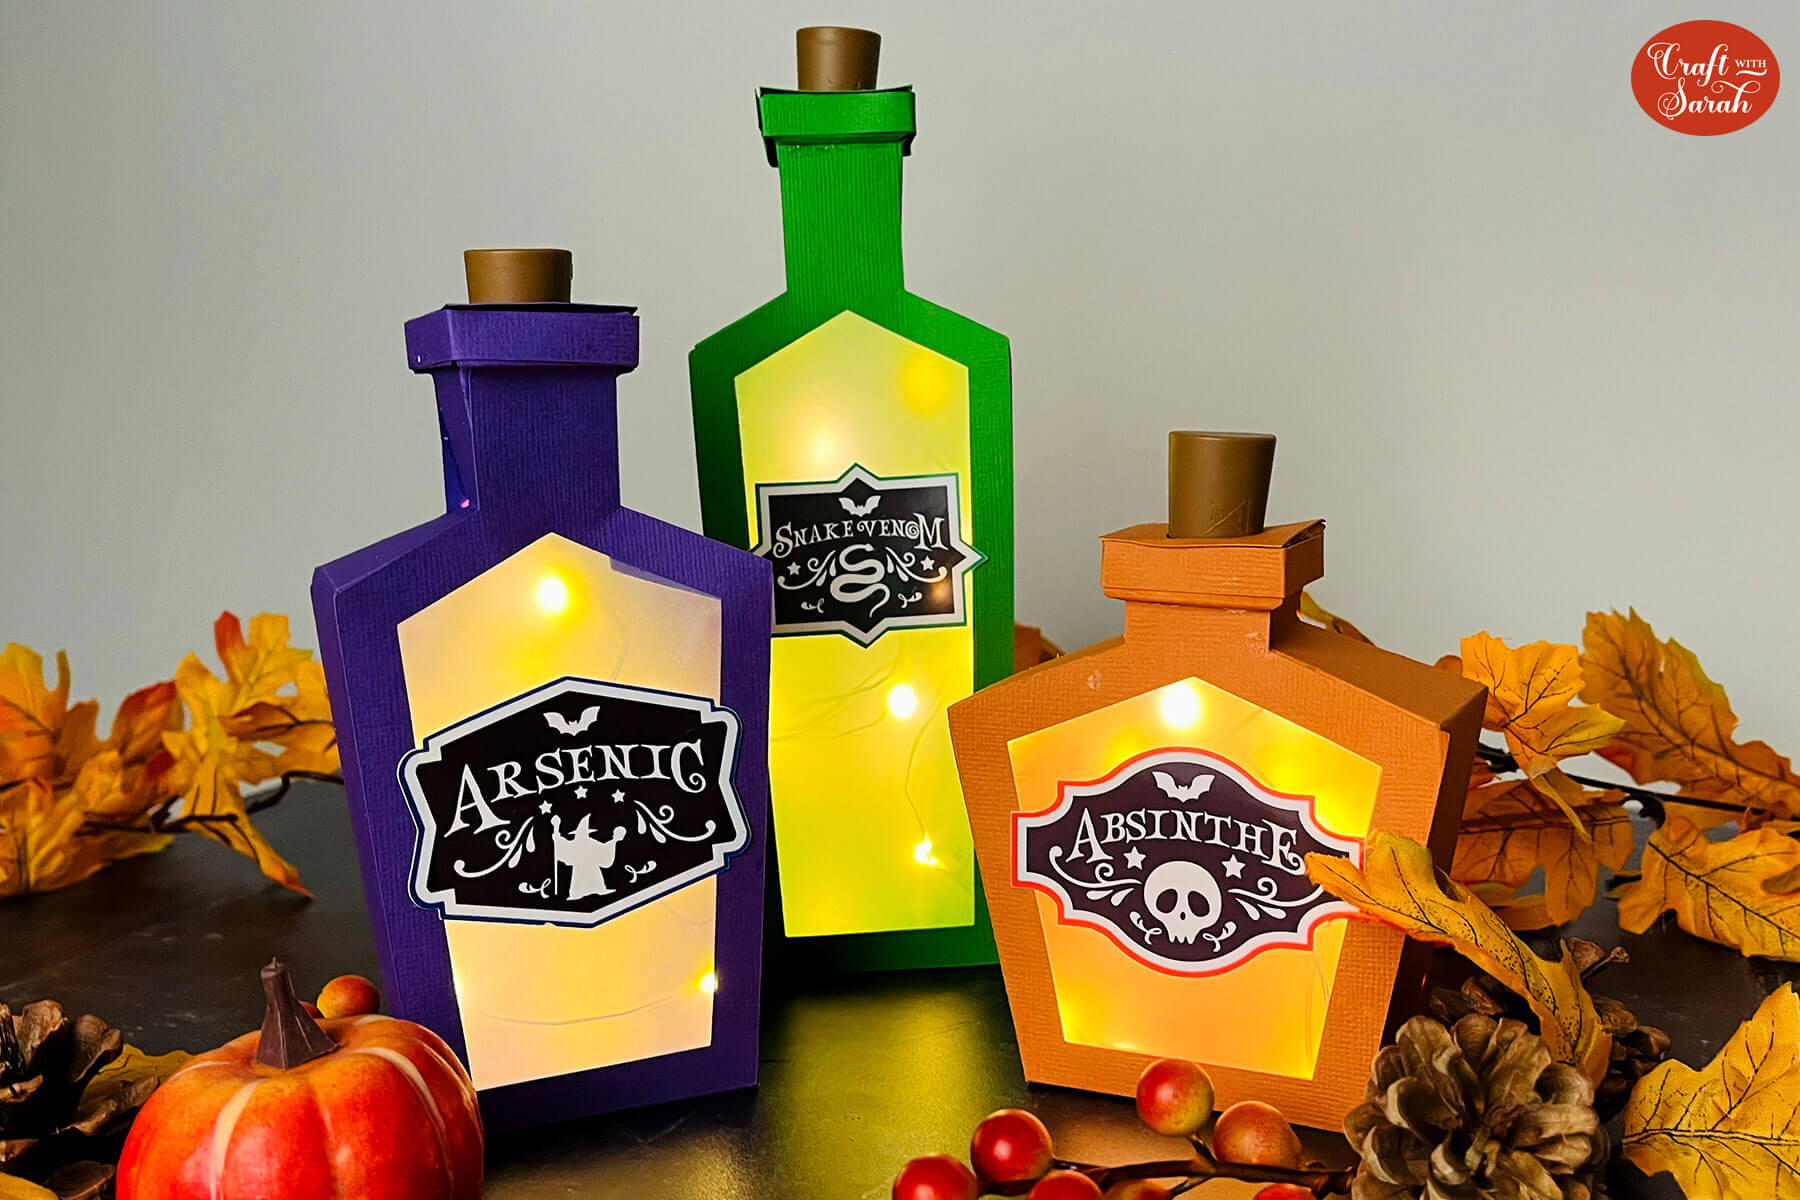
Welcome to day seventeen of the 2024 Halloween Craft Countdown, where I’ve been sharing 20 spooky themed Cricut papercraft projects over the last 20 days.
In this Halloween craft tutorial, I’ll guide you through making 3D potion bottles from cardstock that light up!
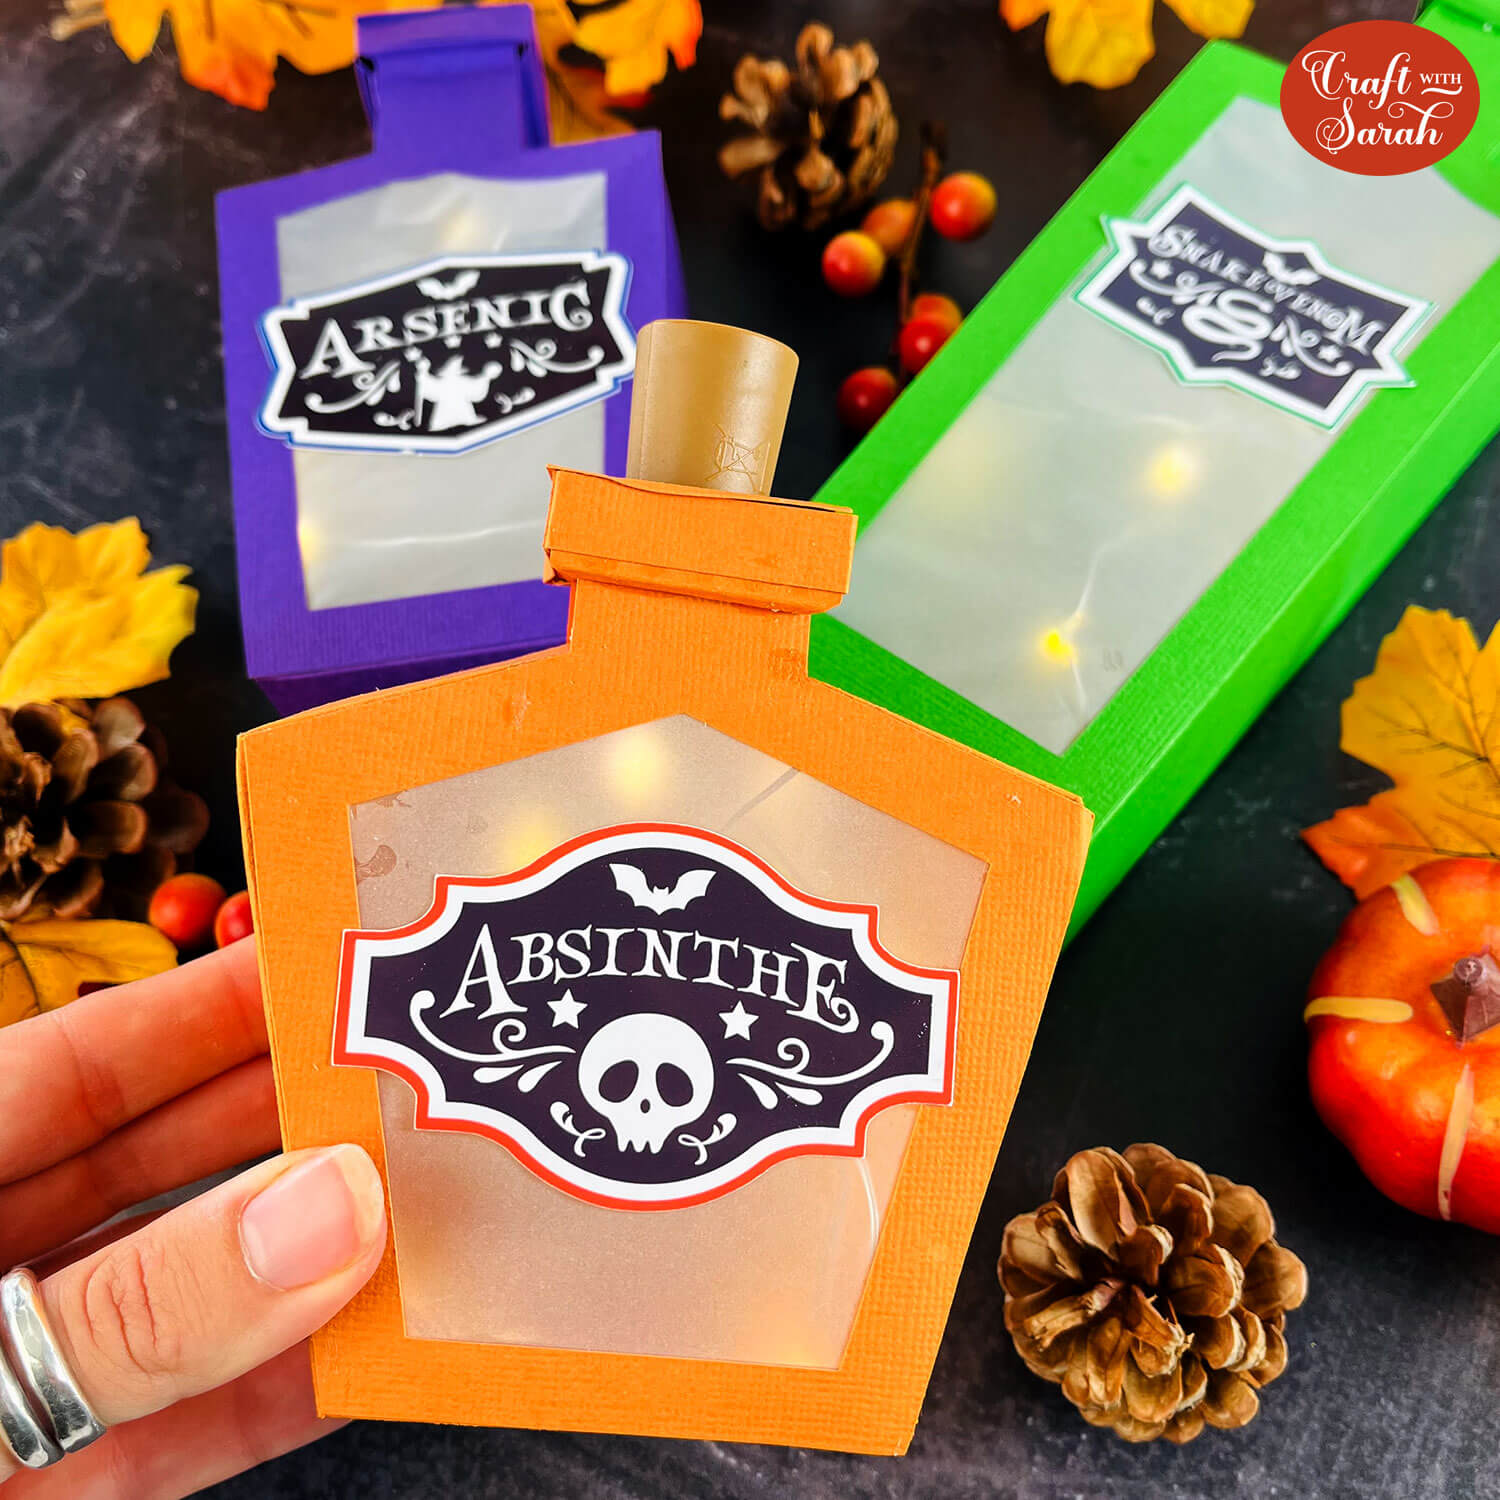
These spooky bottles come in three different shapes, perfect for adding a magical touch to your Halloween décor.
We’ll use Cricut’s print then cut function to create five decorative labels that bring each bottle to life.
If you prefer a simpler look, each template also includes a version with the windows filled in so you can skip the lights.
Plus, I’ve included papercraft corks to complete the look.
Ready to brew up some Halloween magic? Let’s get started!
This Project was part of the Halloween Craft Countdown 2024
Materials supply list
Here is a list of the materials that I used to make this project.
Please note that some of the links included in this article are affiliate links, which means that if you click through and make a purchase I may receive a commission (at no additional cost to you). You can read my full disclosure at the bottom of the page.
- Cricut machine
- Light blue Cricut cutting mat
- Cricut scoring wheel or Cricut scoring stylus
- Coloured card
- Bearly Art Glue, Collall All Purpose glue or similar
- Double-sided tape (if not using glue)
- Translucent material such as vellum or tracing paper
- Bottle top fairy lights
- Colour printer (if printing the labels)
- Glossy photo paper or similar (if printing the labels)
This project is suitable for the following types of Cricut machine: Explore Air 2, Explore Air 3, Maker, Maker 3, Venture and Joy Xtra. It CAN be cut with the Cricut Joy (blue machine) BUT you may need to make the bottles smaller.
Foundation learning
If you're new to crafting with your Cricut, you may find the below links helpful.
They teach some of the skills mentioned throughout this tutorial.
- How to upload SVG files into Design Space
- How to make 3D layered Cricut projects
- The BEST way to frame papercraft projects
- How to mount multiple designs in the same frame with magic guides
- How to score with a Cricut (even without scoring tools)
- Print then cut tutorial
- Design Space tools (Combine, Attach, Slice, Weld, Flatten, etc.)
- Pattern fill tutorial (for making backgrounds & cutting images to a specific shape/size)
- Free envelope SVGs that can be sized to fit any card
- How to write inside cards with Cricut pens
- How to cut layered designs at a small size
- Design Space tips & tricks
- Cricut pens tutorial
Video tutorial
Watch the video below to see how to make this project. Keep scrolling for a written tutorial.
Written tutorial (with photos!)
Here’s how to make 3D potion bottles using a Cricut machine!
Step 1) Download the cutting file(s) & unzip the downloaded folder
Download the files using the box below.
Purchase the File(s)
This cut file is available as part of the Instant Access Bundle.
Or, purchase this design individually here
Before you upload the SVGs to Design Space, you need to unzip the download folder that they come in.
- How to unzip a folder on Windows computer
- How to unzip a folder on a Mac
- How to unzip a folder on an iPad/iPhone
- How to unzip a folder on an Android device
After unzipping, upload the SVG files into Cricut Design Space. These are the files that start svg- in the filename.
Not sure how to do this? Here’s how to upload SVGs to Cricut Design Space. Make sure you upload the file which starts svg- in the filename!
There are three different potion bottle shapes included: large, medium and small.
Each potion bottle comes with two versions: one with a window to show fairy lights through and one with the sides “filled in” for if you don’t want to light them up.
I’ll show you how to make the largest bottle for this tutorial, but the steps are the same for all three bottle shapes.

Step 2) Add the print then cut labels
The bottles come with some optional labels to add extra detail to the front and back.
You can skip this step if you’d prefer not to add them.
Please note that the Cricut Joy cannot do the print then cut feature, so you would probably need to print them in a separate program and hand-cut them if you have that type of machine.
To add a label to your project, click “Upload” in the left menu and then “Upload Image”.
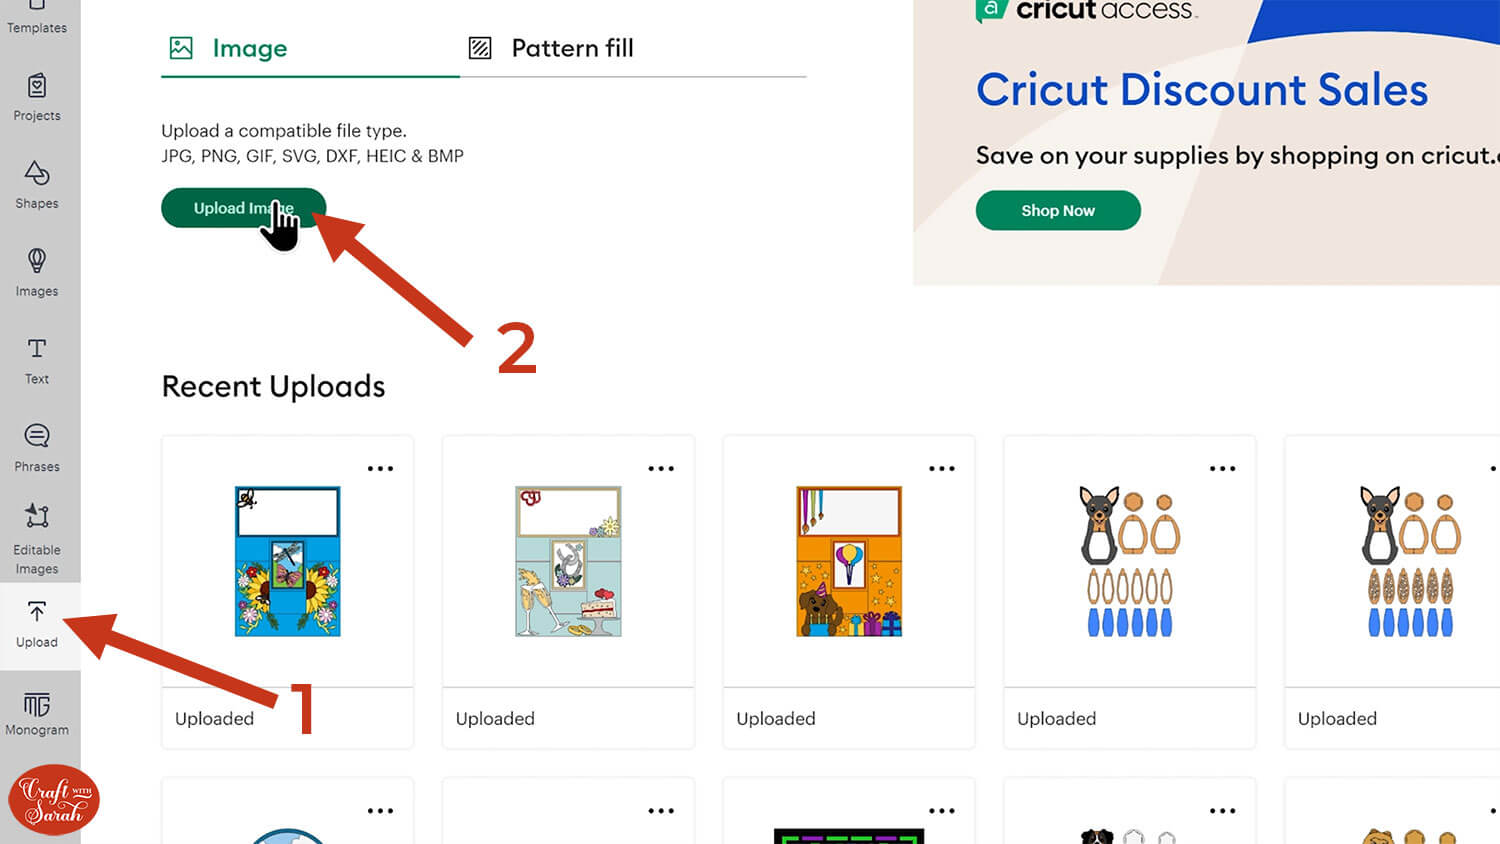
Choose one of the printable labels from the unzipped version of your download folder. Don’t worry if the label looks blurry – it will be fine once it’s added onto your project.
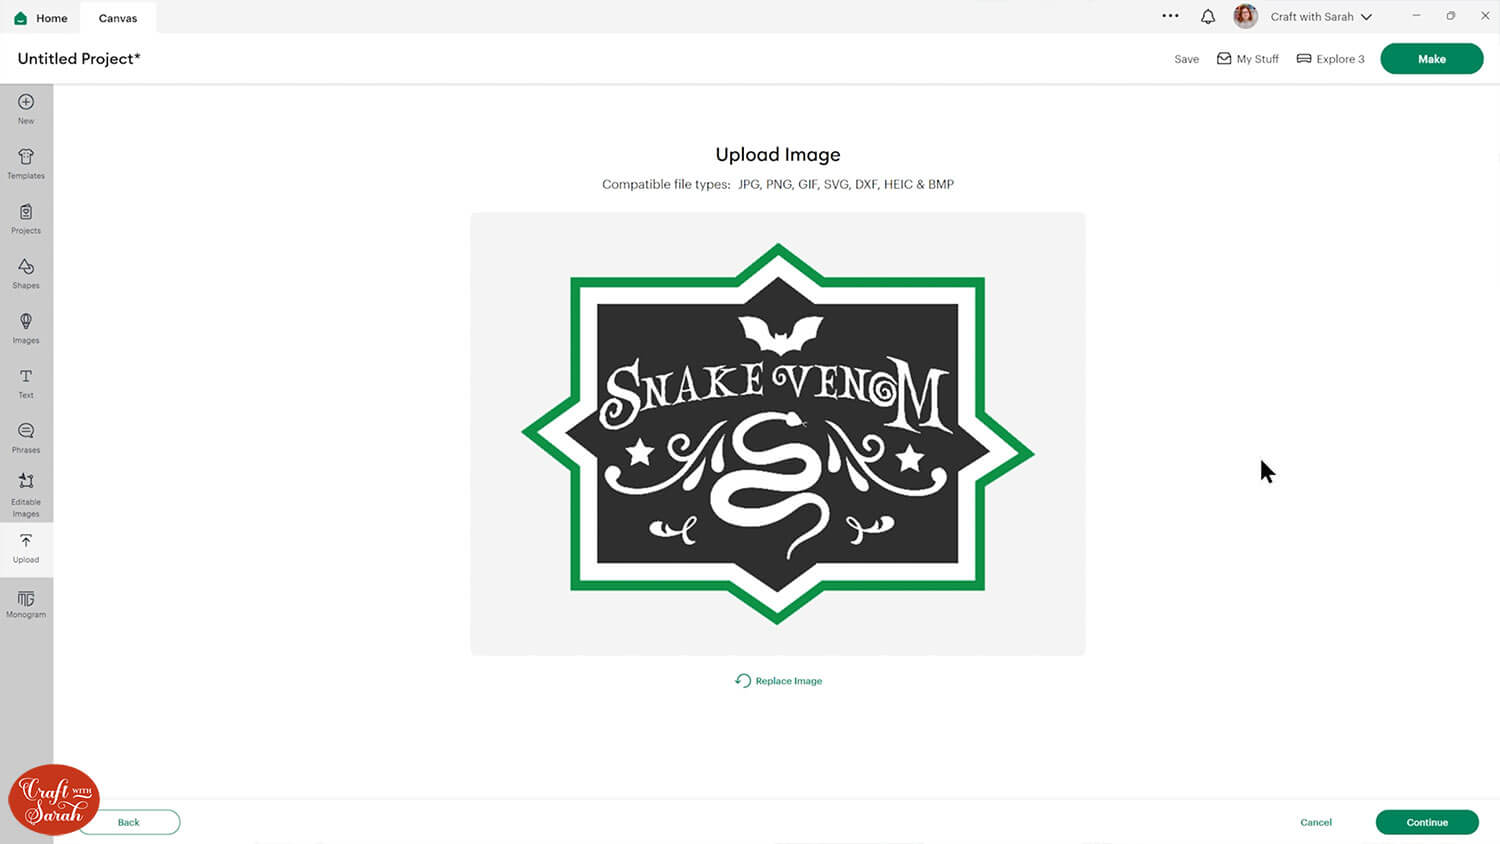
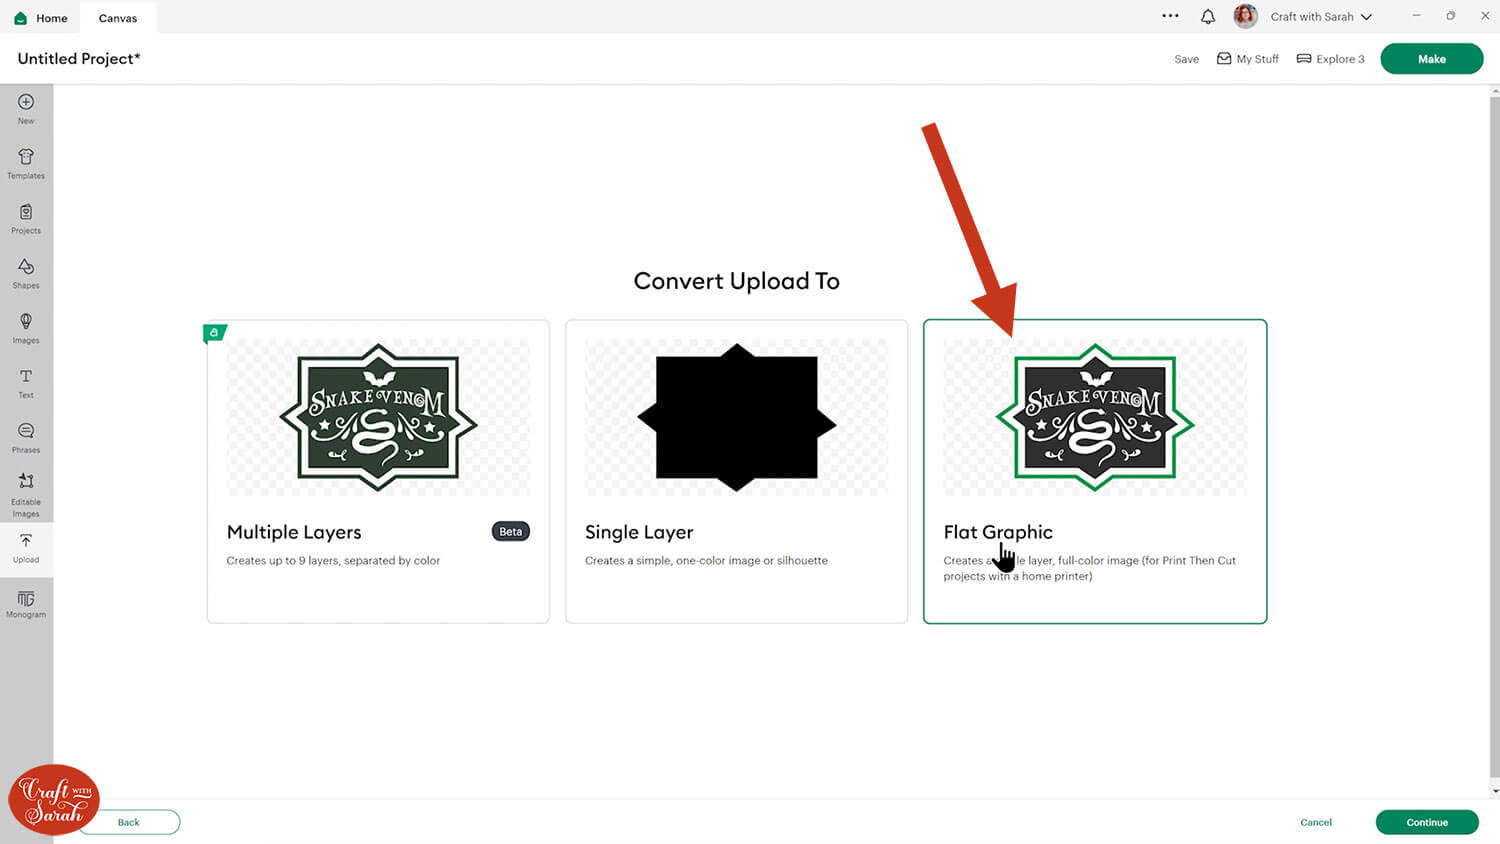
Choose the third option in the last that says “Flat Graphic”.
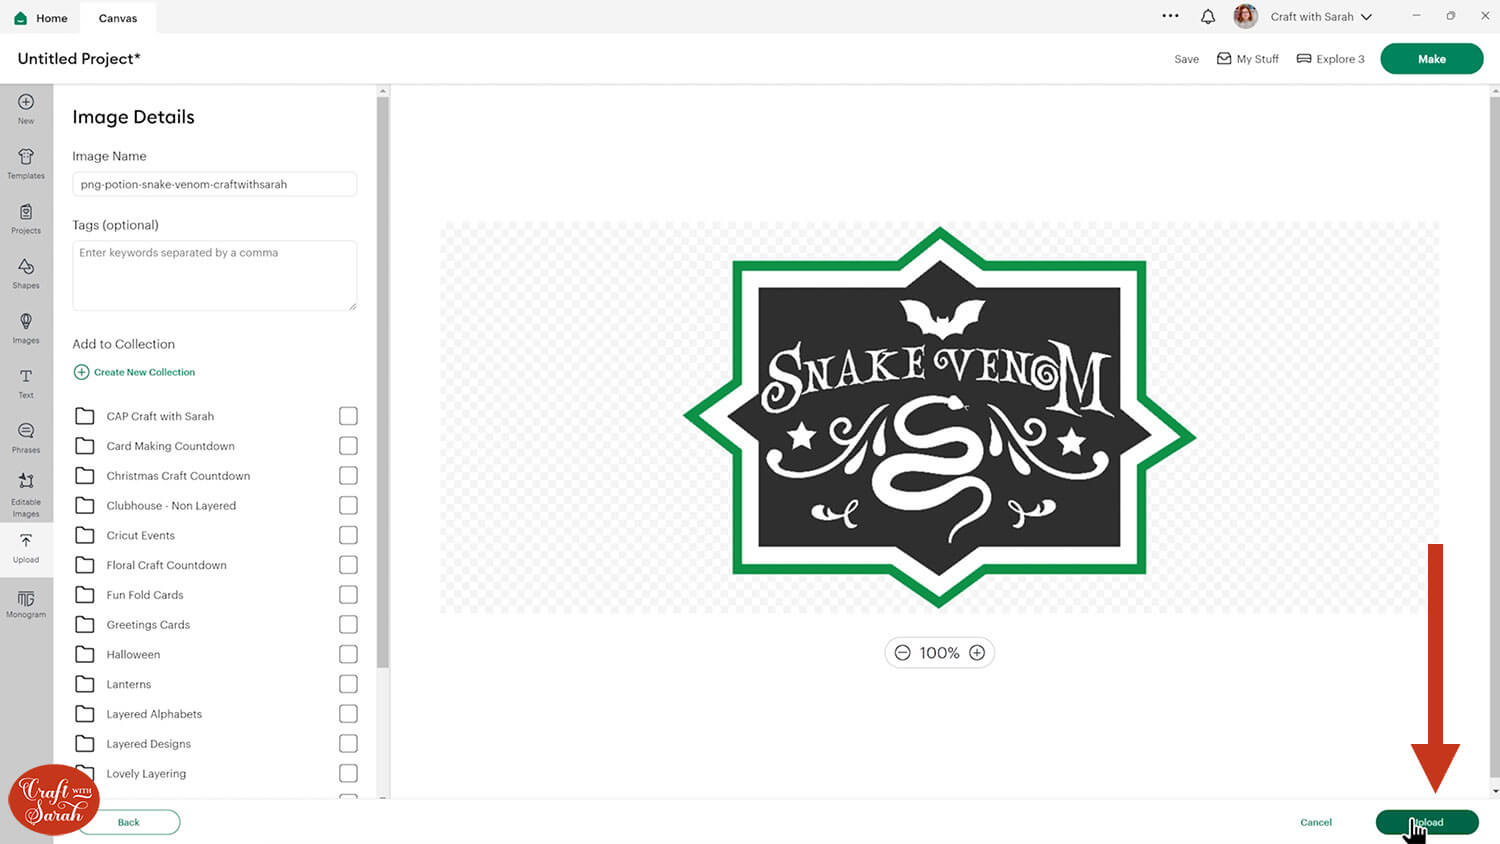
Click “Upload” on the next screen.
The label will be added onto your project. It will probably load it REALLY big.

Resize it smaller so that it fits on your potion bottle.
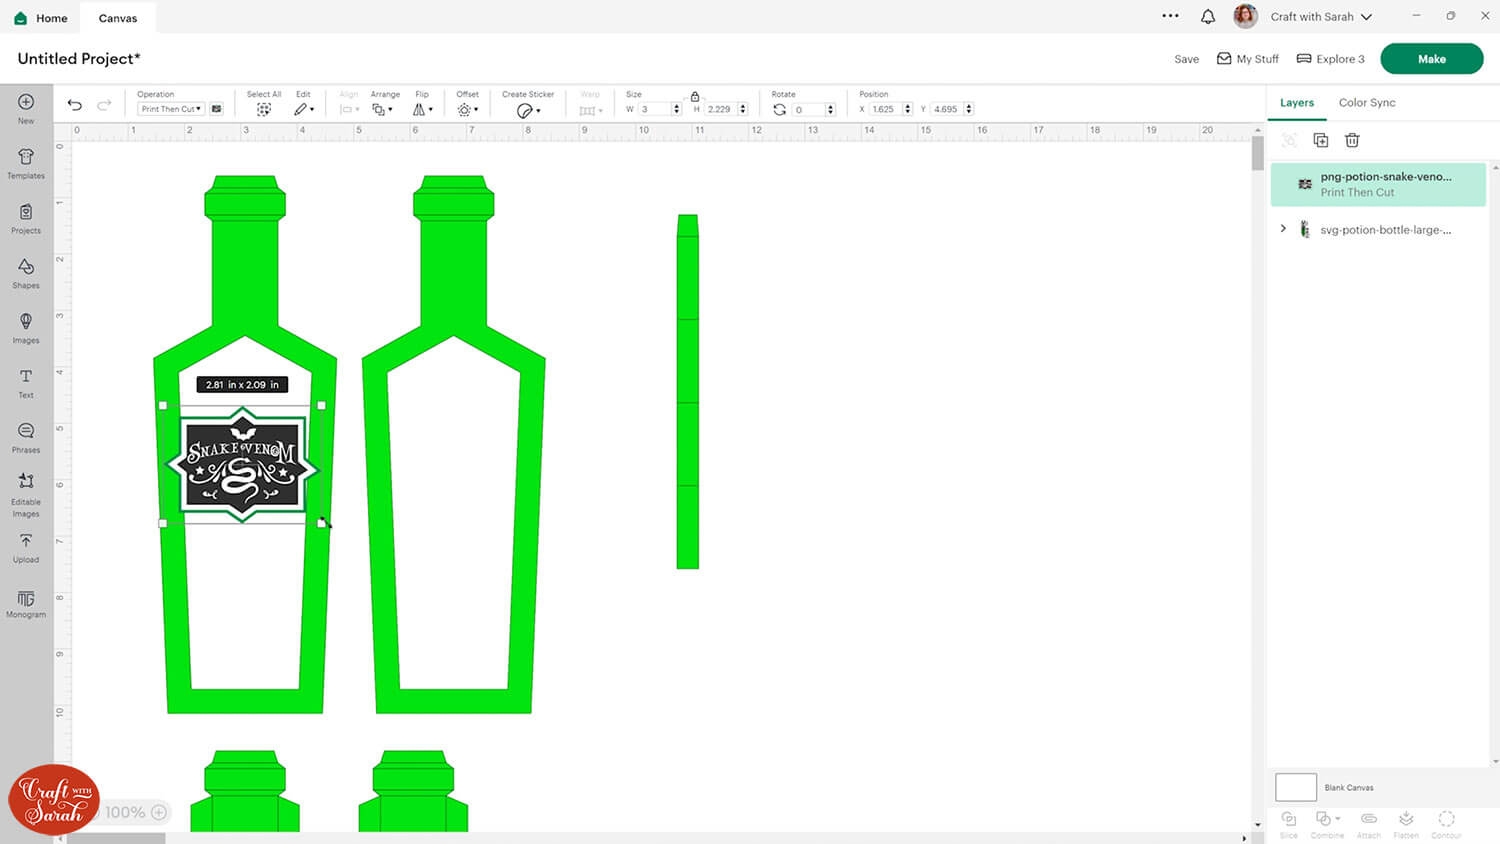
Click the label and press the “Duplicate” button at the top of the layers panel to make a copy. This means you can add one to the front of your bottle and one to the back.
Move them out of the way of the bottle.
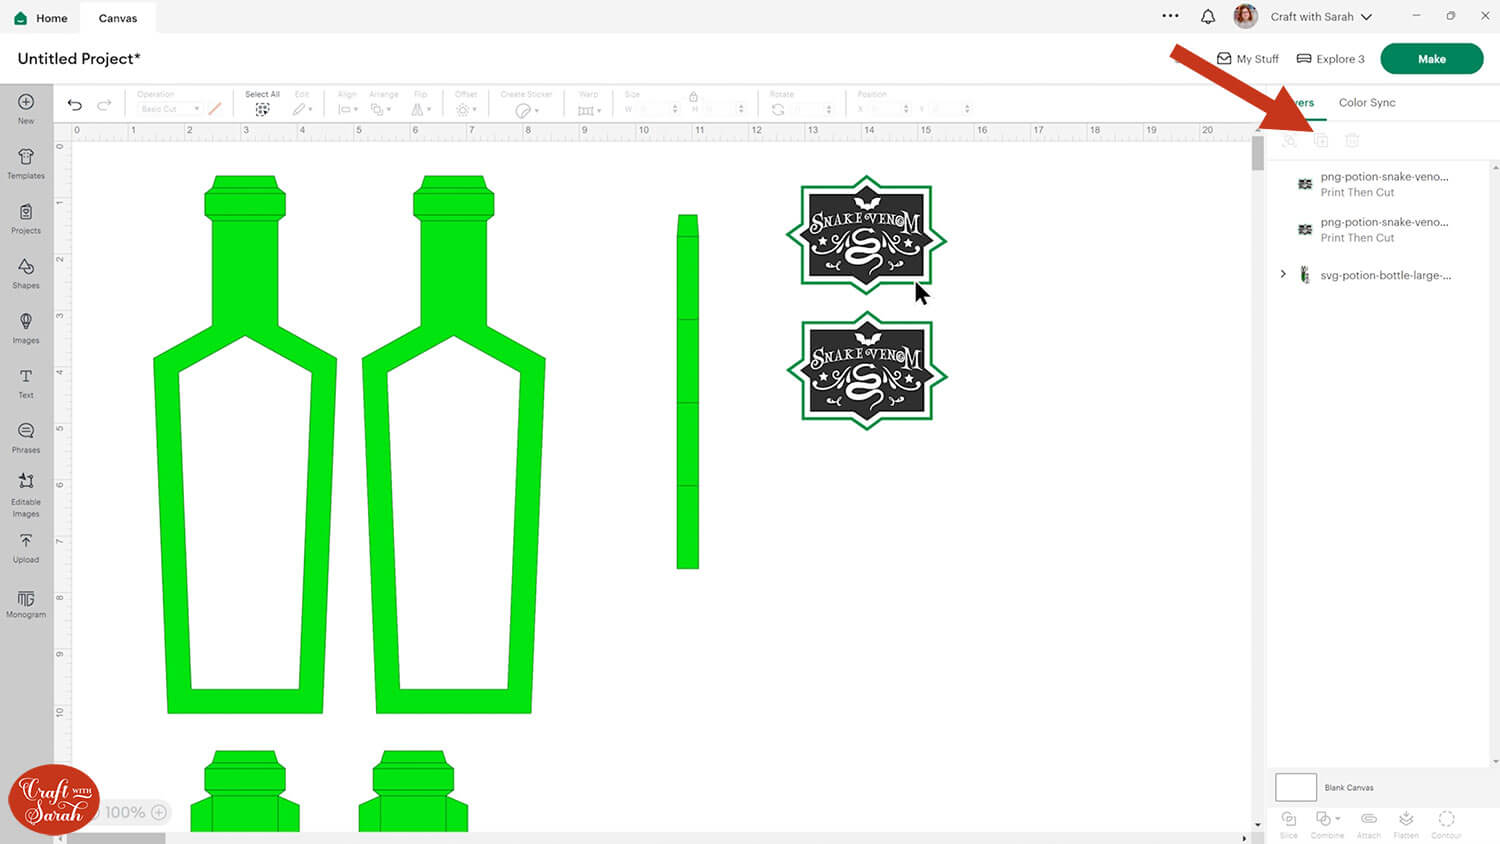
Step 3) Format the score lines on the bottle
These bottle templates have lots of score lines on them. Even if you do not have a scoring tool or stylus, I highly recommend that you score the lines. I detail several different ways you can do this with any type of Cricut machine, even without a scoring tool, in this Cricut scoring guide.
First, click the whole design and then press the Ungroup button at the top of the layers panel to separate out all those layers.
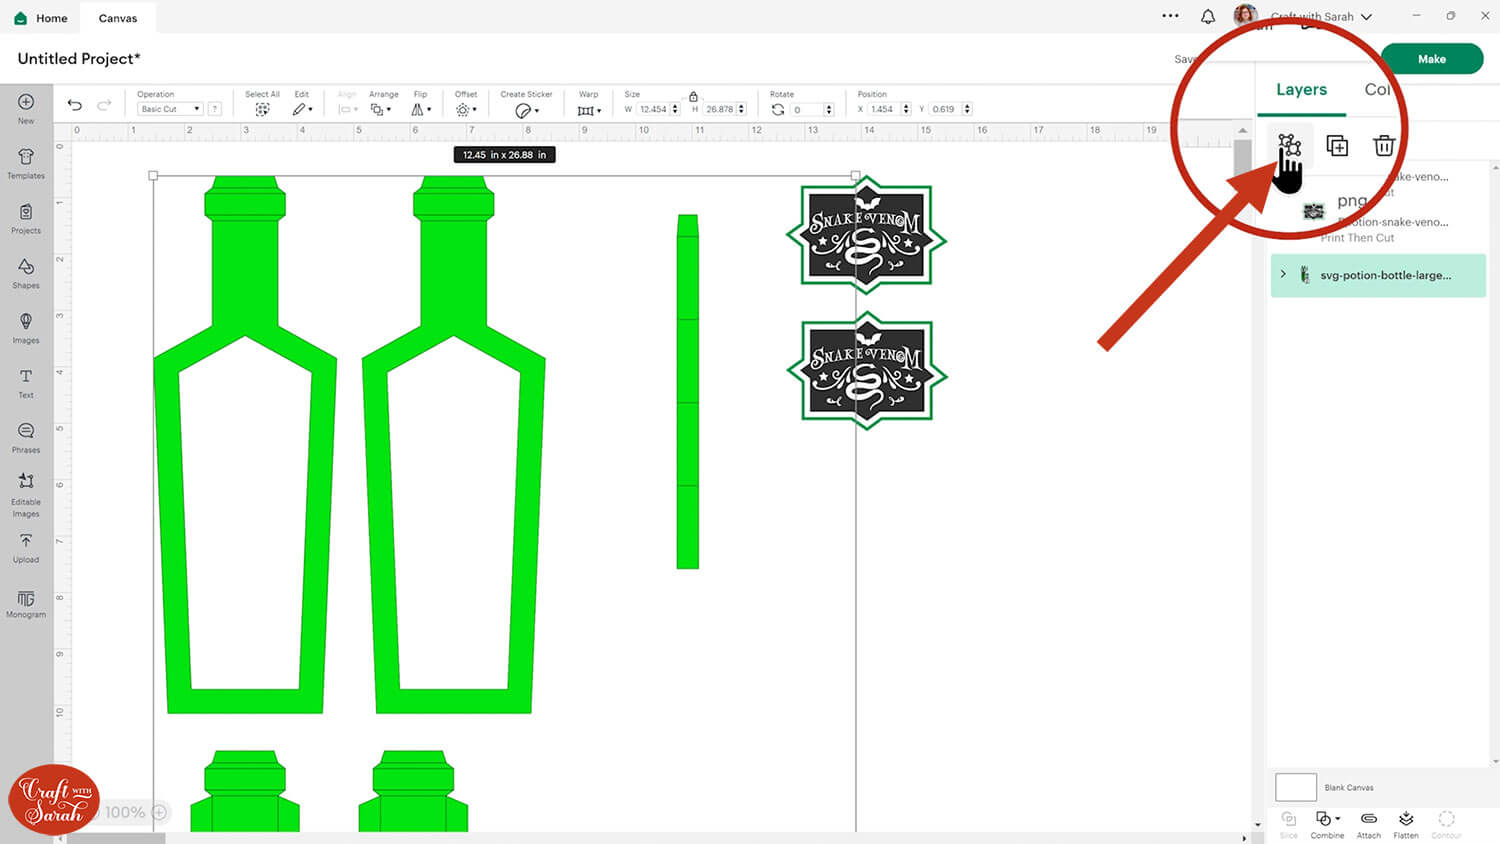
The three brown pieces are to make a papercraft cork to go in the top of the bottle. If you’re using fairy lights that have the battery contained in a cork shape (like the ones in my photos) then you can delete these three pieces.
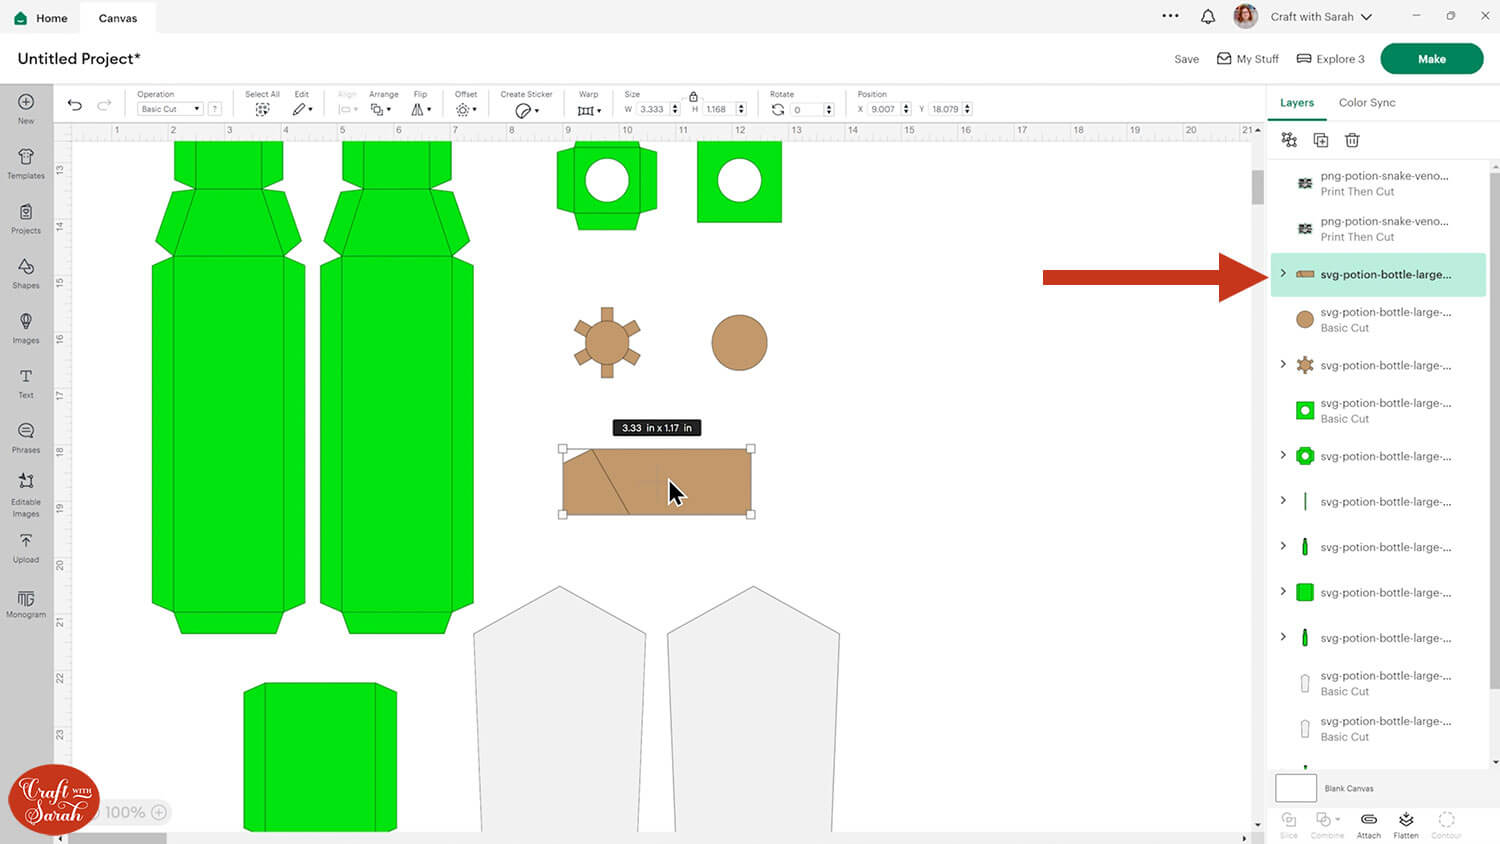
If you’re keeping them, click the arrow next to the brown piece that looks like a circle with tabs on it.
Click the layer that looks like dashed lines in the shape of a circle.
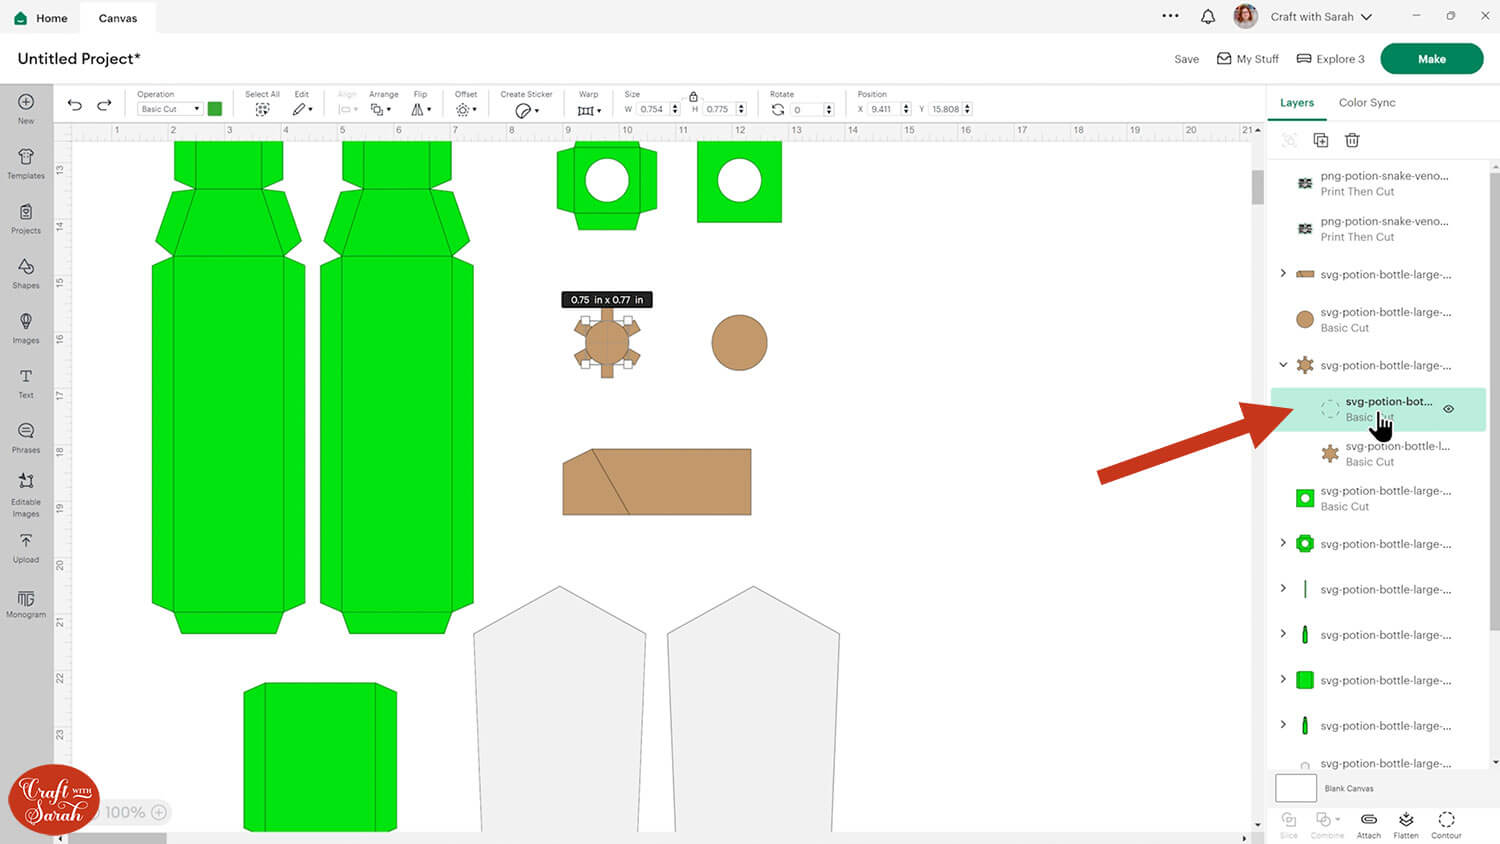
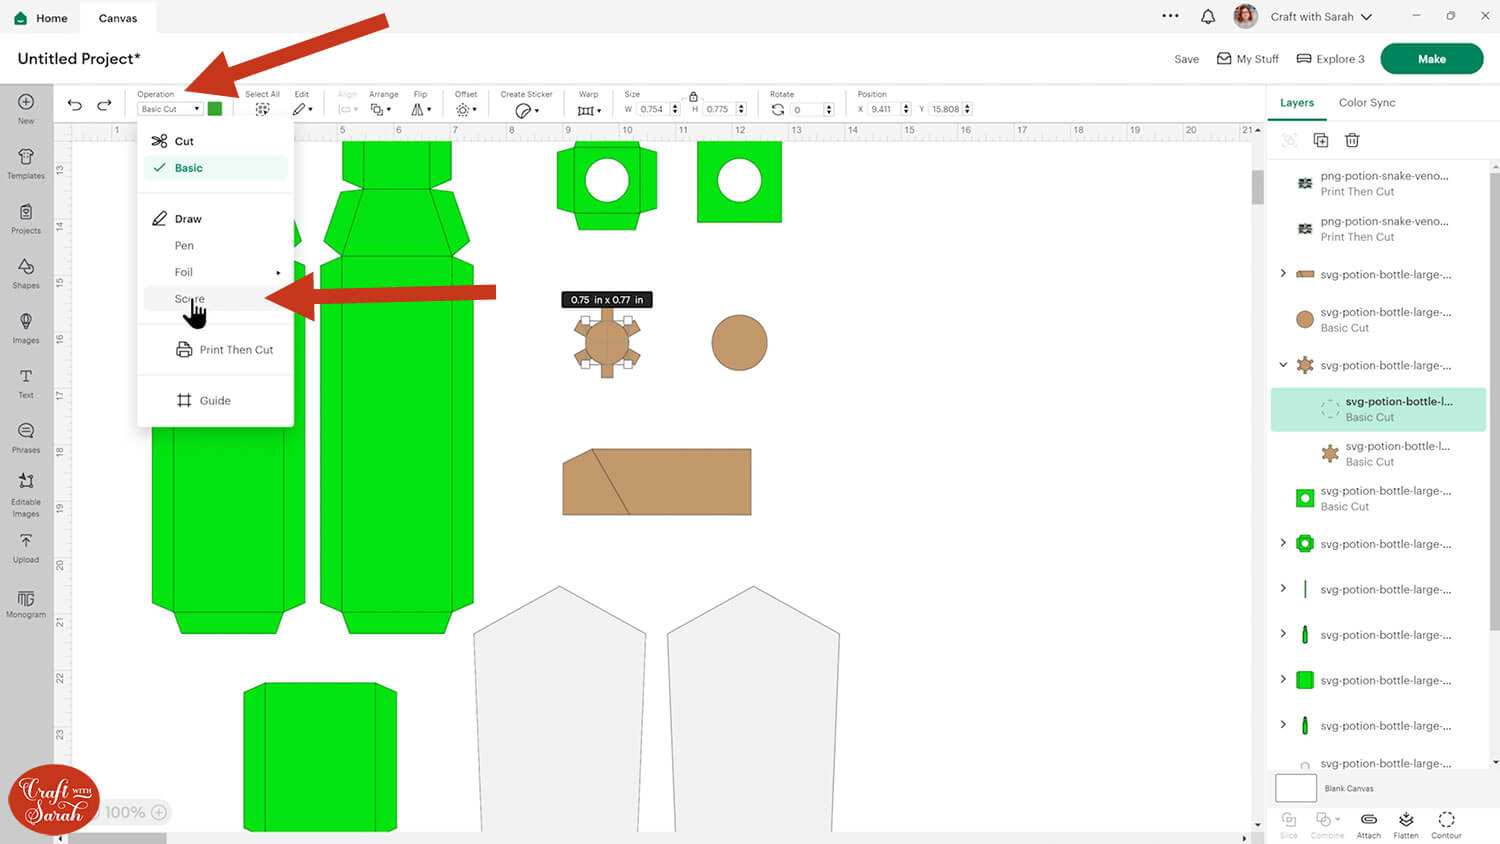
Change it to “Score” using the “Operations” dropdown.
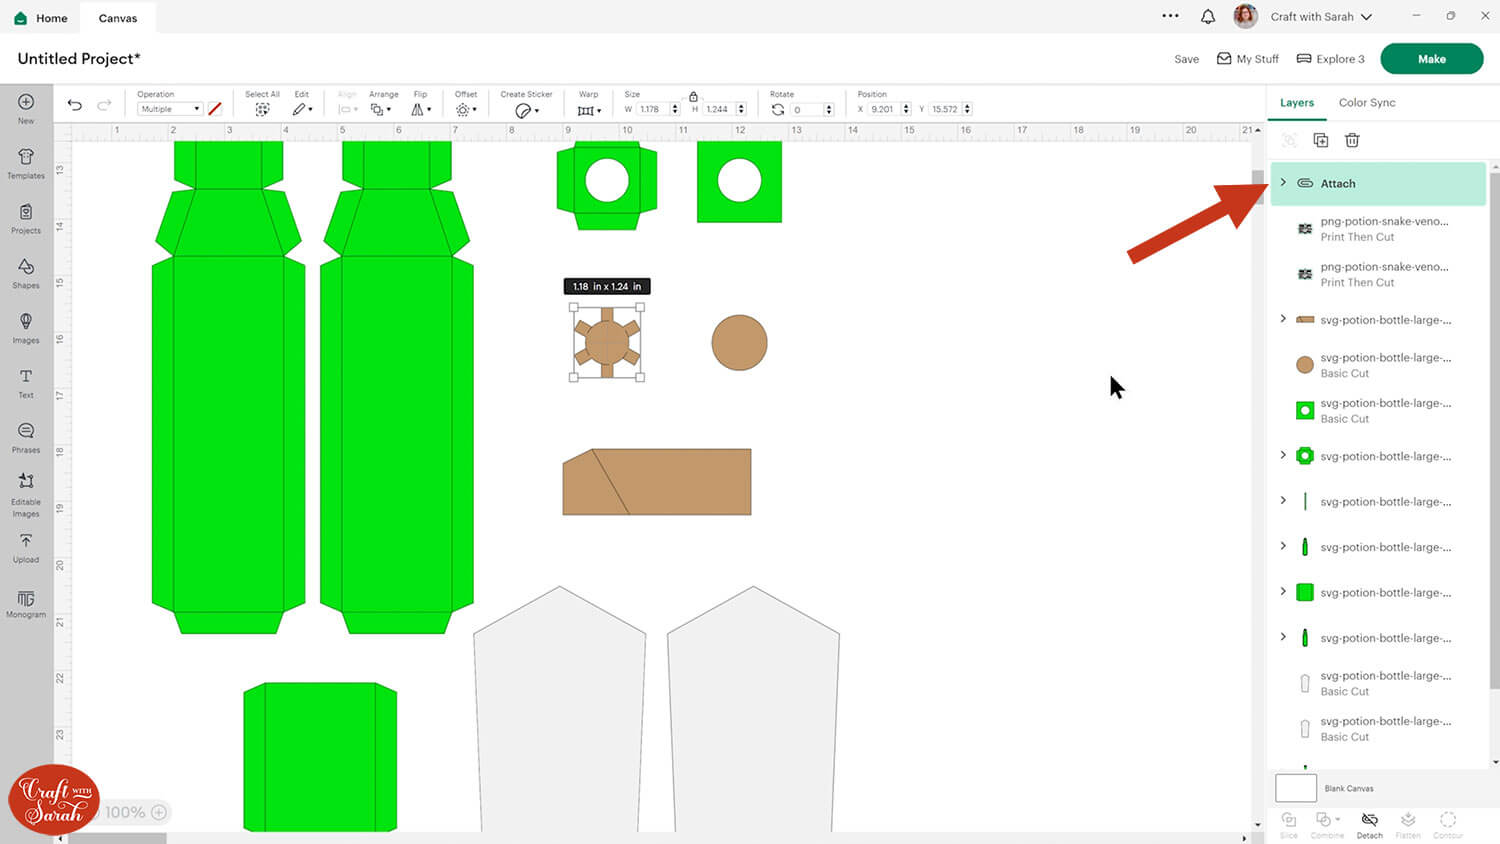
Click the mini-group that contains the layer you just changed to Score and the solid brown piece underneath and press “Attach”.
Attach is what tells the Cricut where to do the scoring.
Repeat these steps for all of the “mini-groups” in the layers panel – i.e. any layer that has an arrow next to it that can be opened up to show two layers inside.
The “single line” layer inside all of those mini-group should be changed to Score and then Attached.
Save your project when you are done.
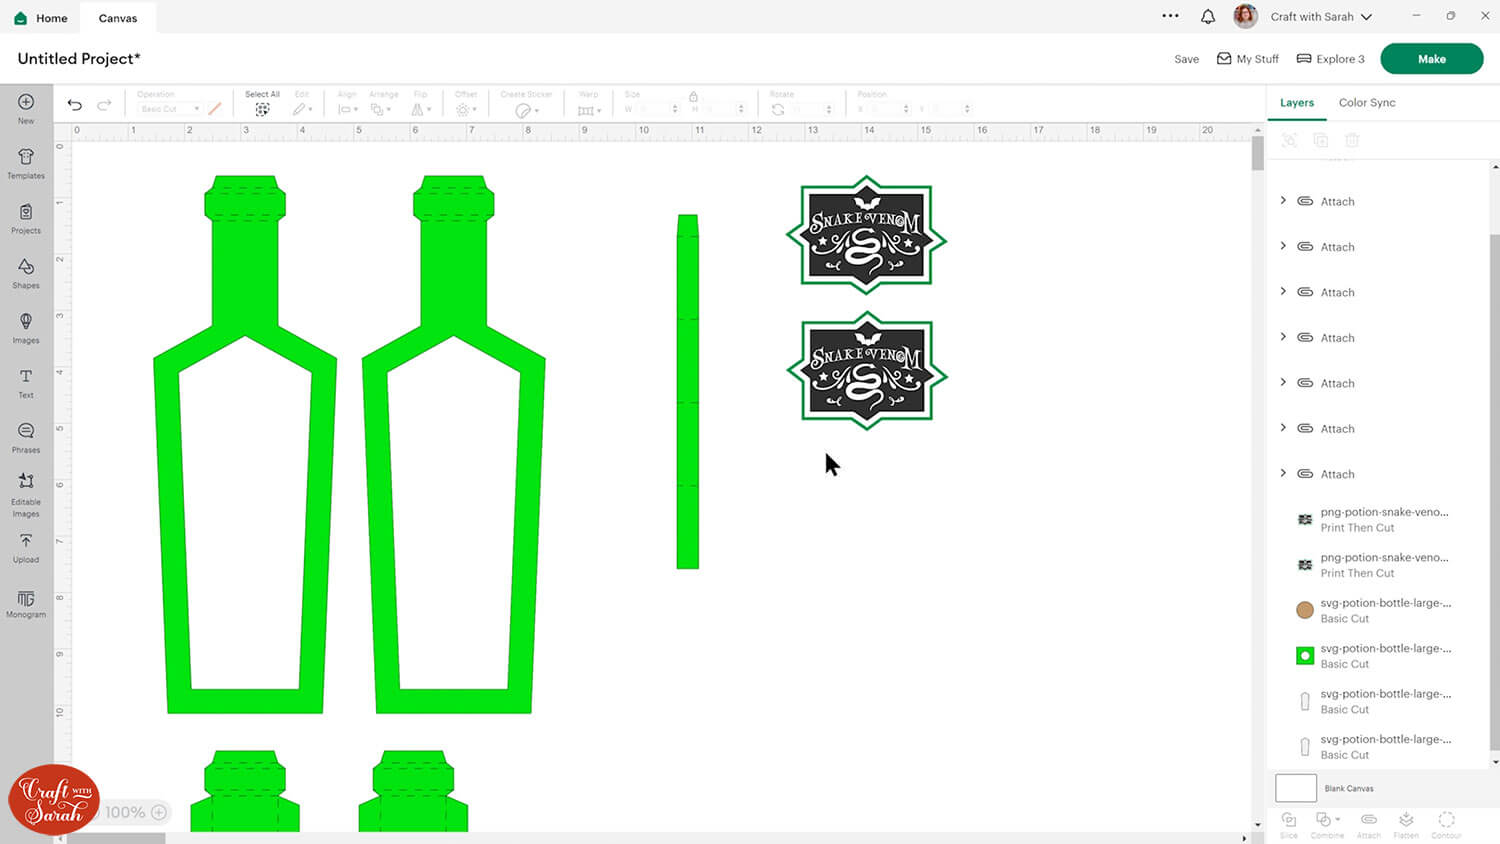
Step 4) Cut the project from cardstock and vellum
When you’re happy with how everything is looking, click “Make” and follow the on-screen instructions to get everything cut out from your cardstock.
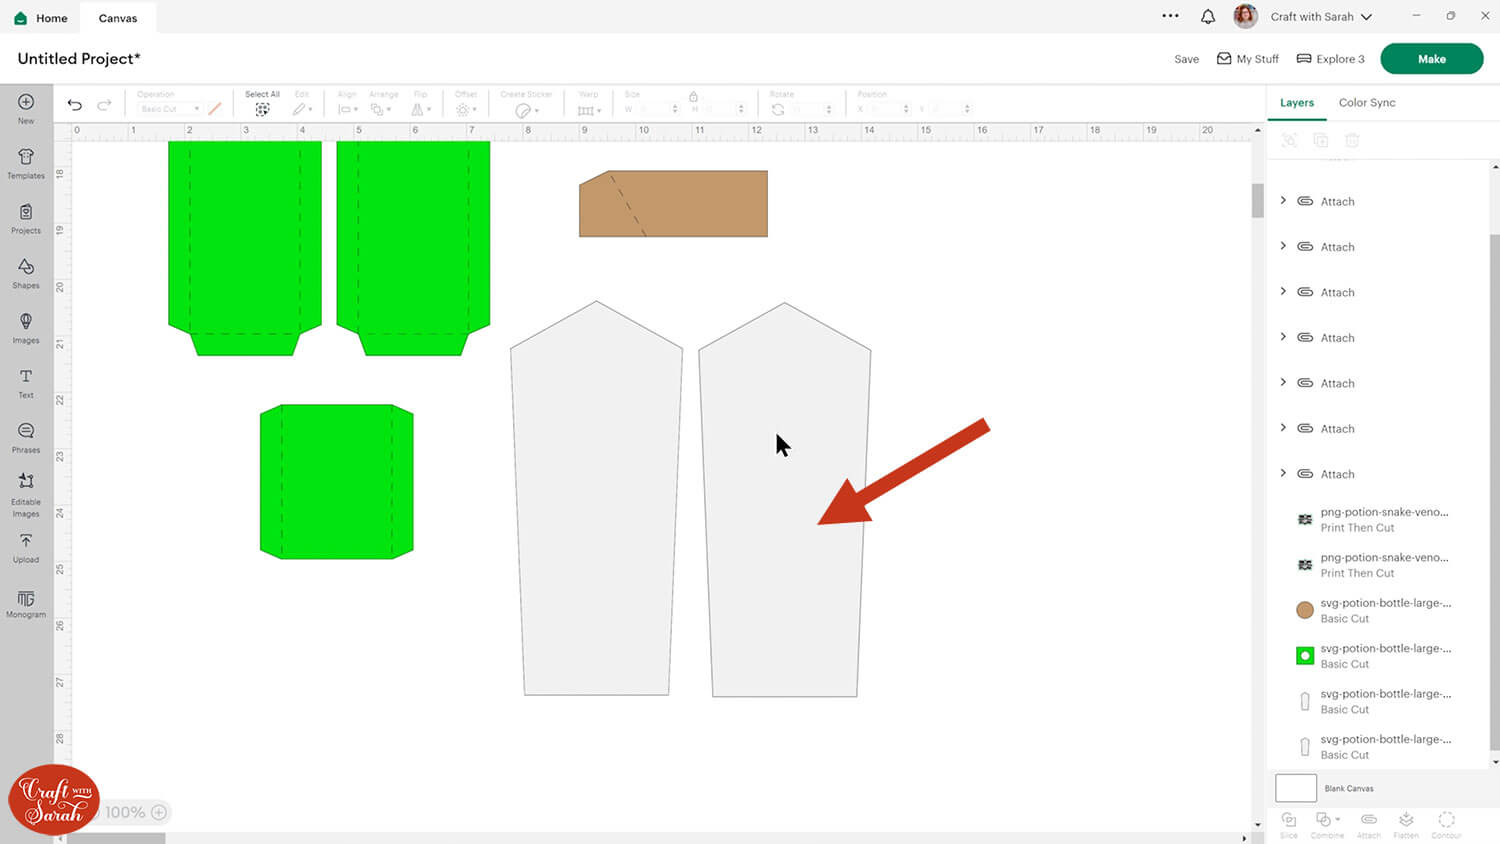
The two white shapes as shown below should be cut from translucent material such as tracing paper or vellum to allow the fairy lights to shine through.
If you’re using the potion bottle versions without the open sides then you won’t have those pieces on your project.
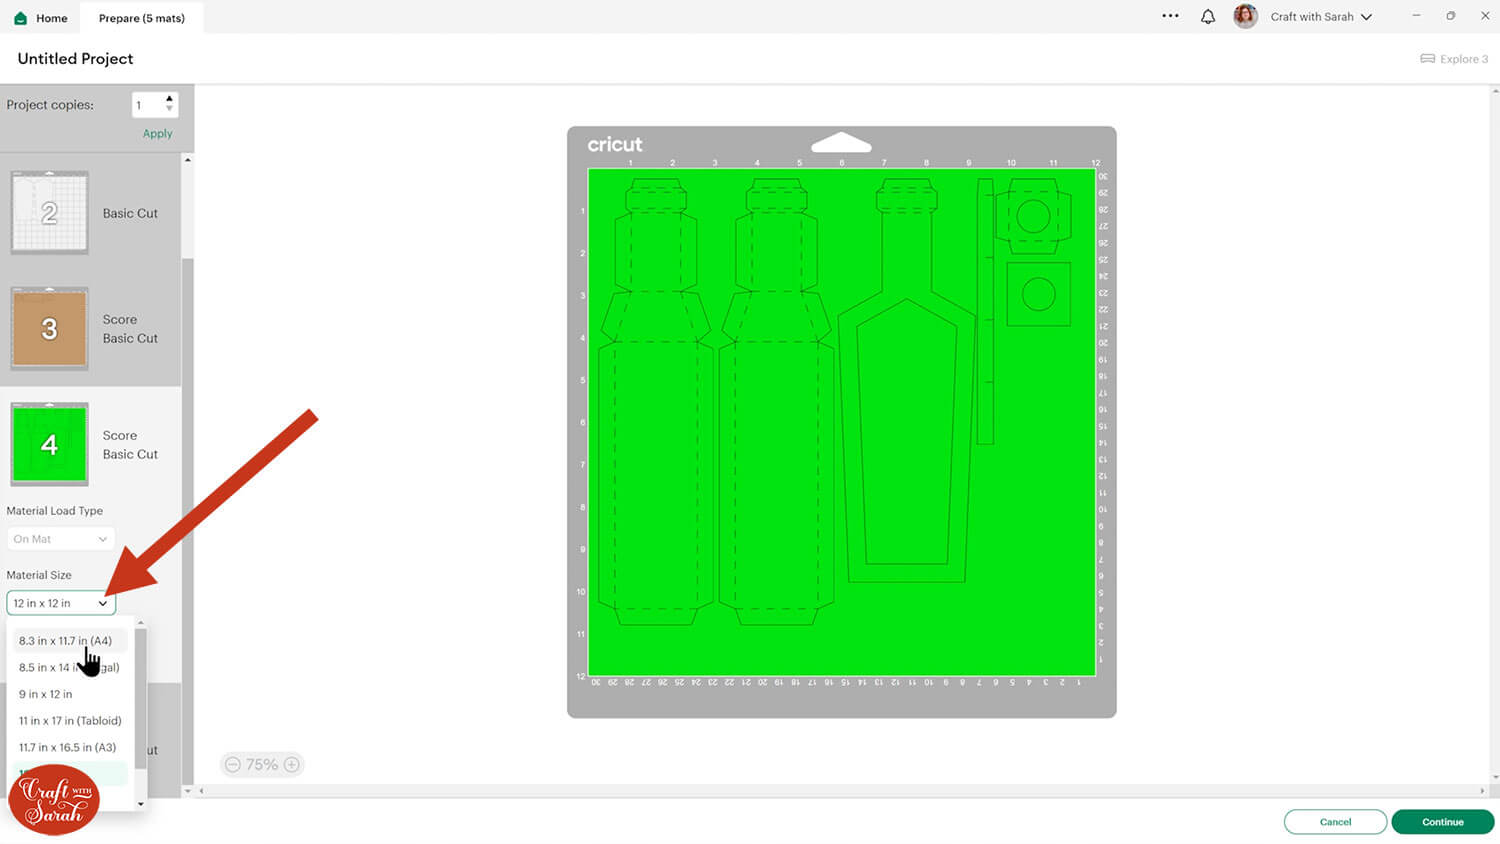
To change the paper size, go into the dropdowns over on the left side of the screen and choose the paper size that you want to use. You need to change it for every single colour.
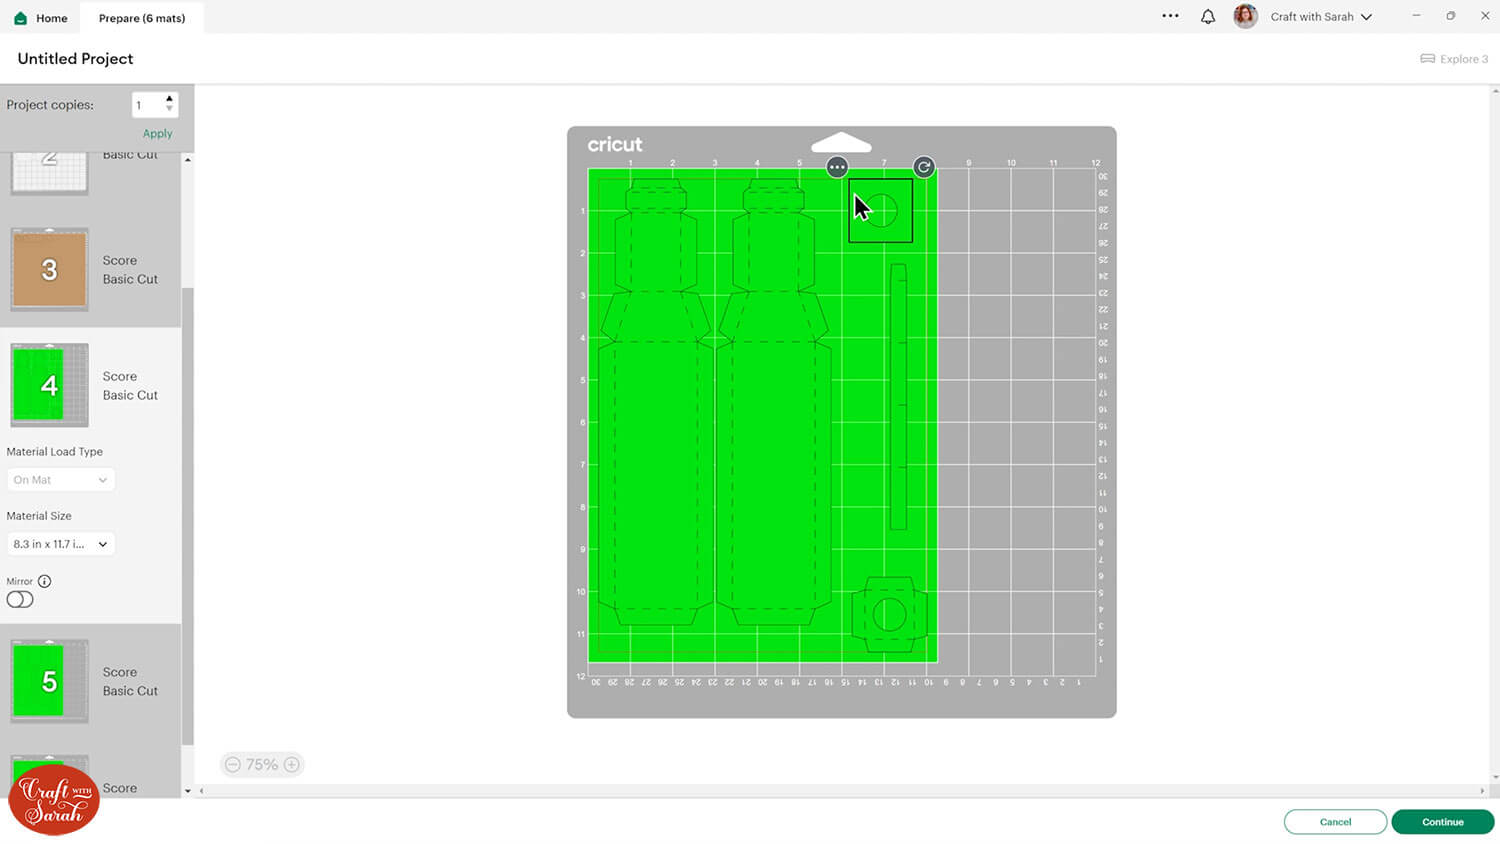
You can move things about on the pages to use up less space on the material.
TIP: New to cutting cardstock with a Cricut? Check out this in-depth tutorial which goes through every step of the process, including tips for getting the best quality cuts from your Cricut.
Step 5) Stick the potion bottle together
Glue the windows to the back of the two bottle shapes with the cutouts.
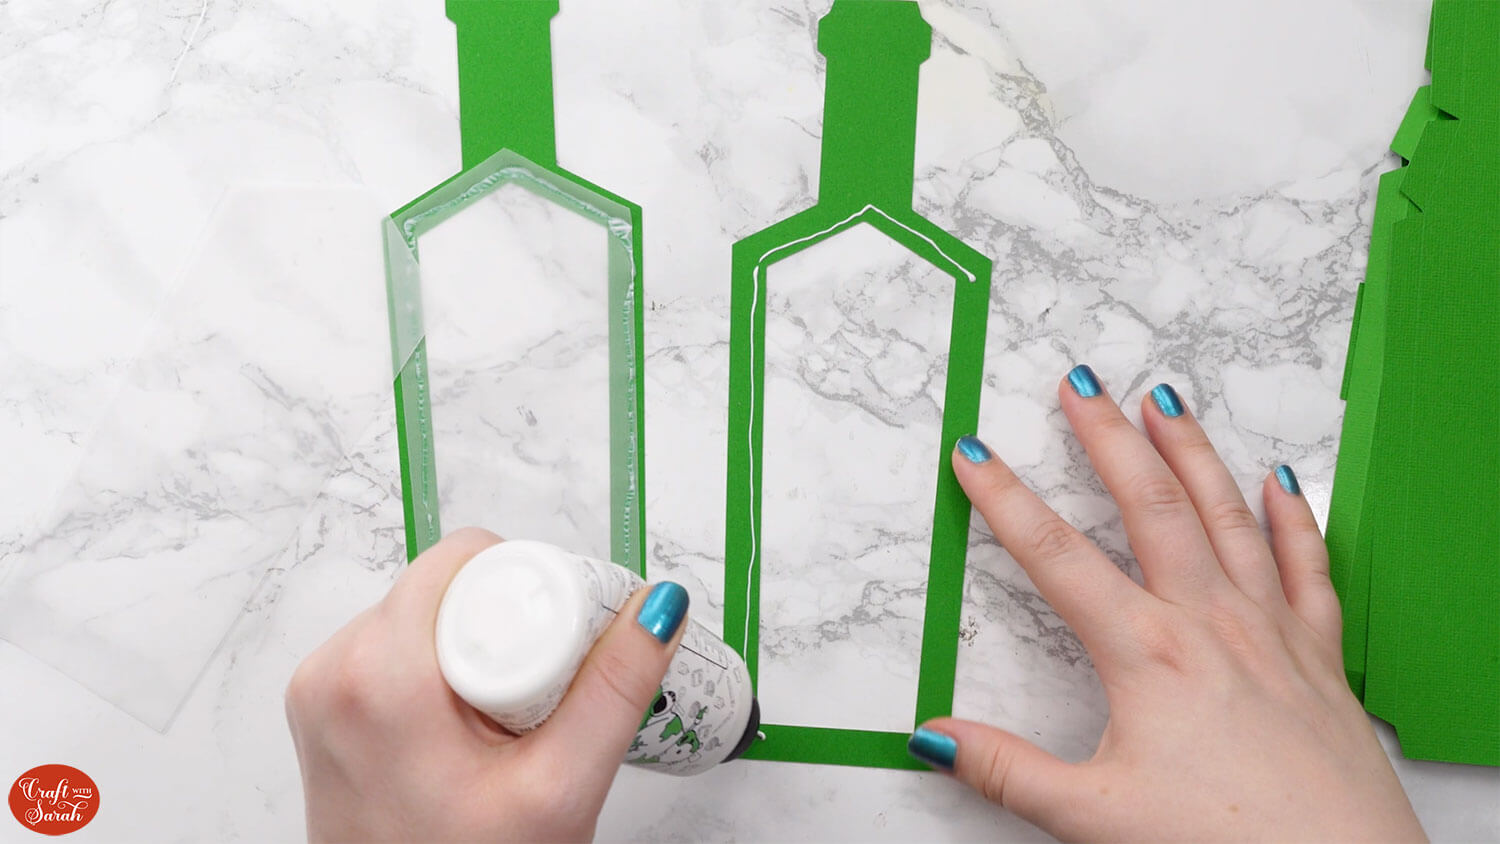
Fold up the score lines on the two bottle side pieces but do NOT fold the shapes in the neck part of the bottle (where the cork goes).
Brayer the score lines to make sure they are crisp.
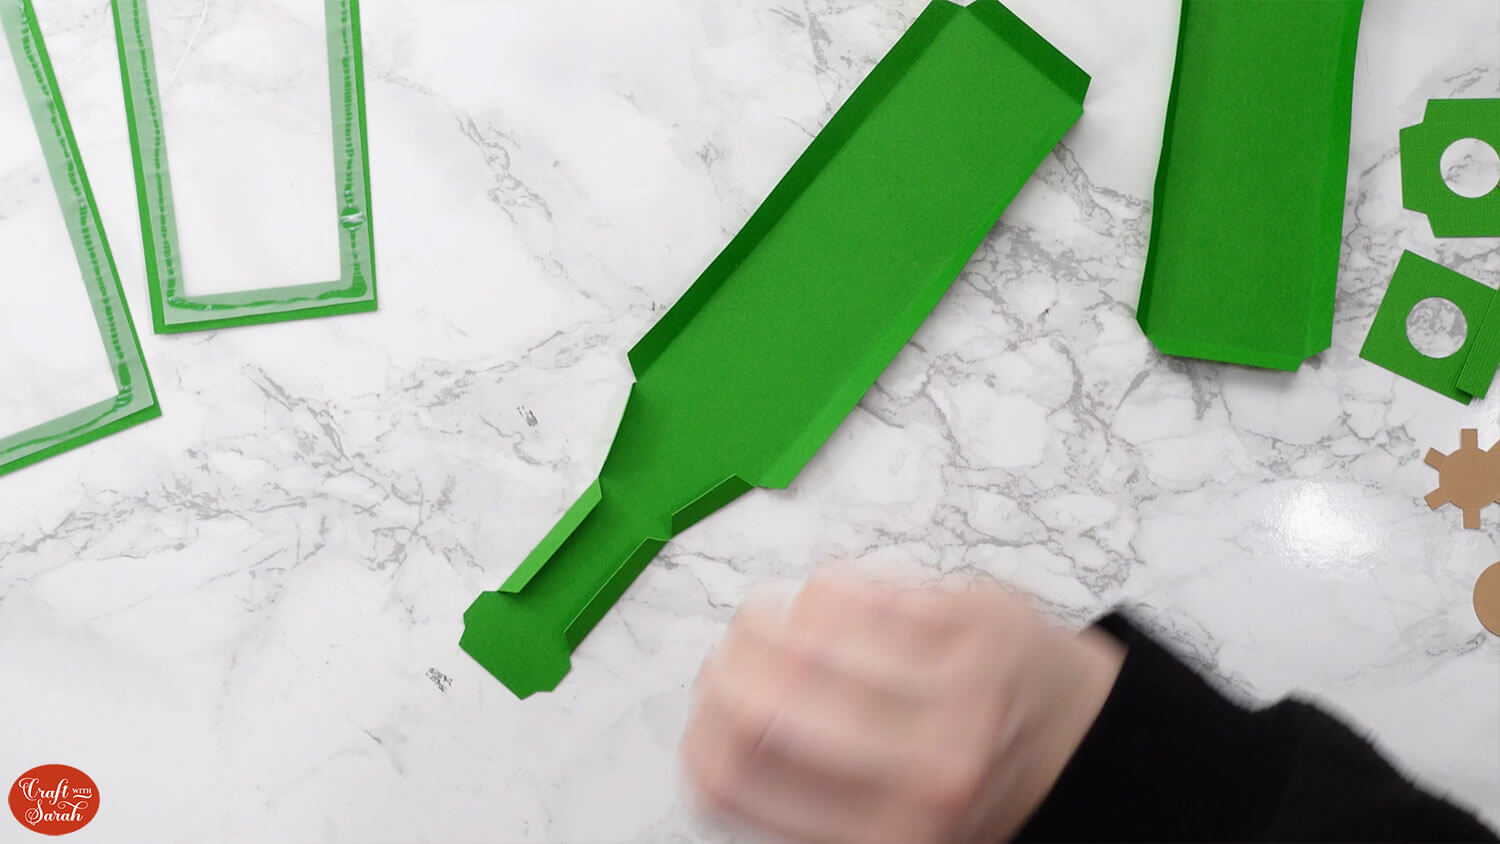
Fold the score lines in the top part of the bottle in the opposite direction. This can be tricky as the score lines are very close to each other, so be careful and take your time.
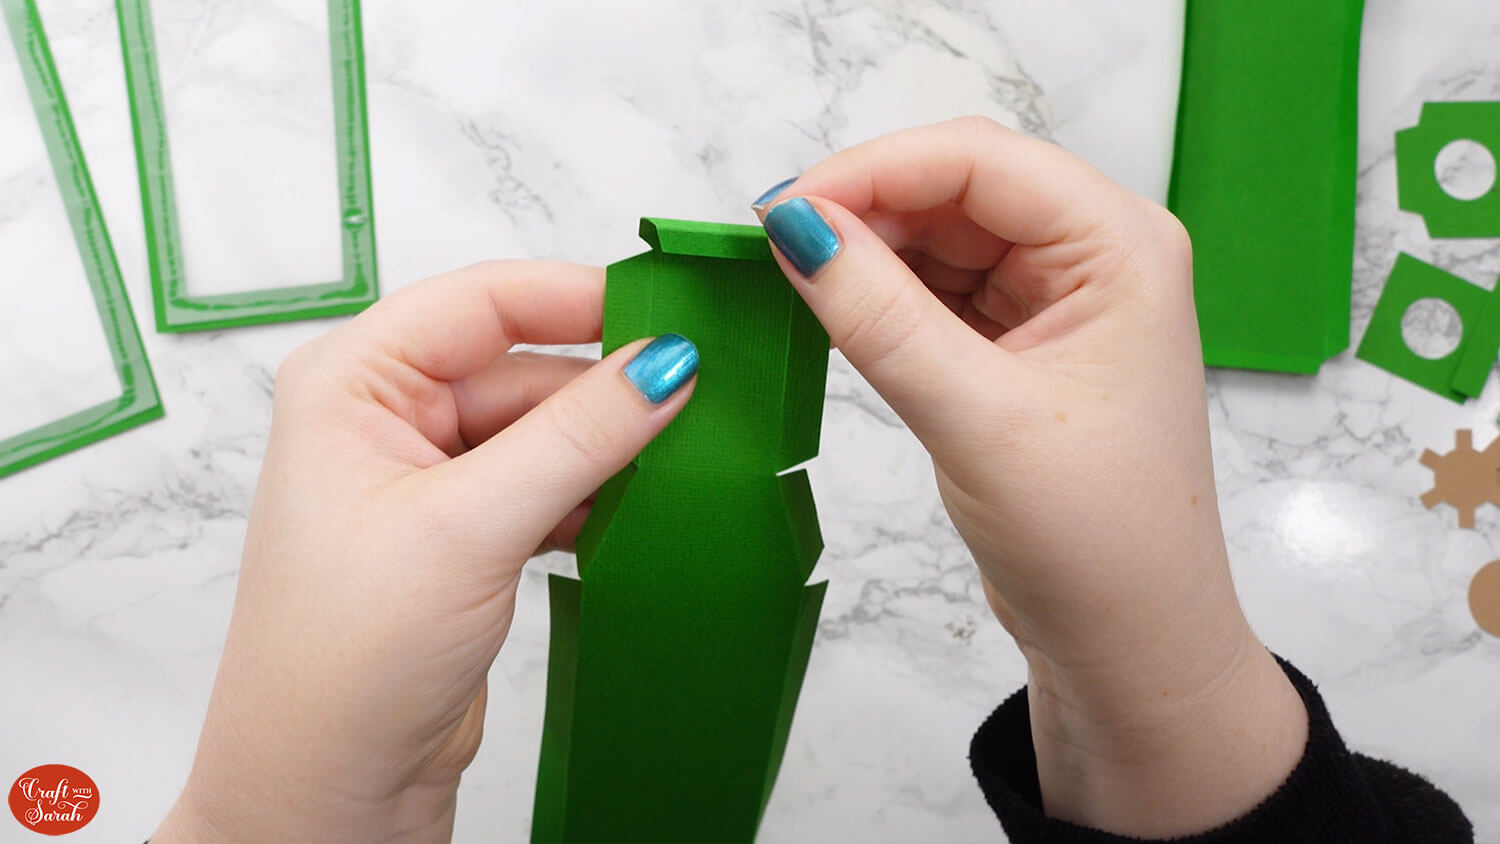
Fold up the two score lines on the square base piece, then use glue or double-sided tape to stick this to both side pieces of the bottle.
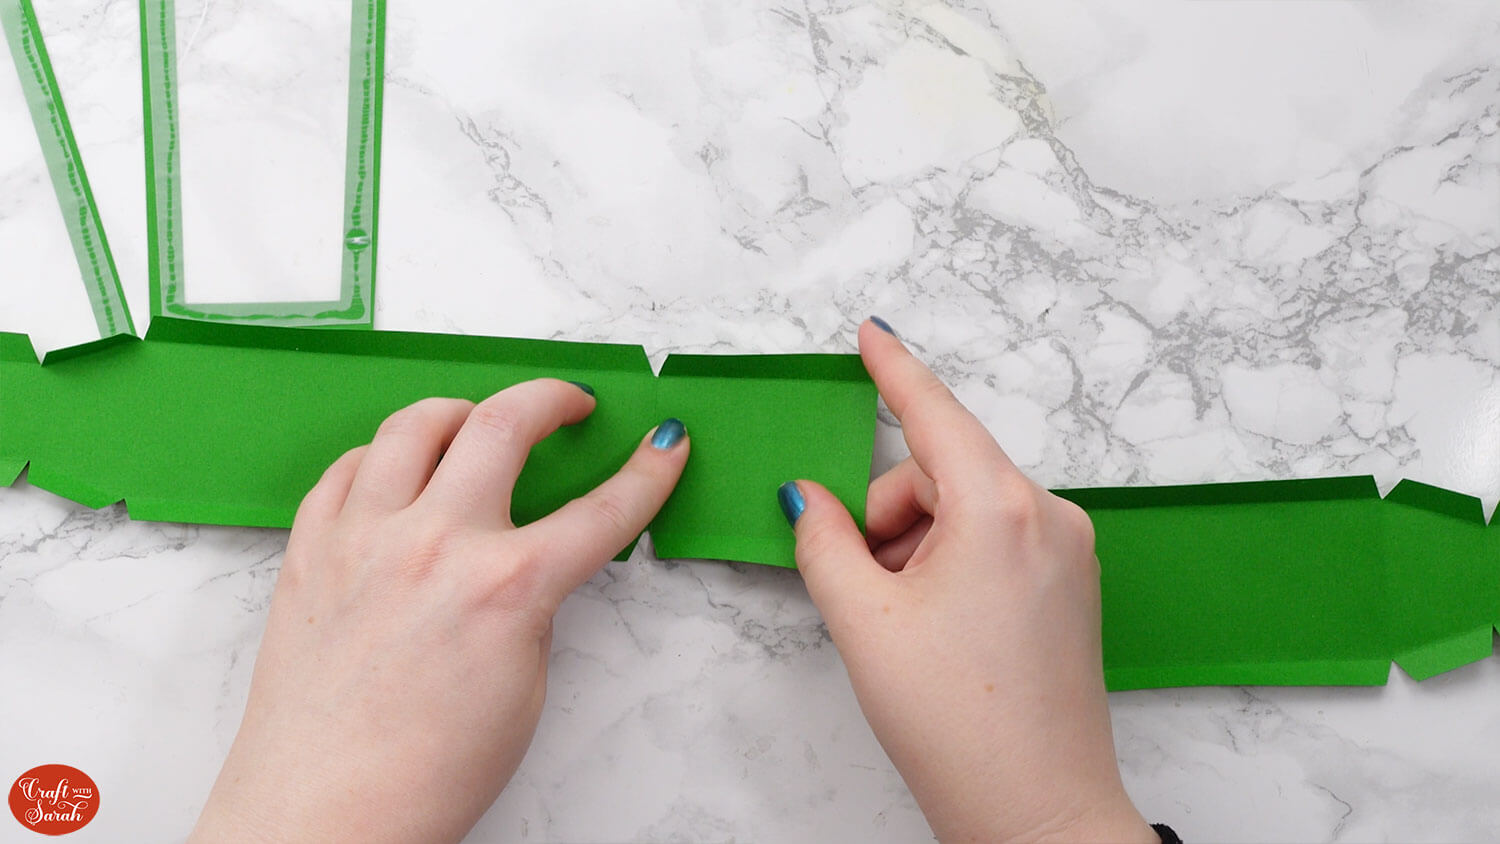
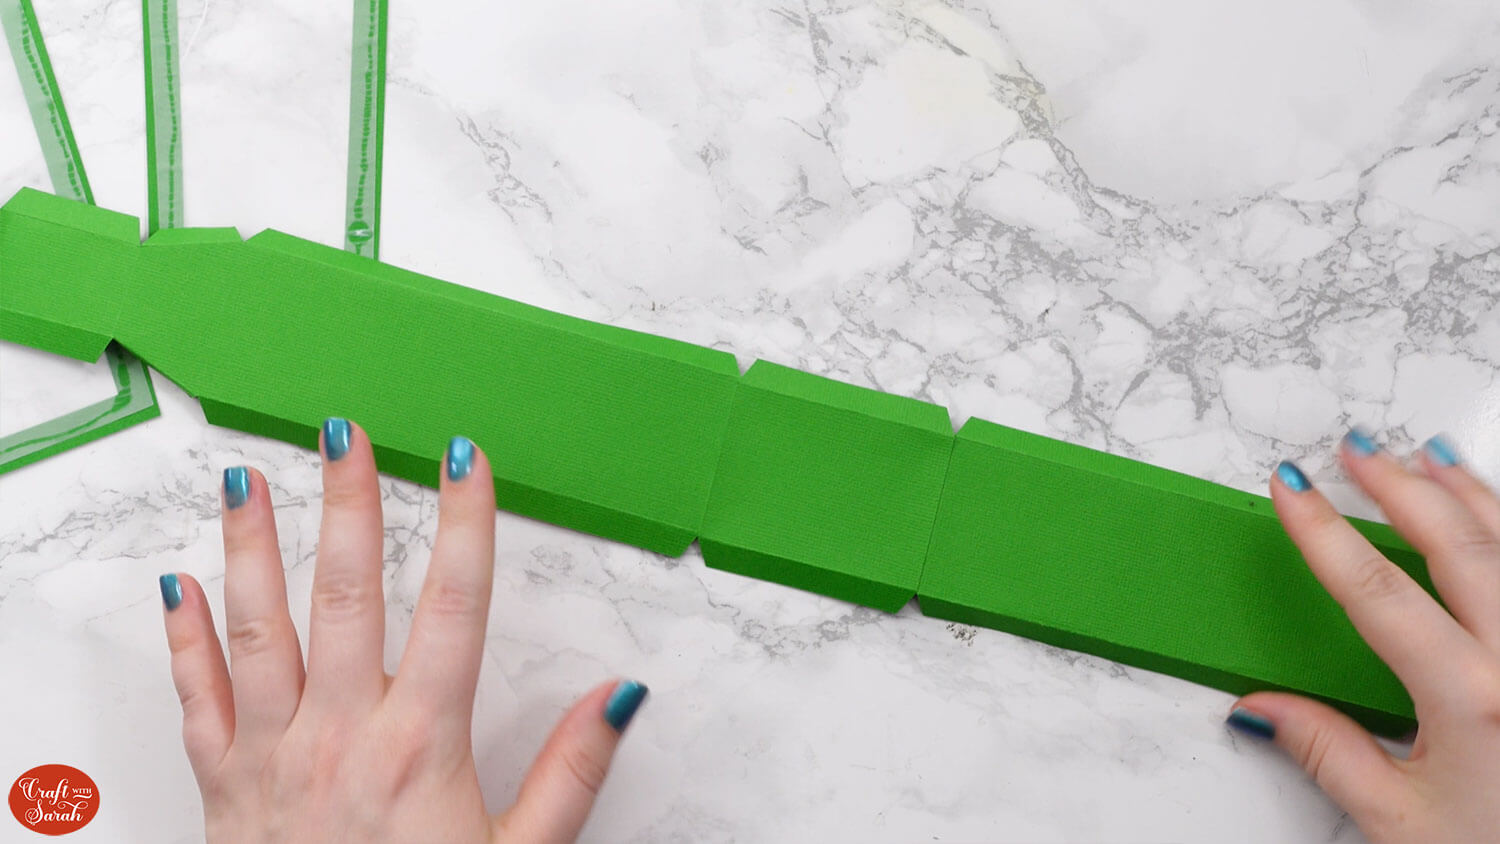
Wait for the glue to fully dry before continuing.
Attach one of the window panel pieces of the bottle to one side of the shape you have just created.
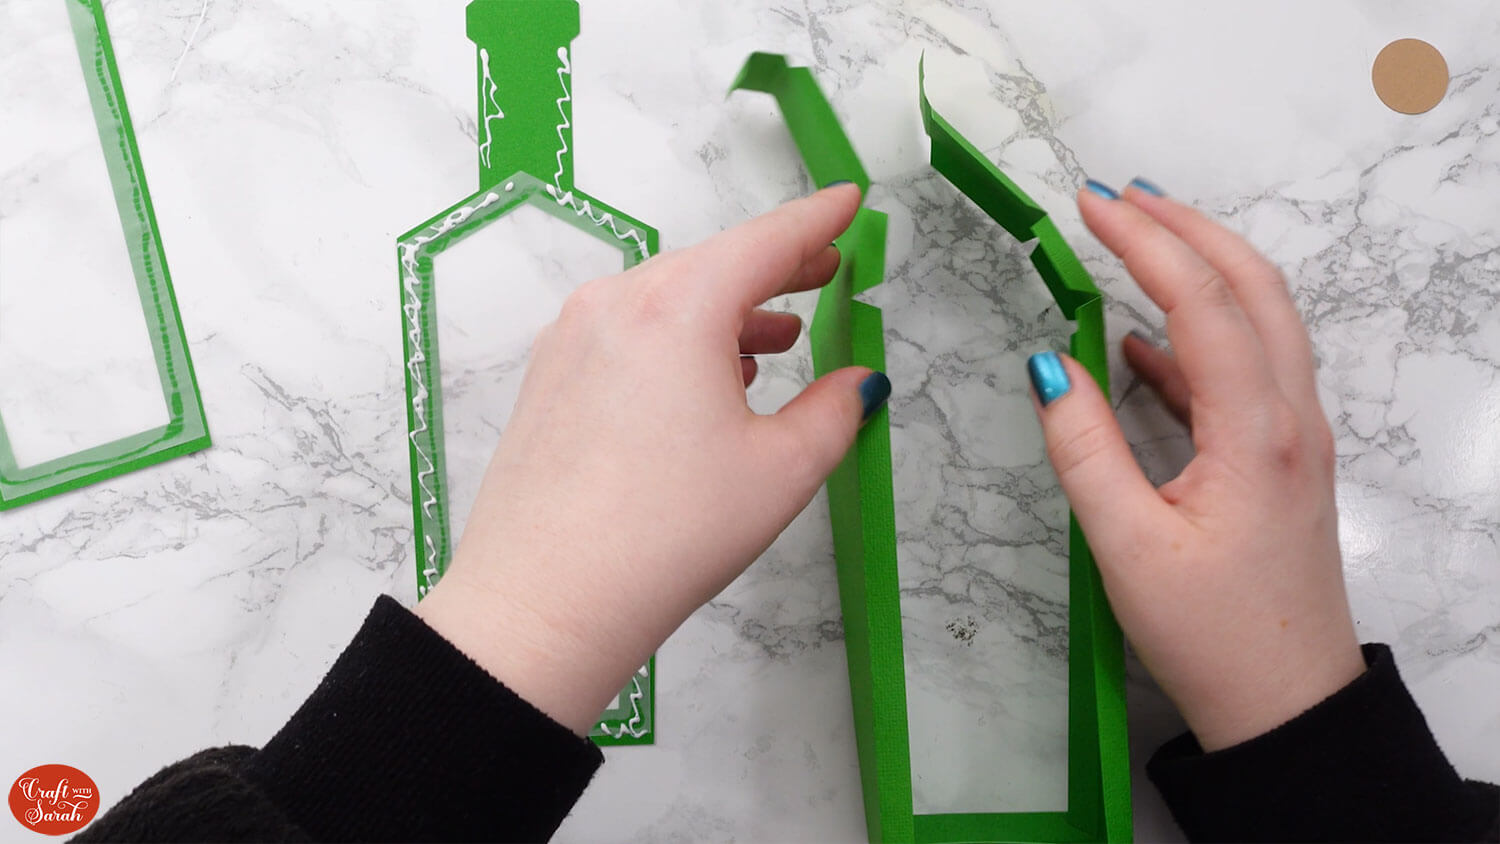
It can be tricky to get the angles correct as the card doesn’t always want to stay in the correct position, particularly around the neck of the bottle. Double-sided tape may be easier than glue.
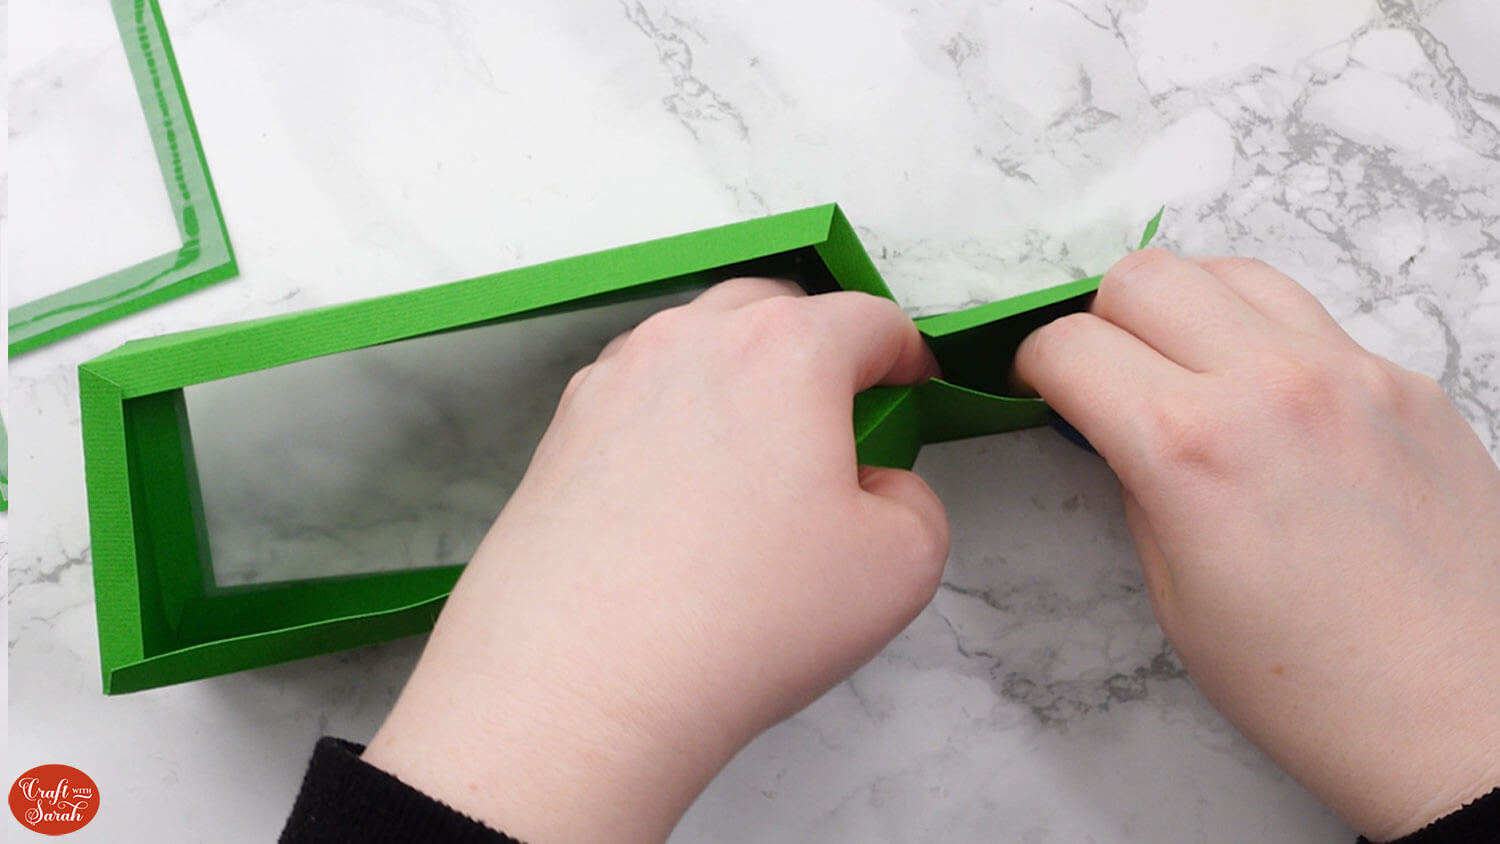
Fold the tops of each of the three sides of the neck inwards on themselves to form a “lip”. Glue the tab to the neck of the bottle.
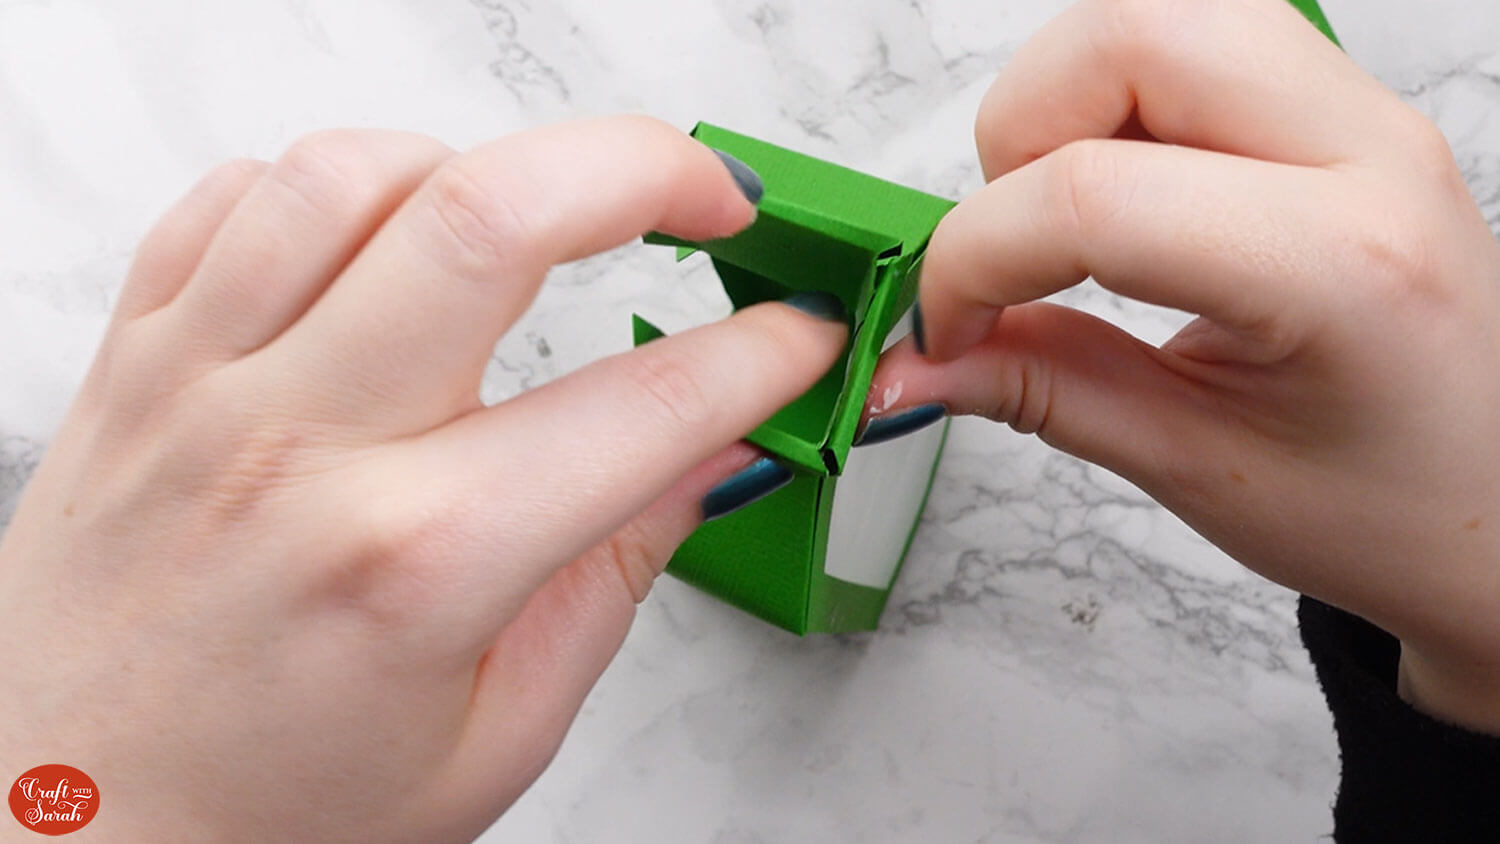
Stick on the second window panel side of the bottle.
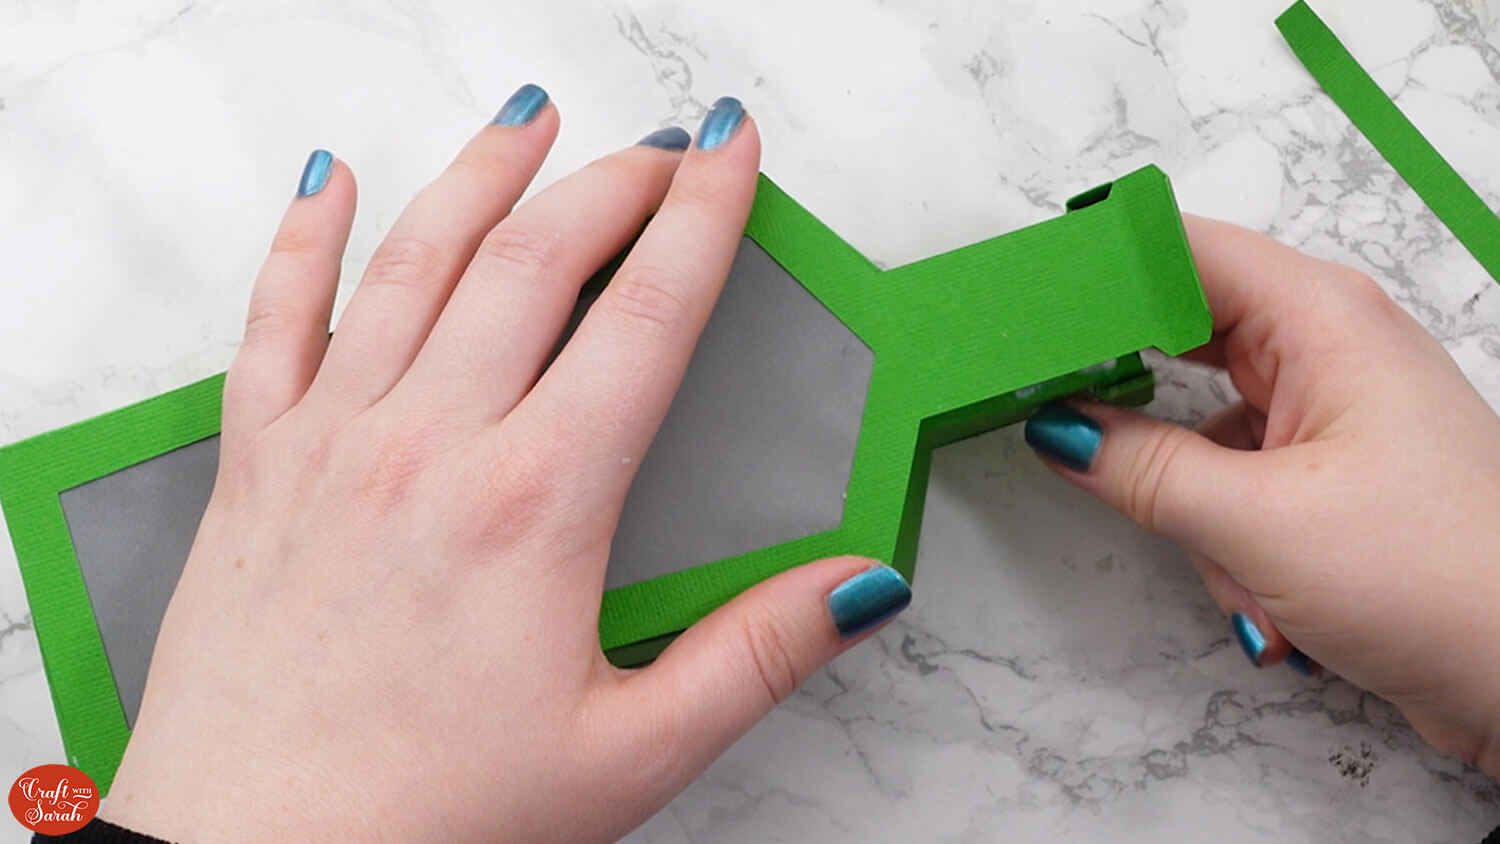
Fold the top of this side inwards to form the “lip” and glue in place.
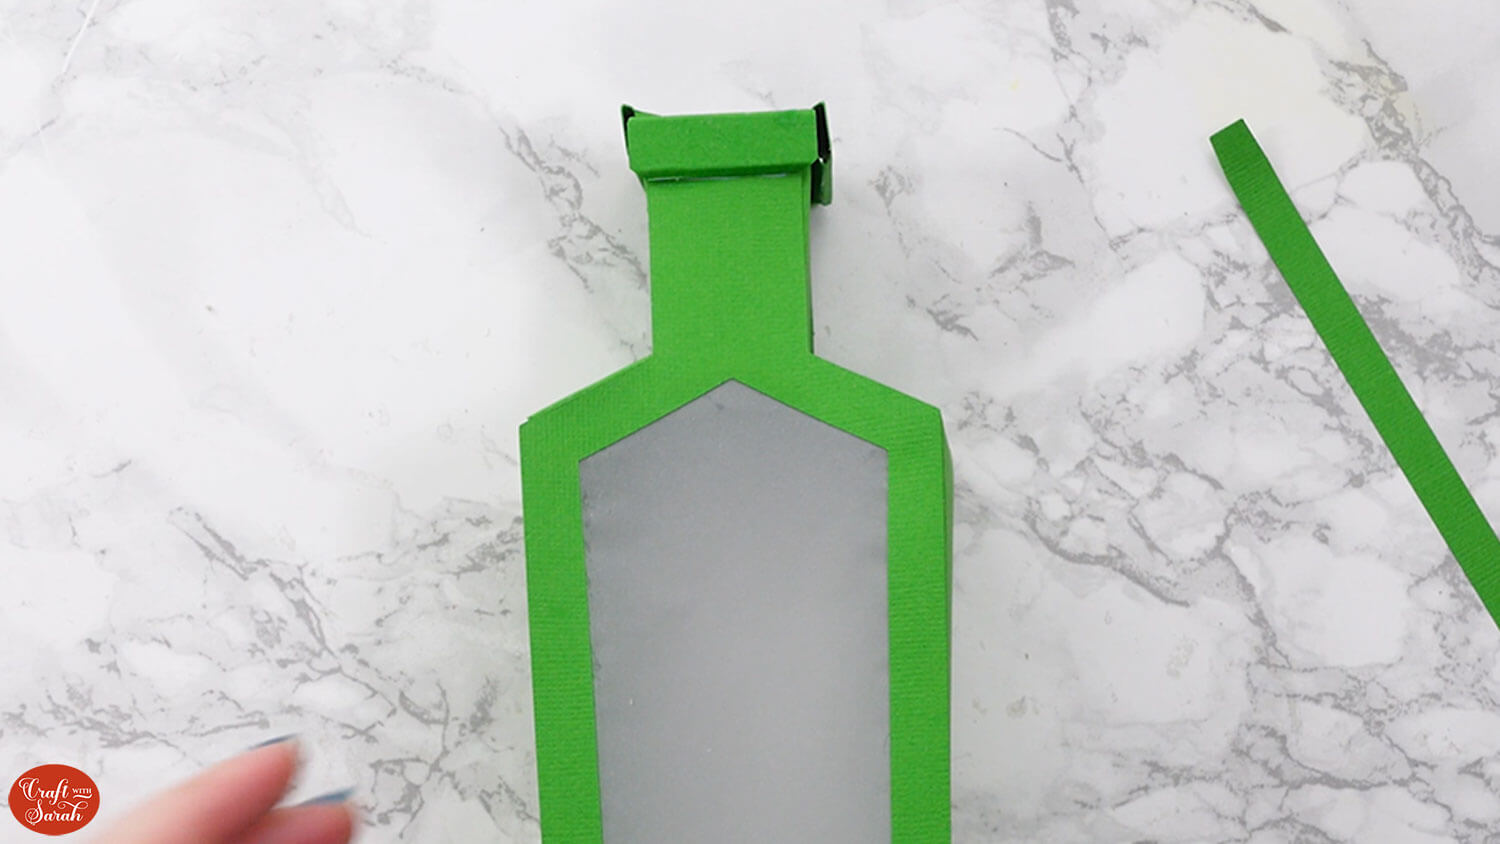
Take the square piece with a circular hole in the middle and four tabs along the edge. Fold along all the score lines, in the same direction.
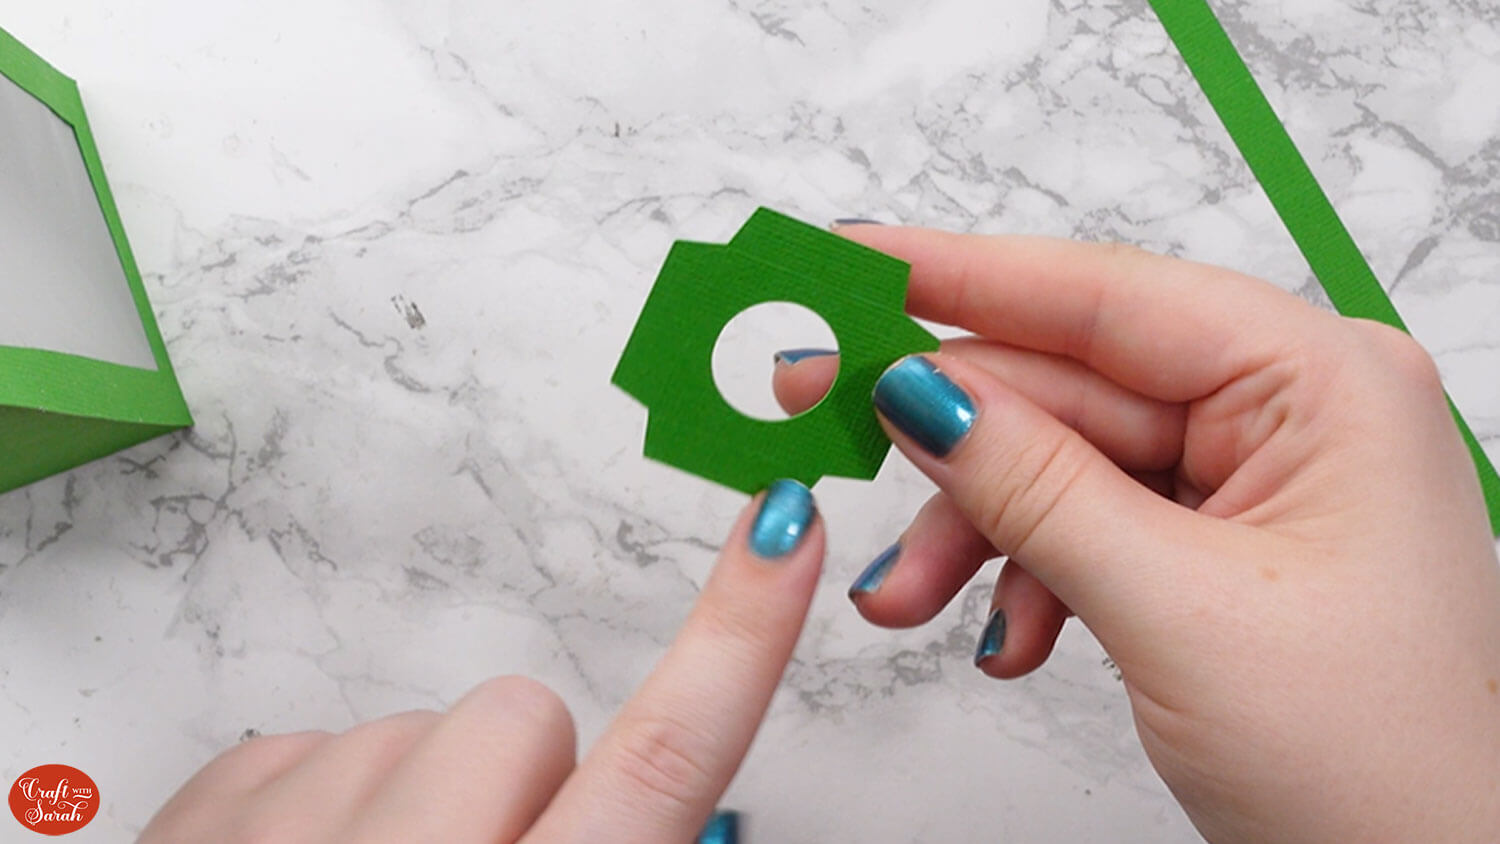
Glue this inside the neck of the bottle so that it lines up with the top of the lip pieces.
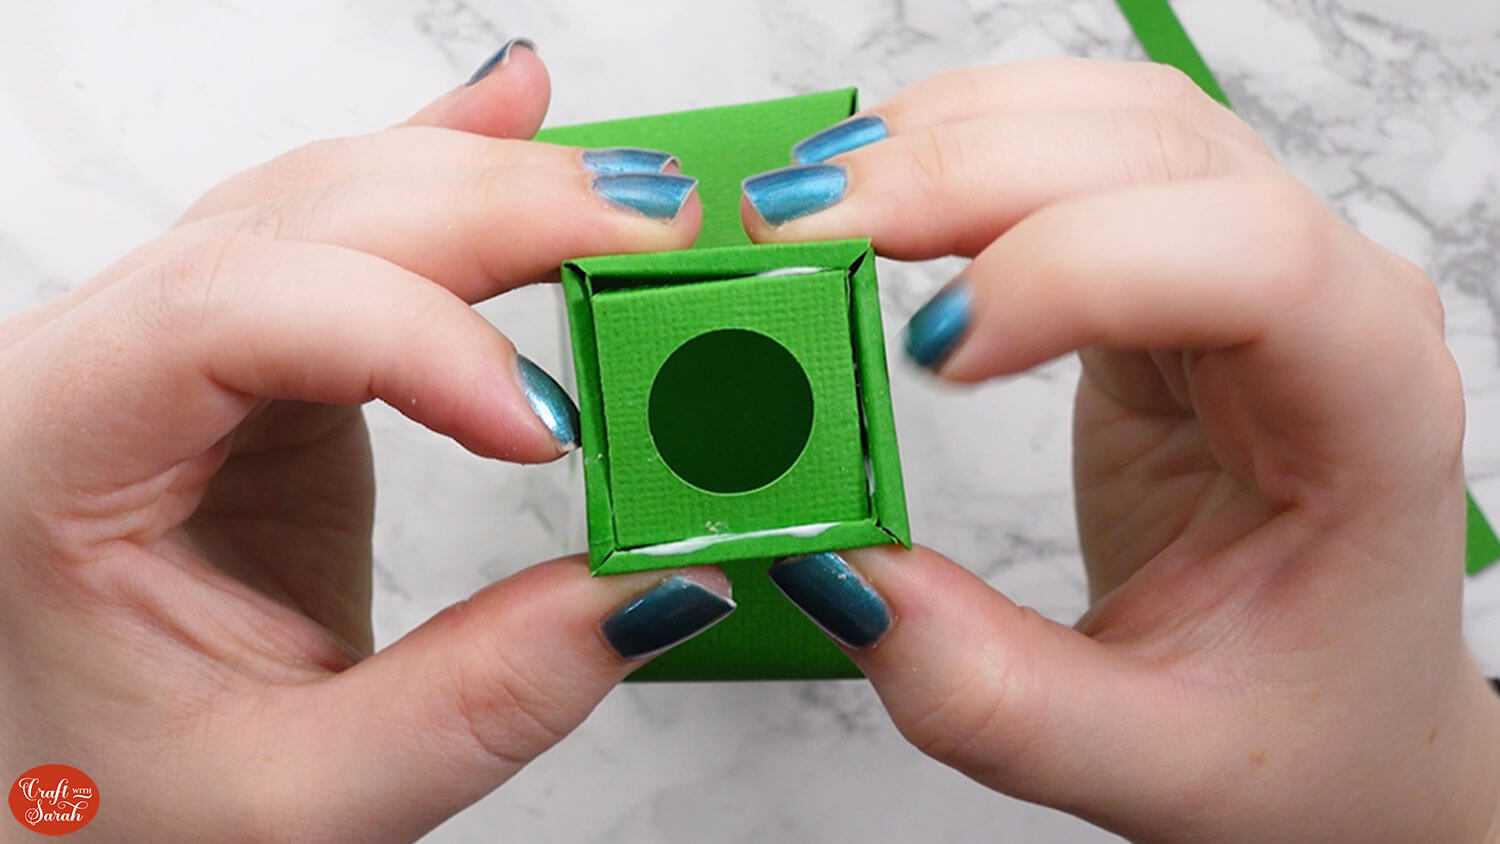
Take the long rectangular strip of card and fold down the tab. Glue this to one of the lip pieces on the bottle (it doesn’t matter which one).
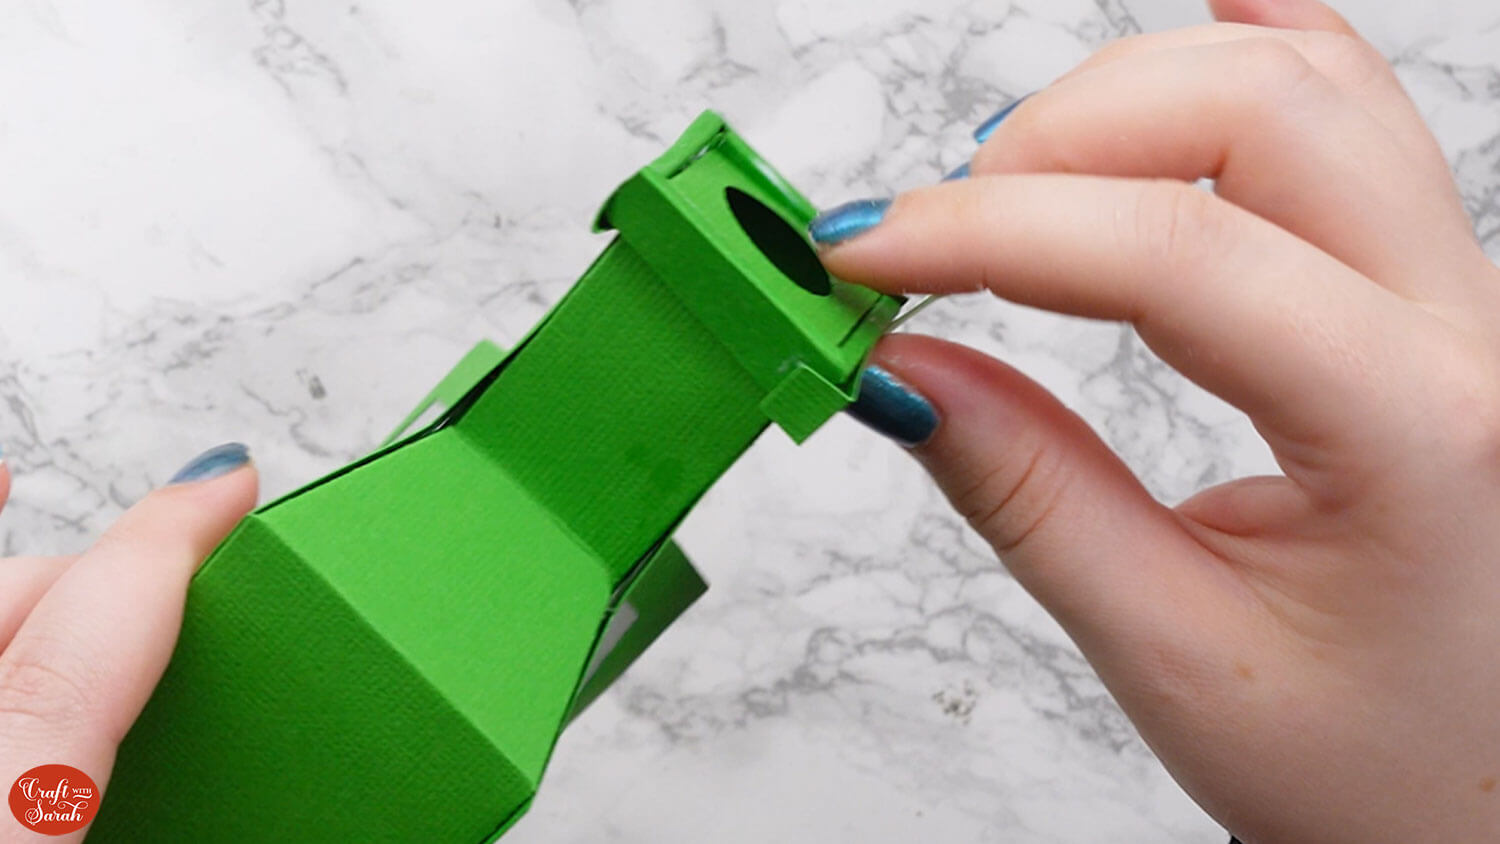
Fold this around the entire width of the lip, glueing as you go. This will hide any gaps in the lips and give you a neater looking bottle.
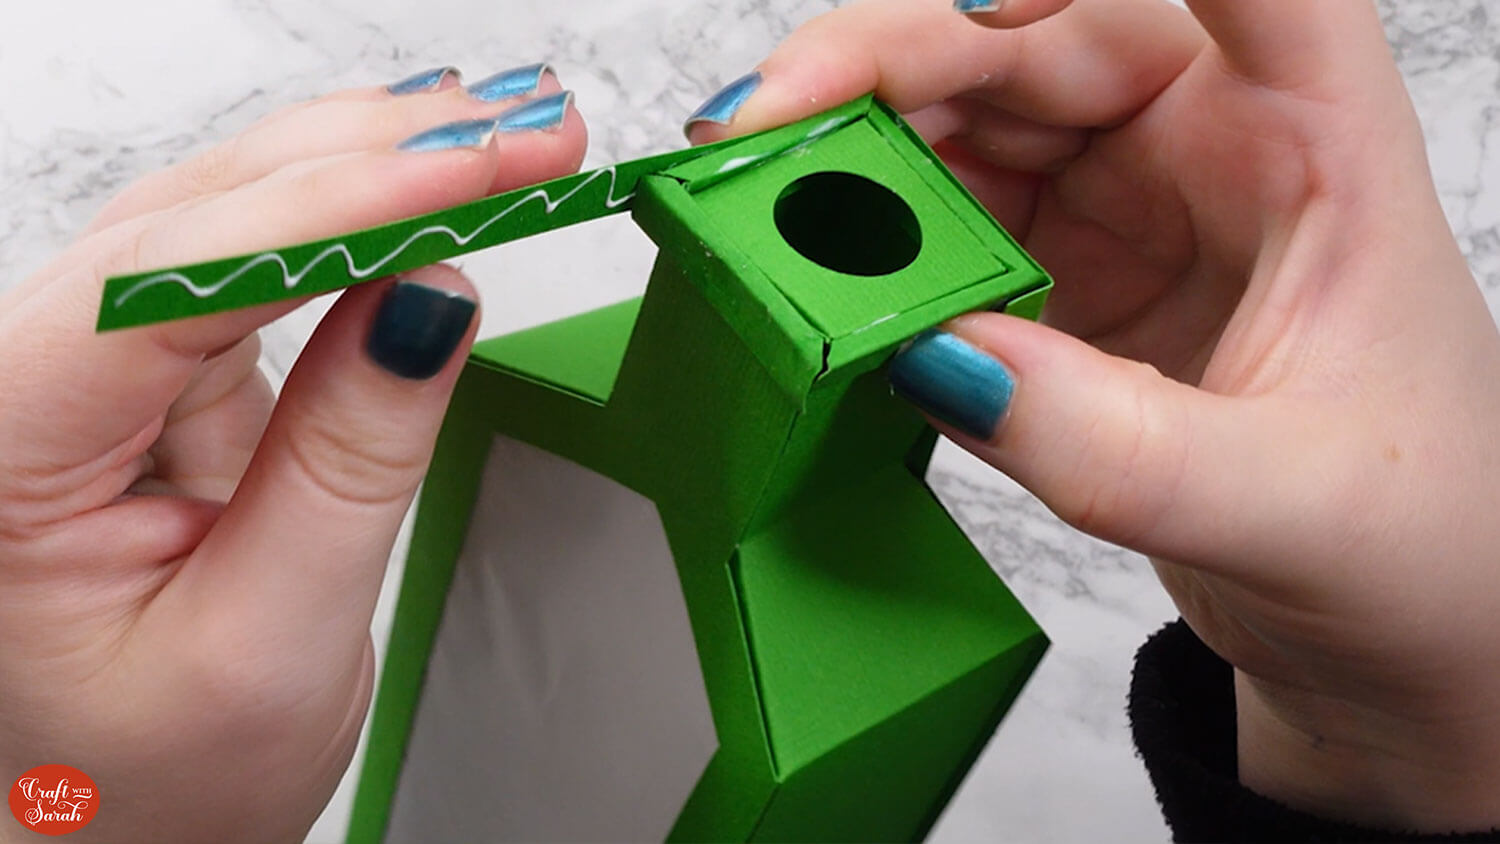
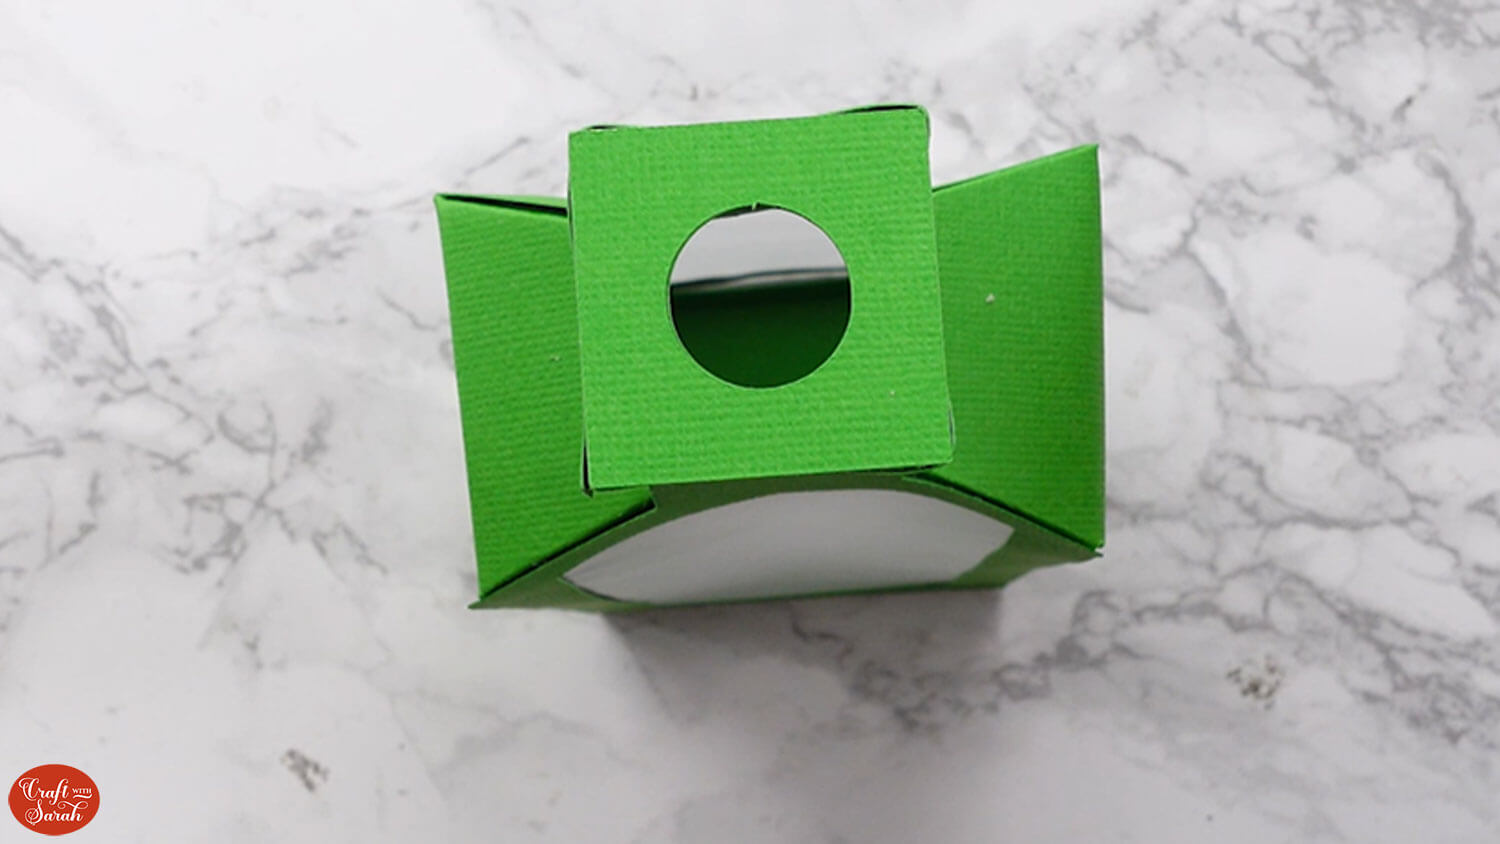
Glue the final square piece to the top of the bottle.
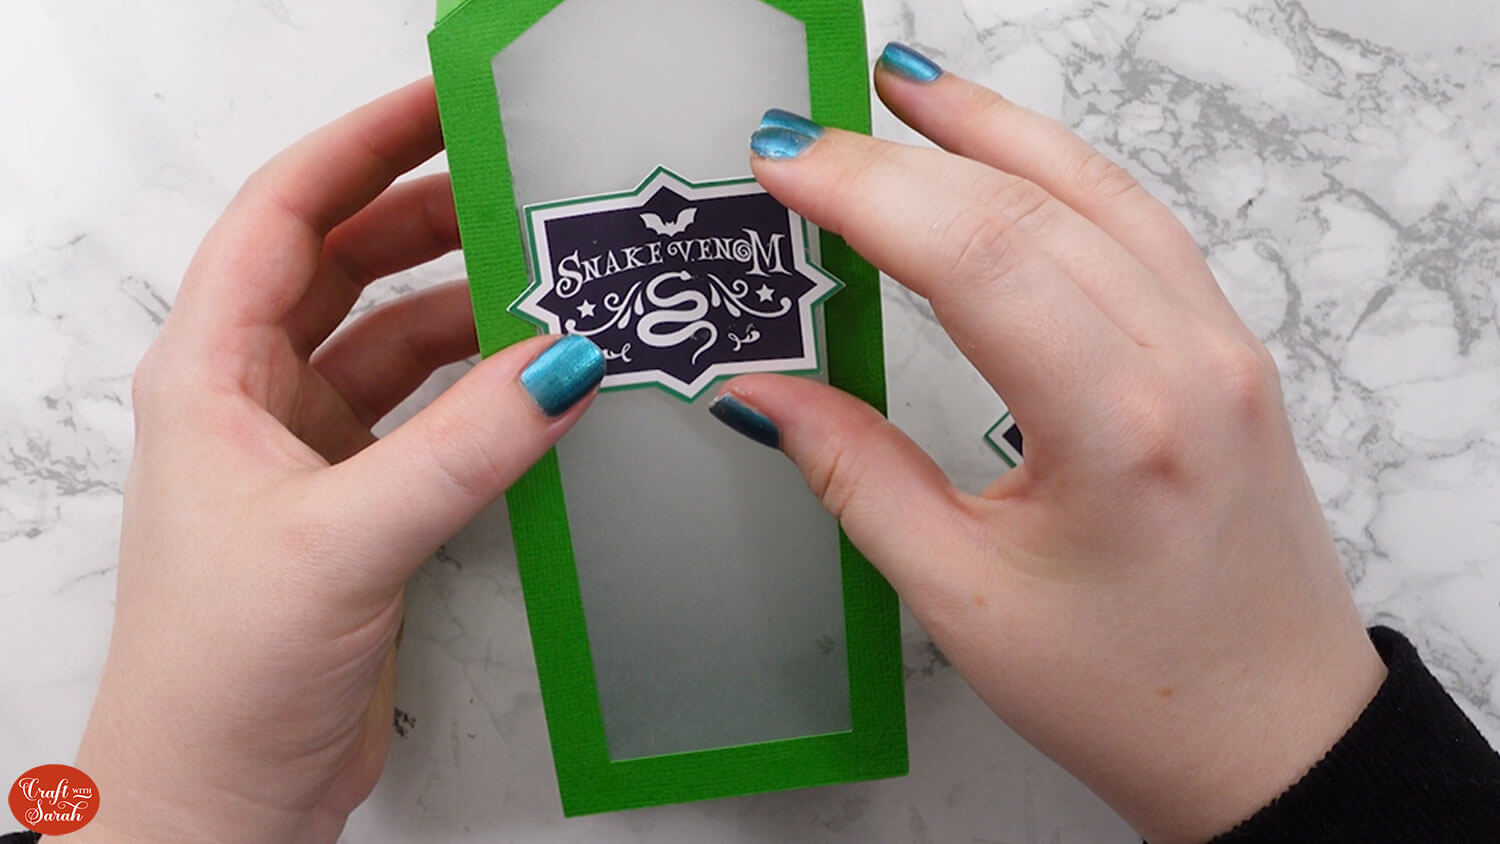
Glue on the print-then-cut labels if you are using them.
Step 6) Add lights or create the paper cork
If you are using fairy lights then thread them through the gap in the top of the bottle.
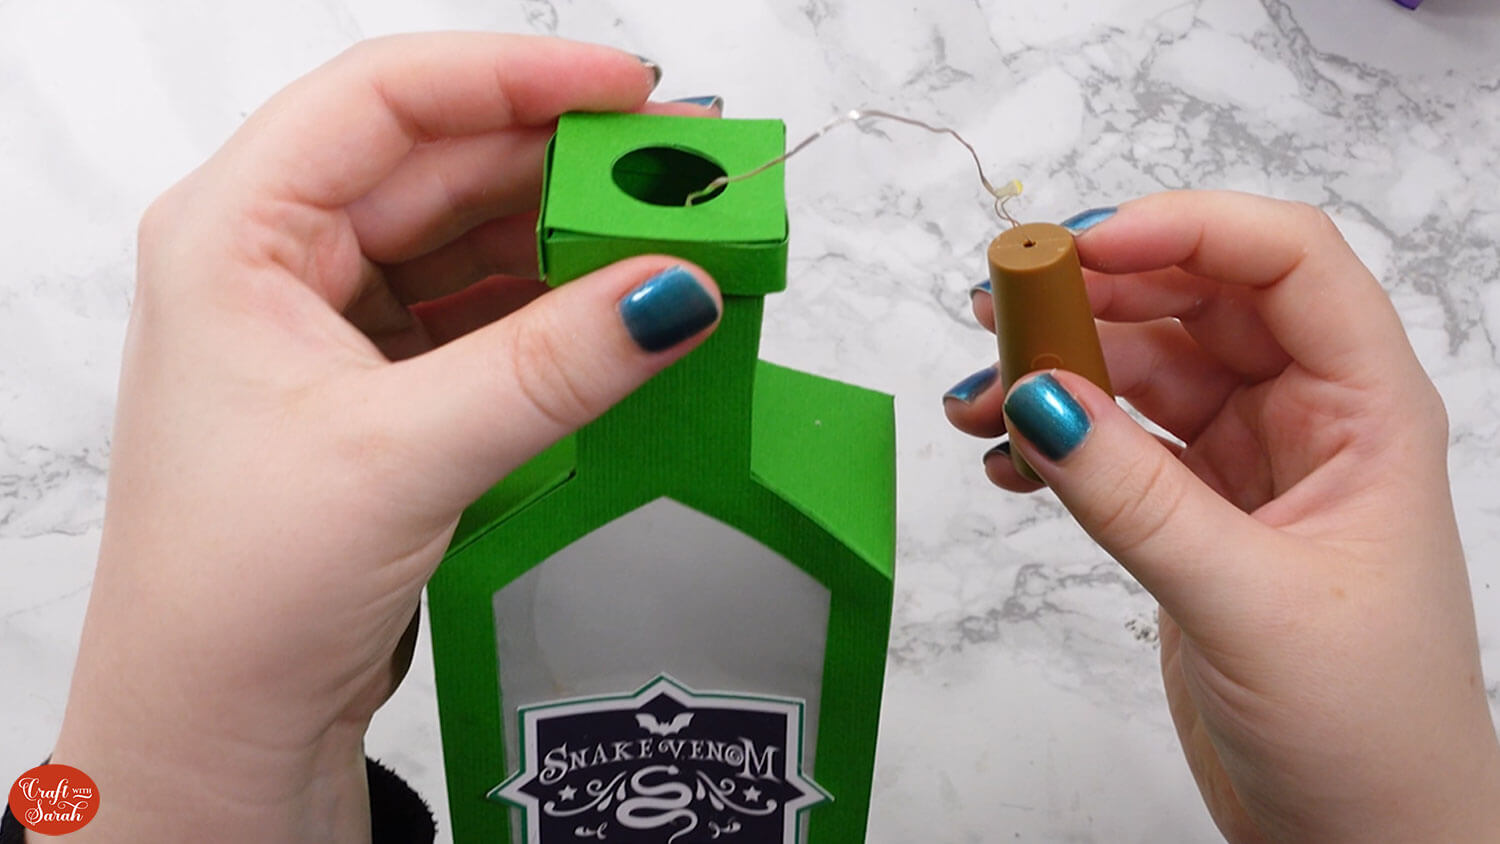
The “cork” battery pack will fit nicely in the hole.
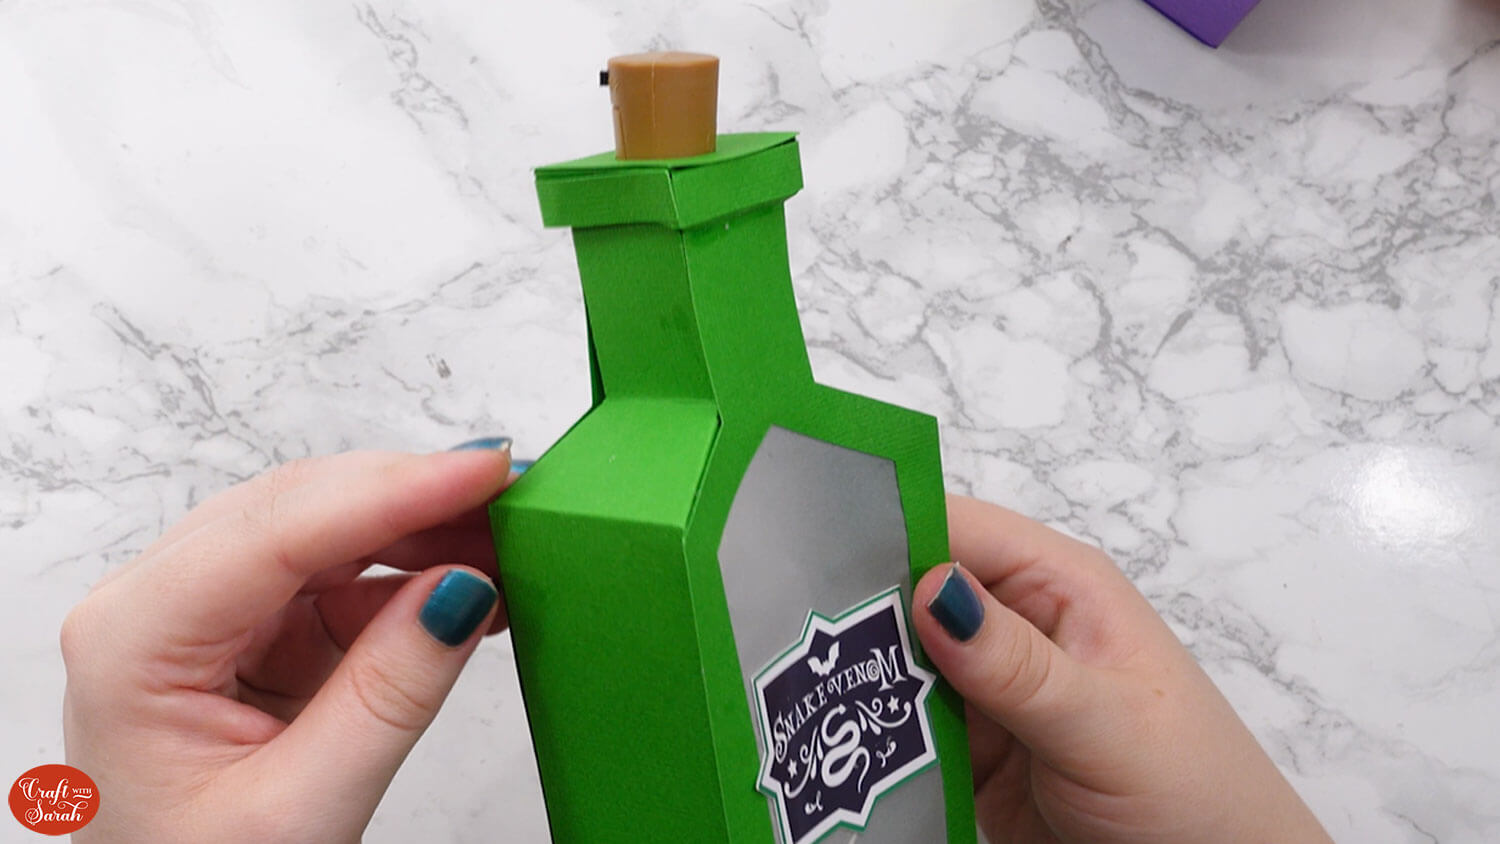
If you’re making the papercraft cork instead, here’s how.
Take the largest piece of brown card and roll it upwards to help to get the card in shape.
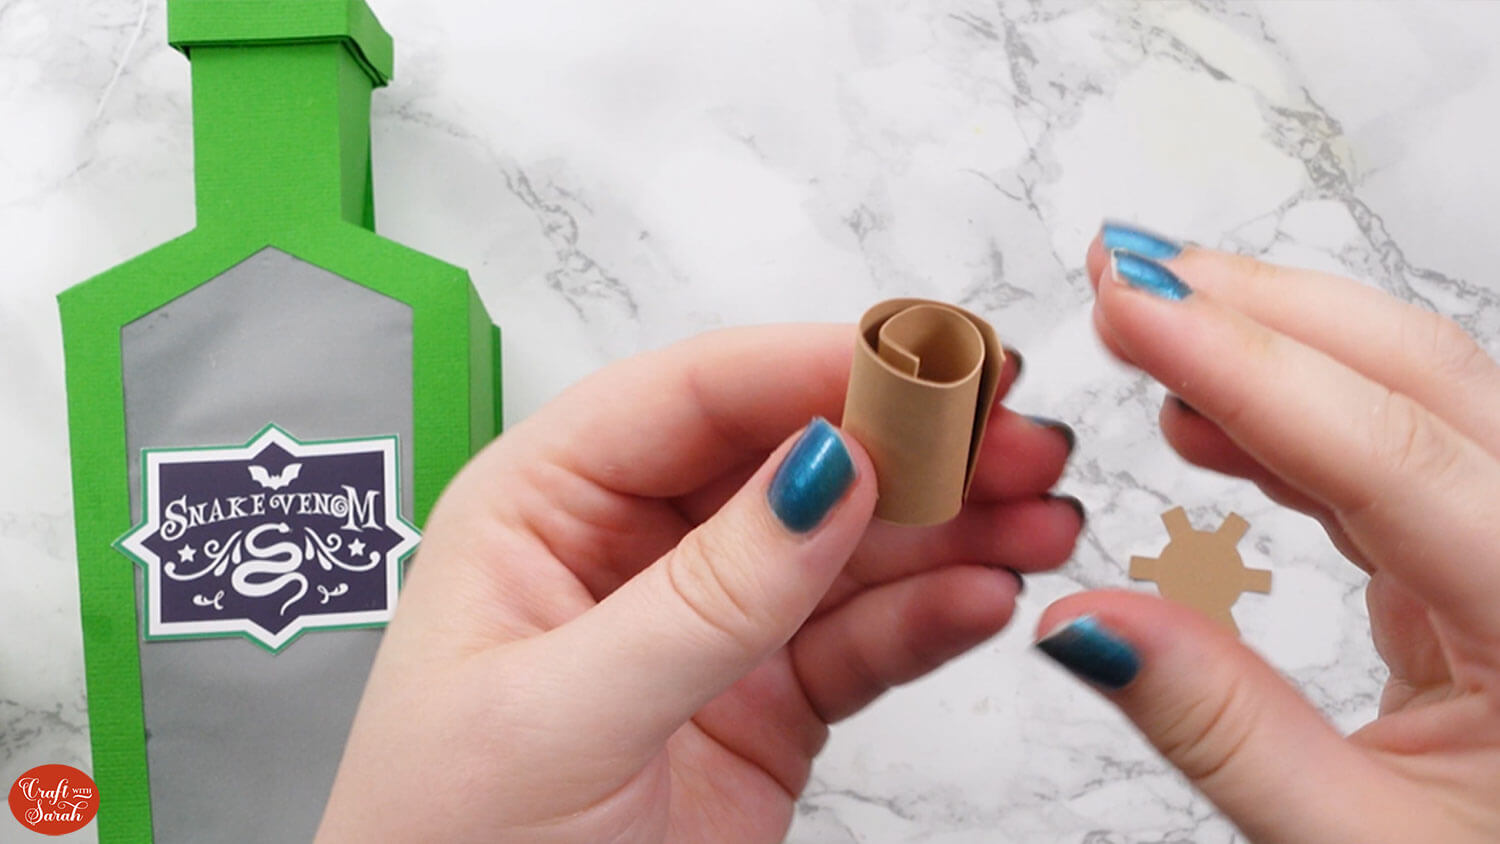
Unravel it and then glue up to the score line.
This score line is a guide to show where to stick the other side – it’s not a line to fold.
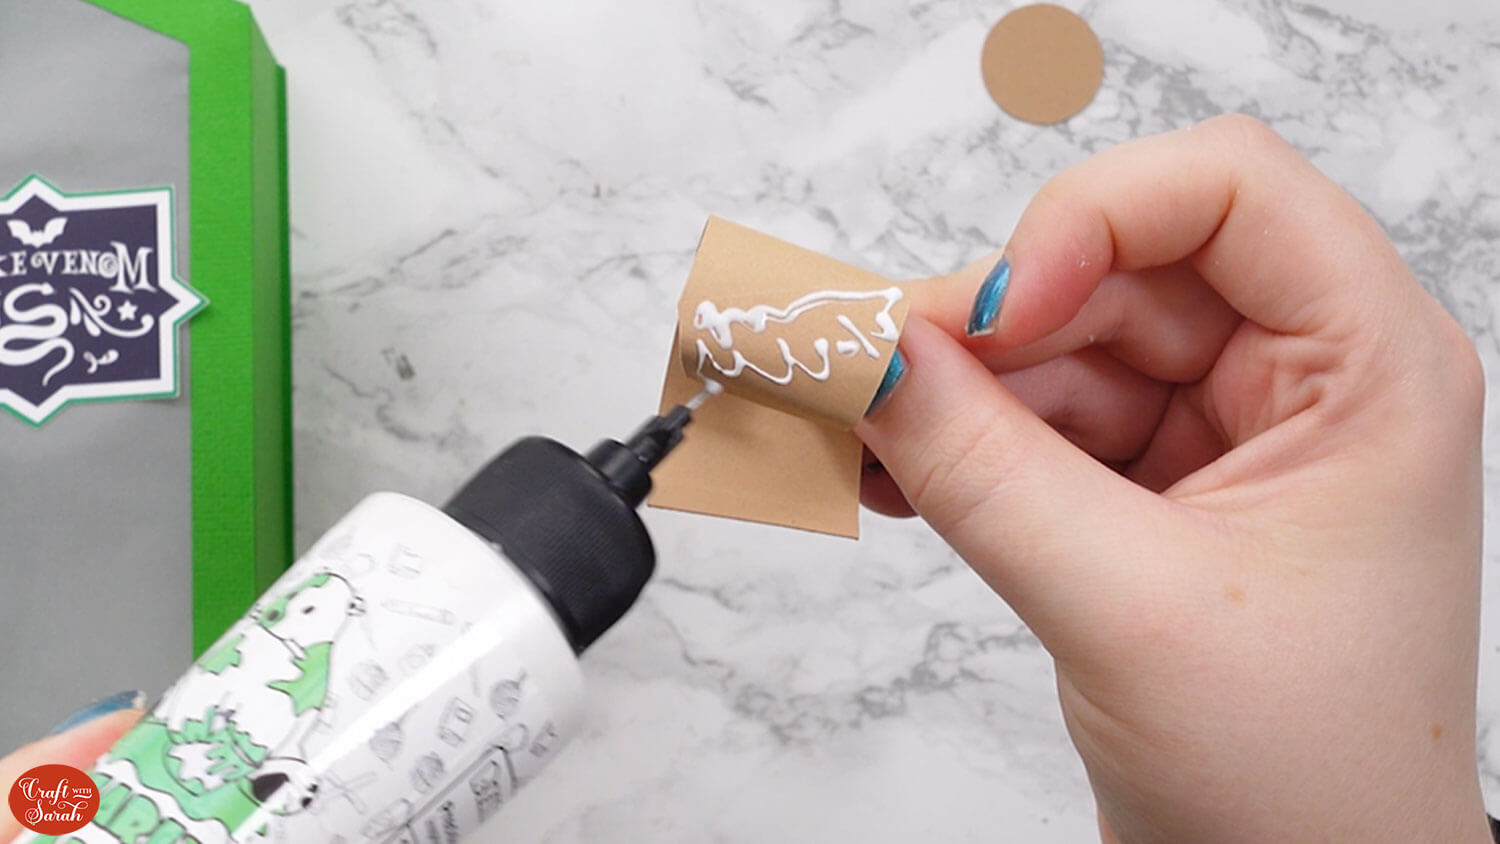
Twist the card around and stick it against the score line.
This will make a tube that’s got one hole larger than the other.
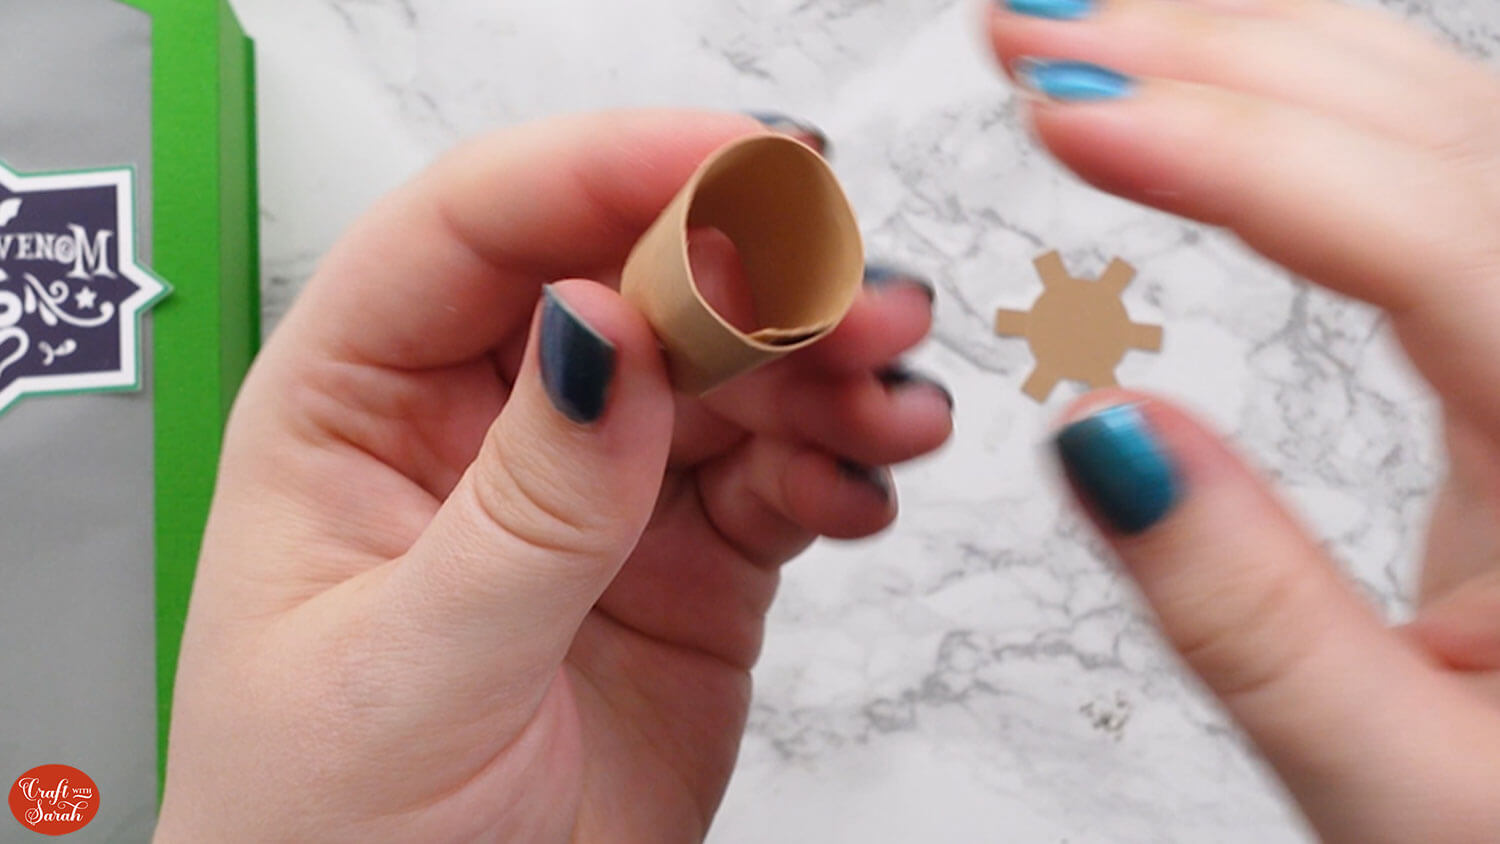
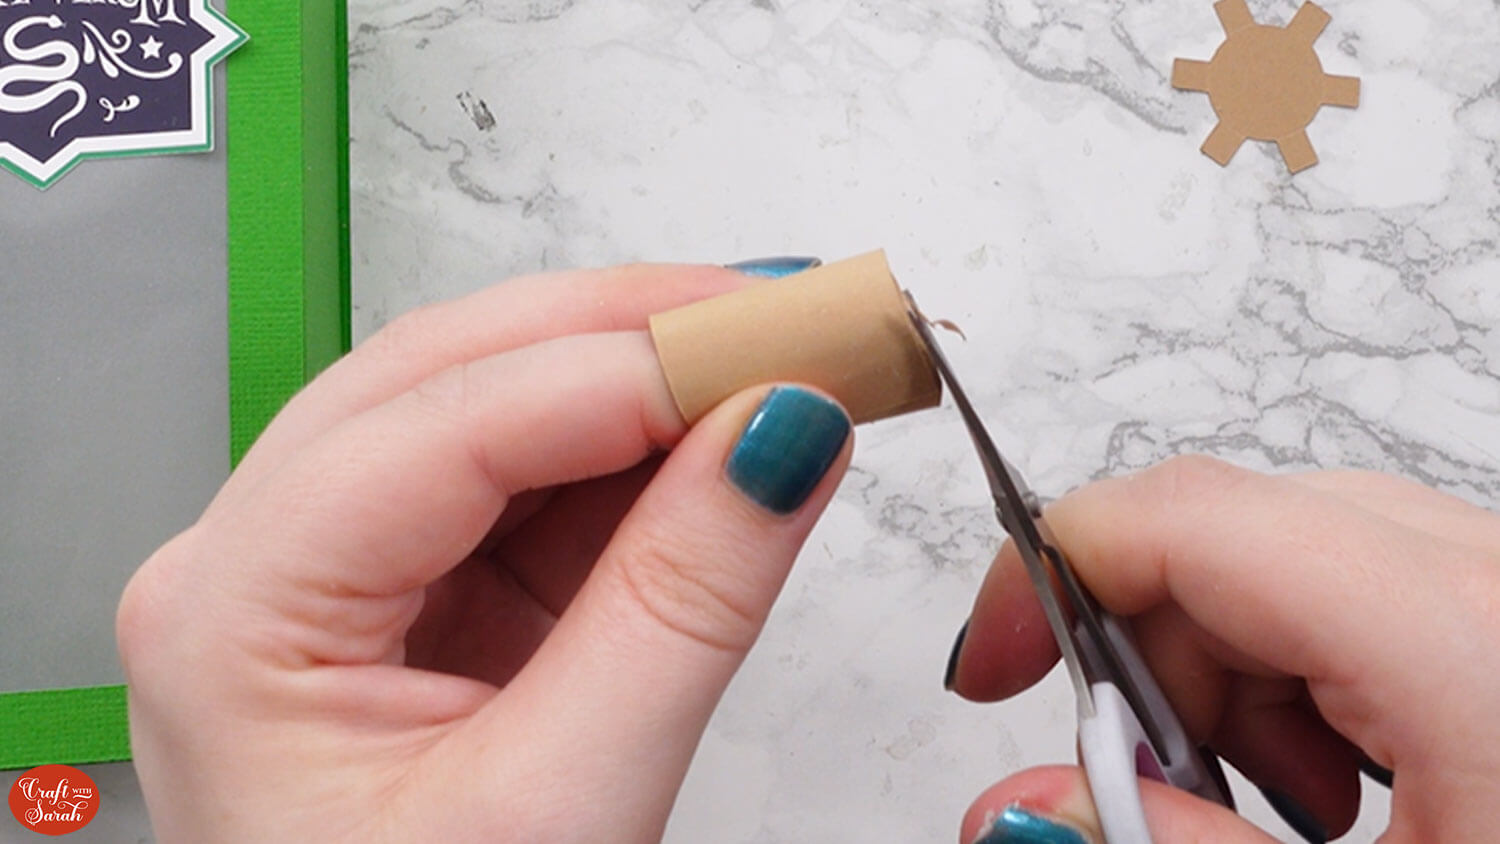
If you need to, use scissors to trim the top so that you have a straight edge to work with. I had to do this as I had a bit of overlap.
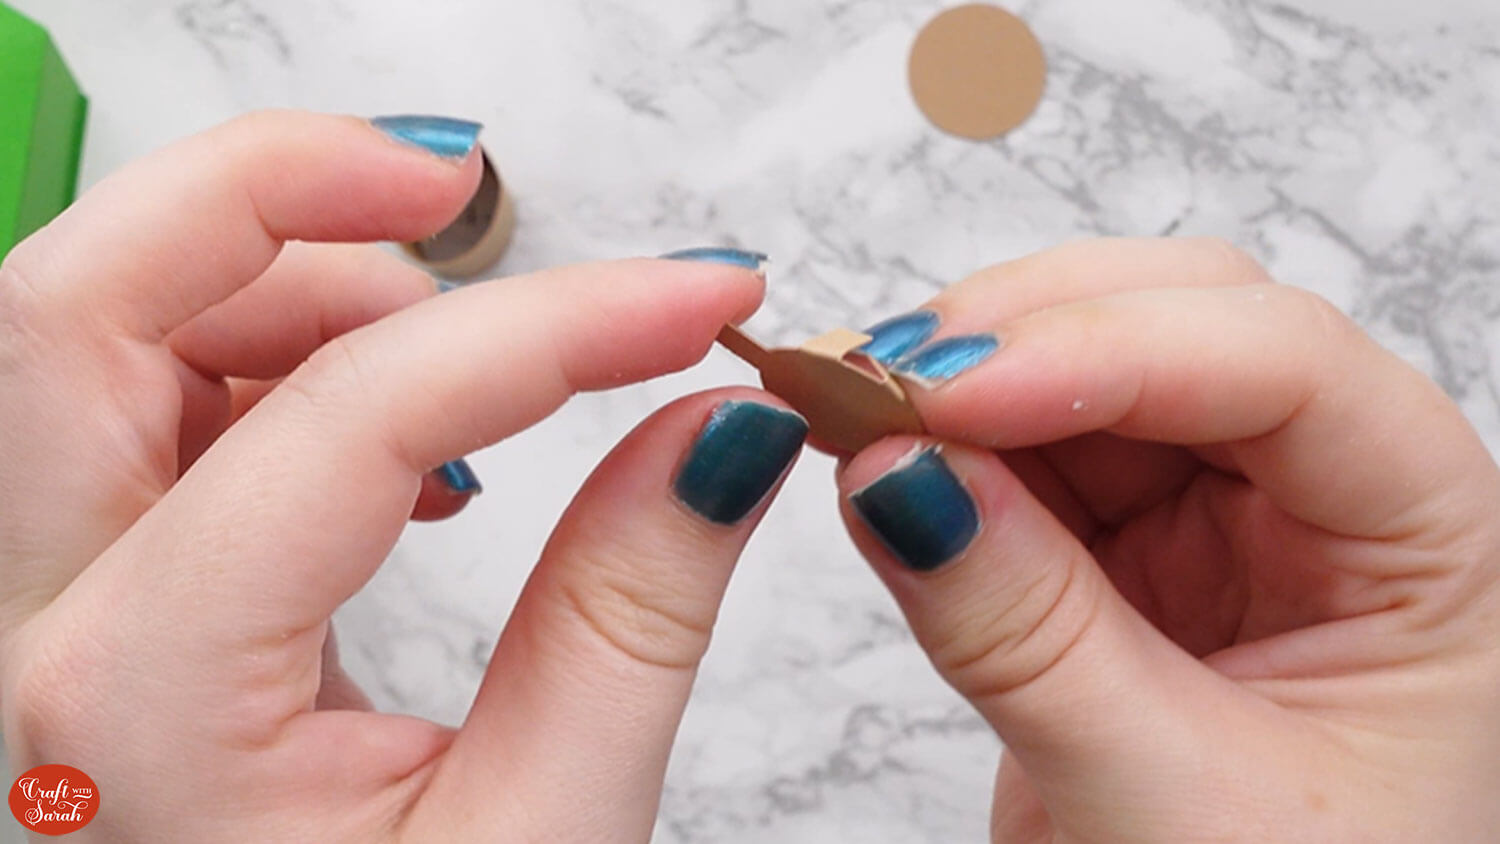
Select the circular piece with the tabs and fold them all inwards.
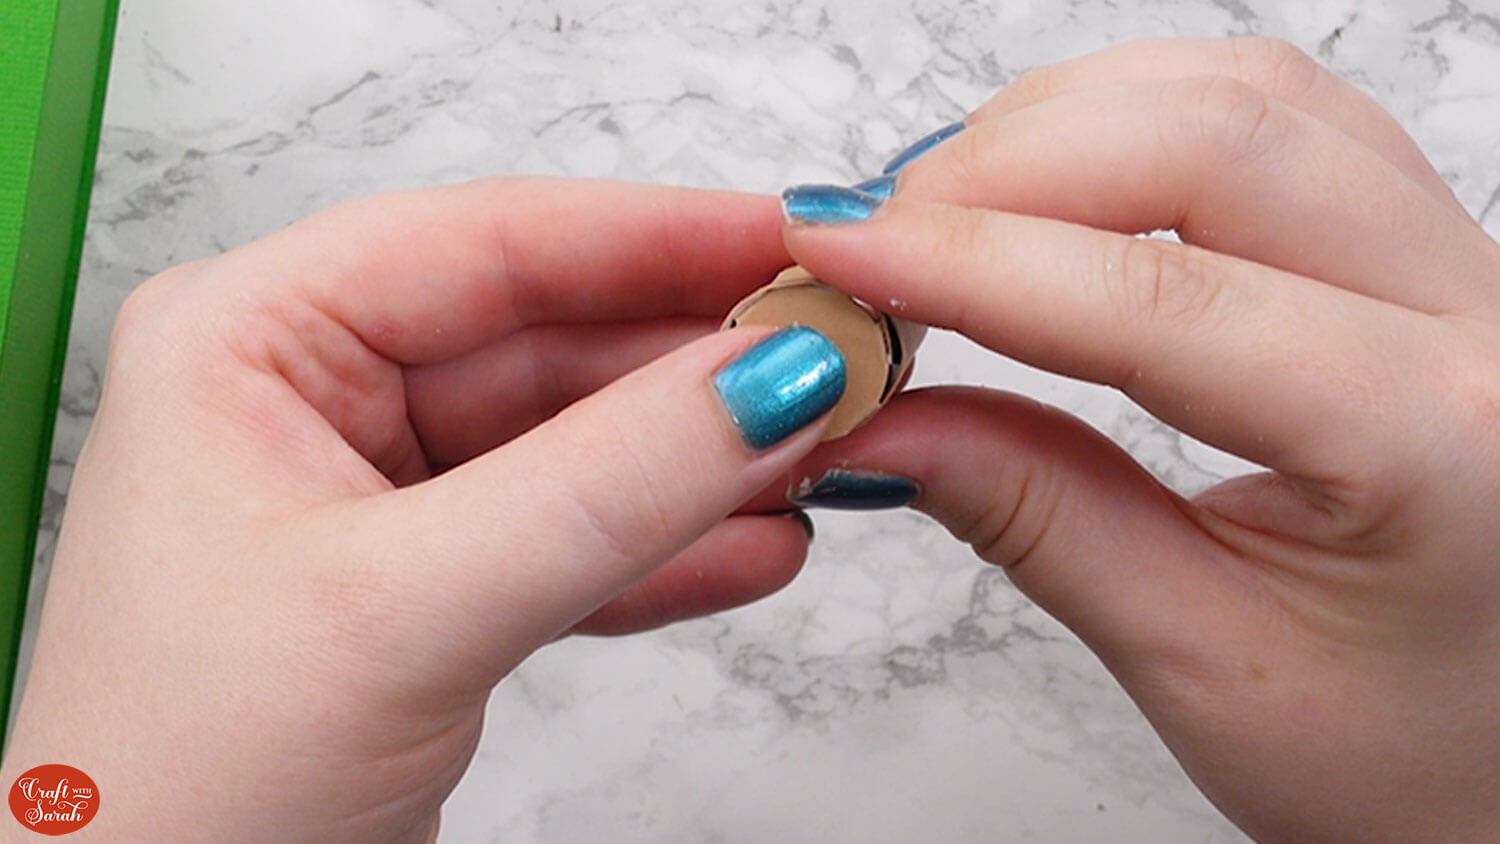
Glue this inside the larger side of the cork.
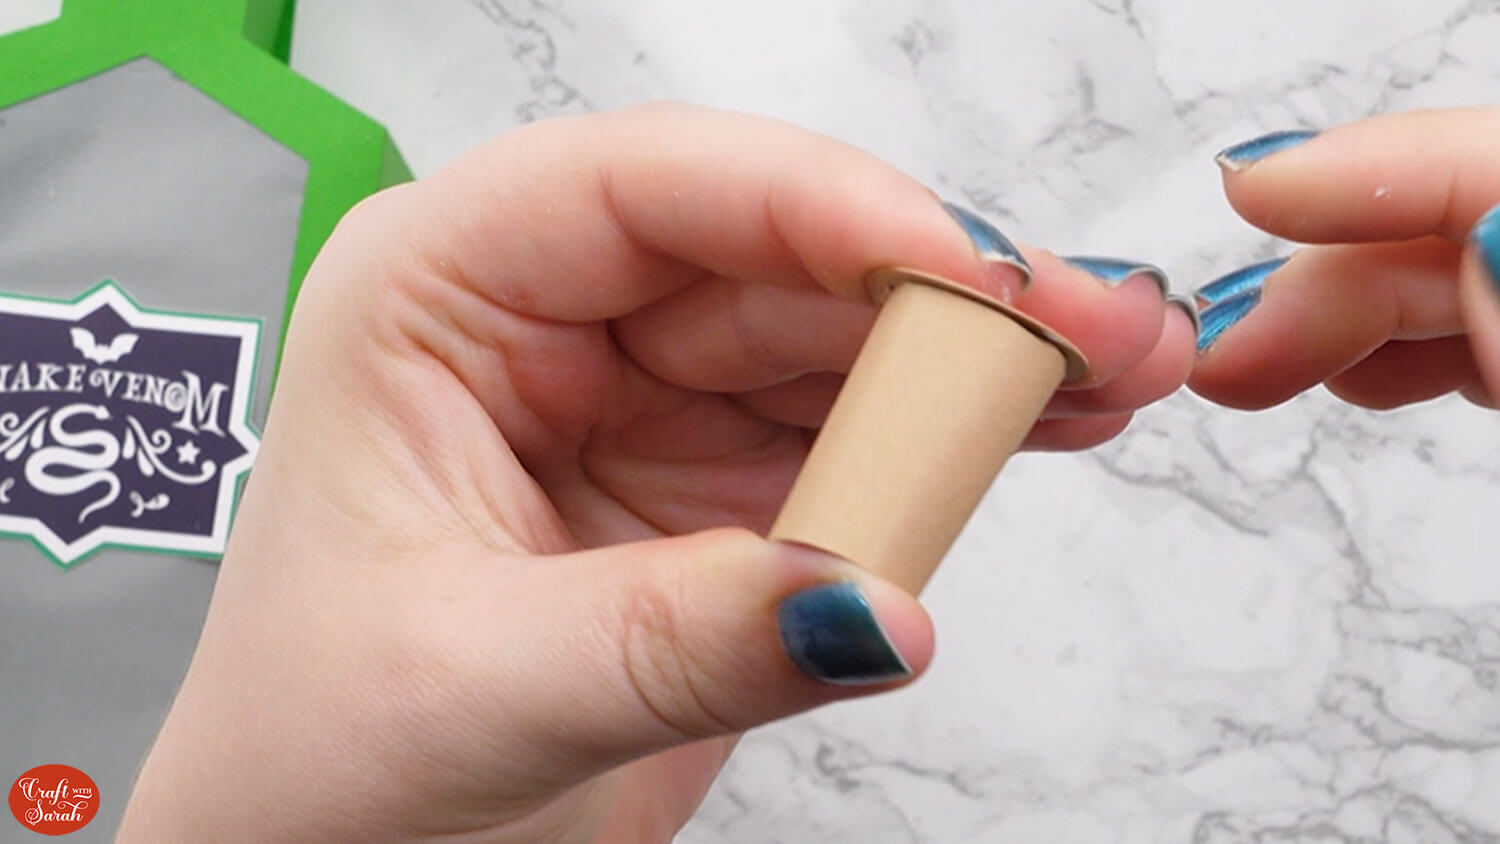
Glue the remaining circle on top.
3D potion bottle template
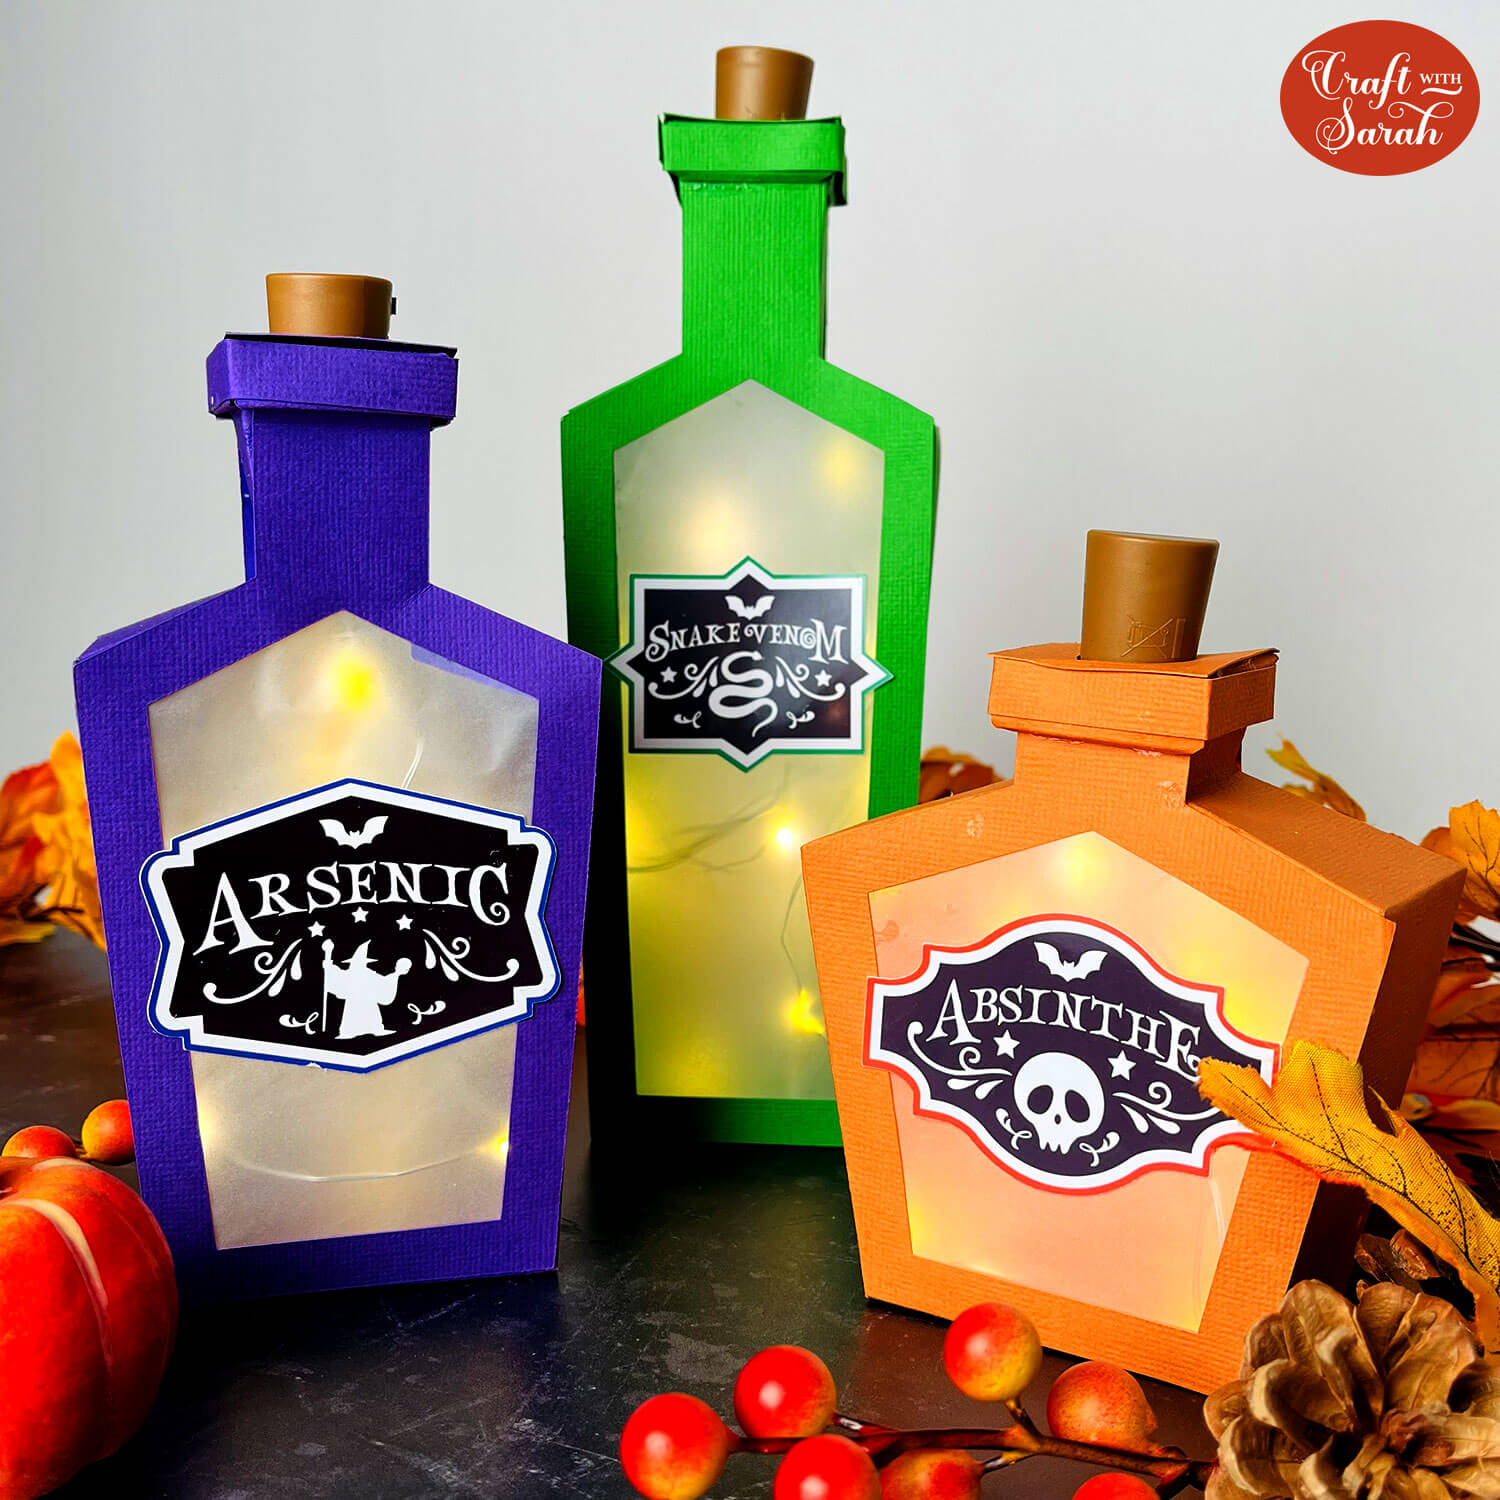
With your 3D potion bottles complete, you’ve crafted some enchanting Halloween decorations to light up the room.

Whether you chose to add the glowing effect or kept the windows filled in, these bottles bring a magical vibe to your spooky setup.
Happy crafting,
Sarah x

