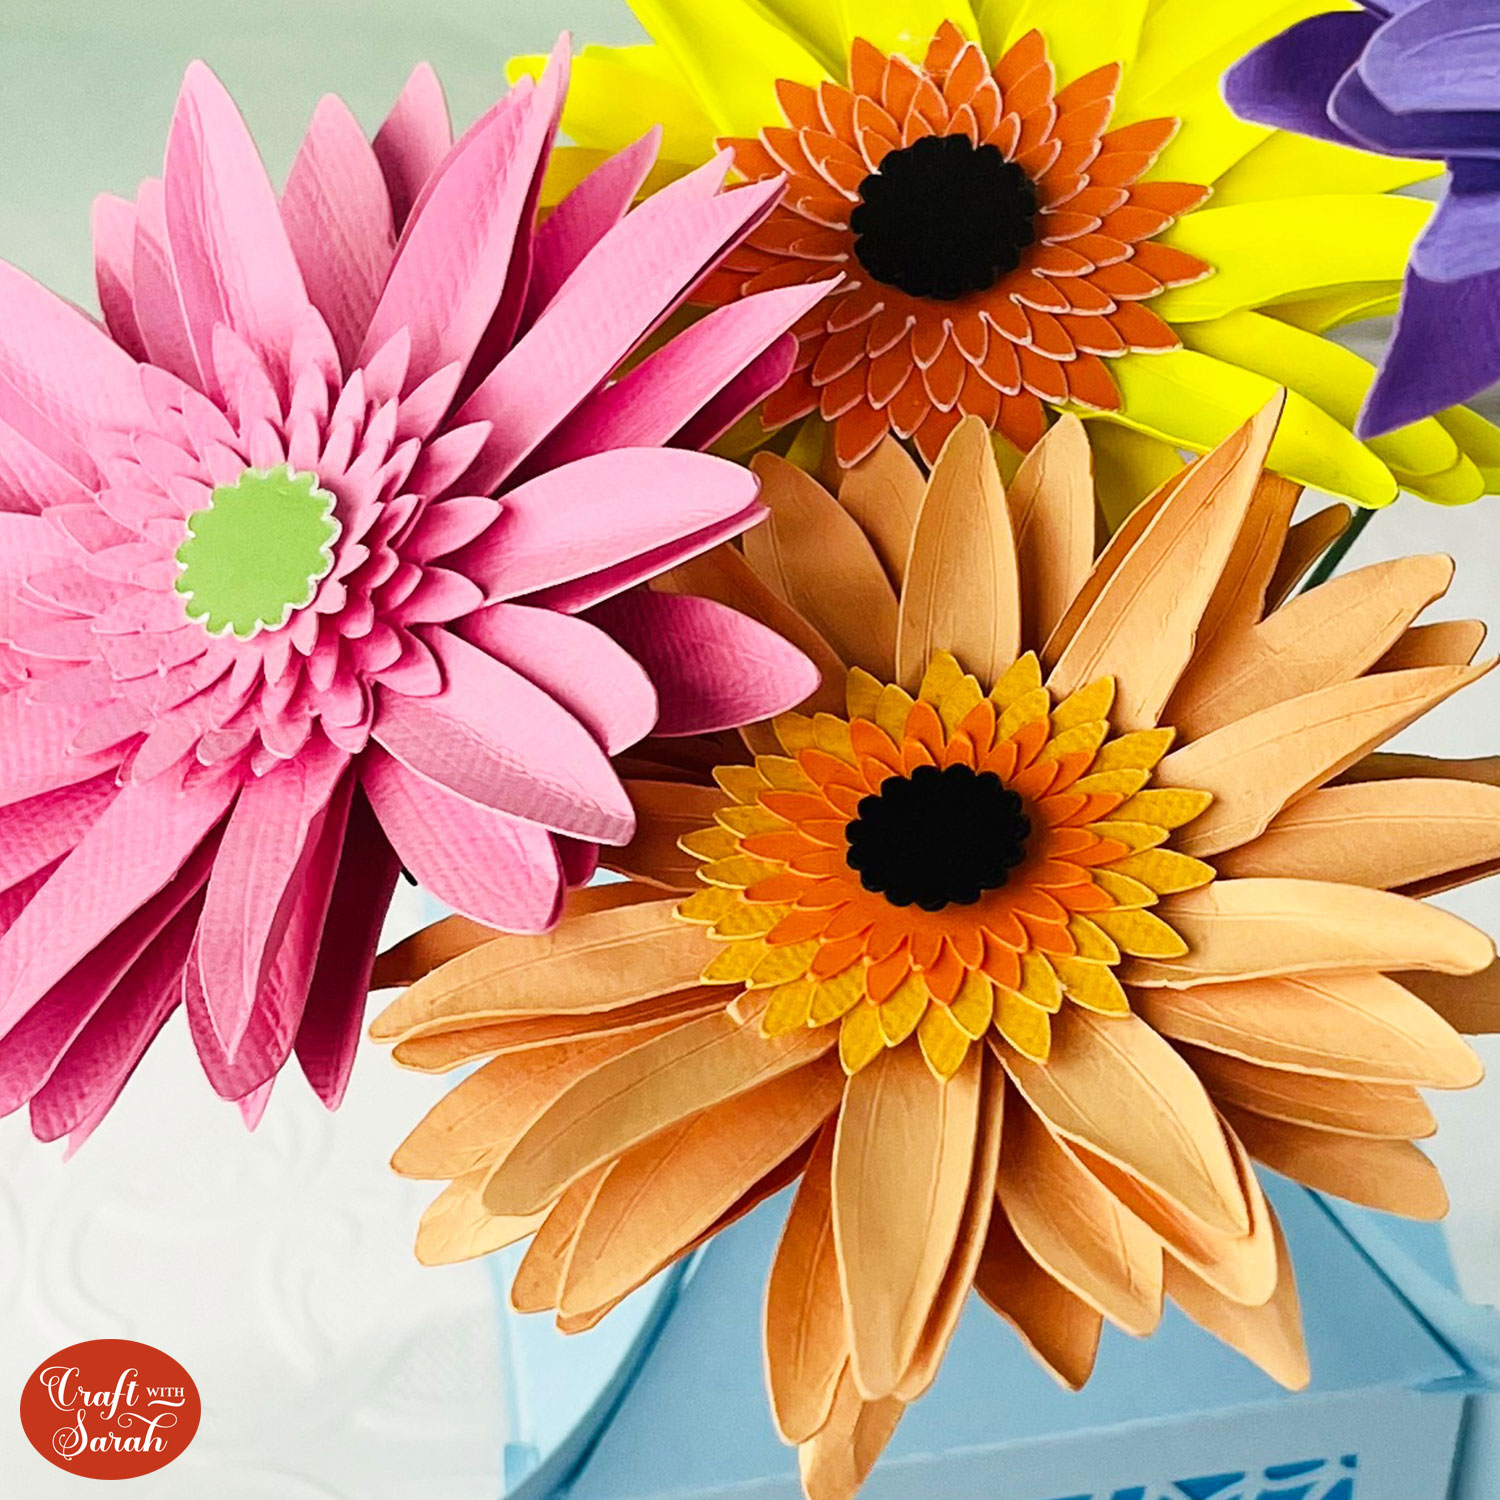
FCC 2024 Day 05: 3D Paper Flowers
Welcome to day five of the Floral Craft Countdown, where I’m sharing 14 flower themed Cricut papercraft projects in 14 days.
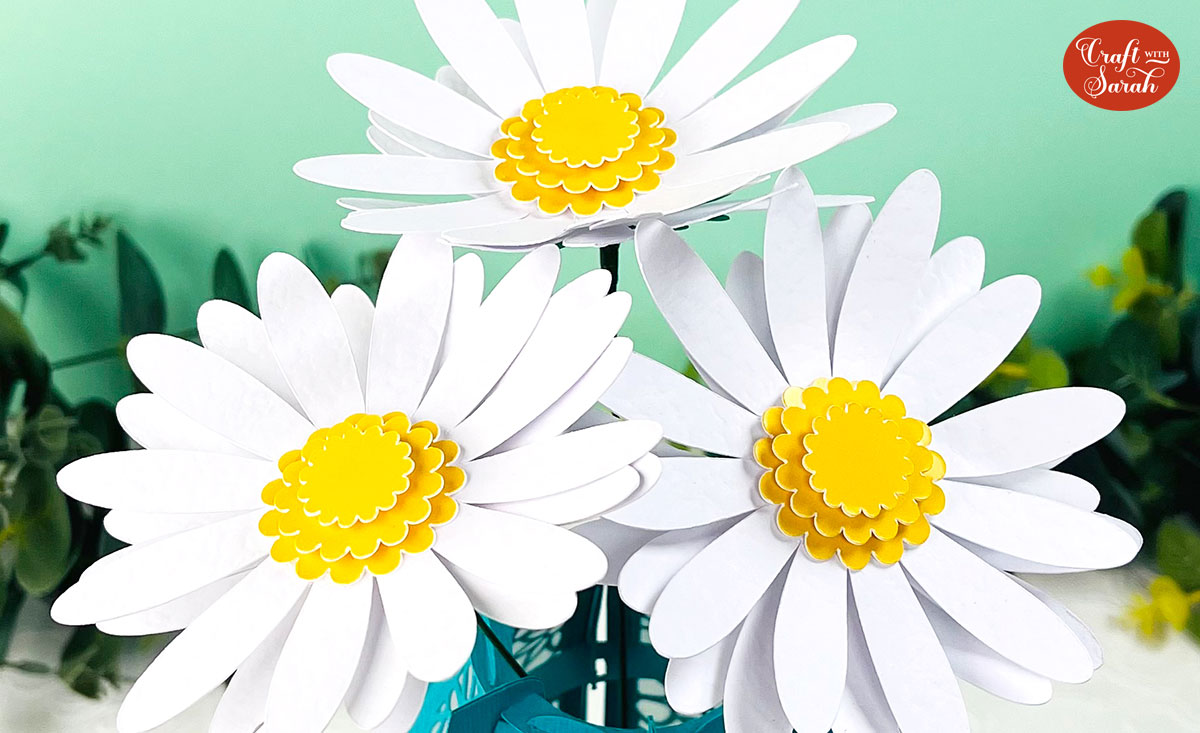
Yesterday we made papercraft vases, so today we’d better make something to go in them!
“Floral Craft Countdown” free ticket holders can download the white daisy design today (19th July). Instant Access Bundle purchases can download the daisy, gerbera, rose, poinsettia AND sunflower.
This Project was part of the Floral Craft Countdown
Materials supply list
Here is a list of the materials that are needed to make this project.
Please note that some of the links included in this article are affiliate links, which means that if you click through and make a purchase I may receive a commission (at no additional cost to you). You can read my full disclosure at the bottom of the page.
- Cricut machine
- Light blue Cricut cutting mat
- Coloured Card (thin card works best)
- Hot glue gun and glue sticks
- Glue (I like Bearly Art Glue and Collall)
- 3D foam pads
- Small wooden beads (mine are 6mm)
- Florist wire
- Wire cutters
- Pliers
- Florist tape (optional)
This project is suitable for the following types of Cricut machine: Explore Air 2, Explore Air 3, Maker, Maker 3, Venture, Joy Xtra and Joy.
Foundation learning
If you're new to crafting with your Cricut, you may find the below links helpful.
They teach some of the skills mentioned throughout this tutorial.
- How to upload SVG files into Design Space
- How to make 3D layered Cricut projects
- The BEST way to frame papercraft projects
- How to mount multiple designs in the same frame with magic guides
- How to score with a Cricut (even without scoring tools)
- Print then cut tutorial
- Design Space tools (Combine, Attach, Slice, Weld, Flatten, etc.)
- Pattern fill tutorial (for making backgrounds & cutting images to a specific shape/size)
- Free envelope SVGs that can be sized to fit any card
- How to write inside cards with Cricut pens
- How to cut layered designs at a small size
- Design Space tips & tricks
- Cricut pens tutorial
Video tutorial
Watch the video below to see how to make this project. Keep scrolling for a written tutorial.
VIDEO TIMESTAMPS:
Introduction: 00:00
White daisy: 03:10
Gerbera: 17:12
Poinsettia: 31:14
Sunflower: 39:39
Rose: 48:11
Uploading the flower SVGs
Download the files using the box below.
Floral Craft Countdown FREE ticket holders get the daisy flower with today’s download. Instant Access Bundle purchasers get all five flowers.

Before you upload the SVGs to Design Space, you need to unzip the download folder that they come in.
- How to unzip a folder on Windows computer
- How to unzip a folder on a Mac
- How to unzip a folder on an iPad/iPhone
- How to unzip a folder on an Android device
After unzipping, upload the SVG files into Cricut Design Space. These are the files that start svg- in the filename.
Not sure how to do this? Here’s how to upload SVGs to Cricut Design Space. Make sure you upload the file which starts svg- in the filename!
Tutorials for each of the five flower types are included below.
You can use the links below to “jump” straight to that particular flower:
Daisy Paper Flower Tutorial
Step 1) Cut the daisy template
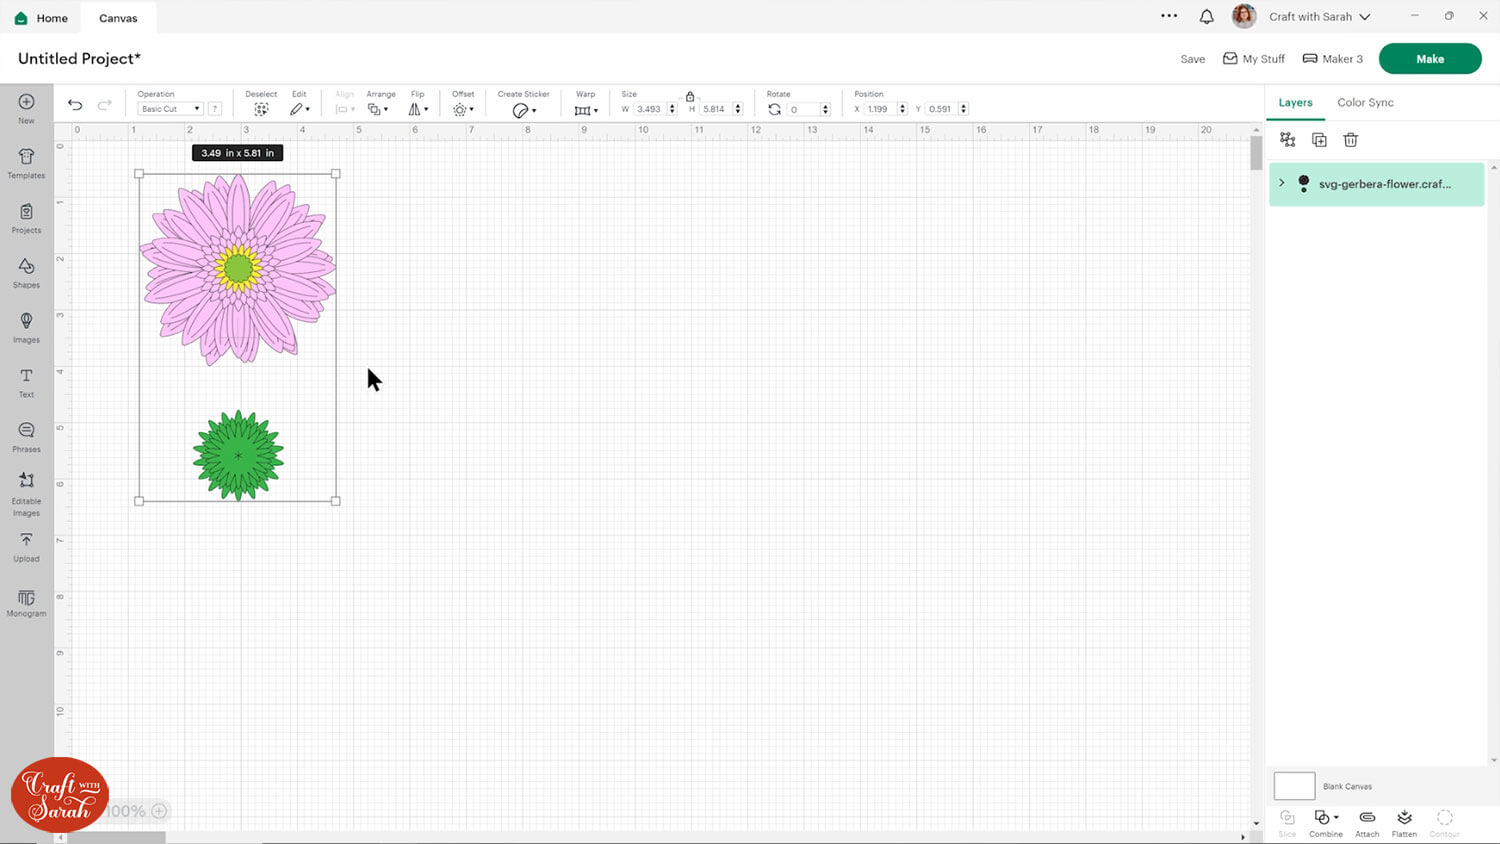
The daisy flower does load into Design Space at a good size to cut, but you may wish to make it larger or smaller.
Here’s how it looks when it’s loaded in:
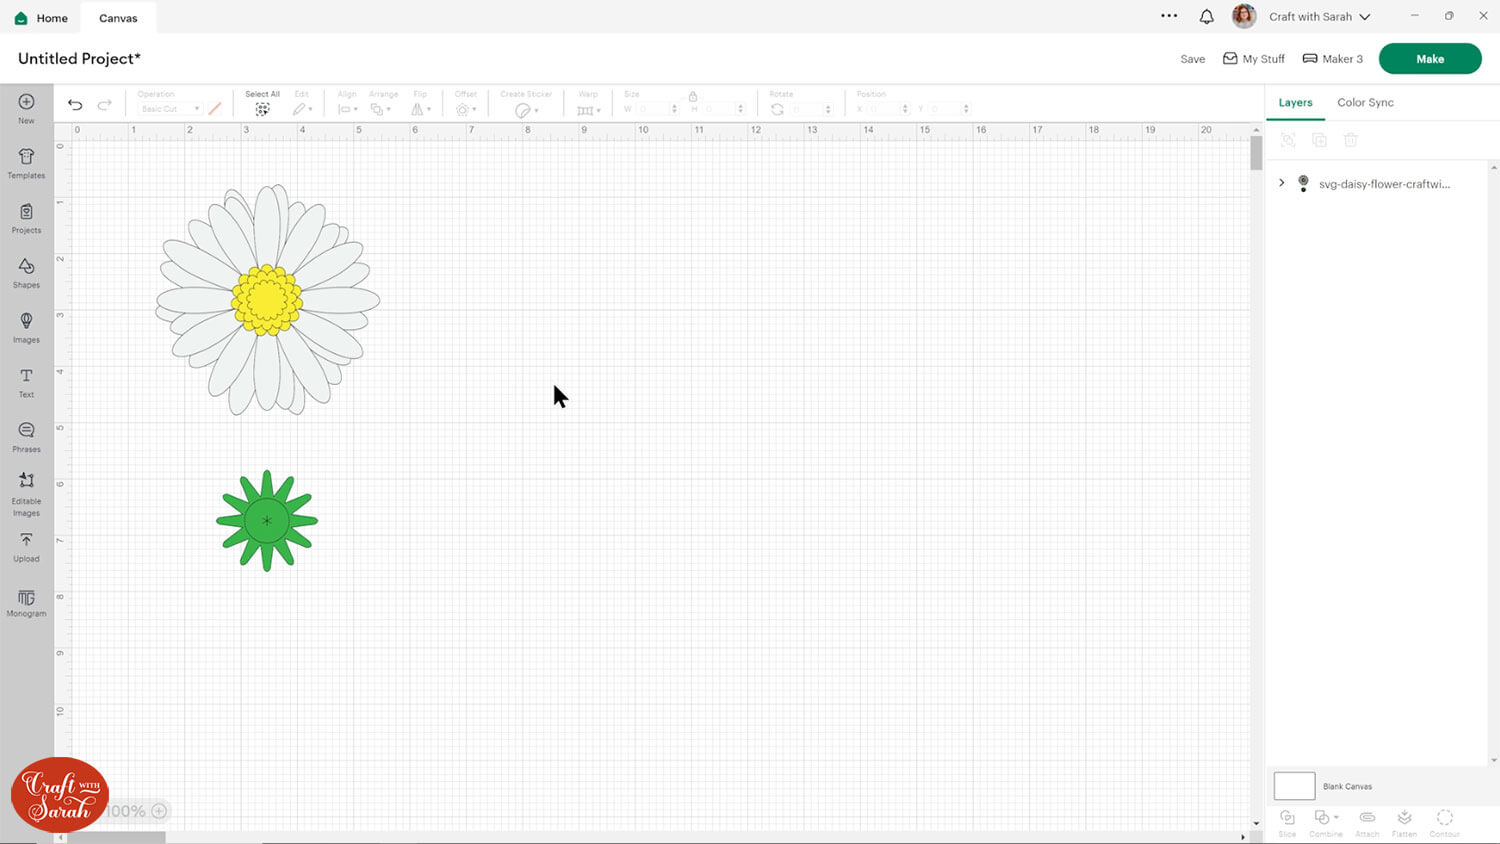
The easiest way to resize is to first Ungroup the layers.
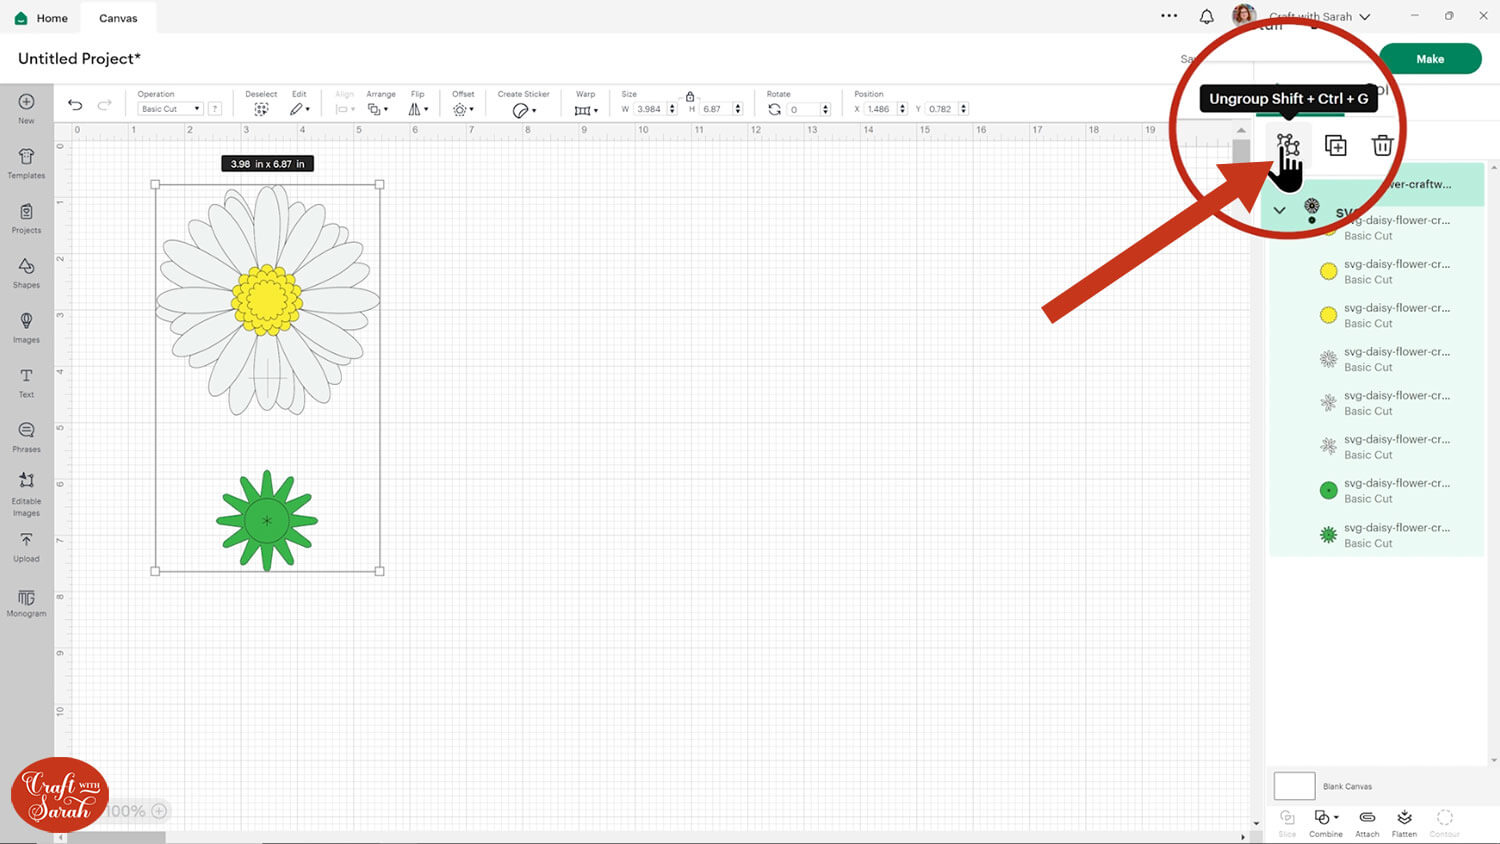
Then, press “Select All”, followed by “Align > Center” to put all the pieces on top of each other.
The green pieces look like they have disappeared, but they are in fact just behind the white petals.
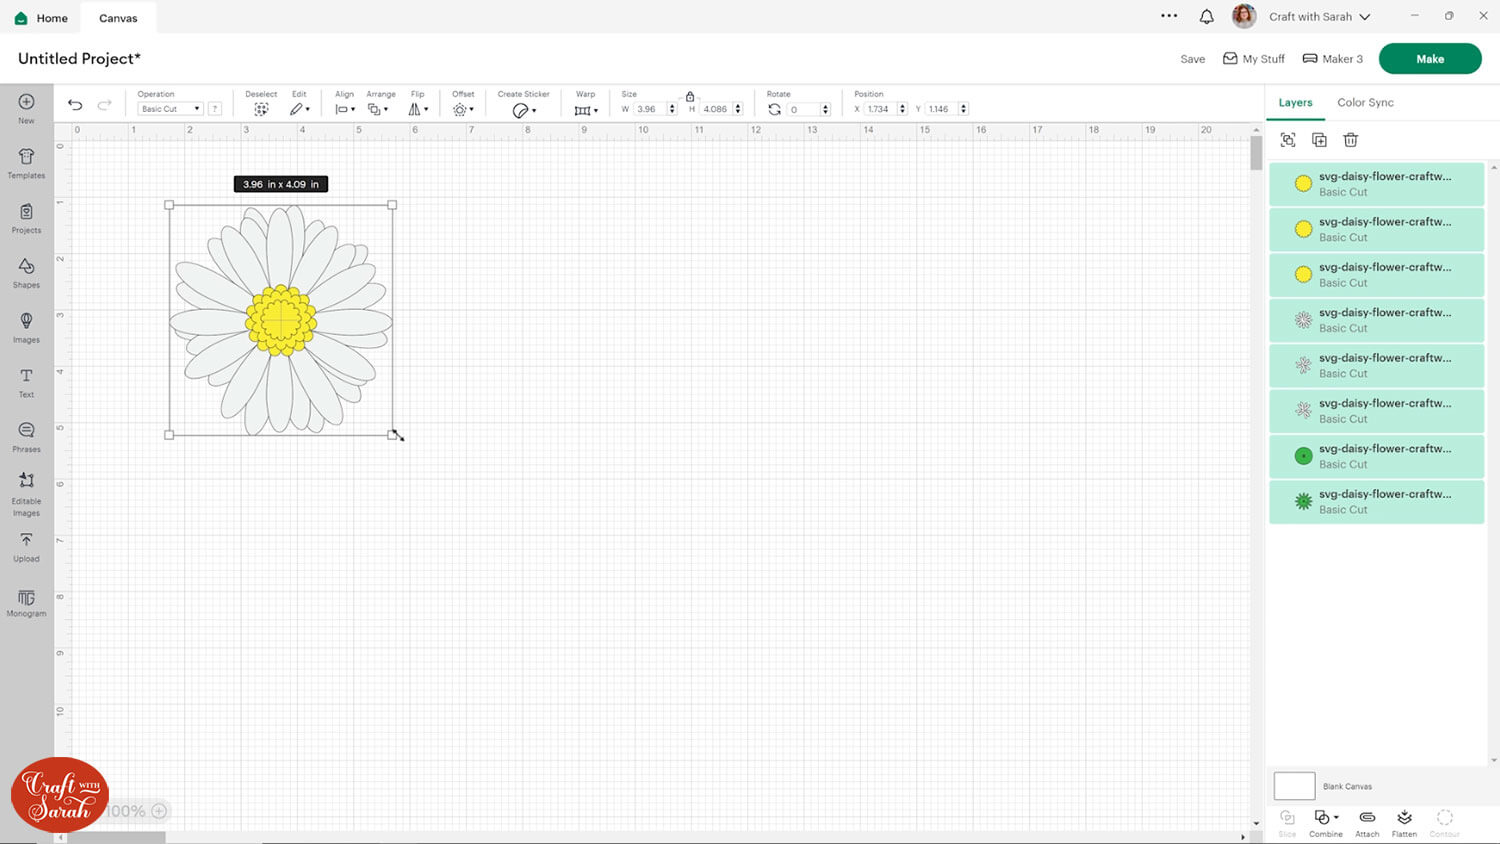
Group the layers and then resize.
Click “Make” and get the daisy flowers cut out. Lighter weight cardstock or even white paper works best.
Step 2) Put the flower together
I used small wooden beads between the petals to give them some depth and to make the flower look more realistic.
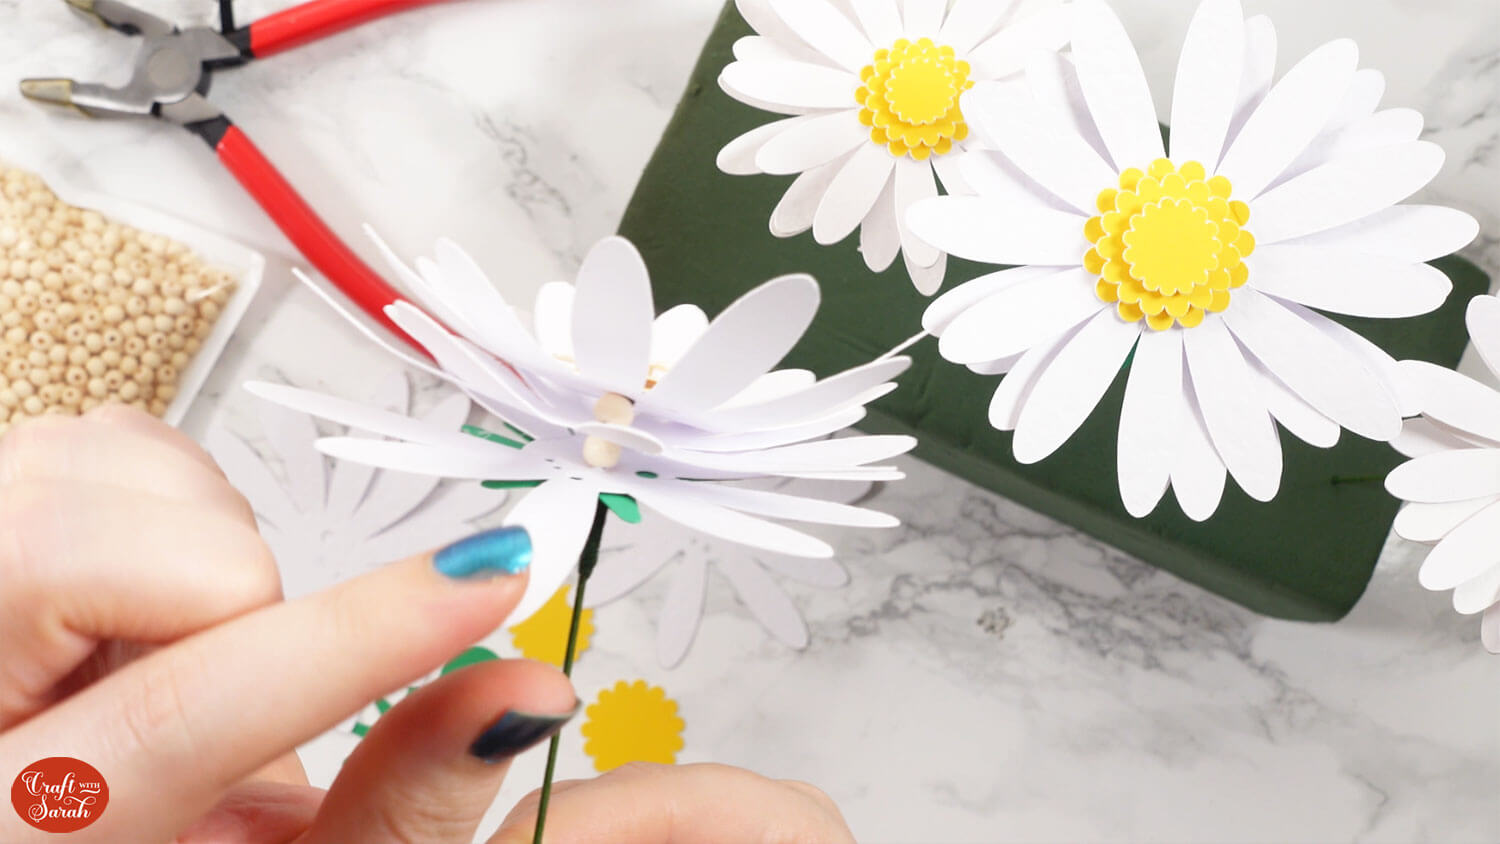
If you don’t have beads, you could use foam pads/squares instead.
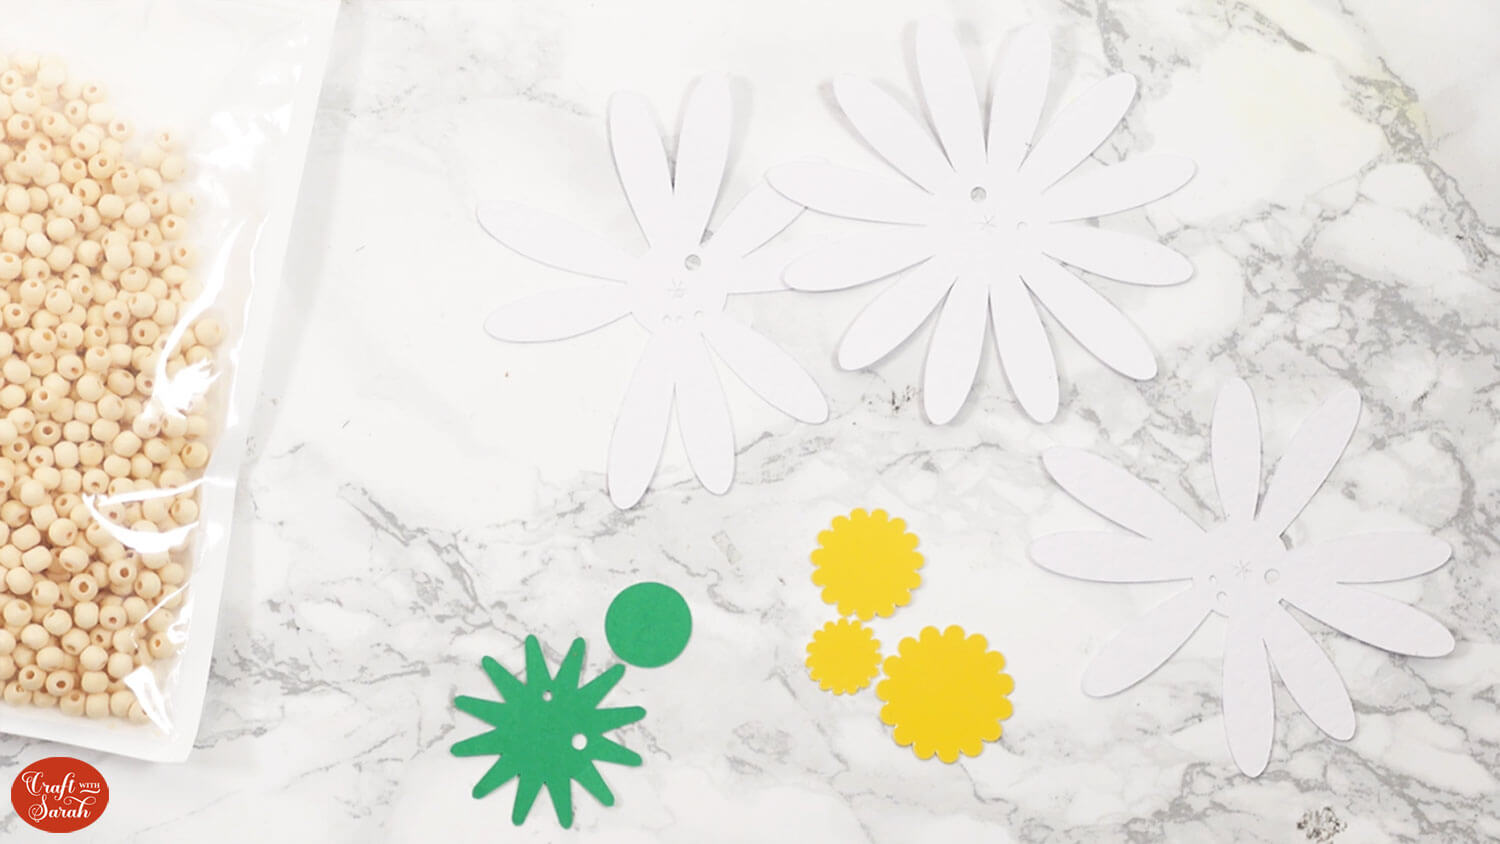
Here are what the pieces of the daisy look like:
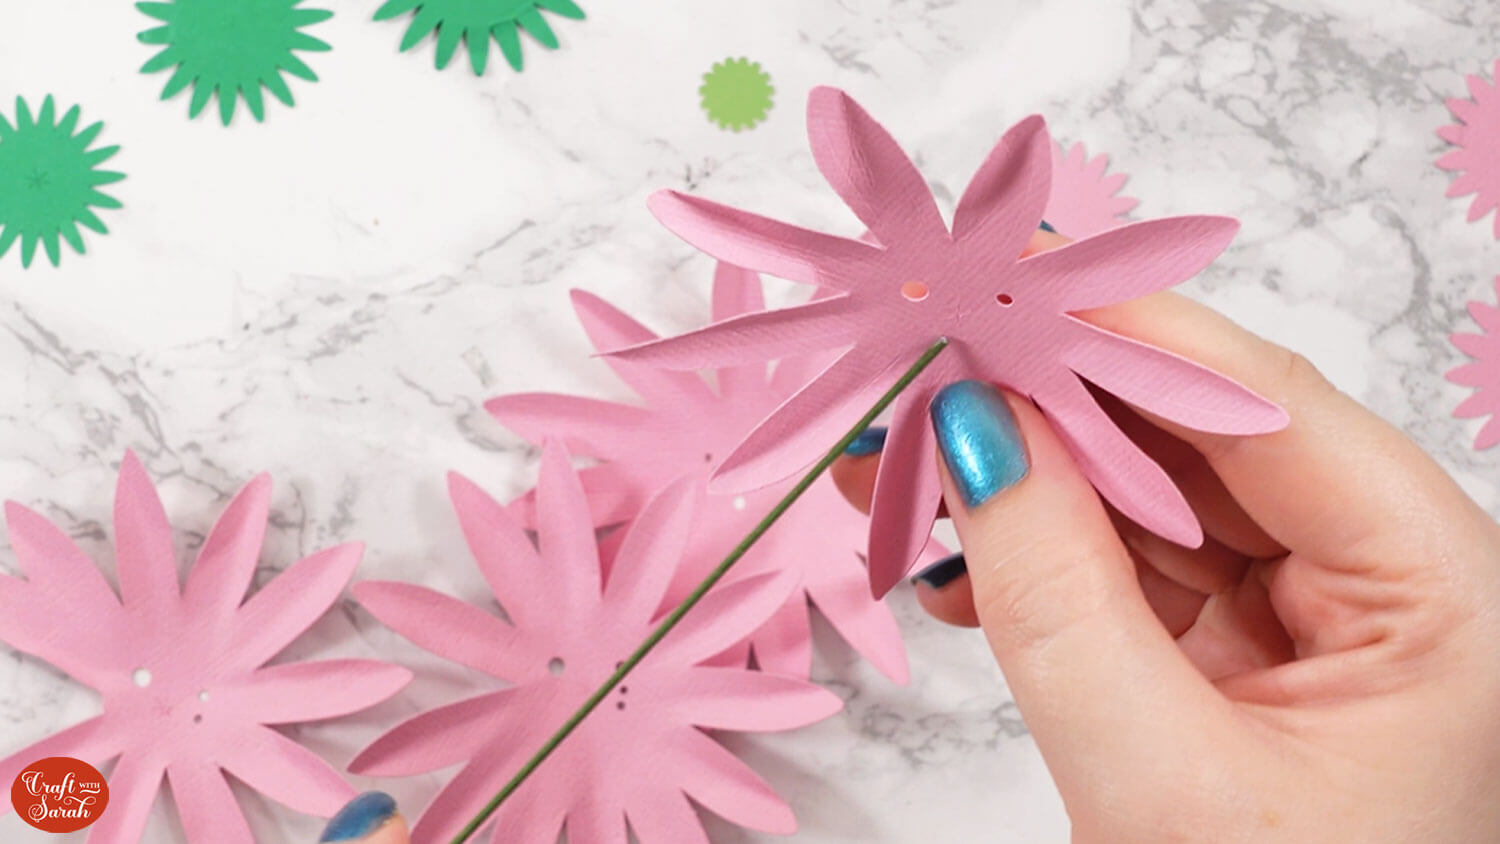
Gently bend up the petals on all the white pieces to give a 3D effect to them.
Use some pliers to bend over one of the ends of your florist wire.
NOTE – I did this wrong and pulled the end of the wire into a “horseshoe” shape. I should have just bend it over like the top of a walking stick instead.
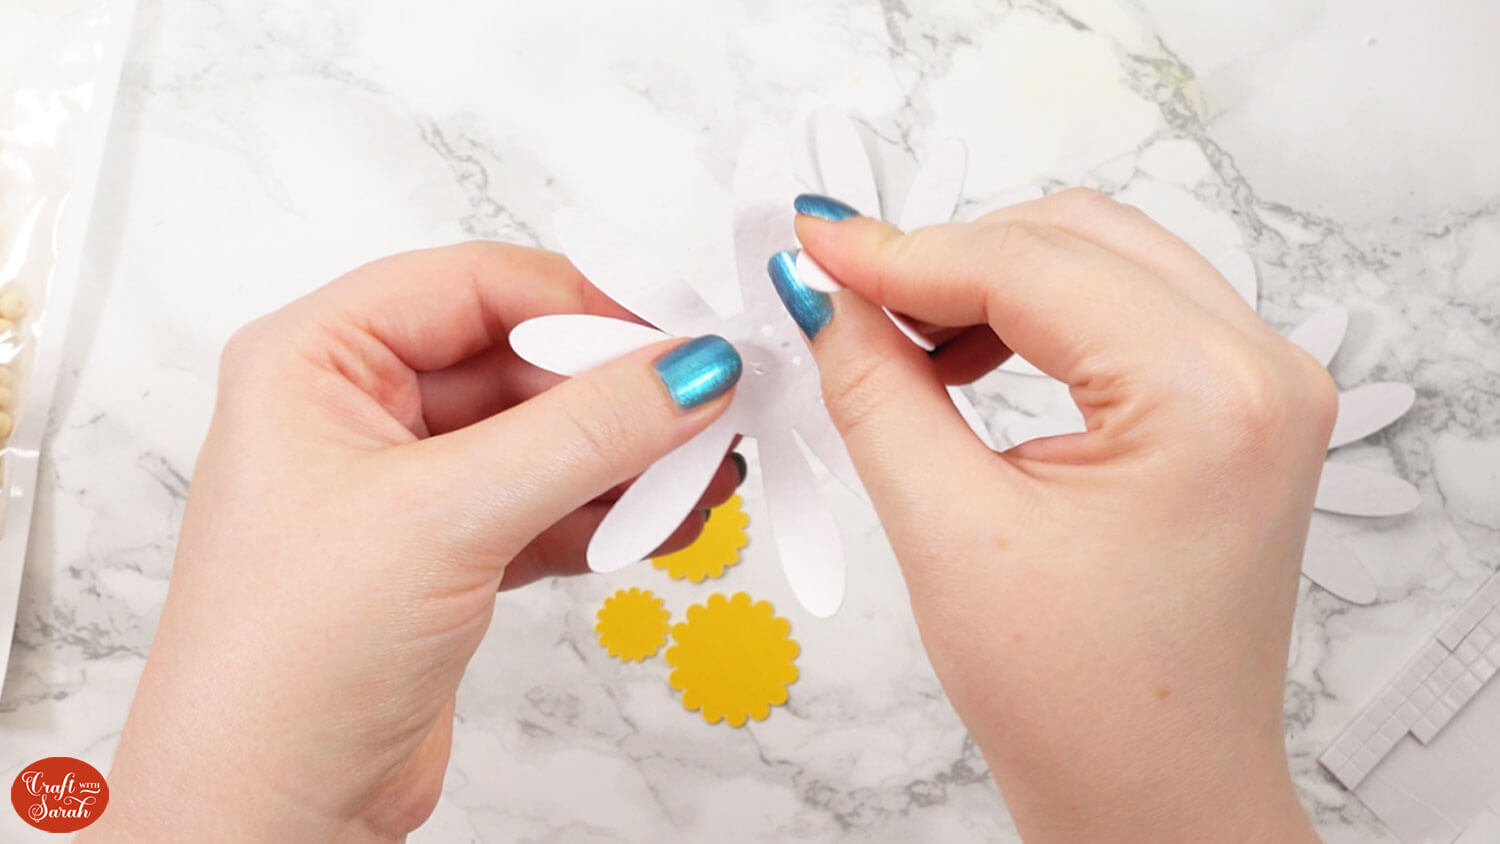
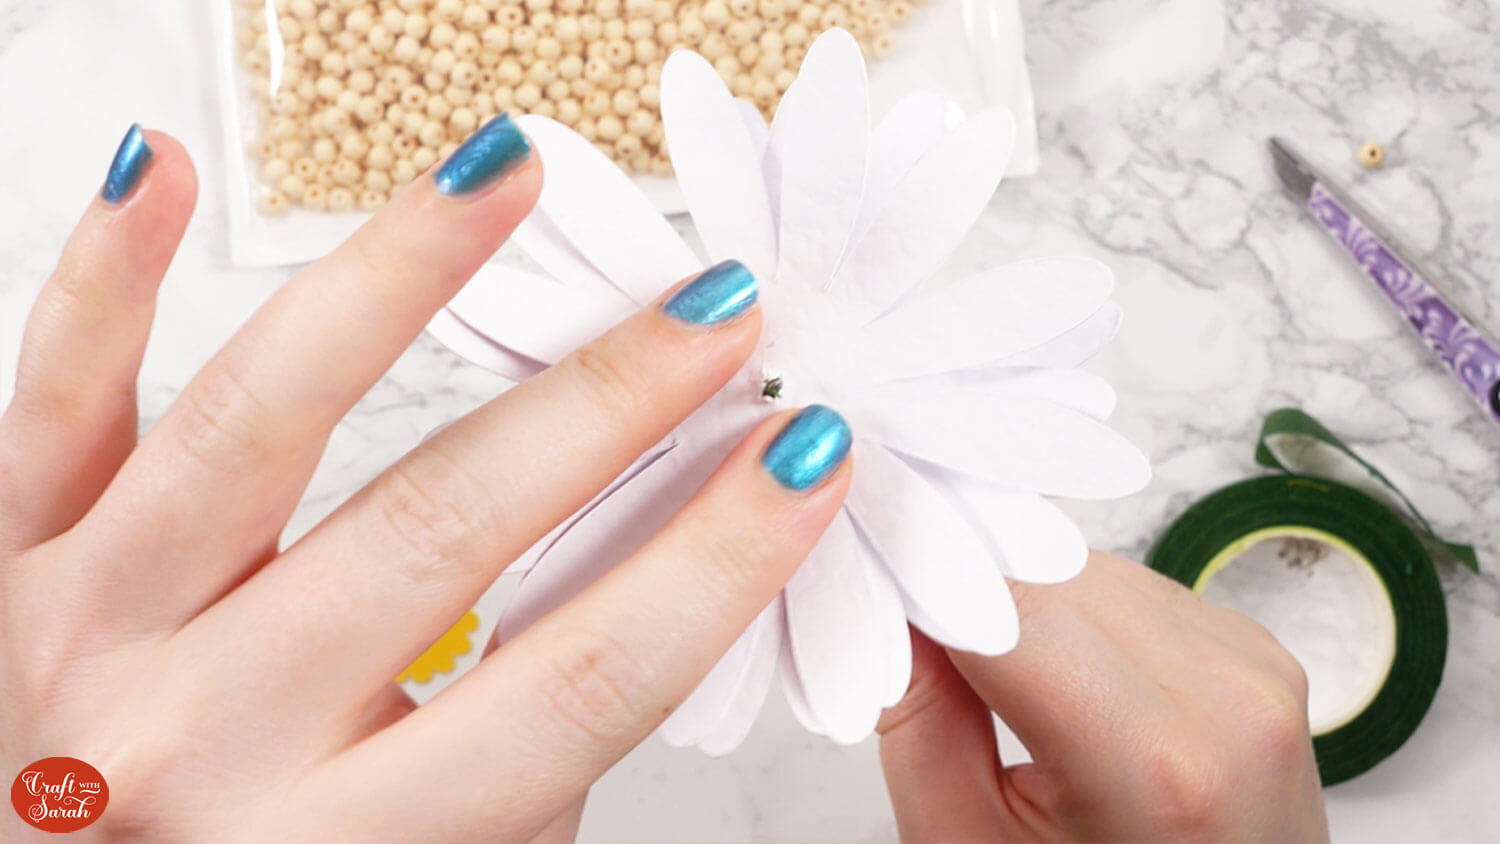
Thread the petal pieces with one large circular hole and one small circular hole onto the wire.
The wire goes through the small “crosshatch” cut in the middle of the petal.
Add a wooden bead onto the wire.
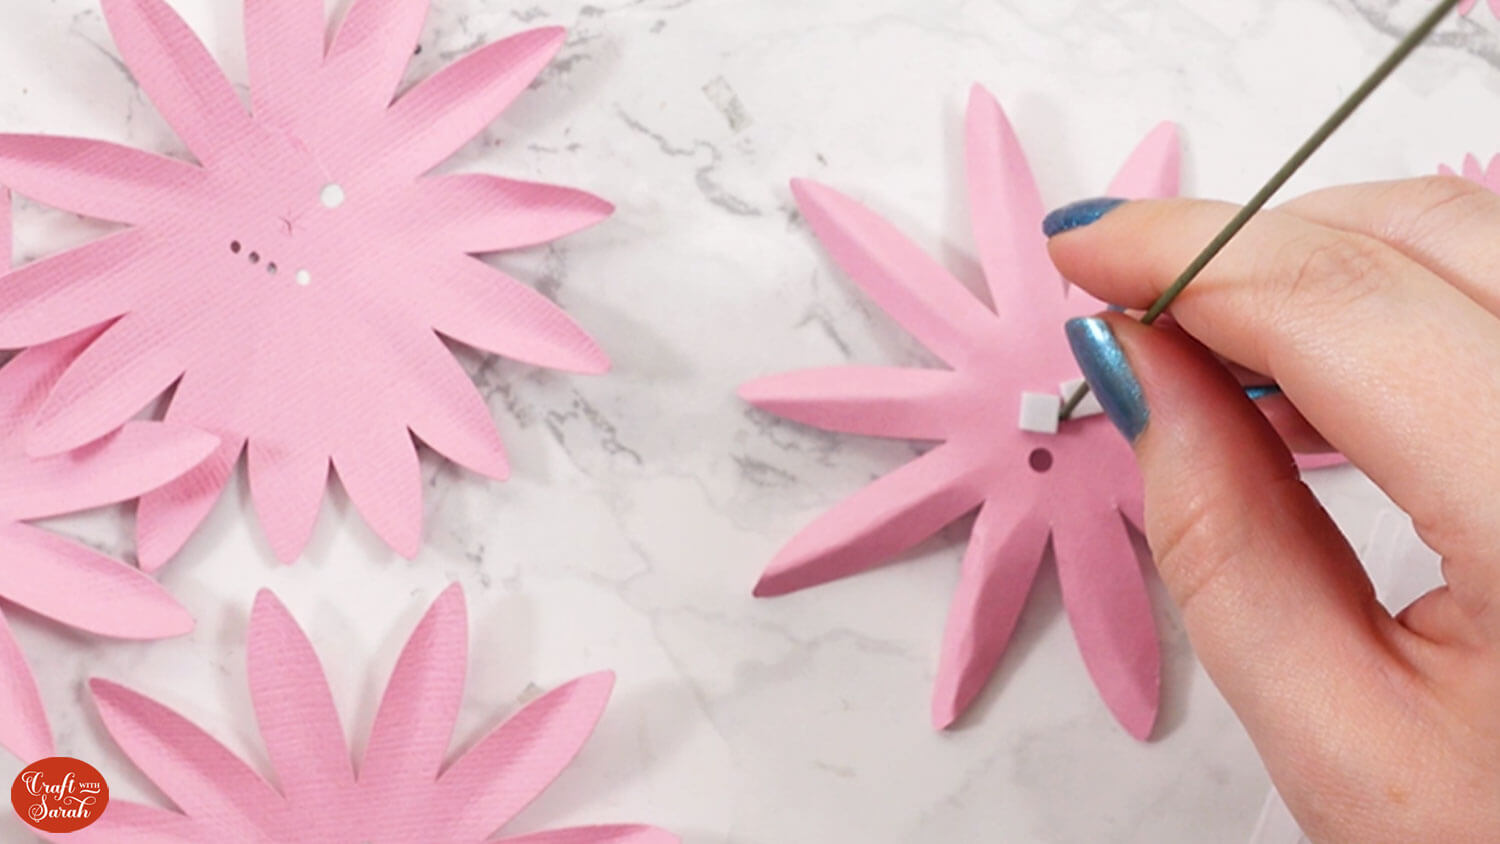
If you don’t have beads, you can put some foam squares on the back of the first petal piece and use that to stick it to the next petal piece.
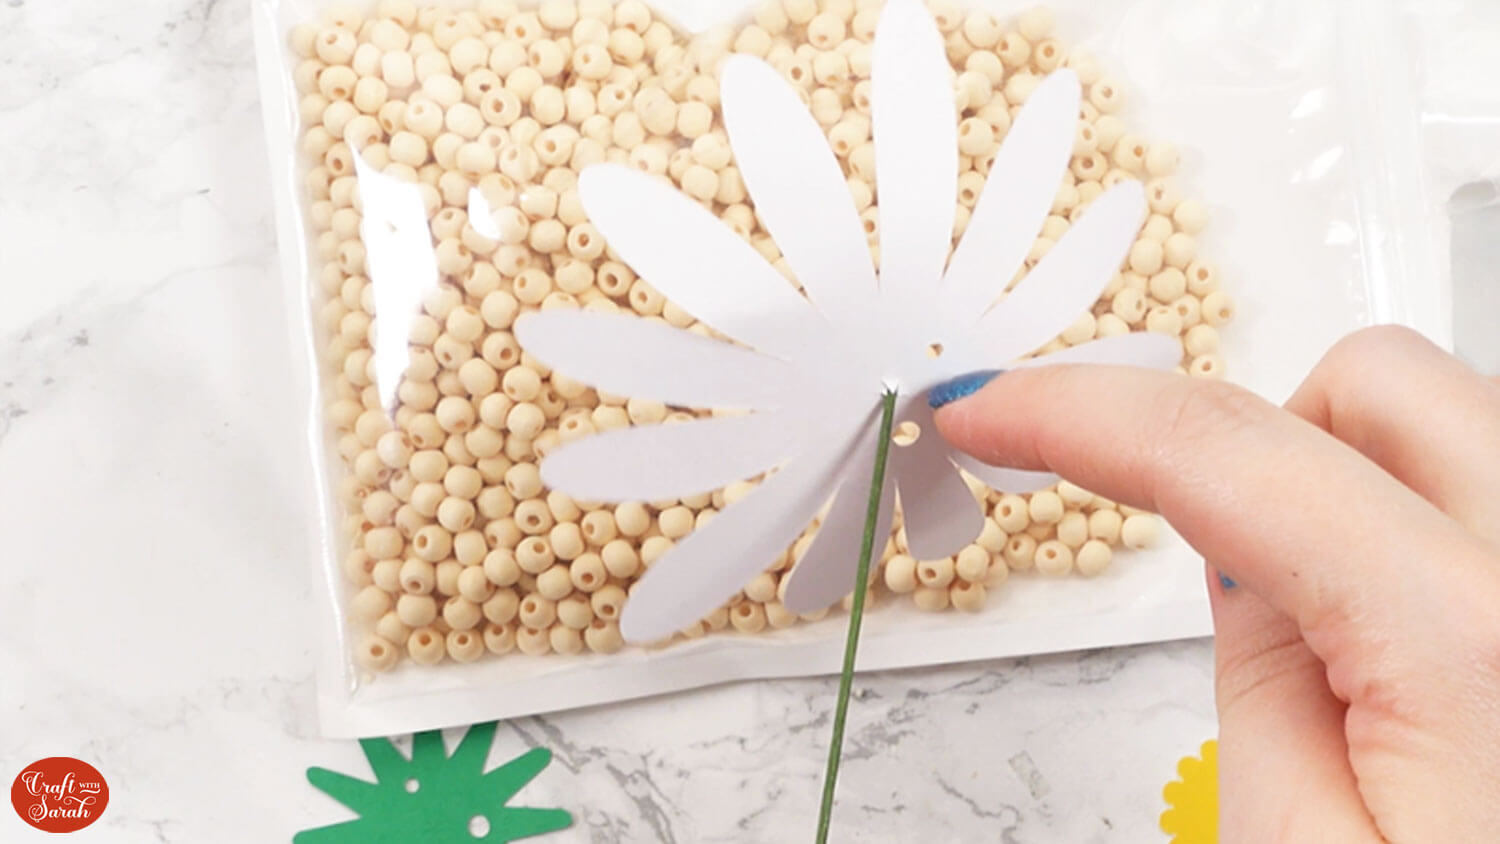
Thread the petal pieces with one large circular hole and two small circular hole onto the wire. Roughly line up the holes with the ones on the first petal shape.
Add a wooden bead onto the wire.
Thread the petal pieces with one large circular hole and three small circular hole onto the wire. Roughly line up the holes with the ones on the first petal shape.
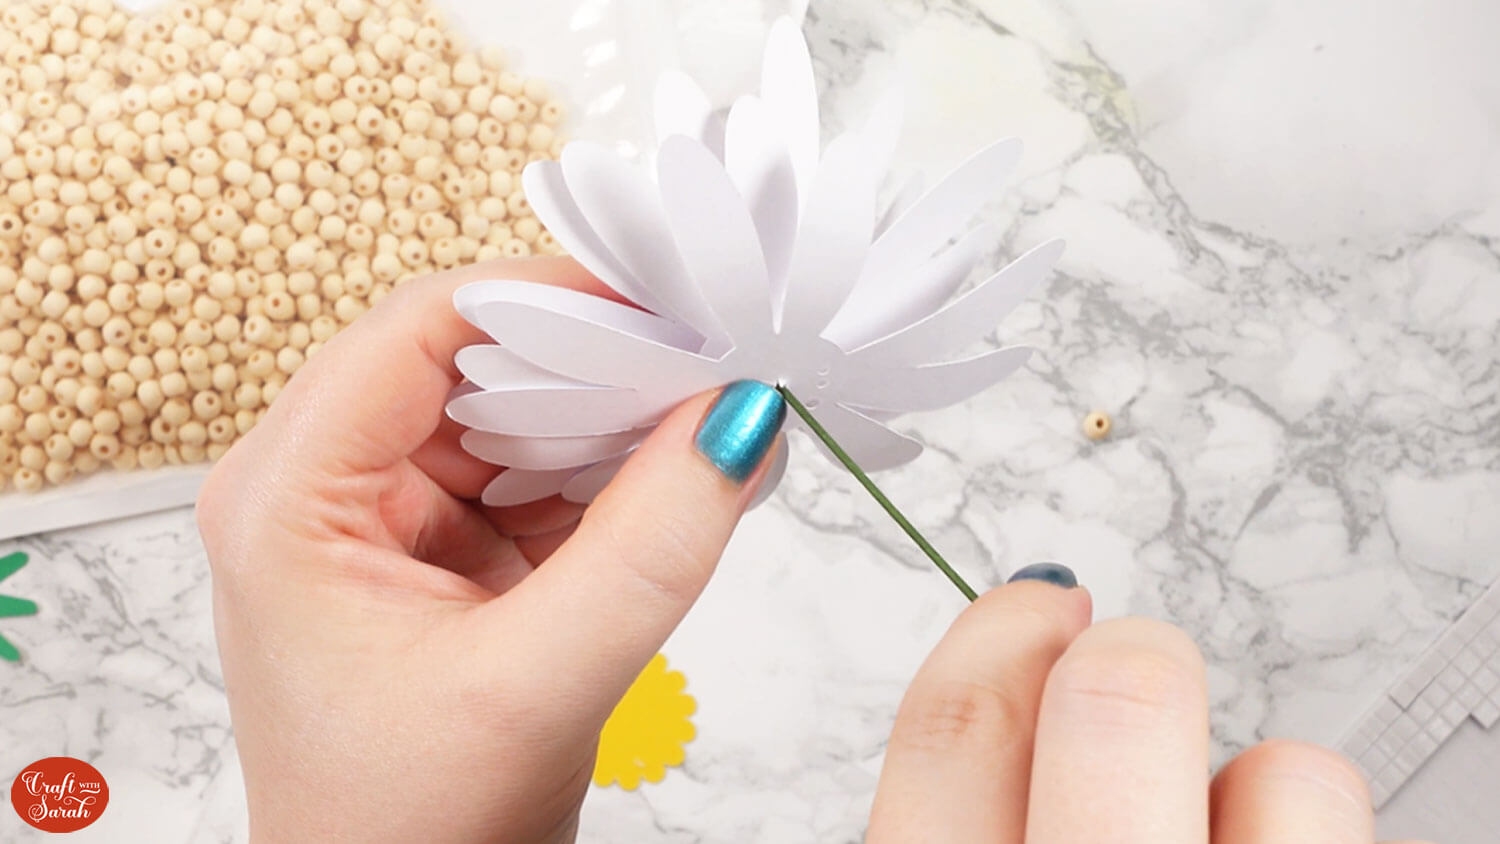
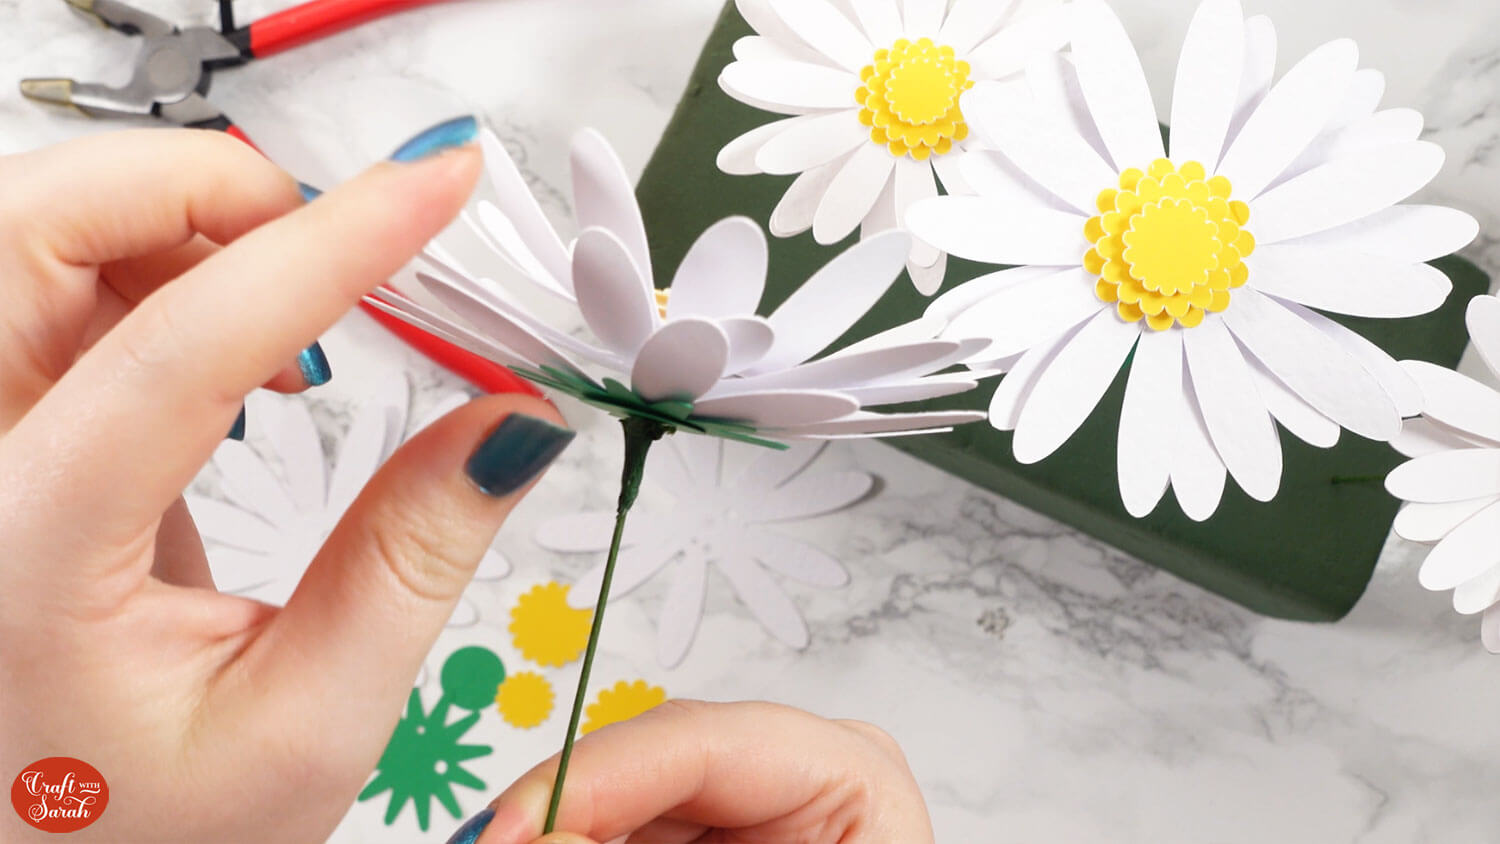
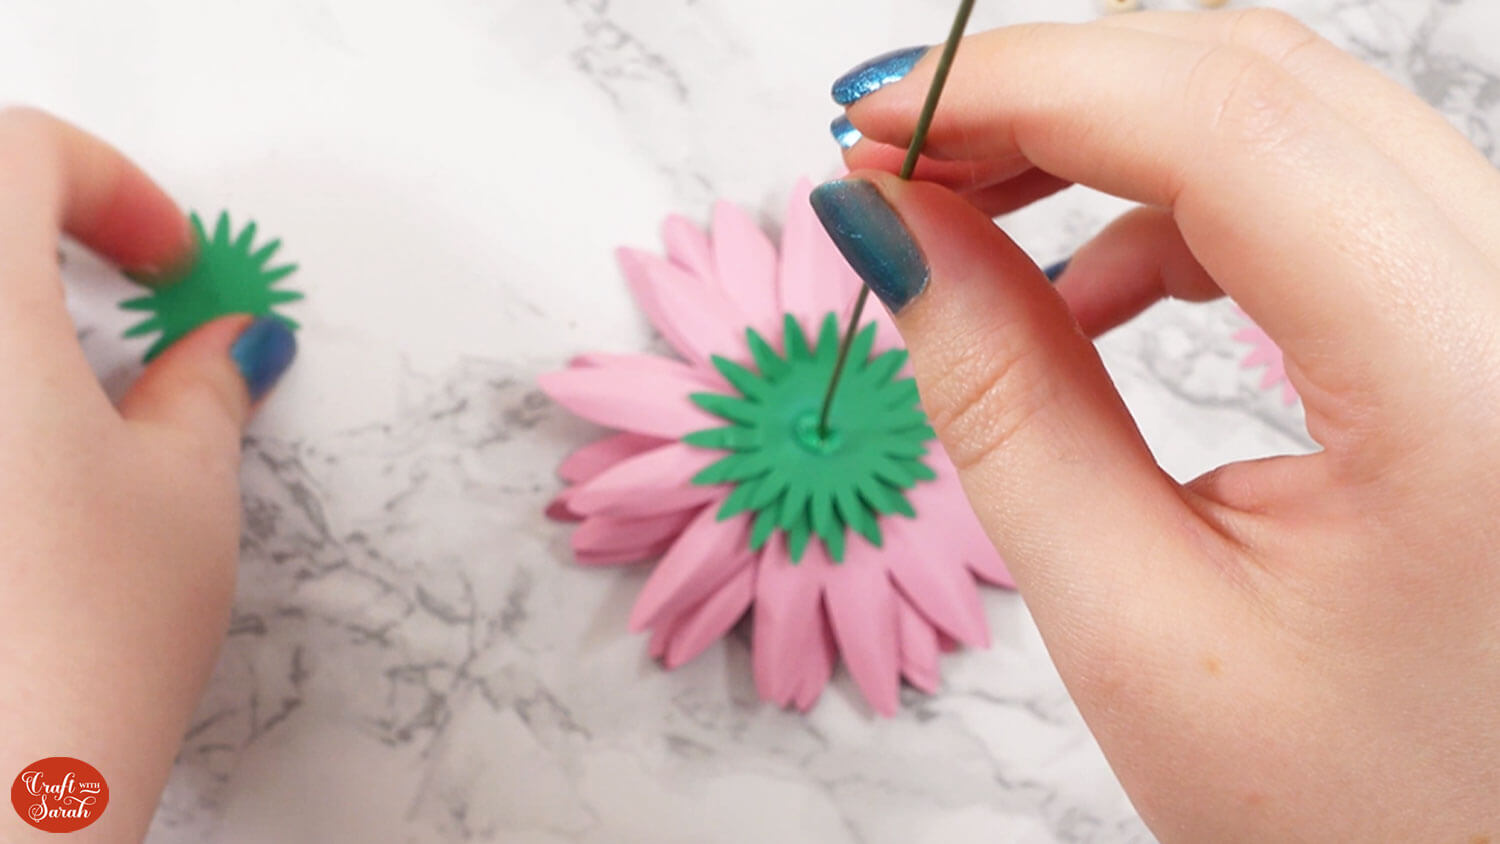
Thread the larger green piece onto the wire.
Now, there are two ways to continue.
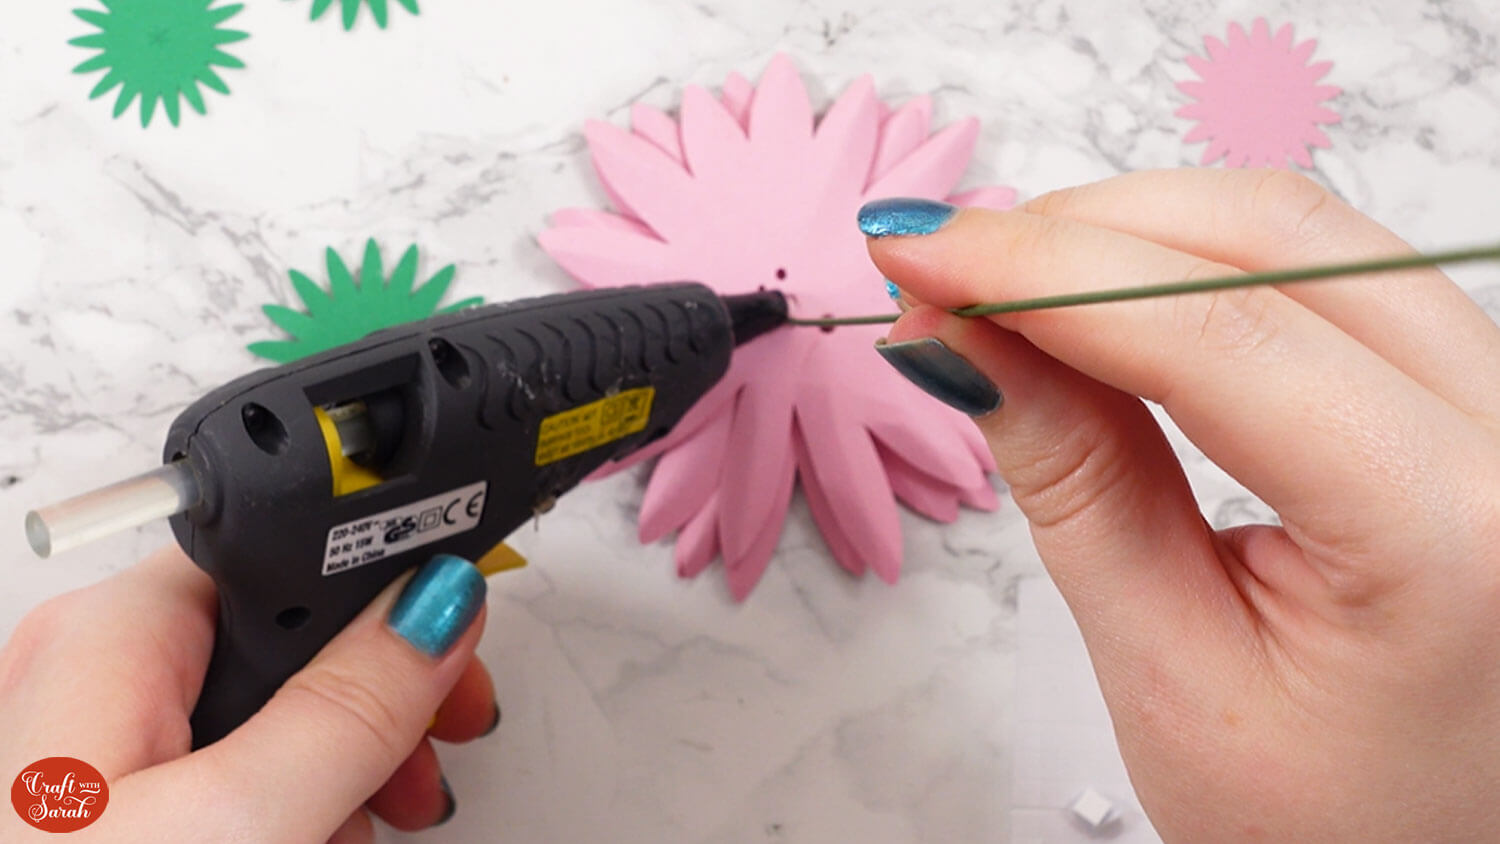
If you have a hot glue gun, the easiest thing to do is to add some hot glue to the bottom of the green piece you have just threaded on, making sure to coat the wire in glue.
Then, thread the final green circle onto the wire and press it firmly into the hot glue before it dries. The glue will hold all the pieces of the flower in place so they don’t fall down the wire.
If you don’t have a glue gun then thread the final green circle onto the wire and then glue a small amount of florist tape to the wire using regular craft glue.
Wrap the tape around a few times to make a “barrier” to stop the petals falling down the wire.
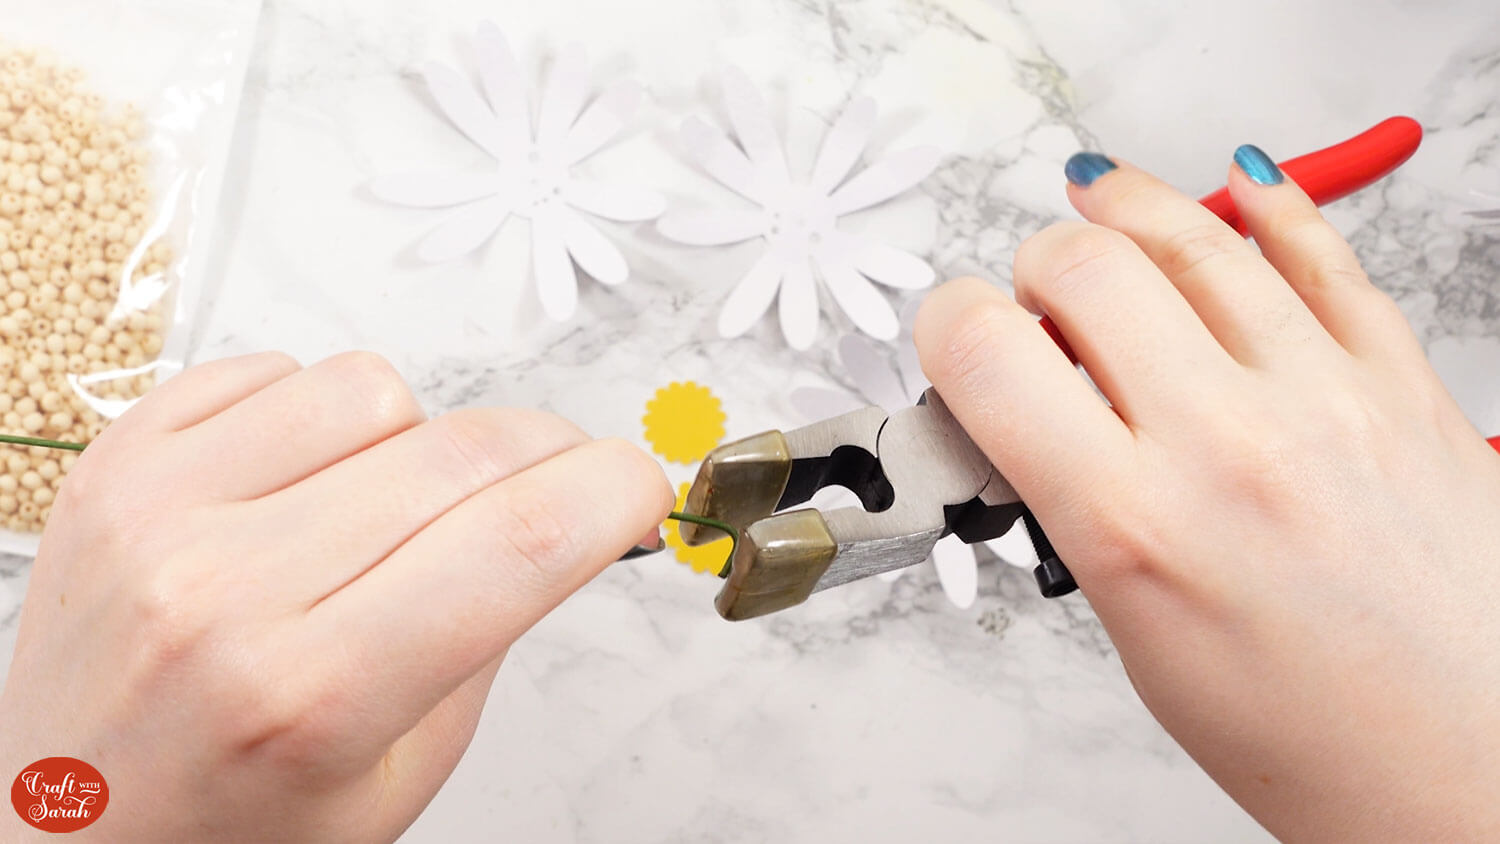
This point is where I realised I had folded my wire over too much at the top, so it was too tall to glue the yellow flower middles on.
I used some wire cutters to cut off the part of the wire that I folded over.
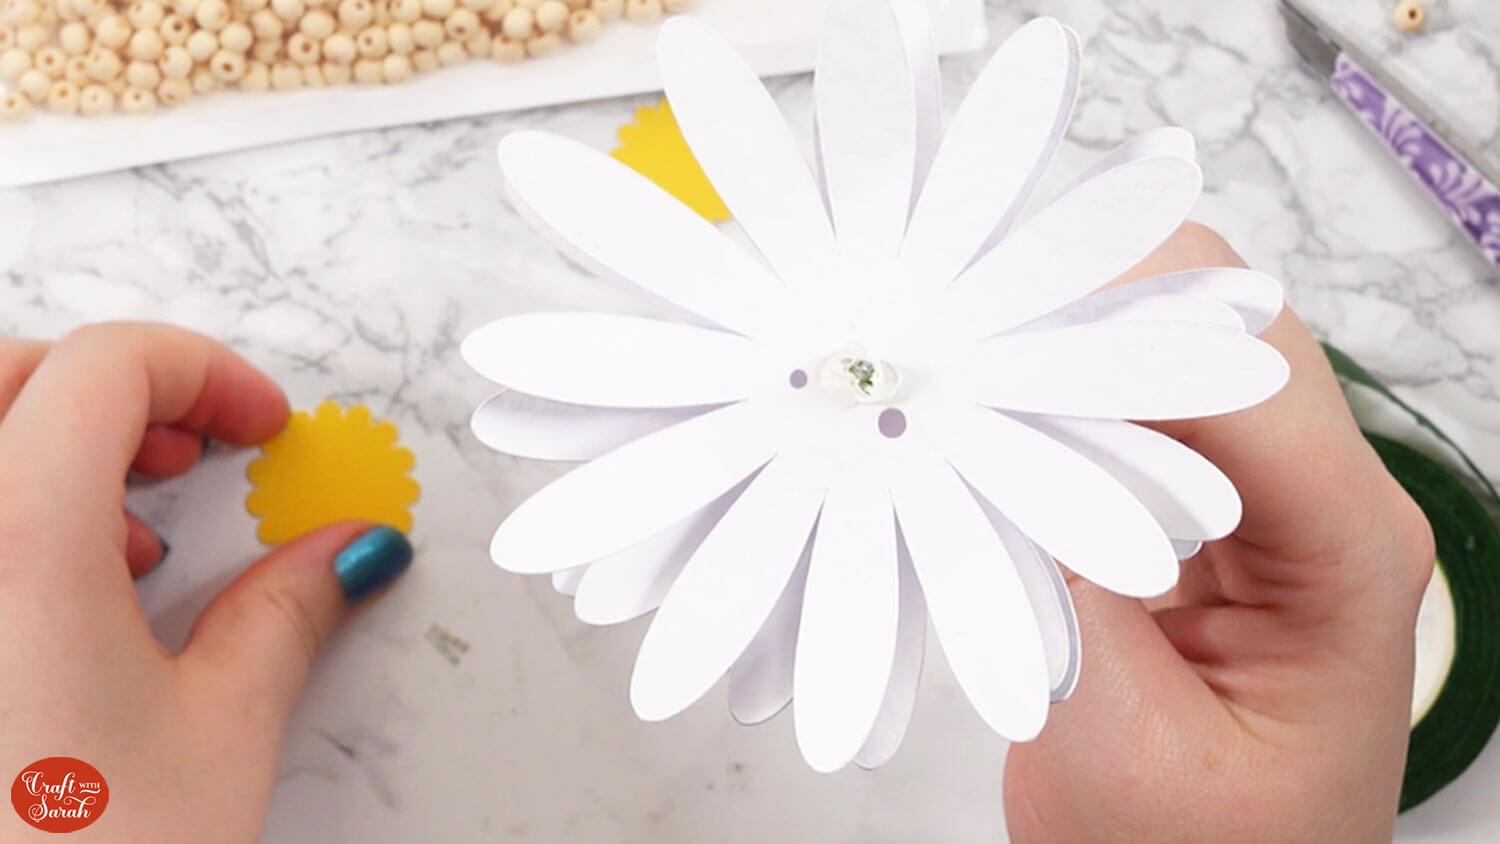
Use craft glue or a glue gun to attach the largest yellow piece of the flower middle.
I put glue all over the top of the wire to hold the petals in place because I had cut off the folded over part, so there wouldn’t have been anything keeping the petals in position without the glue.
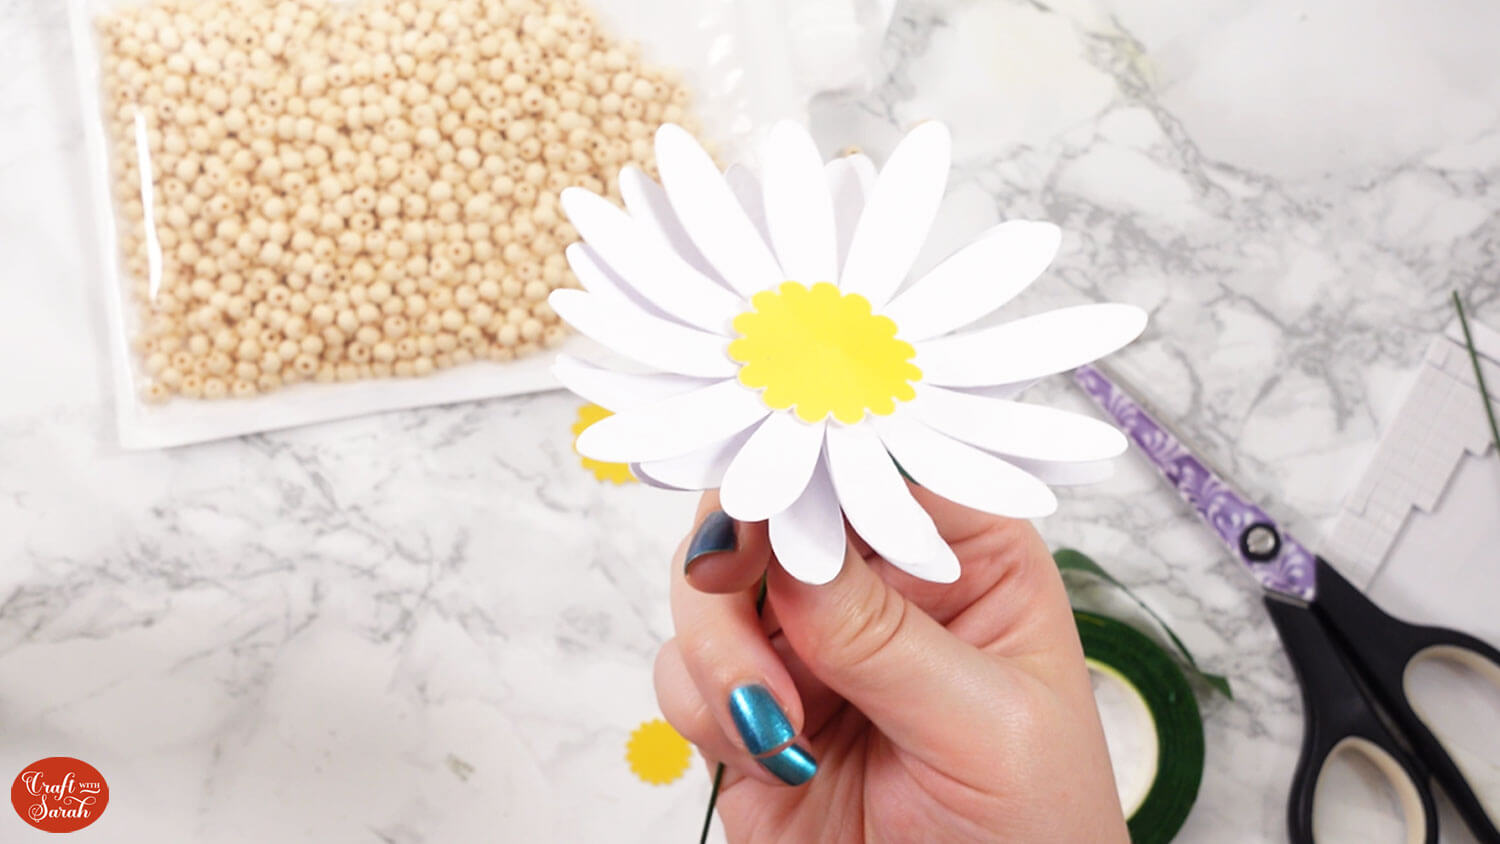
Stick a foam square to the yellow middle, then attach the second size of the middle.
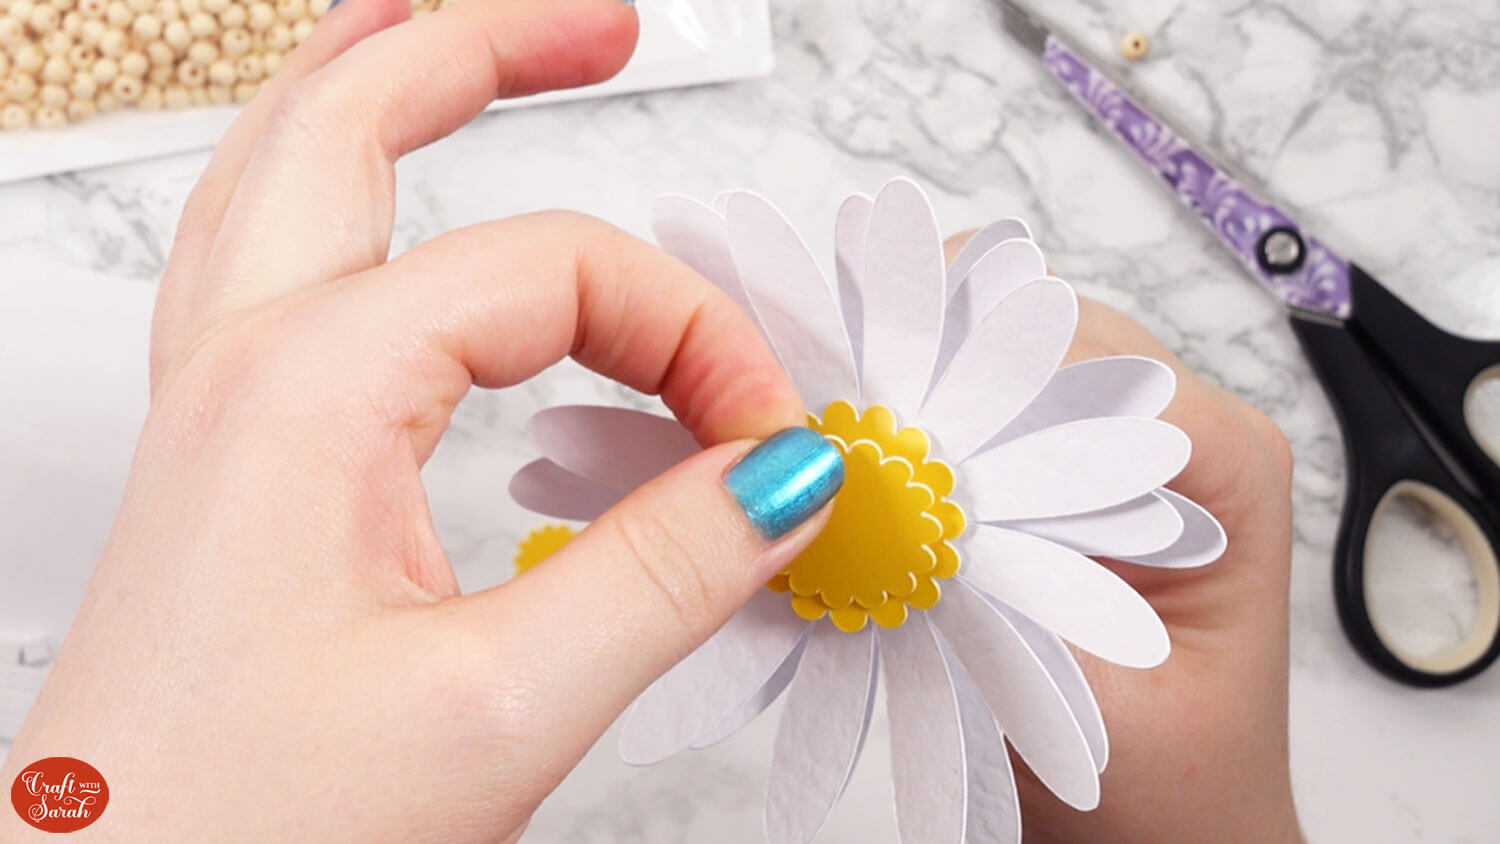
Add another foam square and attach the final middle piece.
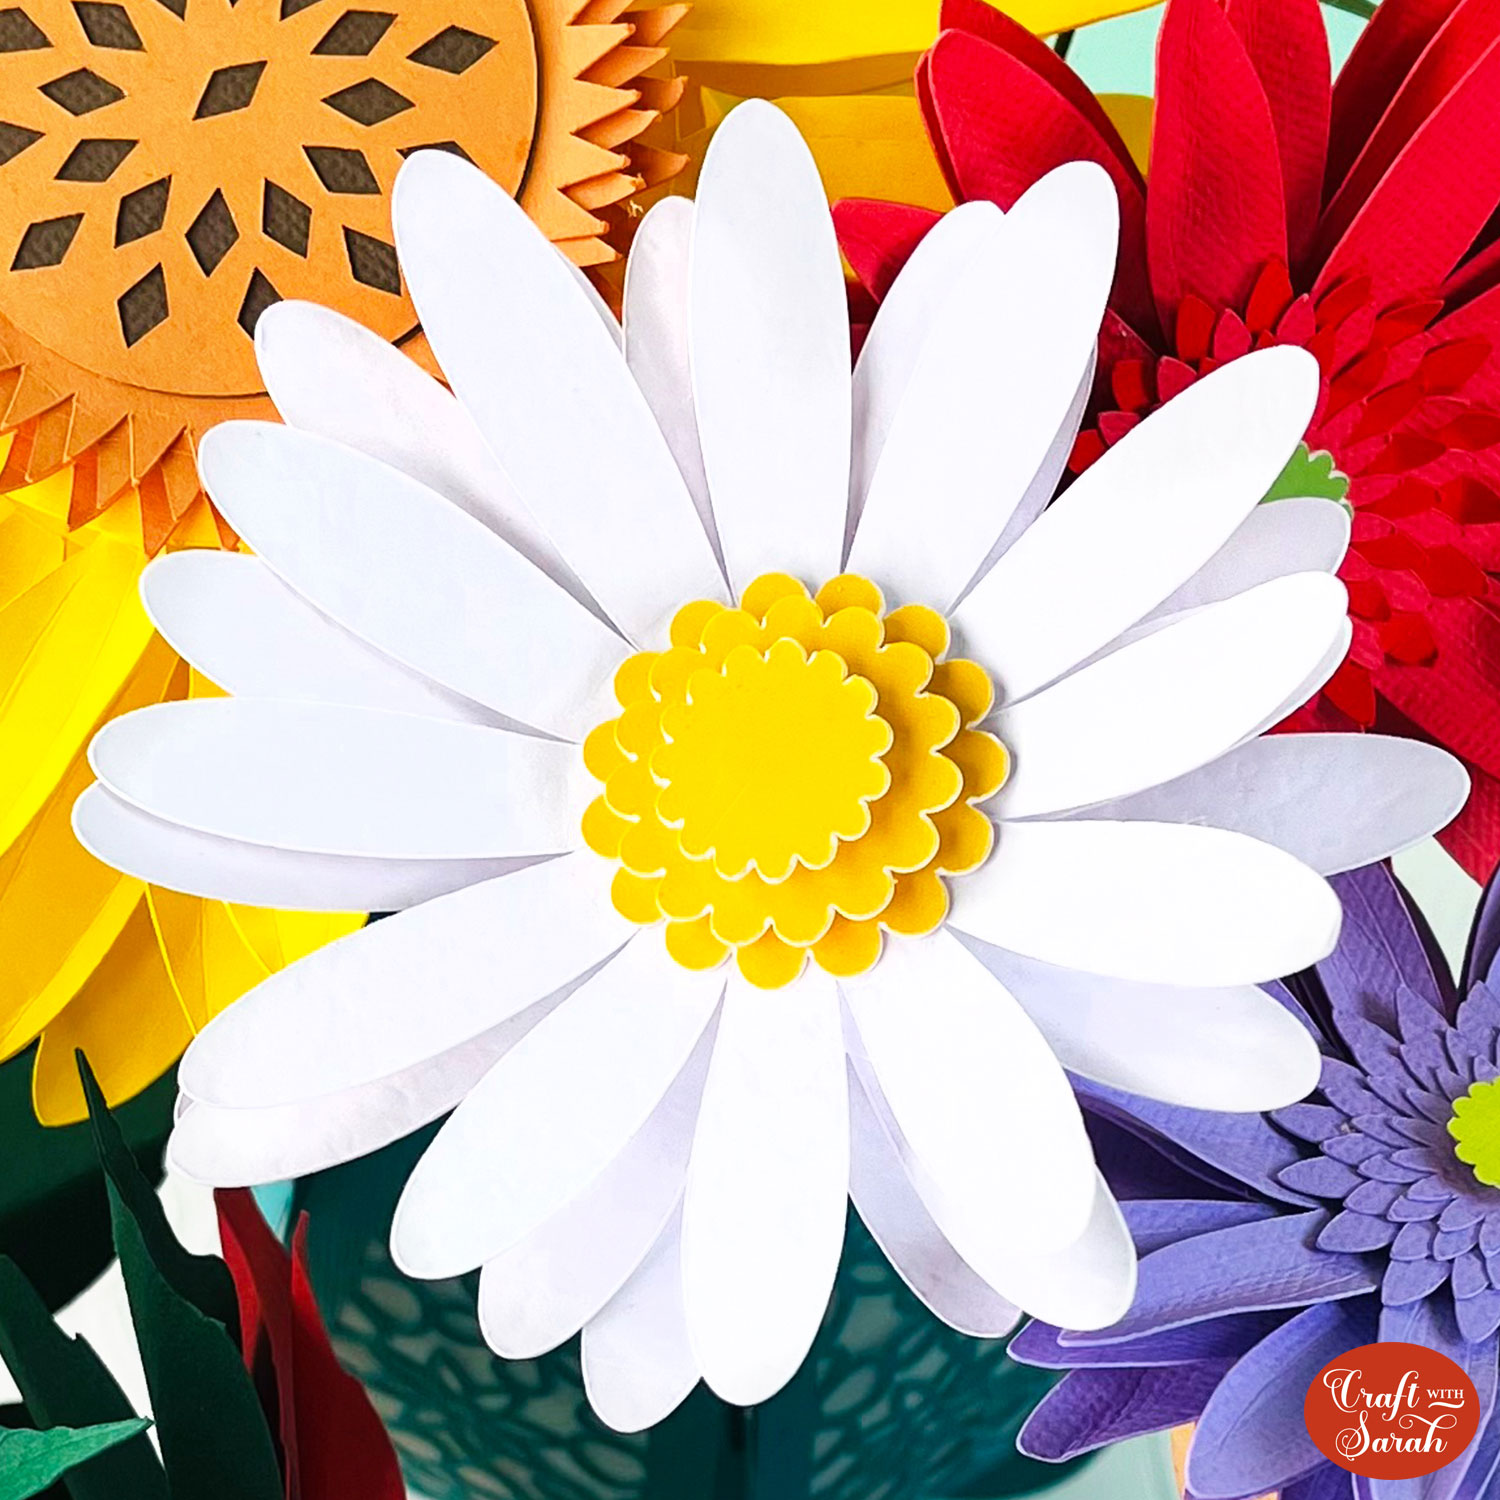
Your daisy flower is now finished!
You may wish to snip the wire shorter with wire cutters to reduce the height of the stem.
Gerbera Paper Flower Tutorial
Step 1) Cut the gerbera template
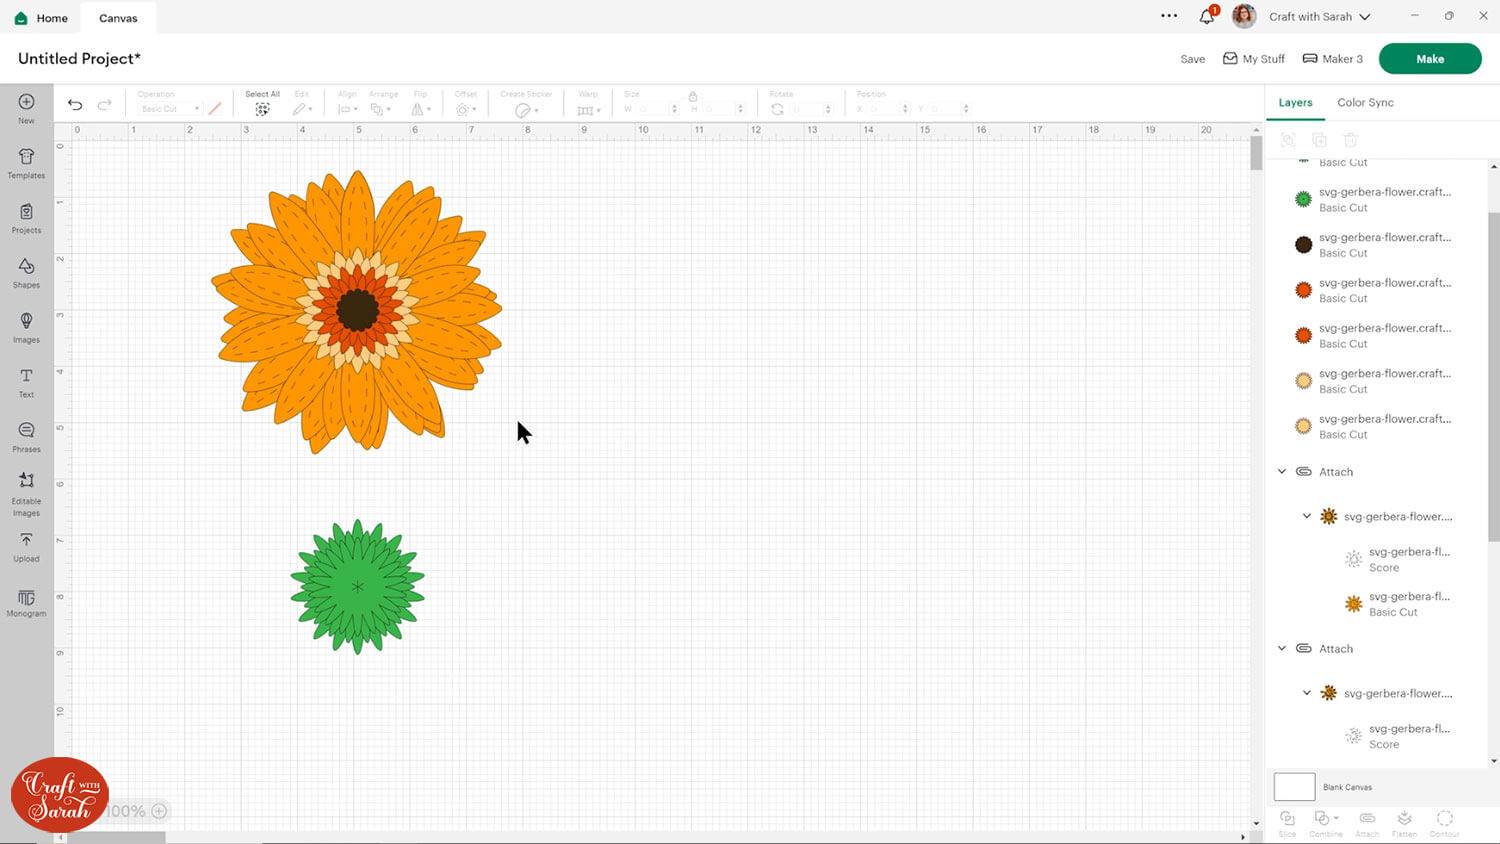
Load the gerbera flower template into Design Space.
This flower has some lines on the petals that we need to turn into score lines.
Select the design and press the “Ungroup” button at the top of the layers panel to separate out the layers.
There are four sub-groups at the bottom of the layers panel – one for each of the “petal” pieces.
Open up one of these sub-groups. Within it are two layers: a pink petal layer and a black single-line layer on top.
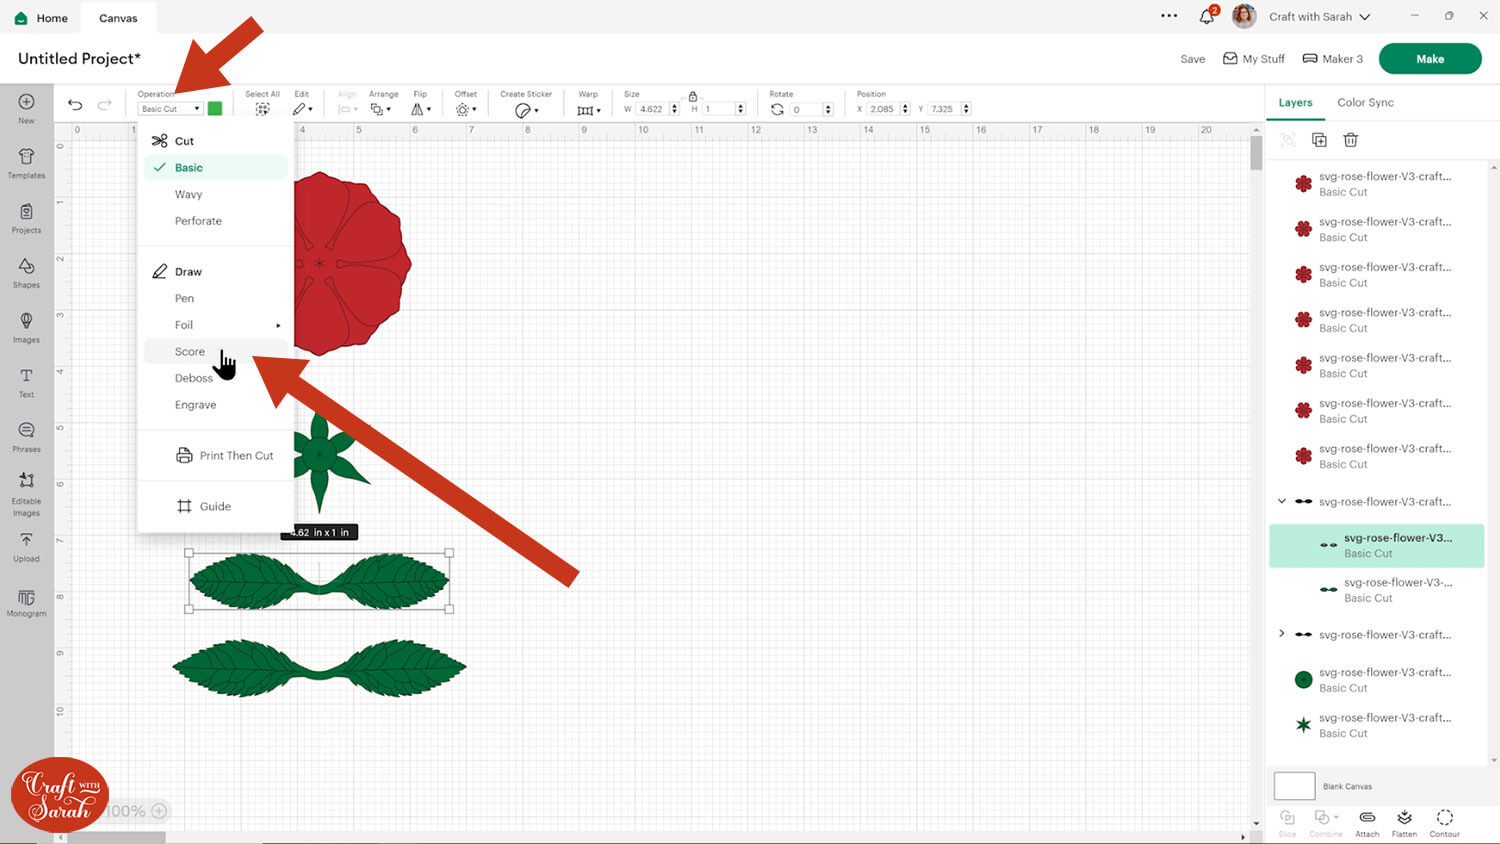
Click the black single line layer.
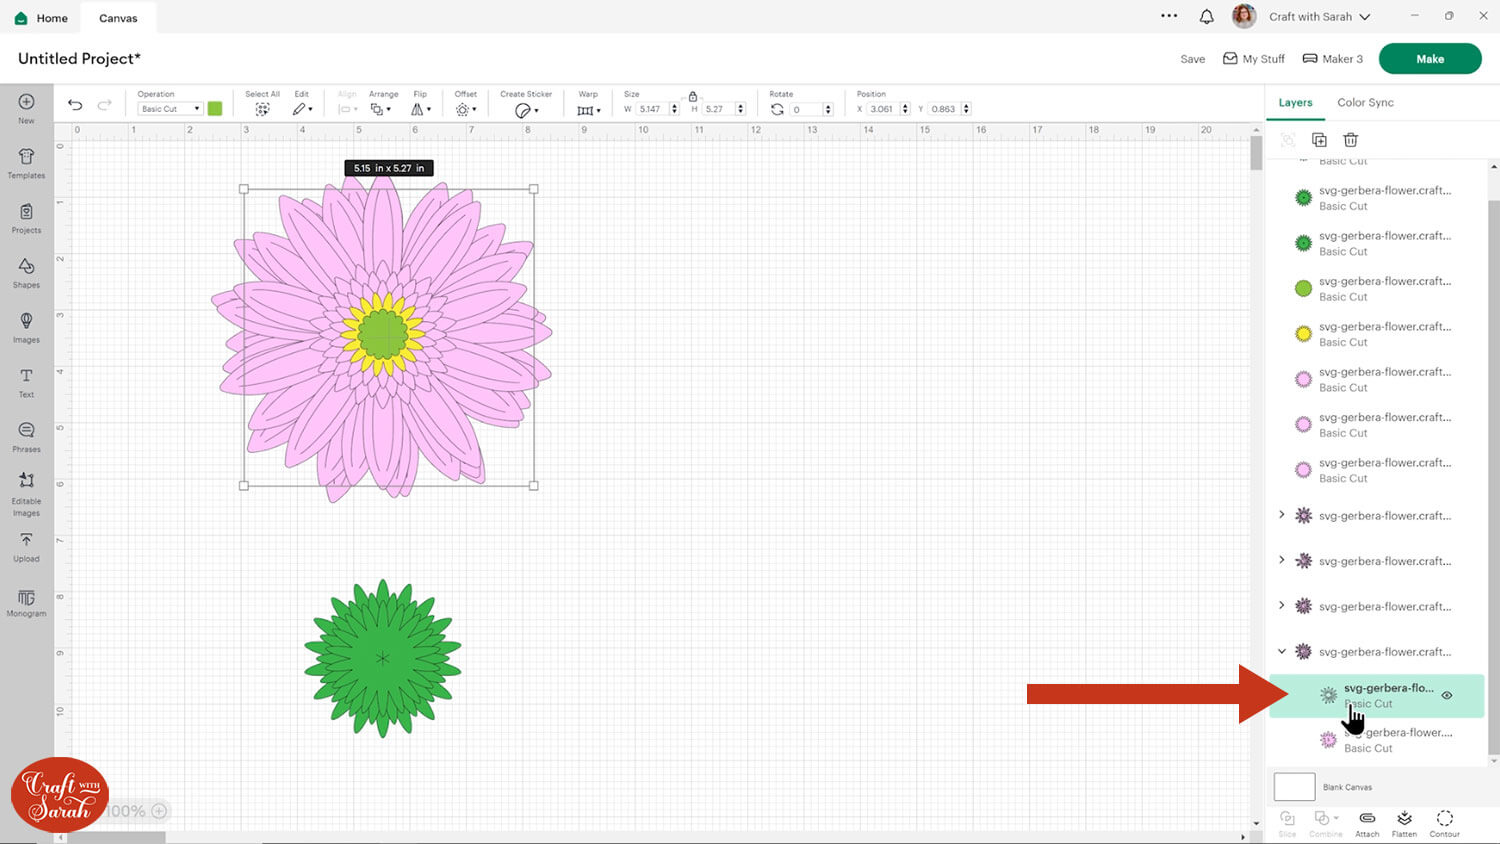
Change it to a “Score” layer in the layers panel.
If you do not have a scoring tool for your Cricut then you can delete the score lines. The flower can still be made without them, it will just be a little trickier to fold the petals.

Click the sub-group in the layers panel to select both layers, then press “Attach”.
Attach is what tells the Cricut to do the scoring on top of the petals.
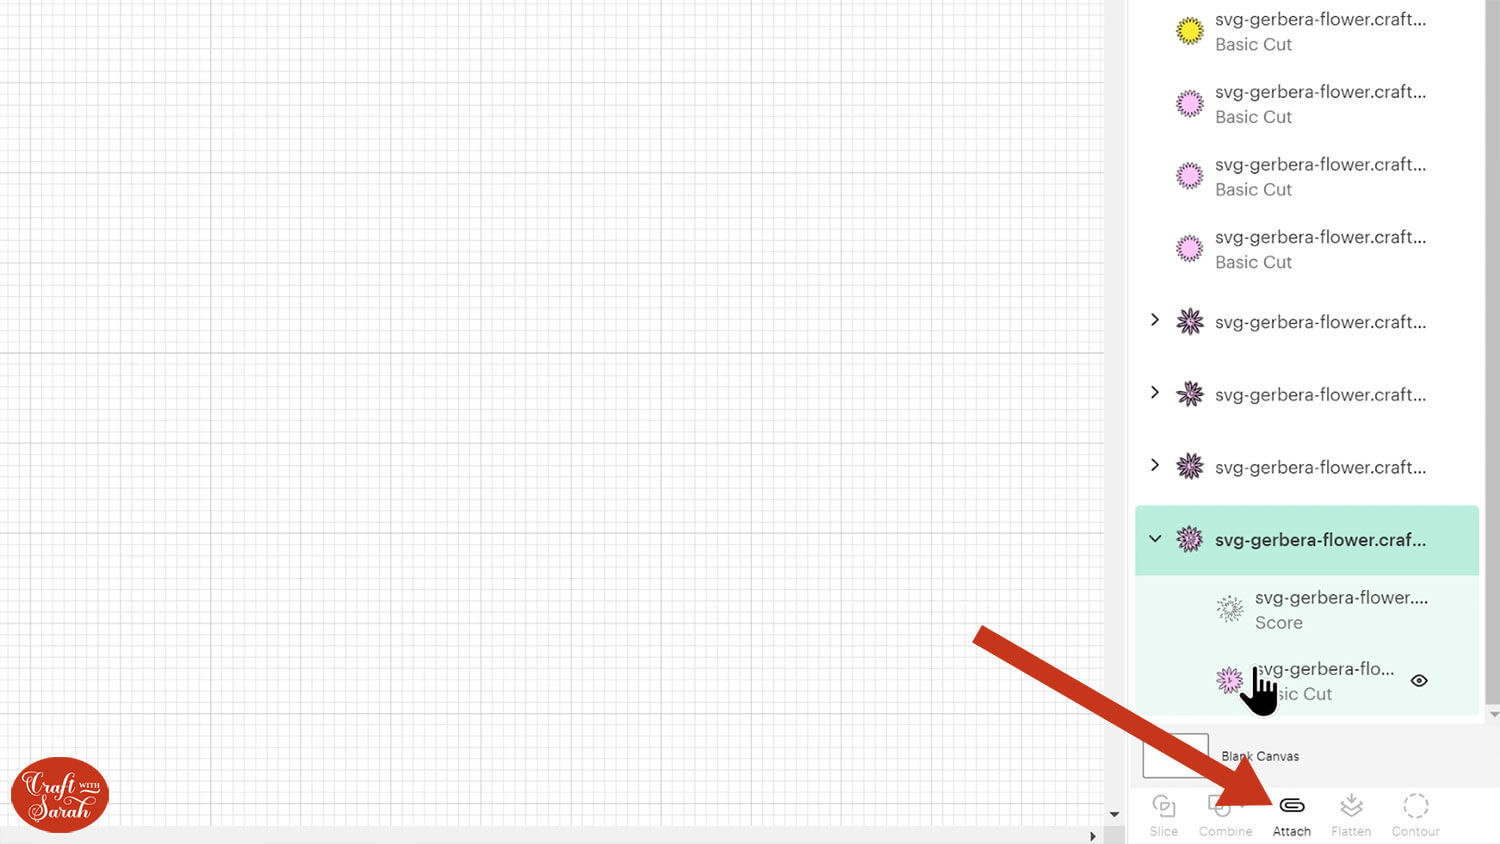
Attaching moves the layers to the top of the layers panel.
Move them back into their original position.
Repeat these steps for all of the petal layers.
The gerbera flower loads into Design Space at a good size to cut, but you may wish to make it larger or smaller.
Group the layers and then resize.
You could also recolour the layers to match different colours of gebera.
Click “Make” and get the gerbera flower cut out. Lighter weight cardstock or even coloured paper works best.
Step 2) Put the flower together
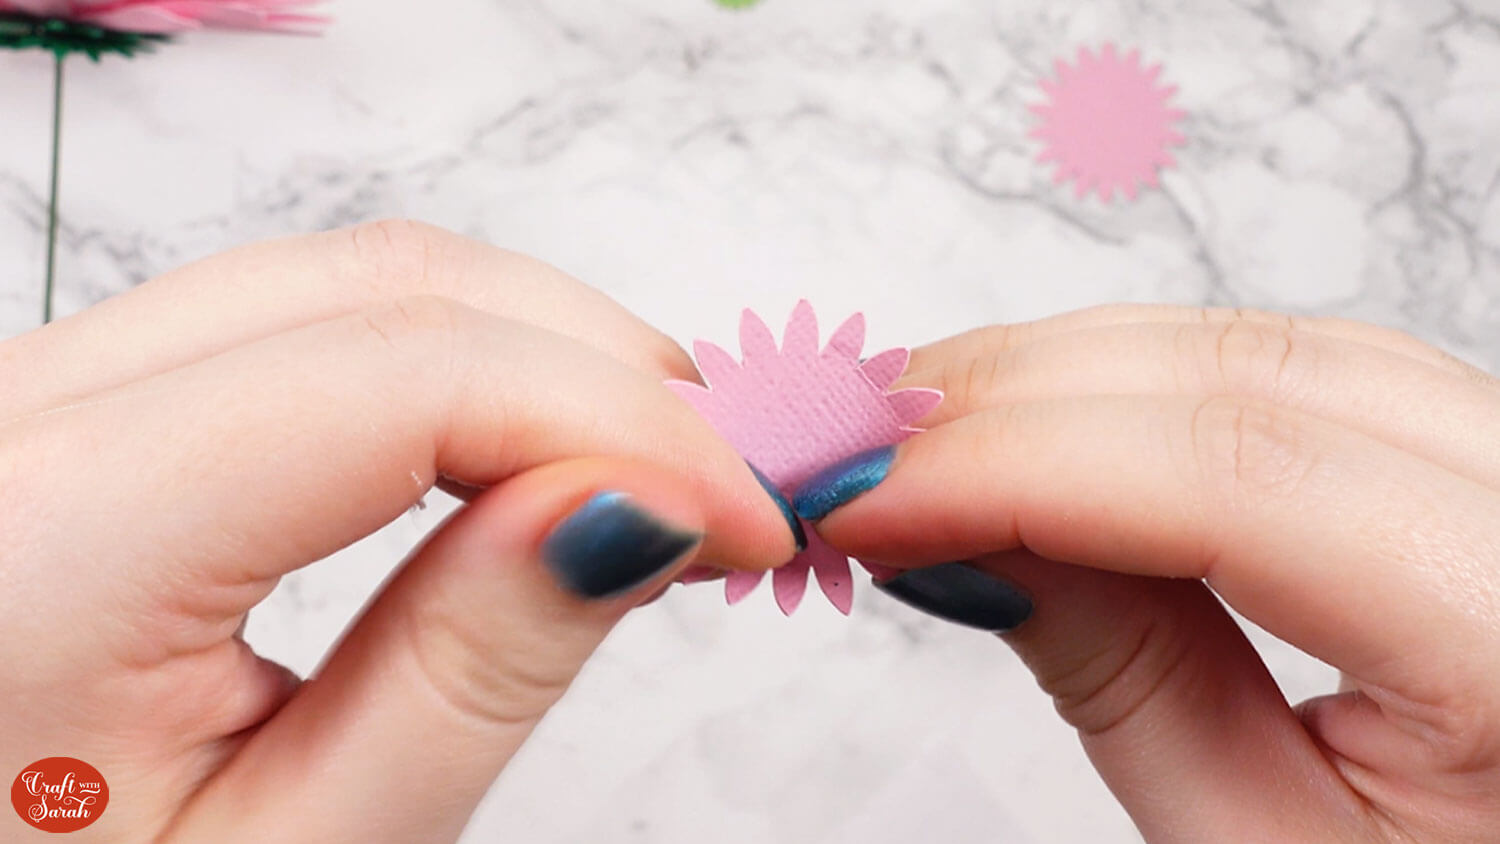
Pinch all the petals together so they they fold up along the score lines.
You don’t need to be super neat – this is just to give a bit more of a realistic effect to the petals.
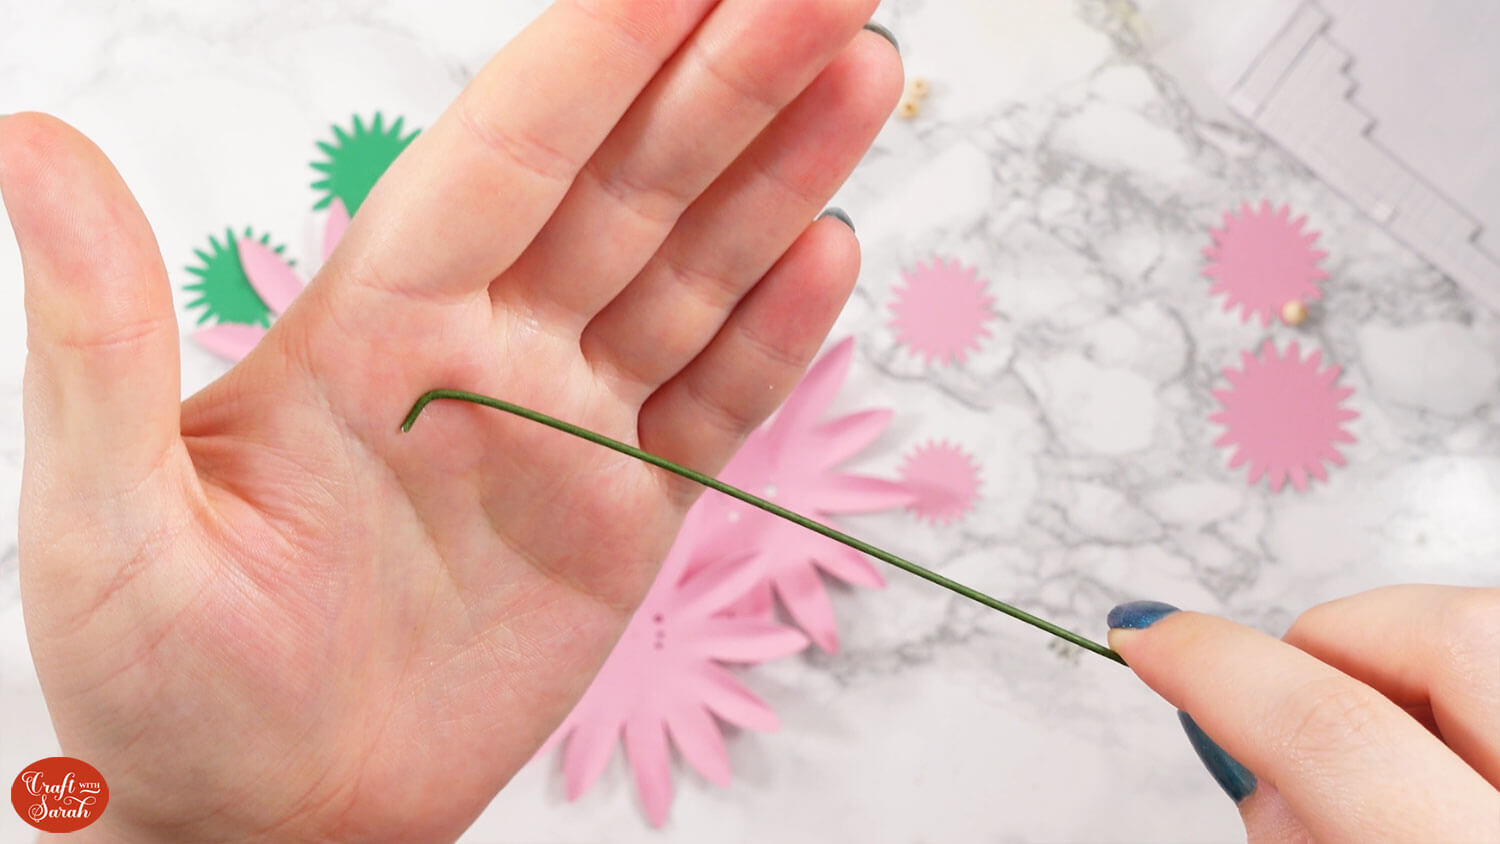
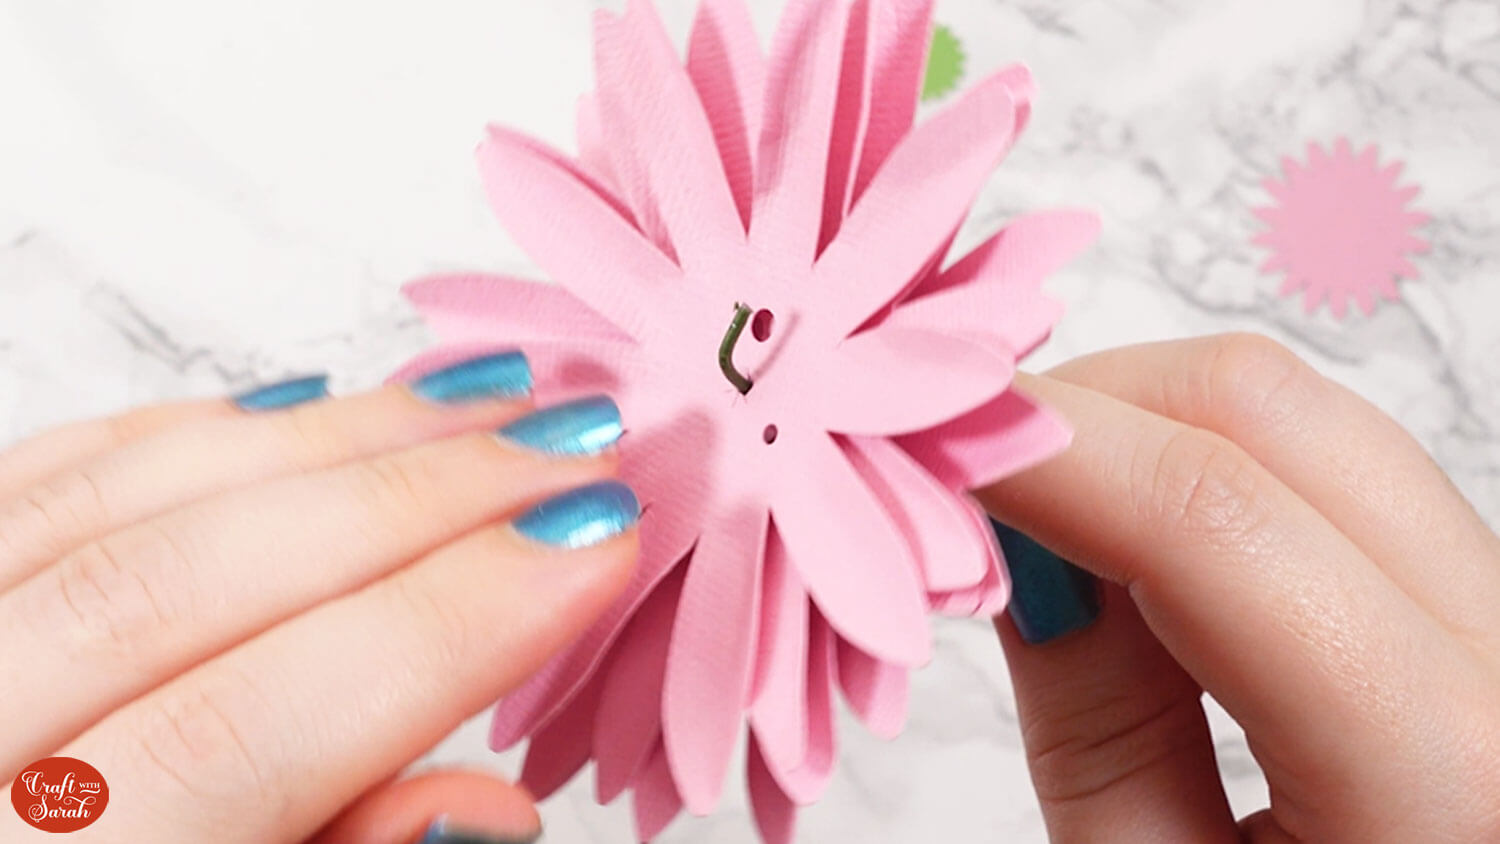
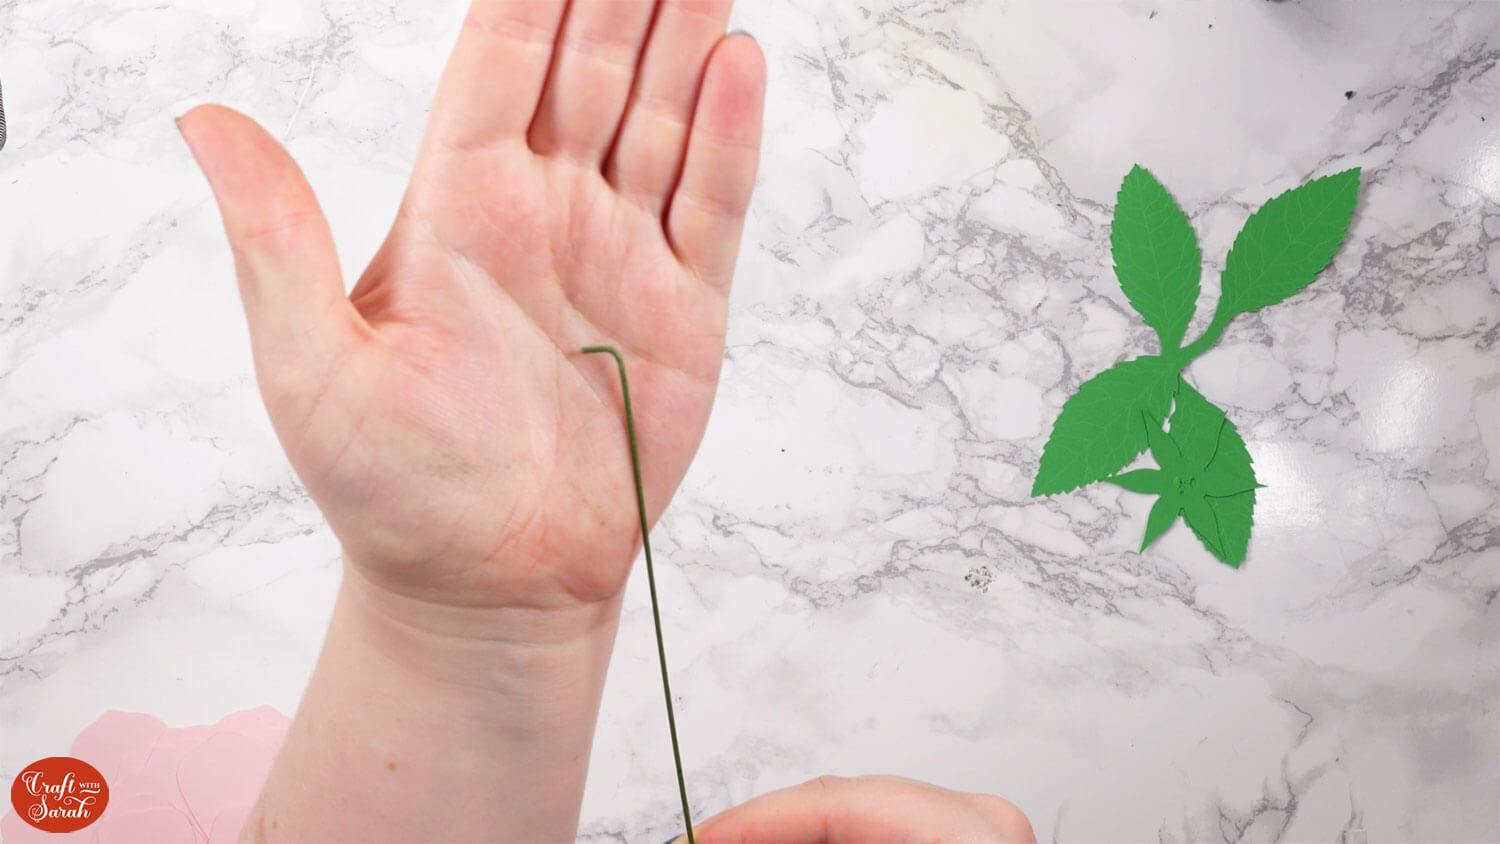
Use some pliers to bend over one of the ends of your florist wire.
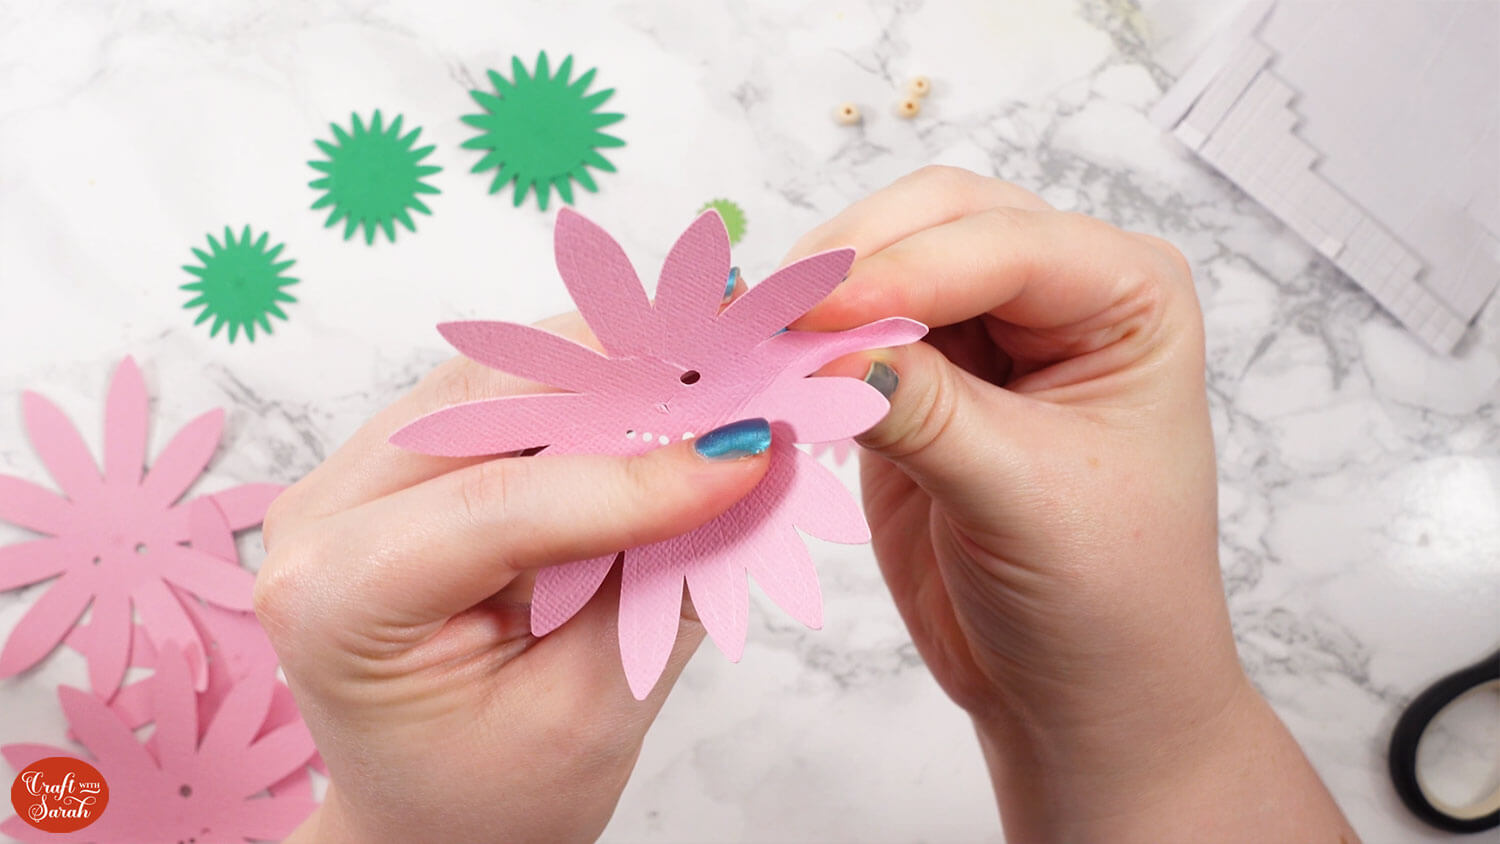
Thread the petal pieces with one large circular hole and one small circular hole onto the wire.
The wire goes through the small “crosshatch” cut in the middle of the petal.
For this flower, I used foam squares between the petals instead of wooden beads.
I tried it with wooden beads, but as there are four petal layers it made it look too “tall” and didn’t quite look right.
Foam squares work better for the gerbera flowers, and have the benefit of holding the petals in-line with each other, so you can line up the holes between each layer and they will stay in that position.
Thread the remaining petal pieces on, in the order shown by the number of holes (i.e. the next one will have one large hold and TWO small holes.
Use foam squares between each petal piece.
Make sure the petals are all pushed to the top of the wire.
Add some hot glue to the bottom of the final petal piece, making sure to coat the wire in glue.
Thread the largest green base piece onto the wire and press it into the hot glue before it dries (watch your fingers!). The glue will hold all the pieces of the flower in place so they don’t fall down the wire.
Stick on the other green base pieces with the glue gun.
This point is where I realised I had forgotten to make sure all my petal pieces were pushed right to the top of the wire before I glued on the green pieces, so there was too much wire left at the top of my flower.
I used some wire cutters to cut off the part of the wire that I folded over.
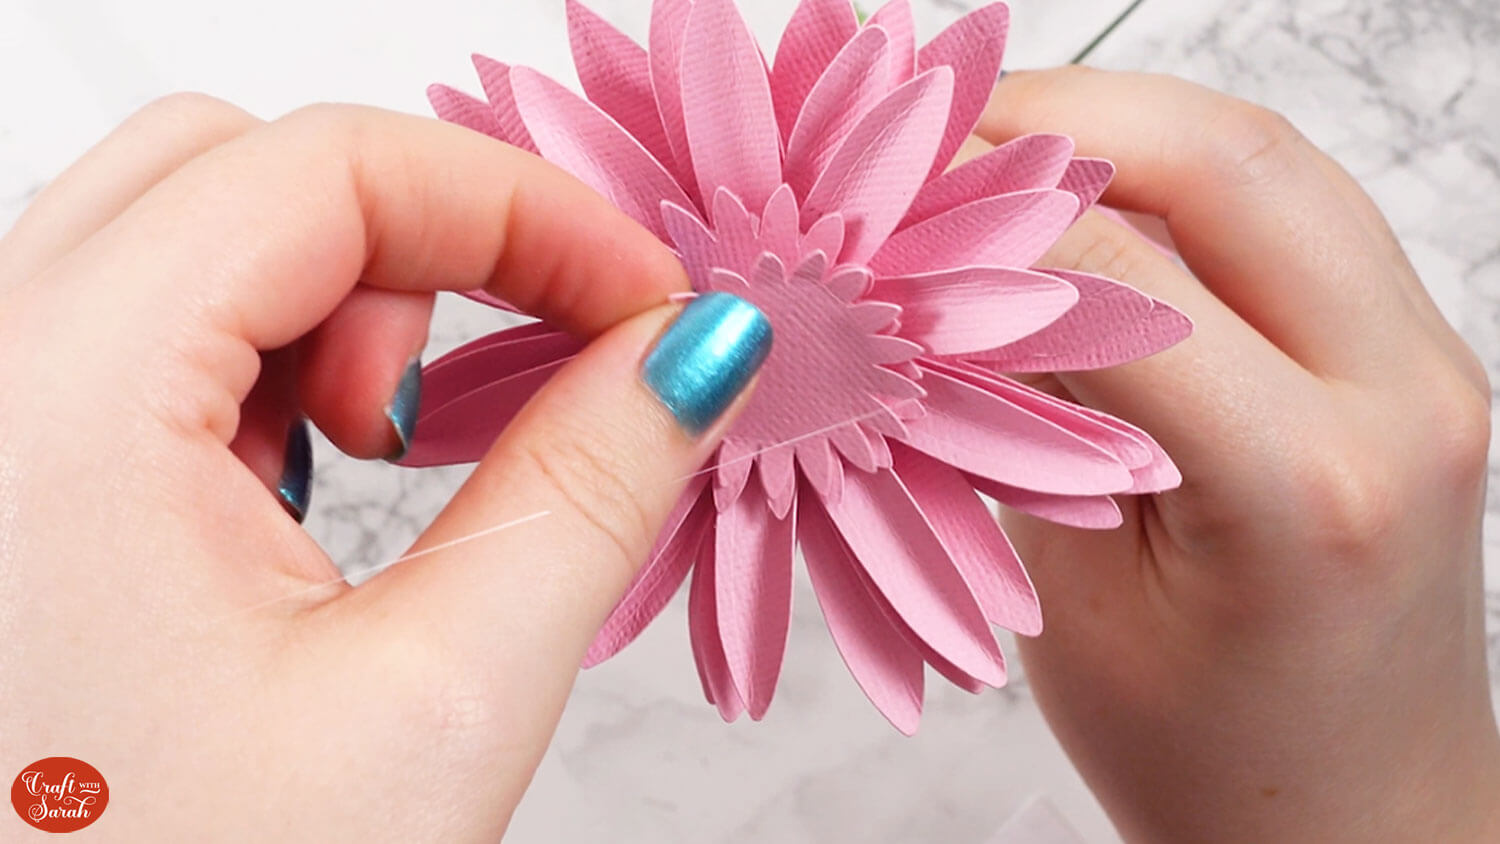
“Rough up” the edges of the middles of the flower by running your fingers backwards and forwards along the edges.
Use craft glue or a glue gun to attach the largest piece of the flower middle to the top petal layer.
I put glue all over the top of the wire to hold the petals in place because I had cut off the folded over part, so there wouldn’t have been anything keeping the petals in position without the glue.
Stick all the flower middles on, in size order (largest to smallest) using the glue gun.
Use a foam square to attach the circular middle of the flower.
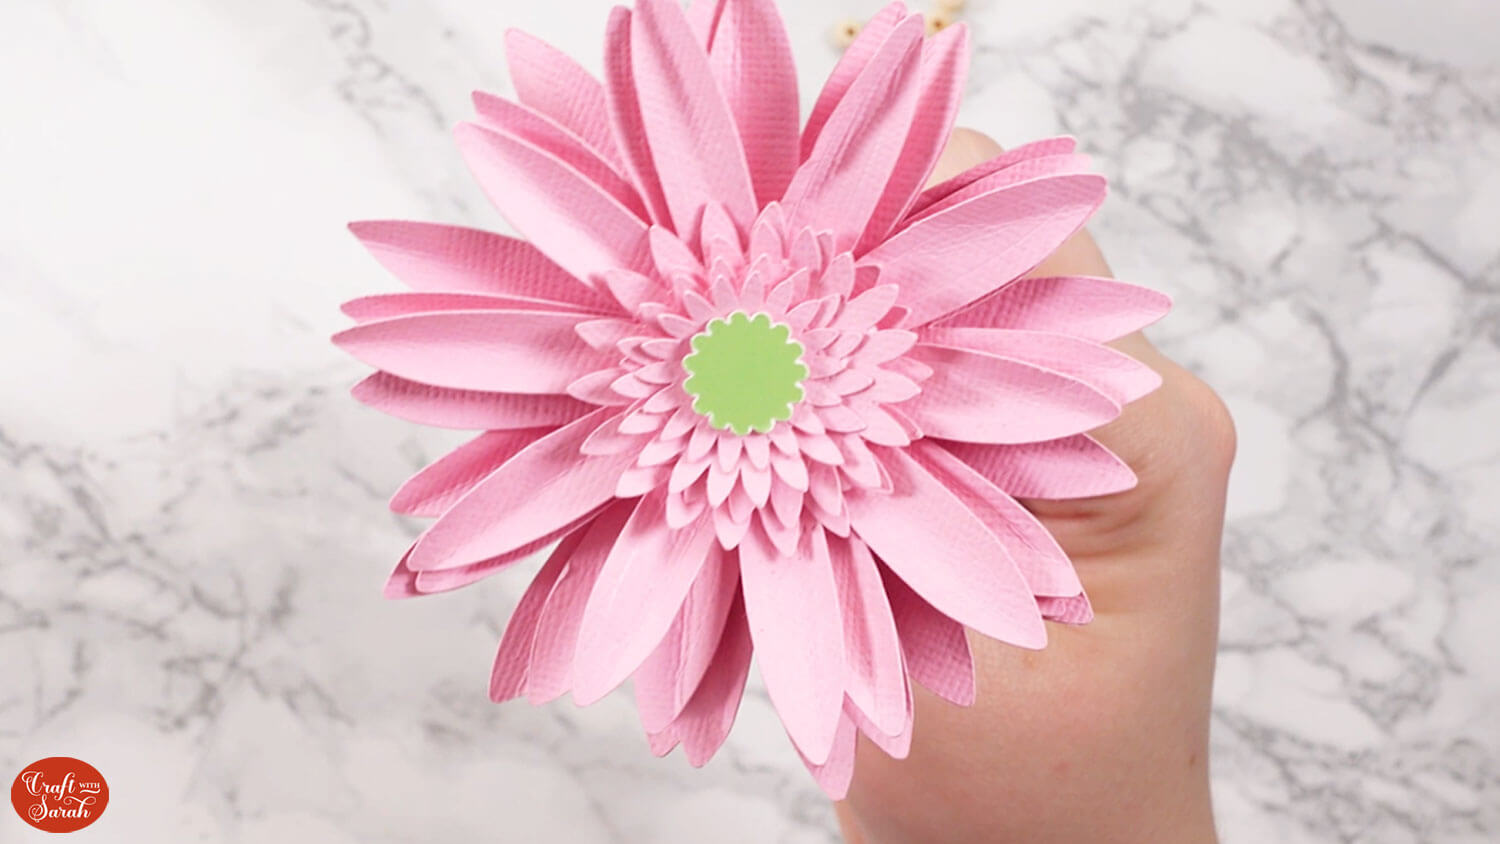
Your gerbera flower is now finished!
You may wish to snip the wire shorter with wire cutters to reduce the height of the stem.
Poinsettia Paper Flower Tutorial
Step 1) Cut the poinsettia template
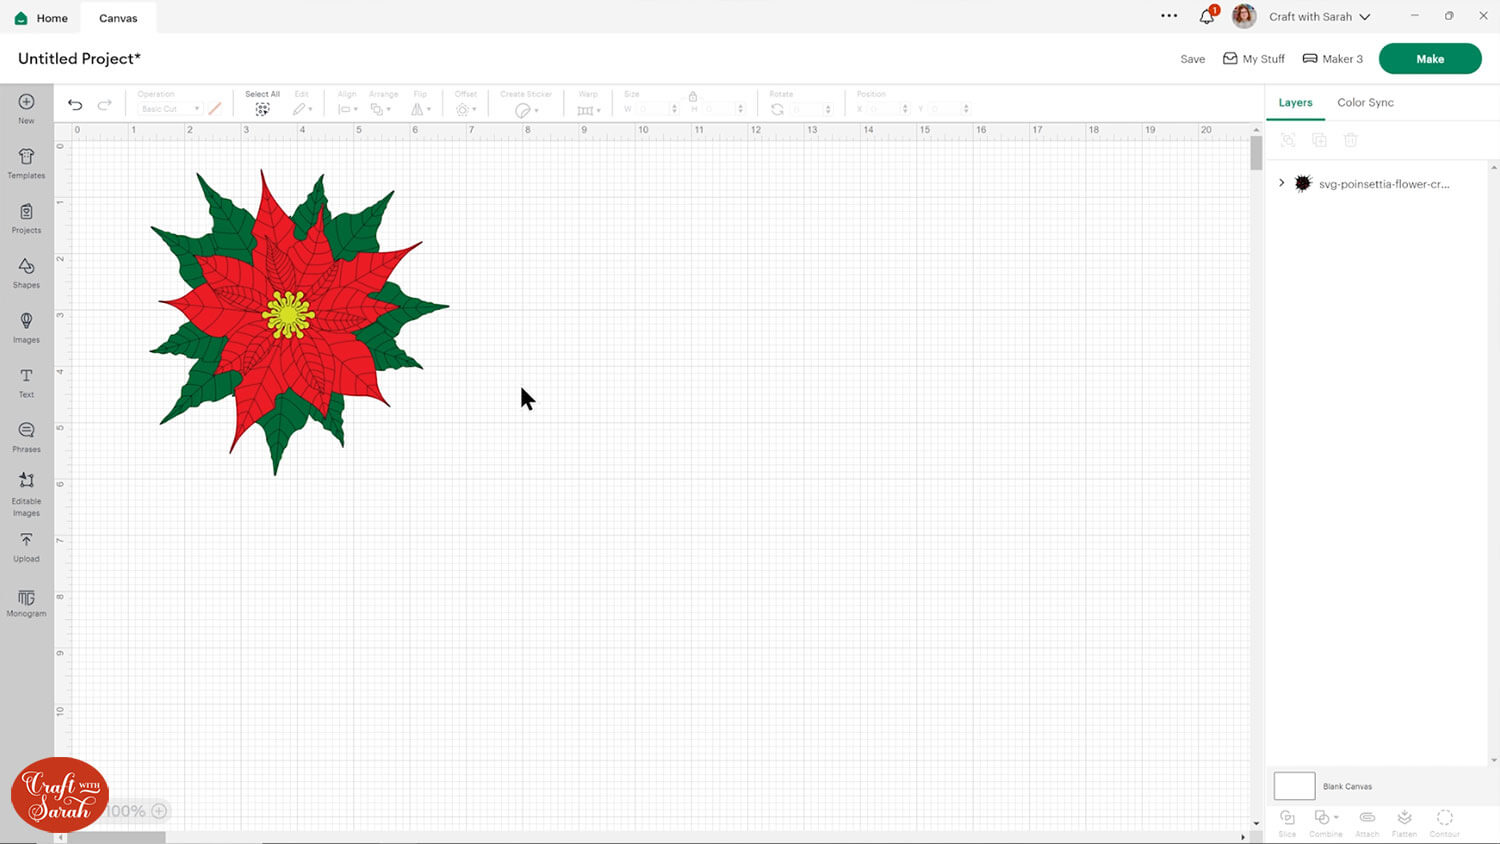
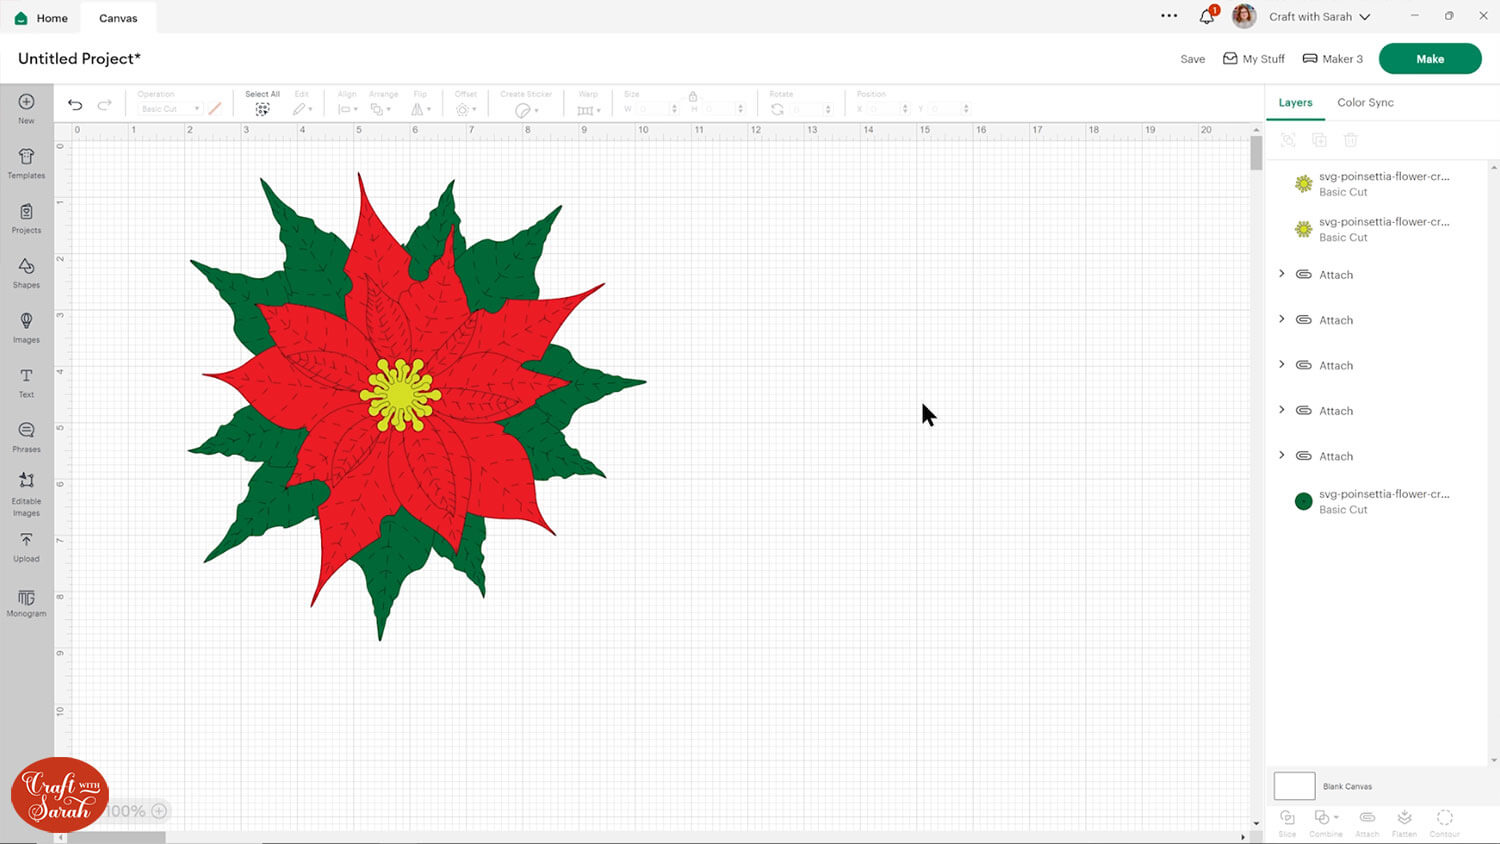
Load the poinsettia flower template into Design Space.
This flower has some lines on the petals that we need to turn into score lines.
Select the design and press the “Ungroup” button at the top of the layers panel to separate out the layers.
There are five sub-groups at the bottom of the layers panel – one for each of the red “petal” pieces and one for both of the green leaf parts.
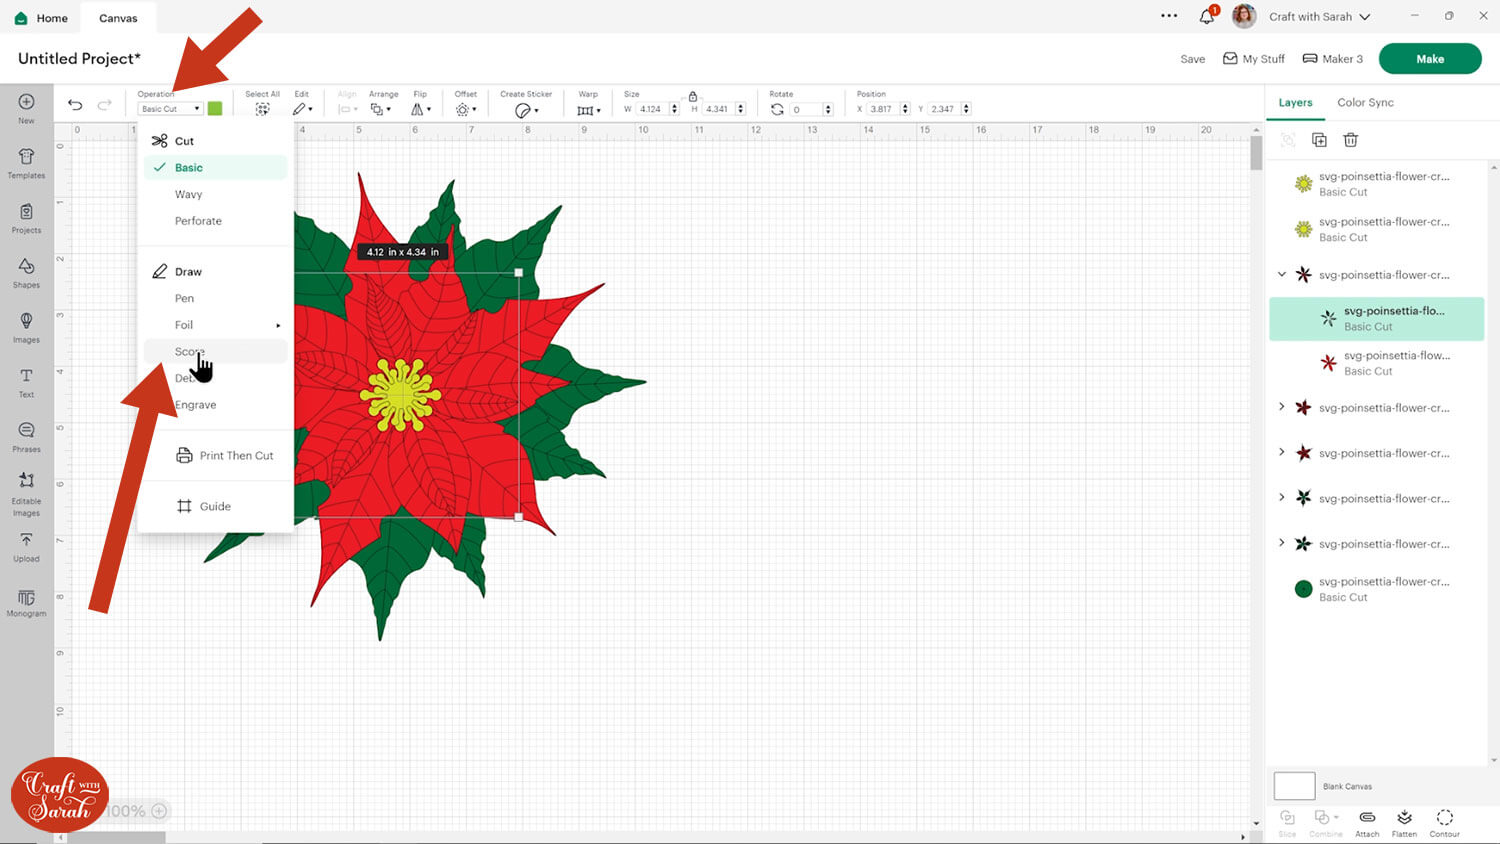
Open up one of these sub-groups. Within it are two layers: a coloured layer (green or red) and a black single-line layer on top.
Click the black single line layer.

Change it to a “Score” layer in the layers panel.
If you do not have a scoring tool for your Cricut then you can delete the score lines. The flower can still be made without them, it will just be a little trickier to fold the petals.
Click the sub-group in the layers panel to select both layers, then press “Attach”.
Attach is what tells the Cricut to do the scoring on top of the petals.
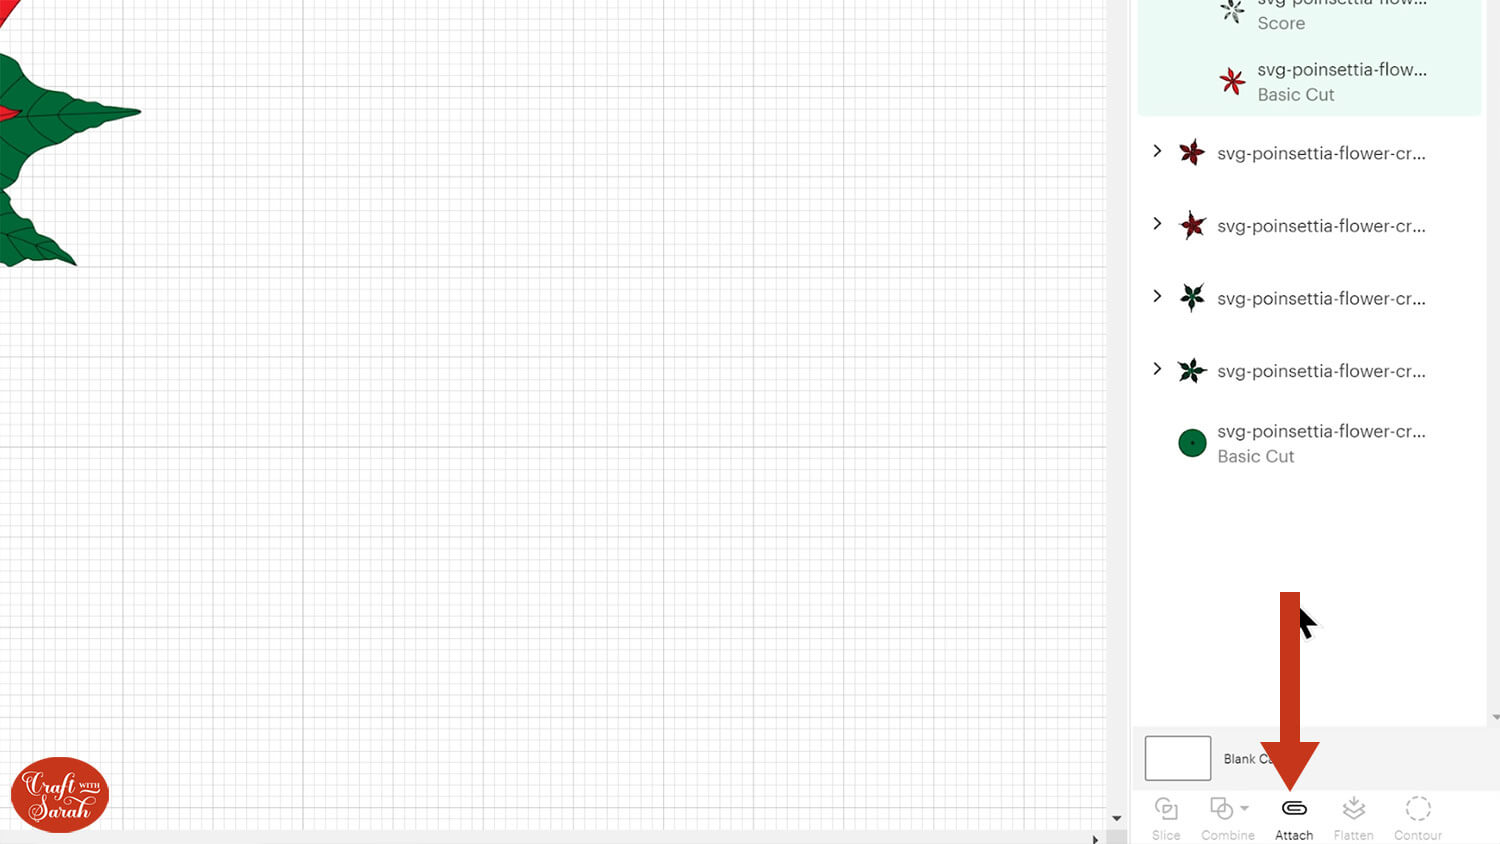
Attaching moves the layers to the top of the layers panel.
Move them back into their original position.
Repeat these steps for all of the sub-groups.
The poinsettia flower loads into Design Space at a good size to cut, but you may wish to make it larger or smaller.
Group the layers and then resize.
Click “Make” and get the gerbera flower cut out. Lighter weight cardstock or even coloured paper works best.
Step 2) Put the flower together
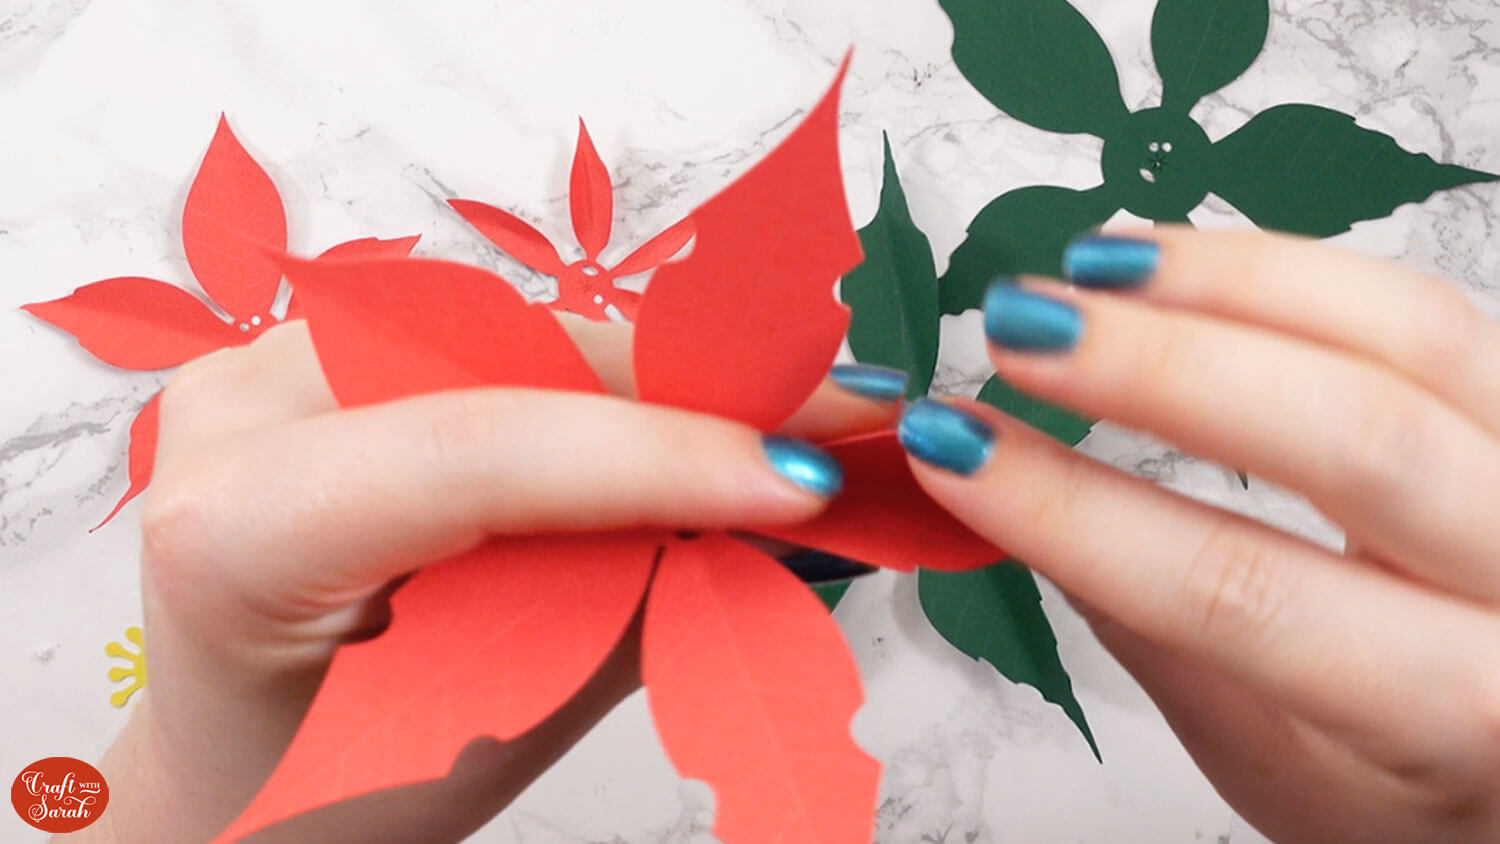
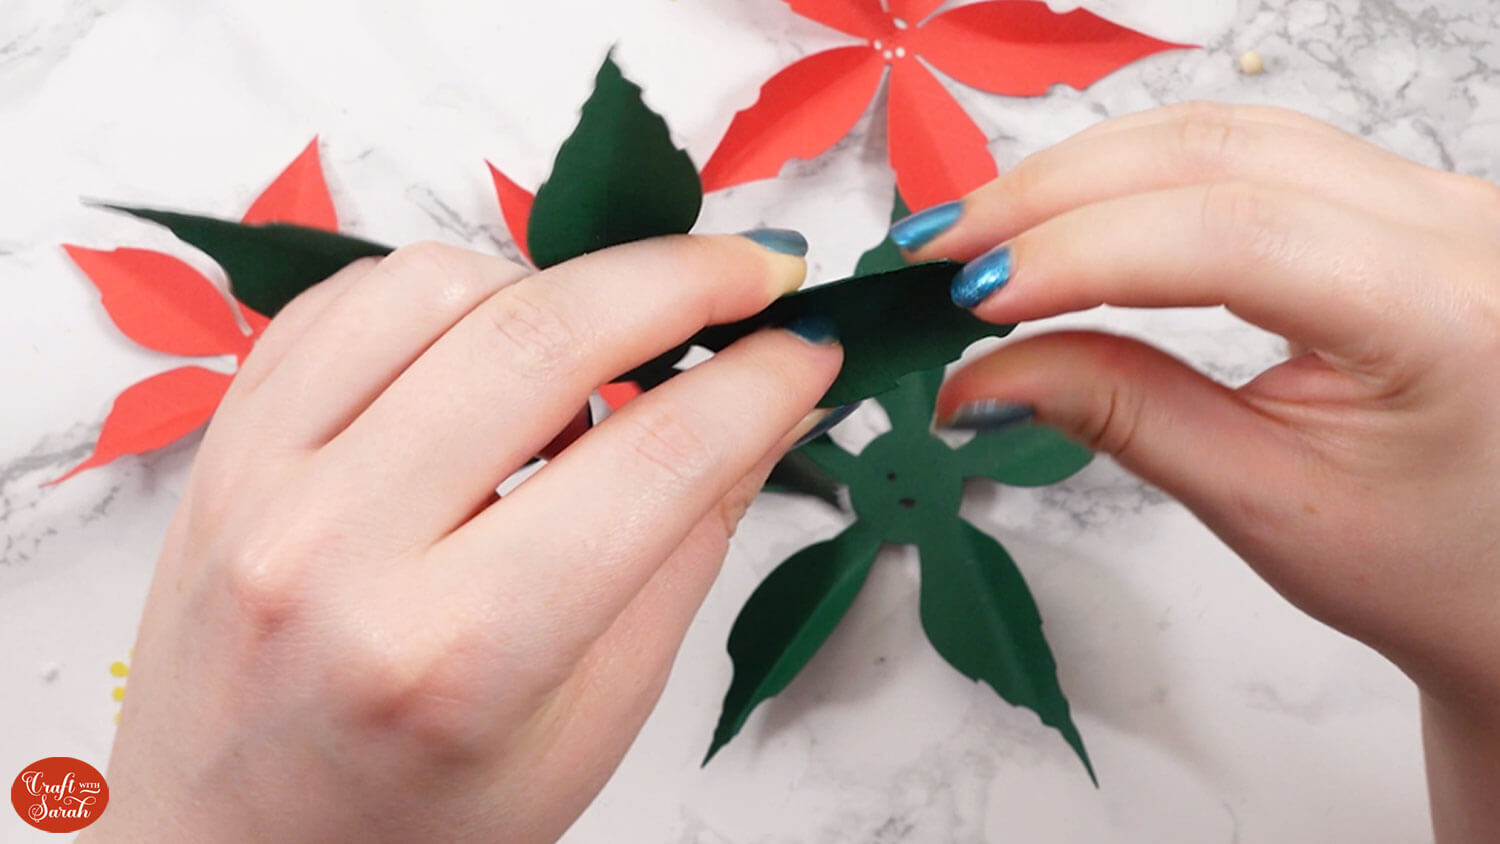
Pinch all the petals and leaves together so they they fold up along the middle of the score lines.
You don’t need to be super neat – this is just to give a bit more of a realistic effect to the petals.
Use some pliers to bend over one of the ends of your florist wire.
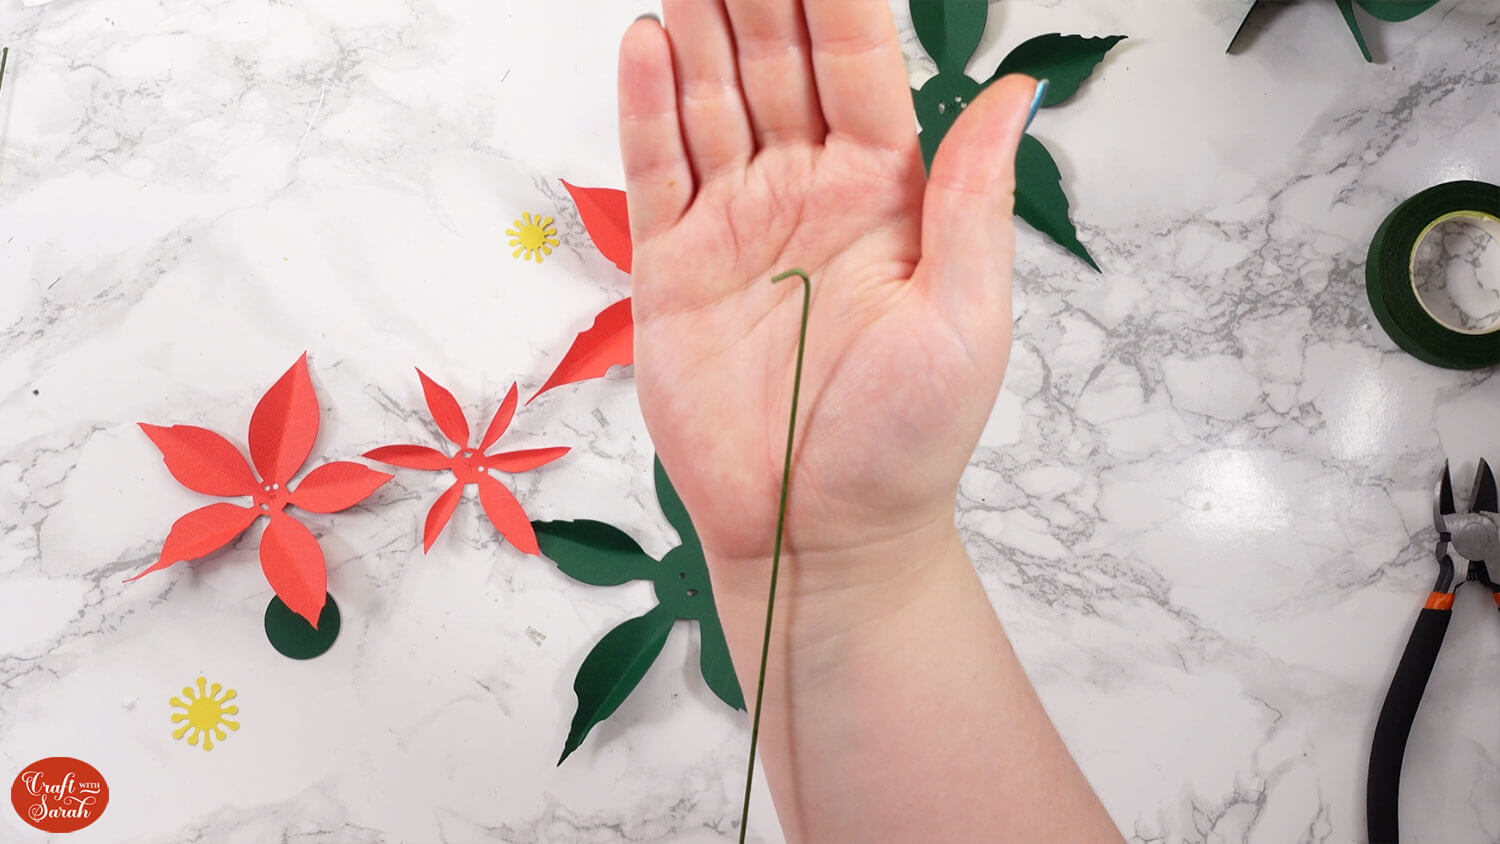
Thread the petal piece with one large oval hole and one small circular hole onto the wire.
The wire goes through the small “crosshatch” cut in the middle of the petal.
I used small wooden beads between the petals to give them some depth and to make the flower look more realistic.
If you don’t have beads, you could use foam pads/squares instead.
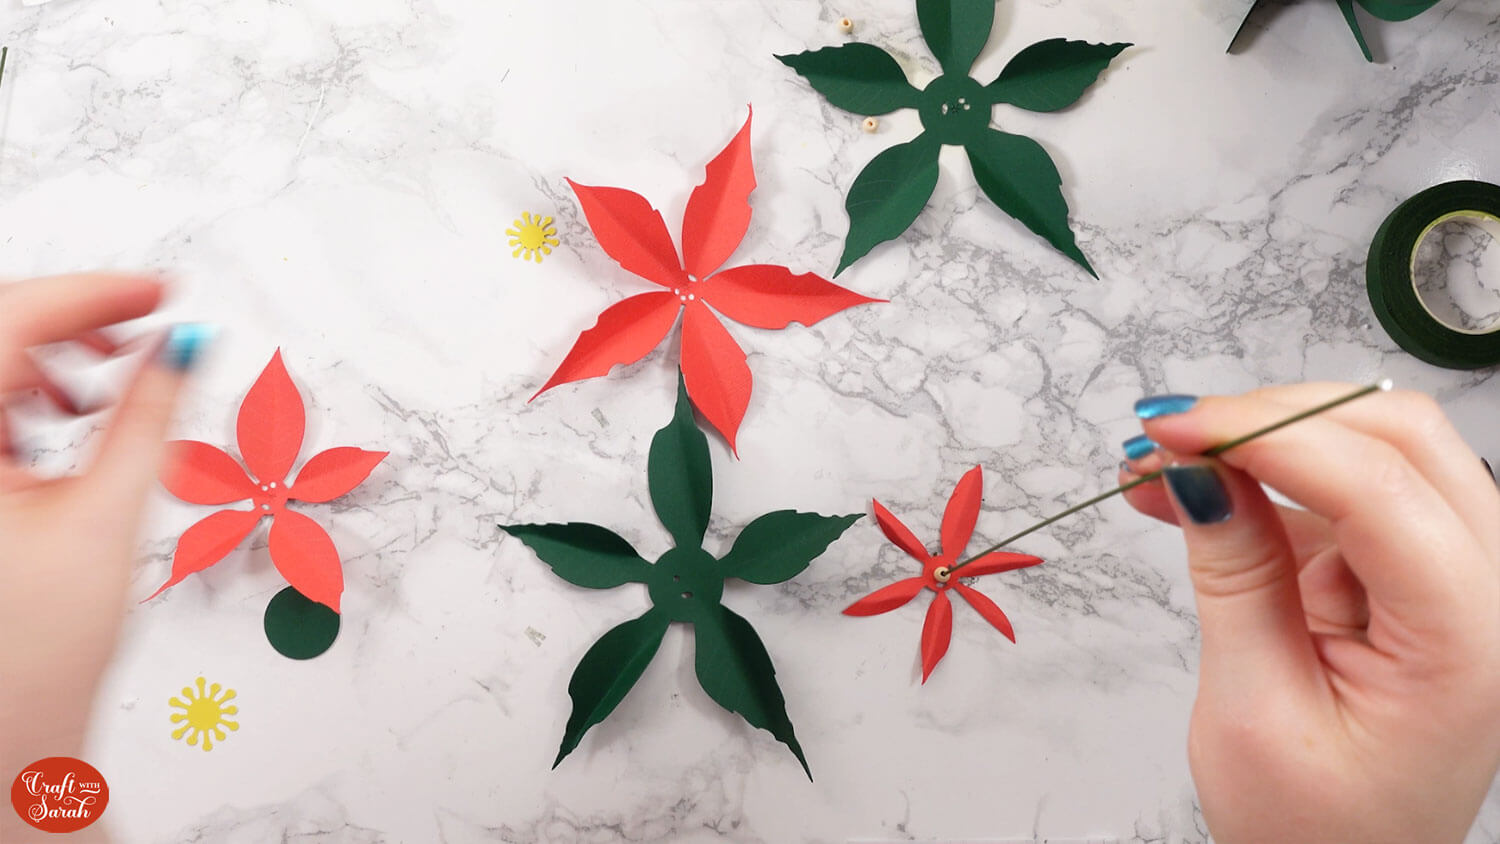
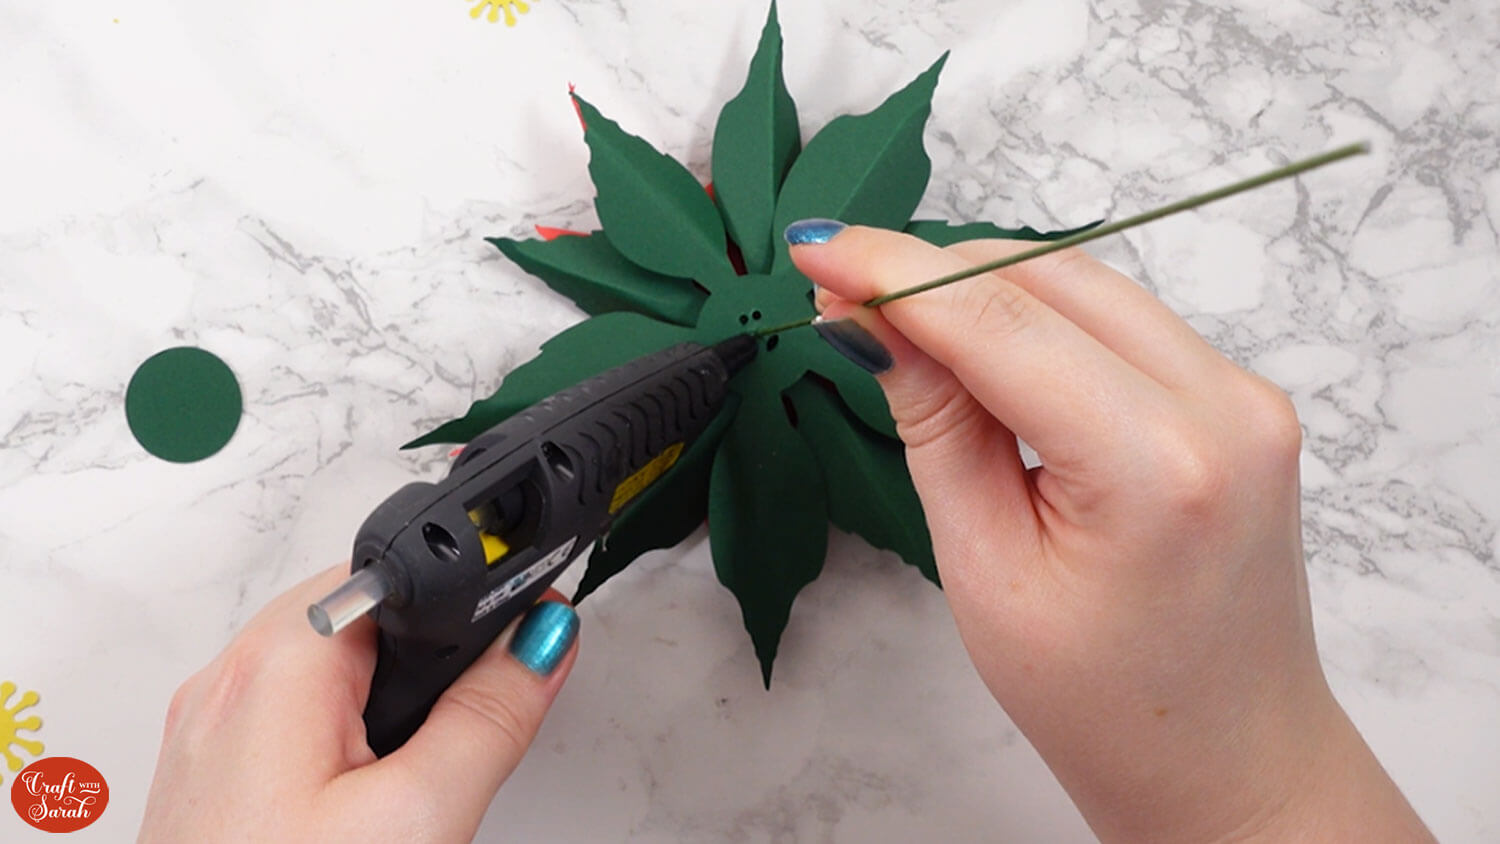
Thread on the rest of the petal and leaf pieces, using a bead or foam squares between each one.

Make sure the petals are all pushed to the top of the wire.
Add some hot glue to the bottom of the final leaf piece, making sure to coat the wire in glue.
Thread the green circular piece of card onto the wire and press it into the hot glue before it dries (watch your fingers!). The glue will hold all the pieces of the flower in place so they don’t fall down the wire.
“Rough up” the edges of the middles of the flower by running your fingers backwards and forwards along the edges.
Use a glue gun to attach both of the middle pieces to the top of the flower.
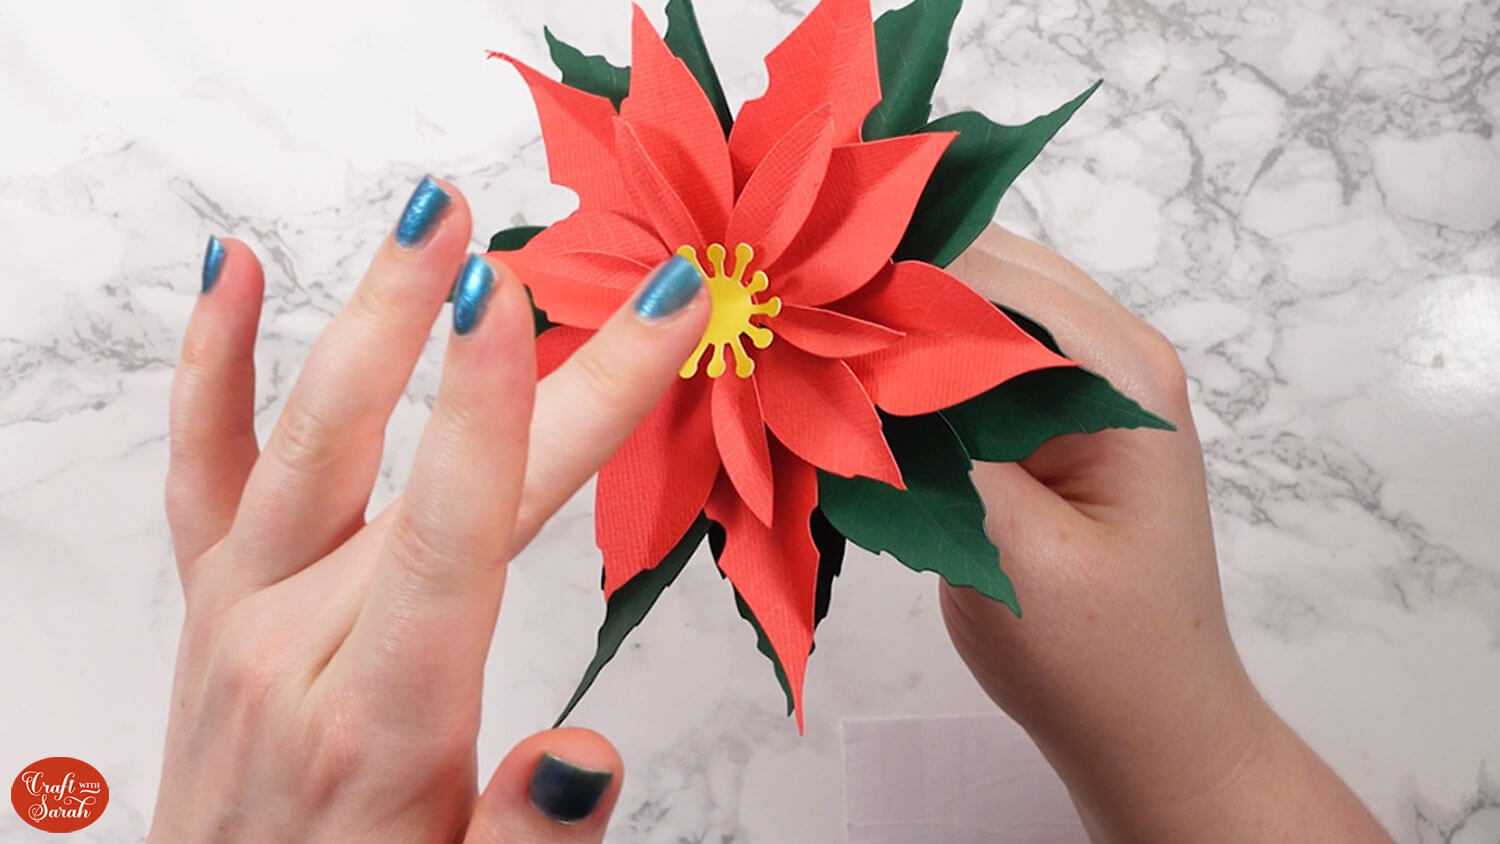
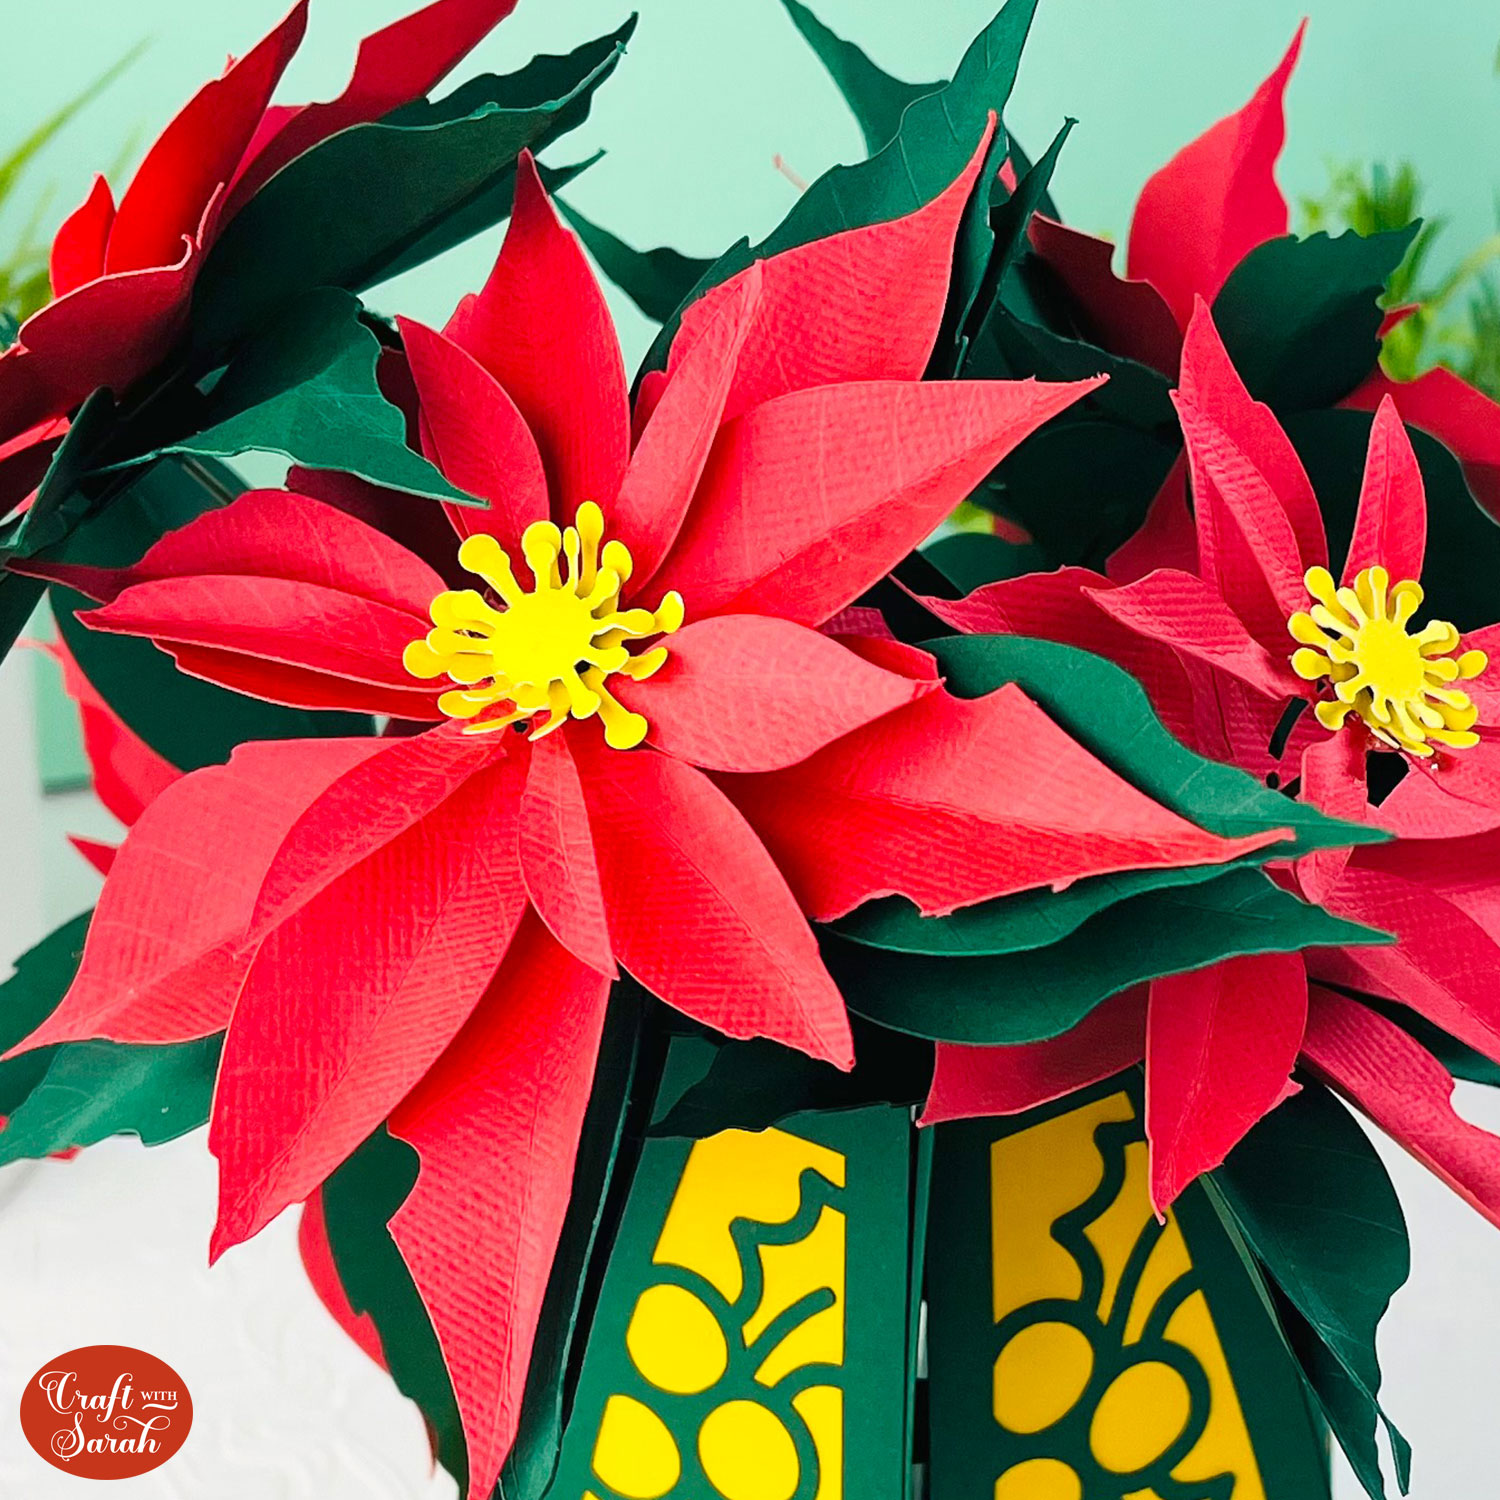
Your poinsettia flower is now finished!
You may wish to snip the wire shorter with wire cutters to reduce the height of the stem.
Sunflower Paper Flower Tutorial
Step 1) Cut the sunflower template
Load the sunflower flower template into Design Space.

This flower has some lines on the petals that we need to turn into score lines.
Select the design and press the “Ungroup” button at the top of the layers panel to separate out the layers.
There are four sub-groups at the bottom of the layers panel – one for each of the yellow petal pieces.

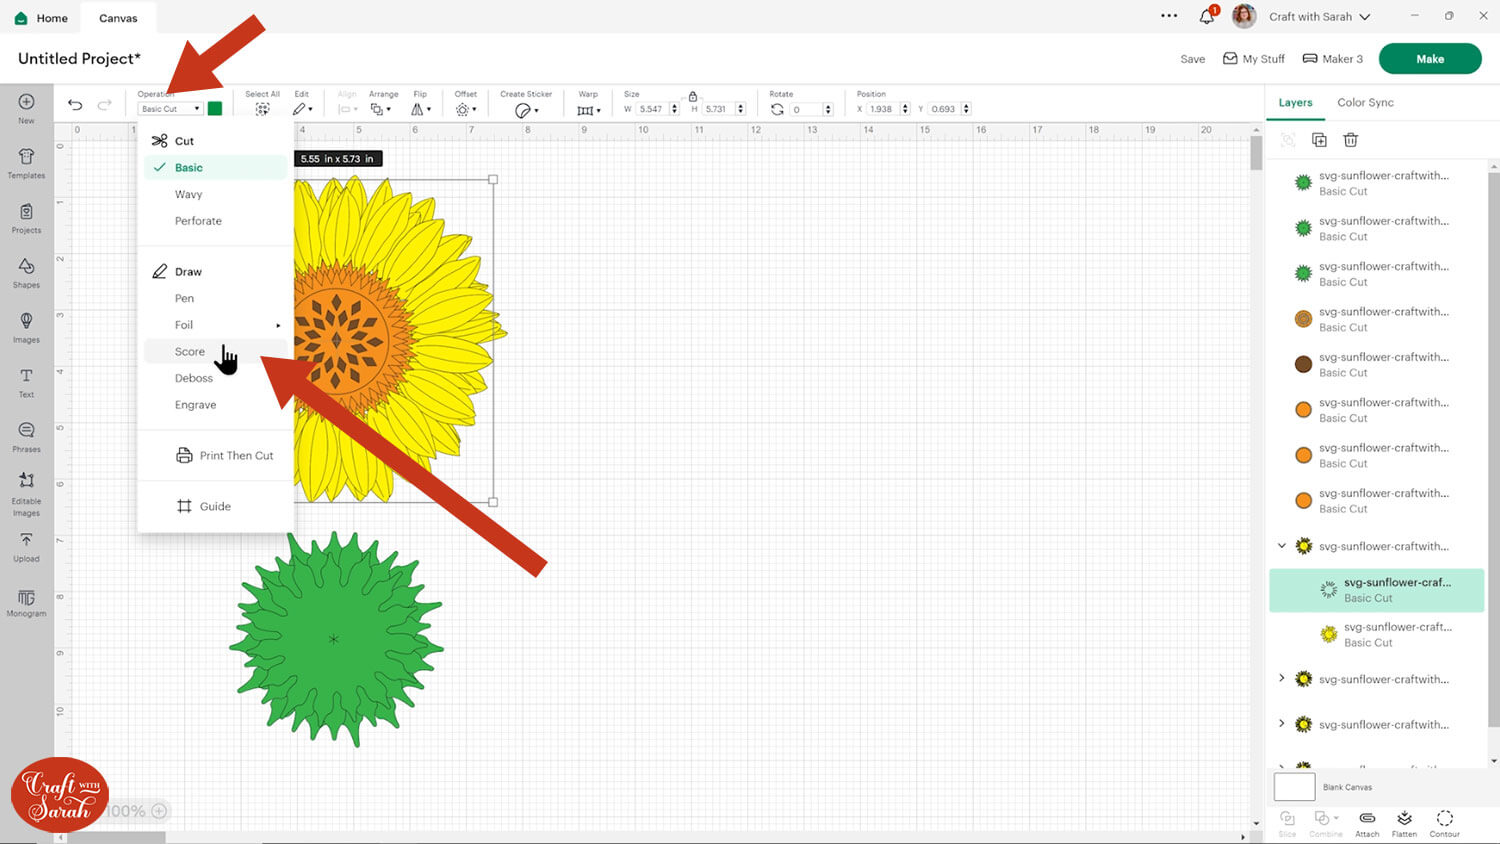
Open up one of these sub-groups. Within it are two layers: a yellow layer and a black single-line layer on top.
Click the black single line layer.

Change it to a “Score” layer in the layers panel.
If you do not have a scoring tool for your Cricut then you can delete the score lines. The flower can still be made without them, it will just be a little trickier to fold the petals.
Click the sub-group in the layers panel to select both layers, then press “Attach”.
Attach is what tells the Cricut to do the scoring on top of the petals.
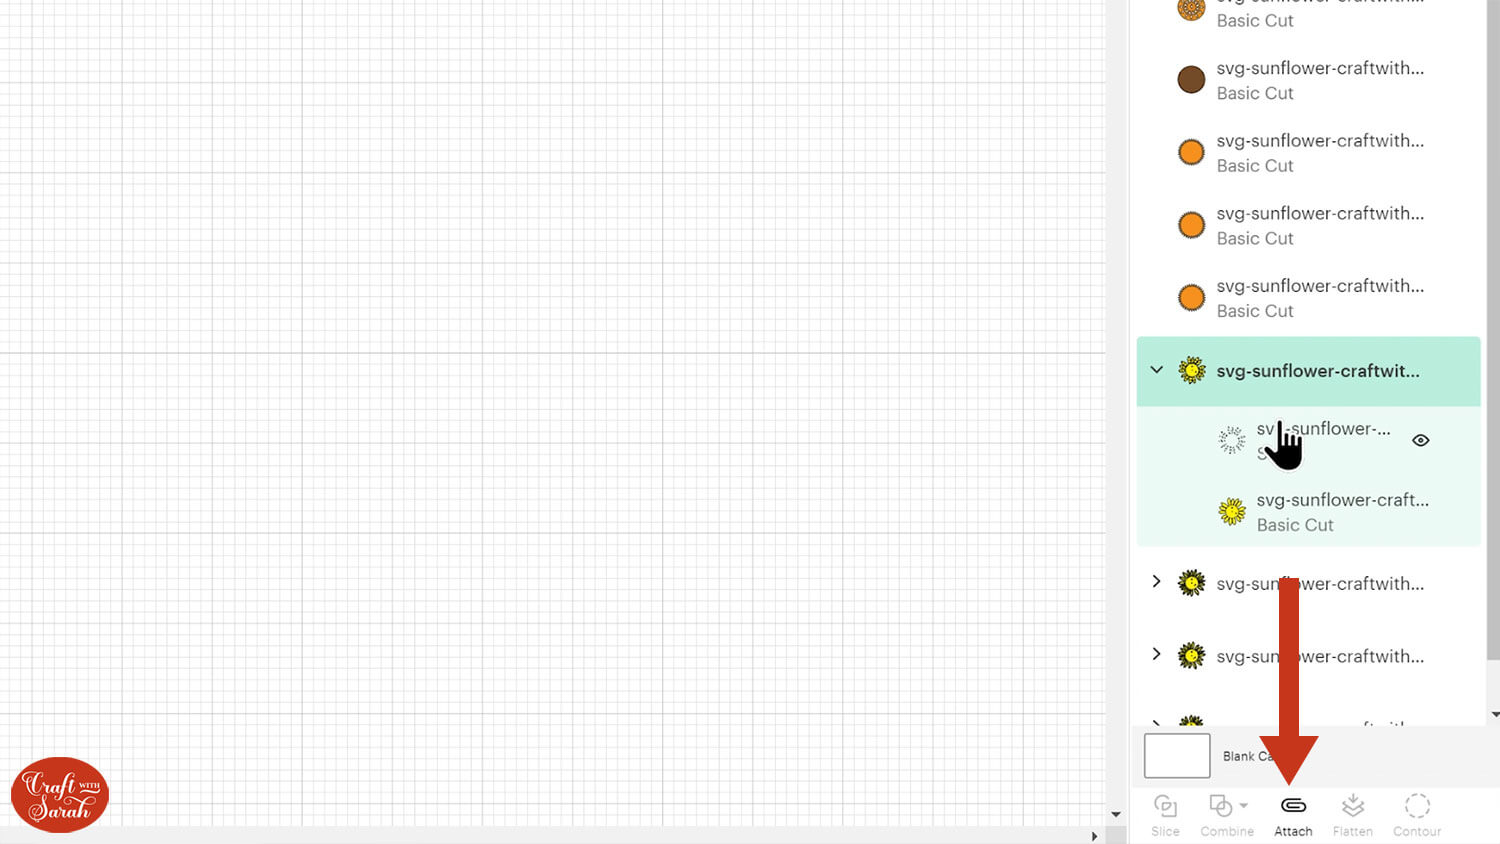
Attaching moves the layers to the top of the layers panel.
Move them back into their original position.
Repeat these steps for all of the sub-groups.

The sunflower flower loads into Design Space at a good size to cut, but you may wish to make it larger or smaller. It will look more realistic if you make it bigger.
Group the layers and then resize.
Click “Make” and get the sunflower cut out. Lighter weight cardstock or even coloured paper works best.
Step 2) Put the flower together
Pinch all the petals together so they they fold up along the middle of the score lines.
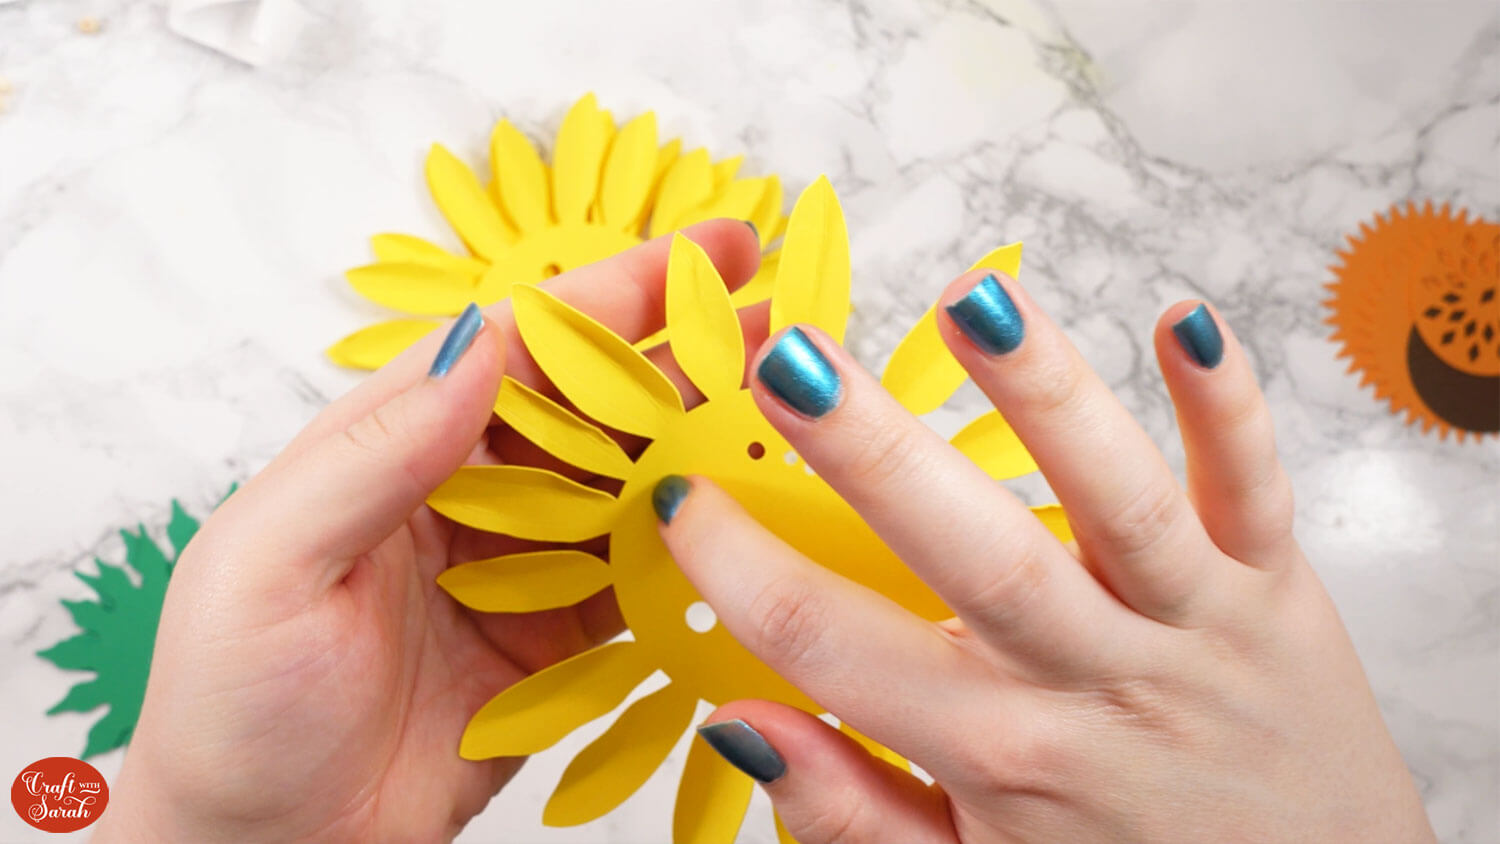
You don’t need to be super neat – this is just to give a bit more of a realistic effect to the petals.
Use some pliers to bend over one of the ends of your florist wire.
Thread the petal piece with one large circular hole and one small circular hole onto the wire.
The wire goes through the small “crosshatch” cut in the middle of the petal.
I used small wooden beads between the petals to give them some depth and to make the flower look more realistic.
If you don’t have beads, you could use foam pads/squares instead.
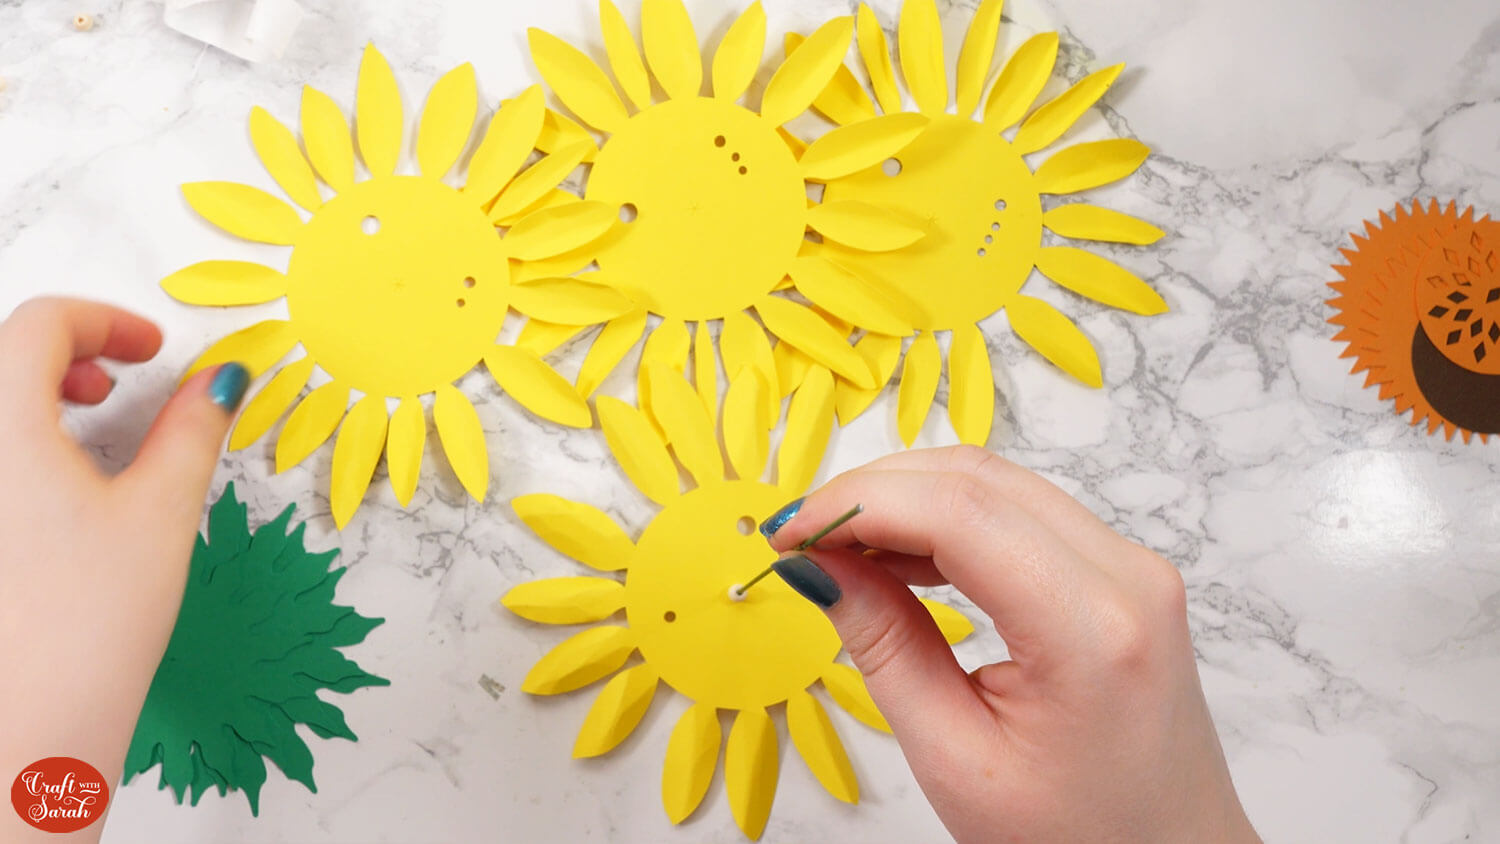
Thread on the rest of the petal pieces, using a bead or foam squares between each one.
Make sure the petals are all pushed to the top of the wire.
Add some hot glue to the bottom of the final leaf piece, making sure to coat the wire in glue.
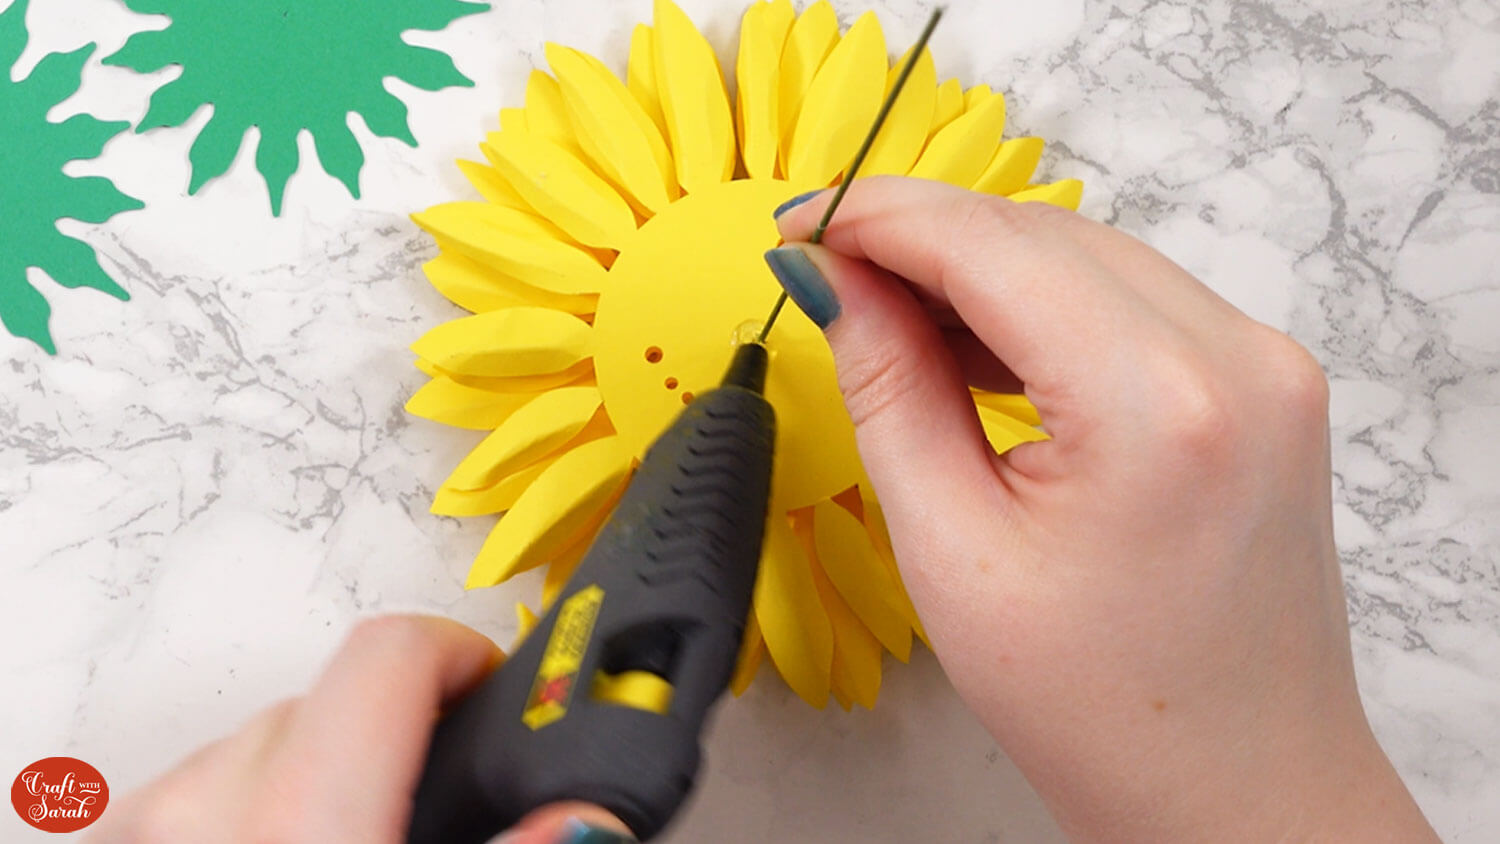
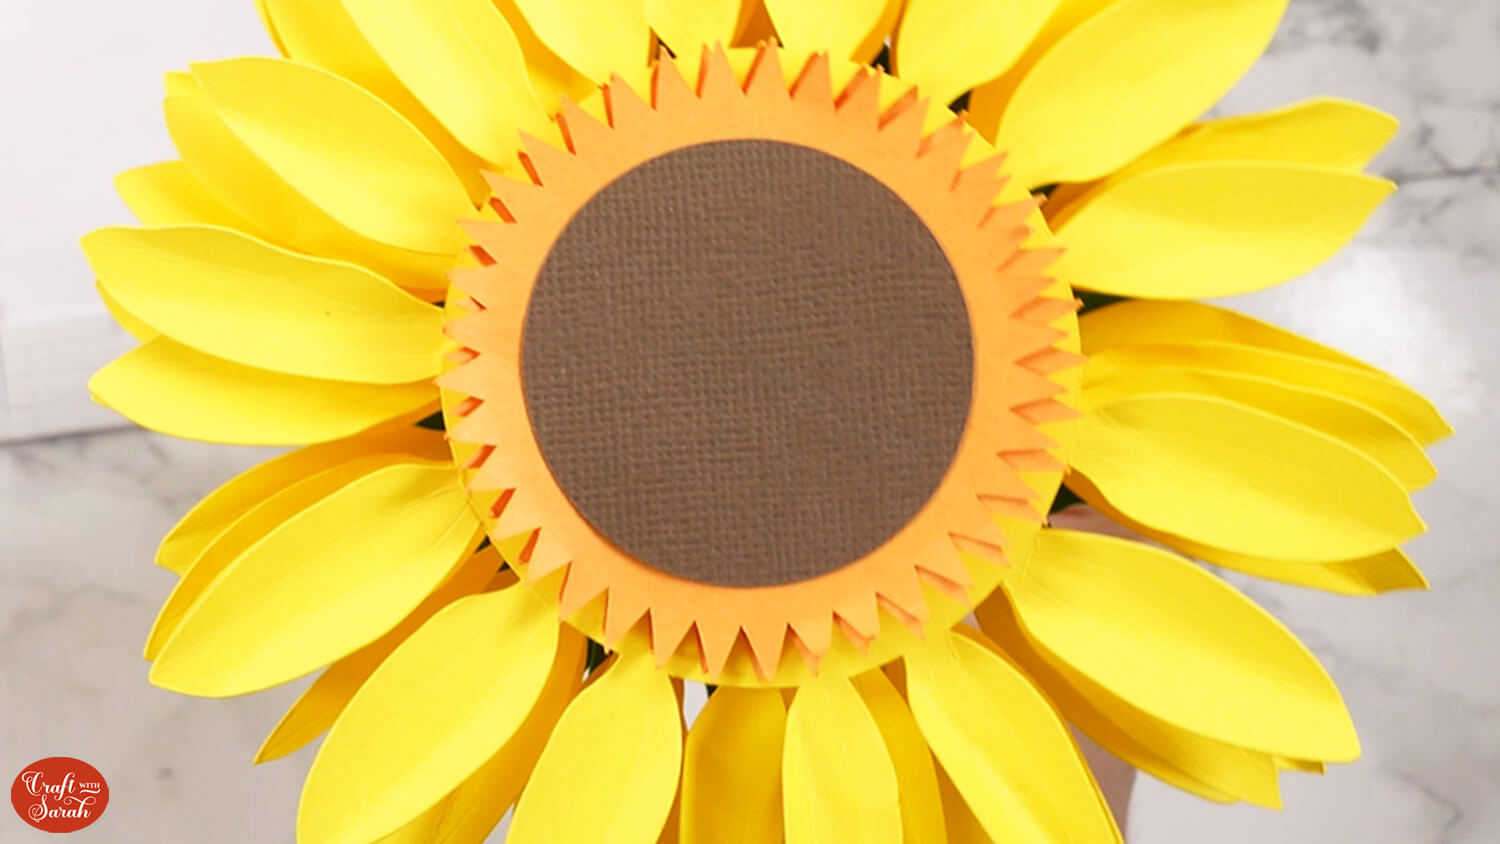
Thread the largest green base piece of card onto the wire and press it into the hot glue before it dries (watch your fingers!). The glue will hold all the pieces of the flower in place so they don’t fall down the wire.
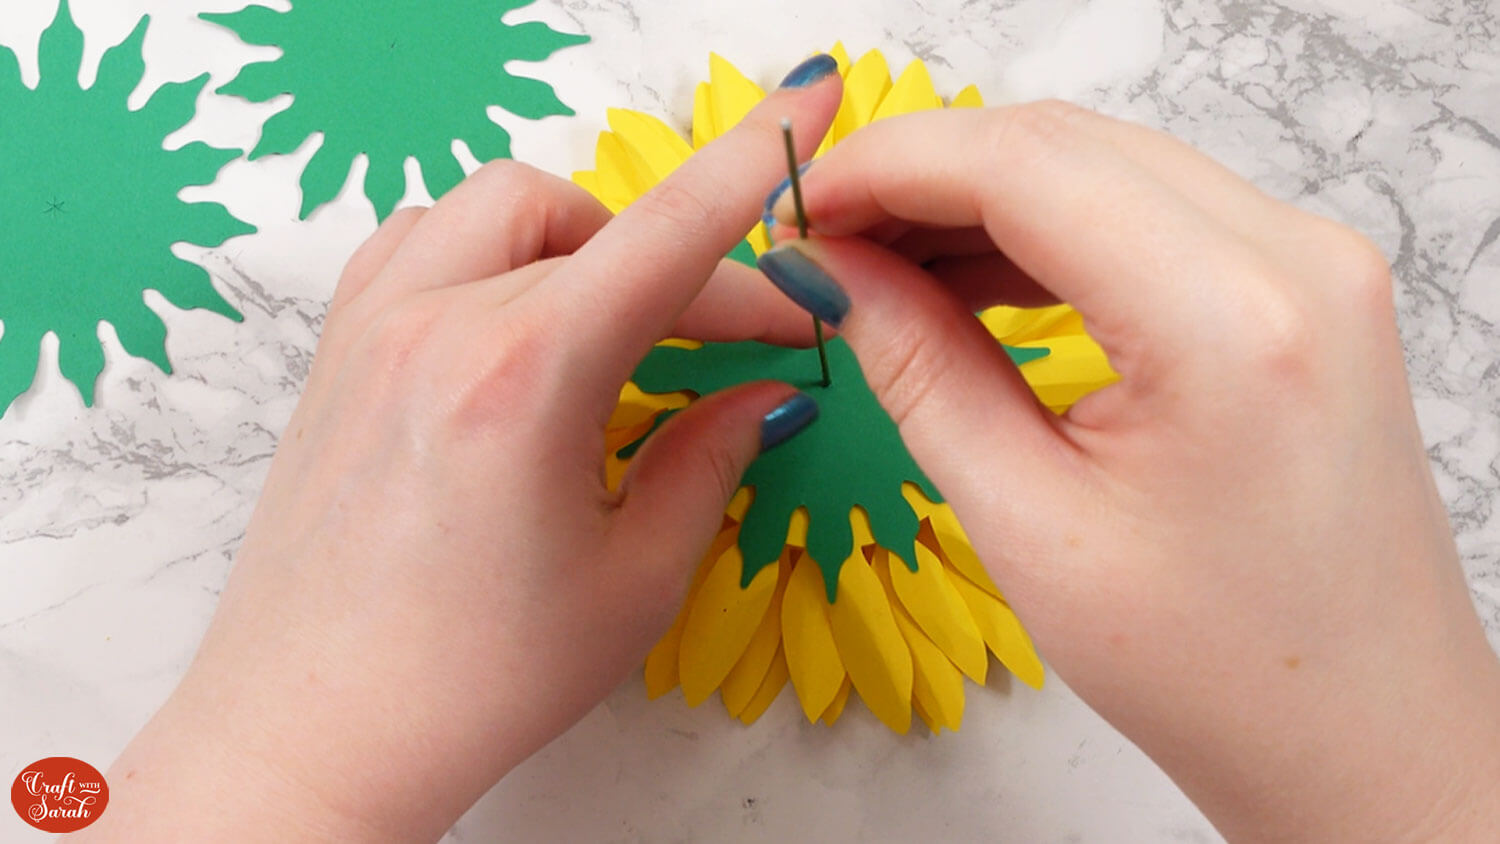
Thread another bead onto the wire, the add the middle sized green piece.
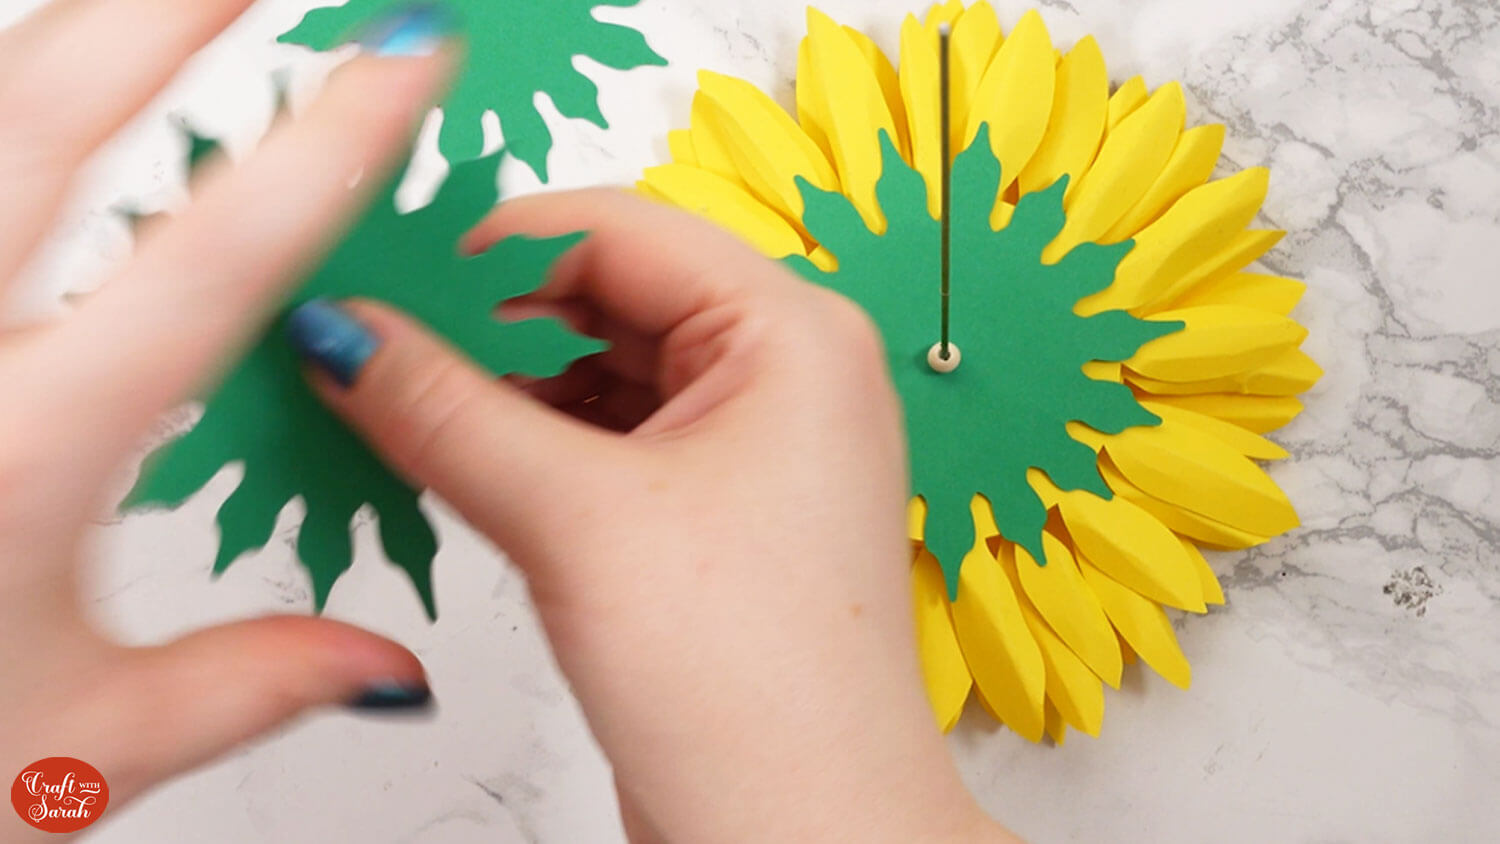
Use hot glue to add the final green piece.
Use foam squares to attach the largest middle piece to the top of the flower. Alternatively, you could use a glue gun.
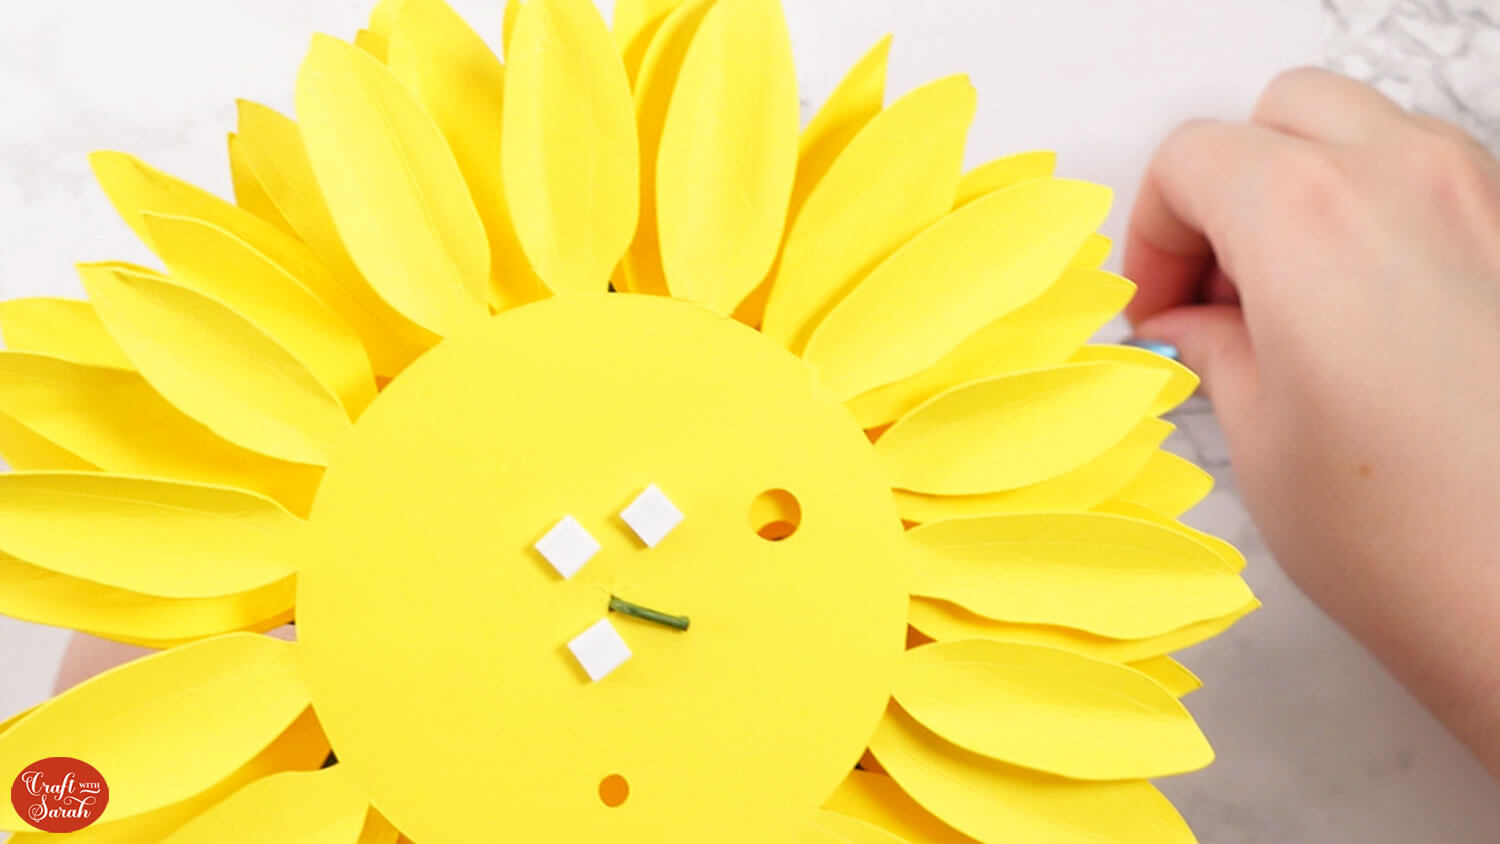
Use a glue gun to attach the next few layers.
Use regular craft glue to stick on the top layer as it is too narrow to use a glue gun.
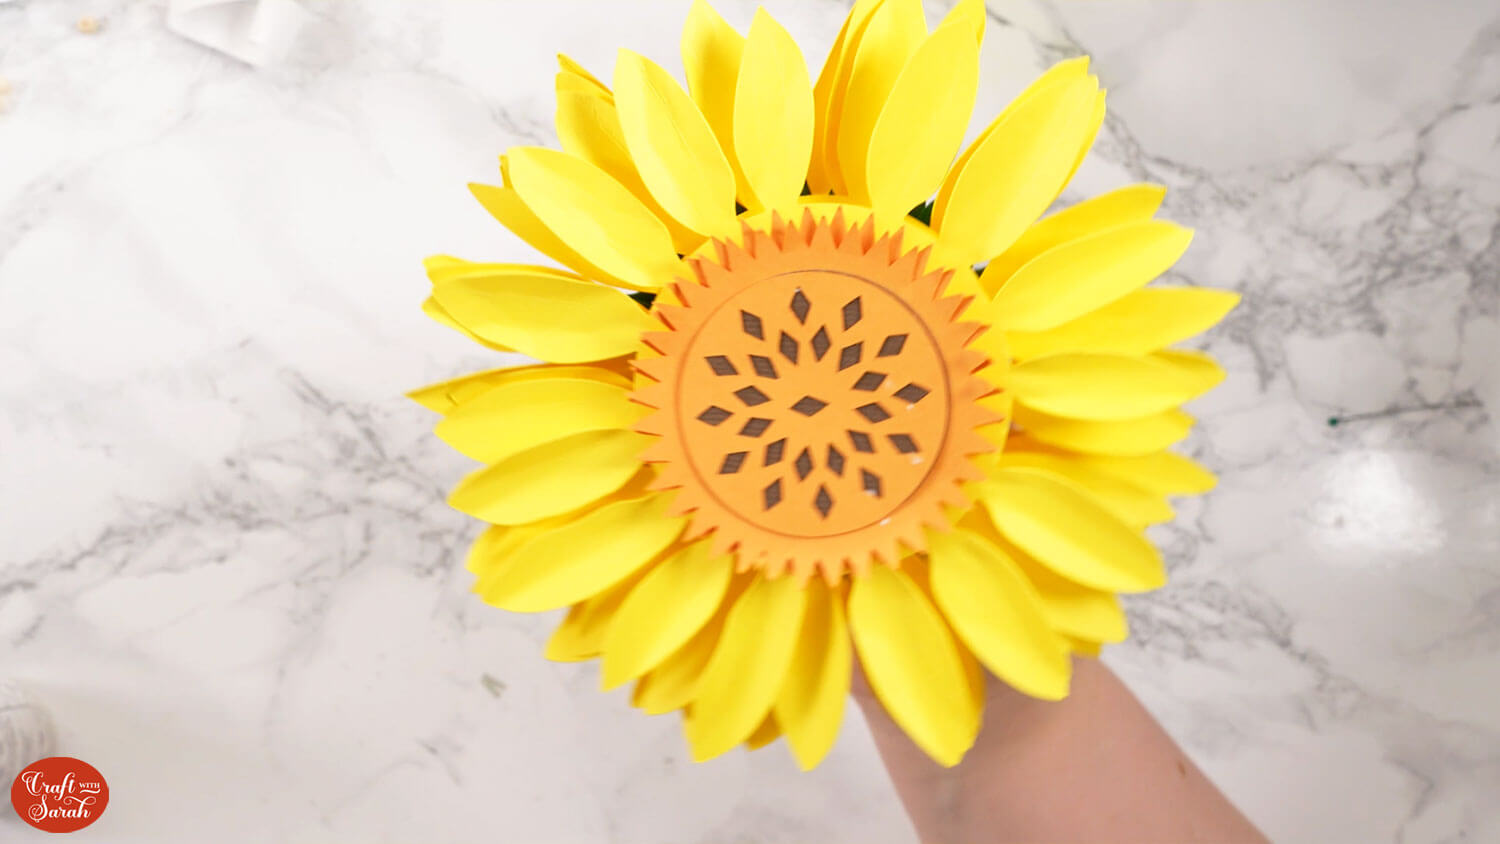
Your sunflower is now finished!
You may wish to snip the wire shorter with wire cutters to reduce the height of the stem.

Rose Paper Flower Tutorial
Step 1) Cut the rose template
Load the rose flower template into Design Space.
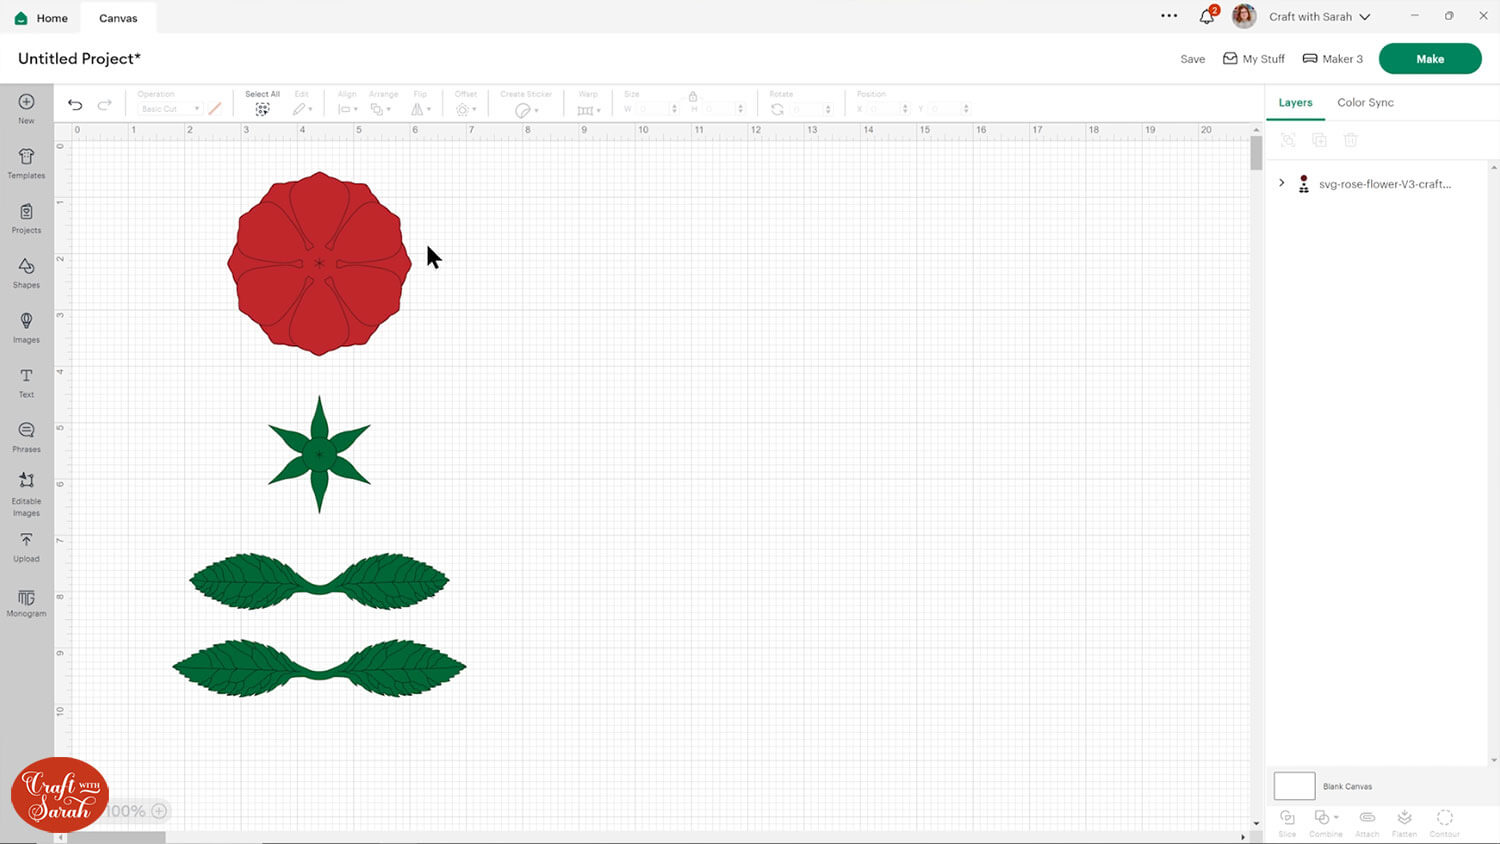
The leaves have some lines on them that we need to turn into score lines.
Select the design and press the “Ungroup” button at the top of the layers panel to separate out the layers.
There are two sub-groups at the bottom of the layers panel – one for each of the leaf pieces.
Open up one of these sub-groups. Within it are two layers: a green layer and a black single-line layer on top.
Click the black single line layer.
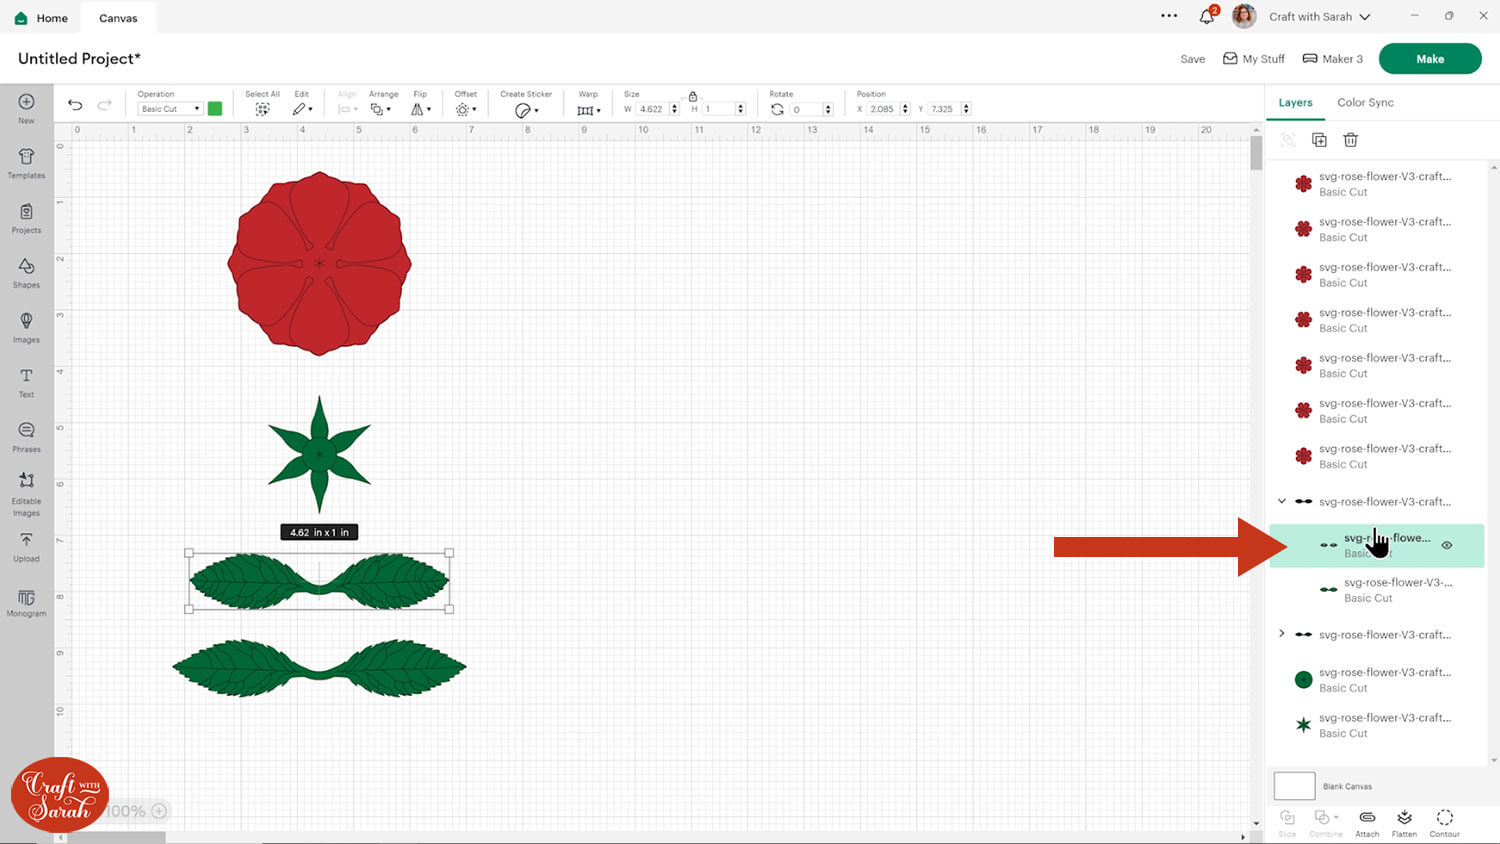
Change it to a “Score” layer in the layers panel.
If you do not have a scoring tool for your Cricut then you can delete the score lines. They are there for decoration only.
Click the sub-group in the layers panel to select both layers, then press “Attach”.
Attach is what tells the Cricut to do the scoring on top of the leaves.

Repeat these steps for the other set of leaves.
The rose loads into Design Space at a good size to cut, but you may wish to make it larger or smaller. It will look more realistic if you make it bigger.
Group the layers and then resize.
Click “Make” and get the rose cut out. Lighter weight cardstock or even coloured paper works best.
Step 2) Put the flower together
The rose flower is a little trickier to put together than the other paper flowers in this tutorial.
It is hard to describe the steps to this one, so it may be easier to watch the video to see how it is done.
Please note that my rose shapes in the photos have circular cutouts on them, however I realised when gluing the flower that these are not needed, so I have filled them in on the version that you receive.
Use pliers to bend over the top of the wire.
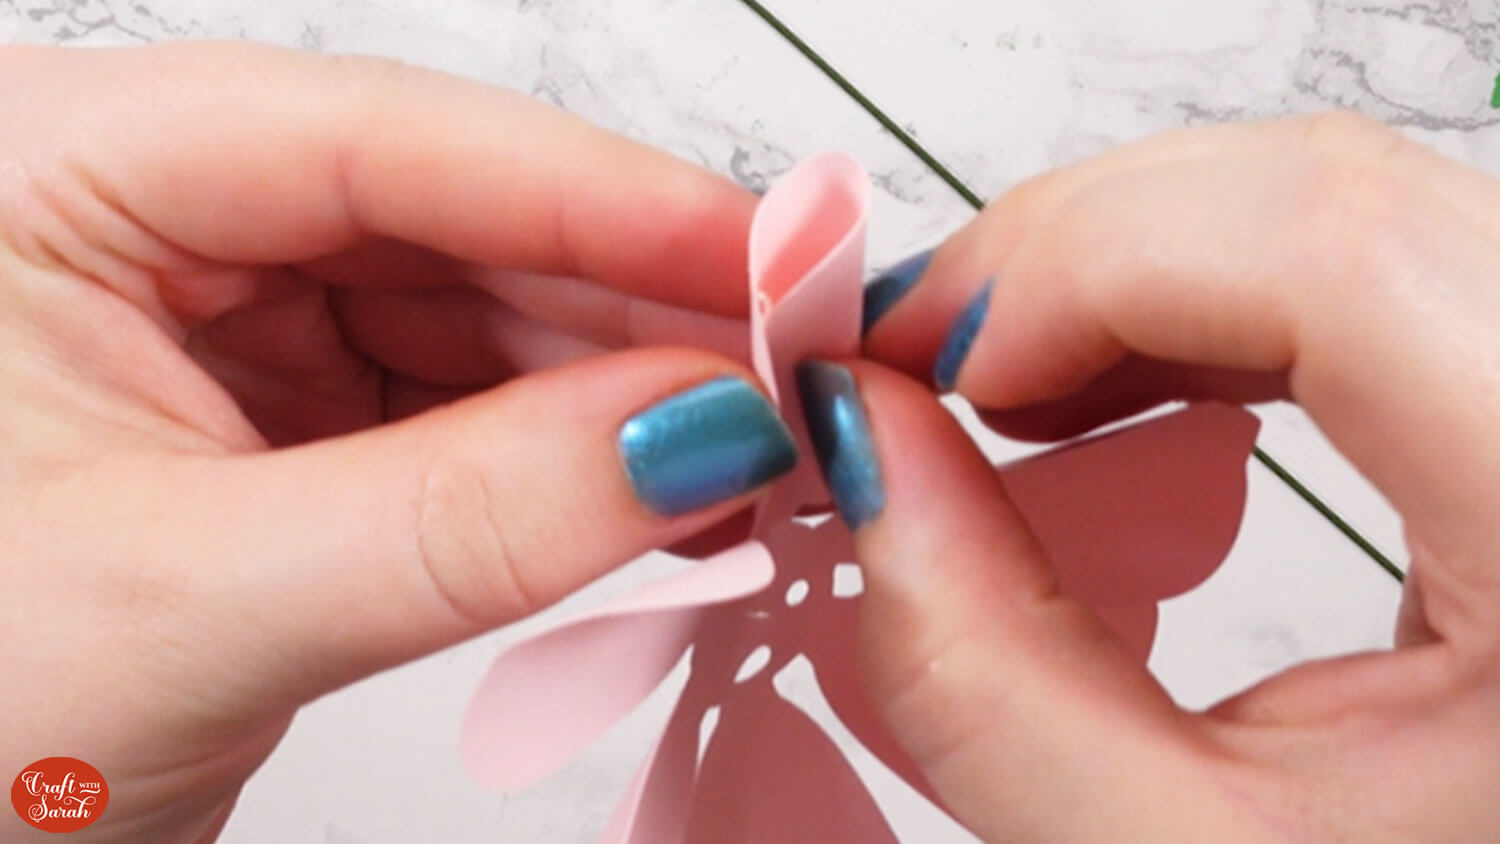
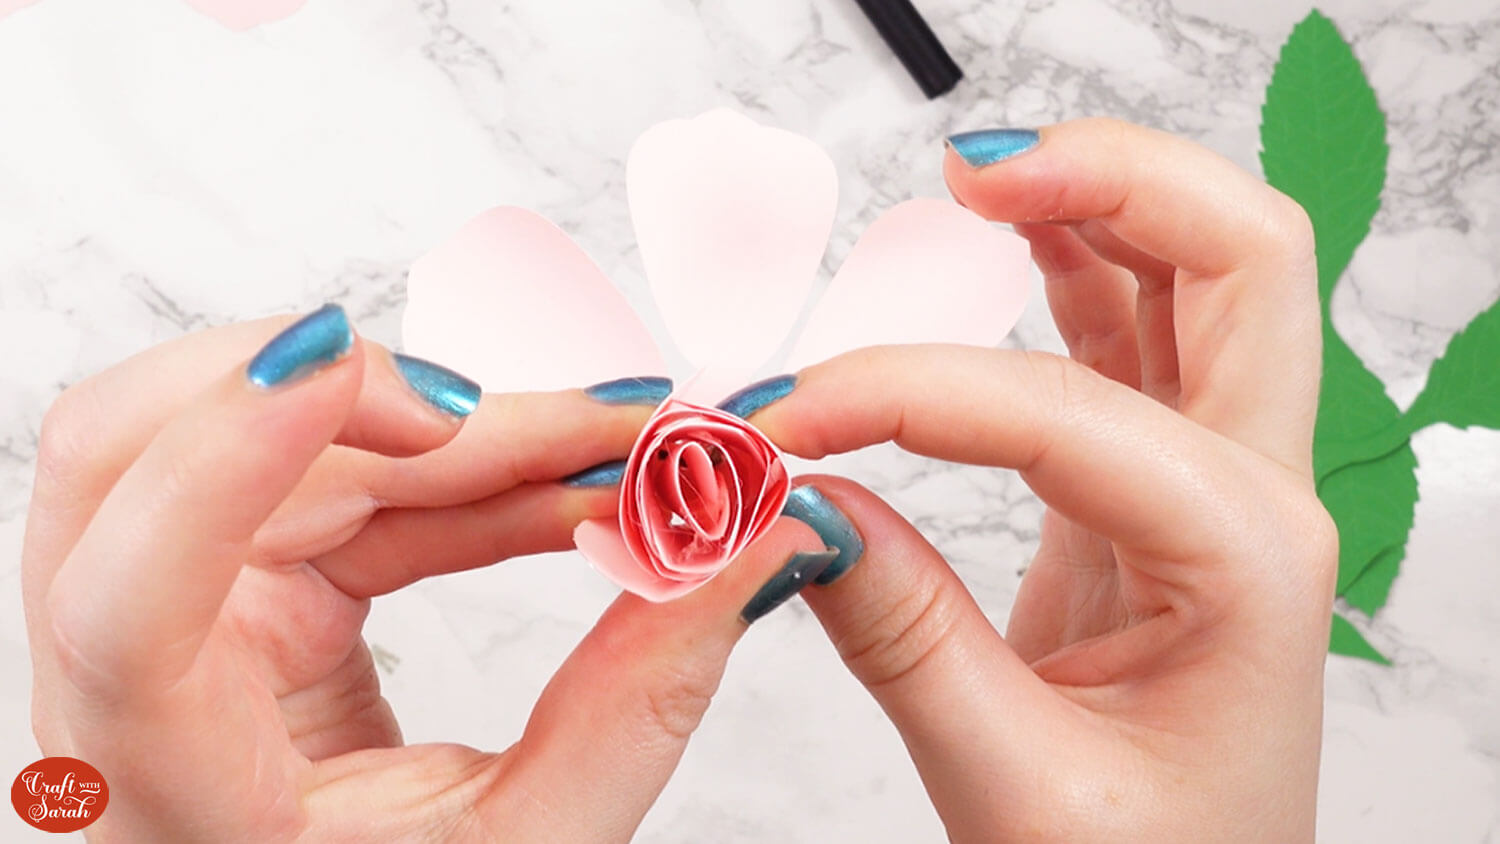
Choose one of the petal shapes. It doesn’t matter which one you choose. Roll the petals of the roses around something small and cylinder-shaped, such as a pen.
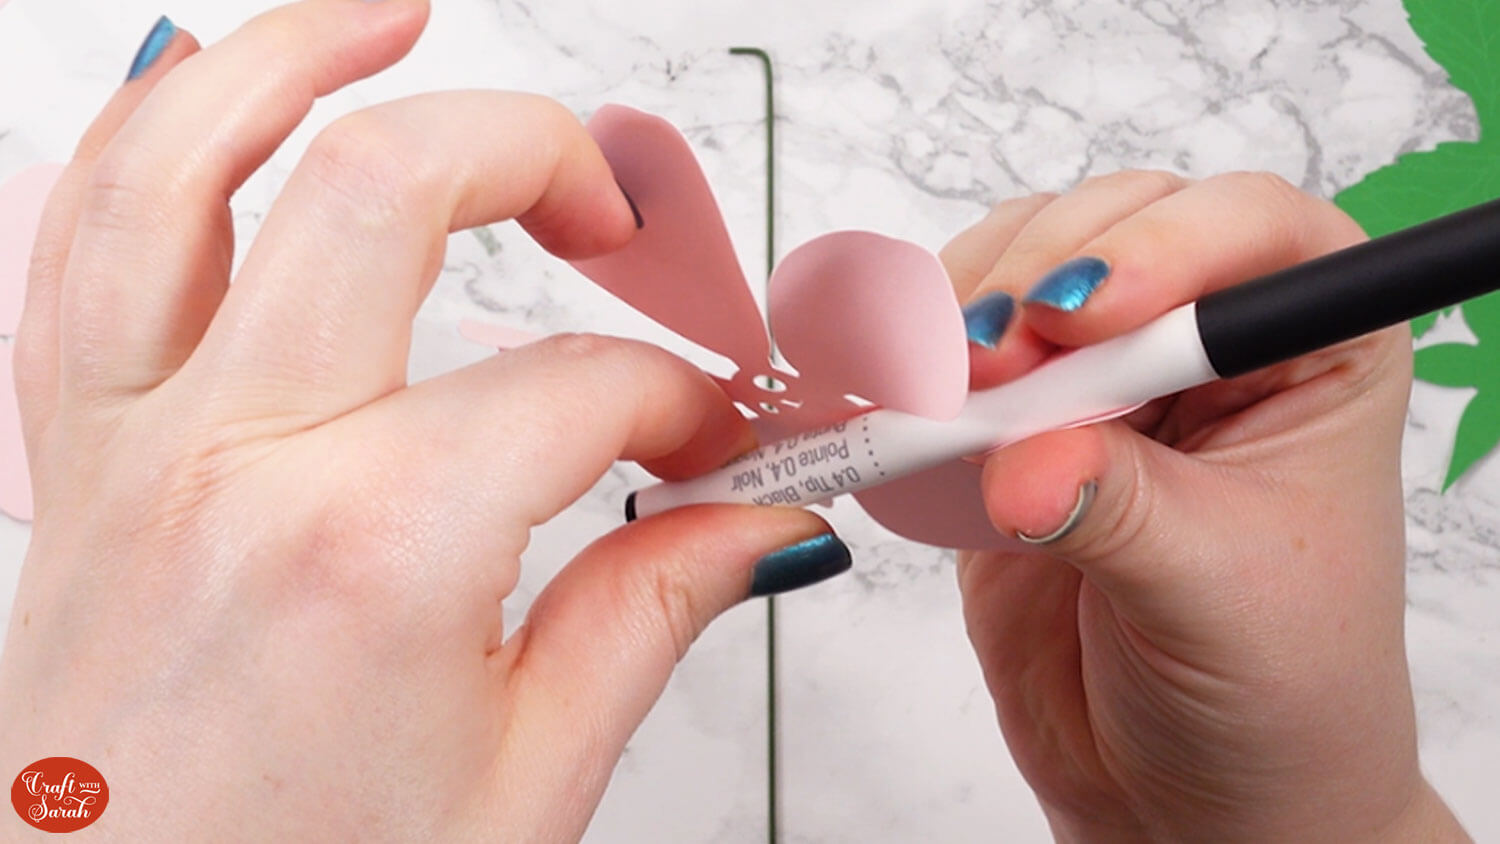
Roughly roll up and squeeze the petals to get the cardstock “used” to being shaped in that way.
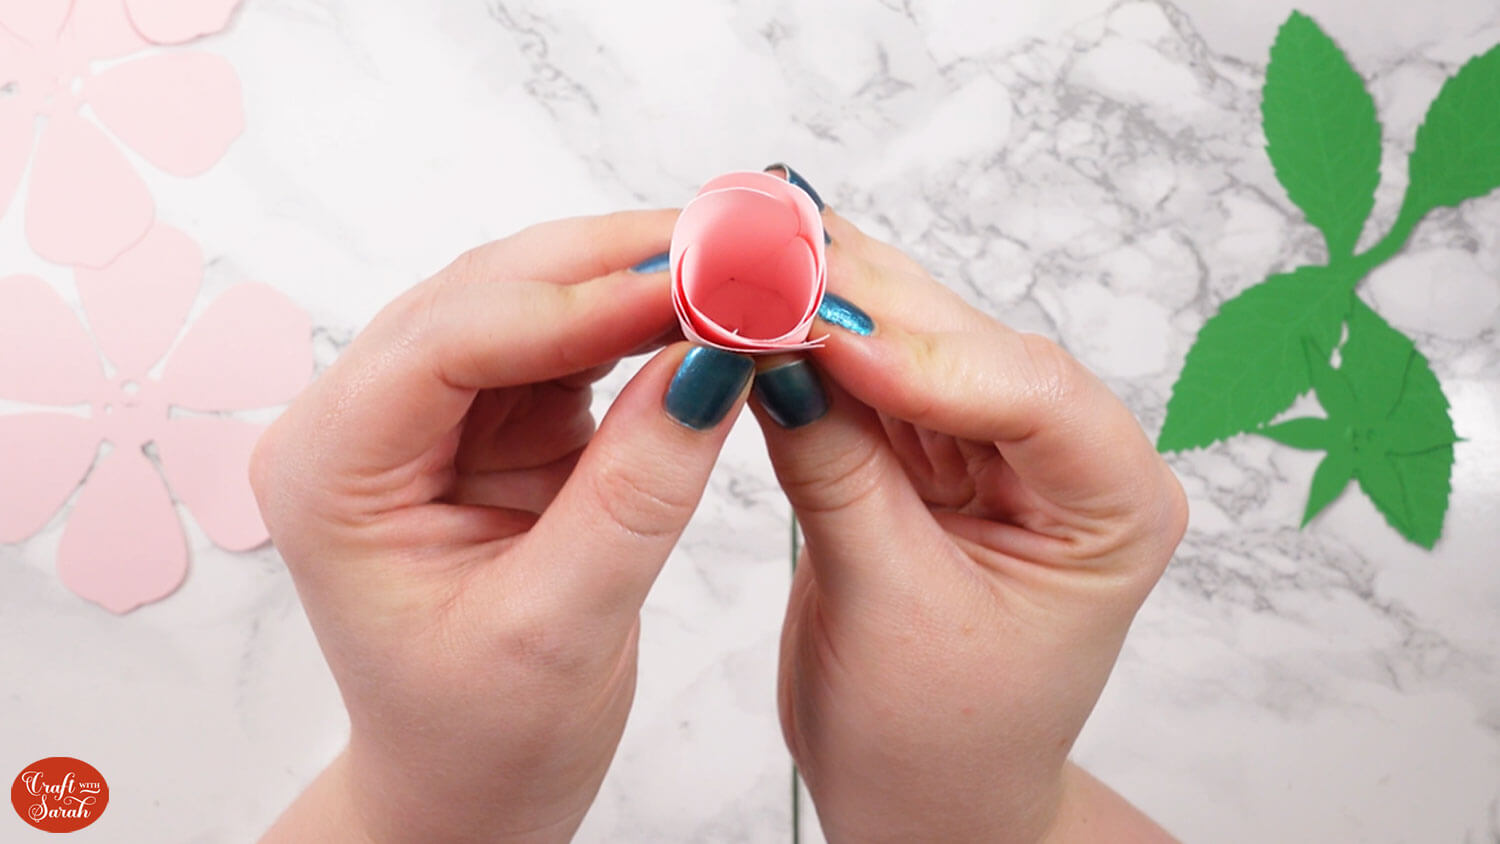
Put hot glue along the two edges of ONE of the petal shapes, then roll them up together. this will form the very middle of the rose.
Thread the piece onto the wire.
Put hot glue around one of the petals next to the first one you rolled and then add that onto the rolled up shape.
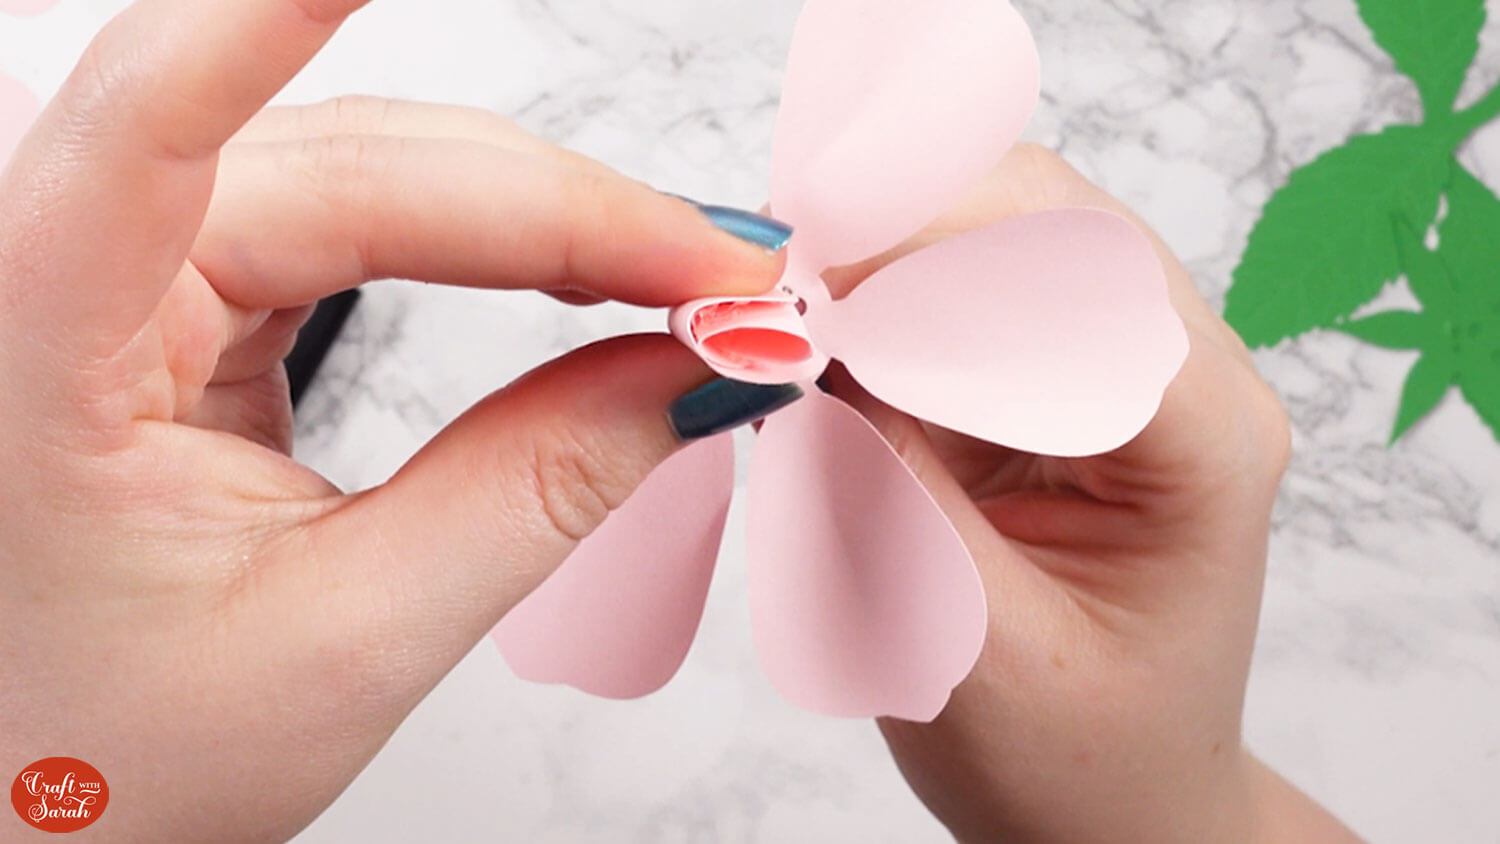
Continue in this manner until all the petals are stuck. Get a little looser each time.
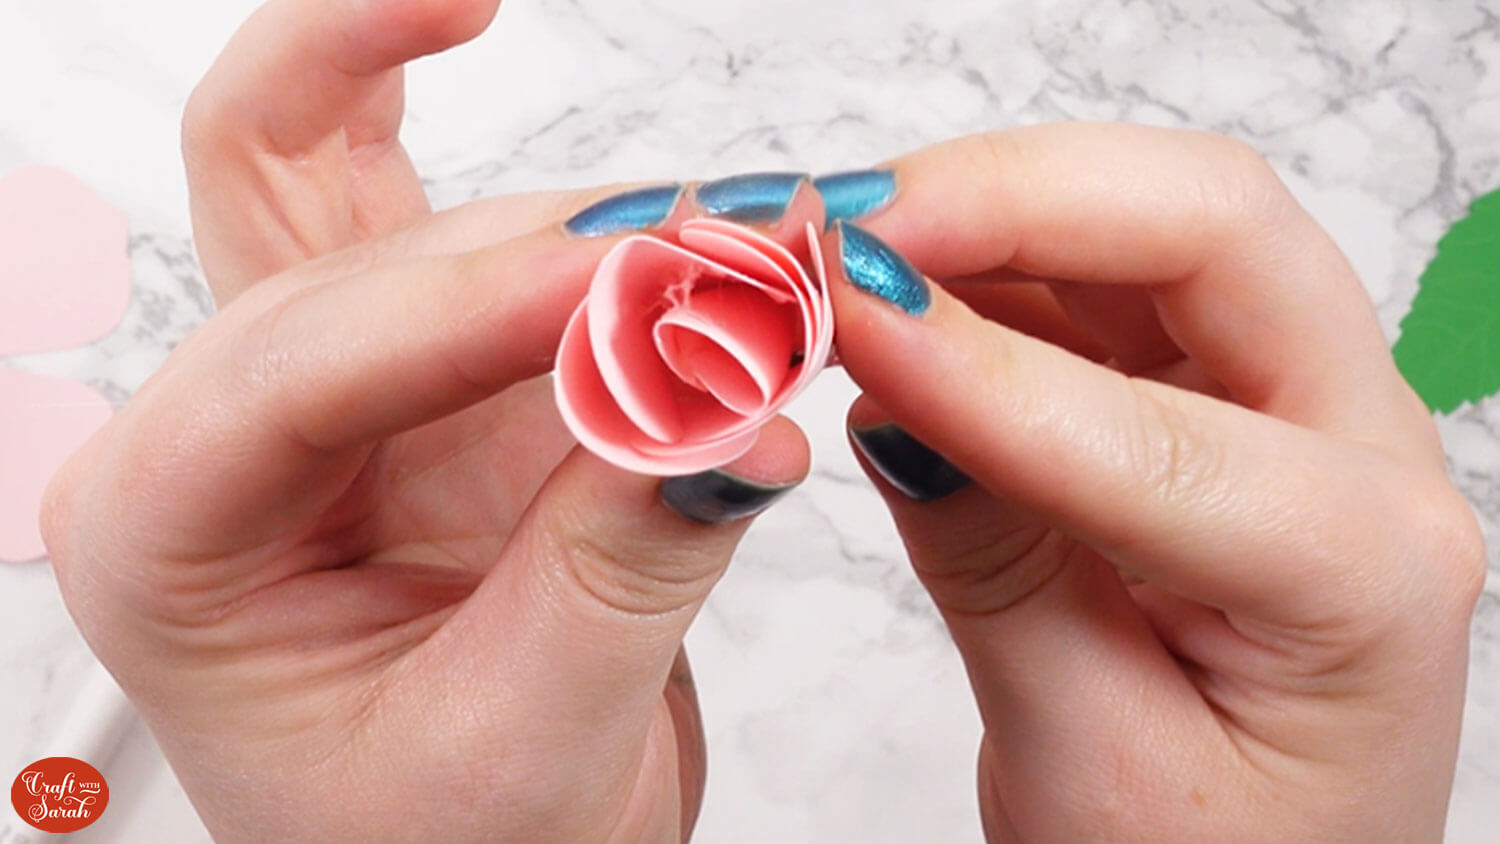
Thread another petal shape onto the wire and continue glueing the petals.
Make sure the flower is sitting vertically against the wire.

Add the next petal shape to the wire and continue gluing.
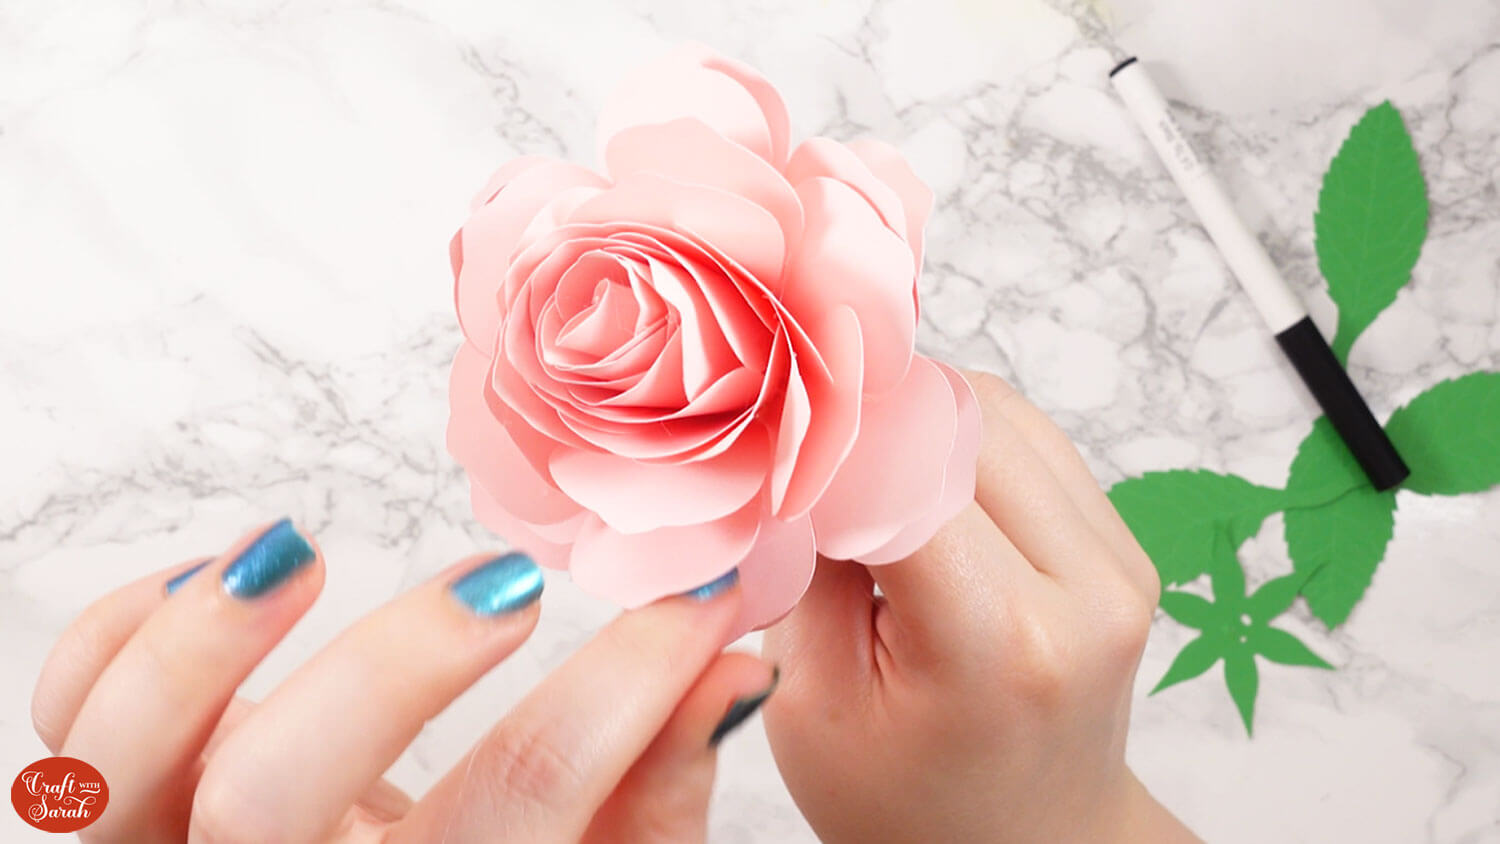
The next petal shape will start looking looser, as it gets close to the outside of the rose.

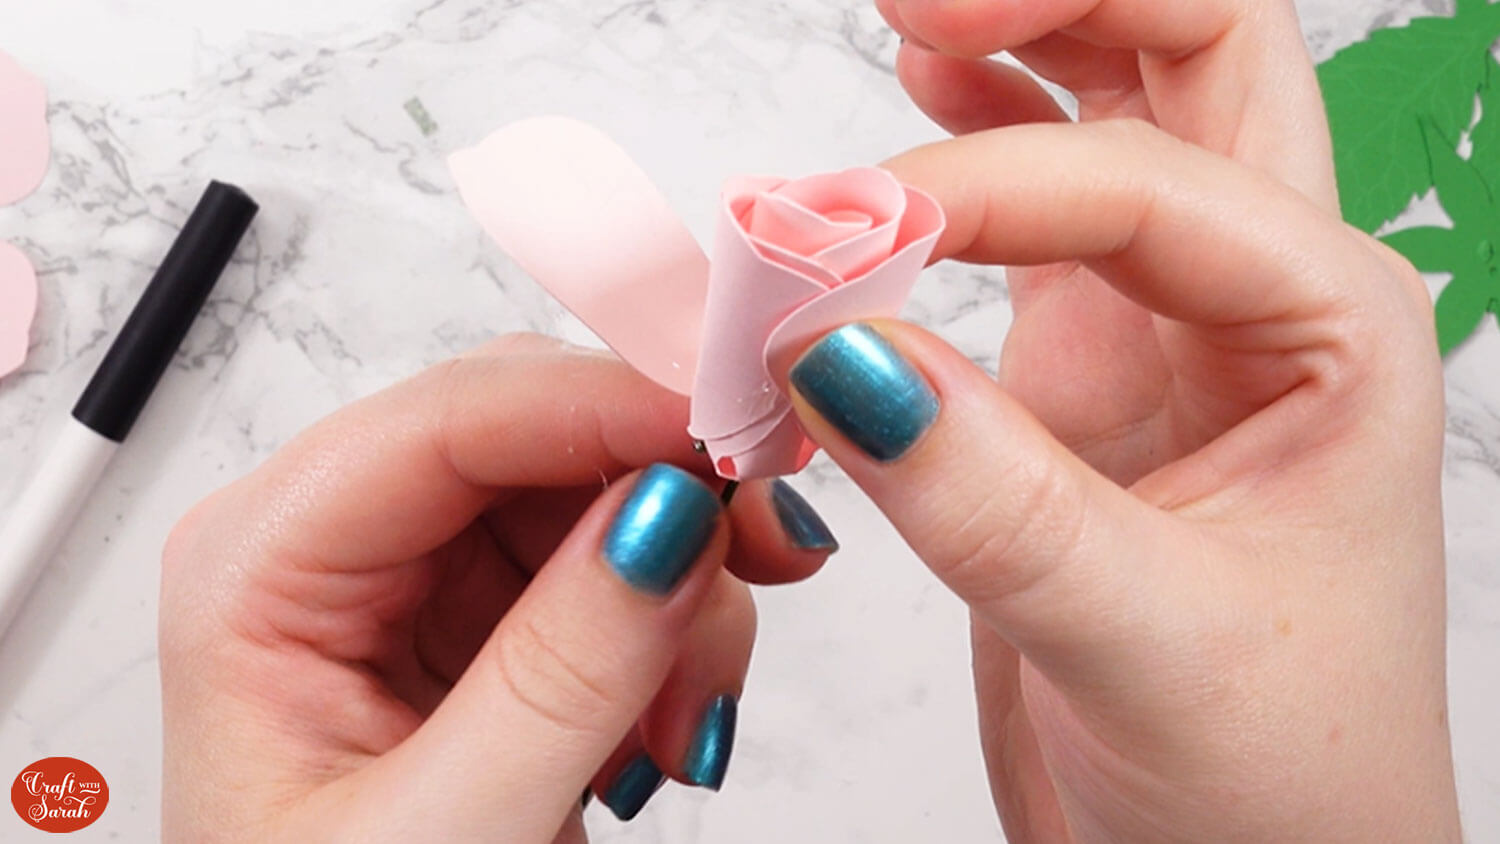
Continue in this manner until all the petals are stuck.
You can see in the image below how the outer petals are stuck looser to make it look real.
You may wish to bend/fold some of the petals in various directions to help fill in any gaps.
Add hot glue to the base of the rose, including against the wire.
Thread on the bottom green shape and push it into the glue (be careful with your fingers).
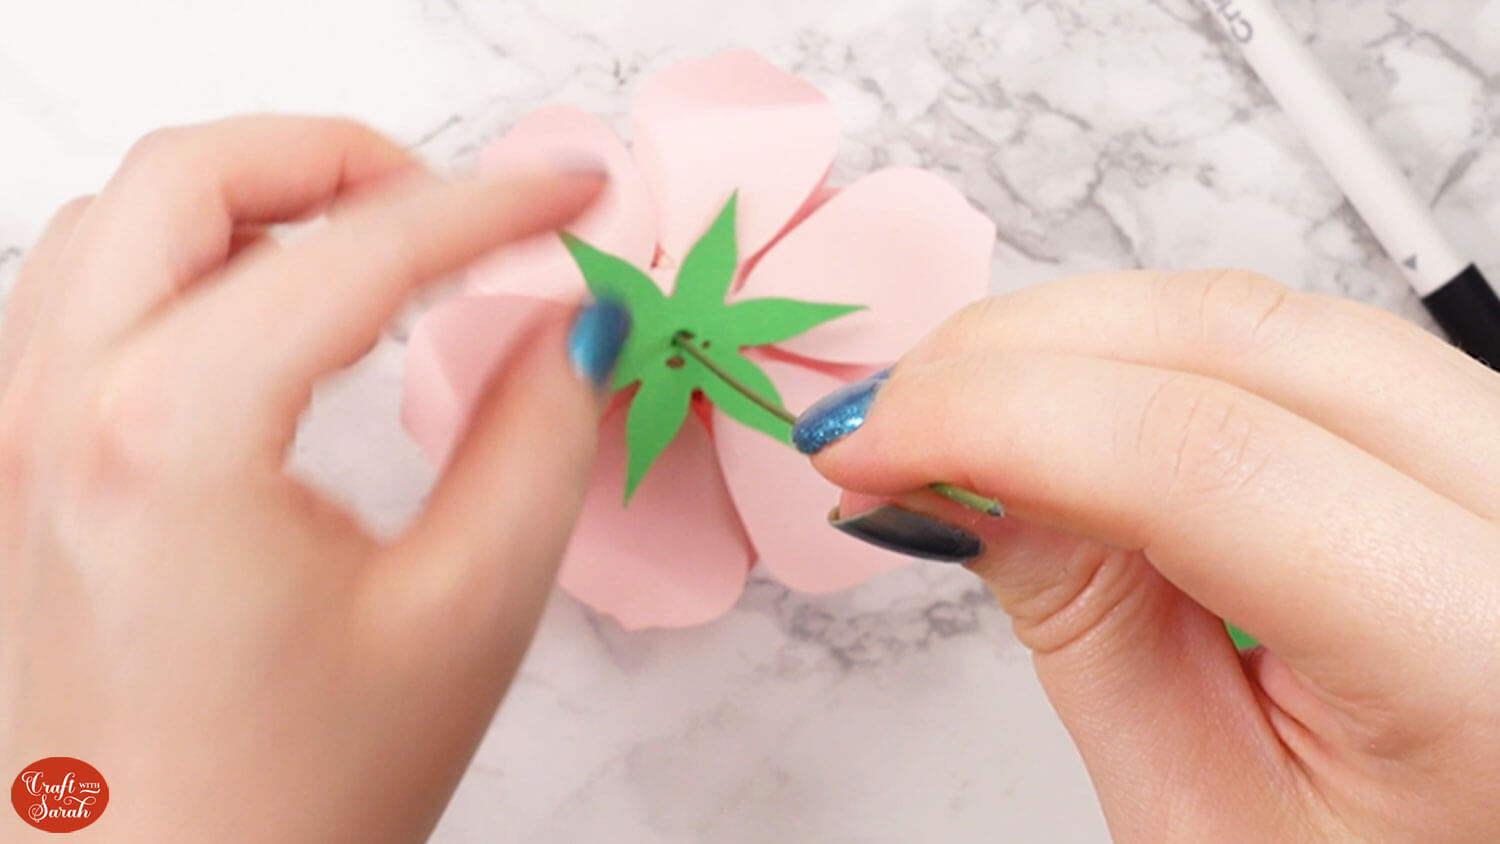
Use hot glue to stick on the green circle.
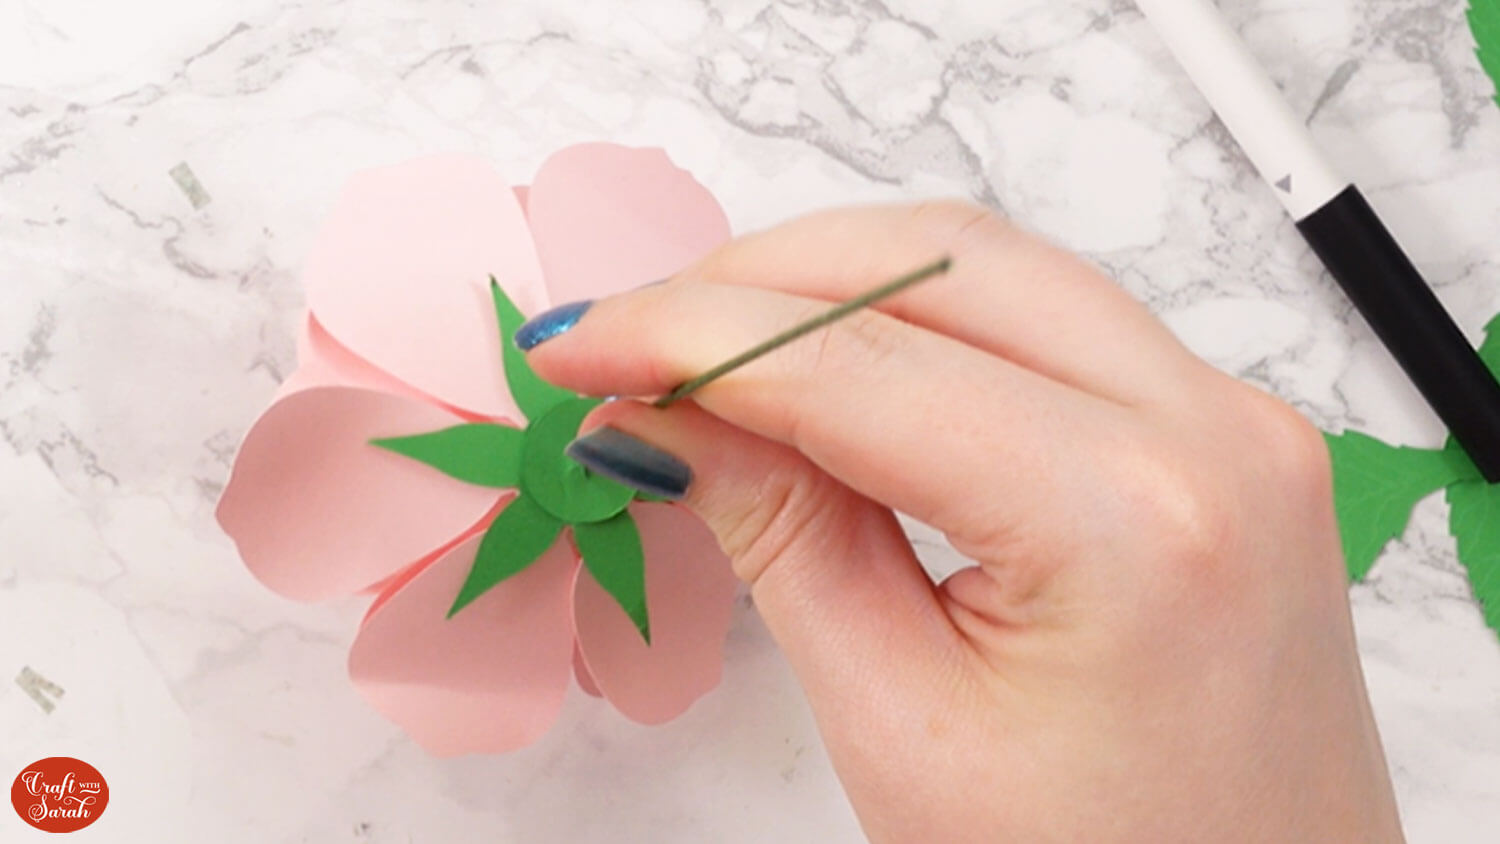
Put hot glue on one of the leaf shapes.
Fold it around the wire. The glue in the middle will hold it in place.
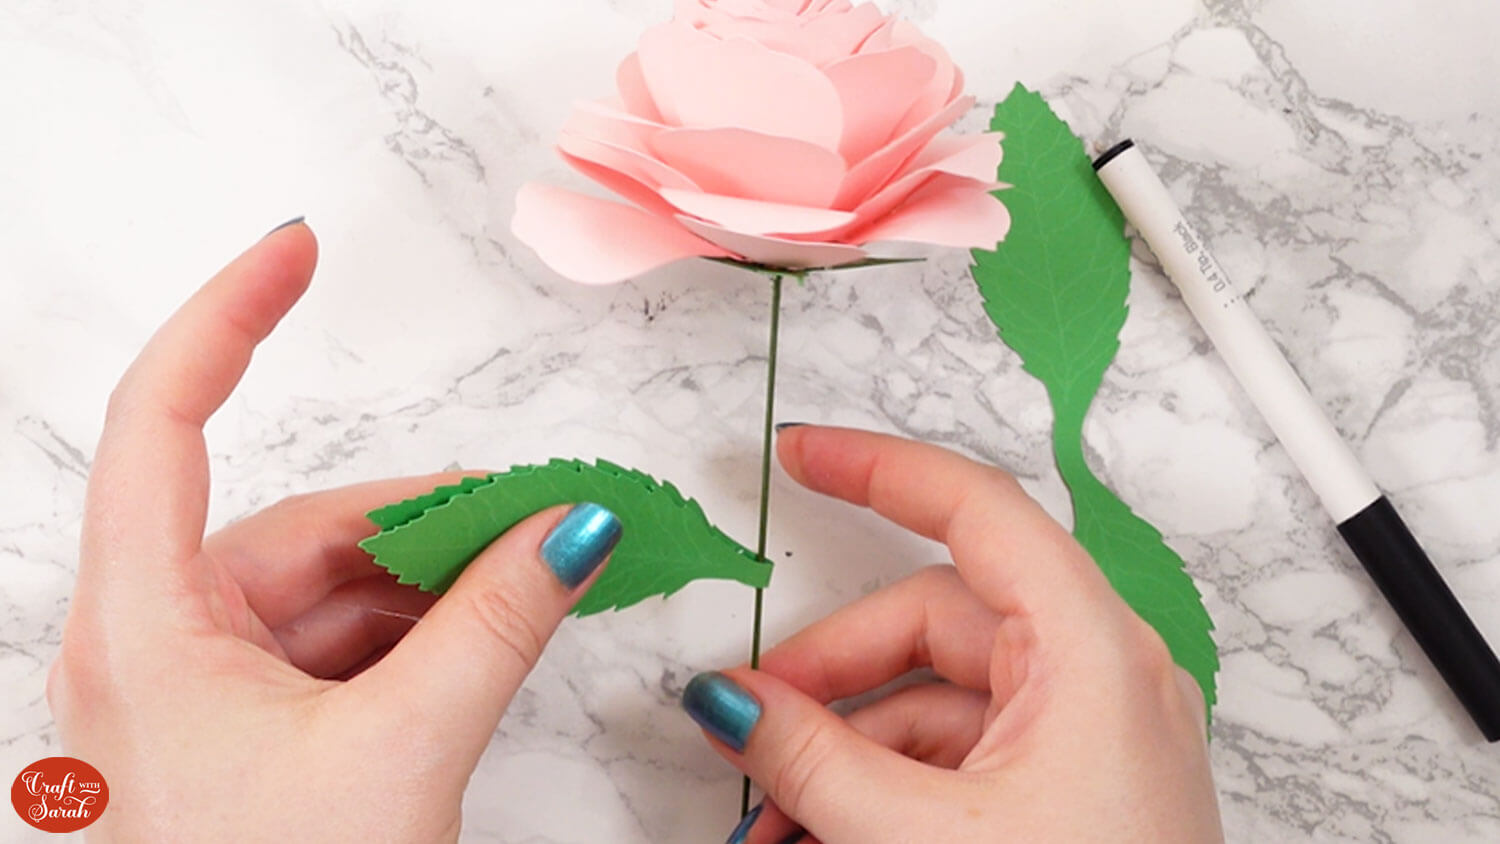
Repeat for the other leaf.
Your rose is now finished!
You may wish to snip the wire shorter with wire cutters to reduce the height of the stem.
Paper flower Cricut cut files
Phew, this was a long tutorial!!
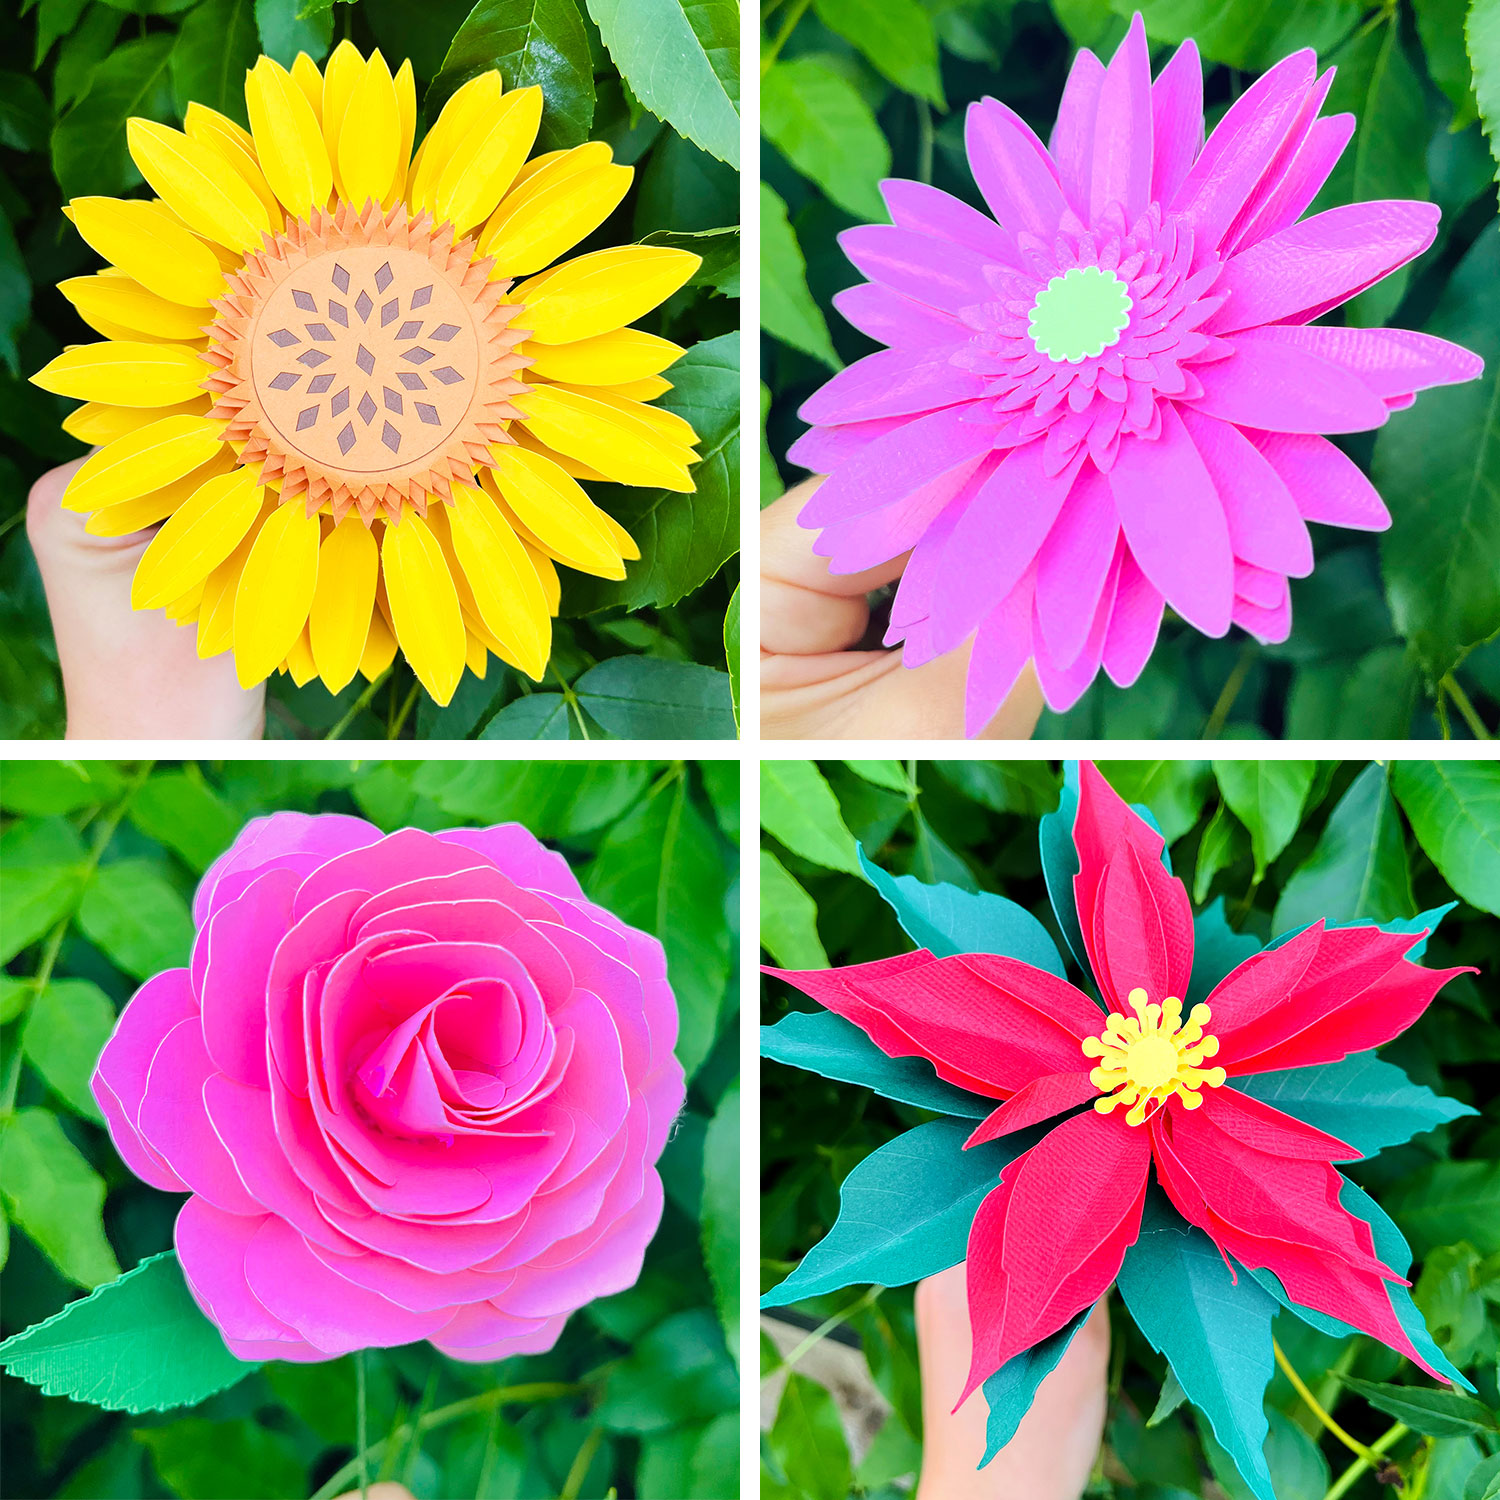
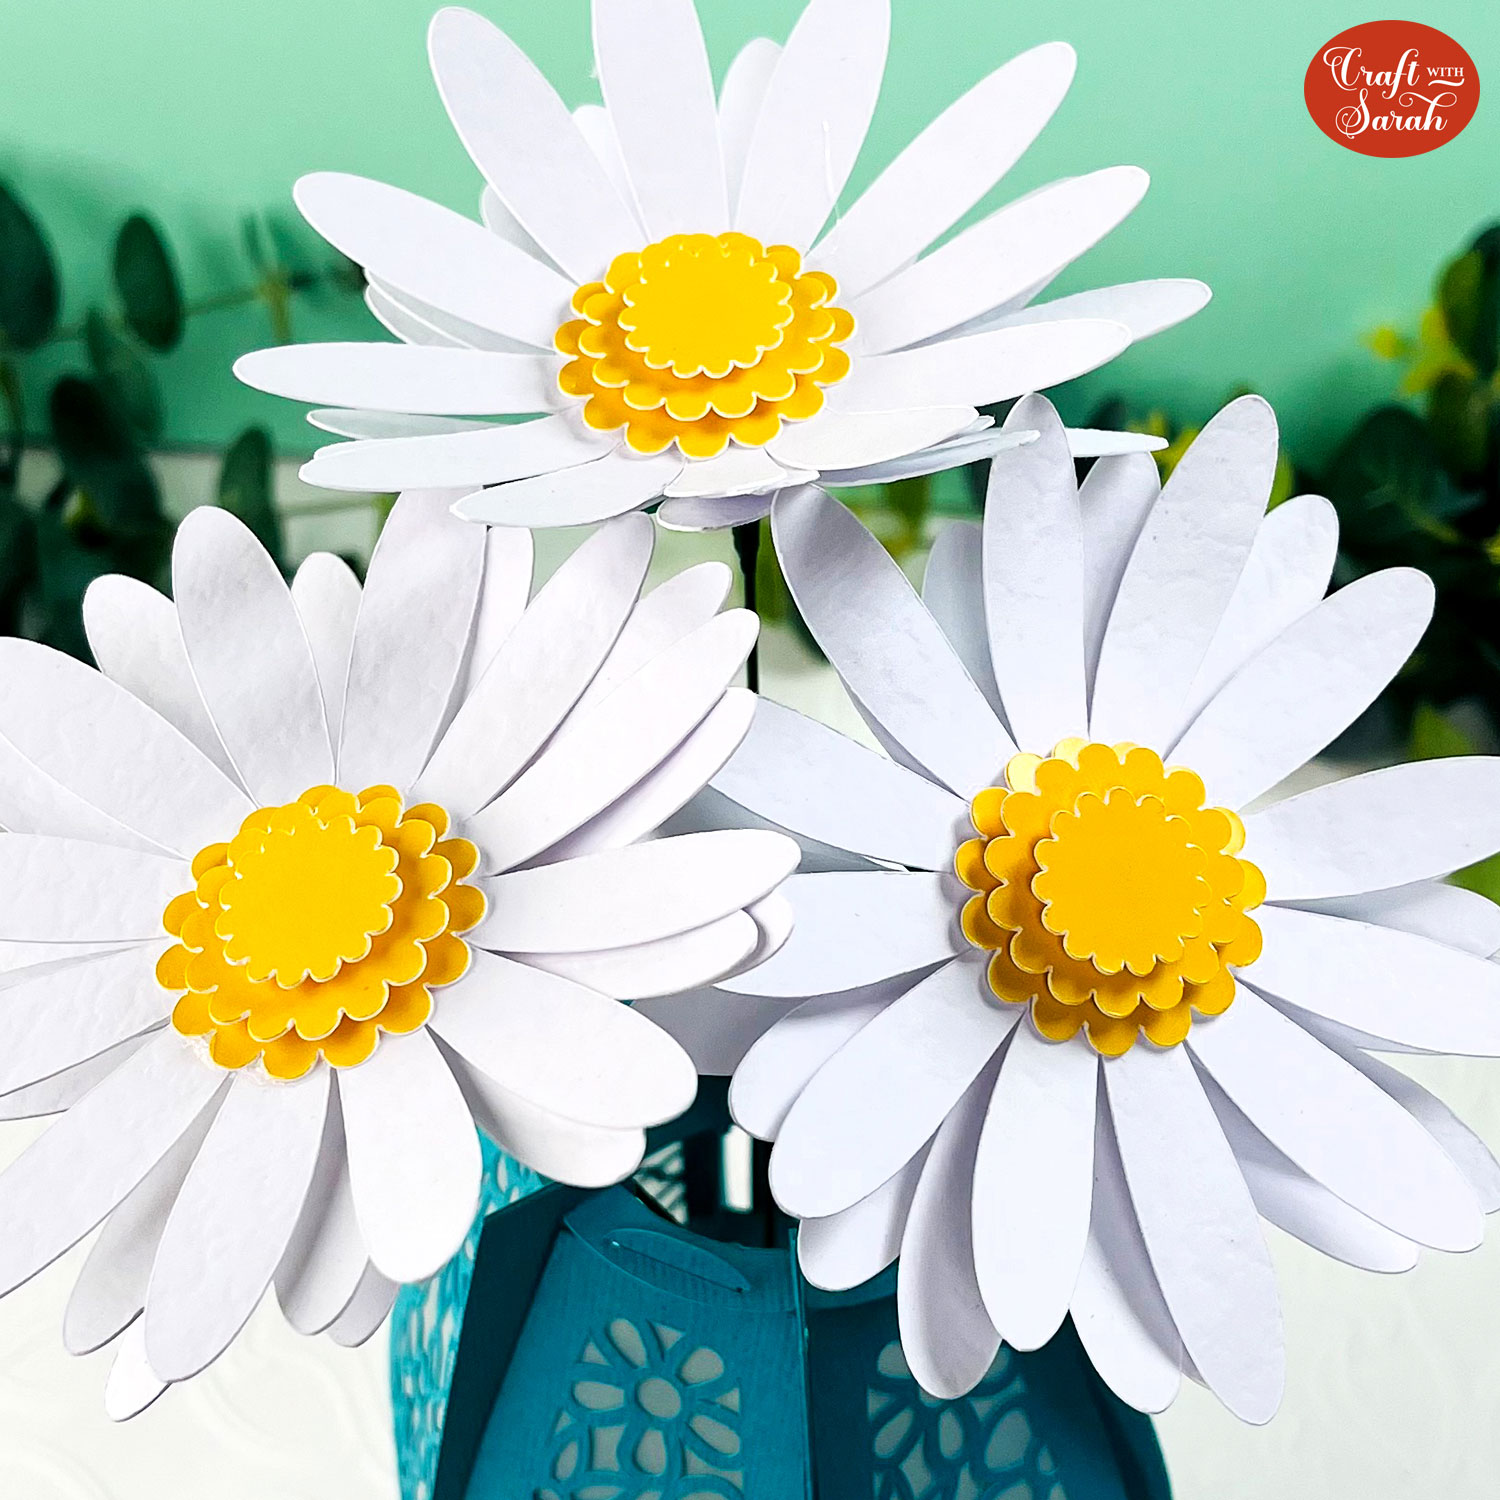
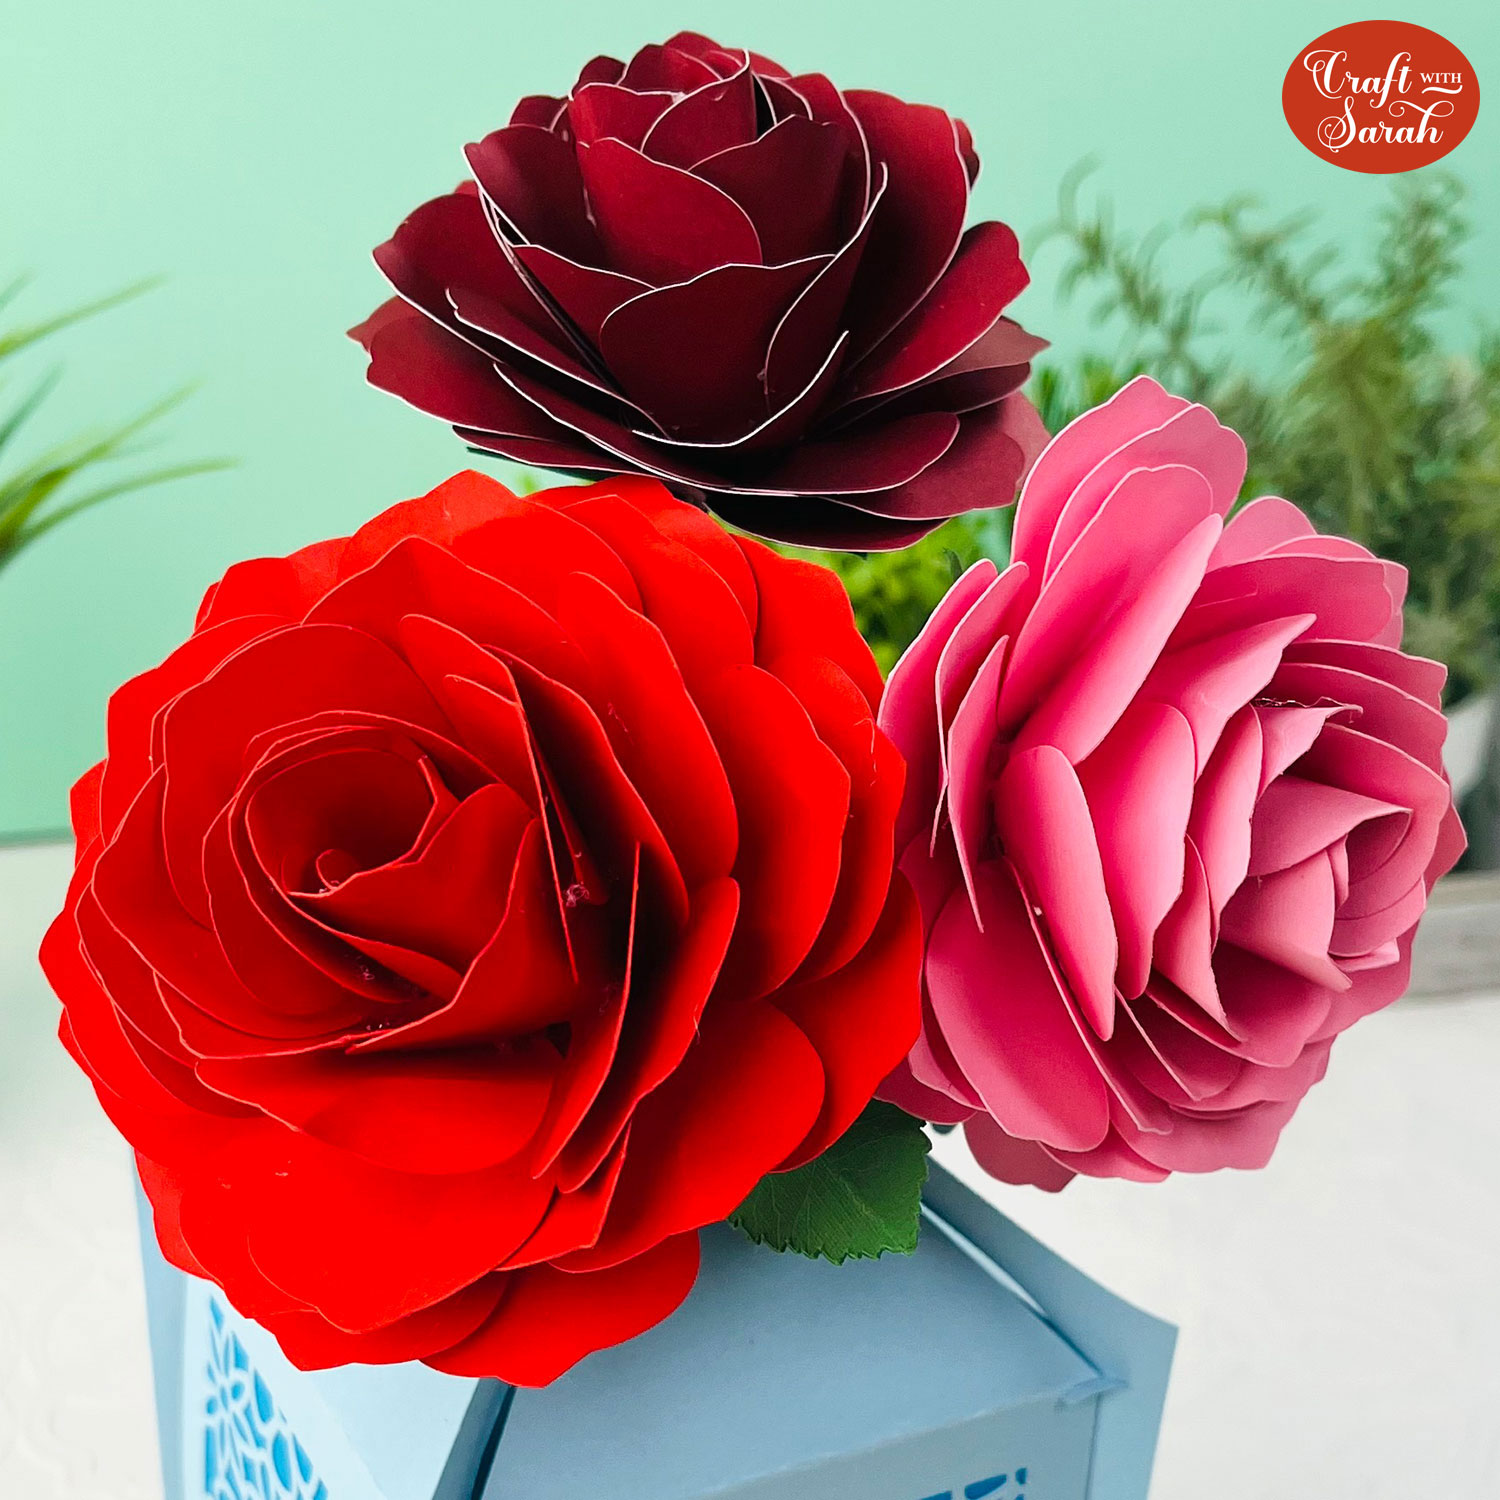
Your five beautiful paper flowers are now all finished!
Which one is your favourite? Mine is the rose!
Happy crafting,
Sarah x

