CCC 2024 Day 13: Light-Up Nativity Star Frame
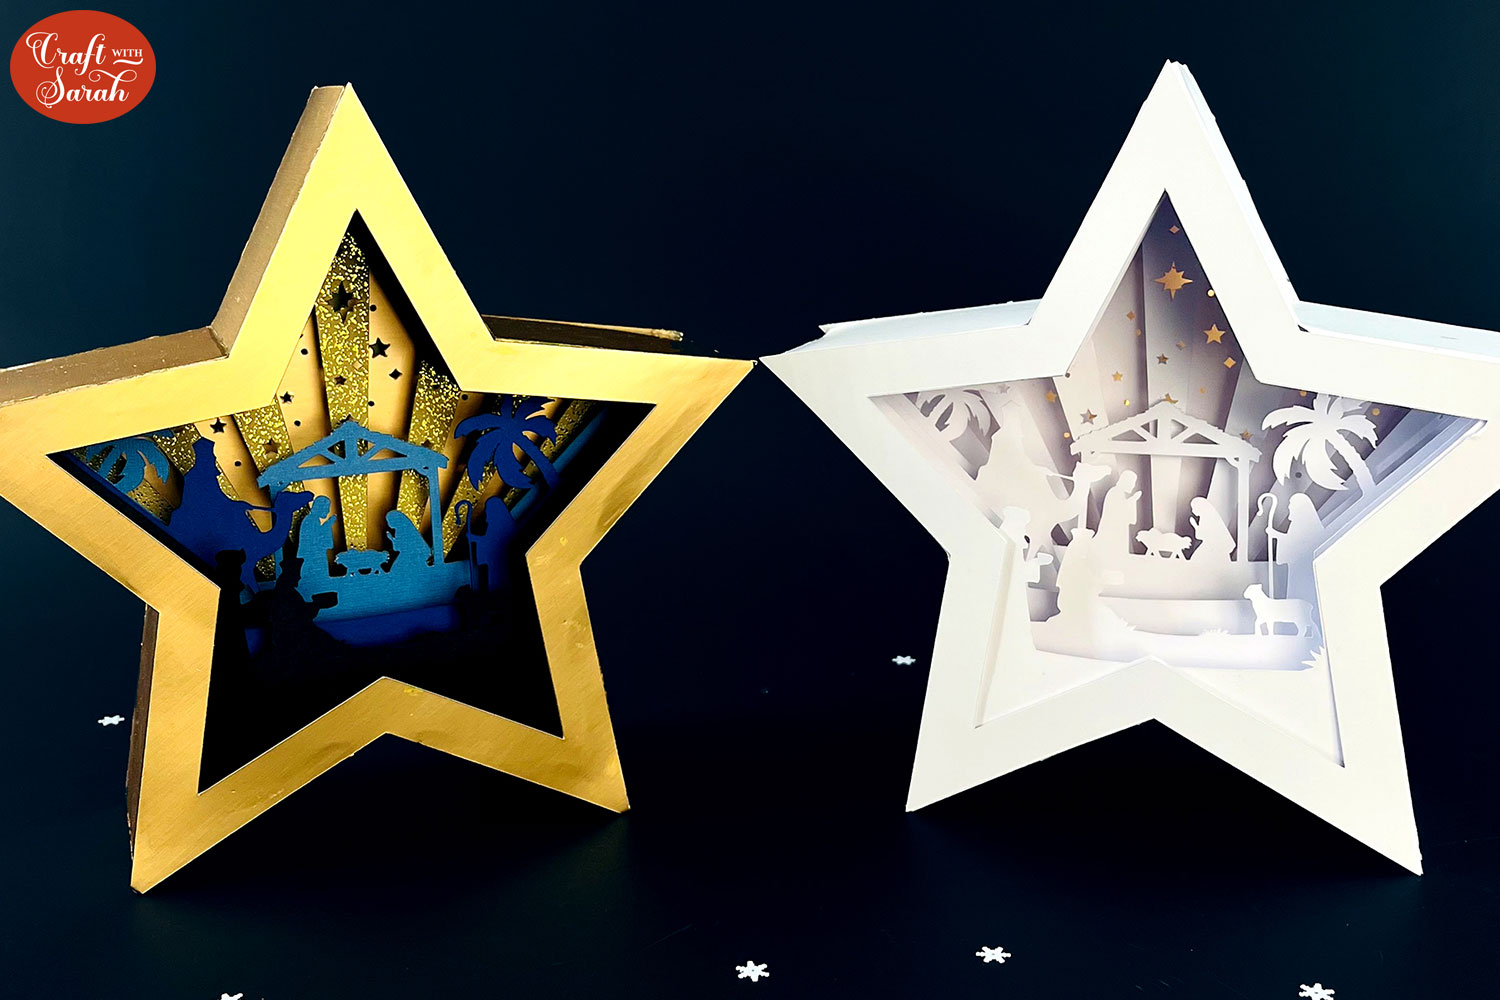
Welcome to day thirteen of the 2024 Christmas Craft Countdown, where I’m sharing 20 festive themed Cricut papercraft projects in 20 days.
Create a freestanding Nativity scene in the shape of a star with this Christmas craft project.
This shadow box project features stacked cardstock layers that form a detailed, traditional Nativity scene. With tabbed edges to hold the layers in place, no foam squares are needed to add depth to the pieces, making assembly fast and straightforward.
For a glowing effect, cut each layer from white cardstock and add fairy lights to the back so light filters through the design. Alternatively, use colored cardstock without lights for a different look.
Follow along with the steps to make this star-shaped Nativity scene with your Cricut machine.
This Project was part of the Christmas Craft Countdown 2024
Materials supply list
Here is a list of the materials that I used to make this project.
Please note that some of the links included in this article are affiliate links, which means that if you click through and make a purchase I may receive a commission (at no additional cost to you). You can read my full disclosure at the bottom of the page.
- Cricut machine
- Light blue Cricut cutting mat
- Cricut scoring wheel or scoring stylus
- White card or coloured card
- Glue (I like Bearly Art Glue and Collall) and/or double-sided tape
- Battery powered fairy lights
- Sticky tape or masking tape
This project is suitable for the following types of Cricut machine: Explore Air 2, Explore Air 3, Maker, Maker 3, Venture and Joy Xtra. It is too large to make with the original Joy.

Foundation learning
If you're new to crafting with your Cricut, you may find the below links helpful.
They teach some of the skills mentioned throughout this tutorial.
- How to upload SVG files into Design Space
- How to make 3D layered Cricut projects
- The BEST way to frame papercraft projects
- How to mount multiple designs in the same frame with magic guides
- How to score with a Cricut (even without scoring tools)
- Print then cut tutorial
- Design Space tools (Combine, Attach, Slice, Weld, Flatten, etc.)
- Pattern fill tutorial (for making backgrounds & cutting images to a specific shape/size)
- Free envelope SVGs that can be sized to fit any card
- How to write inside cards with Cricut pens
- How to cut layered designs at a small size
- Design Space tips & tricks
- Cricut pens tutorial
Video tutorial
Watch the video below to see how to make this project. Keep scrolling for a written tutorial.
Written tutorial (with photos!)
Here’s how to make a star-shaped Nativity scene papercraft using a Cricut machine.
Step 1) Download the cutting file & upload to Design Space
Download the files using the box below.
Purchase the File(s)
This cut file is available as part of the Instant Access Bundle.
Or, purchase this design individually here
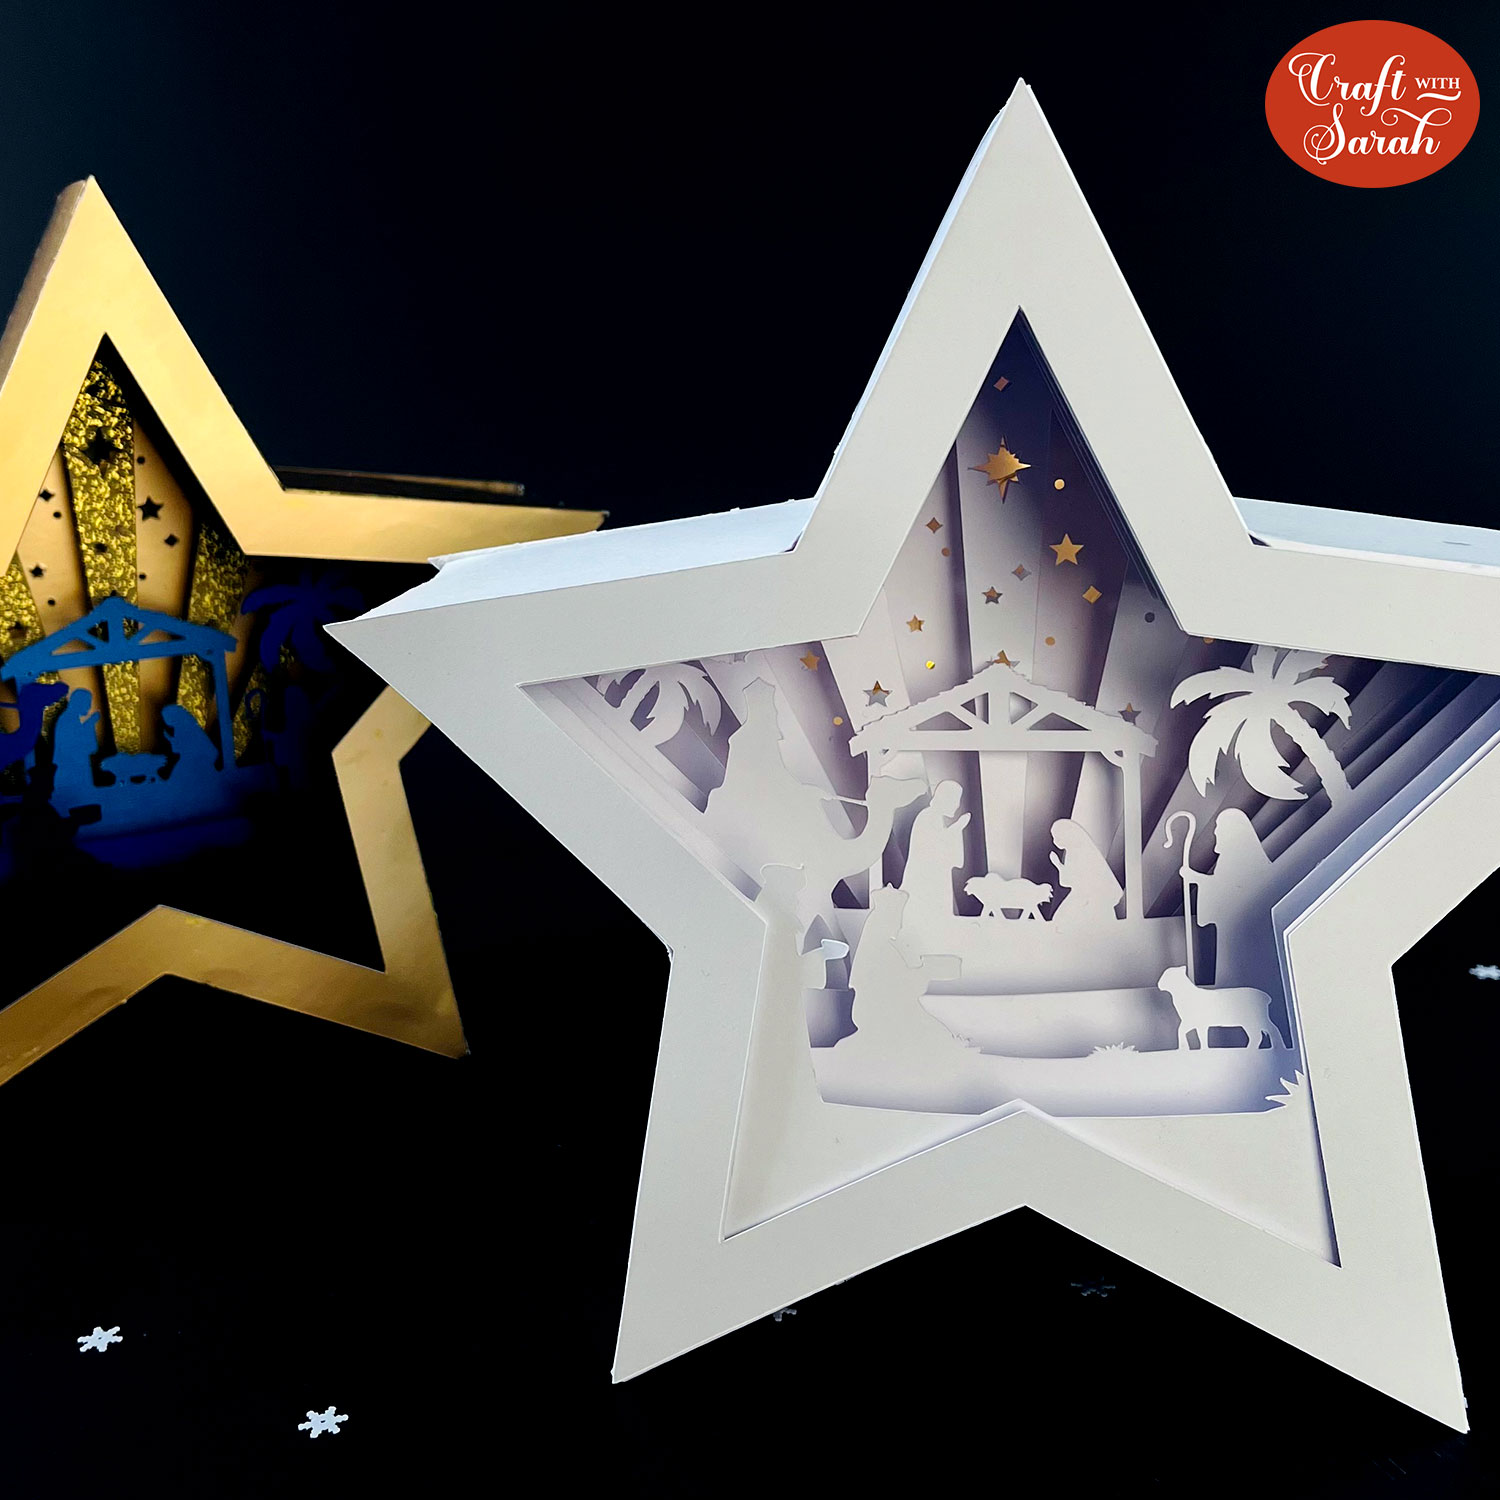
Before you upload the SVG to Design Space, you need to unzip the download folder that it comes in.
- How to unzip a folder on Windows computer
- How to unzip a folder on a Mac
- How to unzip a folder on an iPad/iPhone
- How to unzip a folder on an Android device
After unzipping, upload the SVG file into Cricut Design Space. This is the file which starts svg- in the filename.
Not sure how to do this? Here’s how to upload SVGs to Cricut Design Space. Make sure you upload the file which starts svg- in the filename!
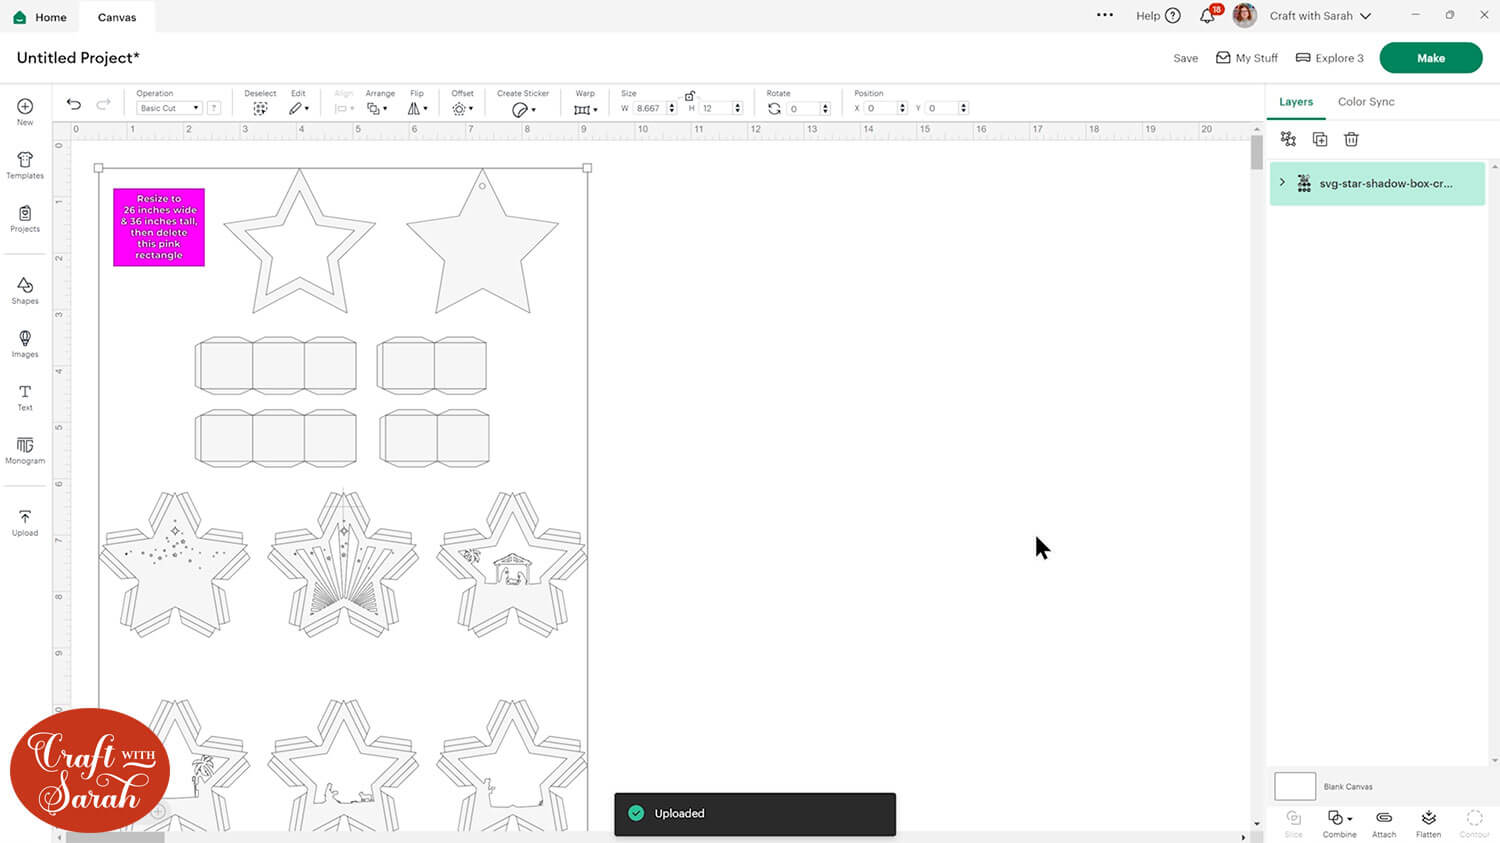
During the upload process, you may wonder if something has gone “wrong” because the file loads in with lots of green lines on the preview screen, and the star shapes are hidden.
This is because I have made all the layers a very pale grey instead of pure white to make them easier to see on your project, but this means that they “blend in” with the default Design Space background colour. Don’t worry – all the pieces are there, they just won’t show up on the preview screen.
Once the project is loaded onto your Canvas, you will be able to see the pieces clearer.
Step 2) Size the design
At the time of writing this tutorial (early October 2024), there has been a change to Design Space whereby it is automatically resizing large SVGs down to a maximum of 12 inches tall. This means that the star frame will load in much too small, so you will need to resize it.
The whole design should be sized to 26 inches wide and 36 inches tall. There is a pink rectangle on the design that lists out those sizes to make it easy to remember.
Click the design on your canvas and use the width/height boxes near the top of the screen to make it the size that you want to cut.
TIP: Make sure the padlock icon above the width/height boxes is CLOSED before you resize. If it appears “open”, click it with your mouse to close it.
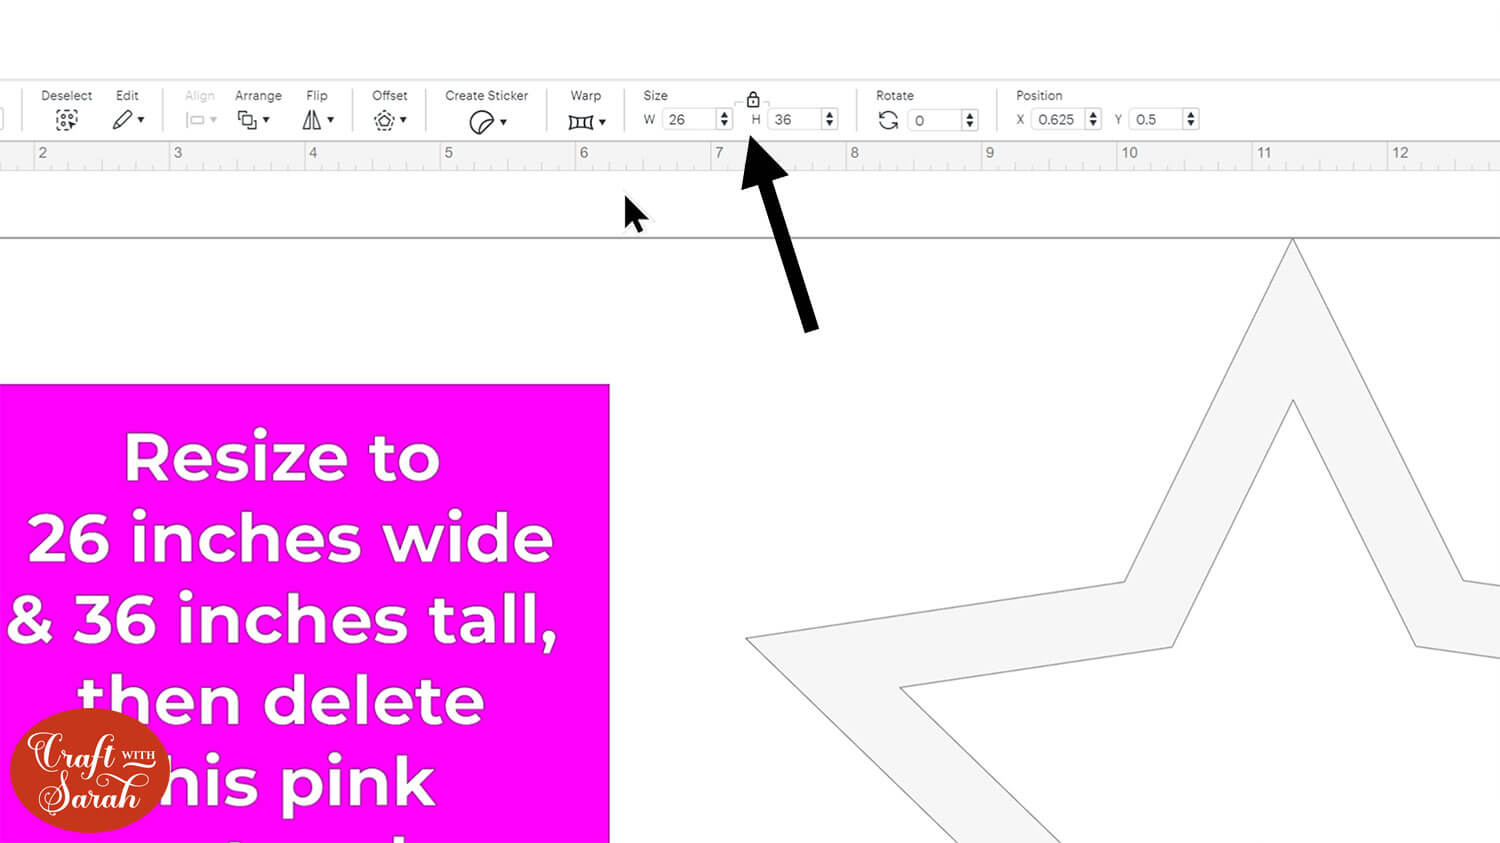
This will make the finished star around 8 inches wide and 7.75 inches tall.
You could make it larger/smaller if you want to, but I don’t recommend making the finished star frame smaller than 5 inches wide as some of the details will get hard to cut. Here’s a tutorial on how to cut designs really small with a Cricut.
After resizing the star, separate the layers by pressing the “Ungroup” button at the top of the layers panel.
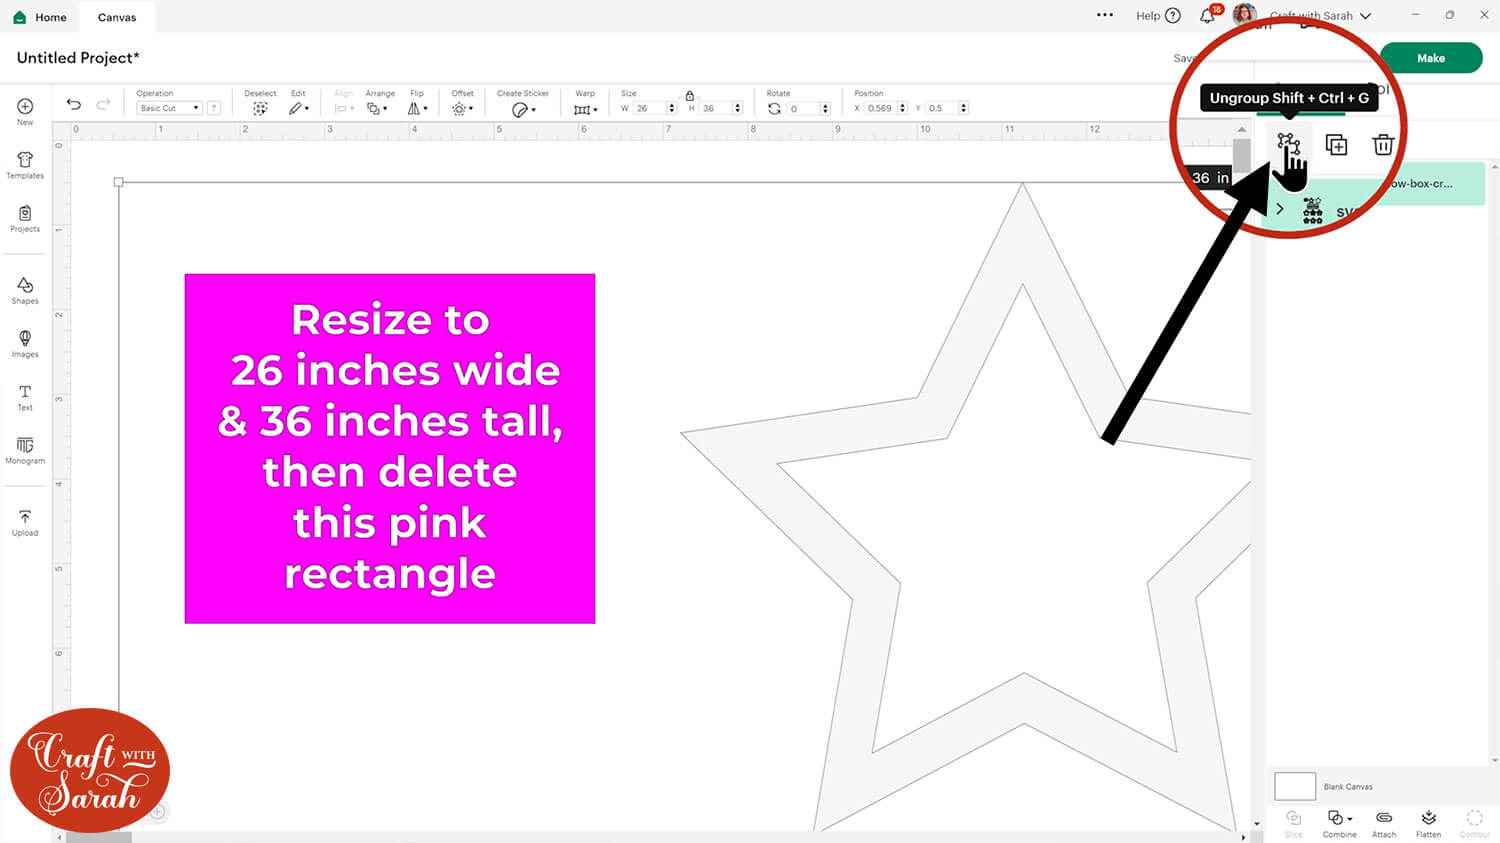
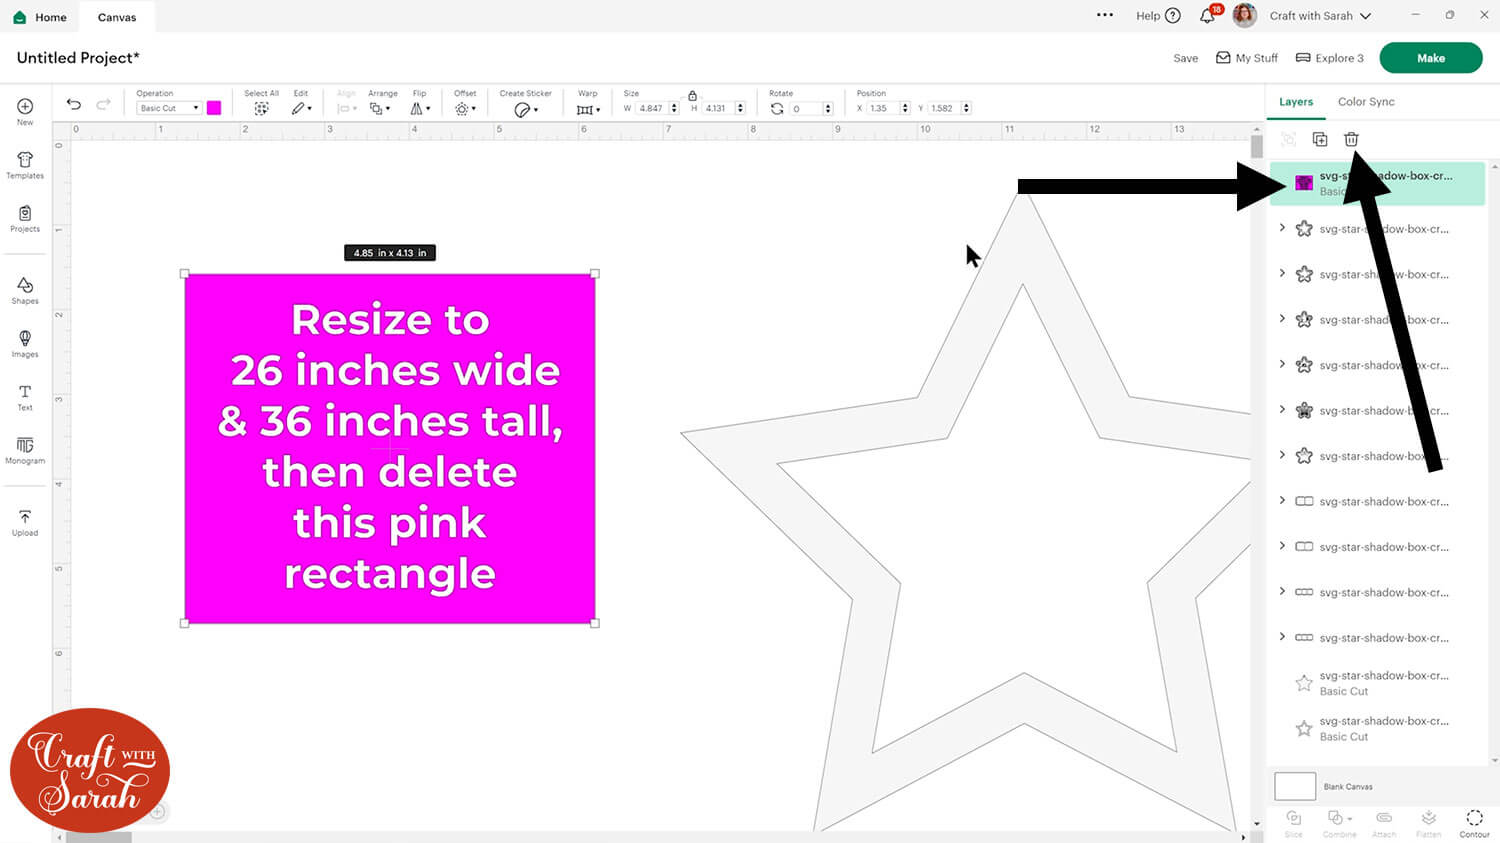
Click the pink rectangle layer and then click the trash can icon (or press the delete key on your keyboard) to remove it.
Step 3) Format the score lines
Design Space doesn’t automatically understand that we want to score some of the layers instead of cutting them, so we need to tell it what to do.
If you are making this project with a Cricut Joy Xtra, or if you don’t have a scoring tool, here is a tutorial on how you can still score with those type of machines.
If you look in the layers panel, you will see that most of the pieces in this design have a little arrow/chevron symbol to the left of them in the layers panel. This means that they are part of a Group.
Click one of the groups and press the arrow to open up the layers.
Each group consists of two layers: a solid white shape at the bottom and a single-line layer on top.
Click the single line layer in the group that you have opened.
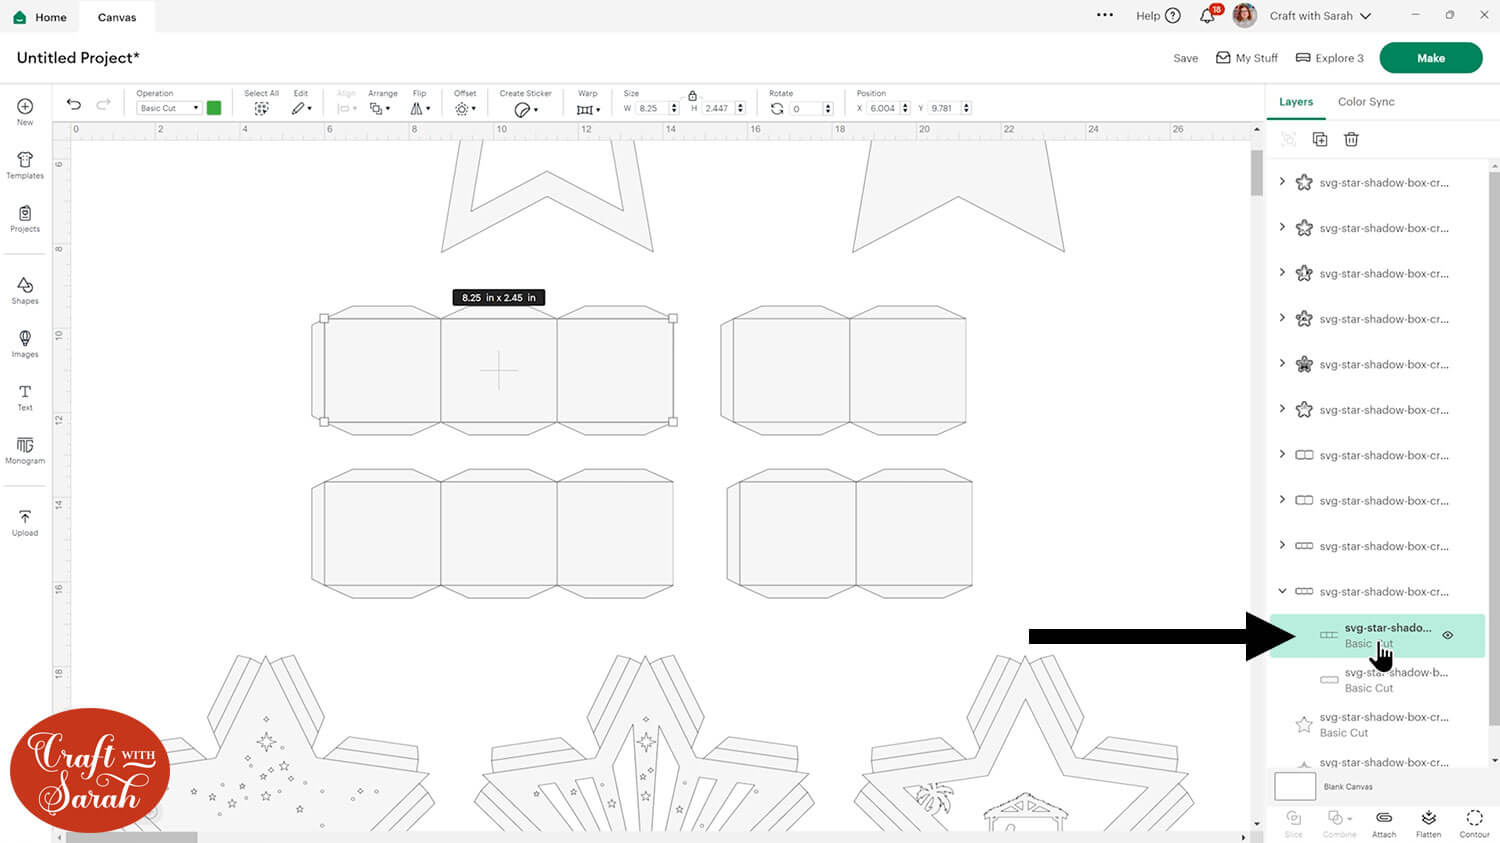
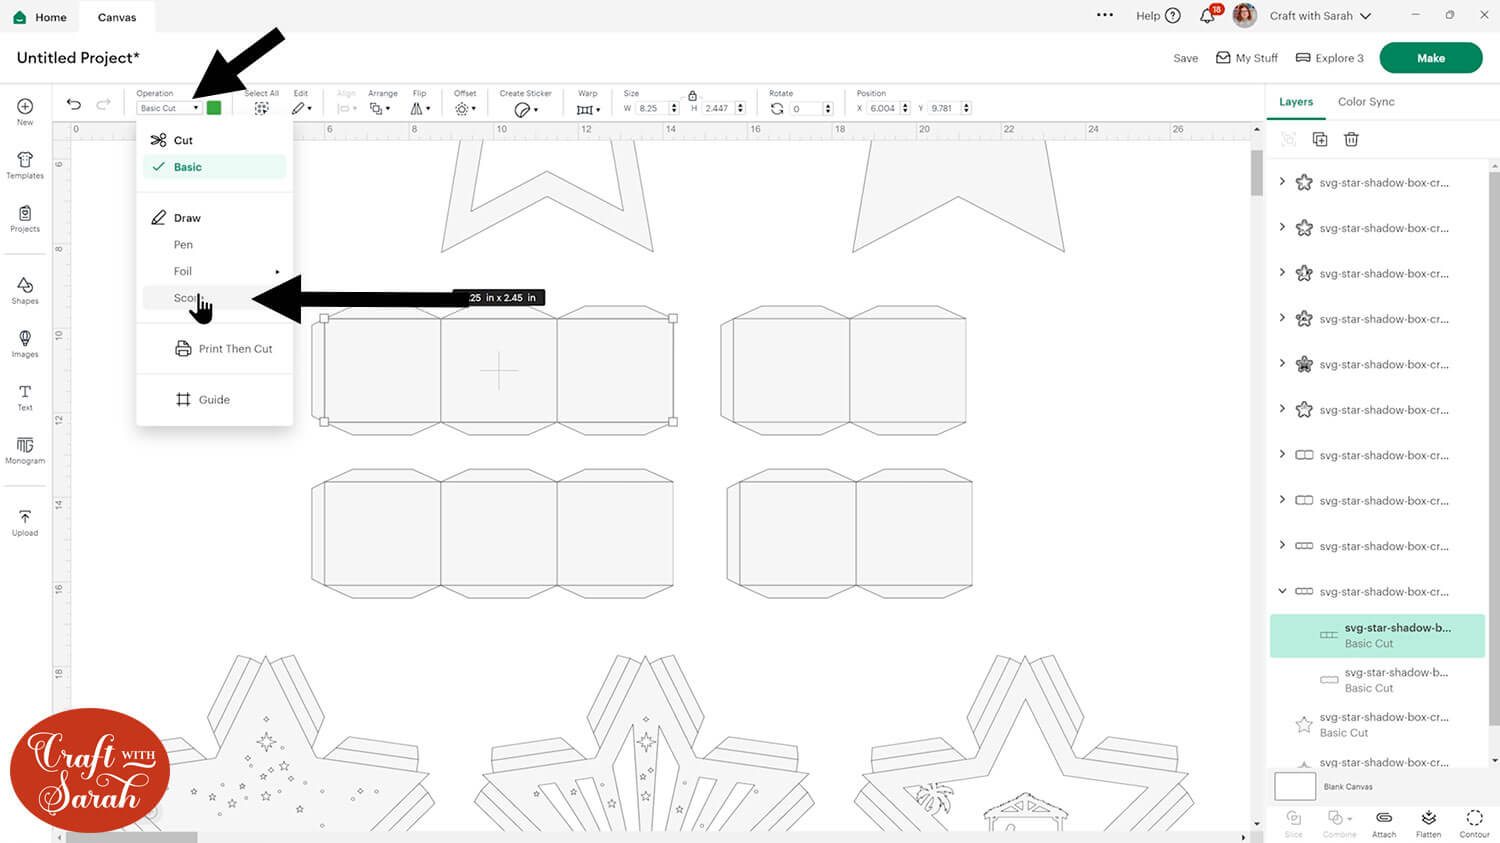
Change it to “Score” using the Operations dropdown menu.
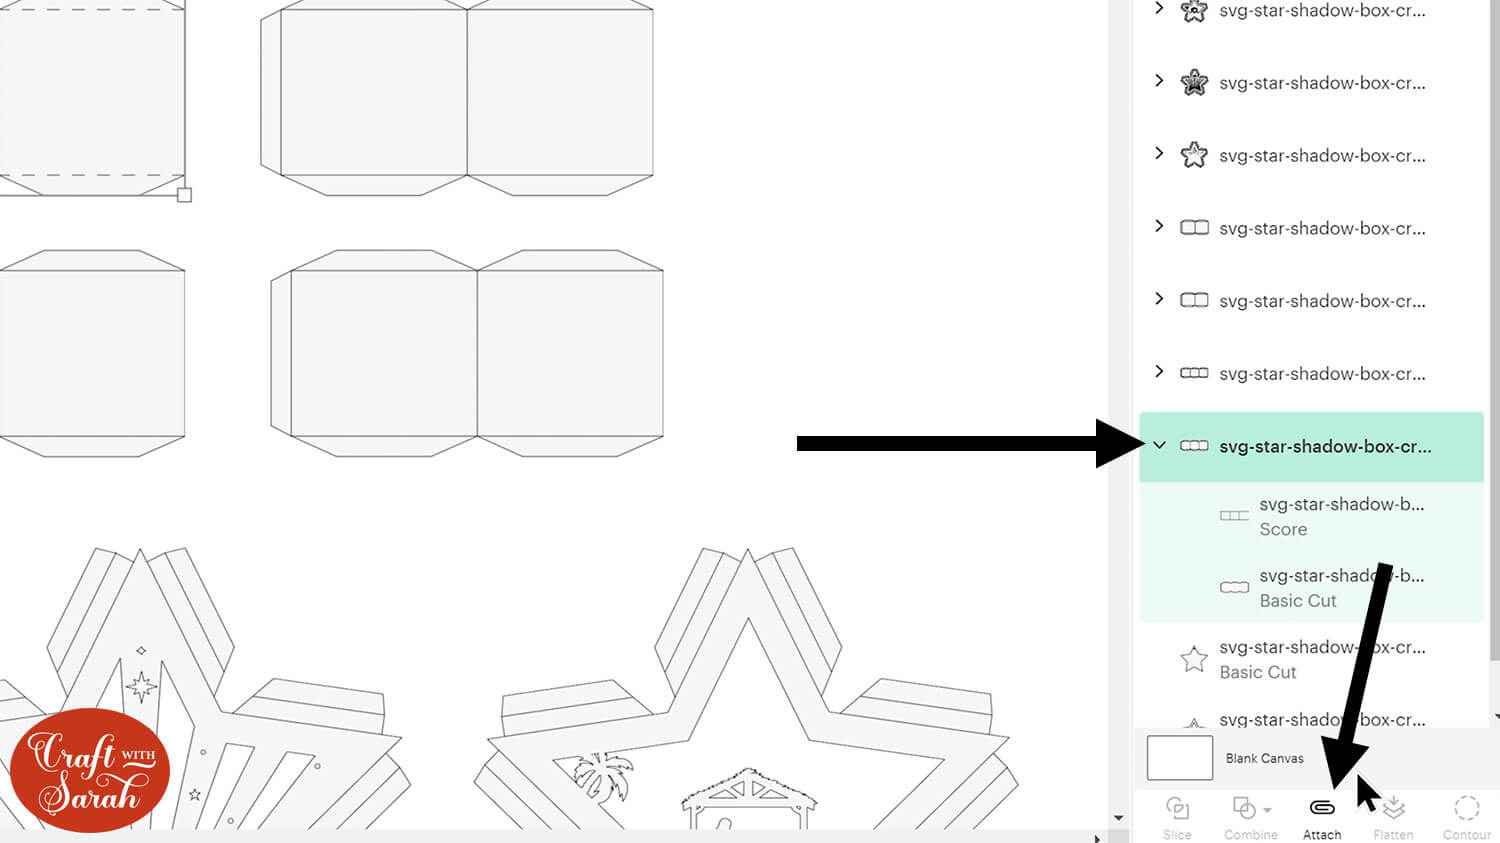
Click to select the group (of 2 layers) and press “Attach”. Attach is what tells the Cricut where to do the scoring.
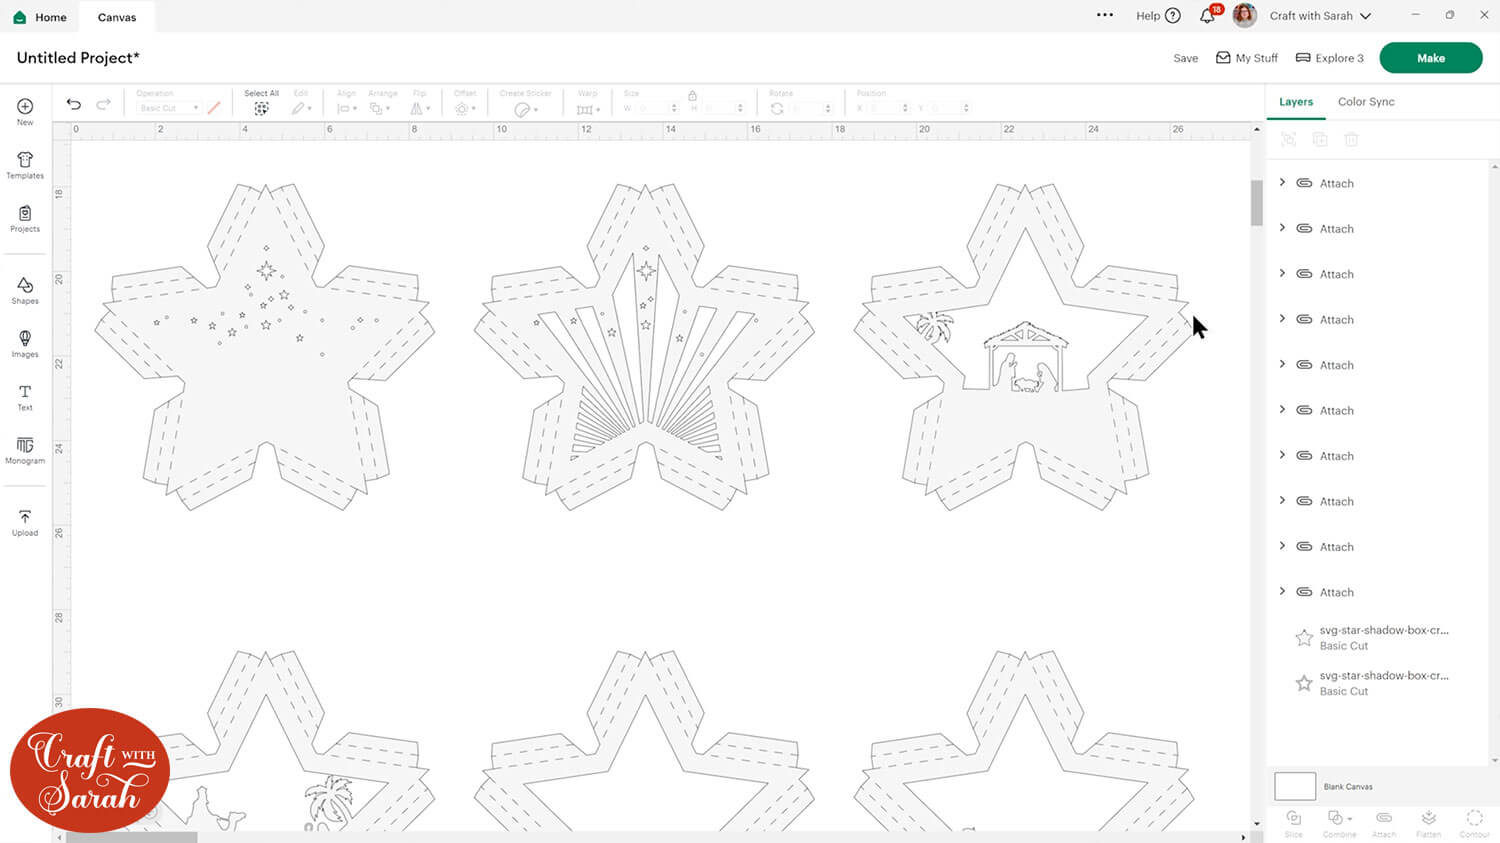
Repeat this for all of the layers in the design that need score lines.
After finishing, your layers panel should look like this:
Step 4) Recolour the layers (optional)
At this point, decide if you want to cut the star frame from white cardstock (so you can light it up), or from coloured cardstock.
The fairy lights only really show through the layers if the Nativity scene is cut from white cardstock – ideally fairly thin cardstock at around 180gsm.
If you use coloured card then the lights will still shine through the stars at the back of the frame, but they won’t be able to penetrate any further than that.
To recolour the star, open up each group individually and click on the solid white shape layers.
Change the colours using the colour box.
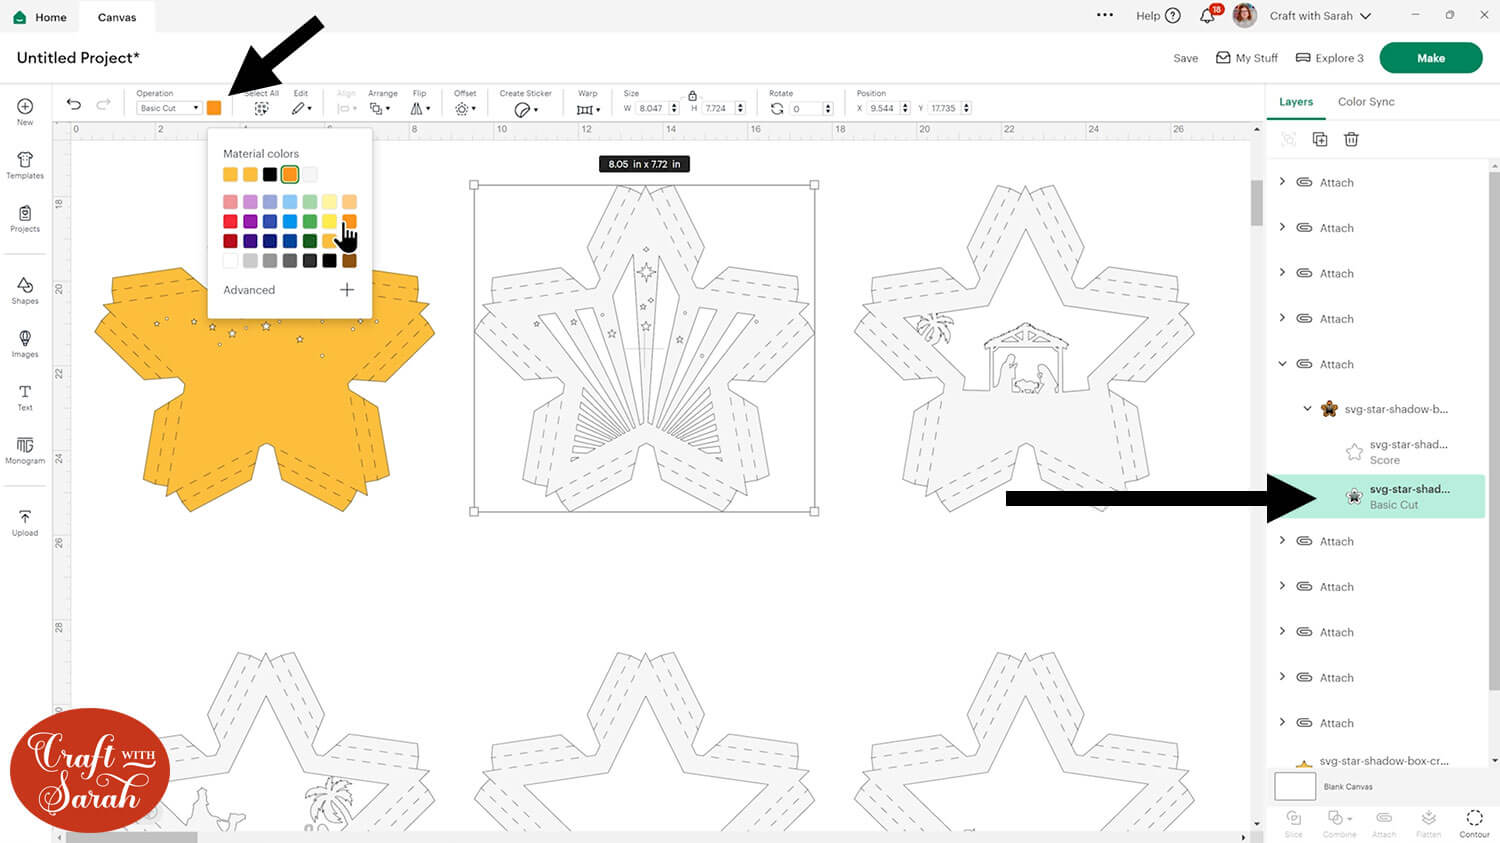
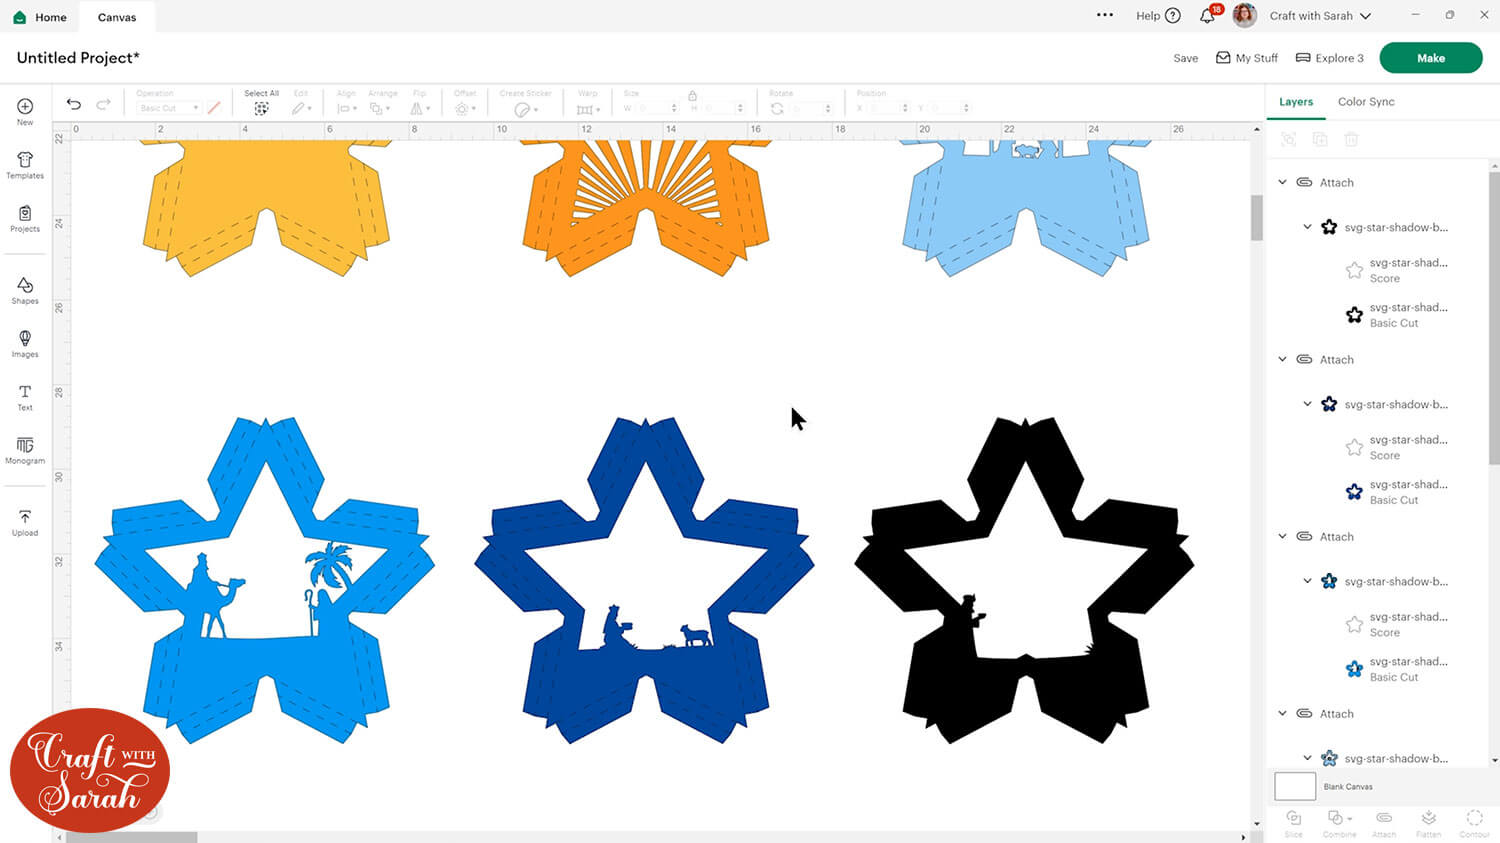
For my colorful version of the shadow box, I made the frame, edges and back layer a gold colour, the front stars layer a darker gold and then I created a gradient/ombre effect with the Nativity pieces, starting with light blue in the middle and getting darker with each “step” in the scene until I ended up with black for the very top piece.
Step 5) Cut out all the layers
When you’re happy with how the project is looking in Design Space, save the project and then click “Make” and follow the instructions on-screen to cut out all the pieces.
To change the paper size, go into the dropdowns over on the left side of the screen and choose the paper size that you want to use. You need to change it for every single colour.
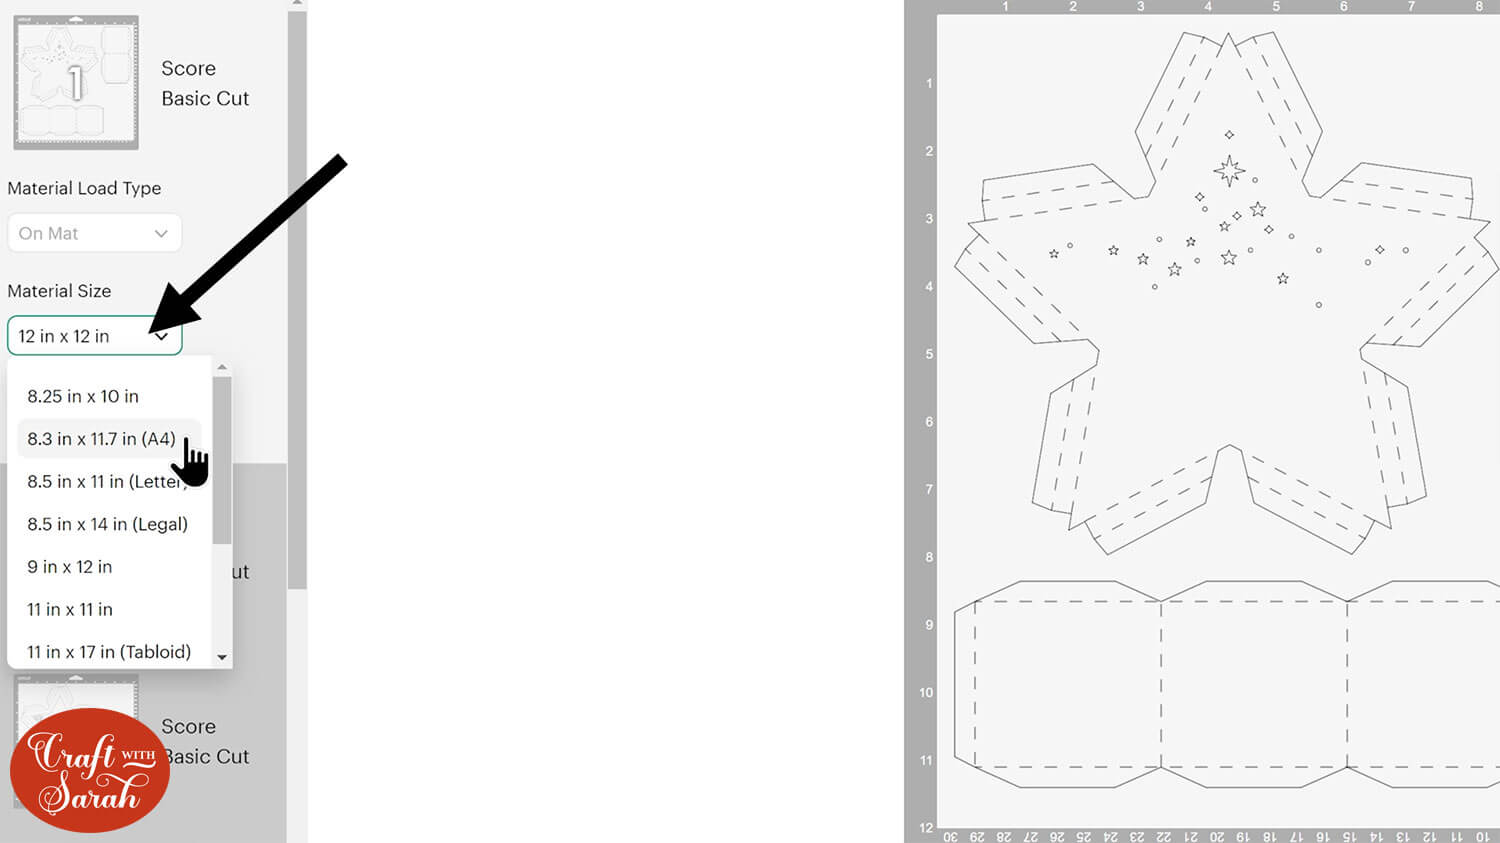
To save space on your cardstock, you can move things around by clicking and dragging. Make sure when you’re moving things about that nothing overlaps because otherwise, it won’t cut out properly.
TIP: New to cutting cardstock with a Cricut? Check out this in-depth tutorial which goes through every step of the process, including tips for getting the best quality cuts from your Cricut.
Step 6) Fold the score lines on the scene pieces
This star frame goes together in a clever way, with folded paper tabs along each side of every layer to give it depth and dimension without having to use foam squares.
Take each star piece that has tabs along the edges and fold them inwards. There are two score lines on each tab – one to create the “vertical” rise between the pieces and the other to be folded over flat to rest on the layer below when they are all stacked together.
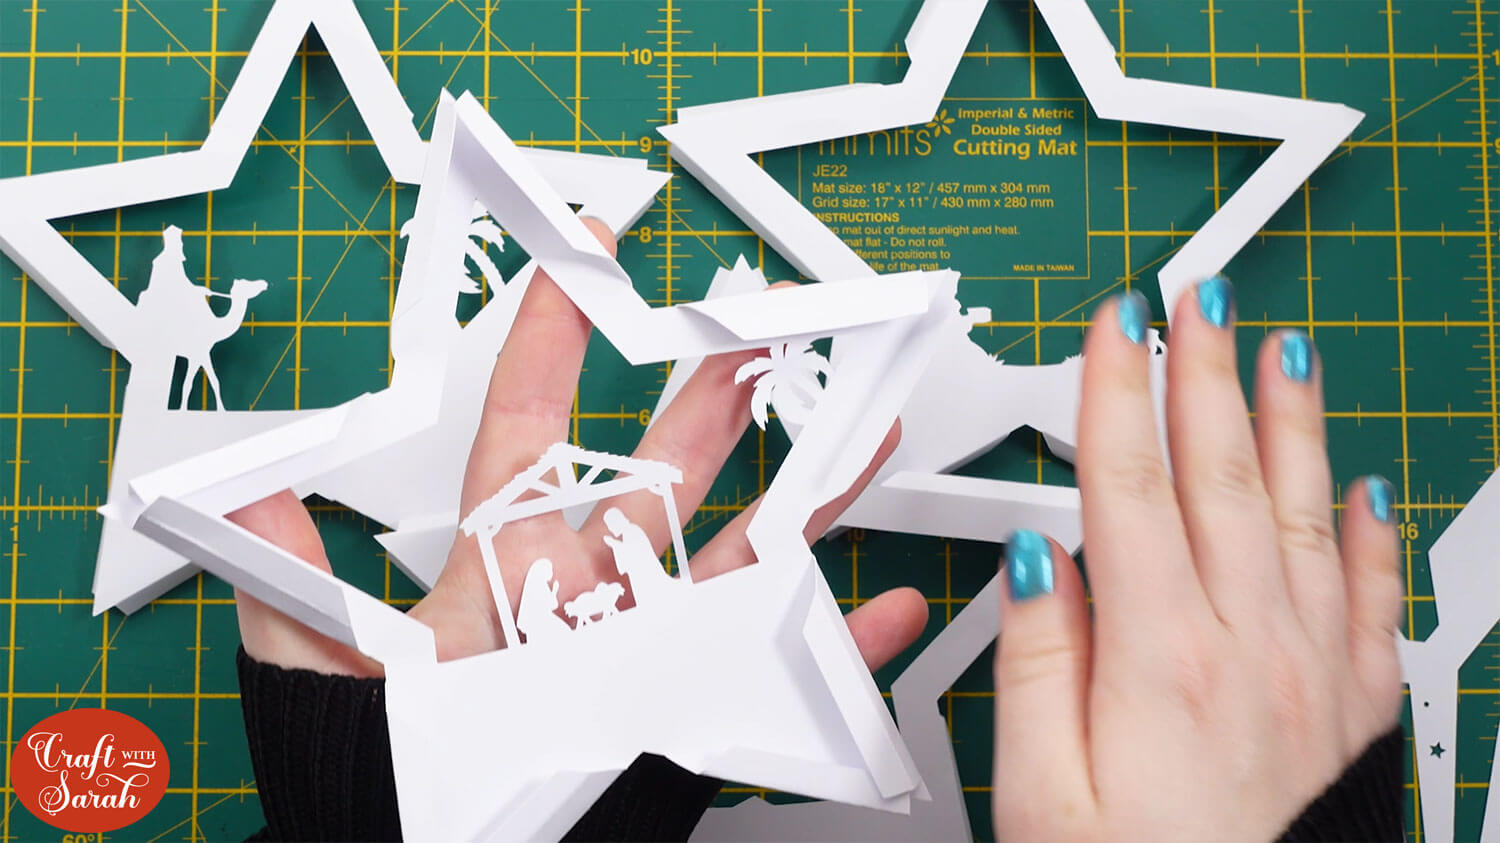
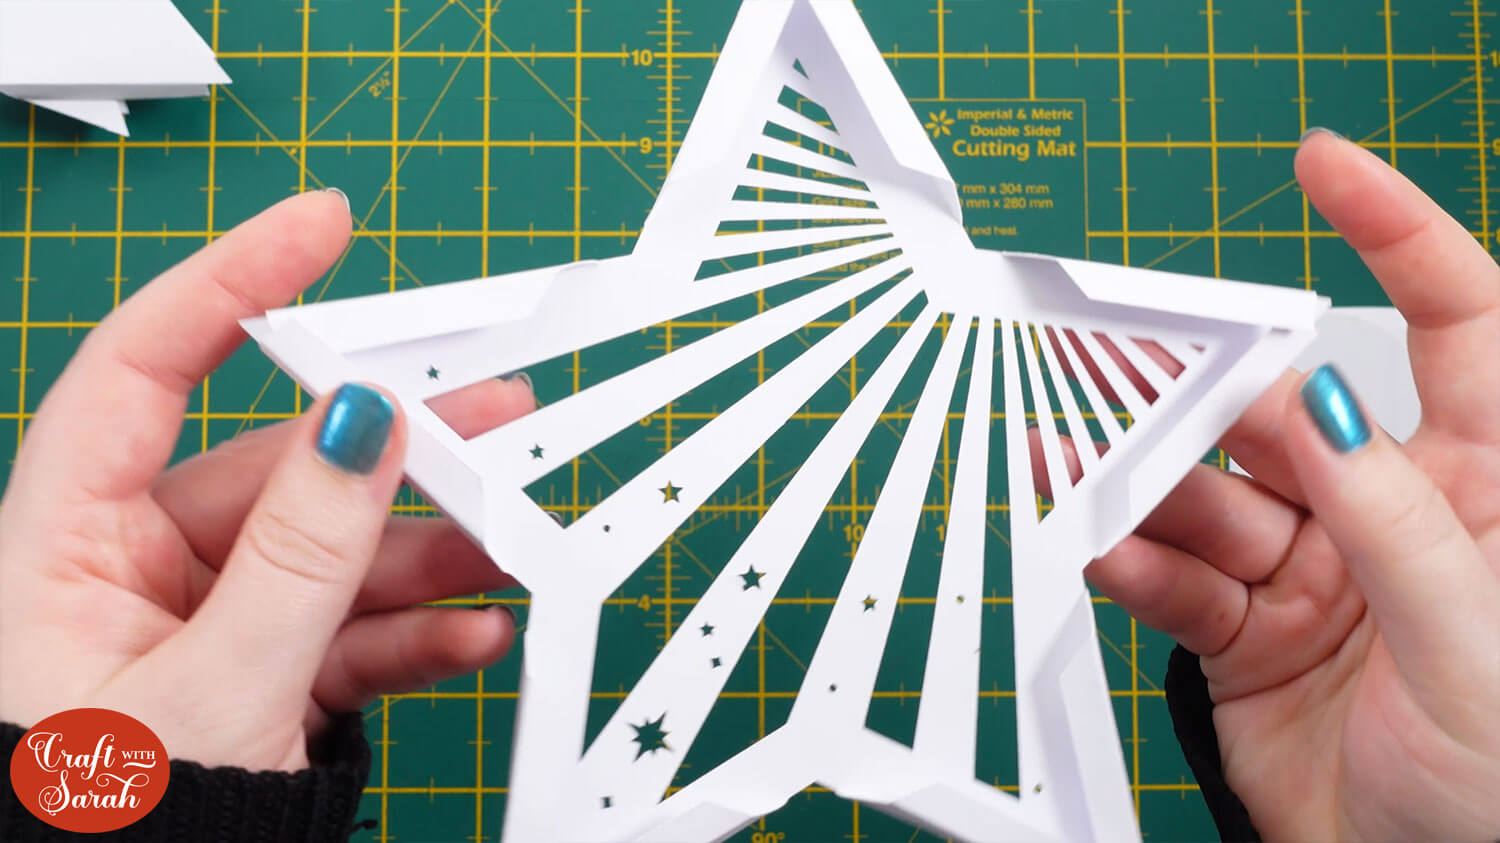
Also fold up the tabs on the four “edge” pieces.
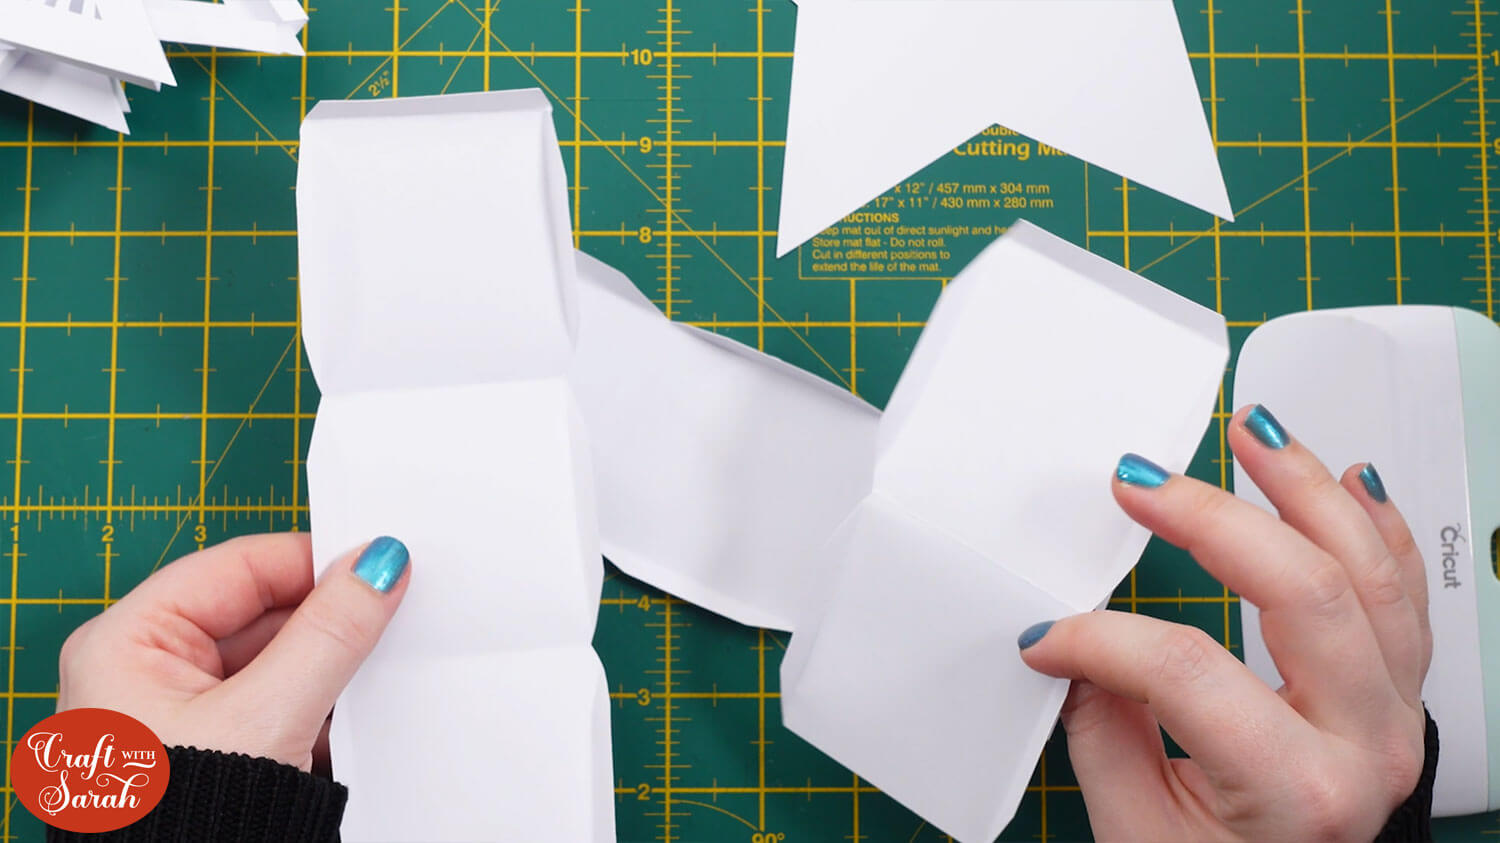
Step 7) Assemble the frame
Use double-sided tape or glue to stick all the edge pieces together into one long line.
I find double-sided tape a bit easier as you don’t need to wait for it to dry.
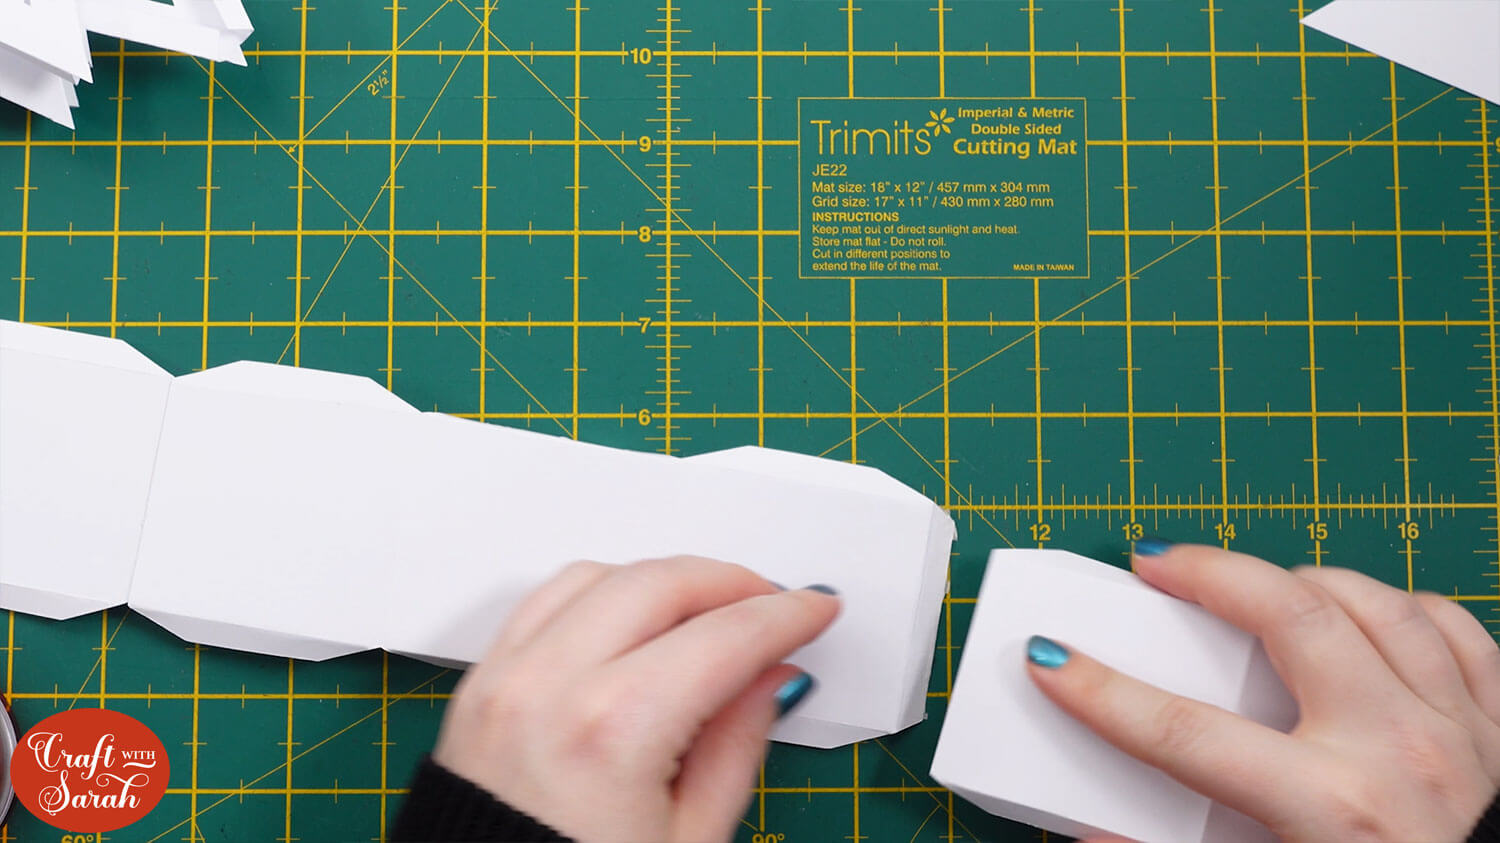
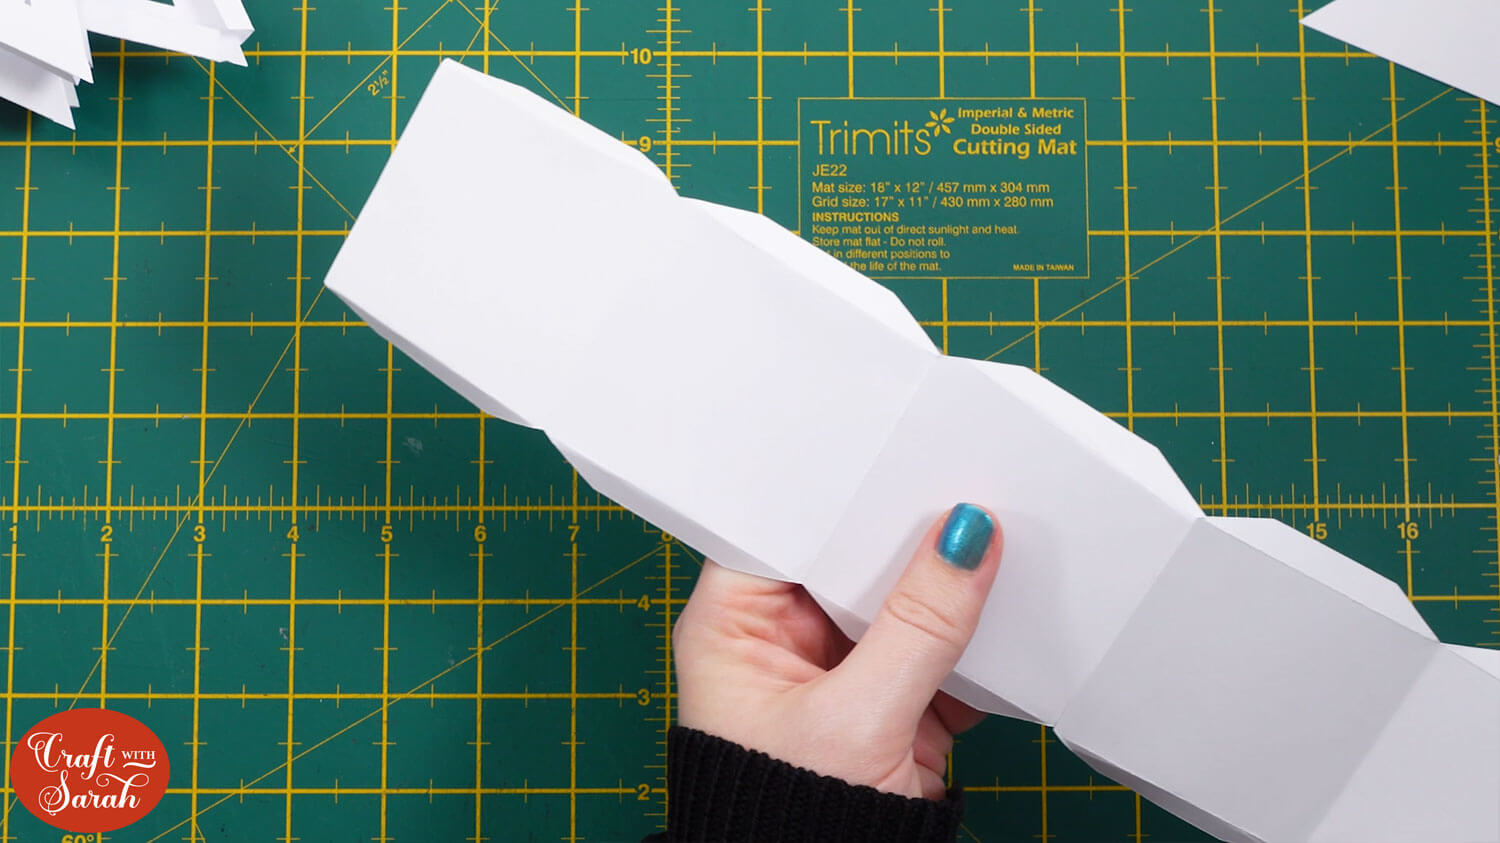
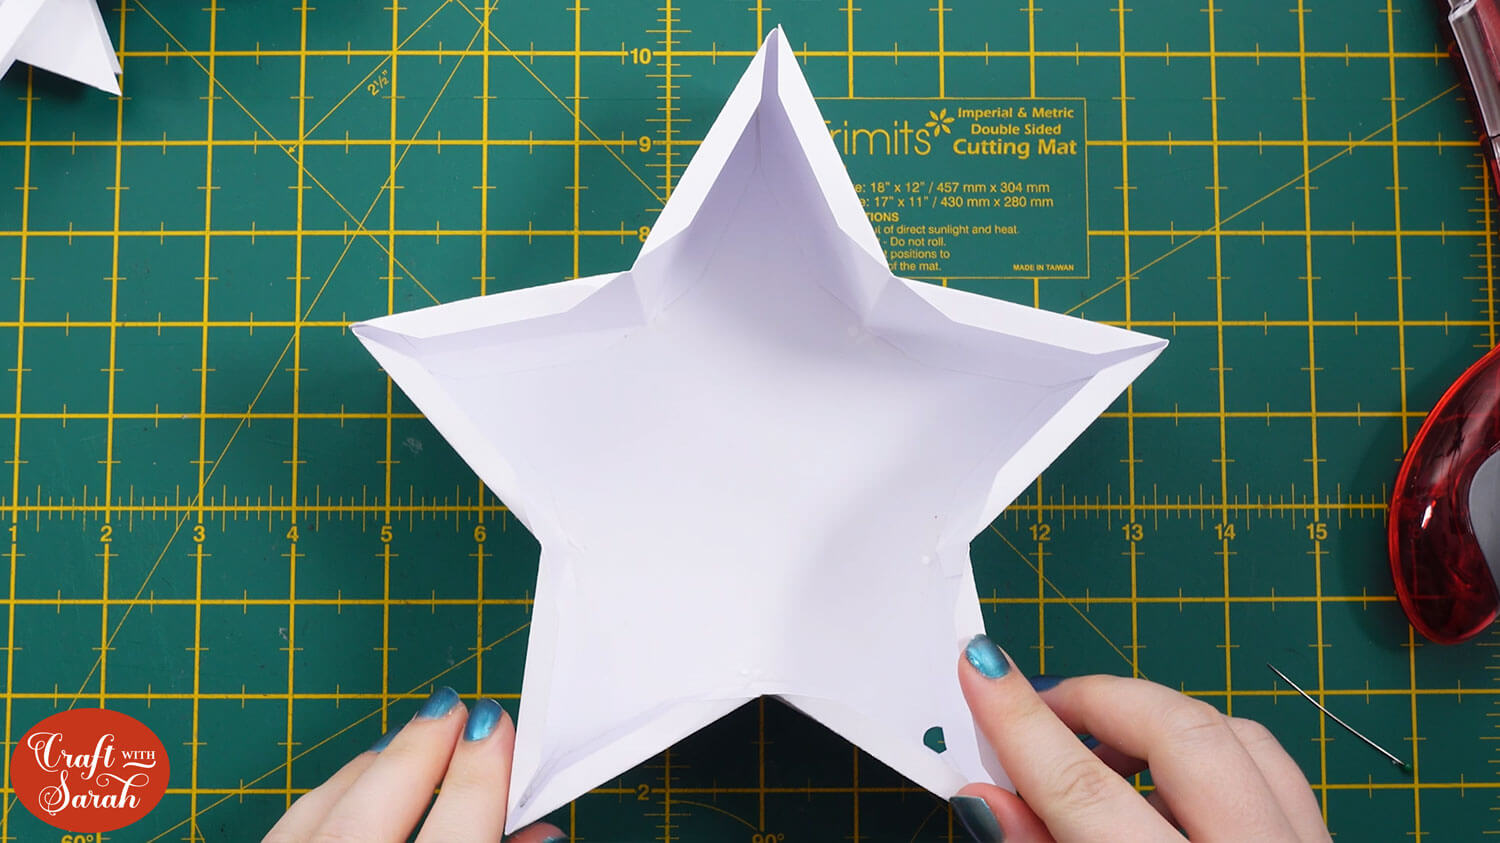
Take the solid star shape that has a tiny circle cutout on one of the points and add double-sided tape (or glue) around all the edges.
If the tape goes over the edges then fold it back against itself to tidy it up.
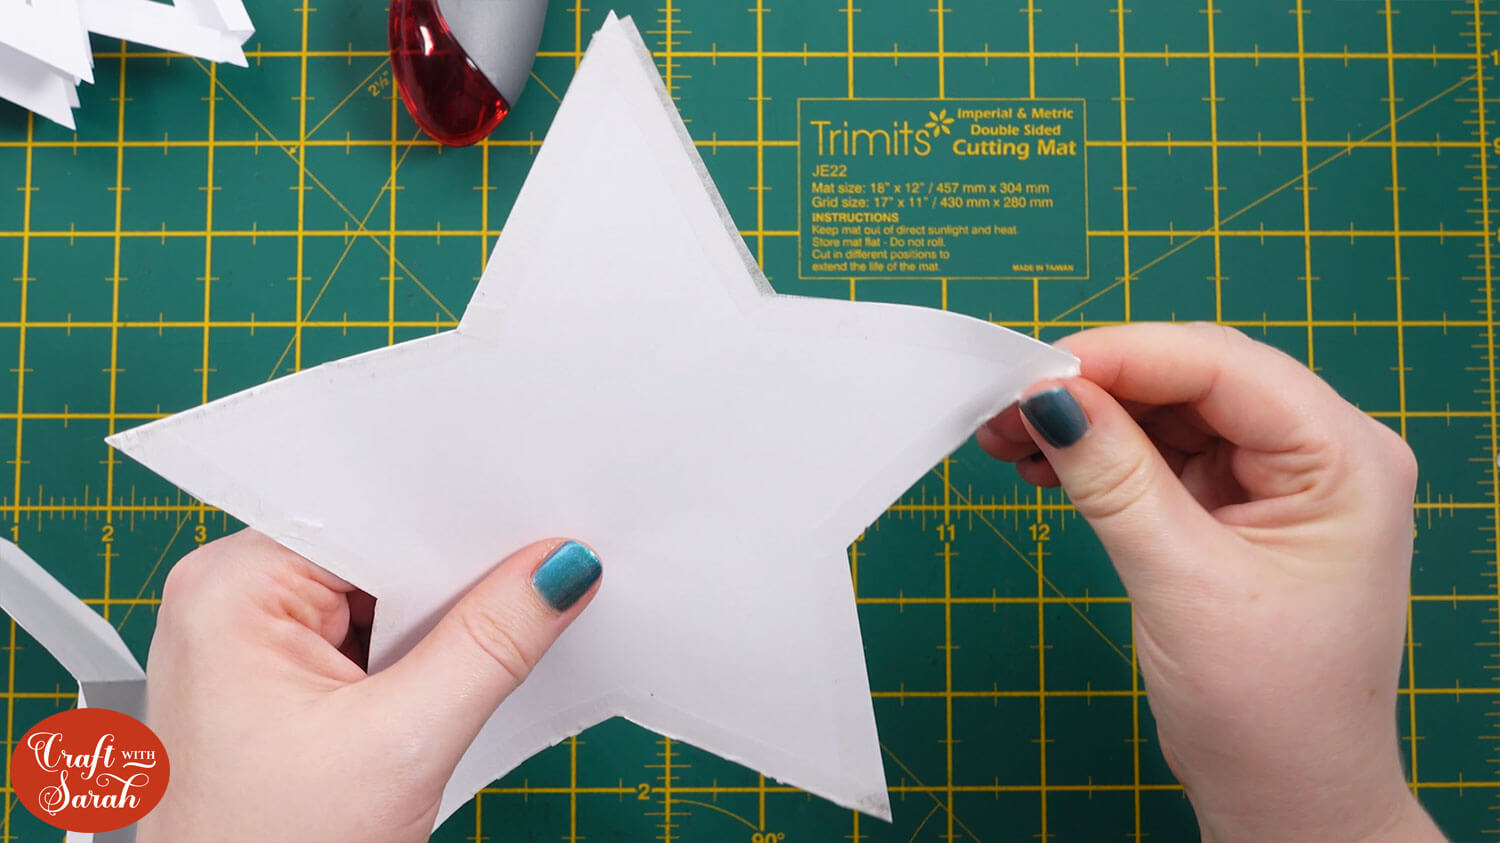
Stick the edge piece to the outside of the star. Get the edge piece as close to the edges of the star as you can.
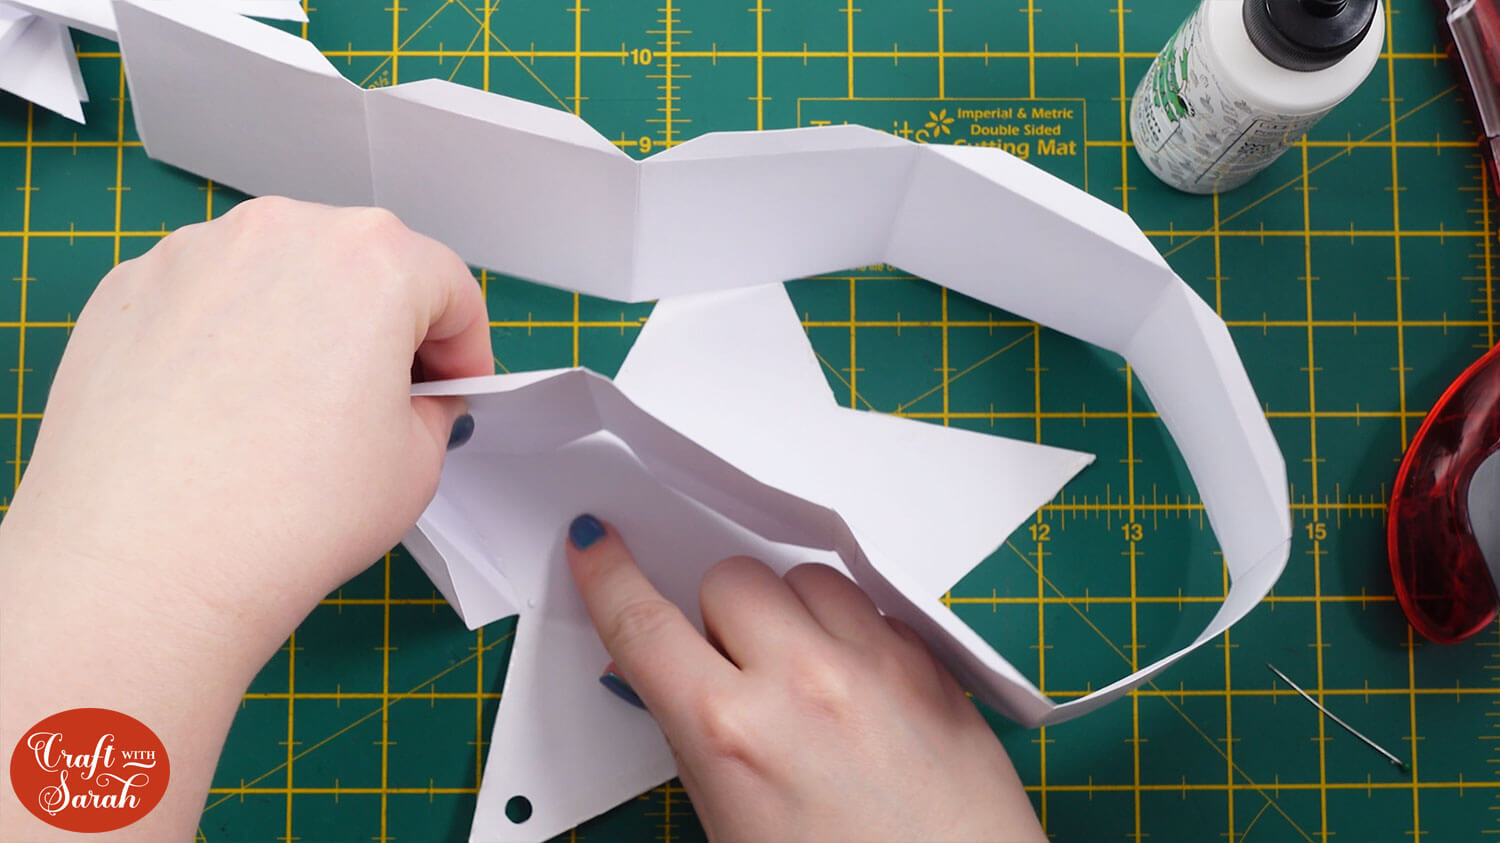
It’s a bit fiddly to start with as the edge piece is so long, so take your time and try to be accurate.
My double-sided tape wasn’t holding very strongly so I added a few dots of glue on top to help give a better stick.
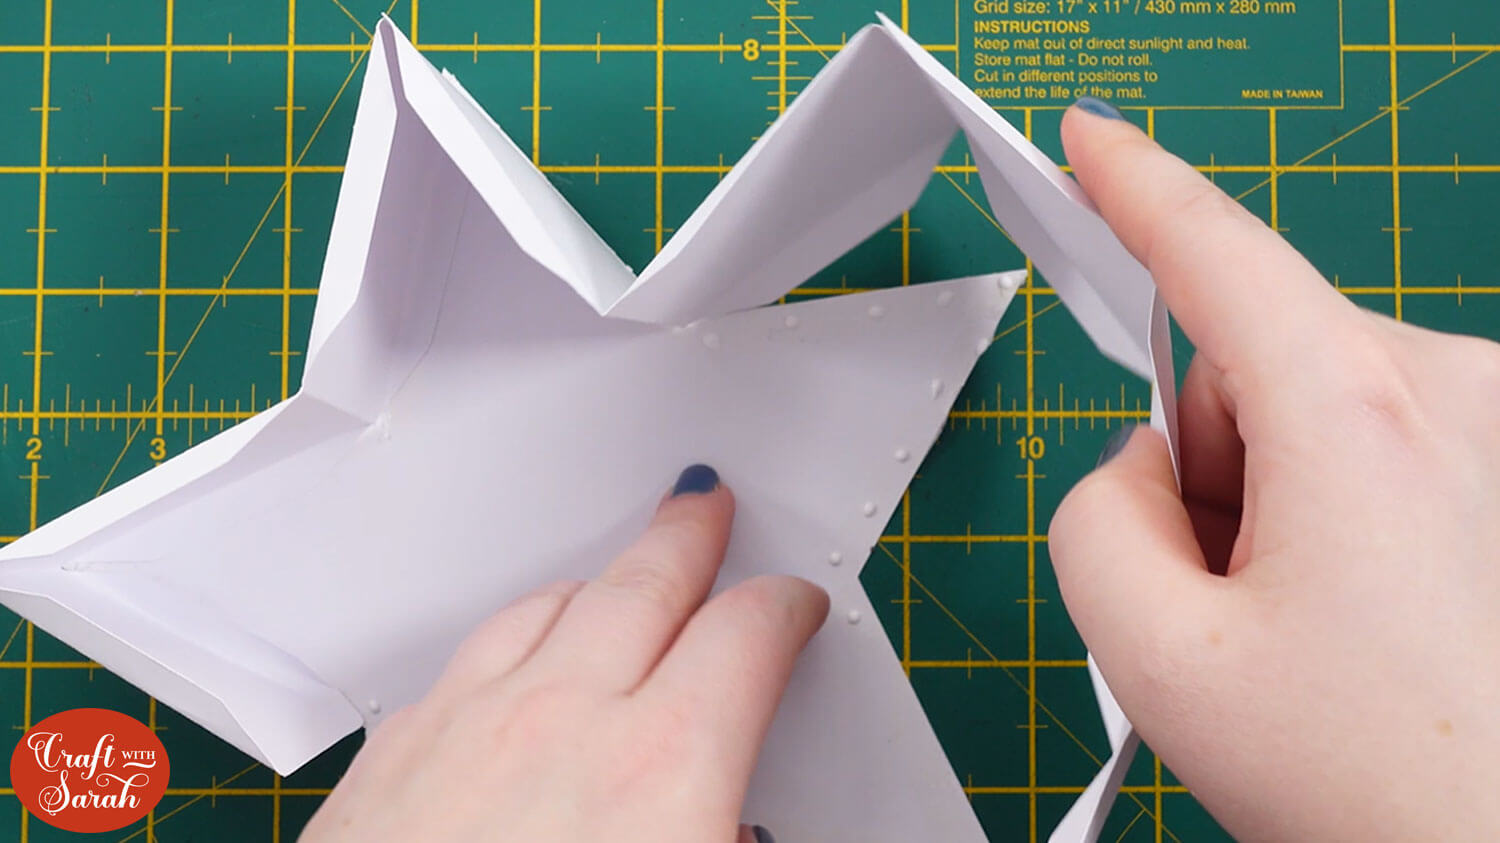
When you get to the end of the edge piece, stick the final “tab” shape to the inside of the point that is already connected to the star to finish off the edging.
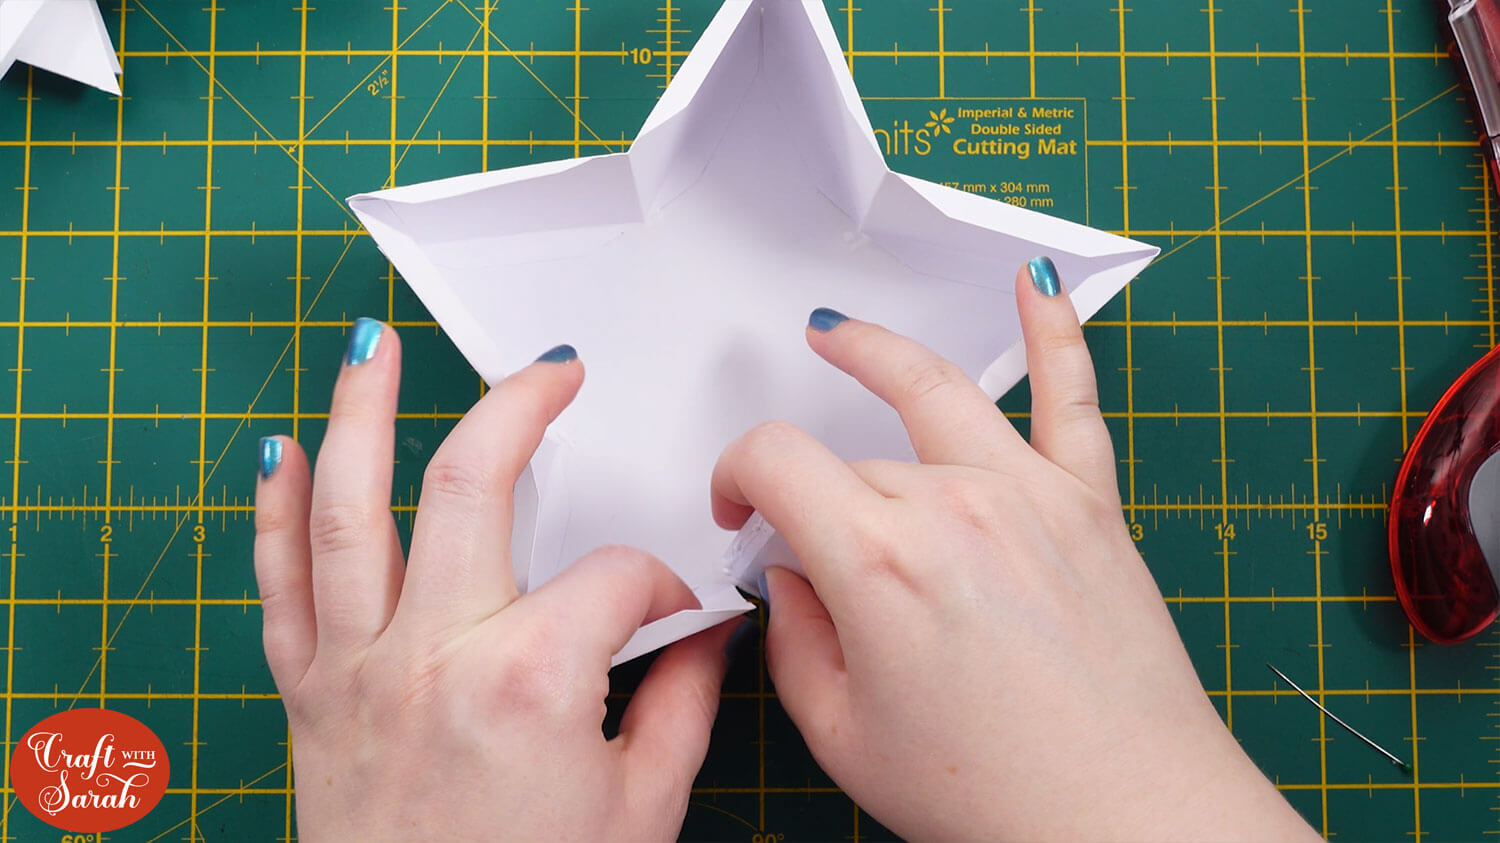
Here’s how it should be looking.
Step 8) Add the fairy lights
If you are adding fairy lights into your star, now is the time to do it.
They will be threaded through the circular hole so that the lights are on the inside but the battery pack is on the outside, to make it easy to turn on and off.
It doesn’t really matter which direction the circle cutout is facing, but I like it on the bottom-right.
Ideally you should use fairy lights with a small, thin battery pack.
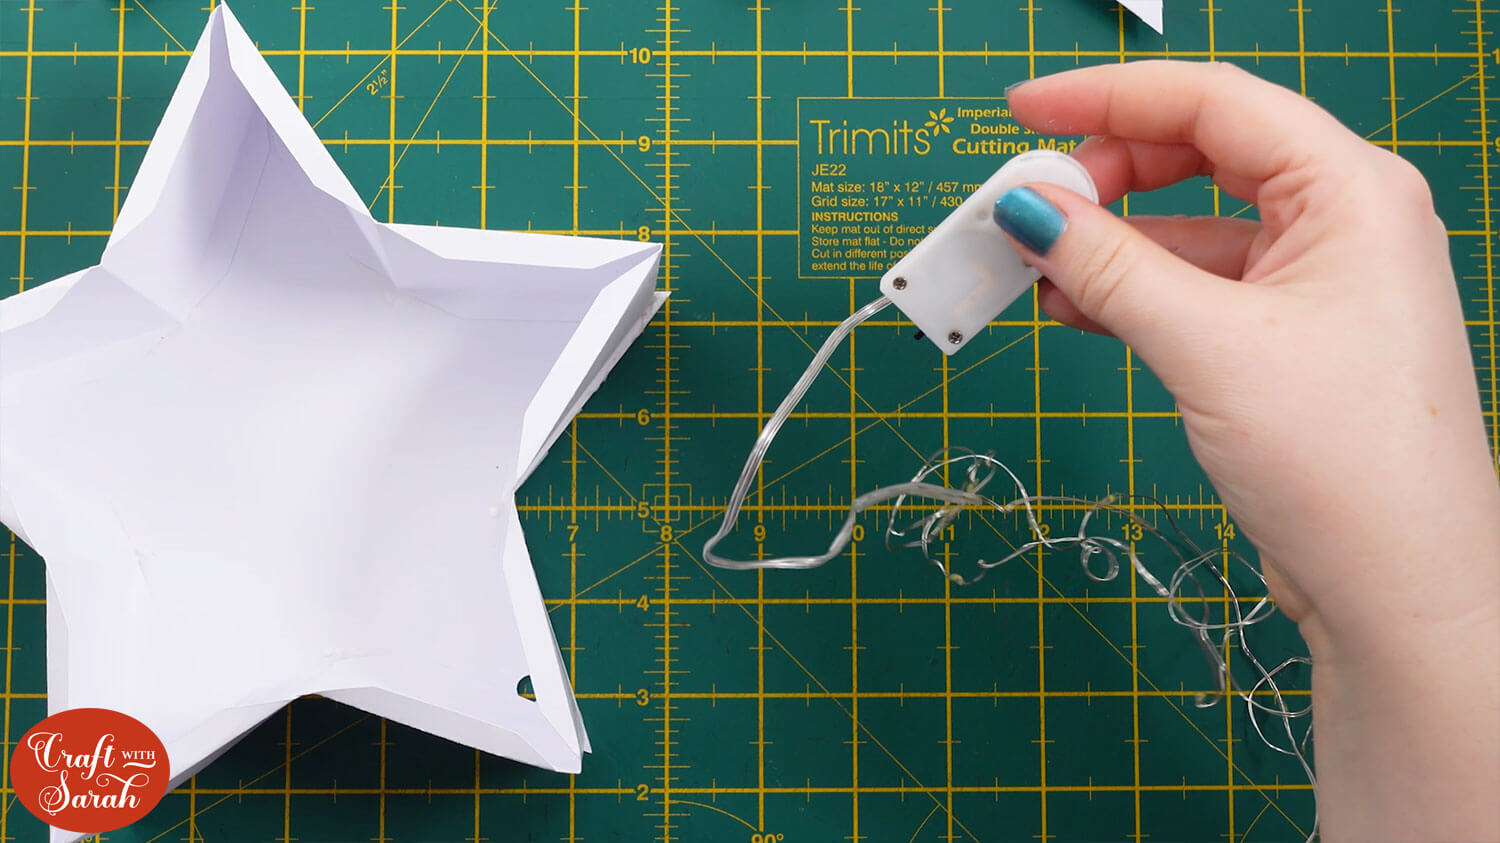
Thread the lights through the hole into the middle of the star. Secure them with sticky tape or masking tape so that the middle of the star has an even distribution of lights.
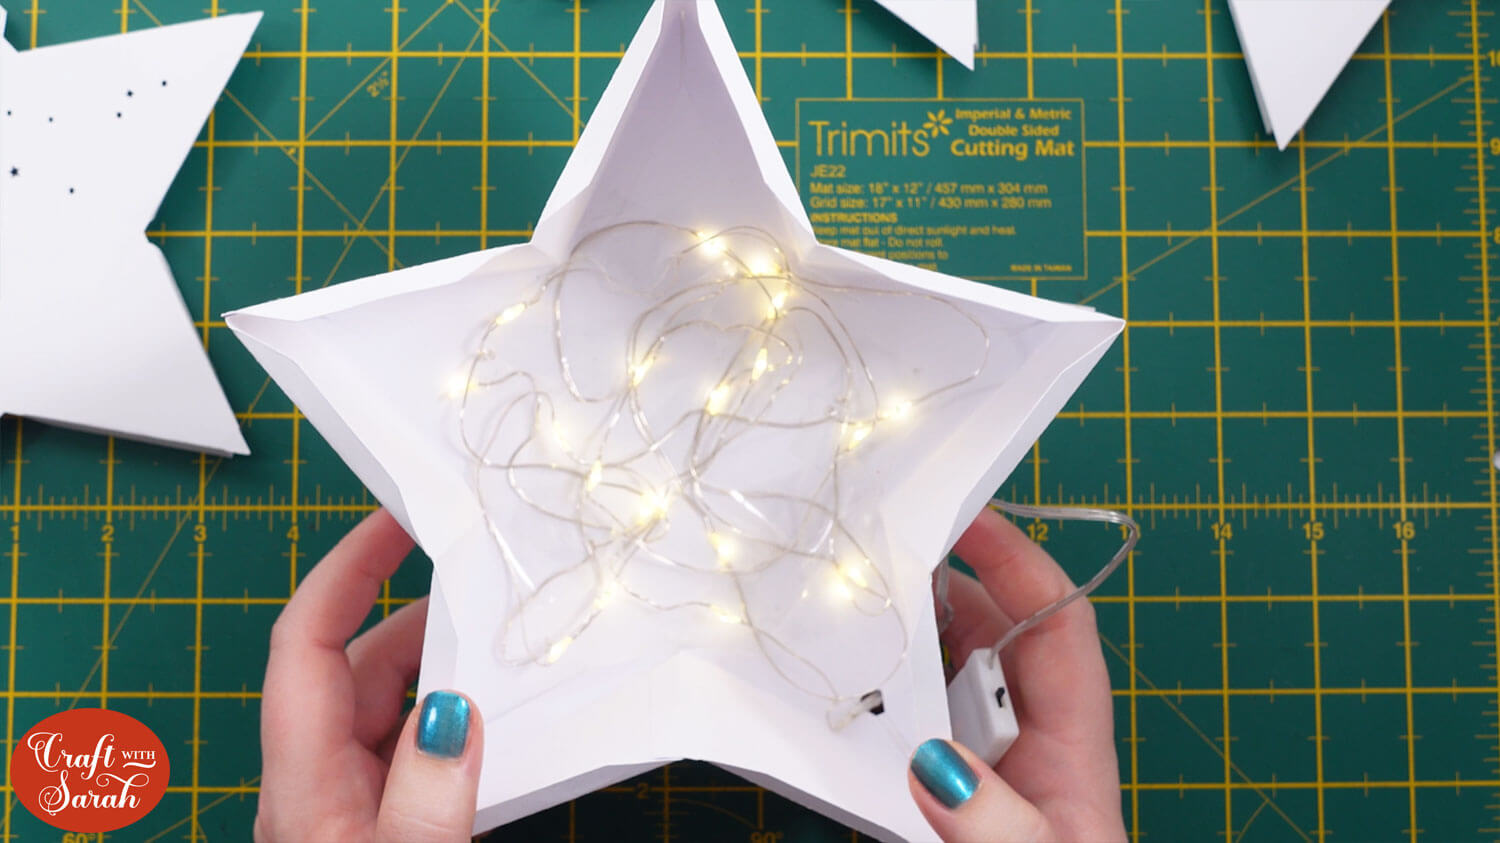
The battery pack will be secured at the end of the project.
Step 9) Add the layers inside the frame
Take the layer with the star shapes cutout and place it into the frame, with the tabbed edges at the bottom.
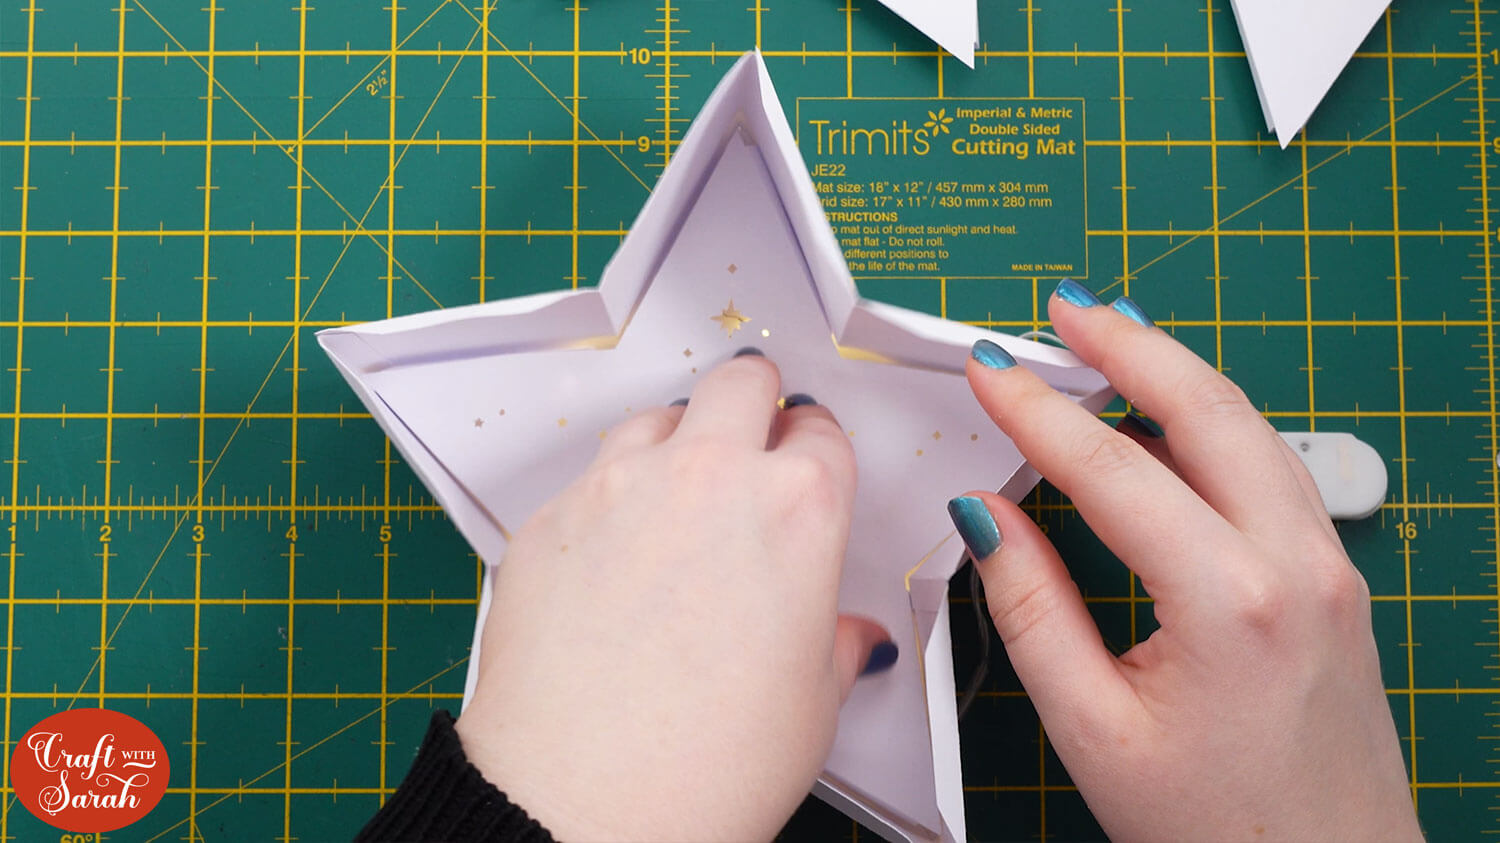
Place the star layer with the starburst edges in next. You don’t need to glue these pieces – just rest them on top of each other.
You may need to wiggle the edges of the box a little bit to get the inside pieces to fit.
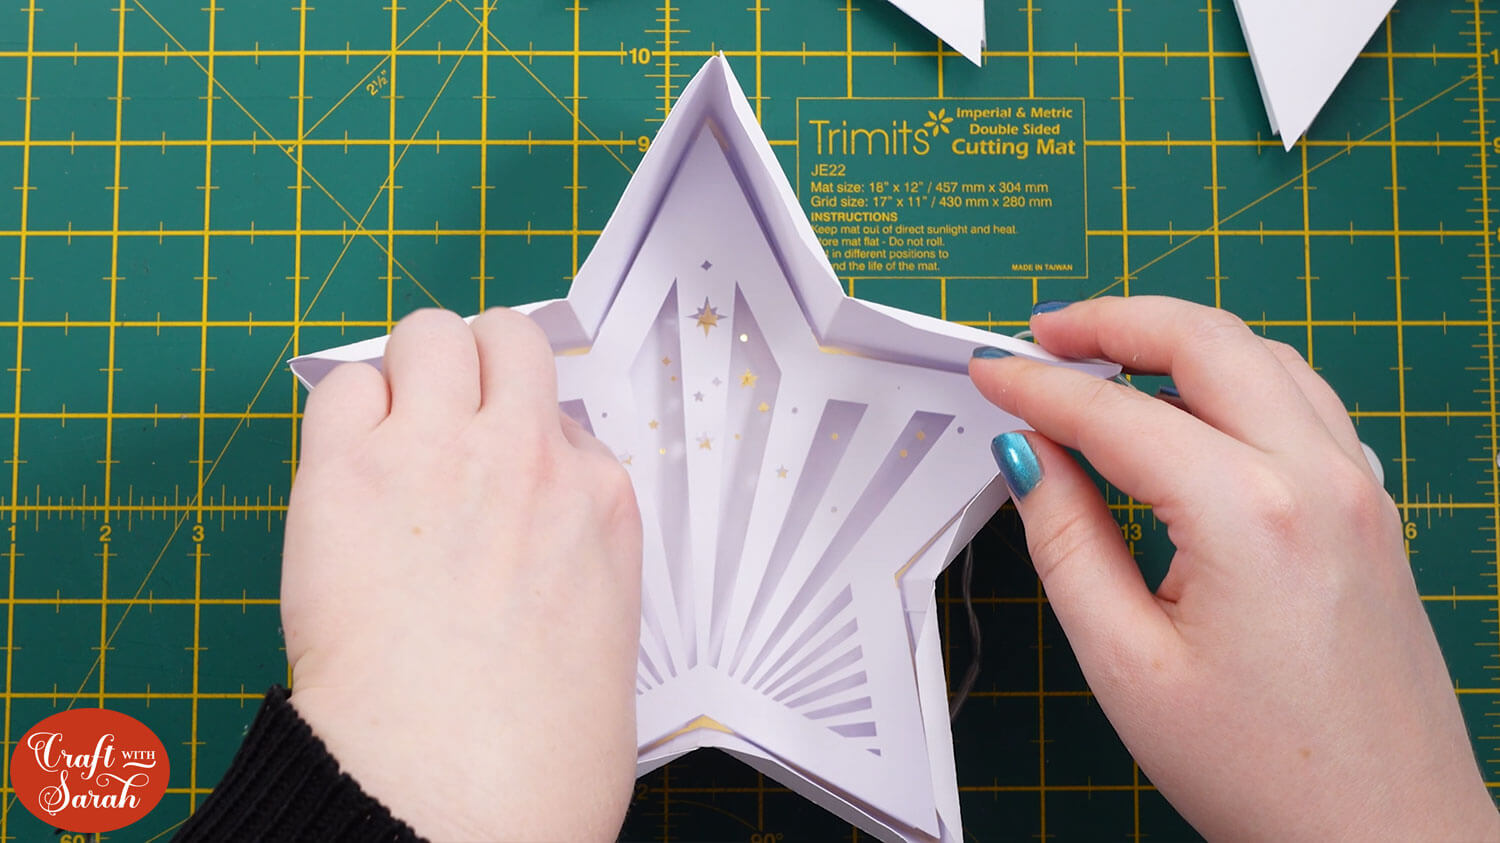
Repeat this for all layers of the Nativity.
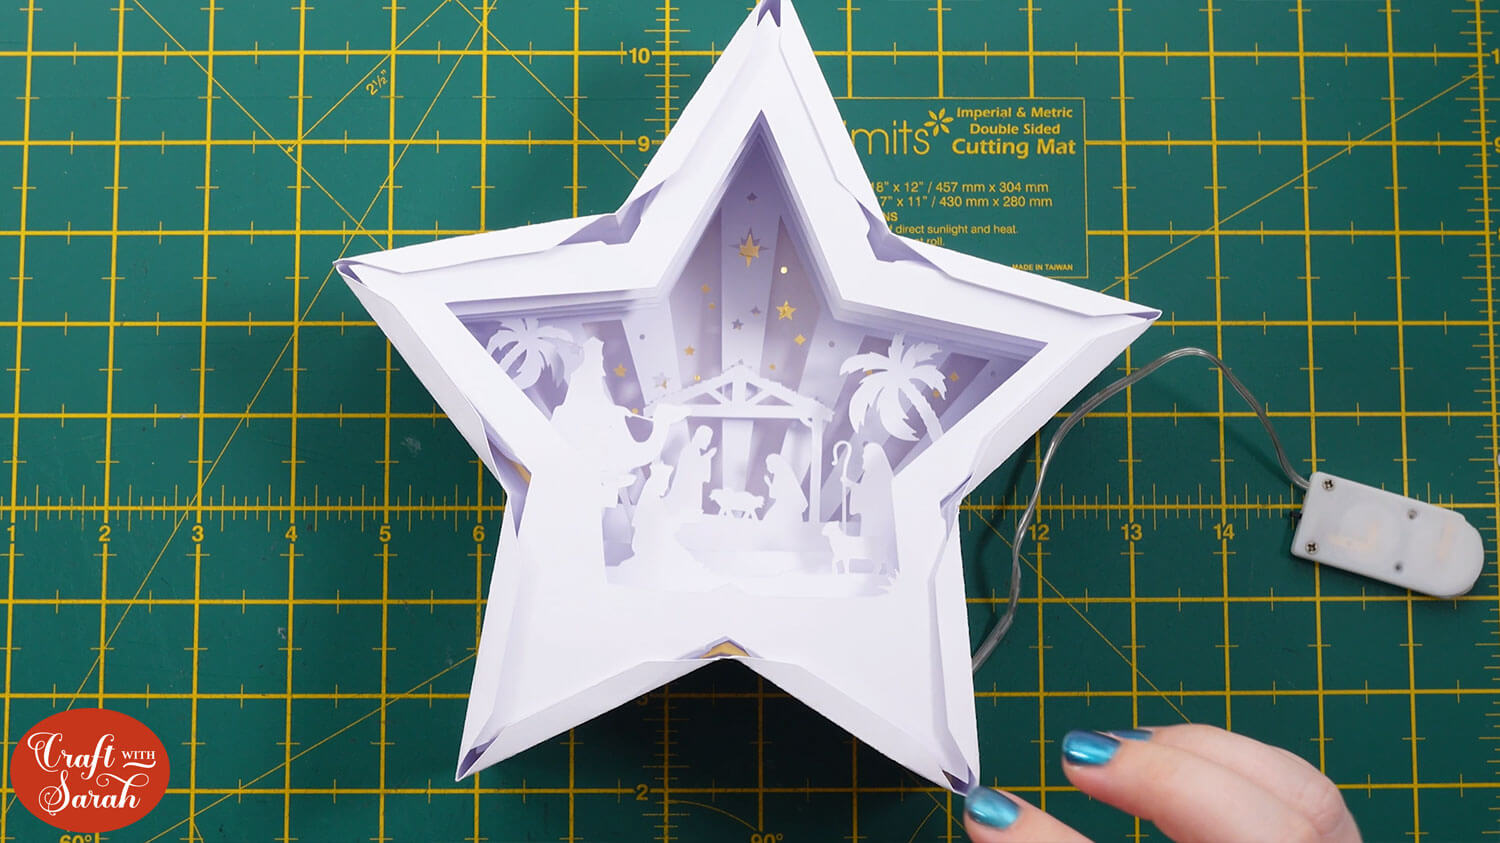
Step 10) Seal up the star frame
Add double-sided tape around the edges on the back of the remaining star piece.
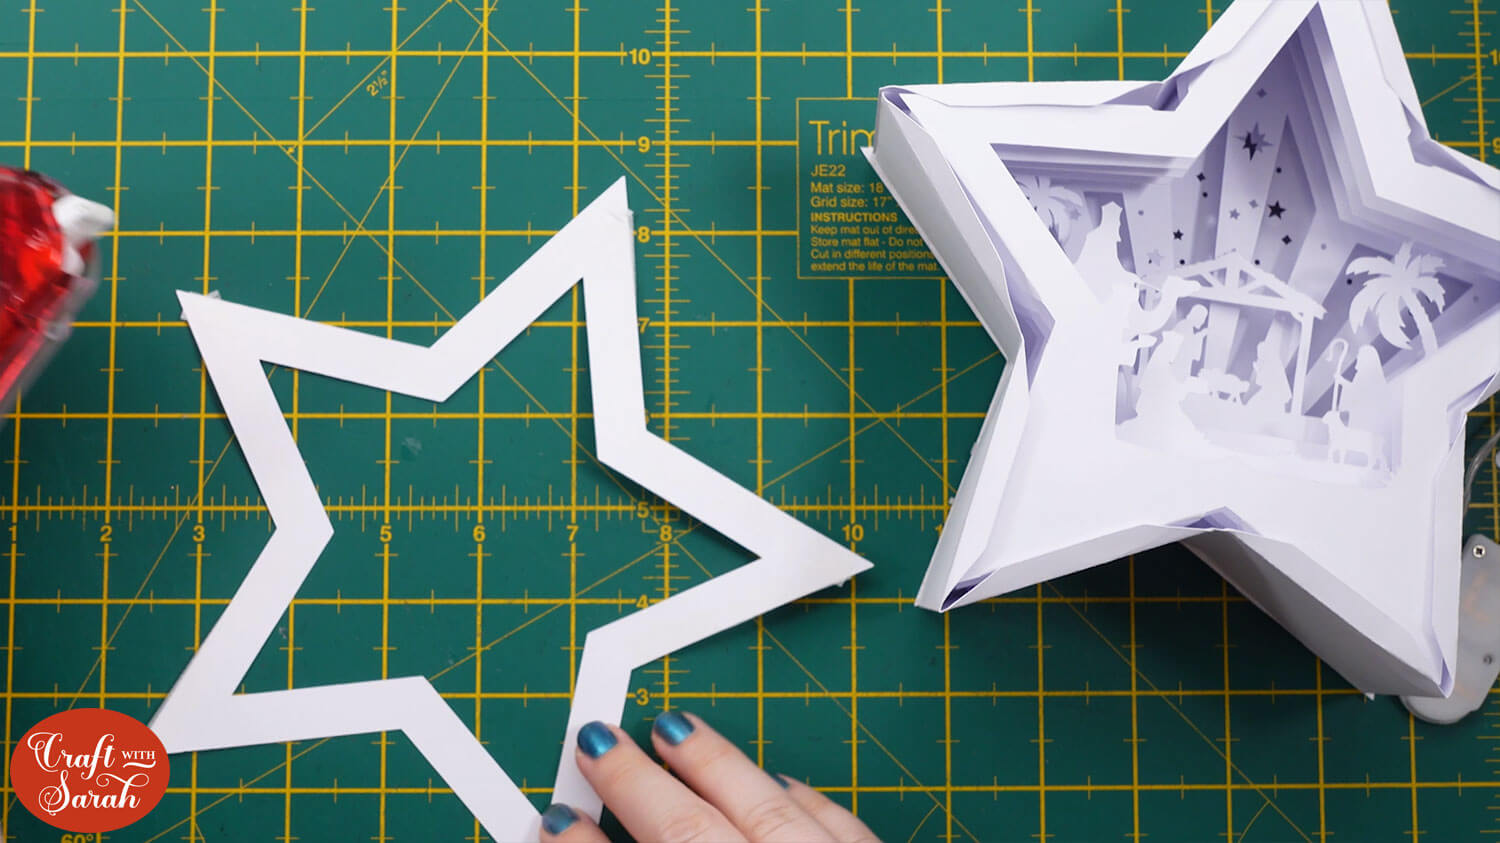
Fold the tabs on the edges of the star frame inwards to rest on top of the final Nativity layer.
Add glue on top of each of the tabs.
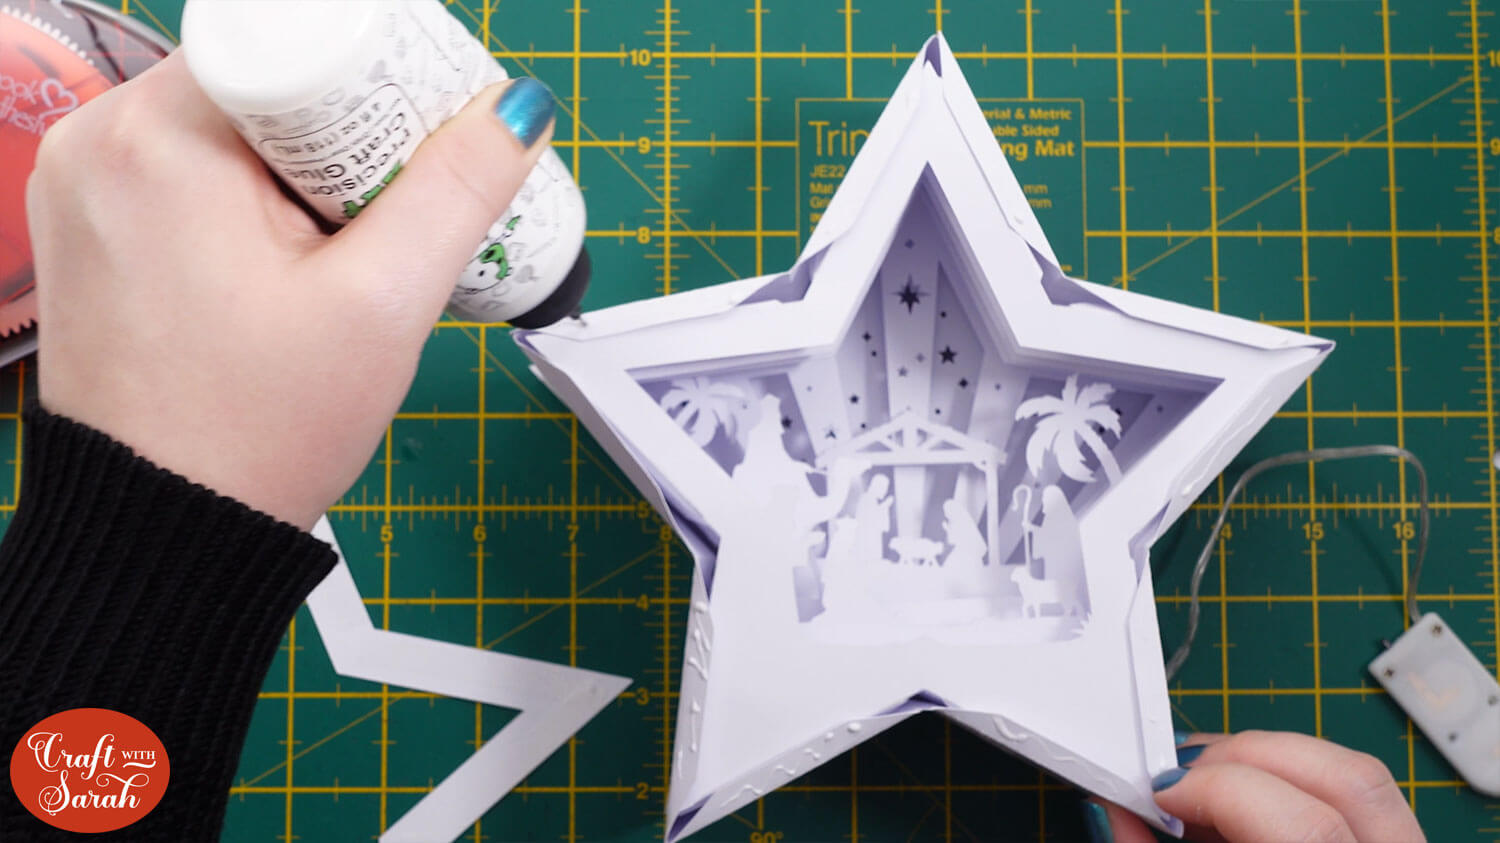
Stick the final star shape on top of the box.
You will need to “pinch” the edges of the box together so that the star perfectly lines up.
This can be easier with two people – one to pinch the sides in and one to hold the star outline in place.
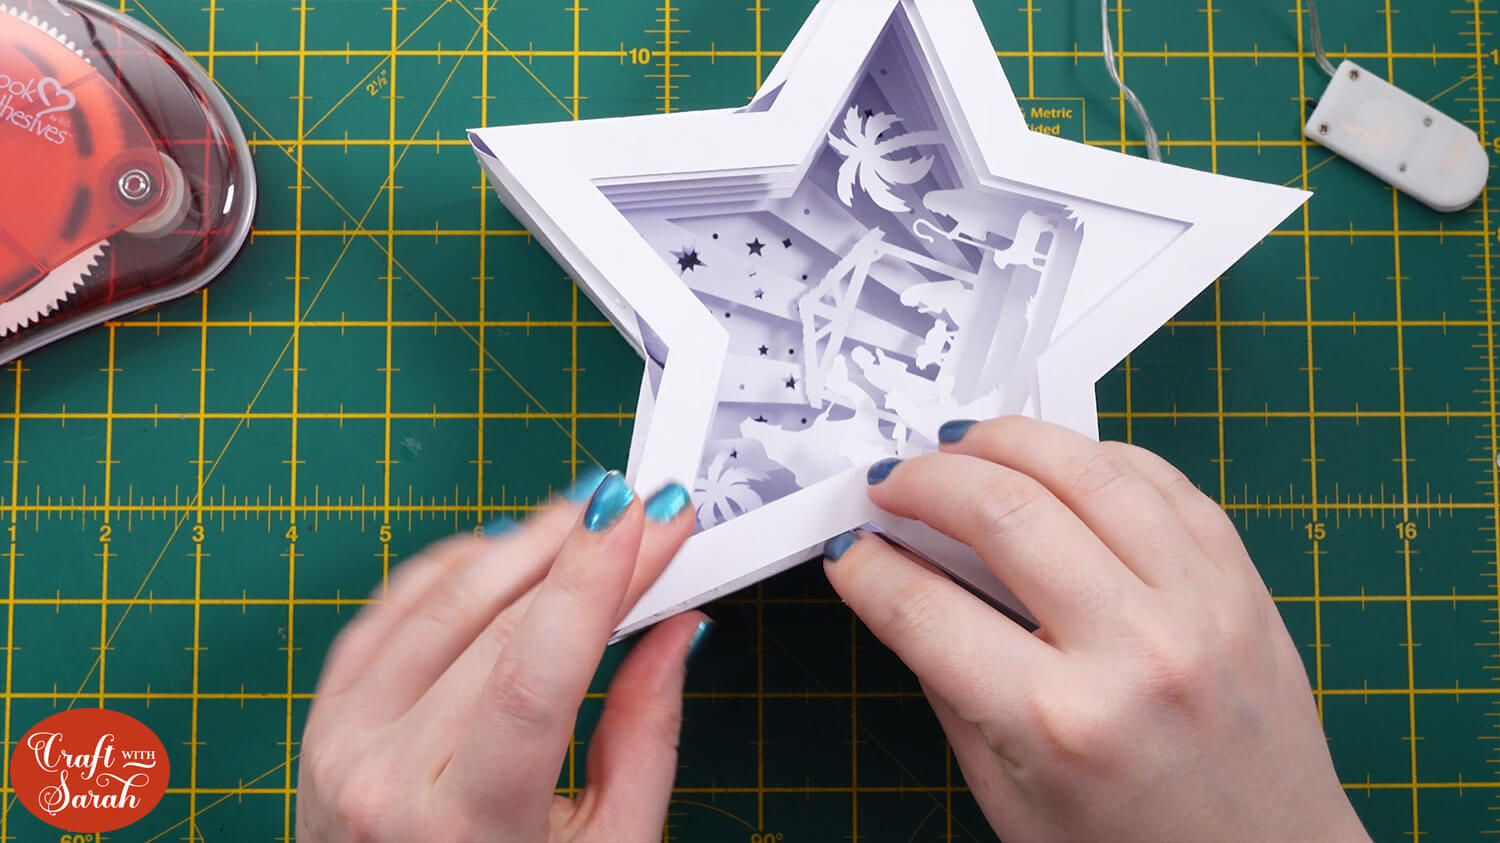
Keep squeezing and (gently!) pressing the edges together until the star is finished.
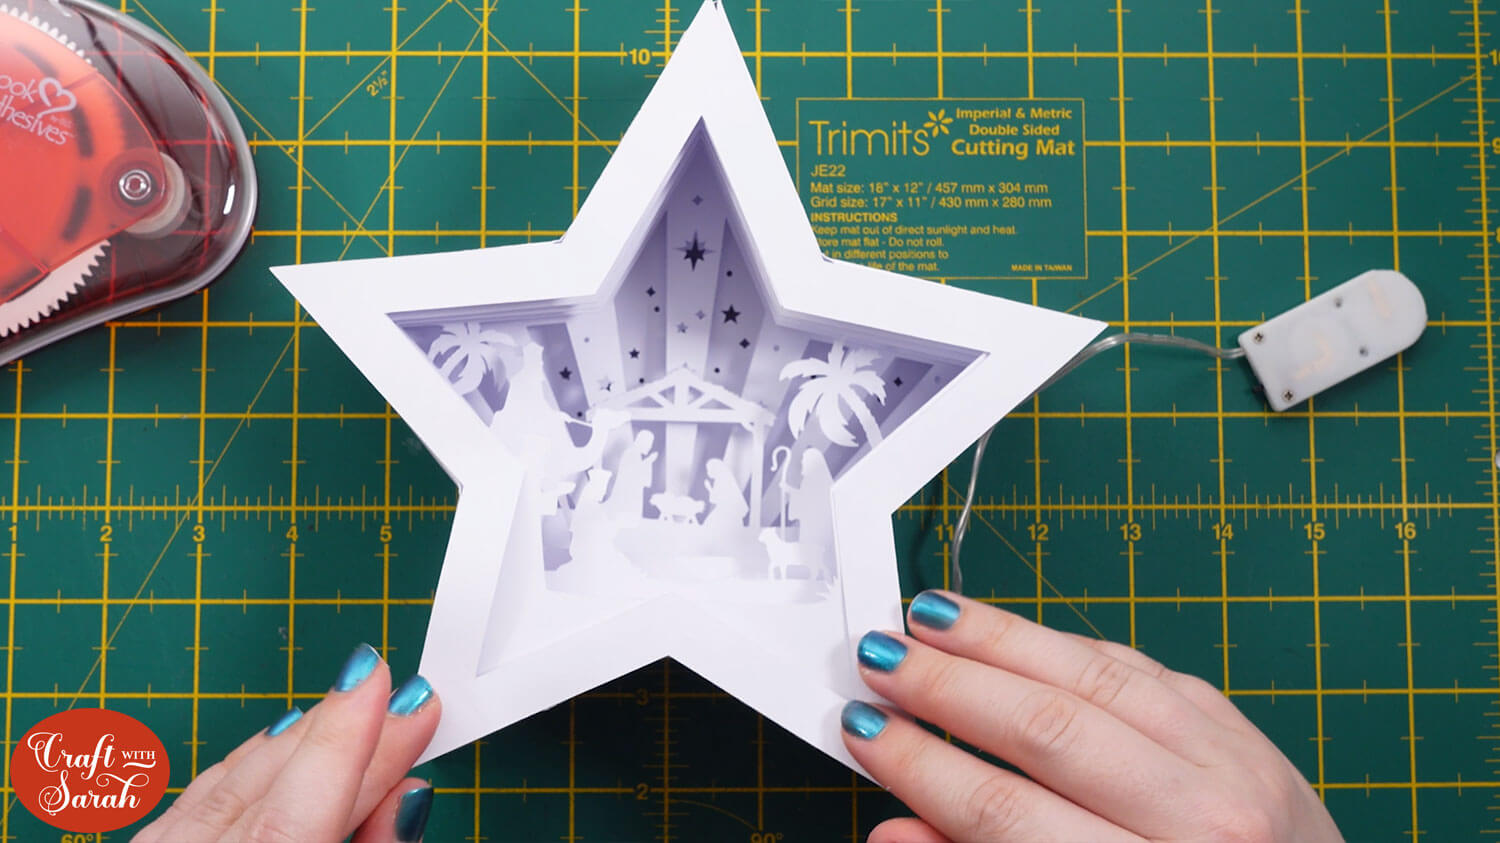
When the glue is dry, turn the star over and secure the battery pack of the fairy lights to the back with tape or glue.
Your Nativity star frame is now finished!
Here’s how it looks with the lights glowing through the white version:

Here’s what my gold and blue colour scheme version looks like:

Nativity craft to make with a Criut
With your star-shaped Nativity Scene assembled, you’ve created a unique and memorable holiday decoration that can light up any space to celebrate the true meaning of Christmas.

I love that the star is freestanding as it makes it so easy to display.
Happy crafting,
Sarah x

