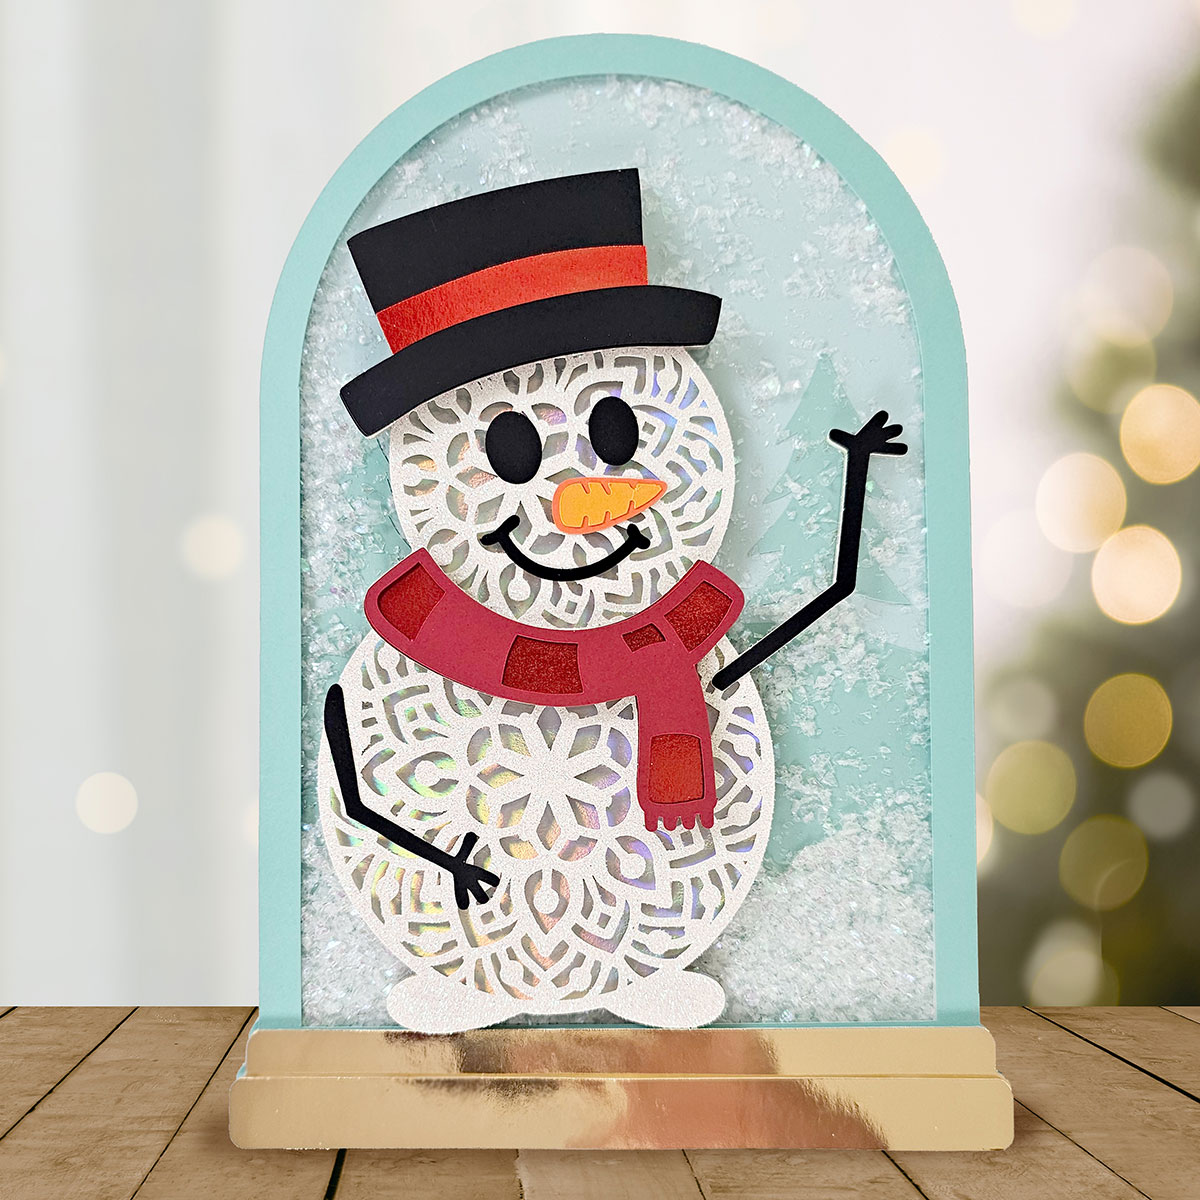
CCC 2023 Day 10 ☃️ Layered Snowman Mandala Shaker
Make an adorable mandala snowman shaker to add to your Christmas decor this year!
It’s Day 10 of the Christmas Craft Countdown and Gina from Gina C. Creates is sharing her mandala snowman shaker design with us.
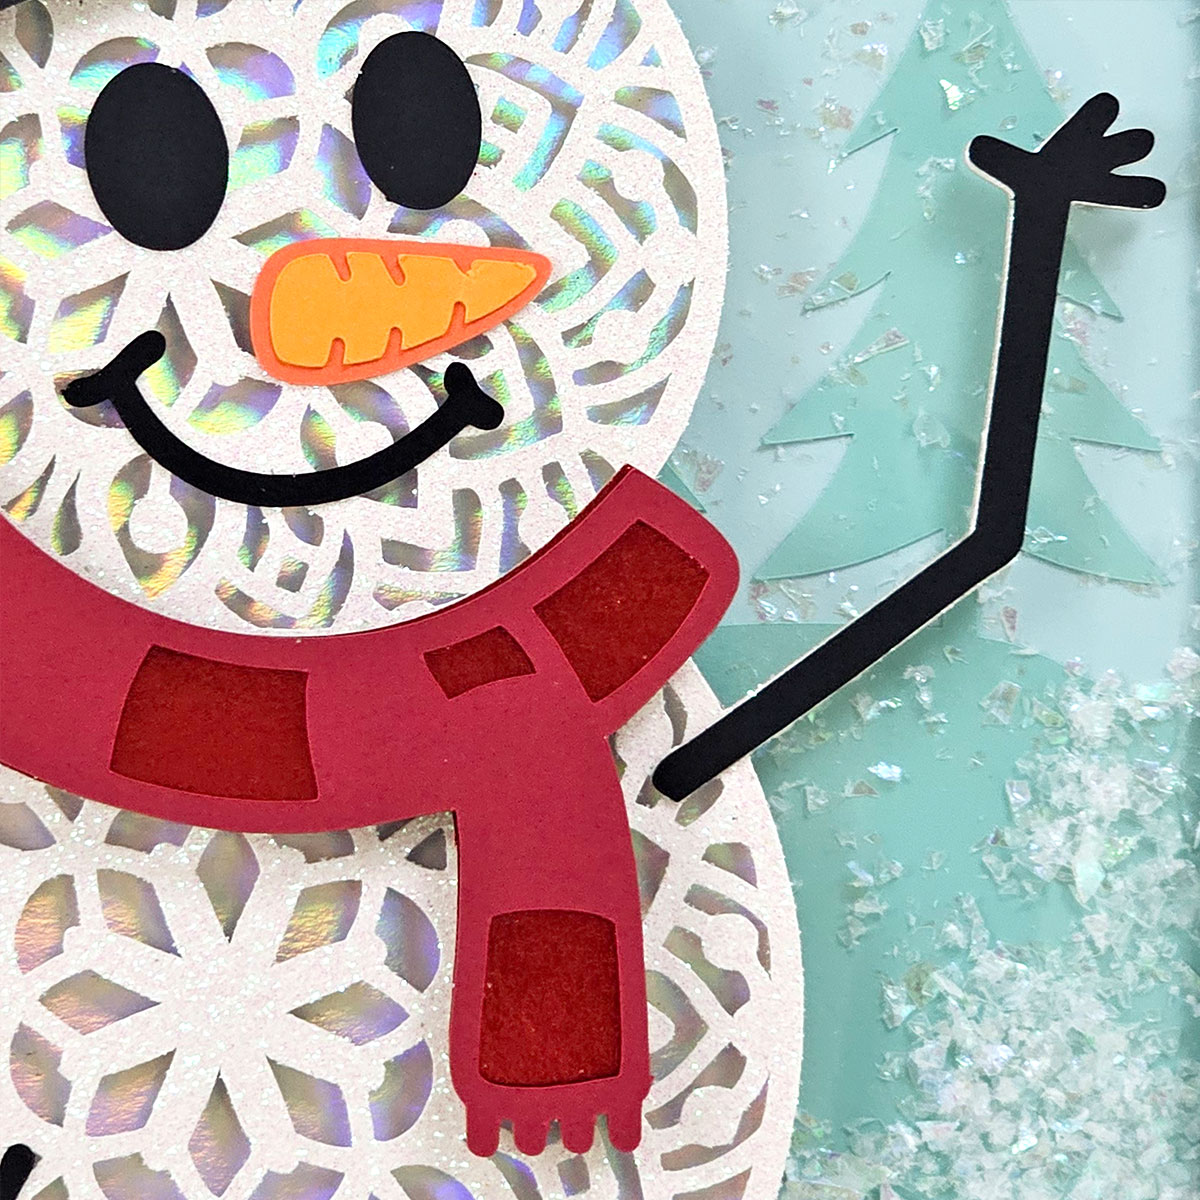
Gina used a combination of glitter, holographic, metallic and solid colour cardstock to give the project a wintery and snowy feel, but you can use whatever cardstock you have to hand.
I love the Christmas trees that you can see behind the snowman when you look closely, it completes the snowy scene!
This Project was part of the Christmas Craft Countdown 2023
Materials supply list
Here is a list of the materials that Gina used to make this project.
Please note that some of the links included in this article are affiliate links, which means that if you click through and make a purchase I may receive a commission (at no additional cost to you). You can read my full disclosure at the bottom of the page.
- Cricut machine
- Light or standard grip cutting mats
- Glue
- Foam tape/strips
- Cricut scoring wheel or scoring stylus
- Cardstock in various colours
- Glitter, holographic and foil cardstock (Optional)
- Confetti/fake snow
- Acetate
- Scissors or craft knife
This project is suitable for the following types of Cricut machine: Explore Air 2, Explore Air 3, Maker, Maker 3, Venture and Joy Xtra.
Video tutorial
Making cardstock Christmas decor has to be one of my favourite things!
Watch the video below to see how to make this mandala snowman shaker.
If you prefer to read rather than watch, keep scrolling!
This project was created by Gina C. Creates
Gina, runs a crafting blog that specializes in Cricut crafts, free SVG files and DIY projects! Her passion is creating new projects and drawing SVG designs by hand on her iPad Pro. She found her calling when she received her first Cricut Machine and started sharing her project designs with her fellow crafters!
Written tutorial (with photos!)
Here’s how to make your very own snowman papercraft using a Cricut machine!
Step 1) Download the cut files & unzip the downloaded folder
Download the files using the box below.
Before you upload the SVG file to Design Space, you need to unzip the download folder that it comes in.
Step 2) Upload the cut files into Design Space
Open up Cricut Design Space and start a new Project.
Click “Upload” and then find your unzipped version of the downloaded files for this project.

Upload the file called “Layered Snowman Shaker.svg”
This is what it looks like:
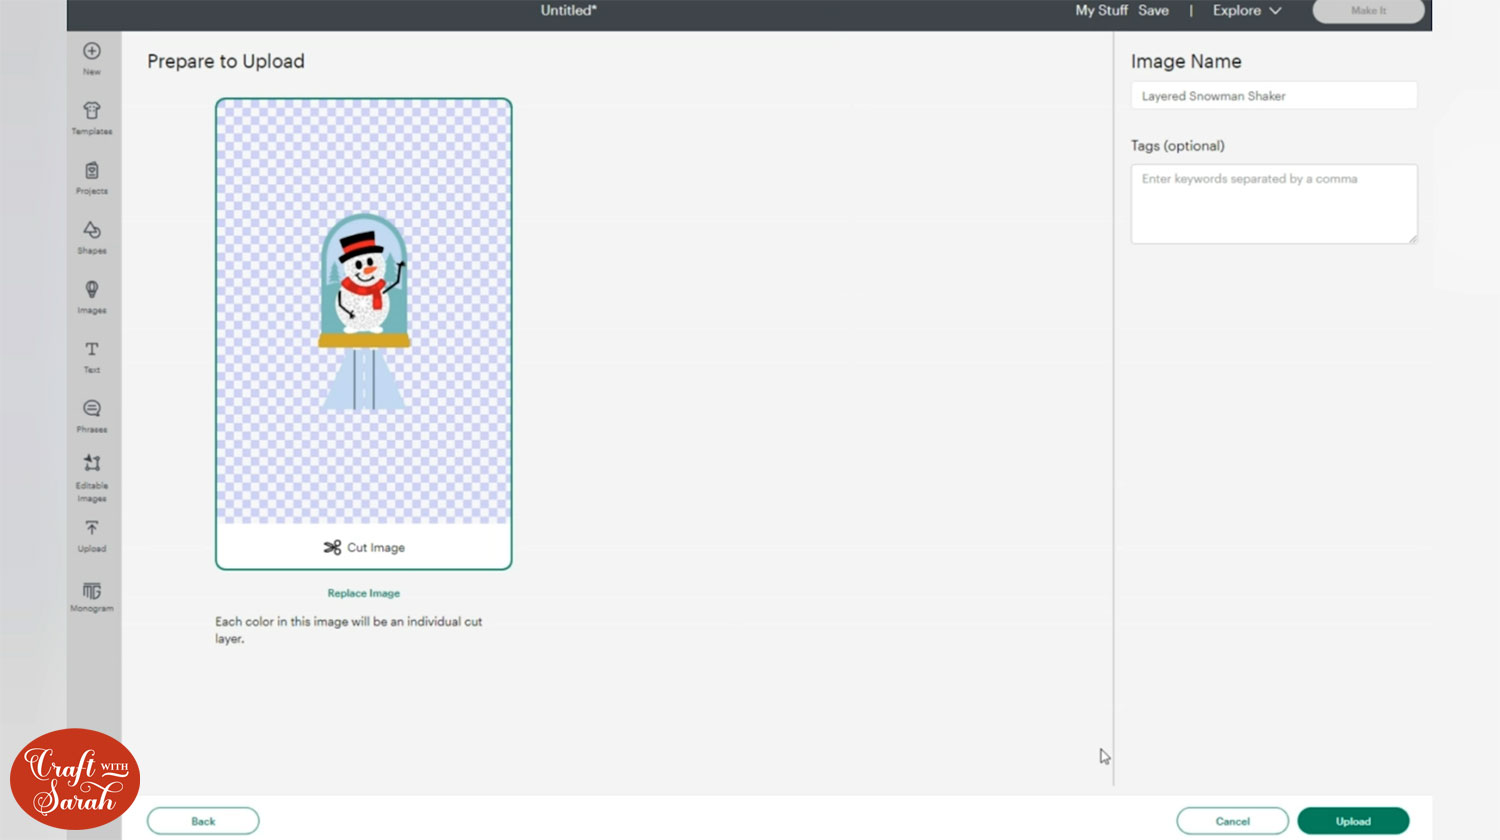
After uploading, the design will show in your “Recently Uploaded Images”.
Click on it and then press “Add to Canvas” to put it onto your Project.
Make sure the size of the entire design (including the stand) is set to 7.066 inches wide and 15.65 inches tall.
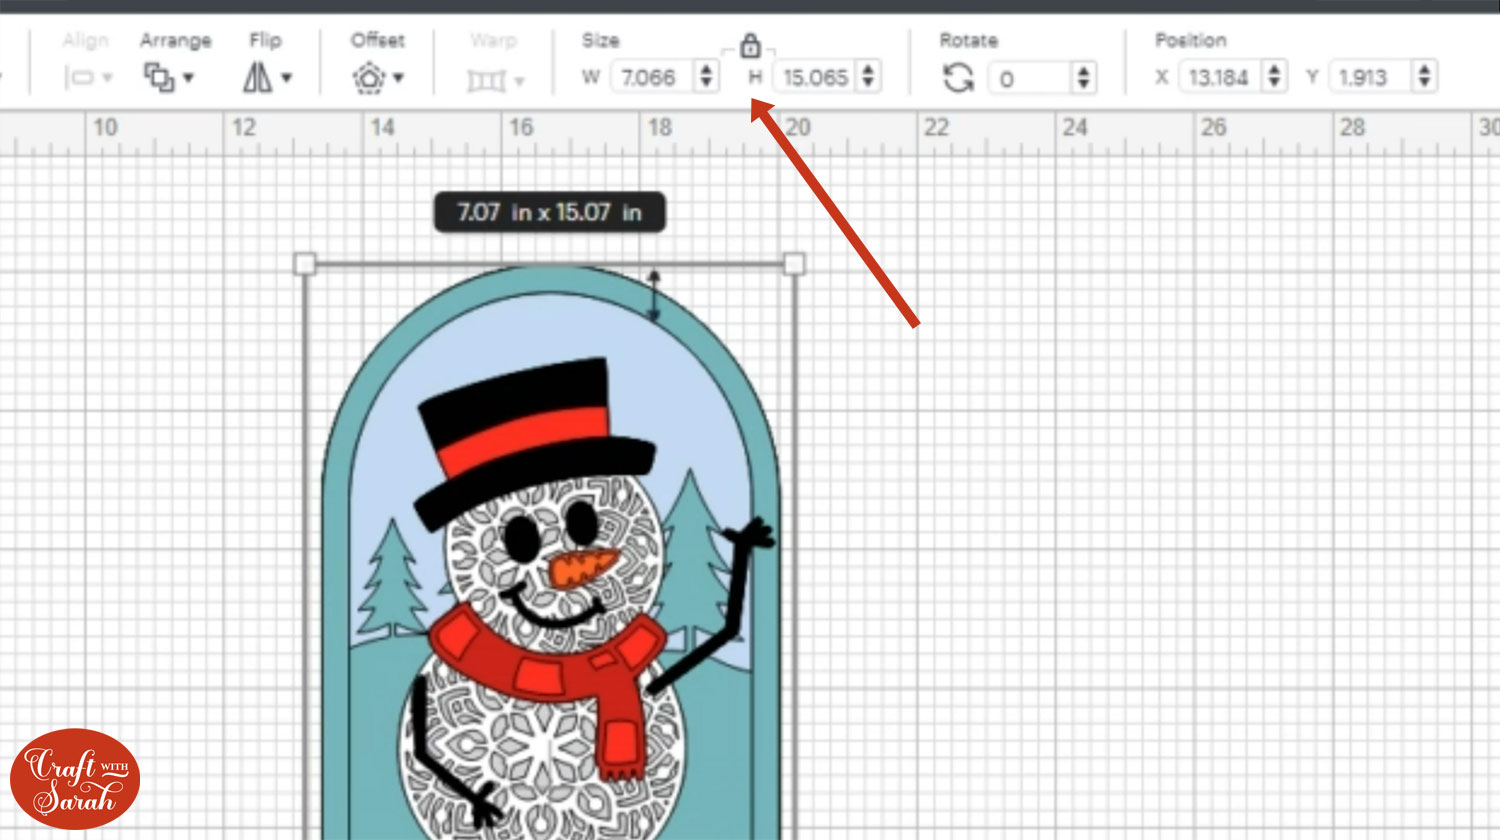
Step 3) Format the design
Click the design and press the Ungroup button at the top of the layers panel.
This will separate out the layers.
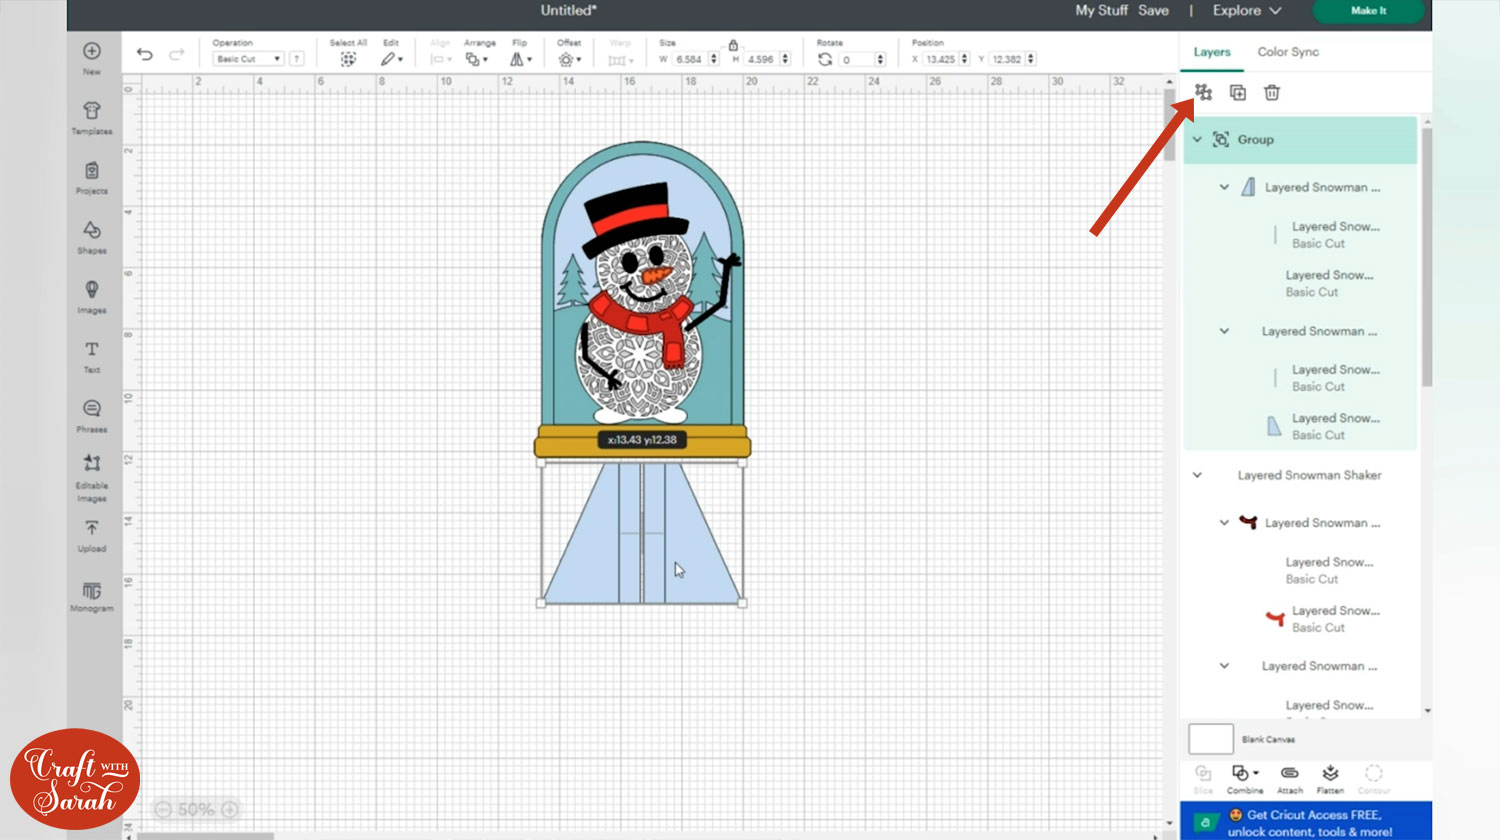
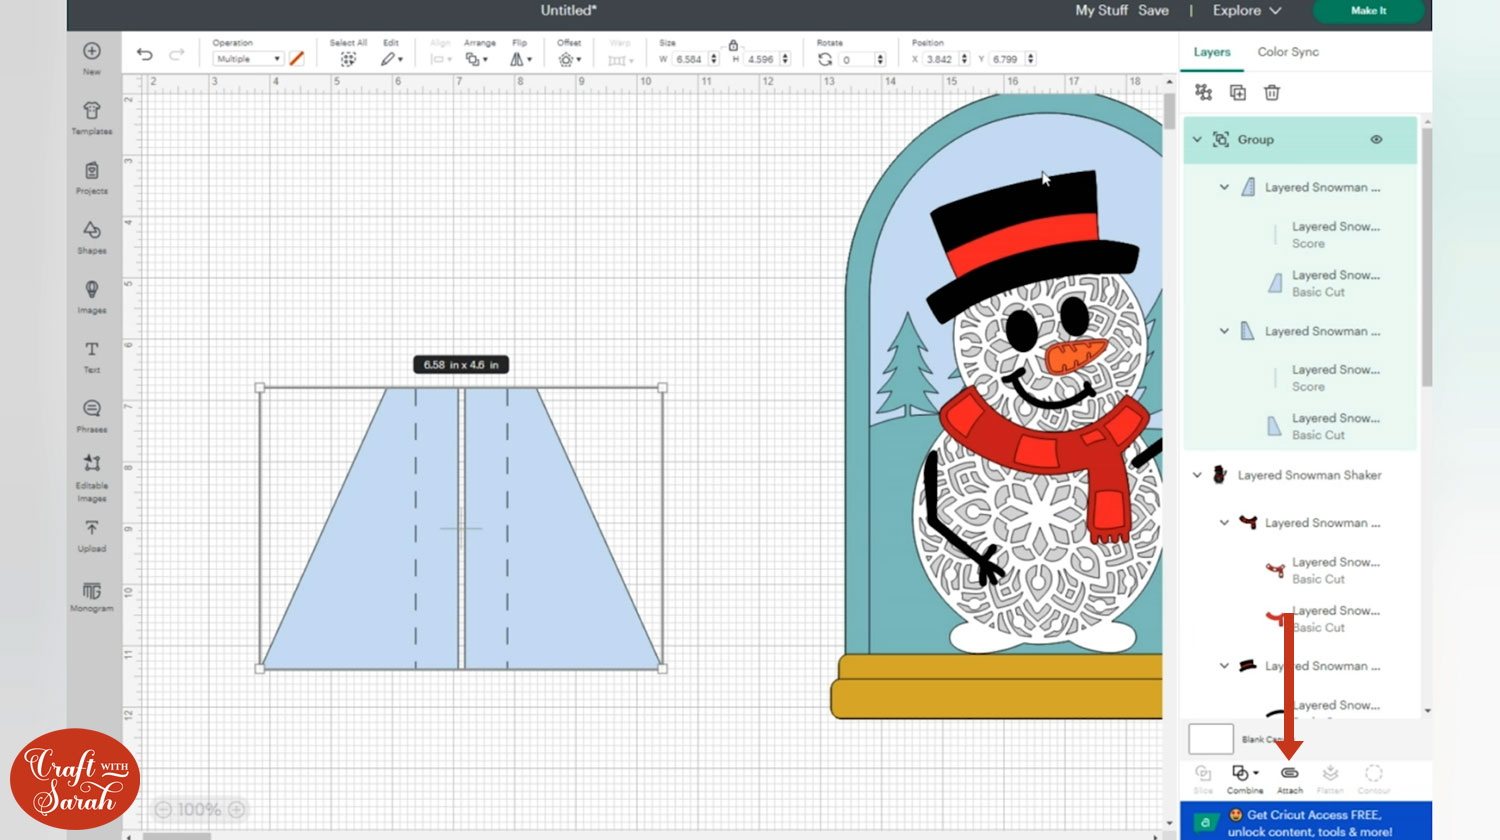
Look at the sub-group containing the blue triangle shapes. These are the pieces that make the stand on the back.
Within there are two layers which look like single vertical lines.
Click one of those lines and change it to “Score” in the Operations dropdown menu.
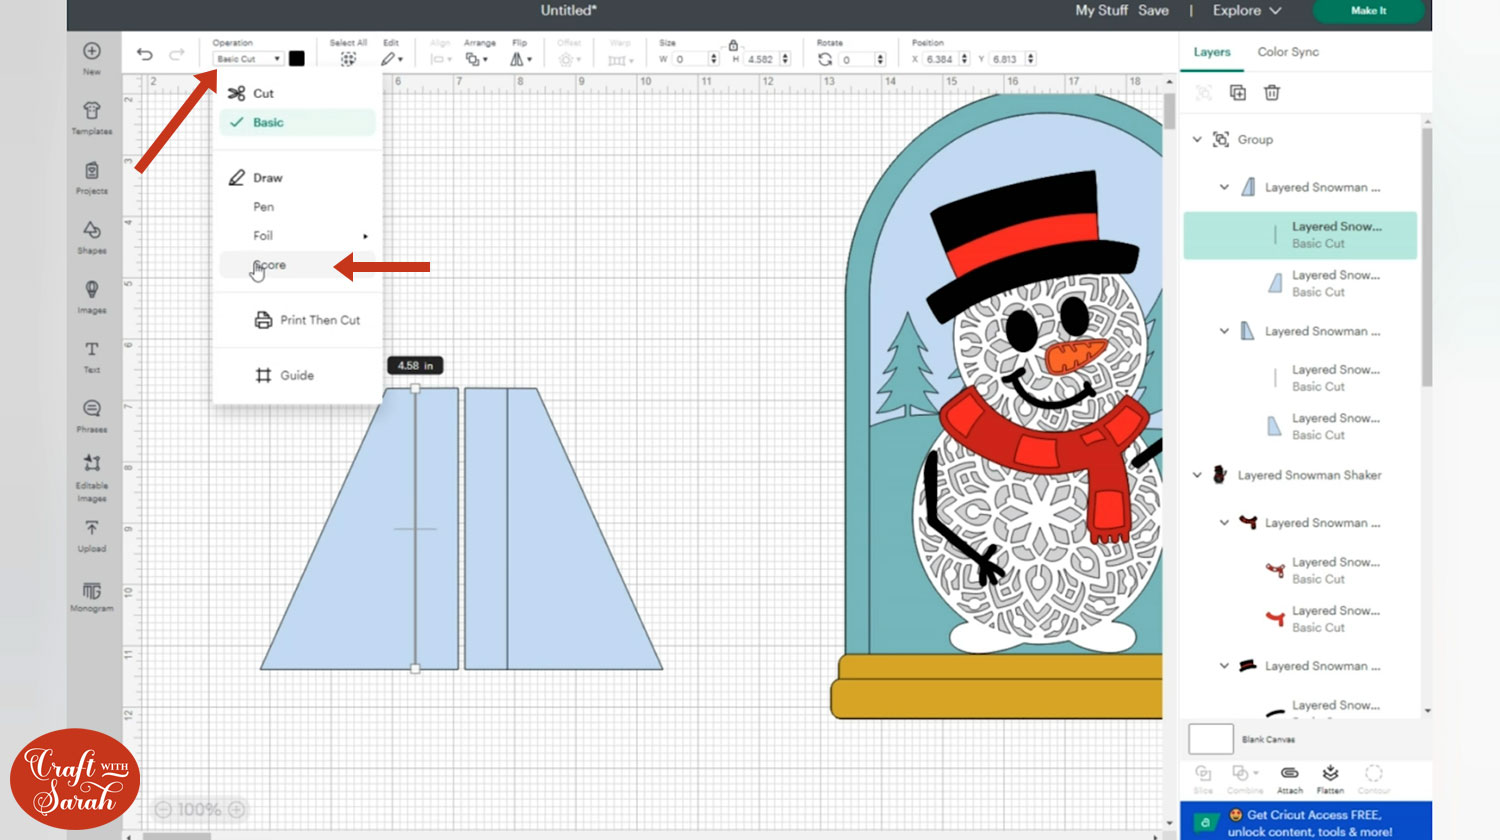
Do the same with the other vertical line layer.
Click the whole sub-group containing the blue shapes and the score lines and press Attach.
Attach is what tells the Cricut where to do the score lines.
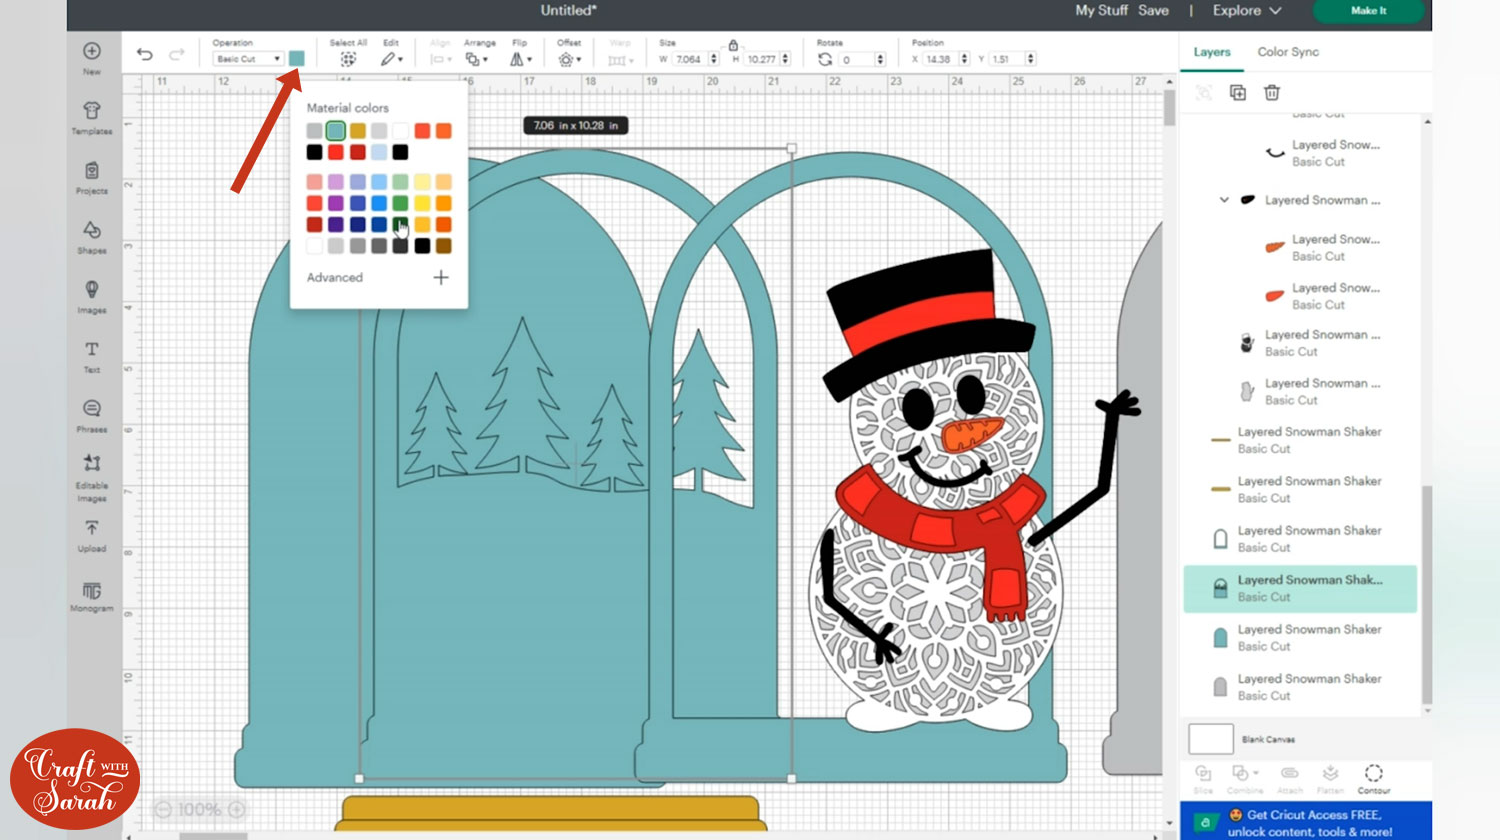
If you want to, you can customise the design by changing the colours of each layer using the colour box.
Step 4) Cut the mandala snowman design
Click “Make It” and follow the Cricut’s on-screen instructions to get everything cut out.
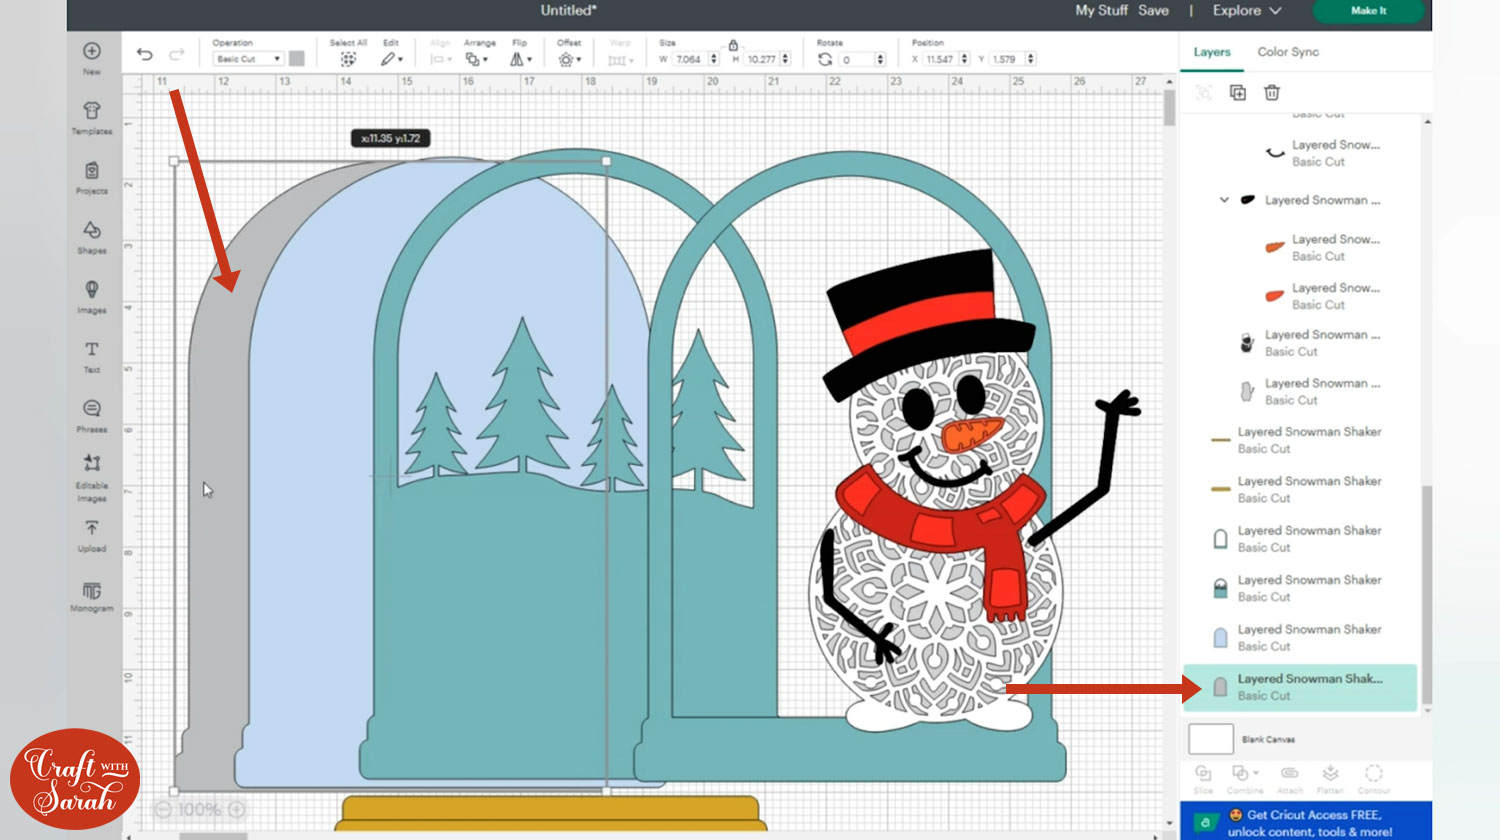
The big grey piece should be cut from acetate.
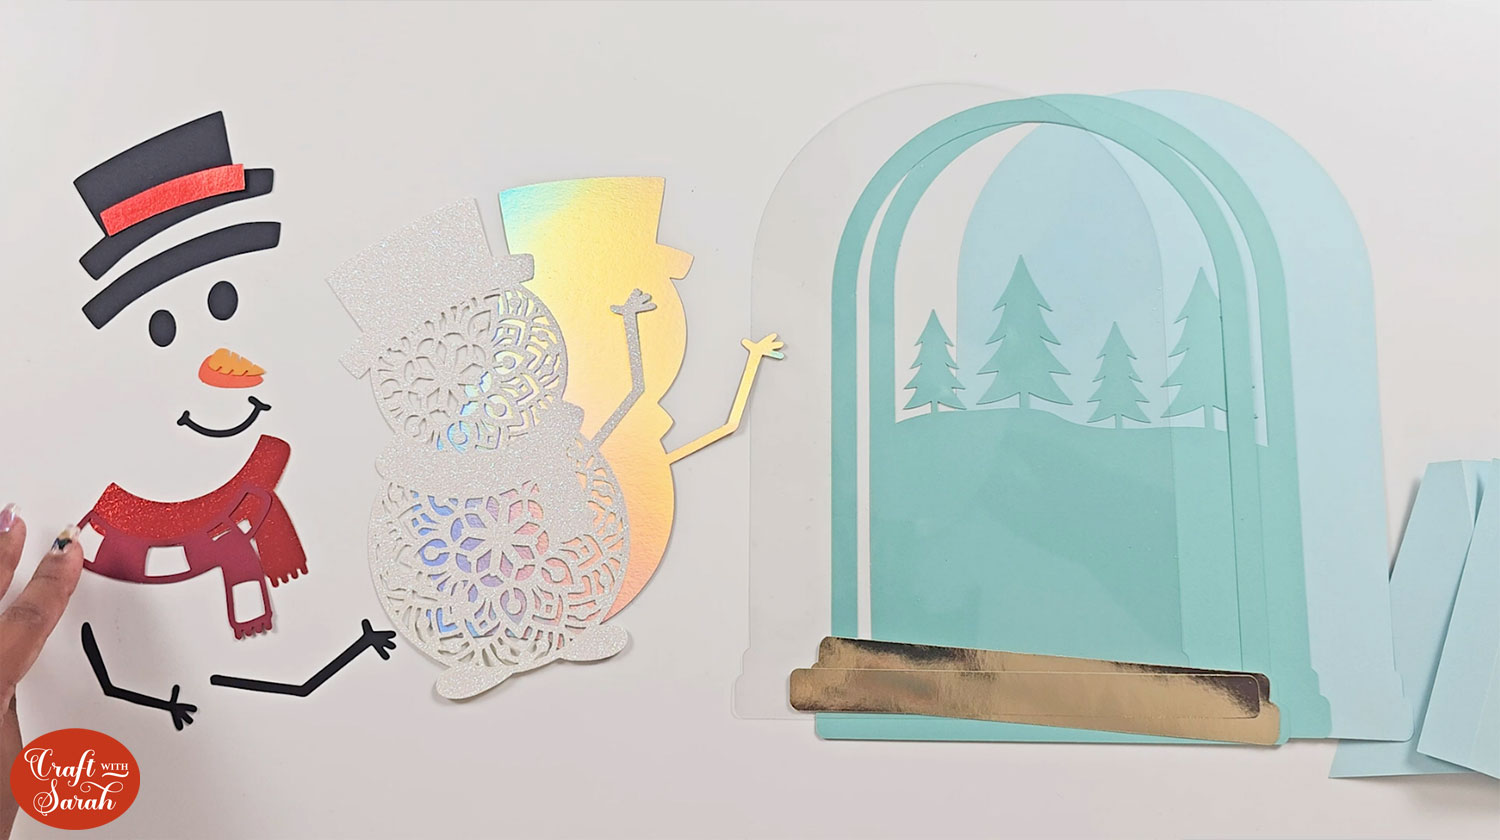
Gina used a glitter cardstock for the intricate snowman layer.
She also used holographic cardstock for the bottom snowman layer.
Metallic cardstock was used along the base of the design.
Step 5) Assemble the design
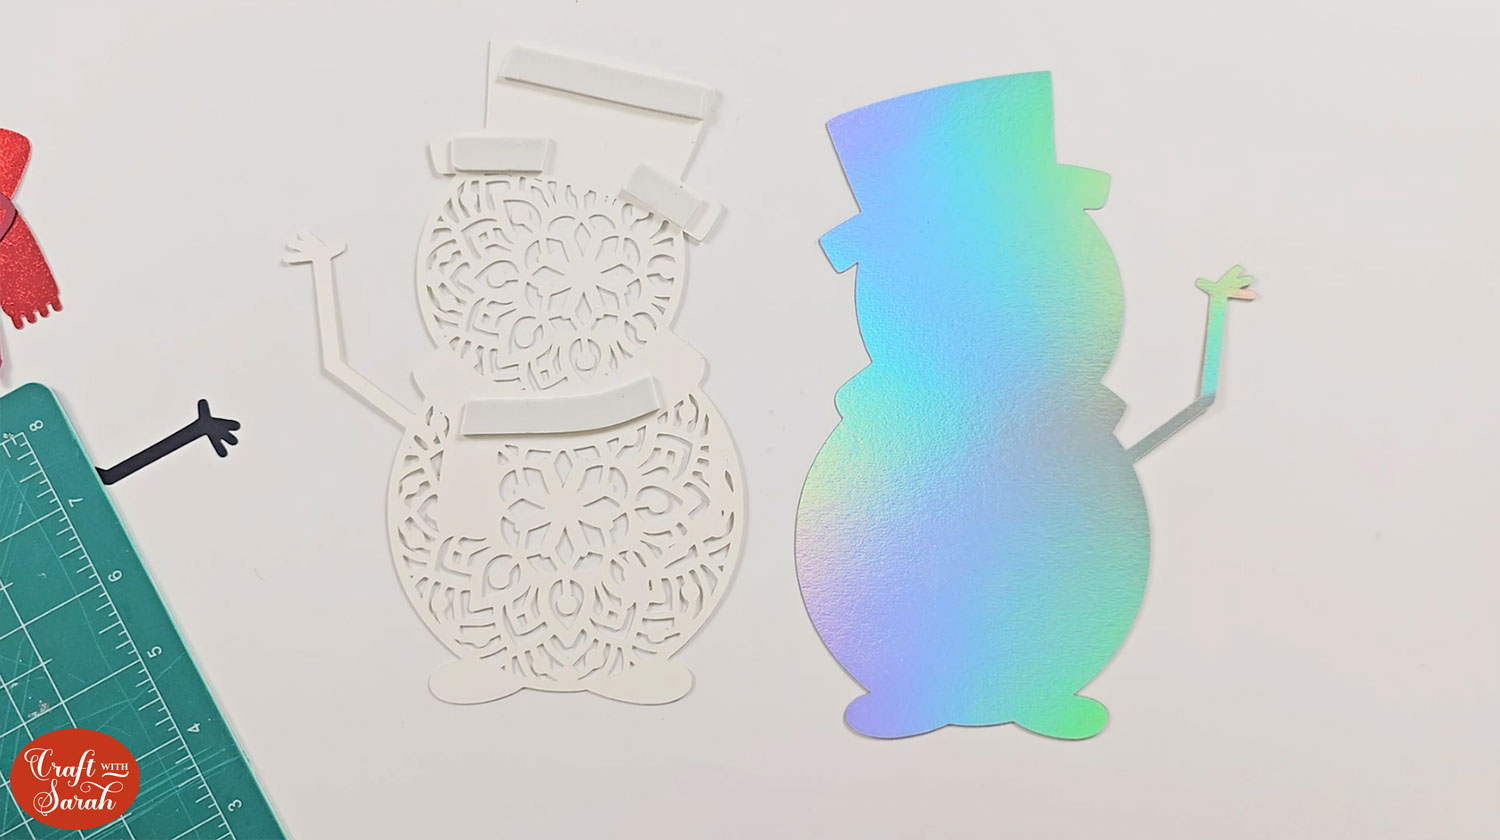
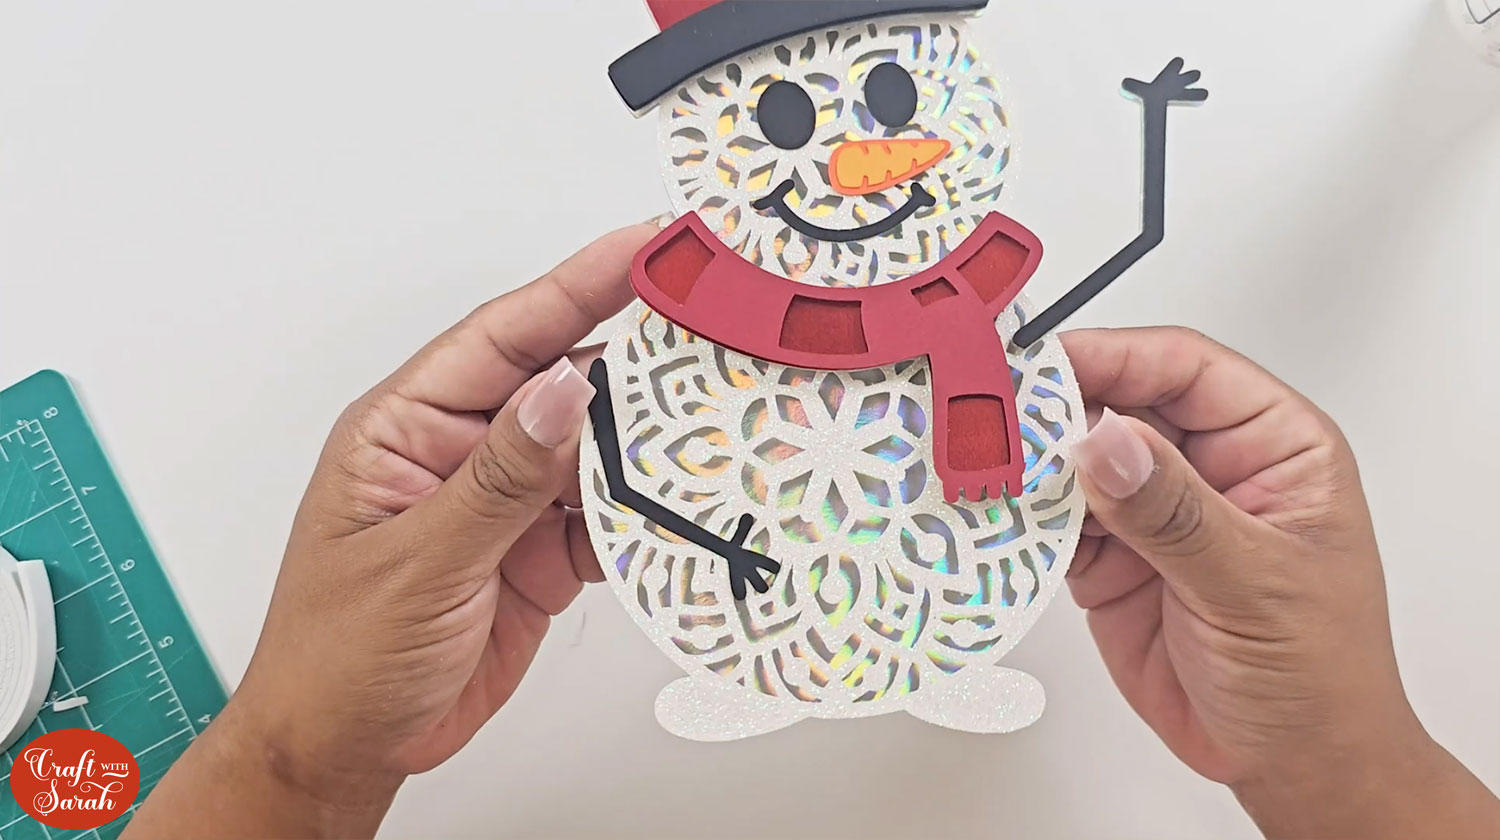
Begin by assembling the snowman first. Flip over the mandala layer and apply foam tape to the back. Stick the layer to the bottom holographic layer.
You may have to cut down your foam tape into different size pieces so that you can get some onto the intricate pieces.
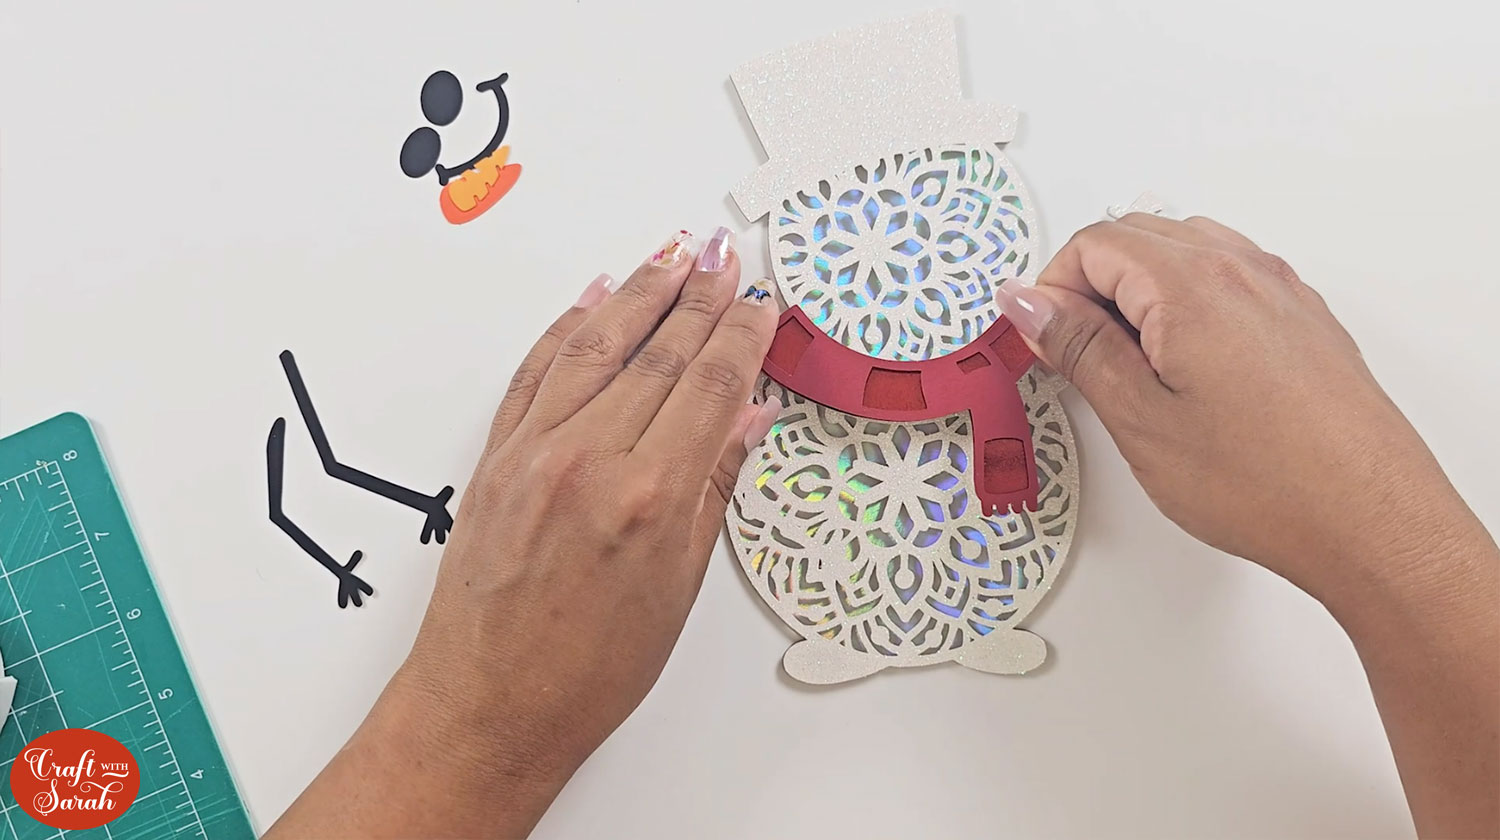
Stick the scarf pieces together using foam tape and foam the finished scarf onto the snowman.
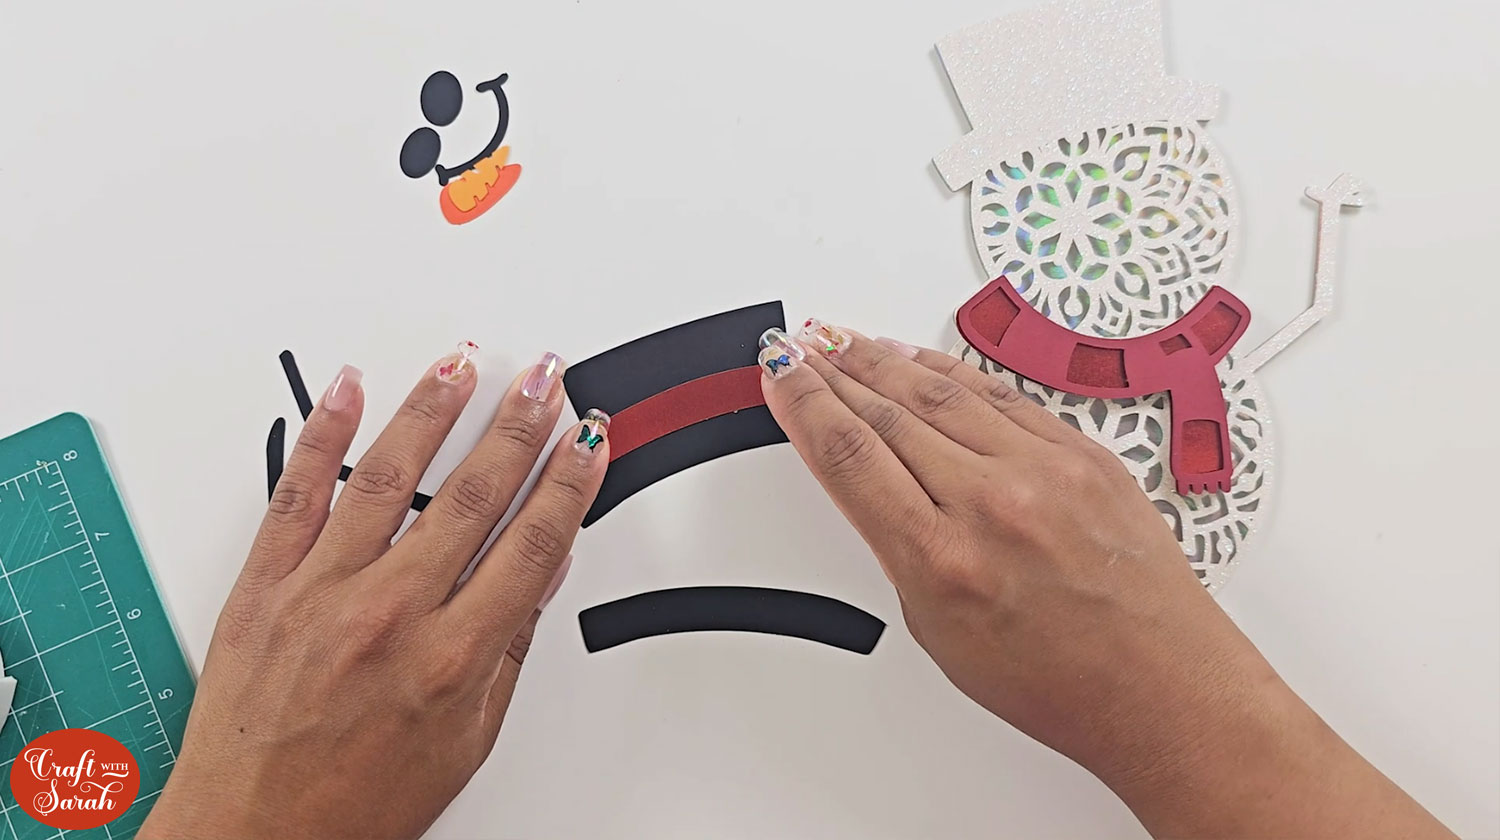
Use glue to stick the red ribbon layer to the hat and foam the bottom hat layer to the hat.
Apply more foam to the back of the hat and stick to the top of the snowman’s head.
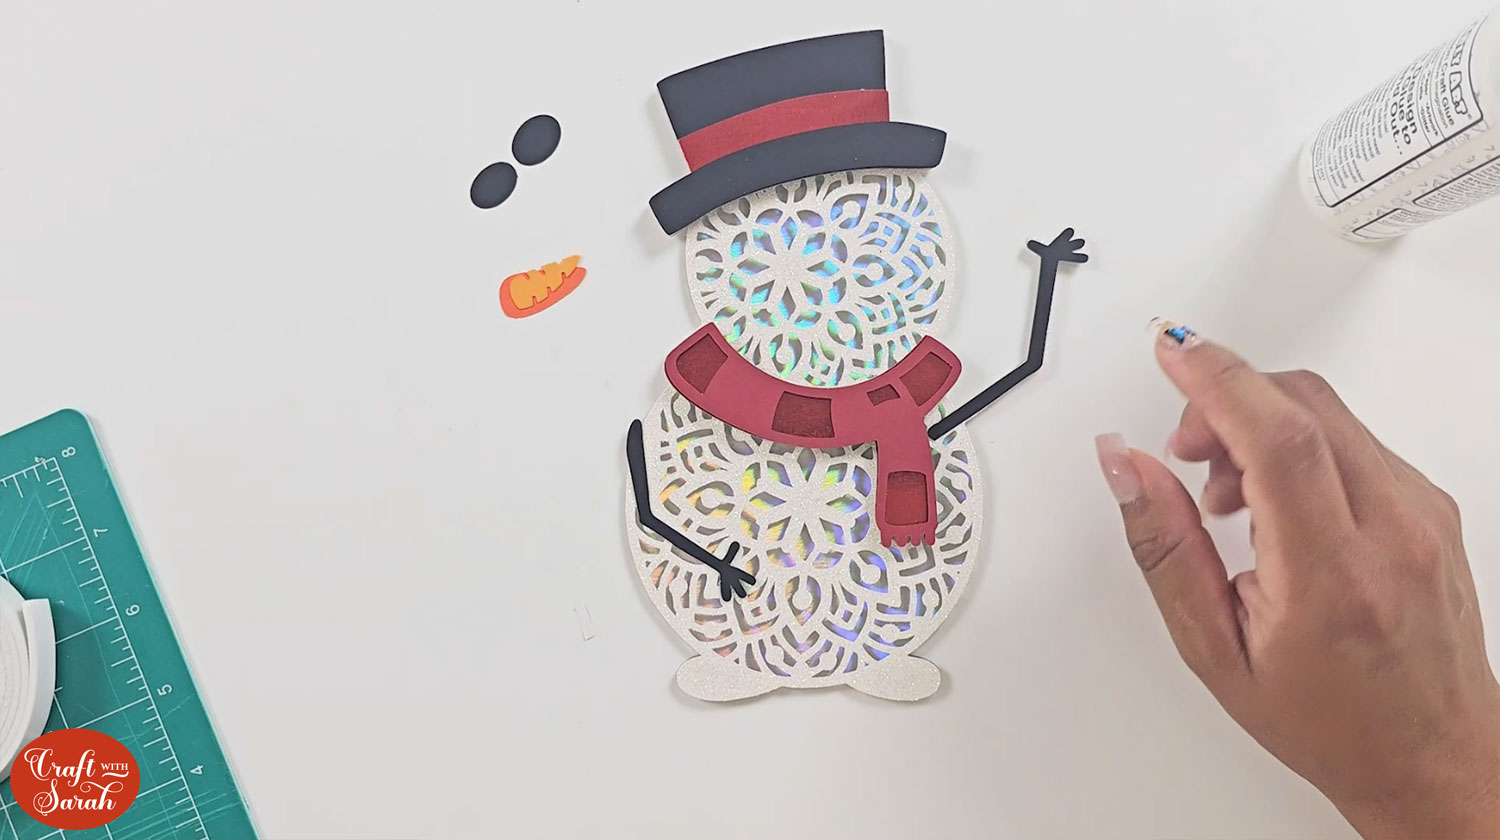
Use glue to stick the arms, face and carrot nose on. You may want to lay it out before sticking so you can decide how you want it to look.
Clean off the acetate with some soapy water and allow it to dry. This removes the static so that your confetti can move freely.
Apply glue to the back of the Christmas tree layer and stick it to the solid base piece.
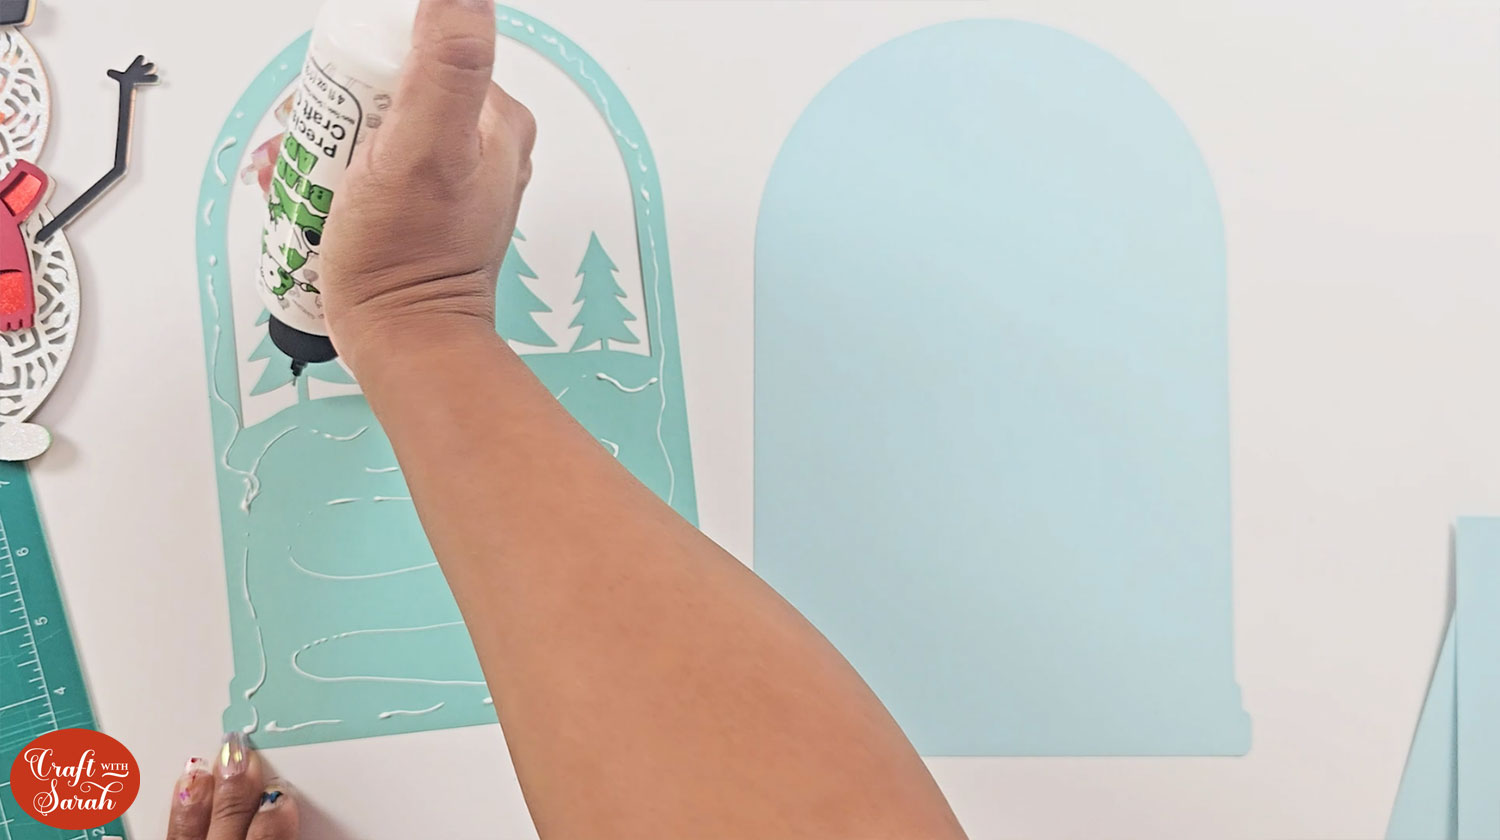
Take the frame layer and the acetate. Glue to the back of the frame layer and place the acetate on top.
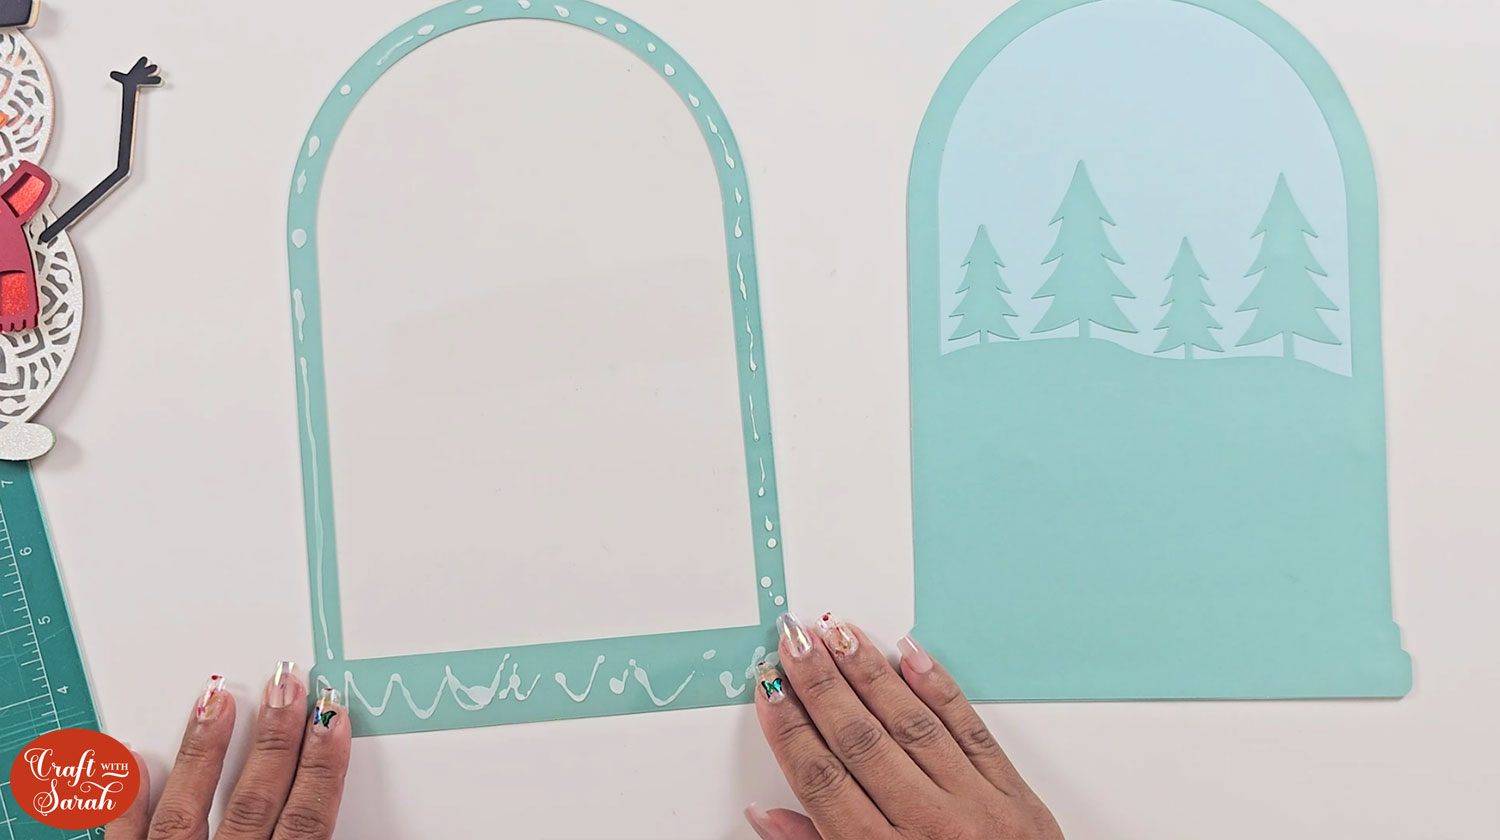
Place foam tape directly onto the acetate around the edge of the frame. If you take the backing off the tape it will help you to curve it round the edge of the frame.
Make sure there are no gaps that the confetti could escape through.
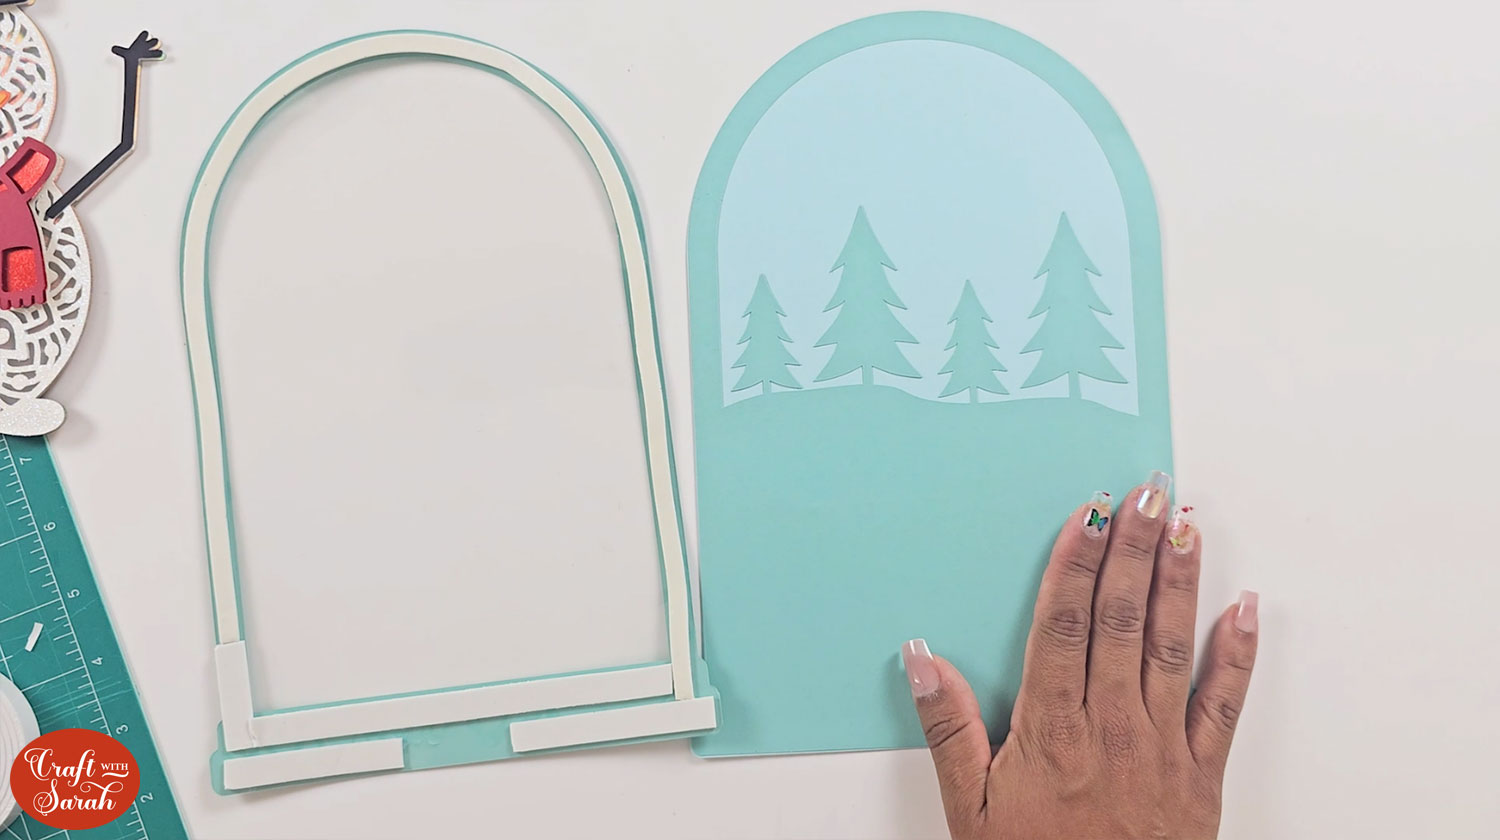
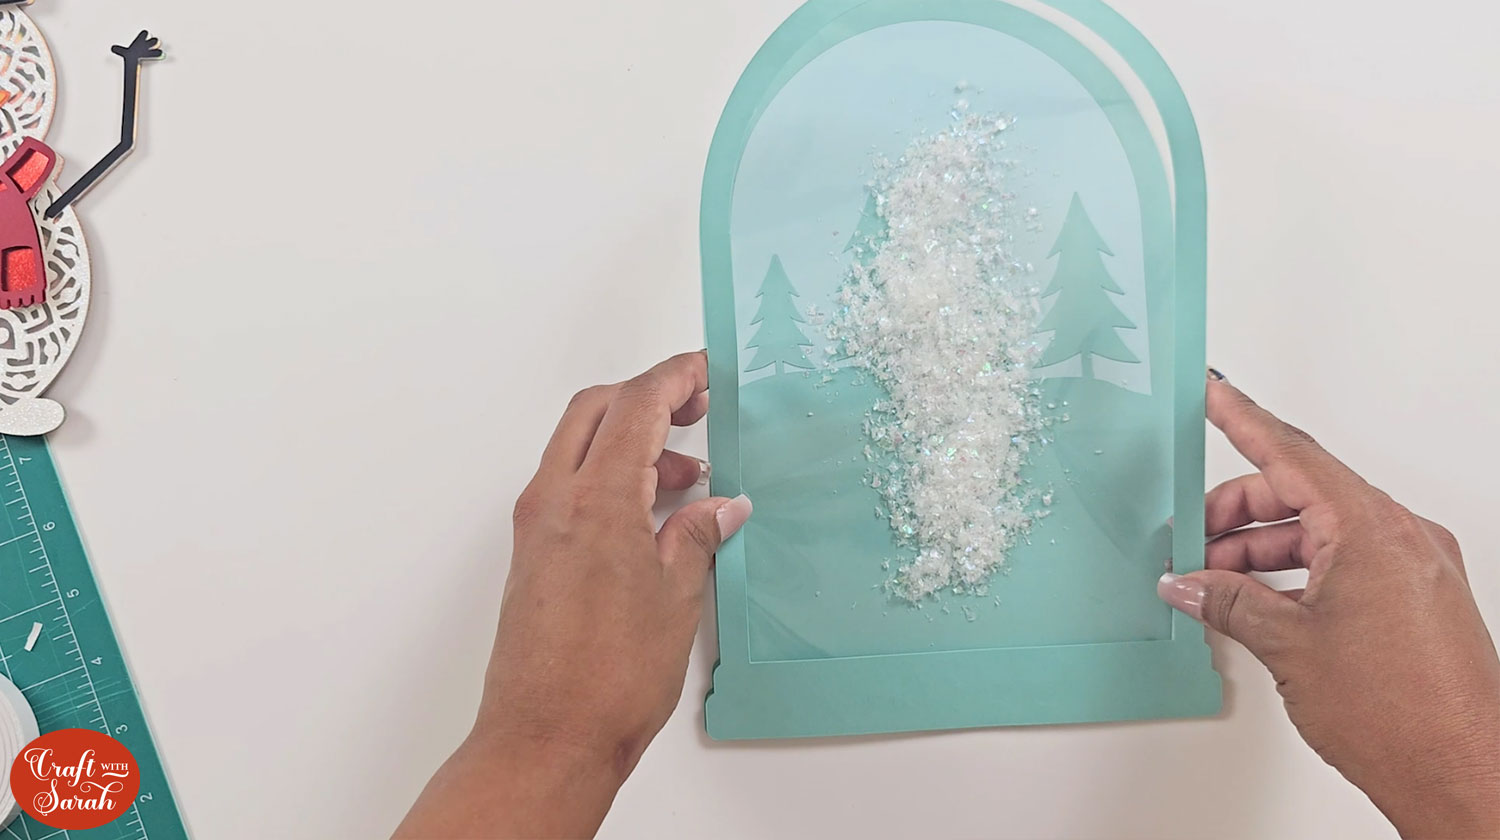
Place the confetti in the centre of the bottom layers with the trees and place the foamed acetate section on top to seal the confetti inside.
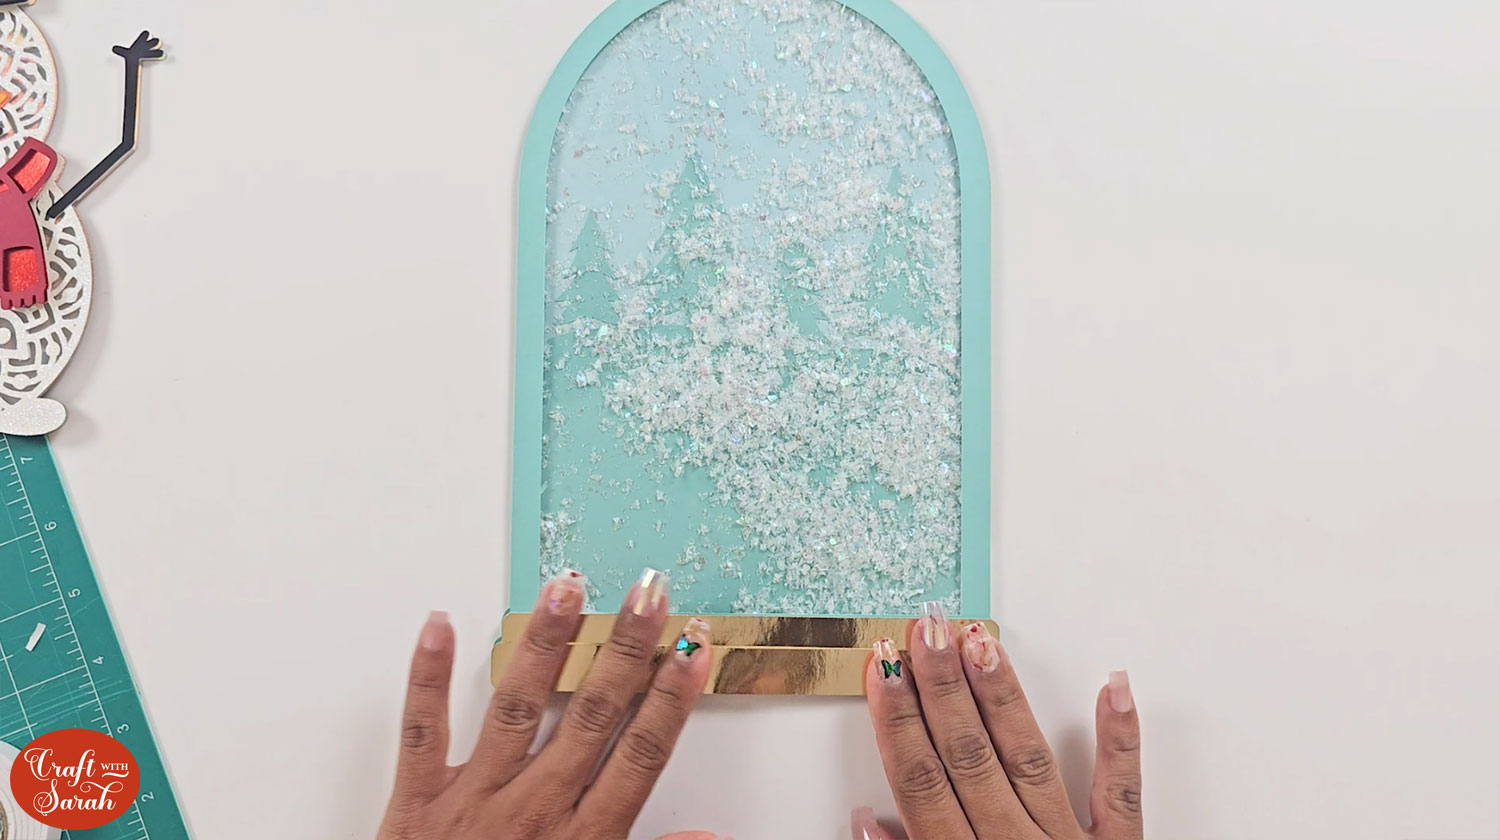
Stick the gold base strips to the bottom using foam tape. Do the same for the top layer which will give more depth to your shaker.
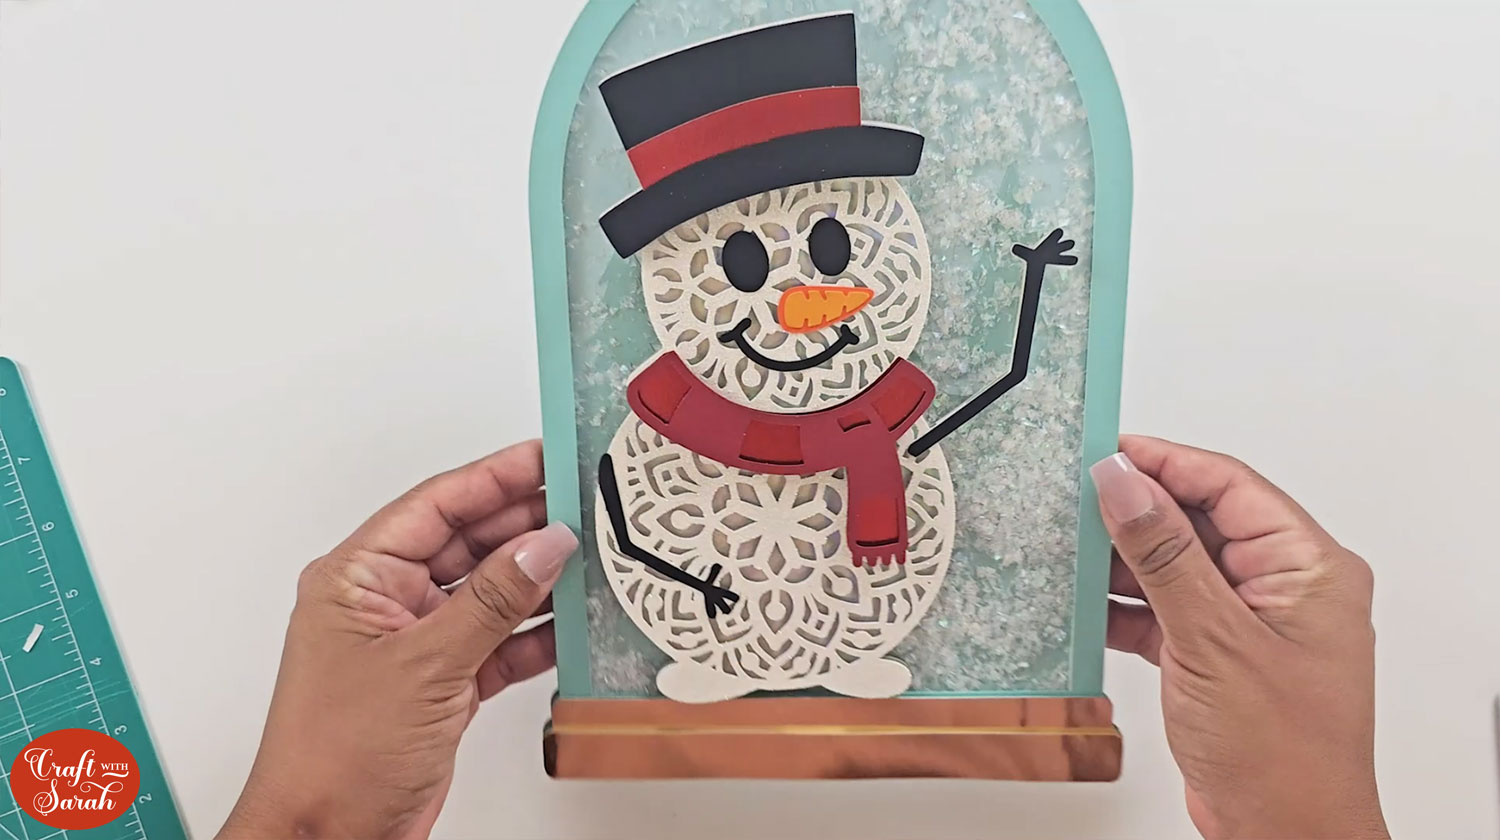
Add foam to the back of the snowman and place it onto the shaker.
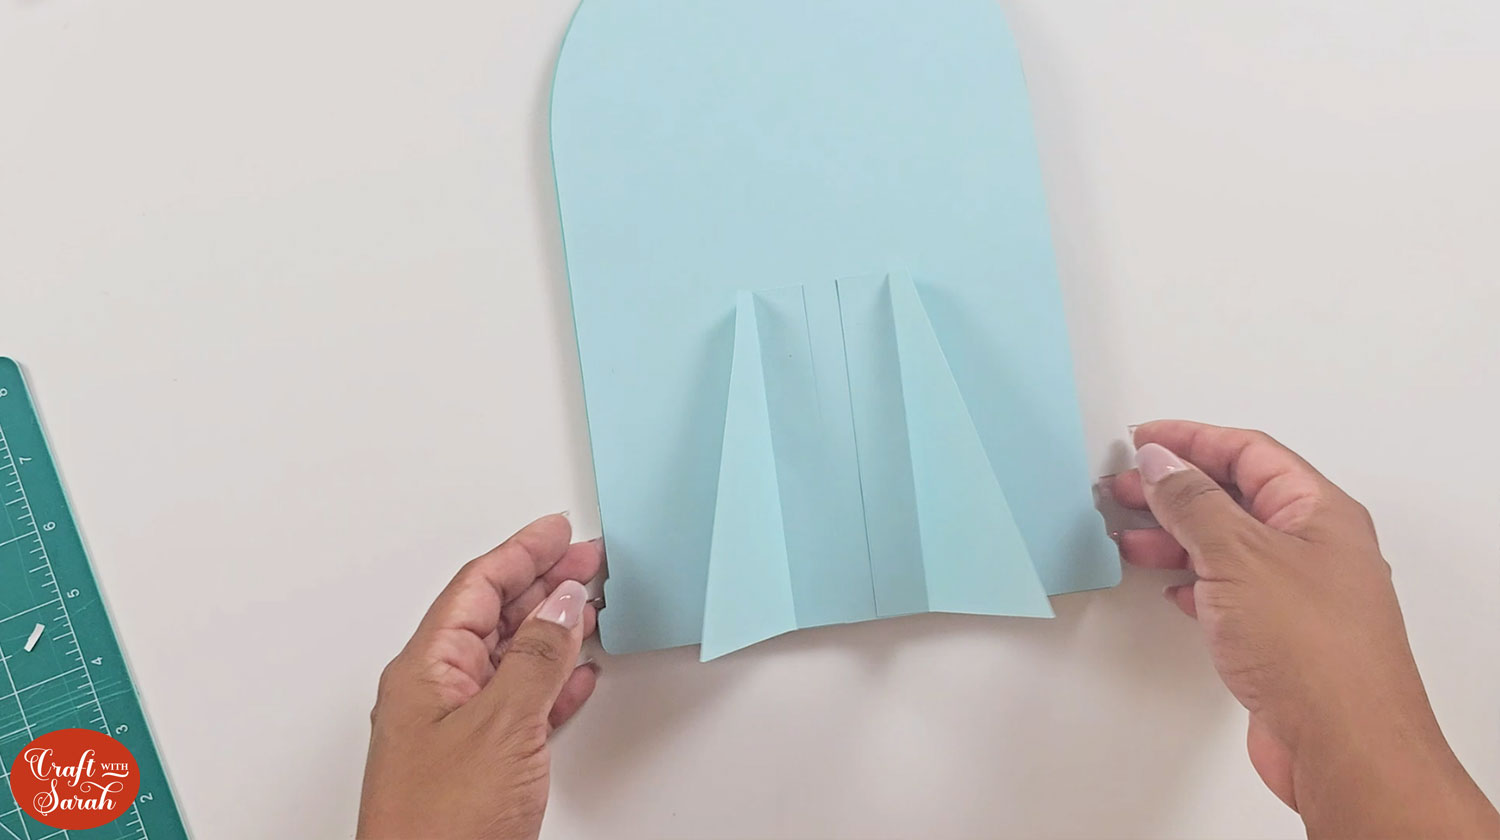
To make the stand, take the two triangular stand pieces and fold along the score lines.
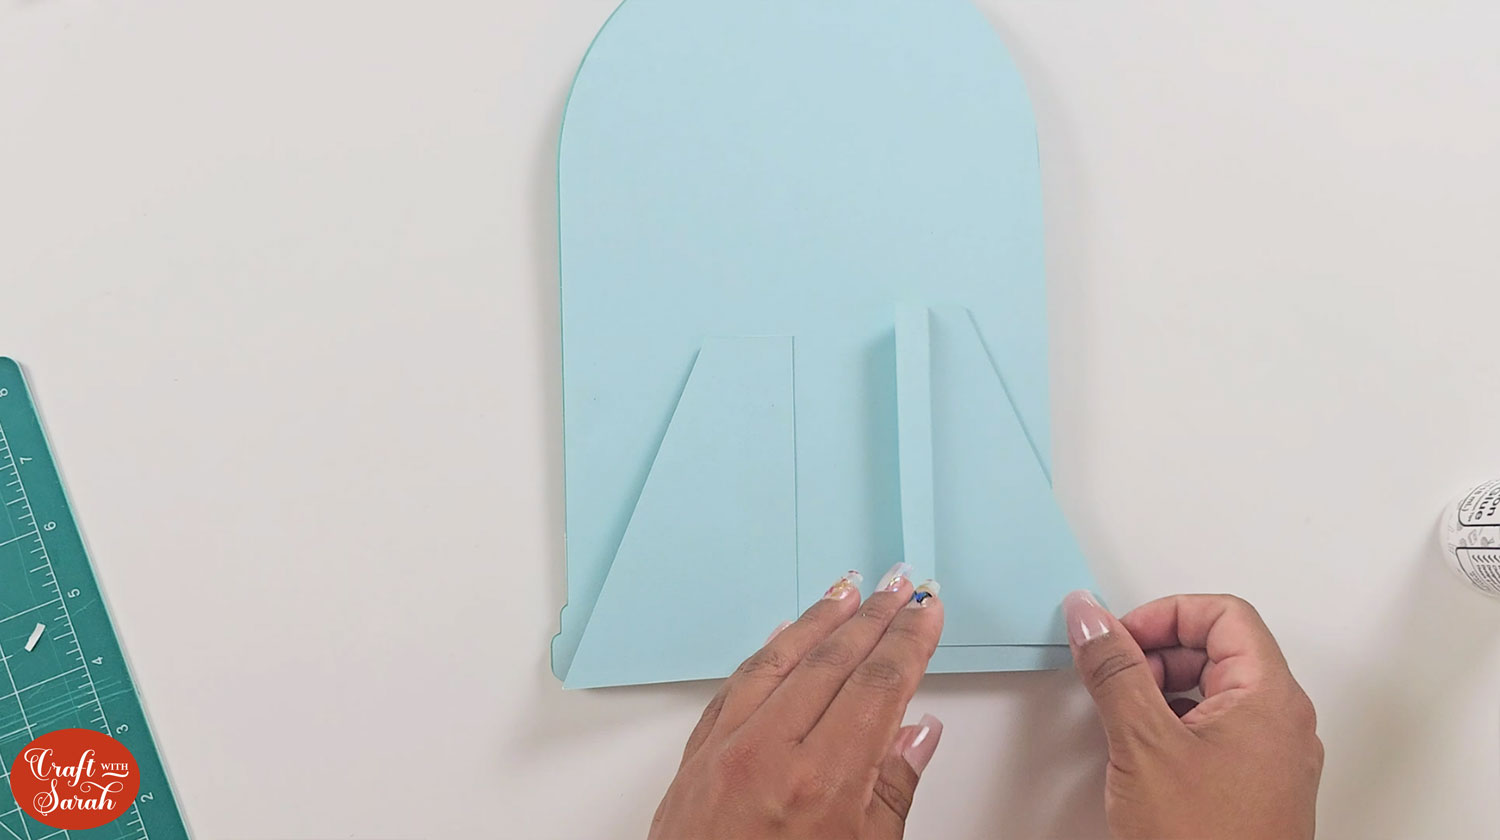
Glue the flaps to the back of the shaker so that the pointy ends are close to the edge of the shaker.
Now your mandala snowman shaker is finished and it can stand up too!
3D snowman papercraft project
How cute is this little snowman?
I love his cheeky smile and that he is waving “hello” to us!

It’s really beautiful how the holographic cardstock shimmers behind the sparkly mandala layer on the snowman; it gives a wonderfully snowy effect!
This will be a great addition to your Christmas decor this year!
Happy crafting,
Sarah x
