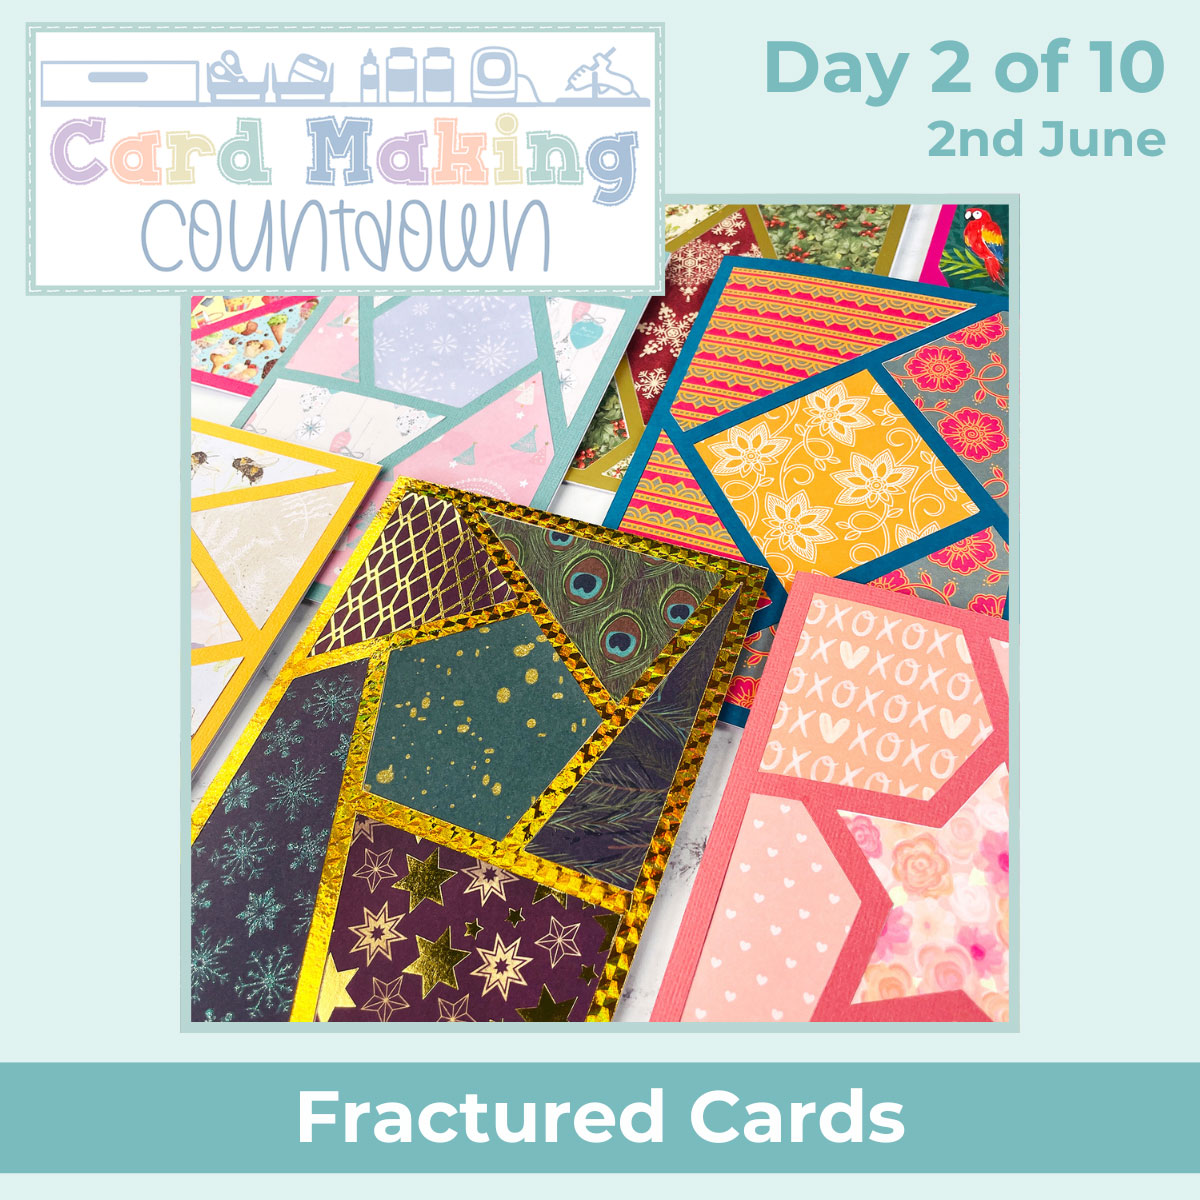
CMC 2024 Day 02 ✂️ Fractured Cards

It’s Day 02 of the 2024 Card Making Countdown!
Hello and welcome to Day 2 of the Card Making Countdown, where I’m showing you how to make 10 different types of card with your Cricut machine in 10 days.
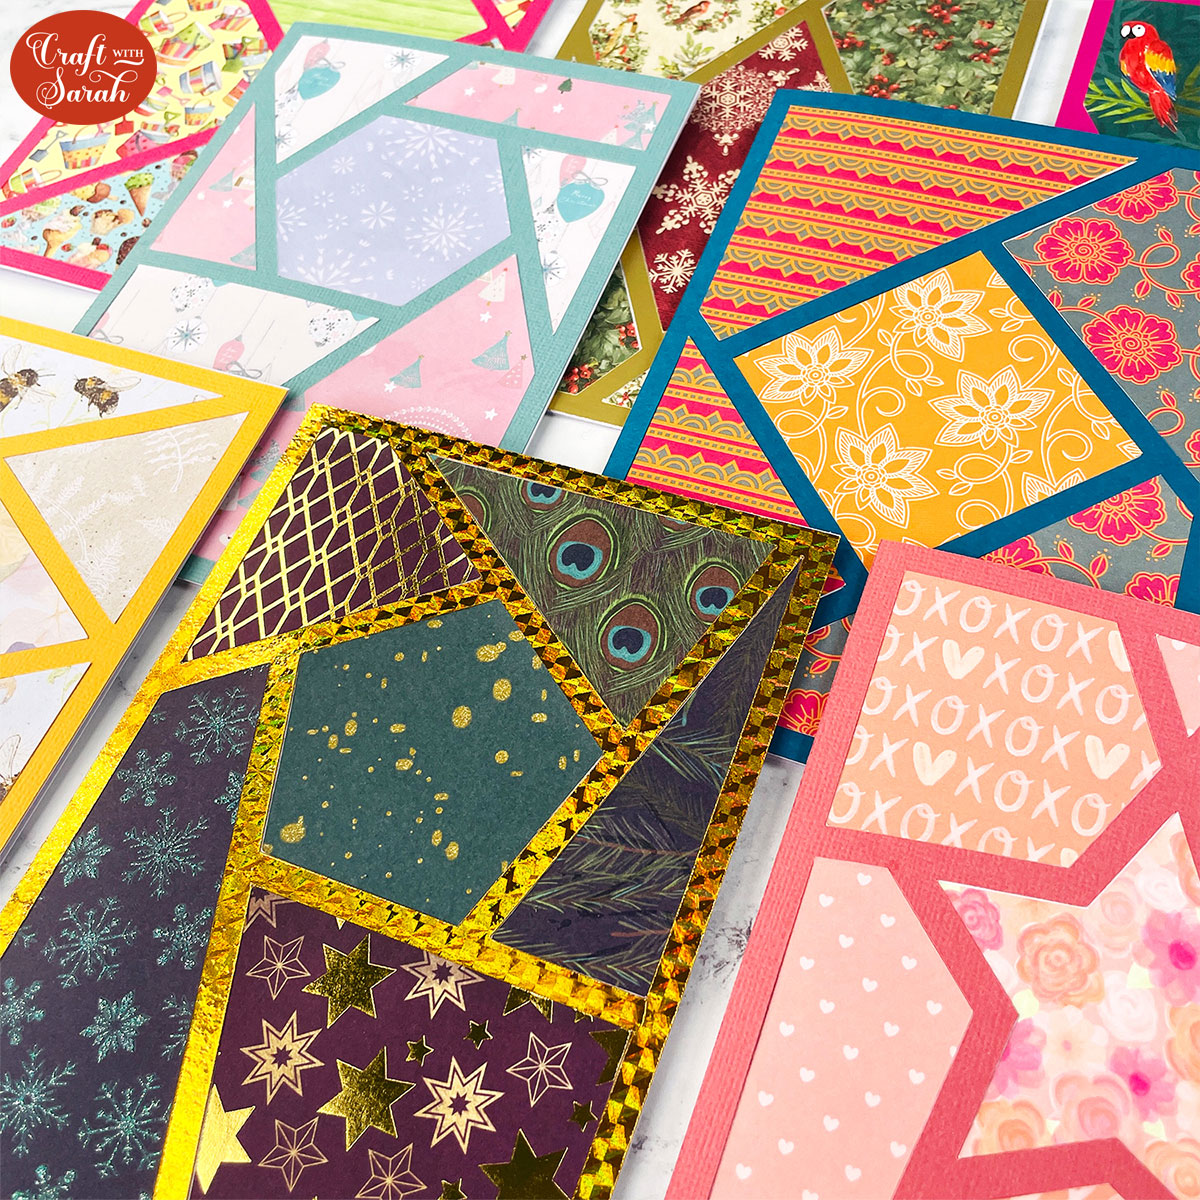
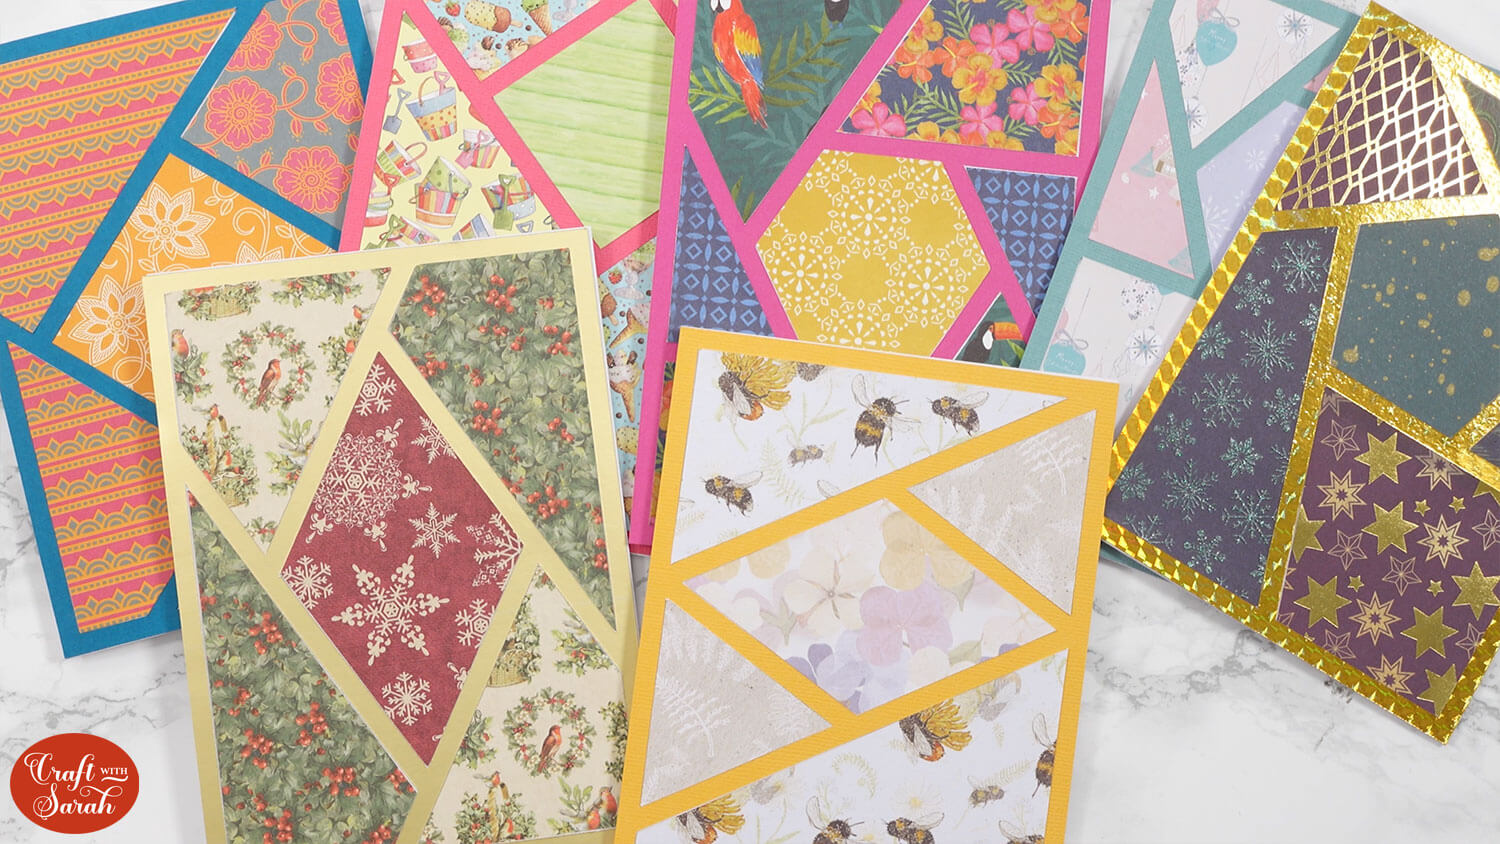
Today we’re making fractured cards! These are perfect for using up your card scraps and patterned paper stashes. Cut the paper into different shapes and build up the shapes like a jigsaw puzzle.
I’ve included seven different fractured card templates for you as part of today’s download. But remember, they’re only available for free for 24 hours, starting at 9am EDT on 2nd June 2024.
I hope you enjoy these fractured card ideas, as well as the segment on how to make your own custom fractured card templates in Cricut Design Space.
This Project was part of the Card Making Countdown 2024
Materials supply list
Here is a list of the materials that are required to make this project.
Please note that some of the links included in this article are affiliate links, which means that if you click through and make a purchase I may receive a commission (at no additional cost to you). You can read my full disclosure at the bottom of the page.
- Cricut machine
- Light blue Cricut cutting mat
- Cricut scoring wheel or scoring stylus (optional)
- Cardstock in a range of colours
- Patterned paper (several different designs)
- Glue or double-side sticky tape (I like Bearly Art Glue and Collall brands of glue)
- Card toppers or embellishments (optional)
This project is suitable for the following types of Cricut machine: Explore Air 2, Explore Air 3, Maker, Maker 3, Joy Xtra and Joy.
Foundation learning
If you’re new to crafting with your Cricut, you may find the below links helpful.
They teach some of the skills mentioned throughout this tutorial.
- How to upload SVG files into Design Space
- How to score with a Cricut (even without scoring tools)
- Print then cut tutorial
- Design Space tools (Combine, Attach, Slice, Weld, Flatten, etc.)
- Pattern fill tutorial (for making backgrounds & cutting images to a specific shape/size)
- Free envelope SVGs that can be sized to fit any card
- How to write inside cards with Cricut pens
- How to cut layered designs at a small size
- Design Space tips & tricks
- Cricut pens tutorial
Video tutorial for fractured cards
Watch the video below to see how to make fractured cards with a Cricut machine.
The first part of the video shows how to use the fractured card templates that are included as part of today’s project.
The second part of the video shows how to design your OWN fractured cards from scratch within Cricut Design Space.
If you prefer to read rather than watch, keep scrolling!
PART ONE: Cricut fractured cards using pre-made templates
Here’s how to make your very own fractured cards with a Cricut machine, using the seven templates from today’s Countdown project.
Scroll further down this page for how to design your own fractured cards.
Step 1) Download the file(s) & upload to Design Space
Download the files using the box below.
Purchase the File(s)
This cut file is available as part of the Instant Access Bundle.
Or, purchase this design individually here
Before you upload the files to Design Space, you need to unzip the download folder that they come in.
- How to unzip a folder on Windows computer
- How to unzip a folder on a Mac
- How to unzip a folder on an iPad/iPhone
- How to unzip a folder on an Android device
The download folder contains seven different fractured card templates, with a range of designs and shapes.
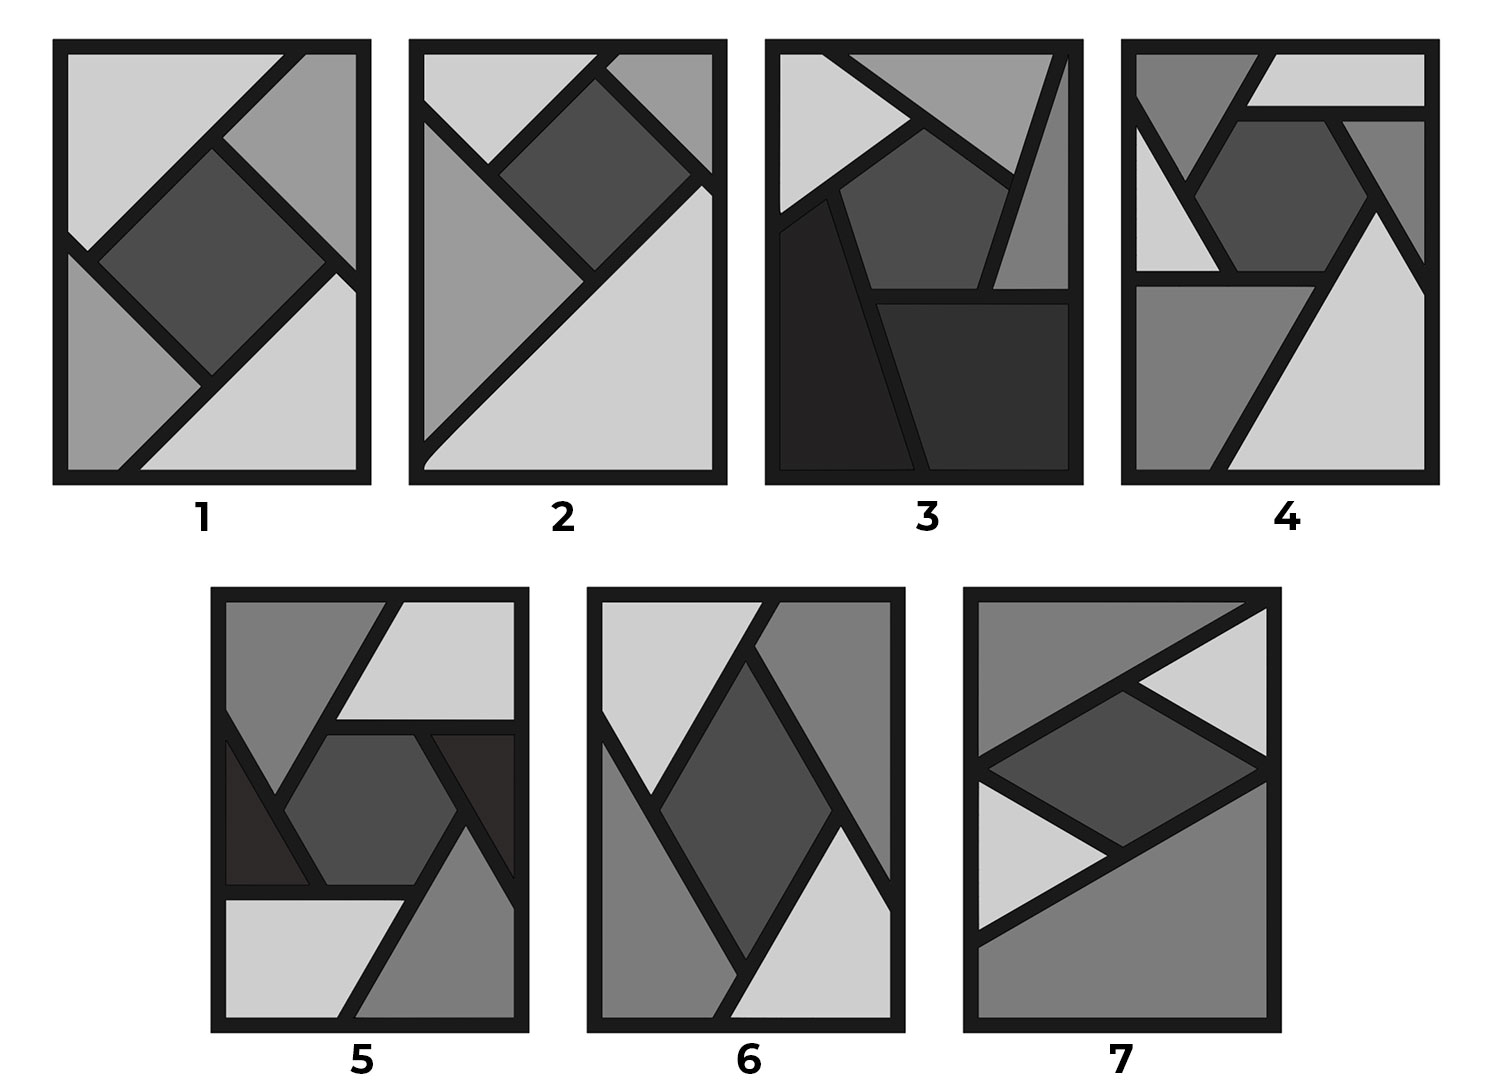
Choose your preferred template and upload the SVG file into Cricut Design Space.
TIP: Make sure you upload the files which start svg- in the filename. Not sure how? Here’s how to upload SVG files into Cricut Design Space.
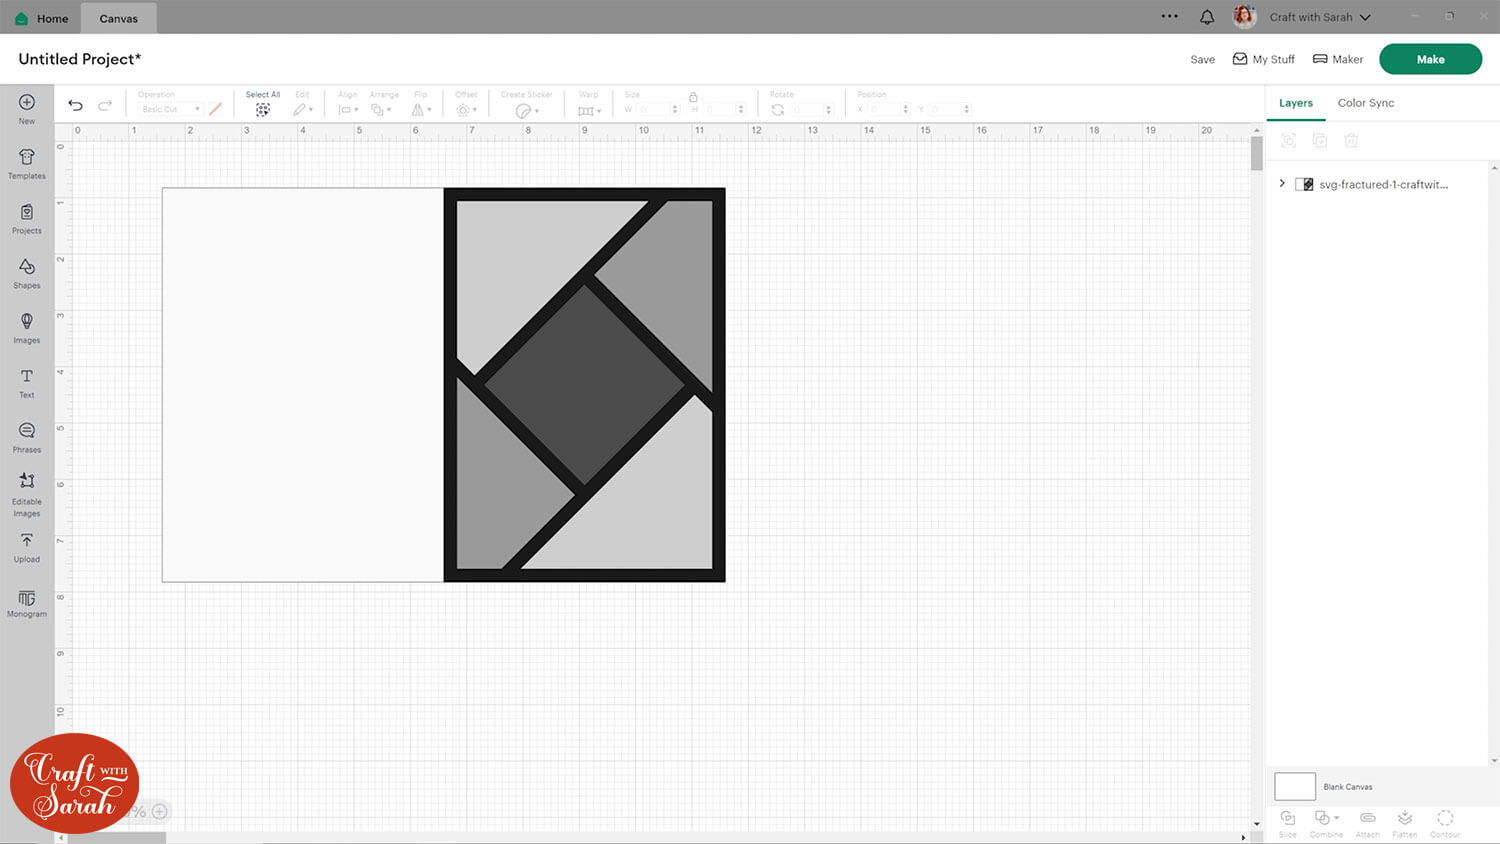
I’m using Template 1 for this tutorial, but the steps are the same for all of them.
Step 2) Add a score line (optional)
If you’re using the Cricut Joy (blue machine) then you’ll need to delete the 10×7 inch base layer of the cards and resize the design down to 4.5 inches wide so that you can cut it on your machine. Hand-cut your base card instead.
For any of the other machines, you can add a score line to make the card easier to fold.
Don’t have a scoring tool? Here’s how to do Cricut scoring without one!
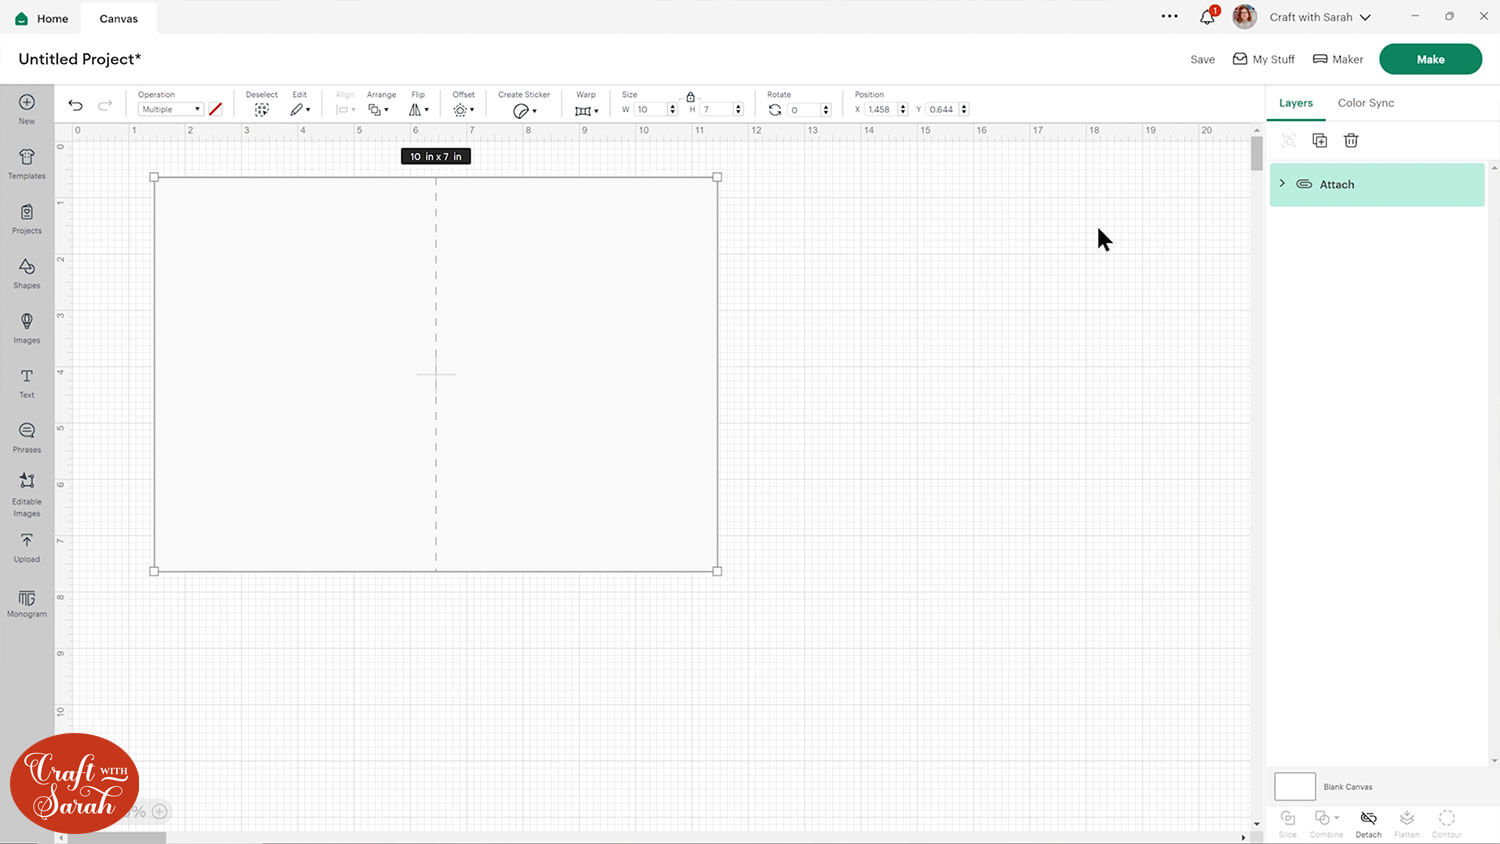
Click the design and separate the layers by pressing the “Ungroup” button at the top of the layers panel.
Go into “Shapes” and select a score line. Make it 7 inches tall.
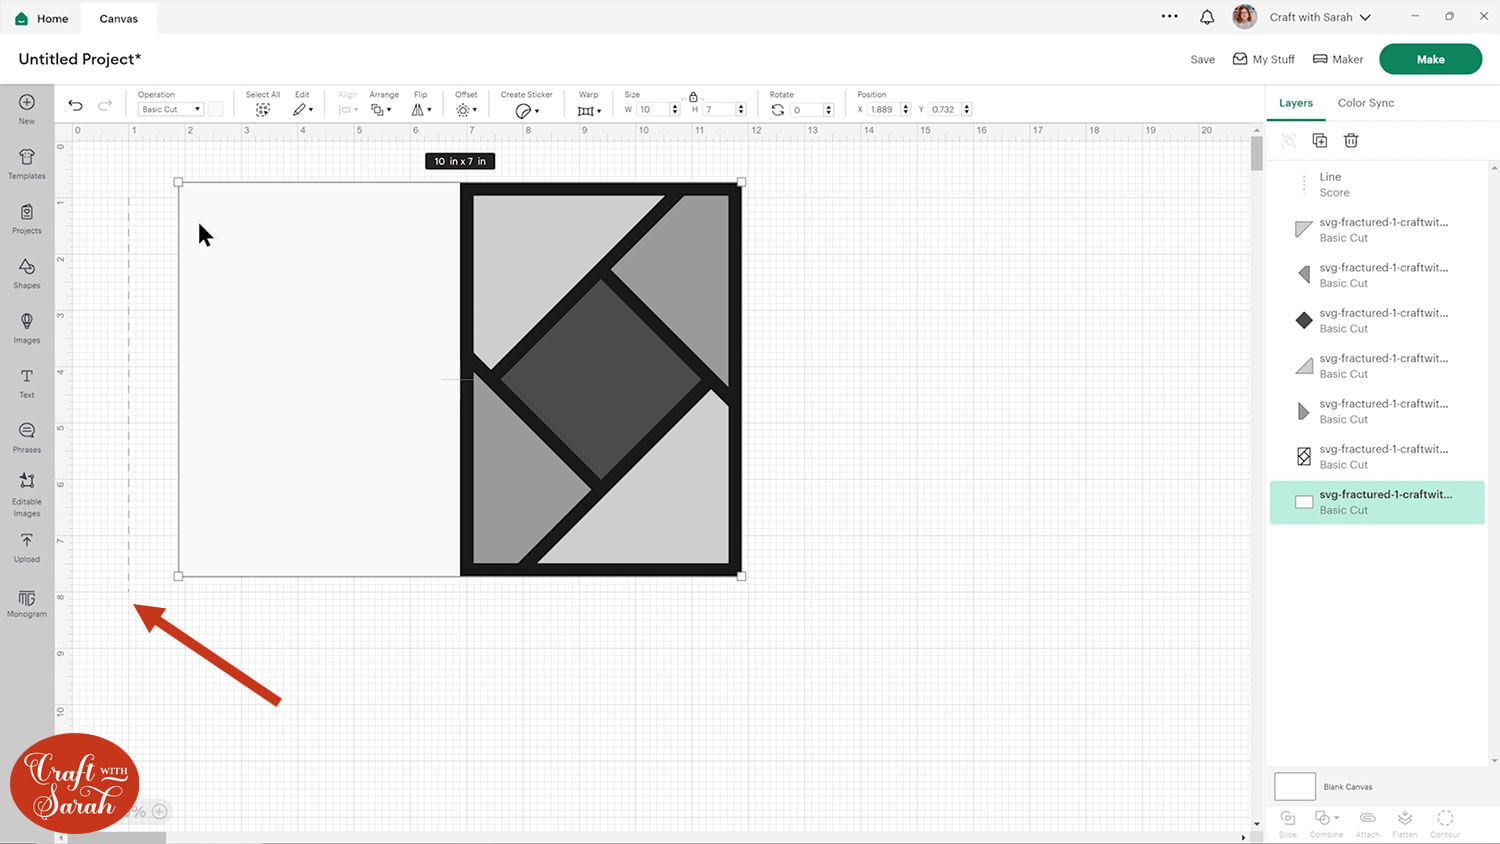
Select the card base layer and the score line and press Align > Align Center to put the score line exactly in the middle.
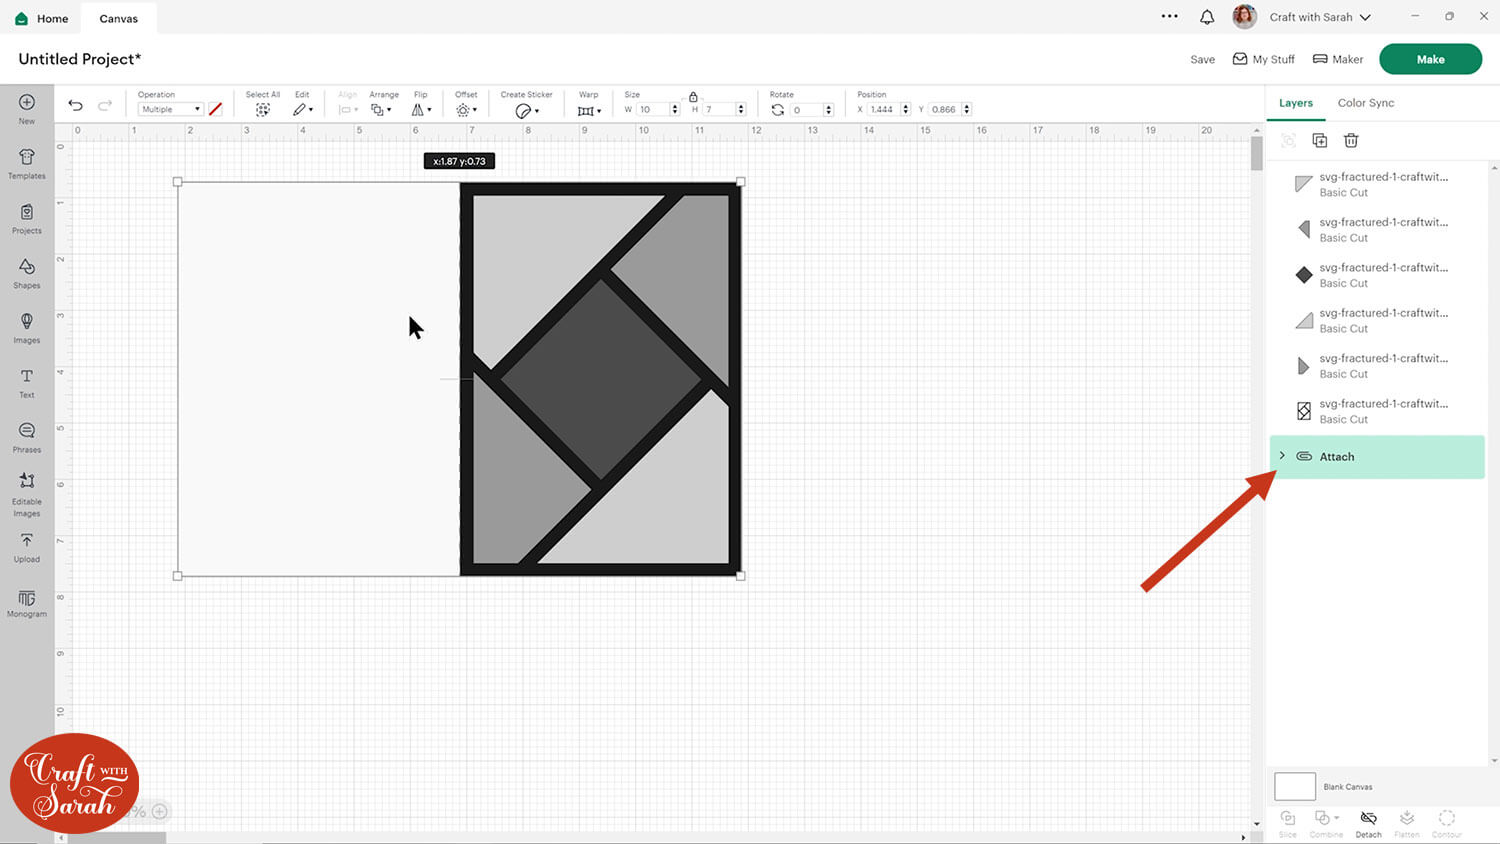
With both layers still selected, click the “Attach” button at the bottom of the layers panel.
Attaching the layers will move them to the top of the layers panel. Click the base card and press Arrange > Send to Back to move it back to the bottom.
Step 3) Choose your papers & cut the project
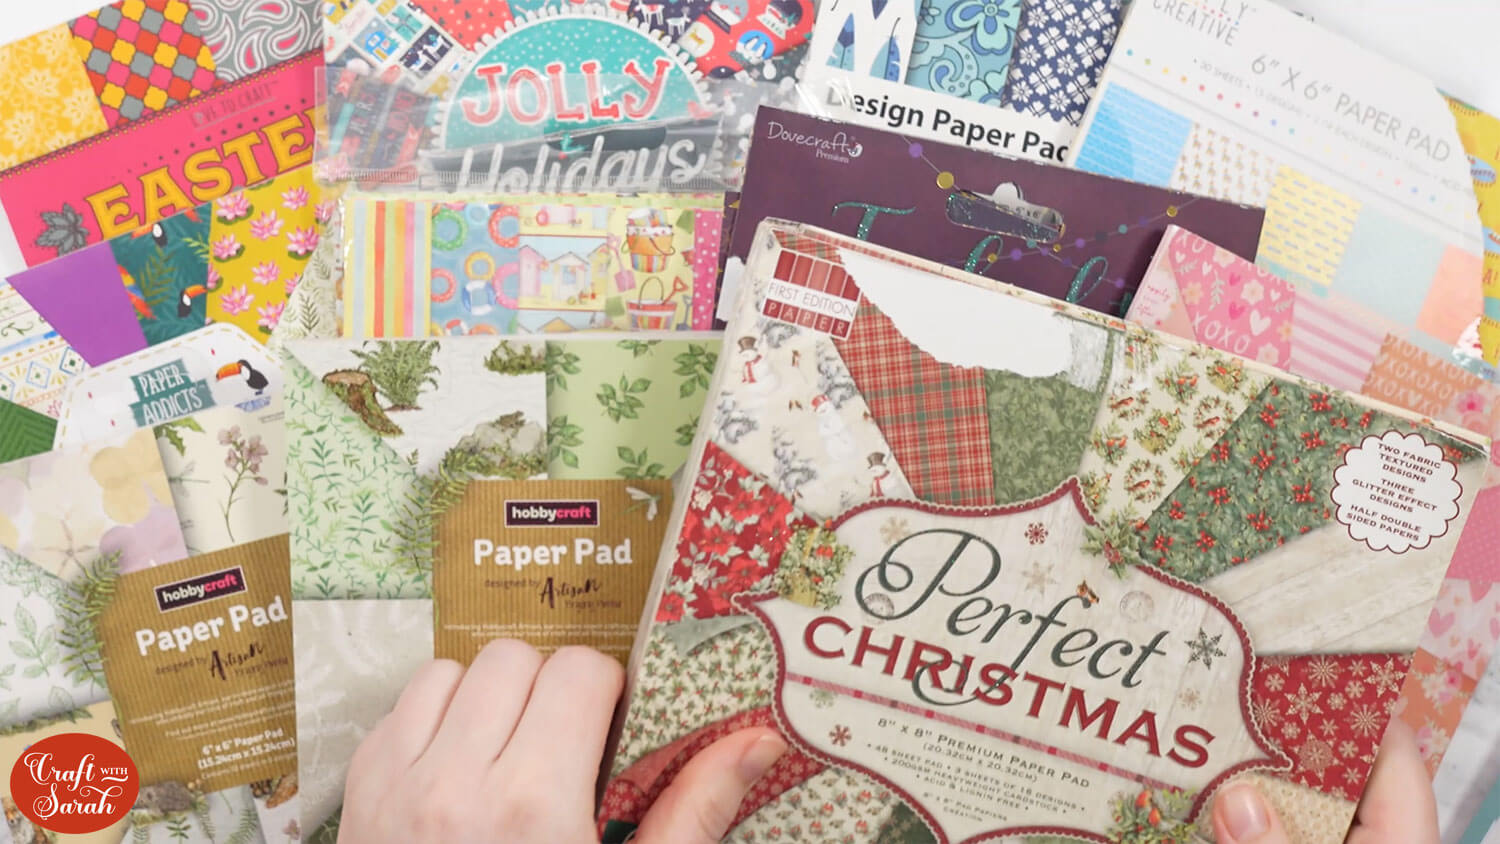
I prefer to choose my papers at this stage, so I can place them next to each other on my table and decide which one I want to appear in which space on the card.
I have a very bad habit of buying pretty paper packs and then never using them… so these cards are great for helping clear some of the older papers!
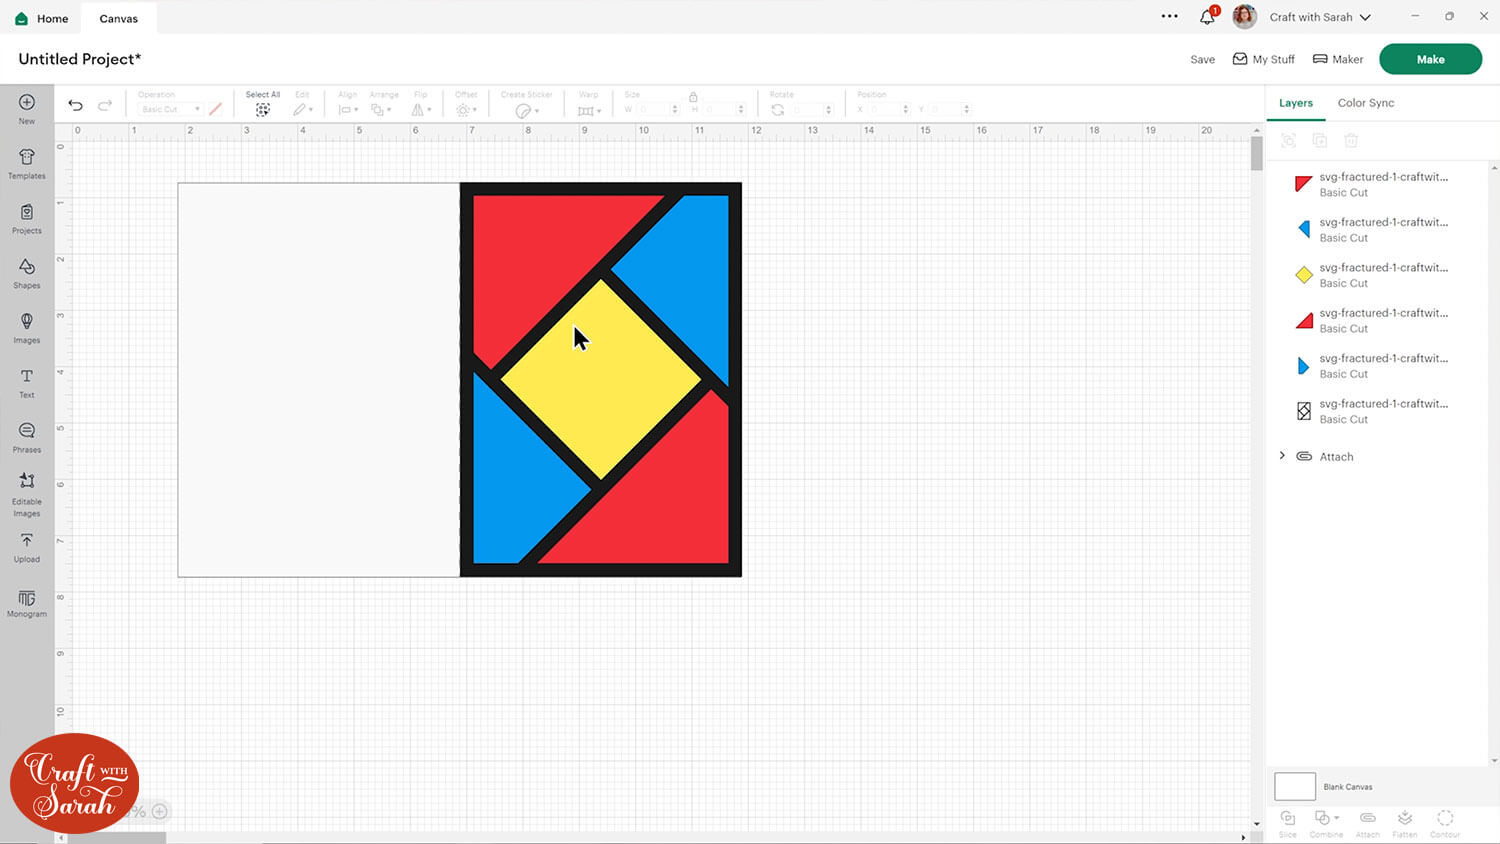
To make it easier to cut the shapes from the correct paper, re-colour the shapes to very different colours.
I write down the new colours on a piece of paper and add a description of the paper next to it (e.g. red = ballerina paper, green = dinosaur paper) to help me remember.
The base card will be completely covered up, so that can be any colour you like. I tend to stick to white so that it’s easier to write inside.
When you’re happy with your paper selection, press “Make” and follow the steps to get everything cut with your Cricut.
TIP: Cut the “frame” layer from a dark or bold solid-colour of card so that it will stand out against the patterned paper.
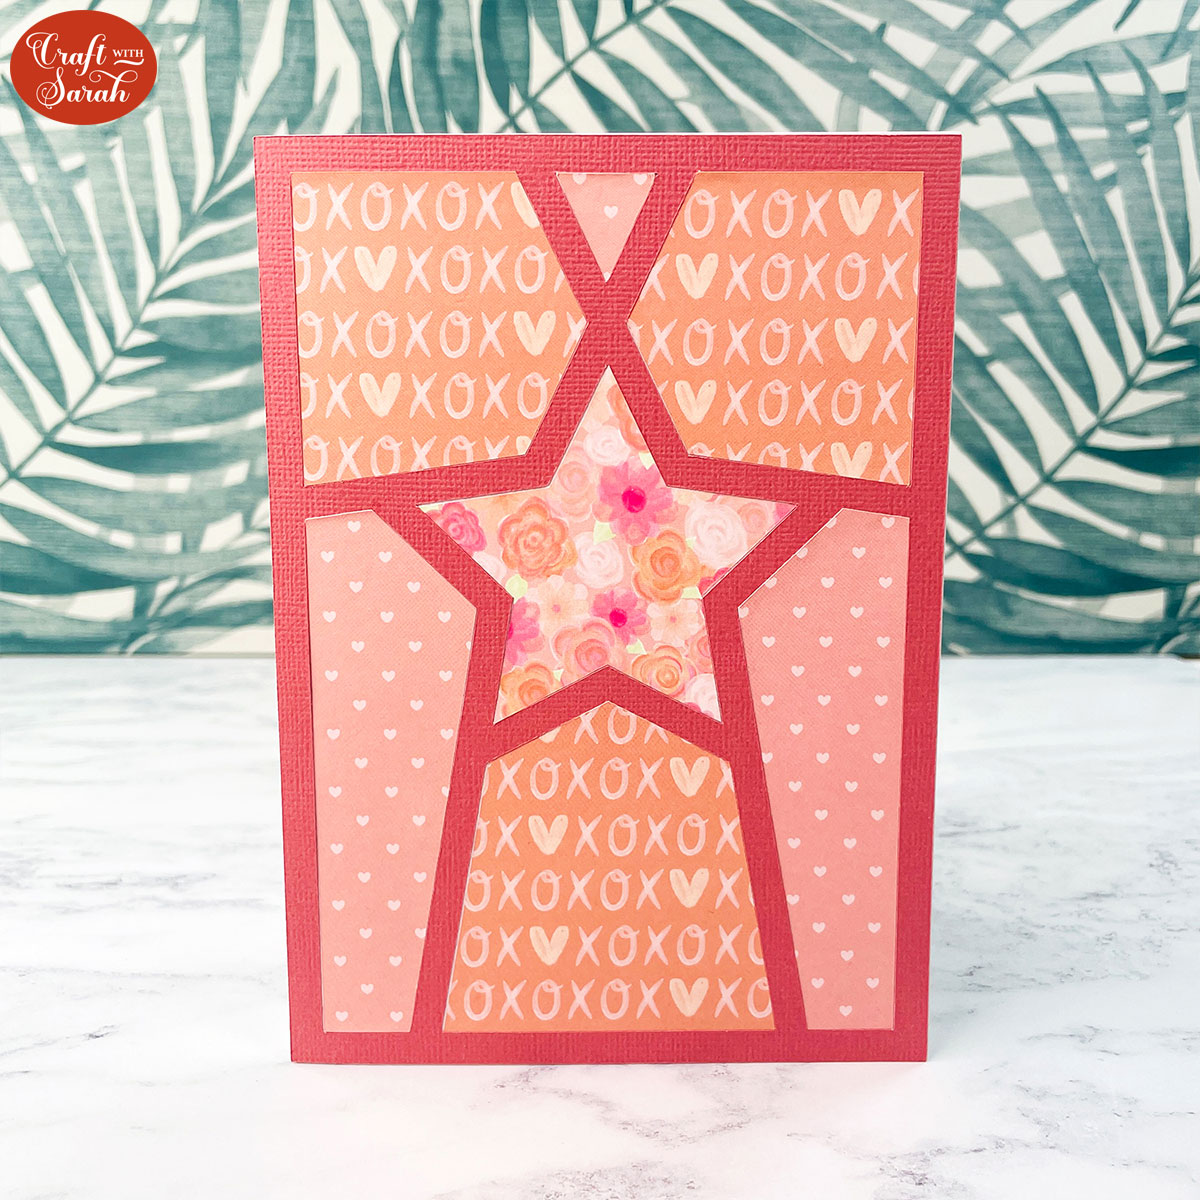
Step 4) Stick the fractured card together
Glue the frame to the front of the card.
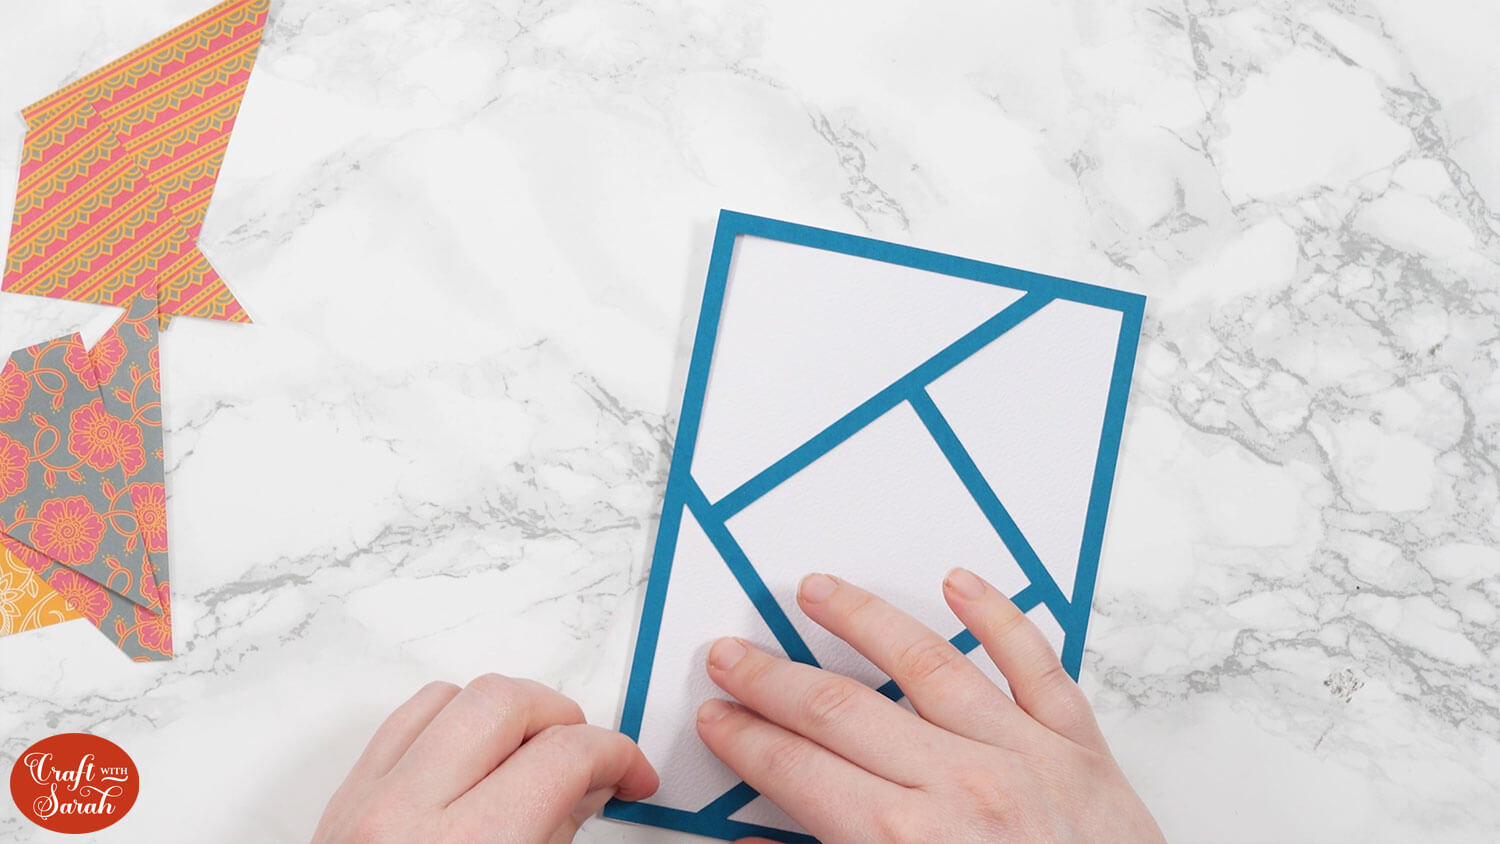
Roughly place the shapes inside to check you’re happy with the colours before you stick it down.
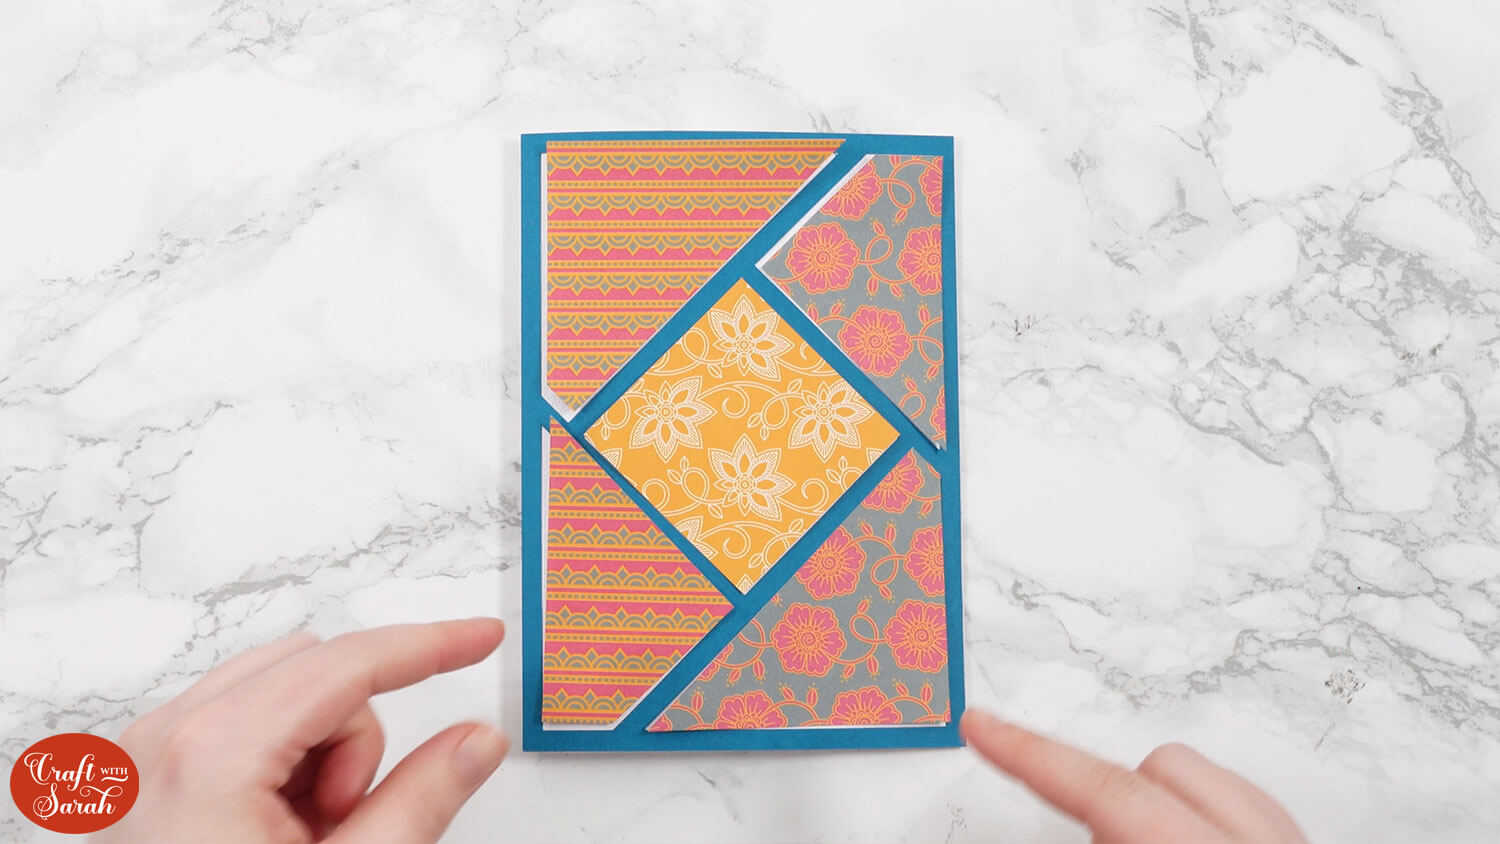
Glue the shapes inside the frame. They will perfectly fit inside, like pieces of a jigsaw puzzle.
Step 5) Decorate the card
This is where you can get creative and add decorations, embellishments or toppers to “finish” off the card design.
I left mine blank for now and will add extra details to them when I am ready to give them to someone so that I can choose decorations that fit the particular person.
PART TWO: How to design custom fractured card designs
This next section is on how to design your own fractured cards, completely from beginning to end, in Cricut Design Space.
Step 1) Create the base card
For 5×7 inch cards you can re-use the base card and score line from one of the pre-made cards.
Or, make a new one if you’d prefer the card to be in a different size.
Step 2) Create the frame outline
Insert a square and change the size to the same as your card front (mine is 5×7 inches).
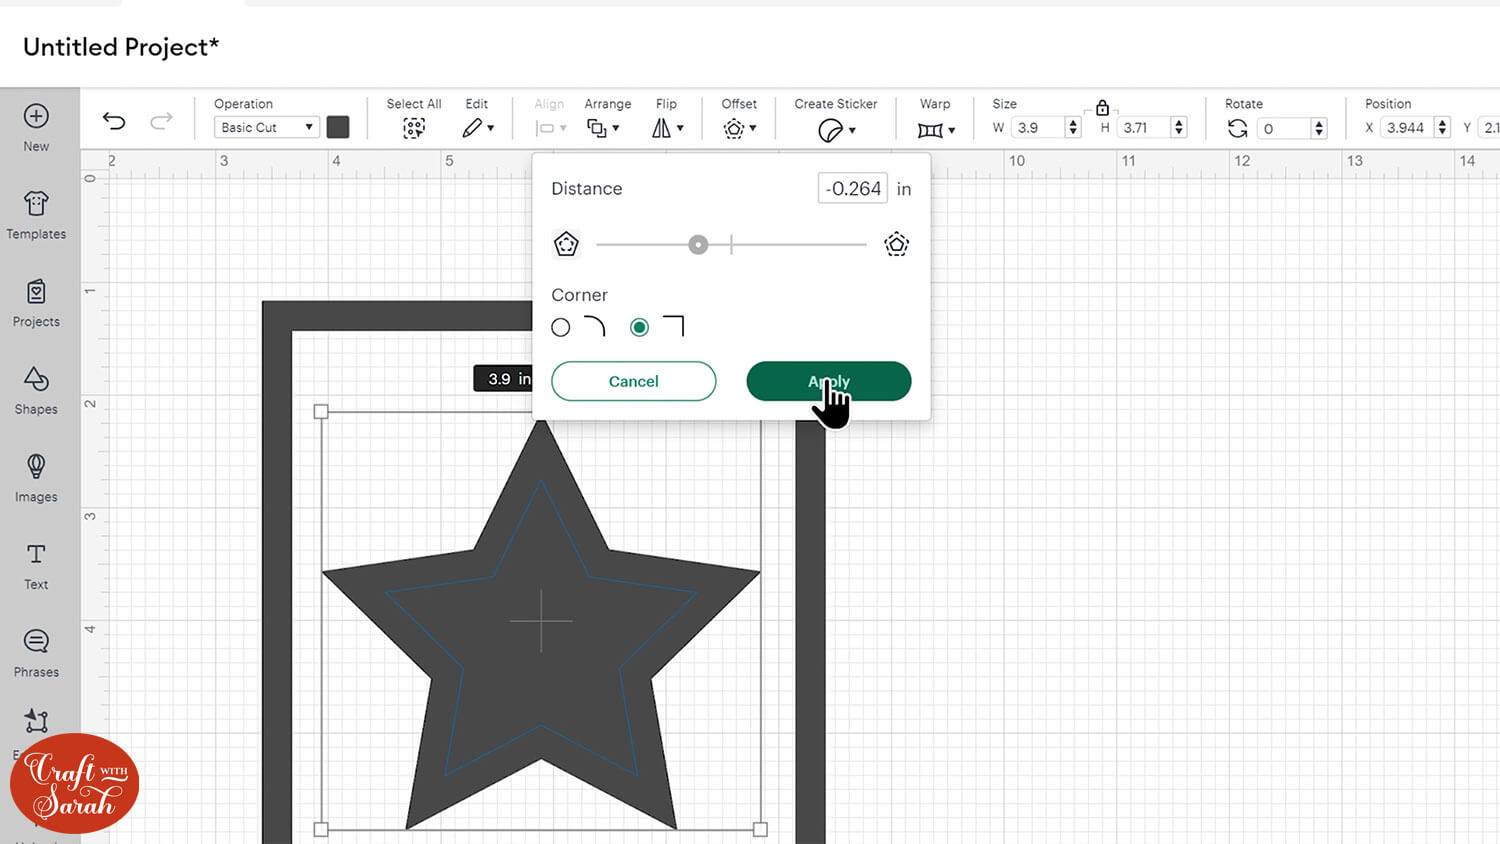
Click the rectangle, then go into “Offset” and give it a negative offset number.
Choose the “pointed” corner option.
Make sure it’s thick enough that it will be easy to cut from cardstock.
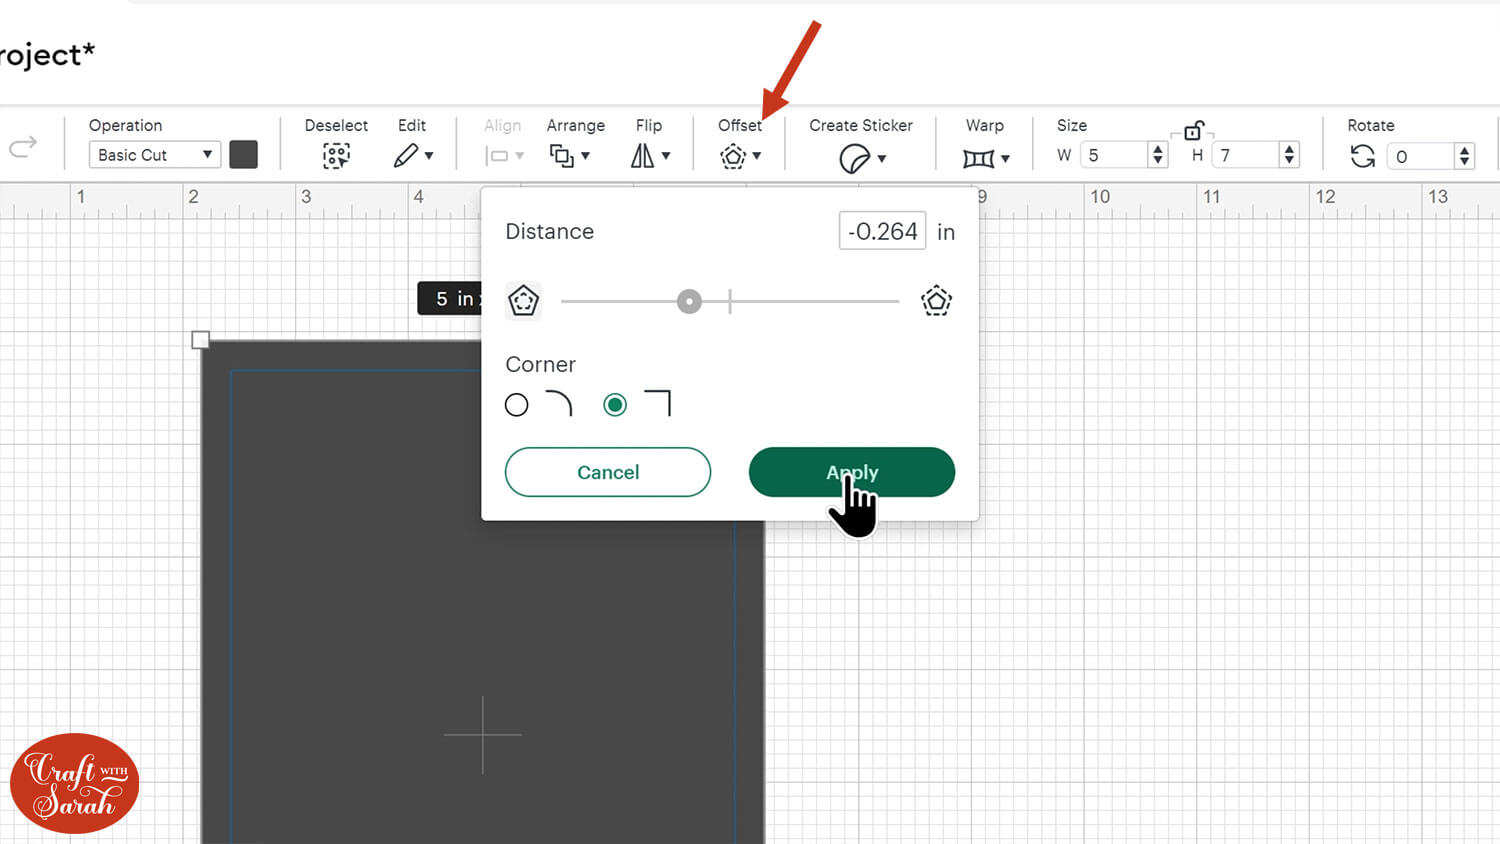
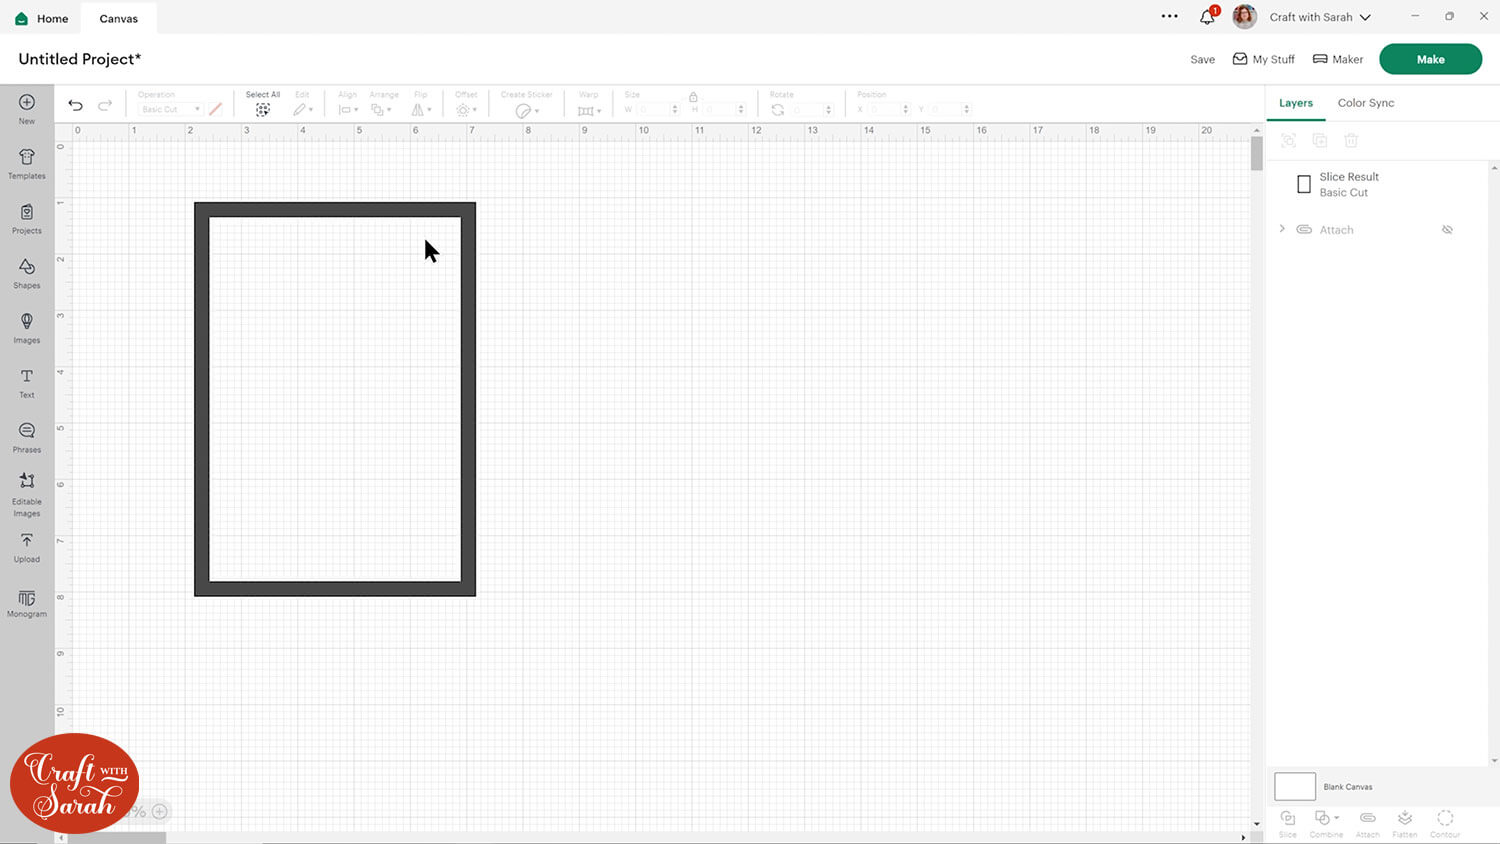
Select the rectangle and the offset layer and press “Slice”.
That will cut the smaller rectangle out of the larger one.
Delete the middles so that you are left with just the frame.
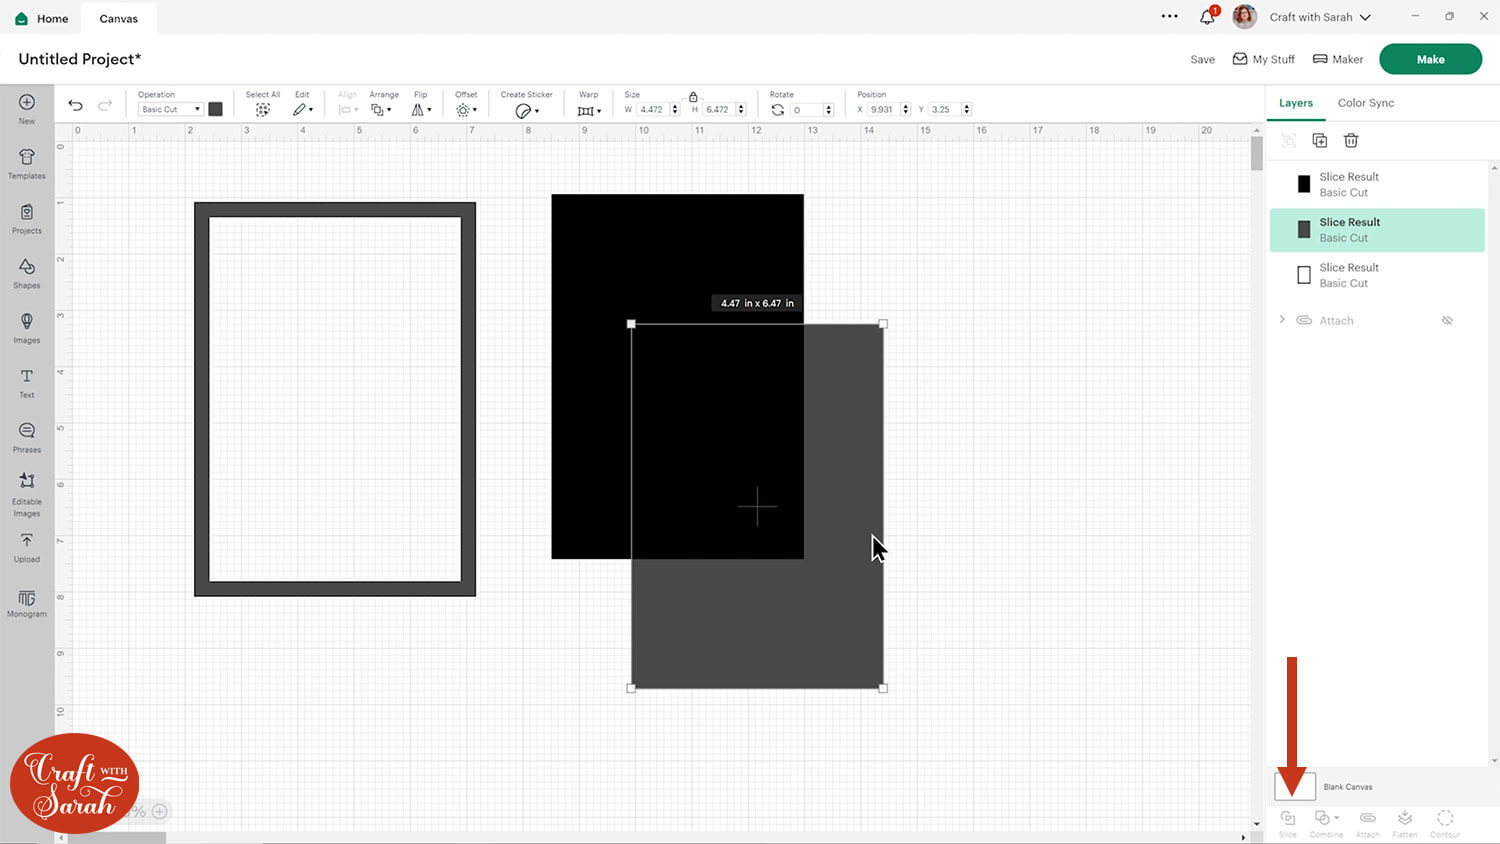
Step 3) Create the card’s focal point
Choose a shape or image to be the focal point of your card. This is what will be used to extend out all the edges to create the “segments” for the patterned paper.
Give your shape a negative offset that’s about the same thickness as the frame.
Slice those two layers and delete the middles.
Select the frame and the shape and Align > Center Horizontally to put it in the middle. You might also want to center vertically, but I left mine closer to the top of the card as I thought it looked better that way.

Step 4) Create the segments
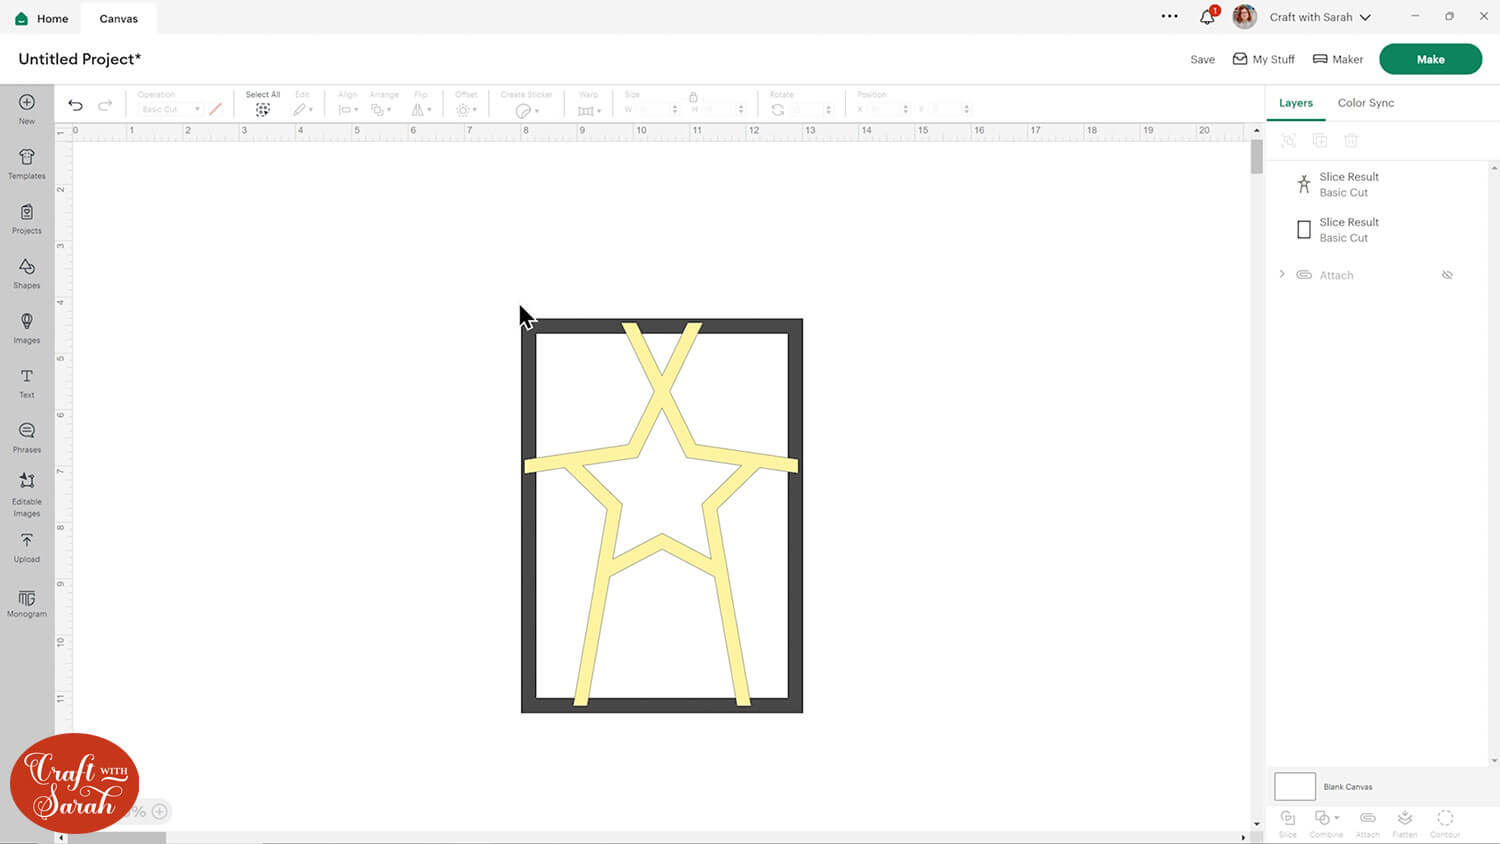
Now for the time-consuming bit… creating the segments!
First, create a rectangle that’s the same height as the frame of the card. Make it a colour that’s different to everything else so that it’s easy to see.

You can change it to a “Guide” under the operations menu to turn it into an outline to make it easier to see.

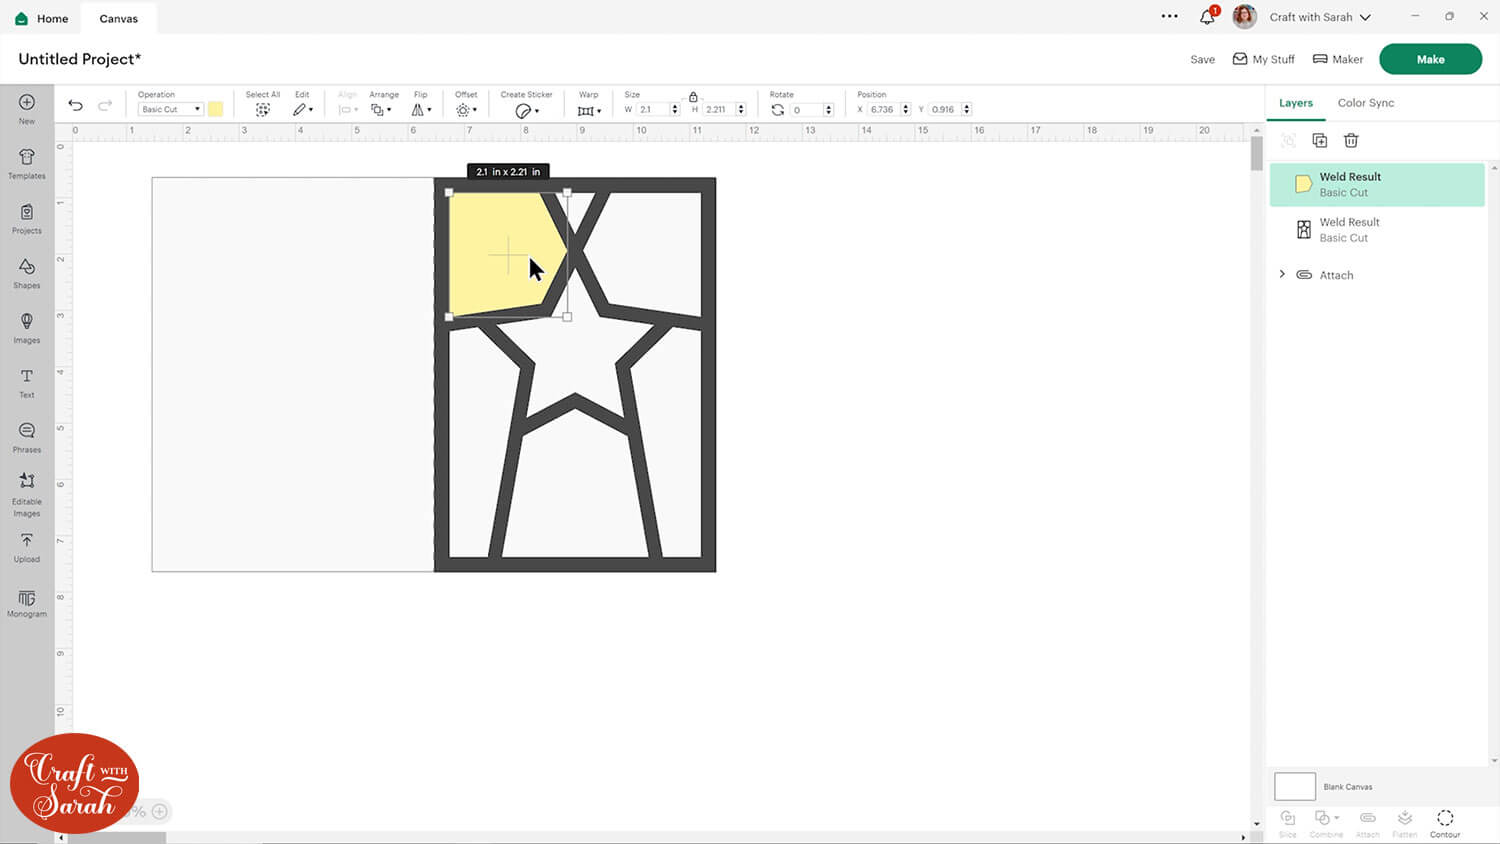
Make the rectangle longer (but don’t change the thickness!) and rotate it to match one of the the sides of your focal point.
It should overlap the edge of the card’s frame. We’ll cut off the excess at the end.
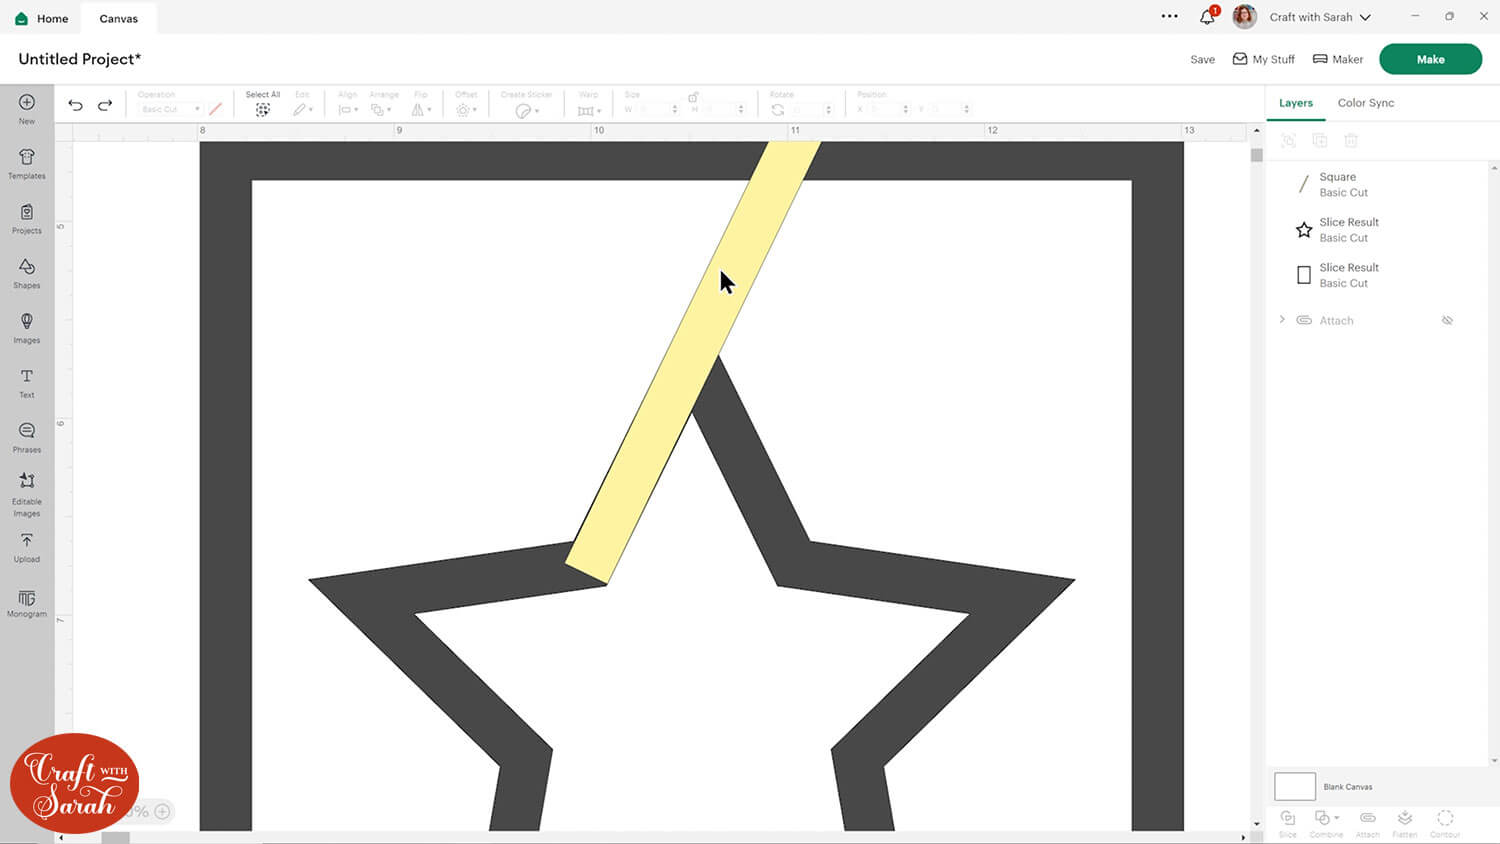
Duplicate the rectangle and position it for as many segments as you want to create.
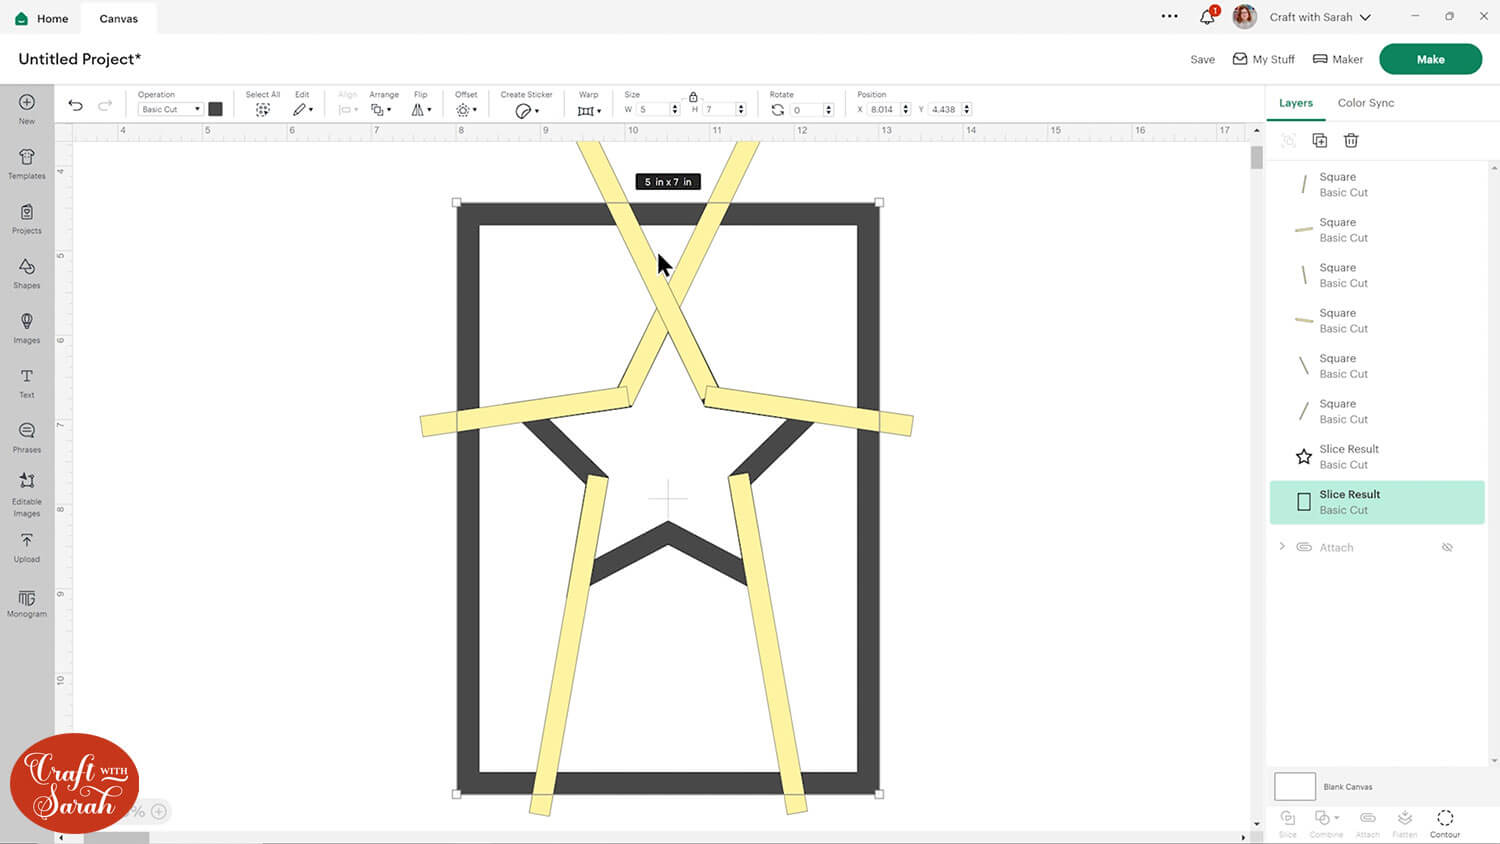
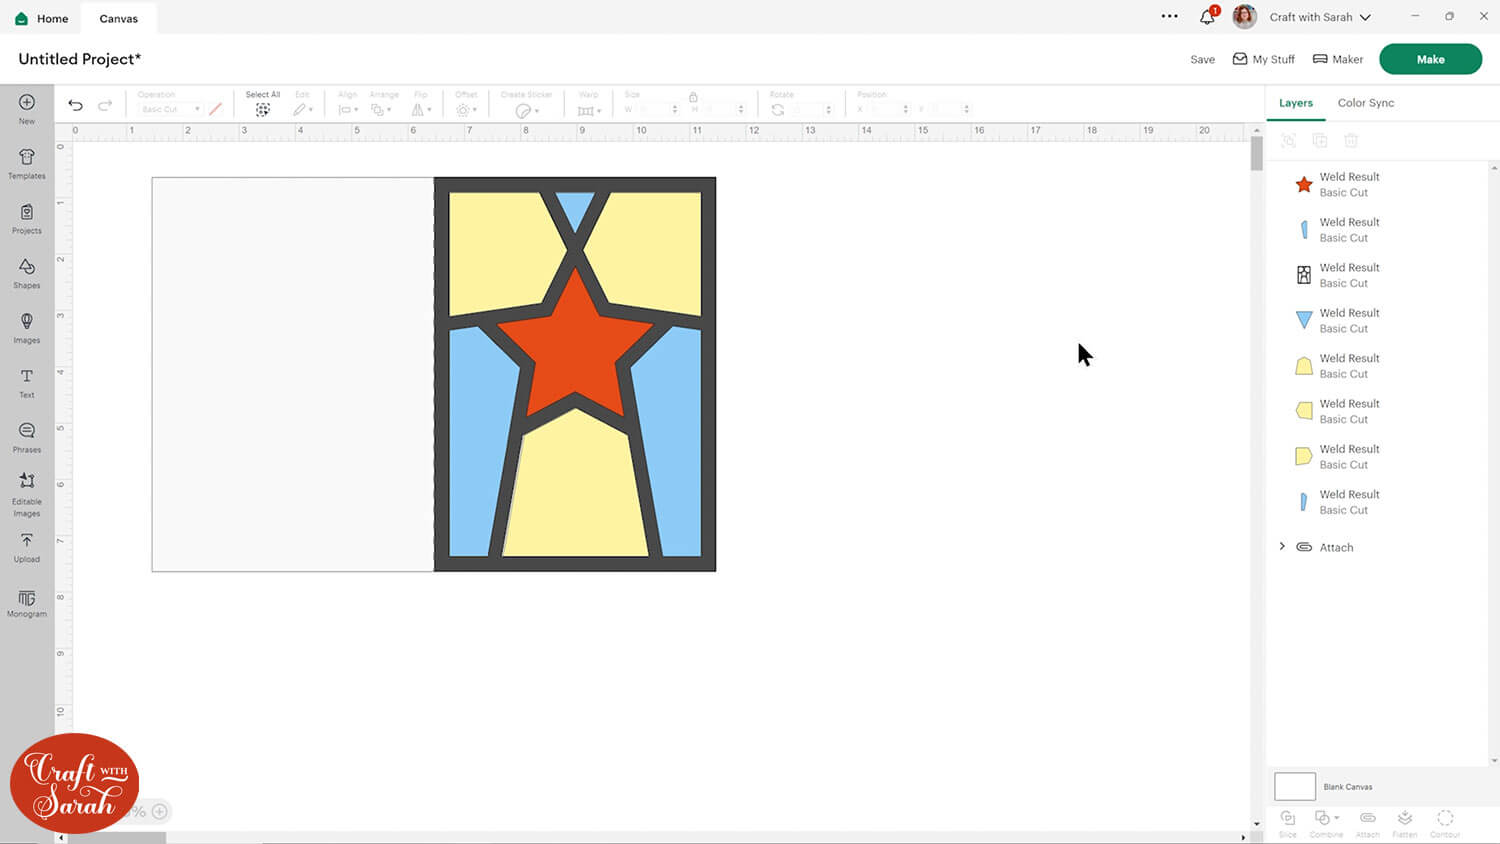
Select all the rectangles and the focal point shape. Press Combine > Weld to join them into one.
You might notice little pieces that you want to tidy up, for example one of the inner corners in my image below.
If so, press “Undo” to get your layers back, make the changes and then re-weld.
This is looking neater now!

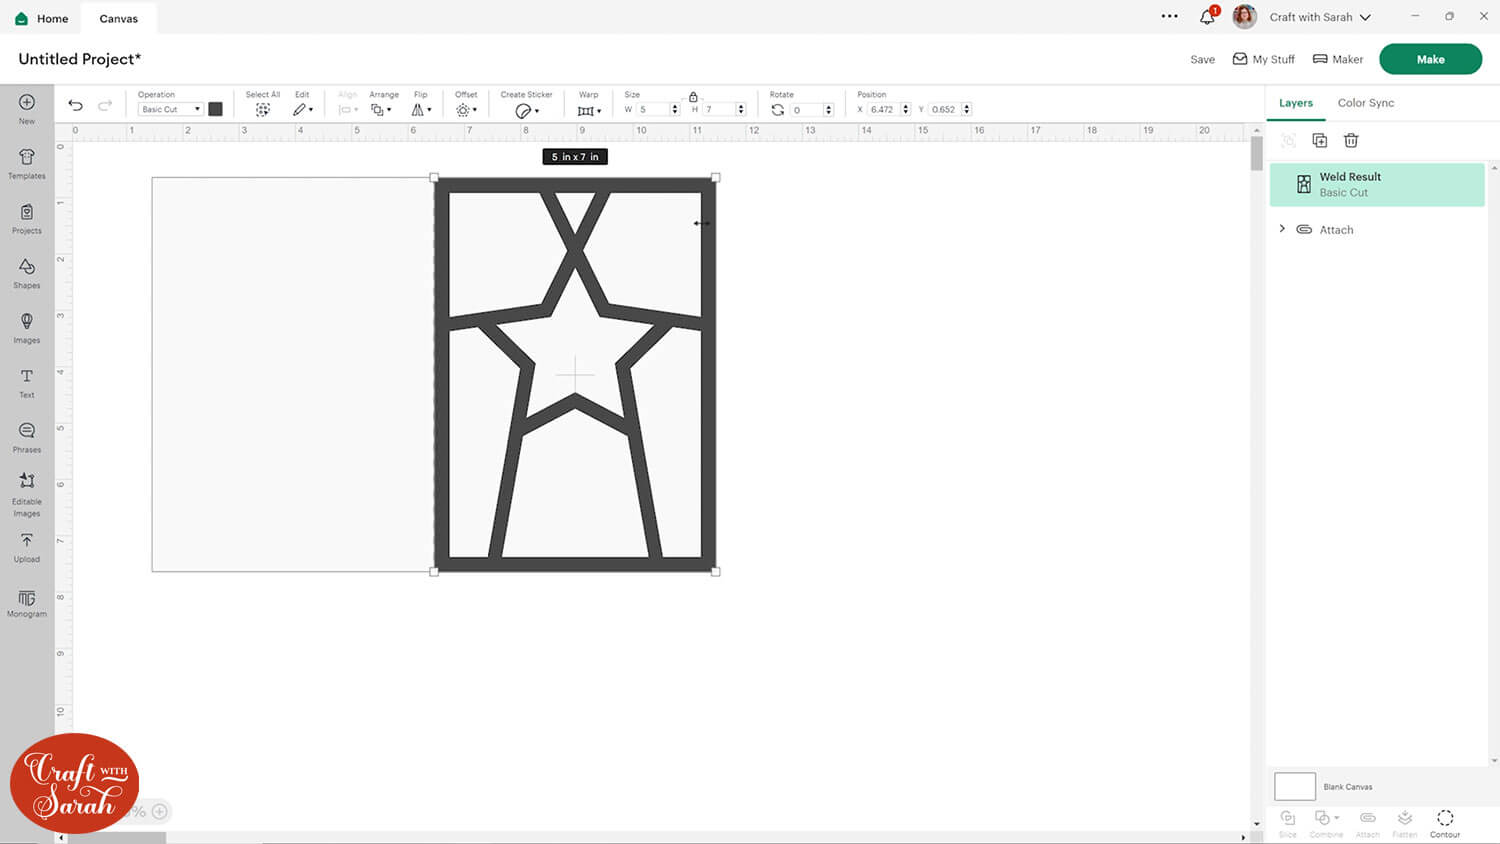
Step 5) Cut off the excess
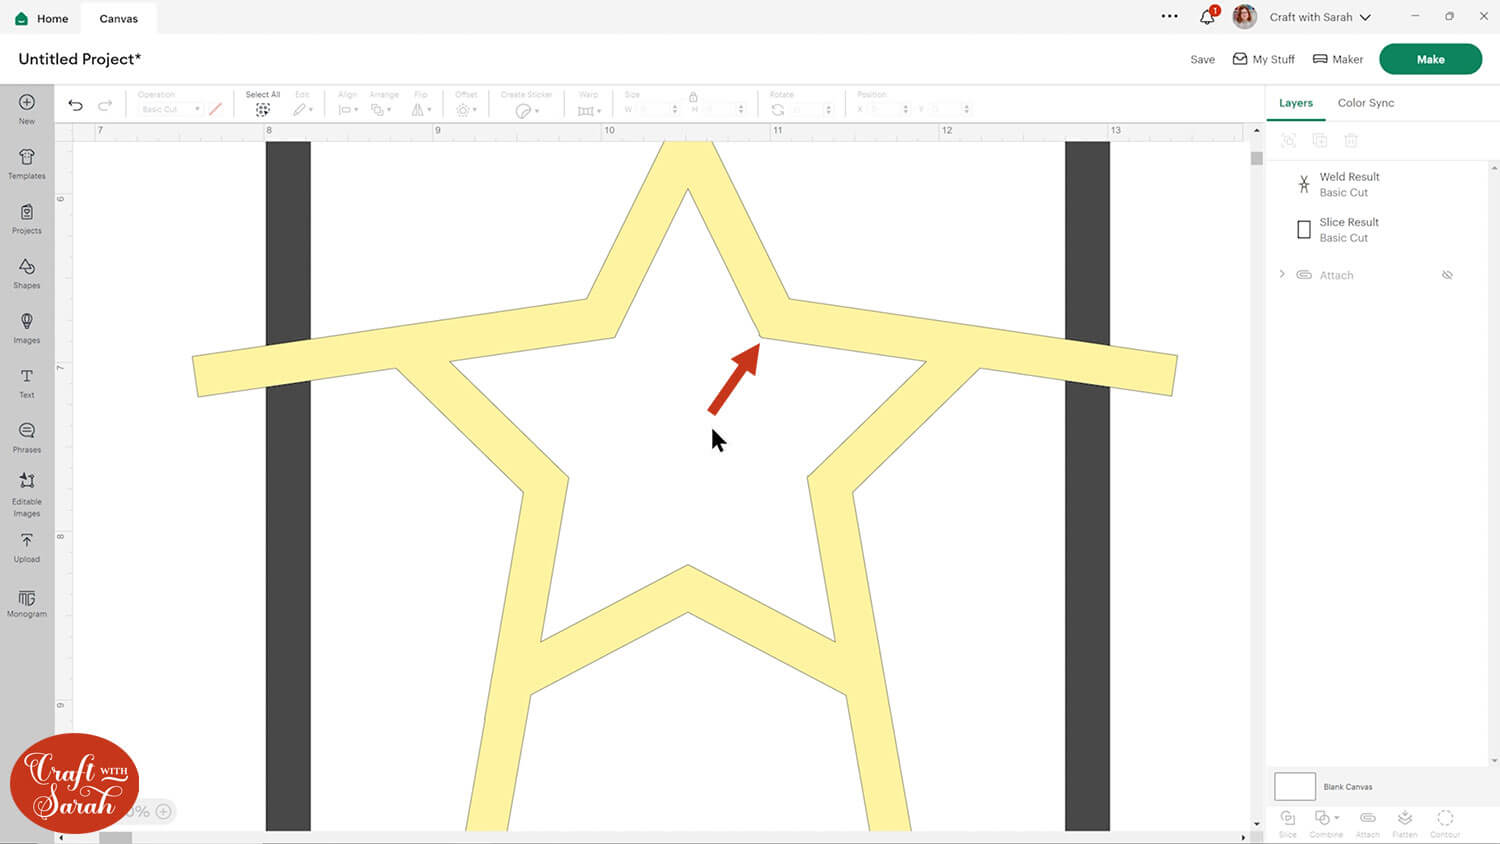
Create new rectangles in a different colour and position them so that they are about half way into the frame.
They should completely cover all parts of the segments that are overlapping the outside of the frame.

Select all these new rectangles and Weld them together.

Slice the rectangle layer from the segment layer and delete the offcuts.
Select the frame layer and the segment layer and Weld them together.
Step 6) Create the patterned paper shapes
The final Design Space step is to make the shapes that will be cut from patterned paper.
Duplicate the frame in place by hovering your mouse over the existing frame (on the Canvas, not in the layers panel), pressing the Alt key on your keyboard, moving the mouse slightly to get a “plus” (+) icon above your cursor and then left-click.
This will copy the frame in exactly the same place.
Change the colour of the new layer.
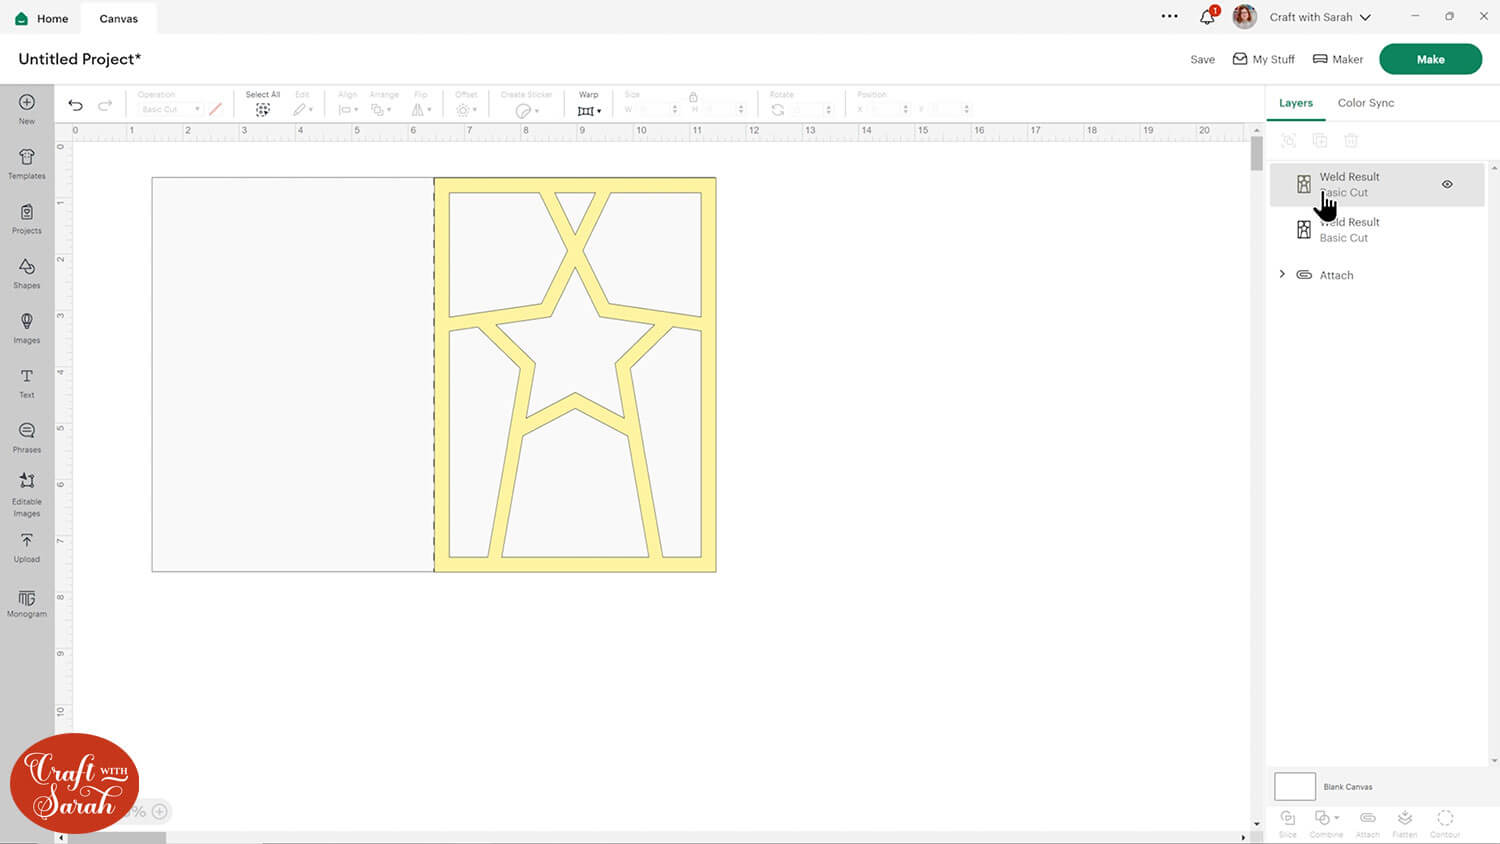
Click the new layer and press “Contour”.
Hide all contours apart from the middle of one of the segments.
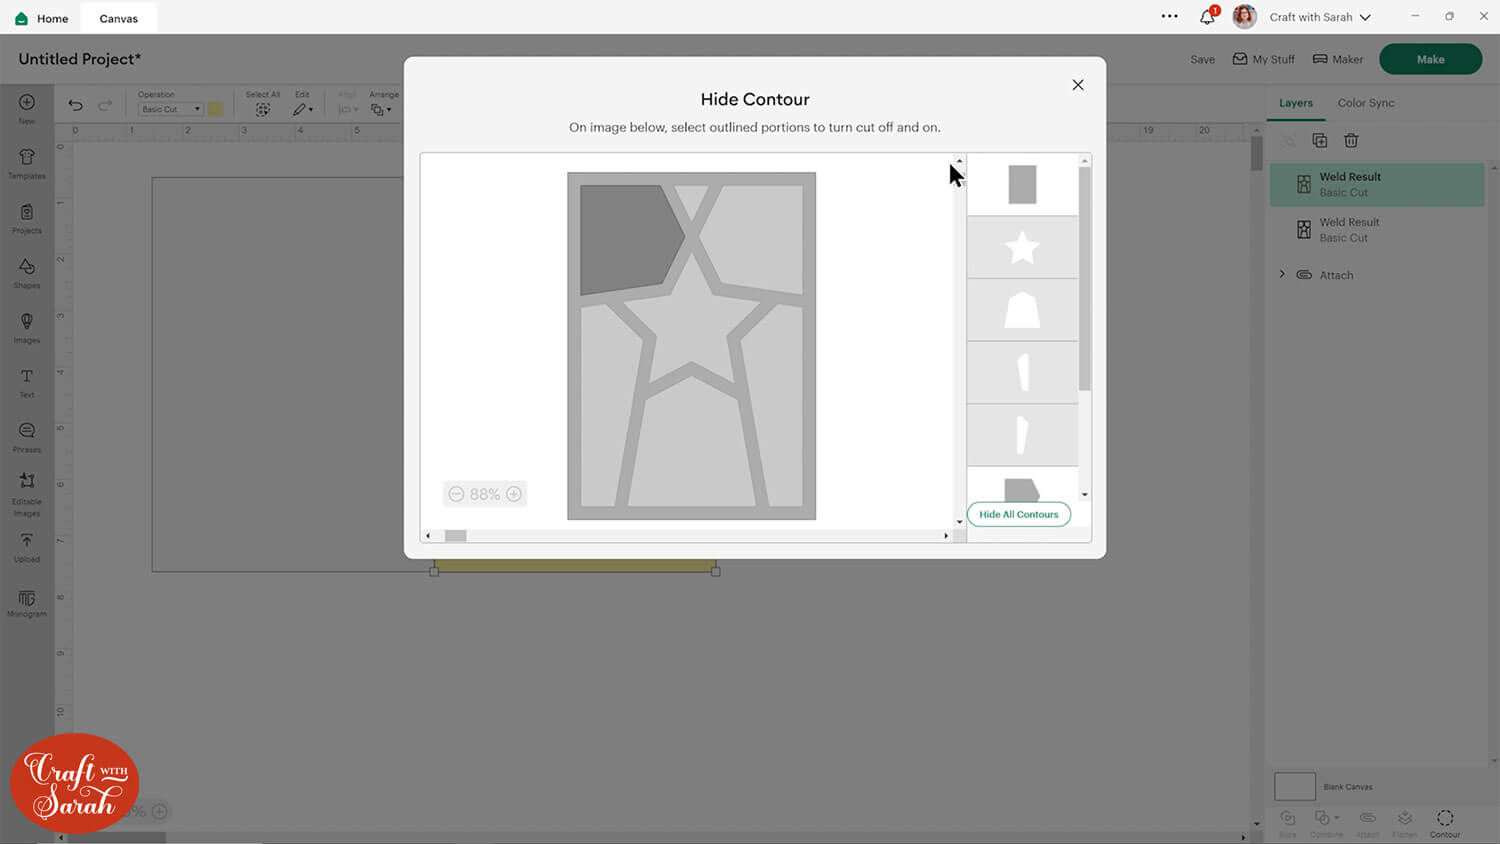
Here’s how it looks when the Contour window is closed:
Repeat this for all the segments.
Step 7) Finish the card
Your card is now ready to cut out. Don’t forget to save your Project first!
When everything is cut out, stick it together in the same way as the pre-made templates from earlier in this tutorial.
Fun fractured cards to make with a Cricut
I hope you enjoyed this tutorial on how to use my pre-made fractured card templates, as well as how to design your own!
I had so much fun going through all my patterned paper packs to make these cards. I didn’t realise I had so many… I definitely need to stop buying them!!

Don’t forget to check back tomorrow for the next Card Making Countdown project.
Happy crafting,
Sarah x

