FCC 2024 Day 09: Print then Cut Sticker Sheets
Welcome to day nine of the Floral Craft Countdown, where I’m sharing 14 flower themed Cricut papercraft projects in 14 days.
Today we are making sticker sheets using Cricut’s print then cut functionality.
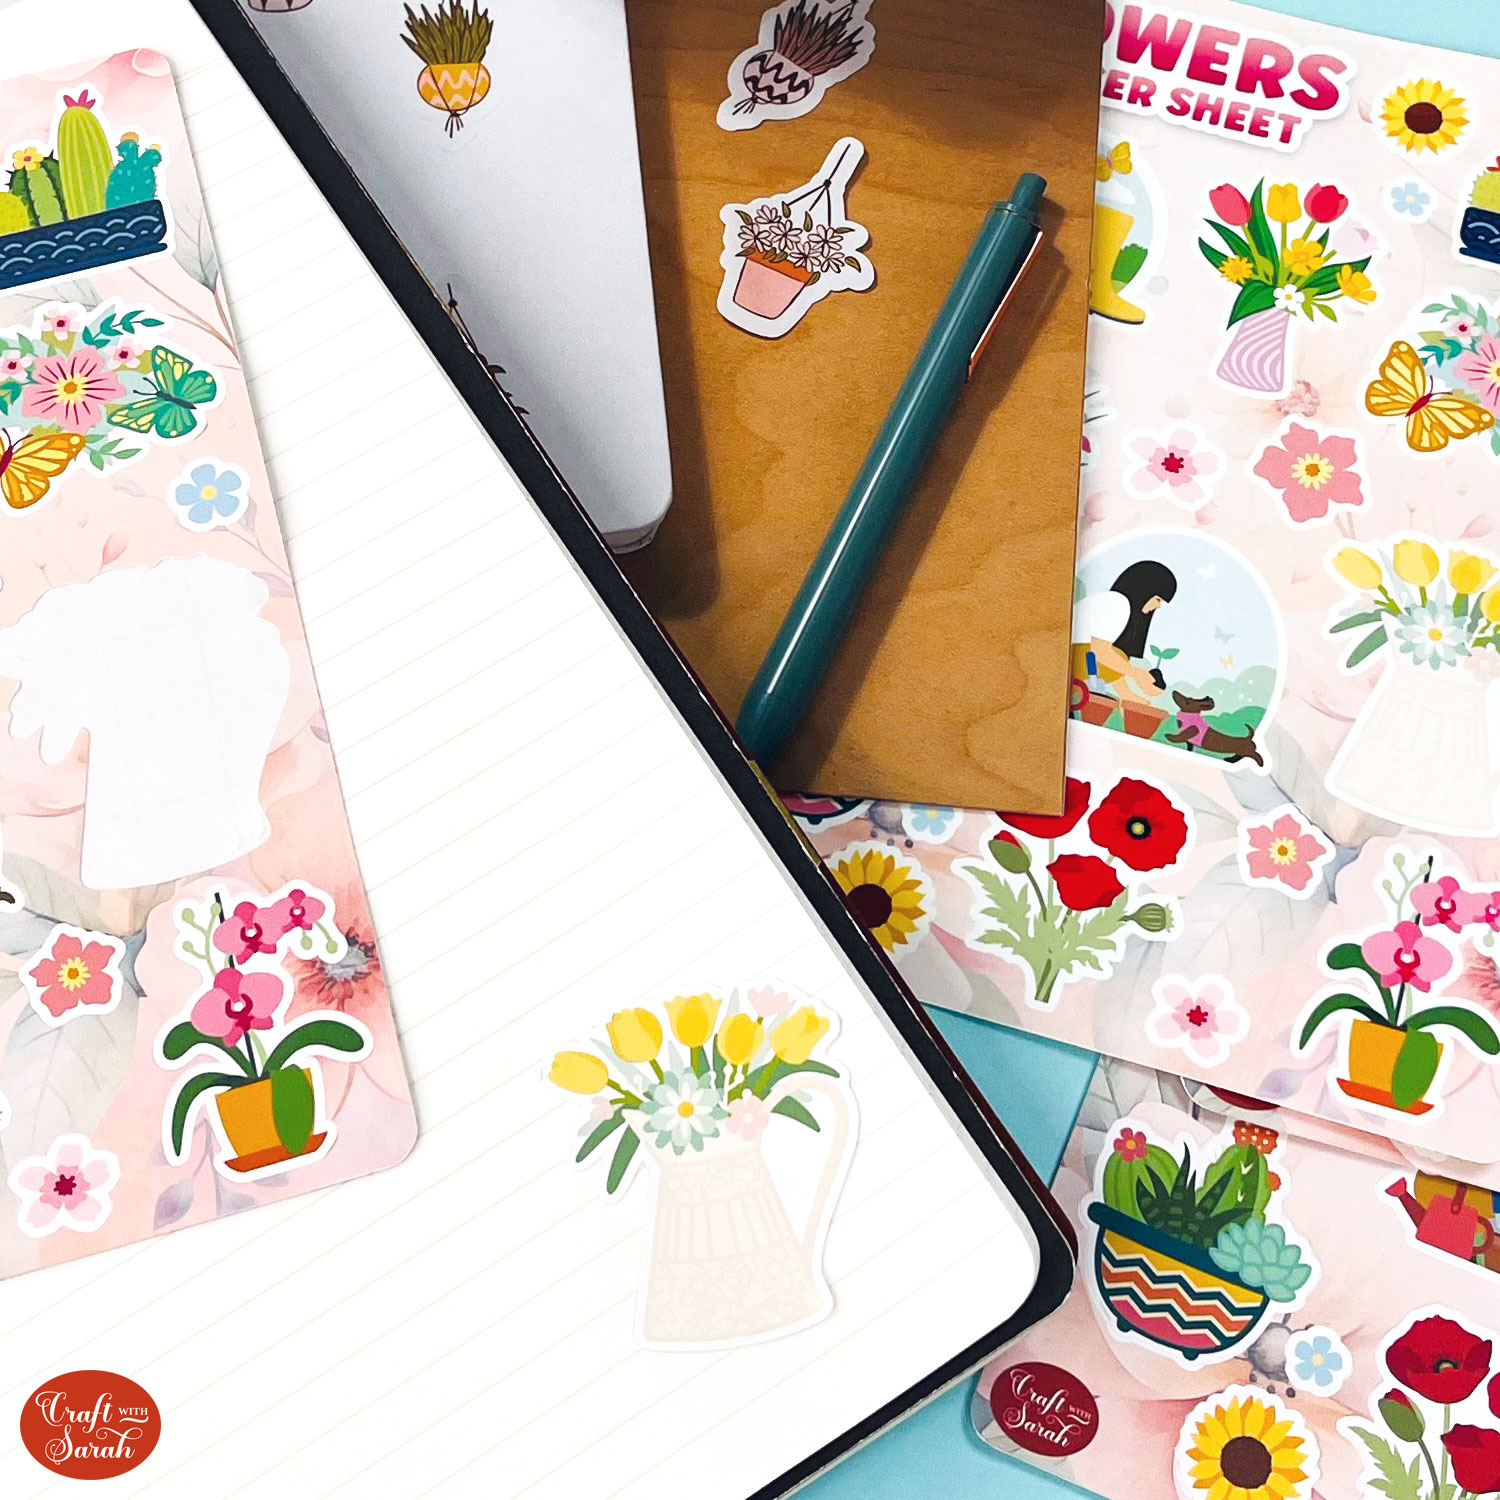
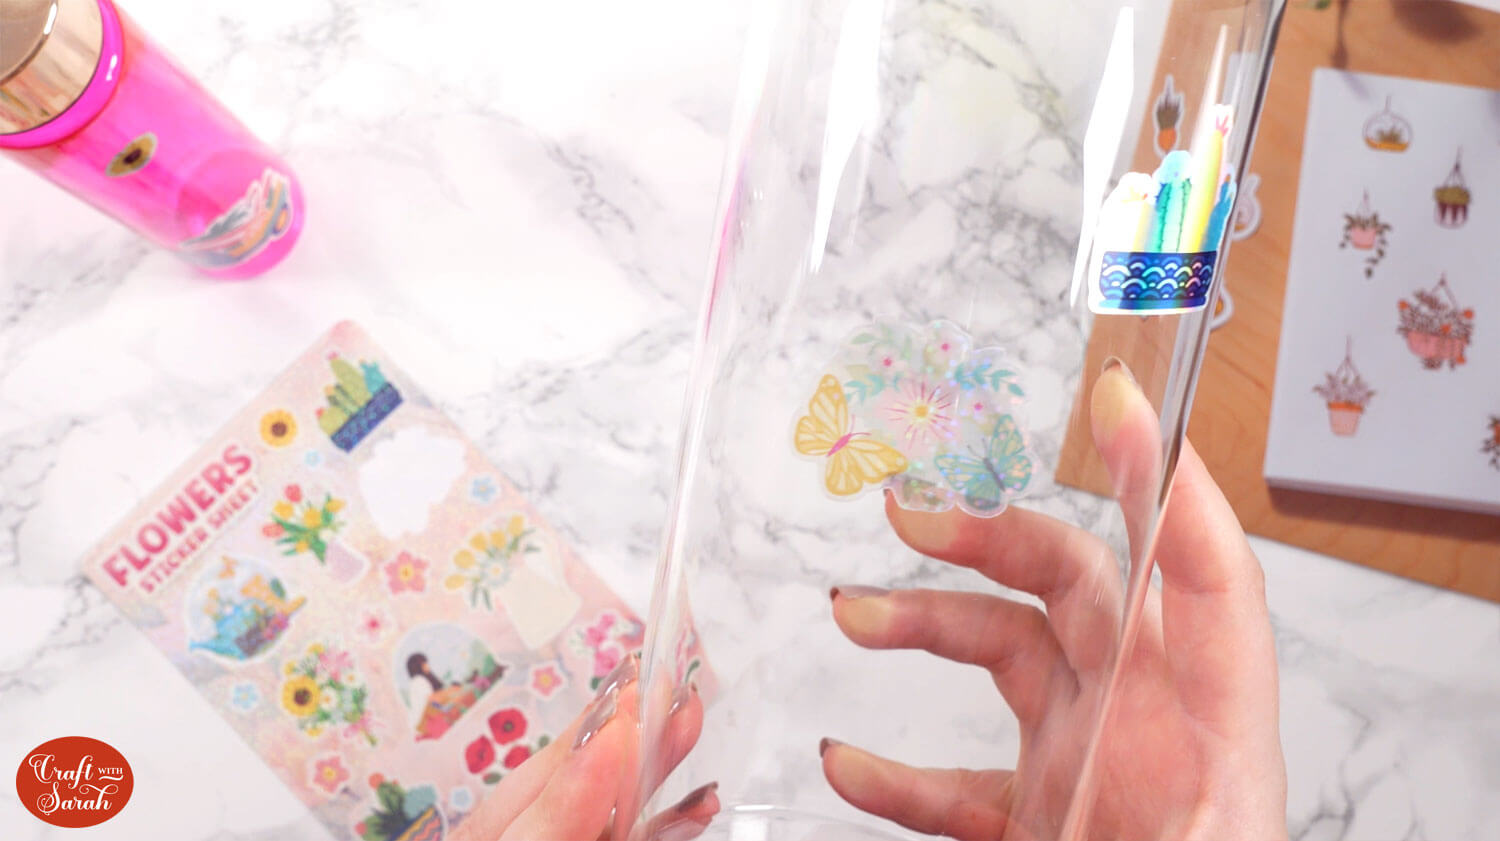
Stickers are great for decorating items such as water bottles and notebooks, but they can be stuck to anything you want to put them on!
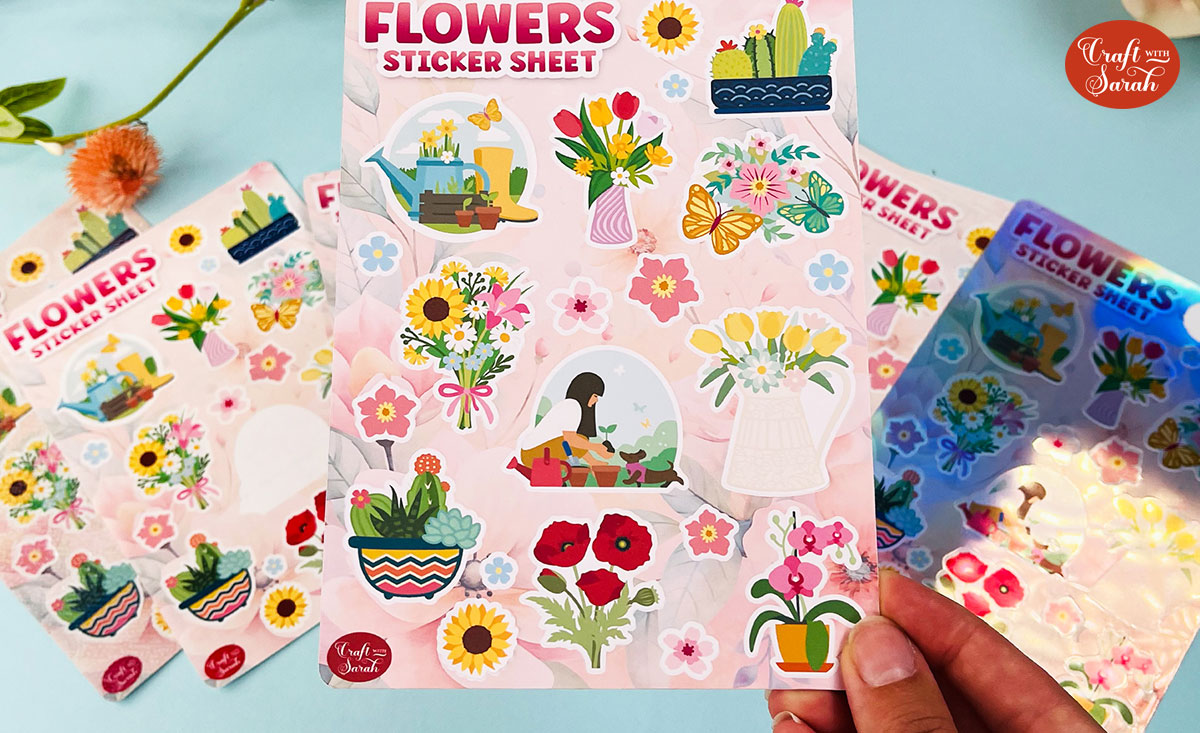
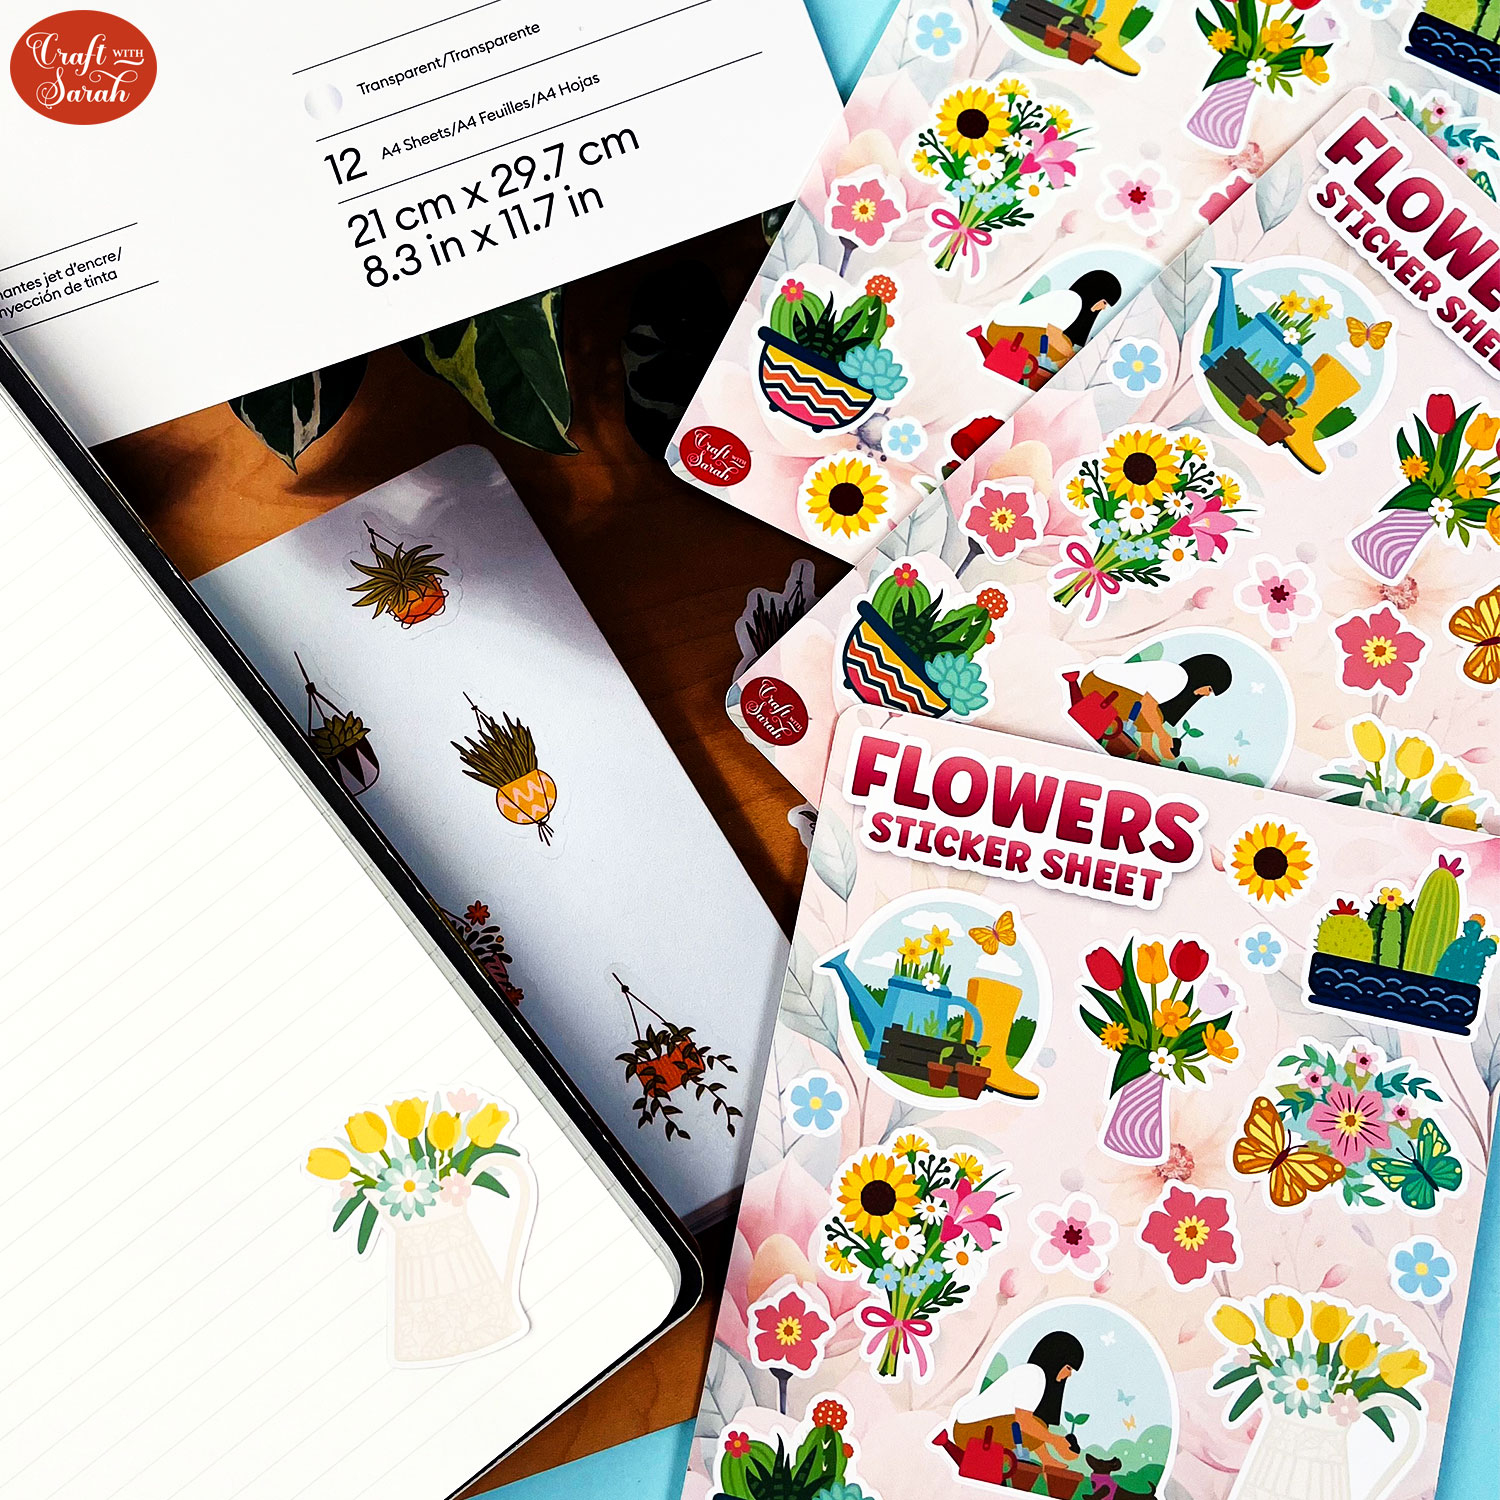
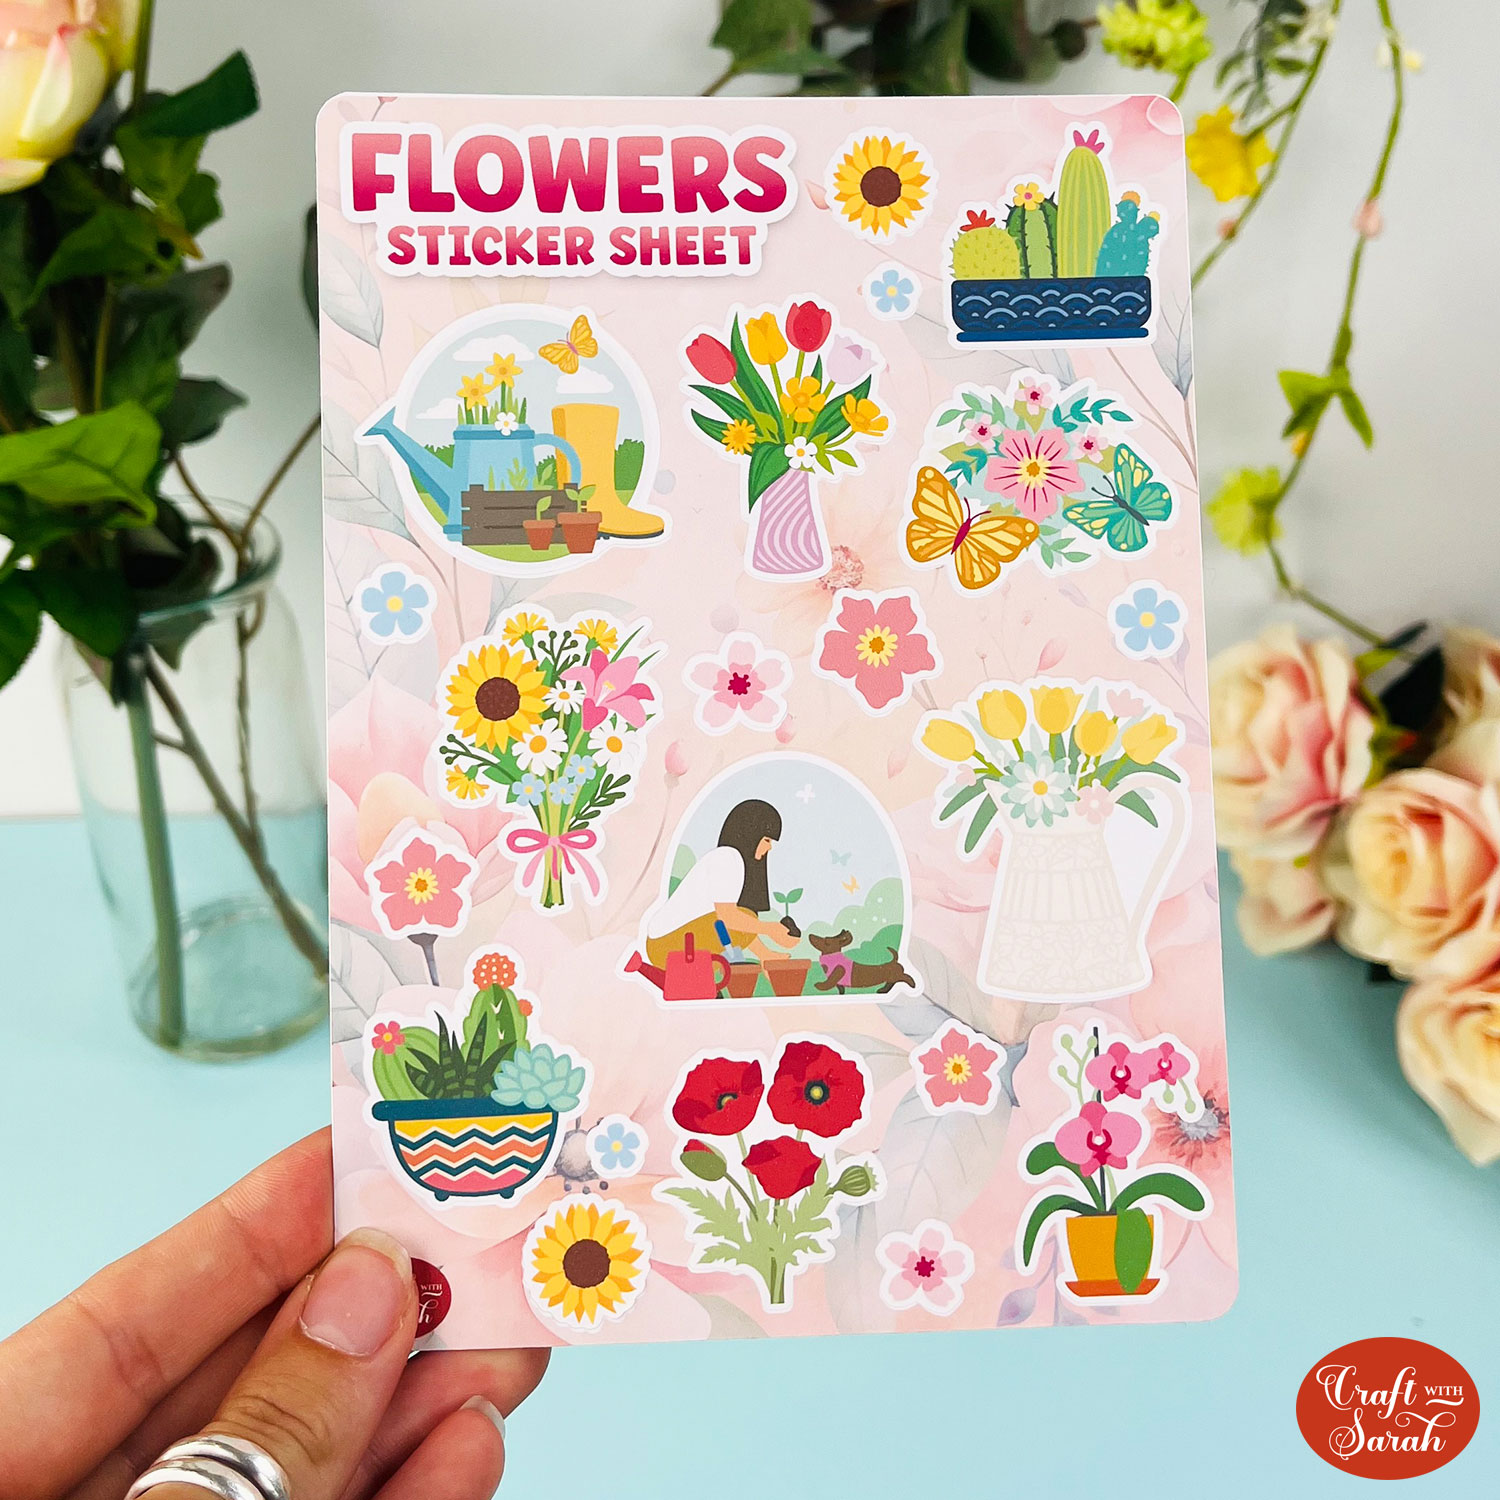
These sticker sheets also make lovely gifts as the designs come on a patterned background that makes a finished sticker sheet that’s around 5×7 inches in size.
Your Cricut will kiss-cut cut around the stickers which means that it doesn’t go all the way through the backing, so you end up with a completed sheet where you can peel off the stickers, rather than lots of little individually cut stickers.
You could include a sticker sheet in the envelope with a greetings card for a little extra birthday present.
This tutorial shows two different ways to make these stickers in Cricut Design Space. One of the ways requires the Cricut Access subscription and the other one can be done without the subscription.
This Project was part of the Floral Craft Countdown
Materials supply list
Here is a list of the materials that I used to make this project.
Please note that some of the links included in this article are affiliate links, which means that if you click through and make a purchase I may receive a commission (at no additional cost to you). You can read my full disclosure at the bottom of the page.
- Cricut machine
- Light blue Cricut cutting mat
- Colour printer
- Sticker paper or printable vinyl
This project is suitable for the following types of Cricut machine: Explore Air 2, Explore Air 3, Maker, Maker 3, Venture, and Joy Xtra. It cannot be made with the original Joy machine as that doesn’t have print then cut functionality.
Foundation learning
If you're new to crafting with your Cricut, you may find the below links helpful.
They teach some of the skills mentioned throughout this tutorial.
- How to upload SVG files into Design Space
- How to make 3D layered Cricut projects
- The BEST way to frame papercraft projects
- How to mount multiple designs in the same frame with magic guides
- How to score with a Cricut (even without scoring tools)
- Print then cut tutorial
- Design Space tools (Combine, Attach, Slice, Weld, Flatten, etc.)
- Pattern fill tutorial (for making backgrounds & cutting images to a specific shape/size)
- Free envelope SVGs that can be sized to fit any card
- How to write inside cards with Cricut pens
- How to cut layered designs at a small size
- Design Space tips & tricks
- Cricut pens tutorial
Video tutorial
Watch the video below to see how to make this project. Keep scrolling for a written tutorial.
Written tutorial (with photos!)
Here’s how to make print then cut sticker sheets using a Cricut machine.
Step 1) Download the files & upload to Design Space
Download the files using the box below.
Purchase the File(s)
This cut file is available as part of the Instant Access Bundle.
Or, purchase this design individually here
Before you upload the files to Design Space, you need to unzip the download folder that they come in.
- How to unzip a folder on Windows computer
- How to unzip a folder on a Mac
- How to unzip a folder on an iPad/iPhone
- How to unzip a folder on an Android device
IMPORTANT – This project does NOT contain SVG files. It contains PNG files because this is a “print then cut” project.
Each sticker sheet has two files that need uploading: one for the base and one for the sticker images.
These are both “print then cut” images, saved as PNG files.

Open up Cricut Design Space and start a new Project.
Click “Upload” and then find your unzipped version of the downloaded files for this project.
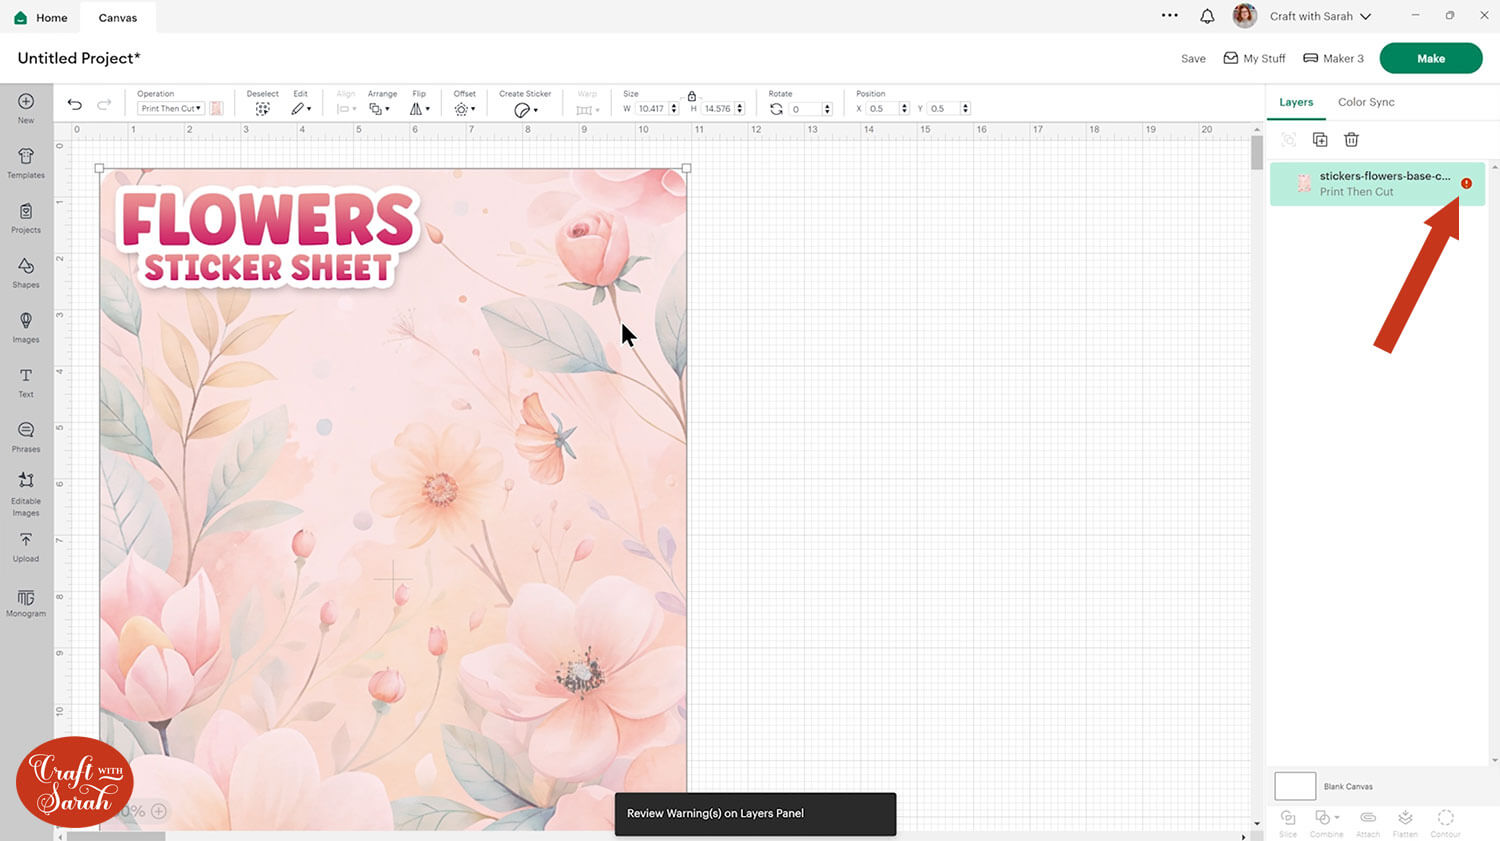
First, upload the base/background graphic. This is the file called stickers-flowers-base-craftwithsarah.png
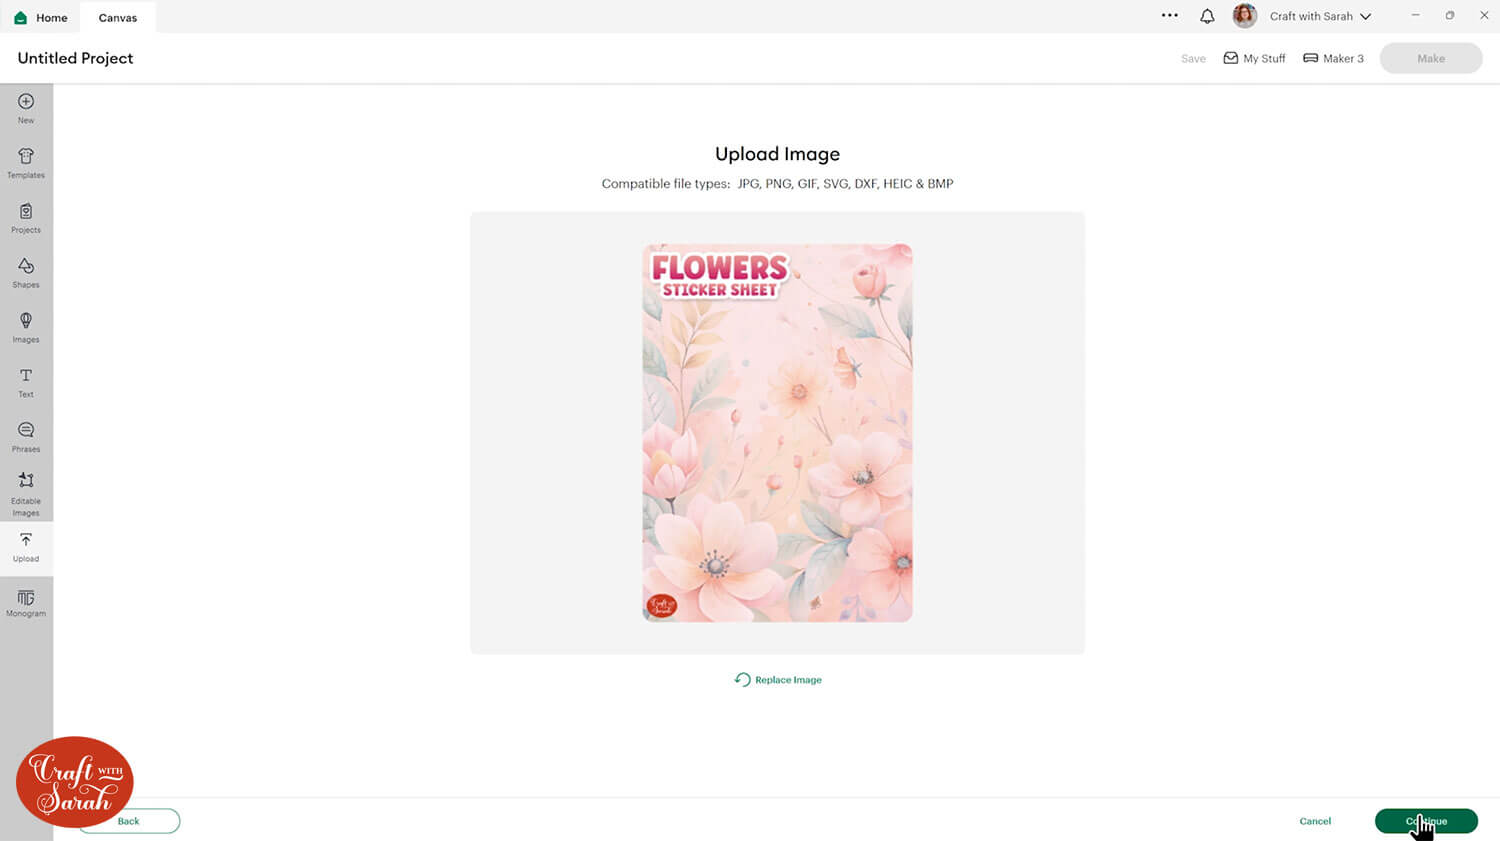
Click “Continue”.
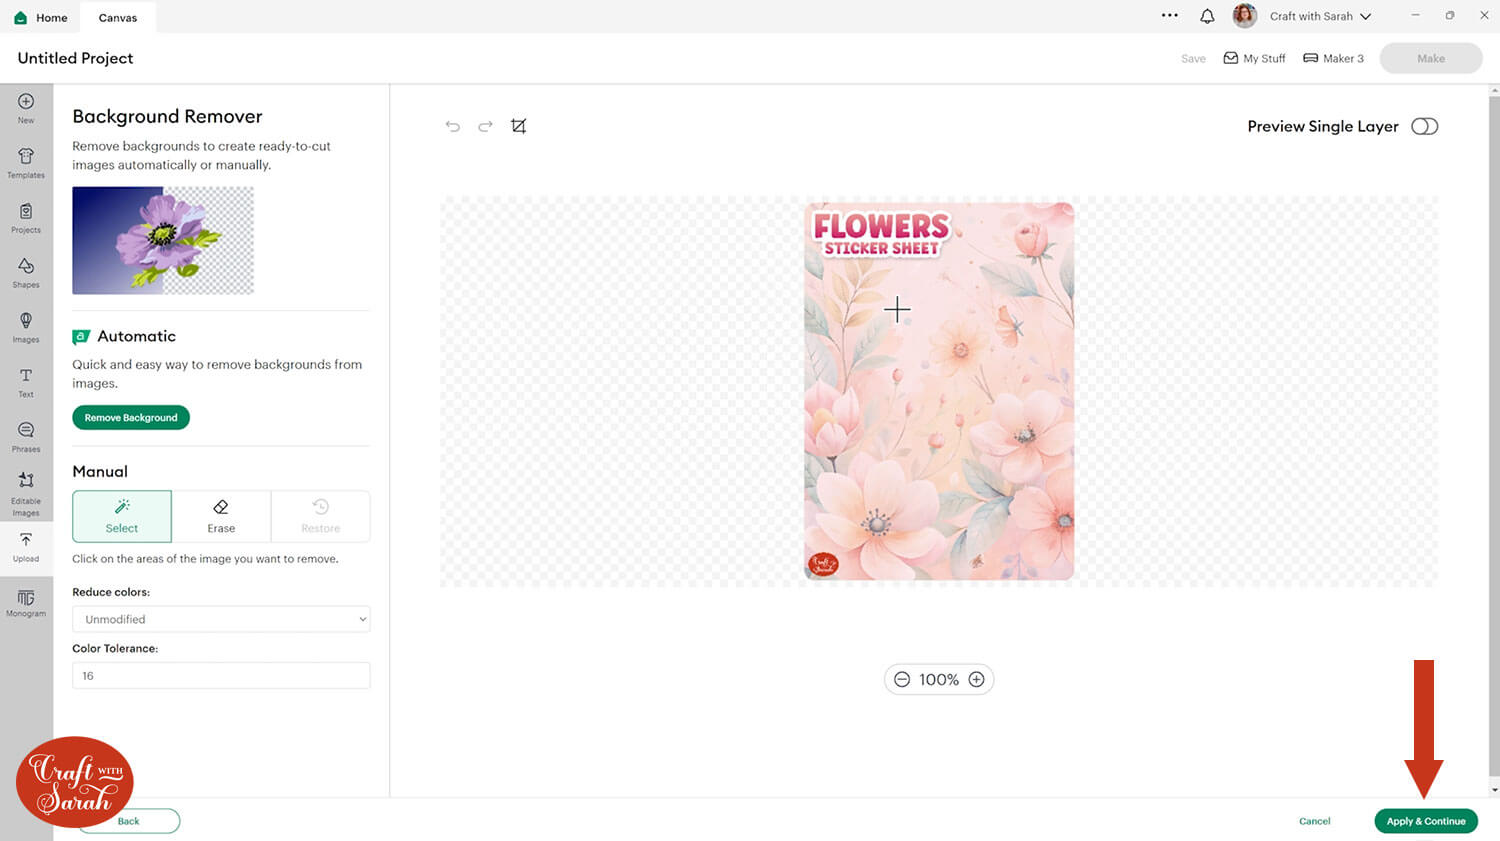
You don’t need to change anything on the next screen, simply click “Apply & Continue”.
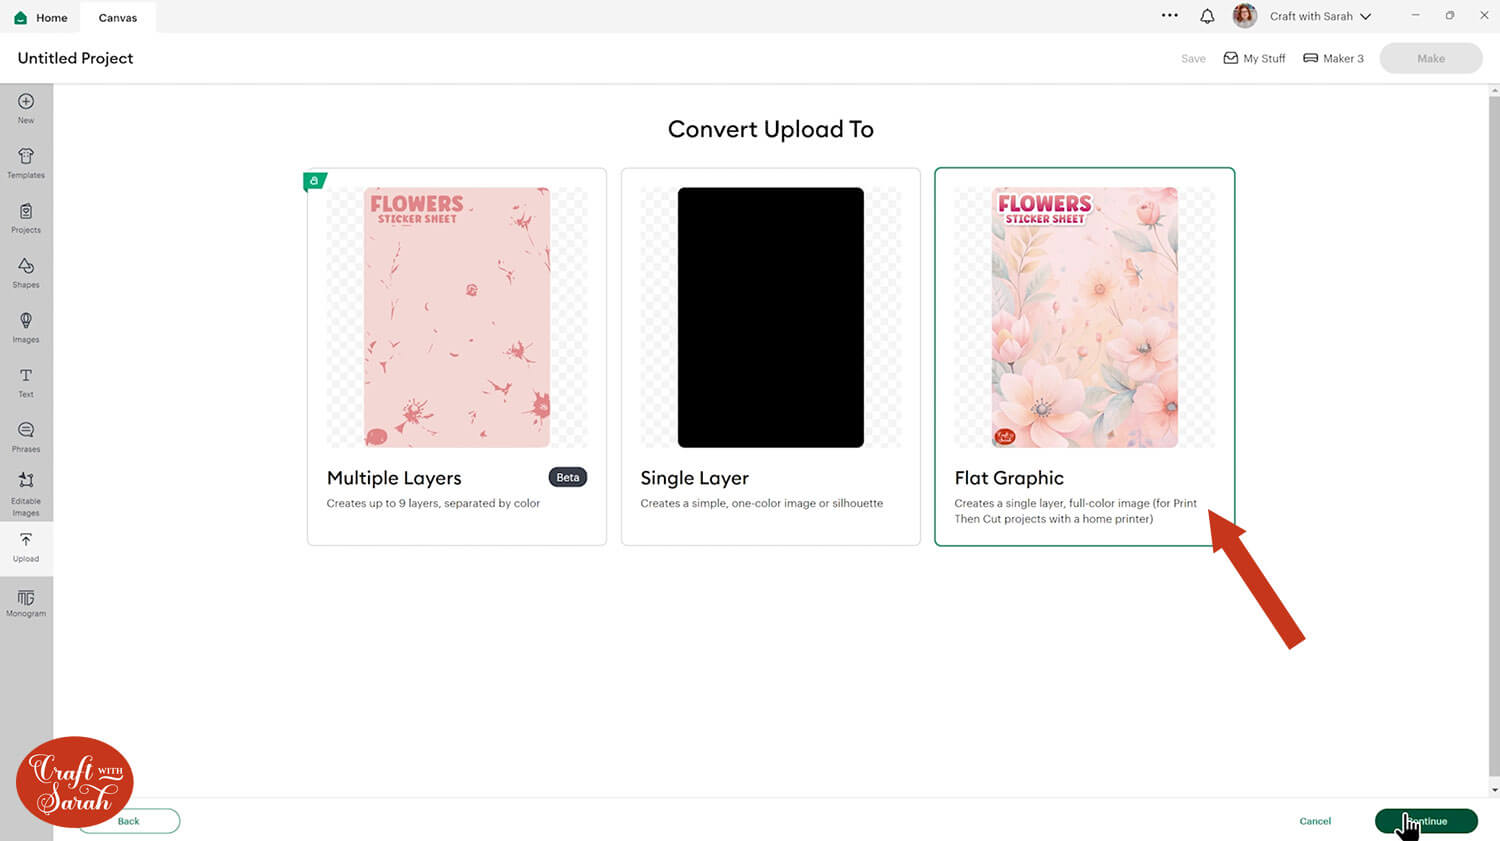
On the next screen, choose the third option called “Flat Graphic”. It’s REALLY important that you choose the correct option here!
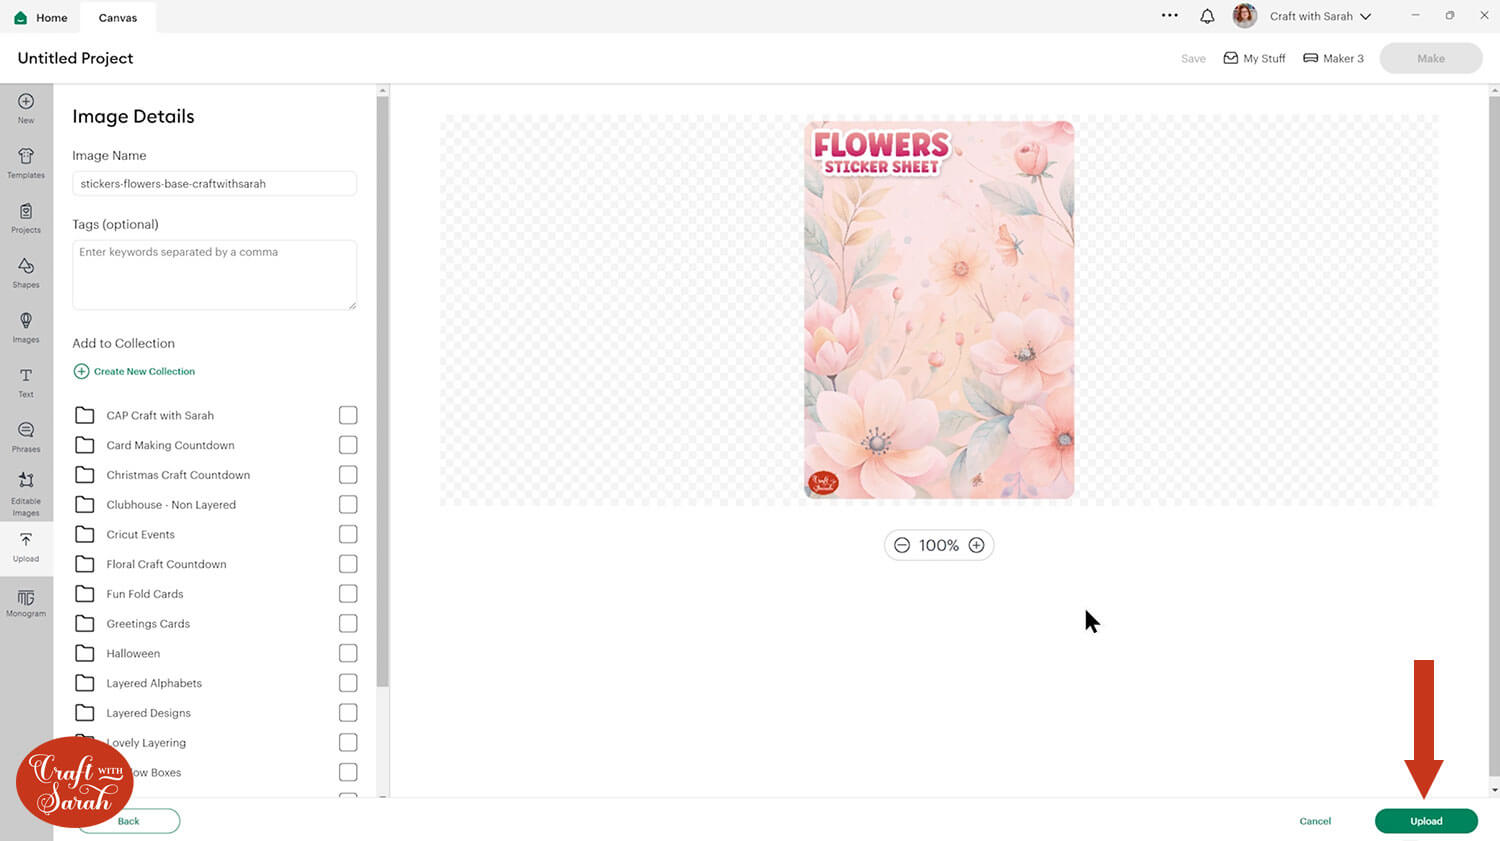
You can give the image a name and Collection (category) if you like, or just press “Upload”.
The sticker background will then be added onto your project.
Don’t worry if it loads in really big – this is normal when you upload a PNG file into Design Space. We’ll fix the size once the next file has been uploaded.
You can also ignore any warnings about image resolution. Design Space gives this warning even if the image is high quality (which these sticker designs are!).
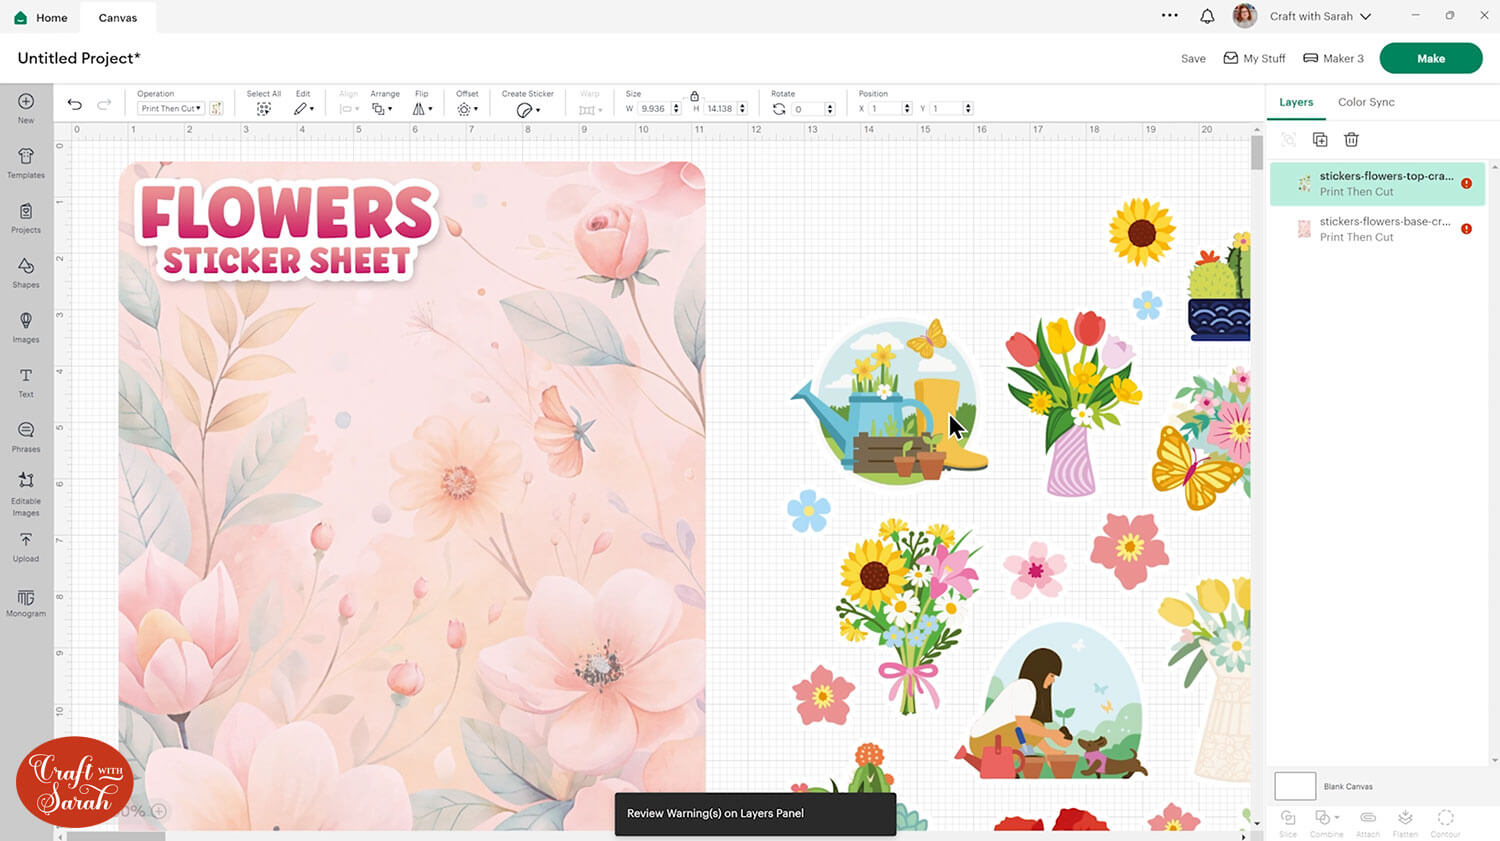
Repeat exactly the same upload steps for the other image, which is called stickers-flowers-top-craftwithsarah.png
Step 2) Resize the sticker sheets
For some reason, Design Space enlarges print then cut images when they are put onto the screen, so we need to make them smaller.
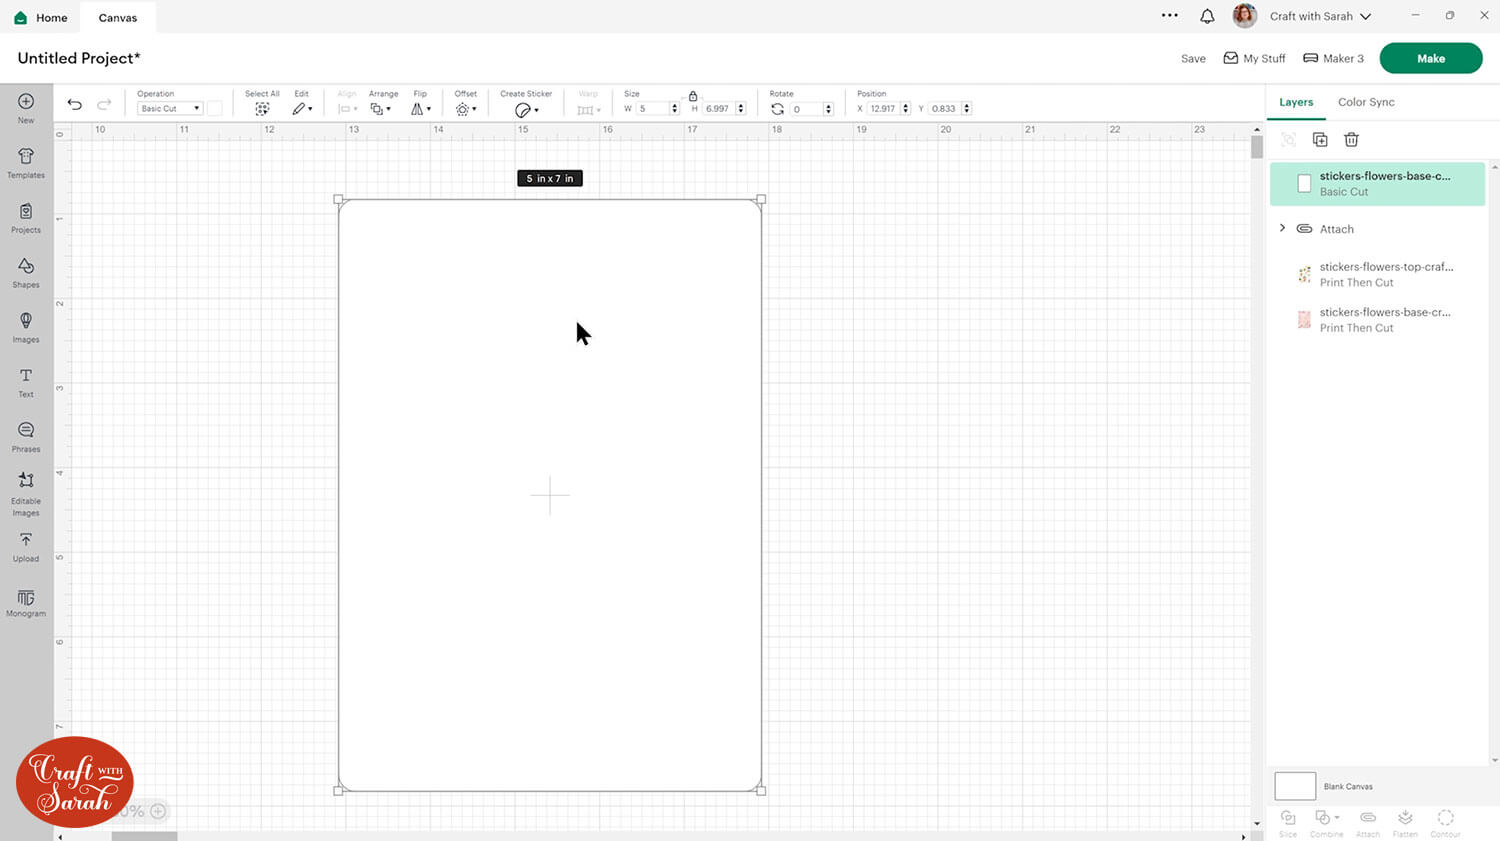
Click the base/background image and resize it to 5 inches wide, which will be around 7 inches tall (perhaps slightly off).
You can make the sticker sheet smaller than that if you want smaller sticker, but do not make it larger than 5×7 as that may make the images become blurry.
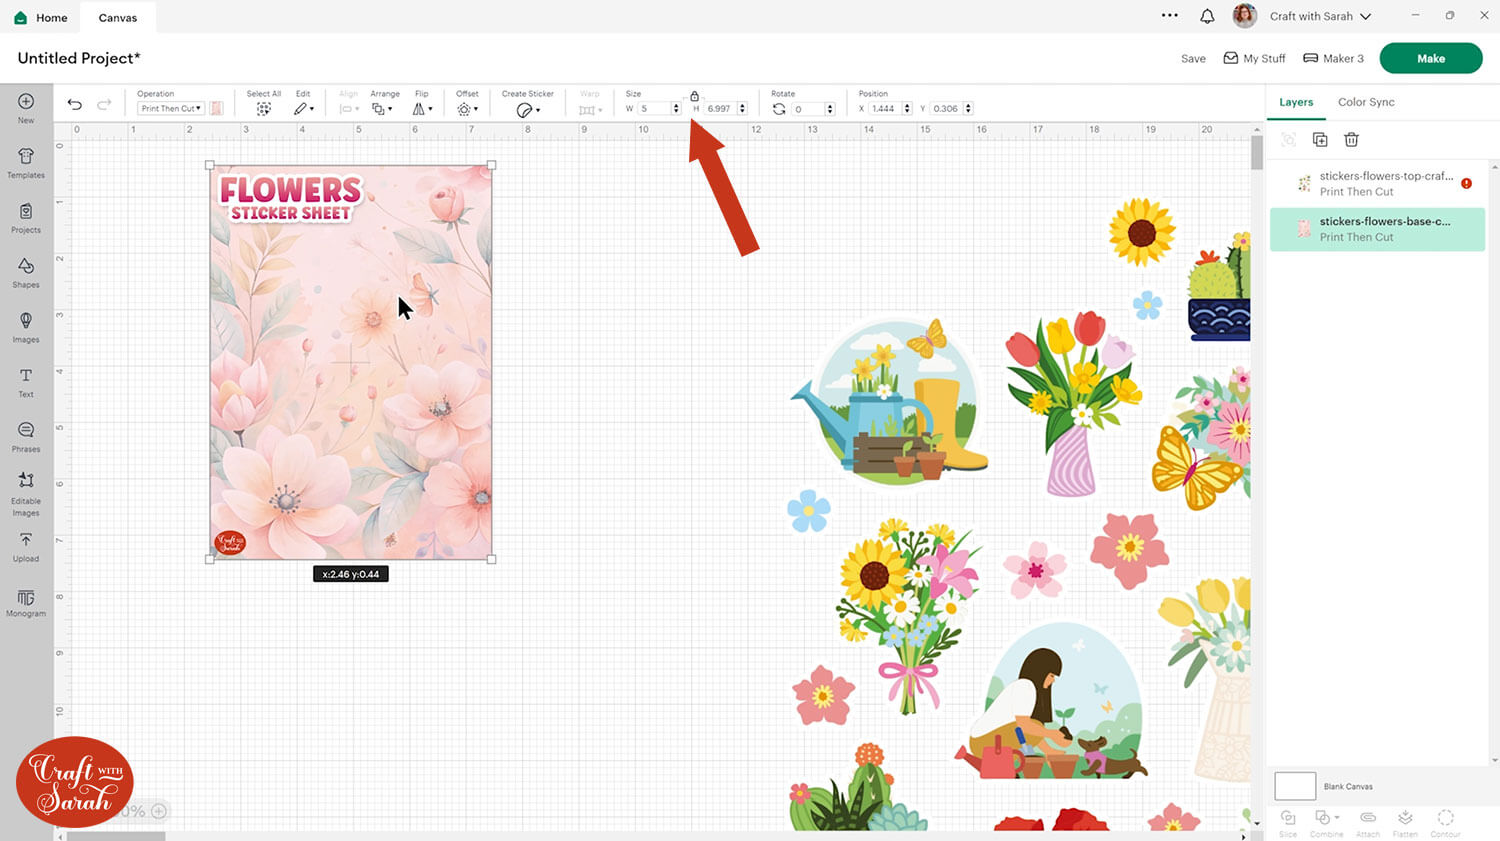
Move the stickers on top of the background and resize them to fit on the background piece.
Step 3) Get the stickers ready for cutting
There are two different ways to do this. The easiest is to use Design Space’s “Create Sticker” feature. However, this feature is ONLY available if you are a Cricut Access subscriber.
If you do not pay for Cricut Access, keep scrolling to find a different way to do it.
My screenshots in the next few steps show two copies of the sticker sheets. This is so that I can do both methods on the screen, to show you each of them. You do not need to make a copy of your stickers.
CRICUT ACCESS VERSION – “CREATE STICKER” FEATURE
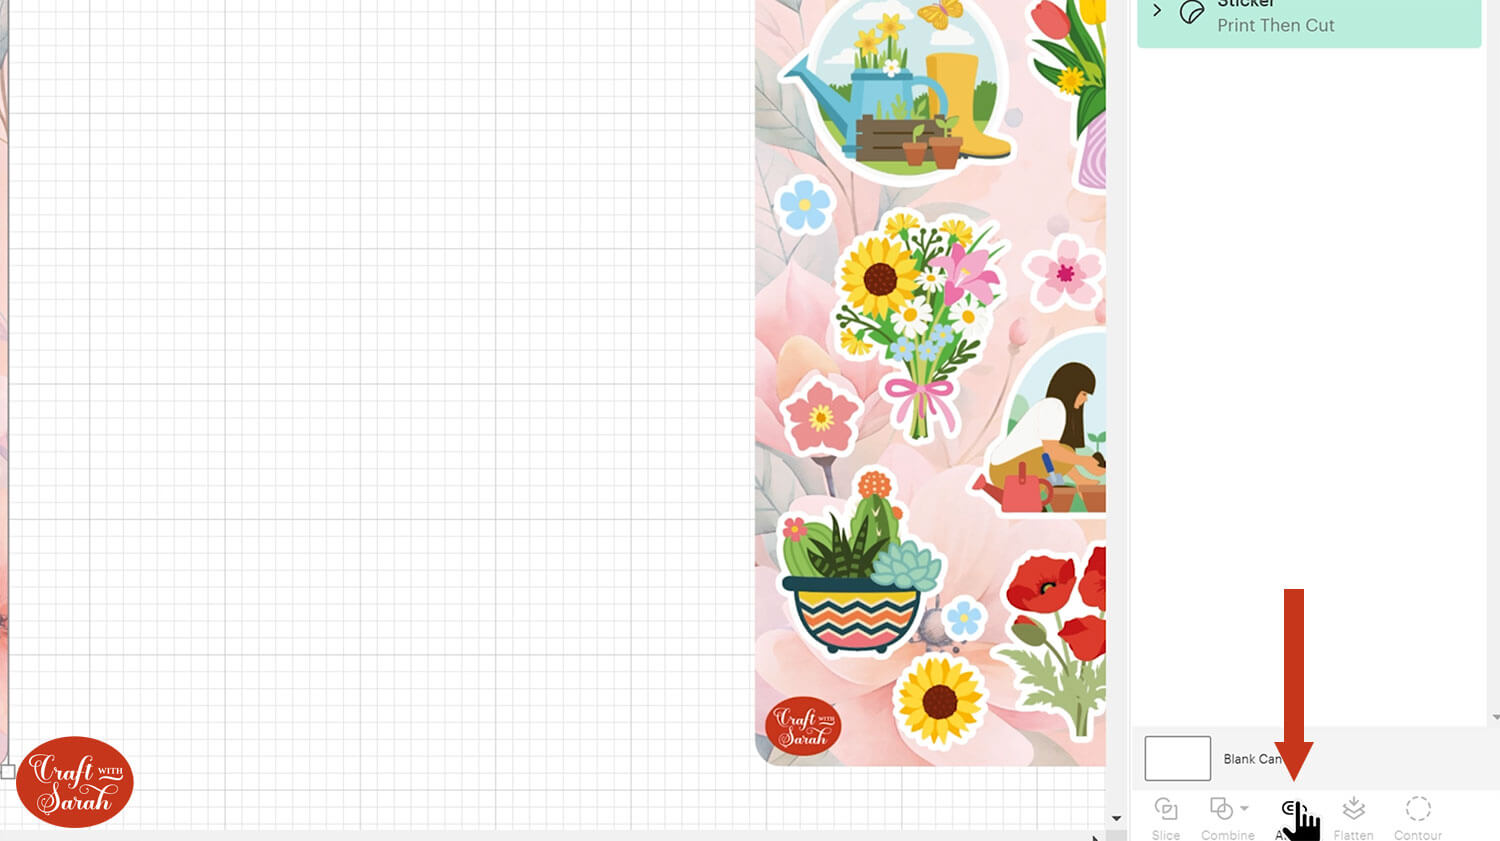
Click the top layer with the sticker shapes. Click into the “Create Sticker” button along the top of the screen.
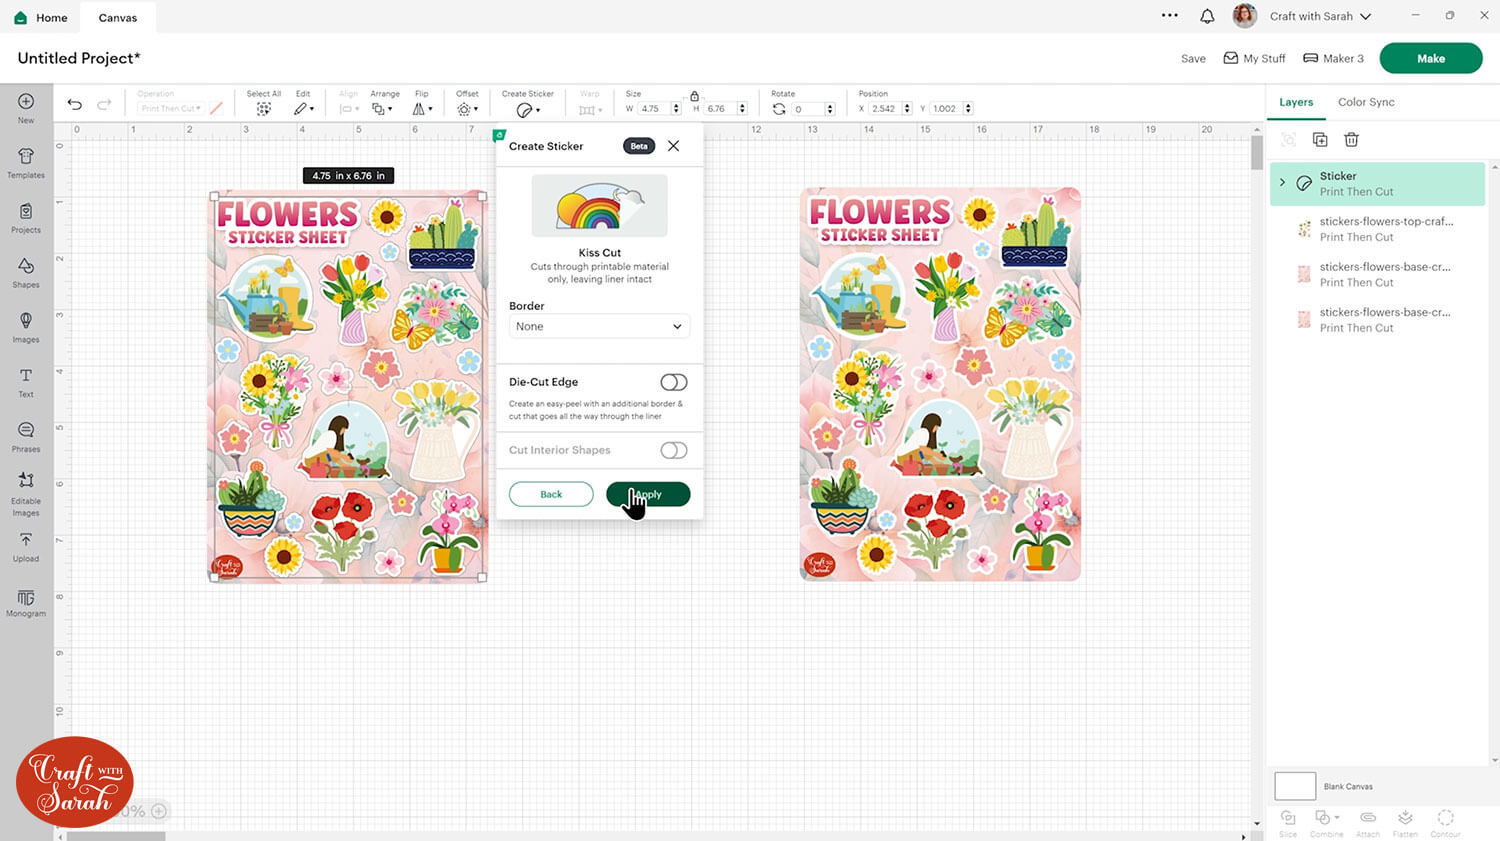
Choose the “Kiss Cut” option.
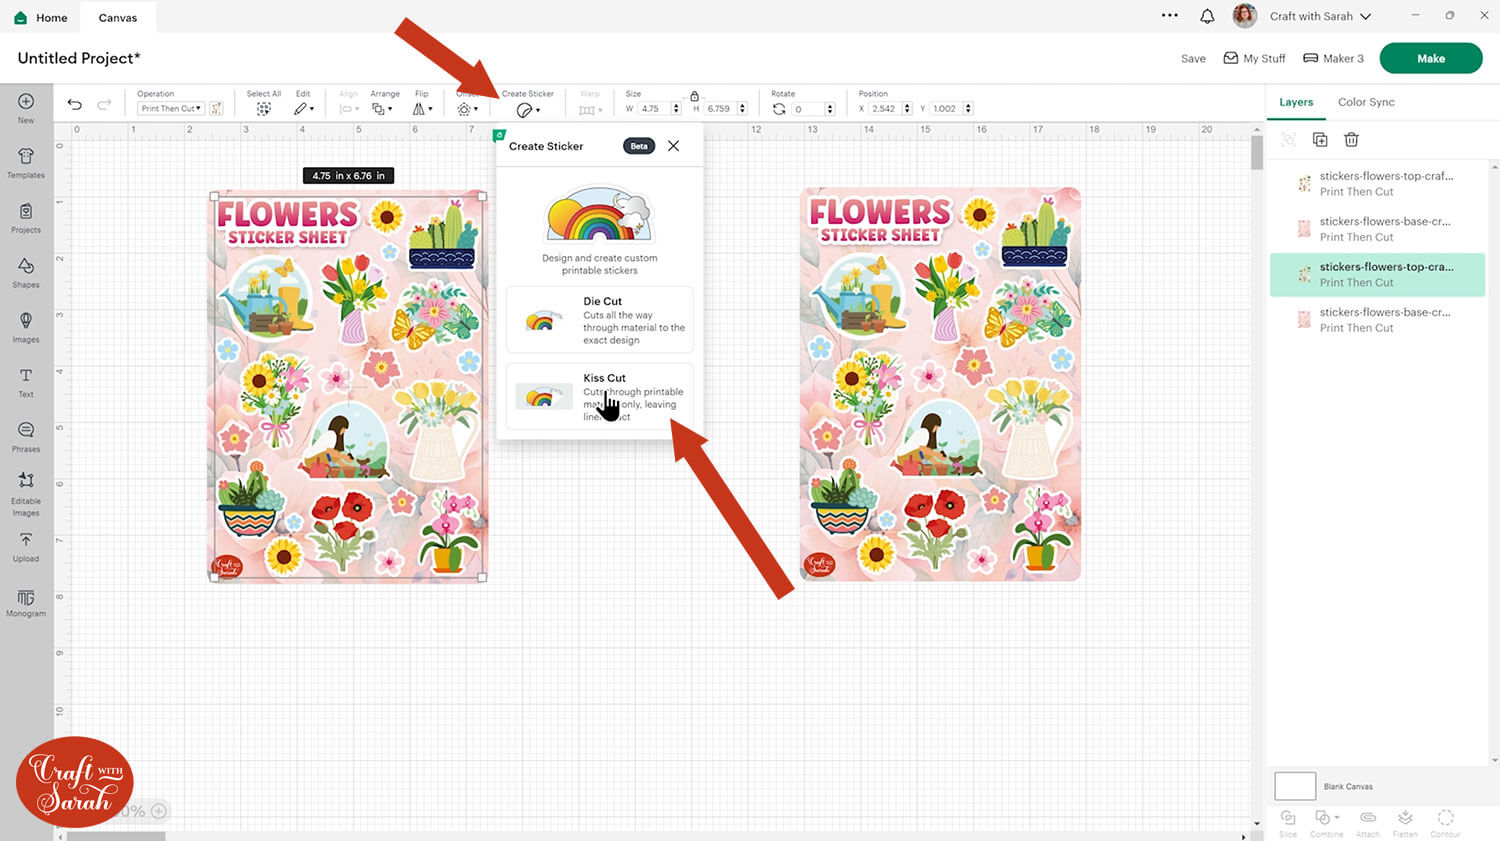
Select “None” for the Border.
Make sure the “Die-Cut Edge” and “Cut Interior Shapes” options are turned off.
Press Apply.
Click the base/background layer. Click into the “Create Sticker” button again.
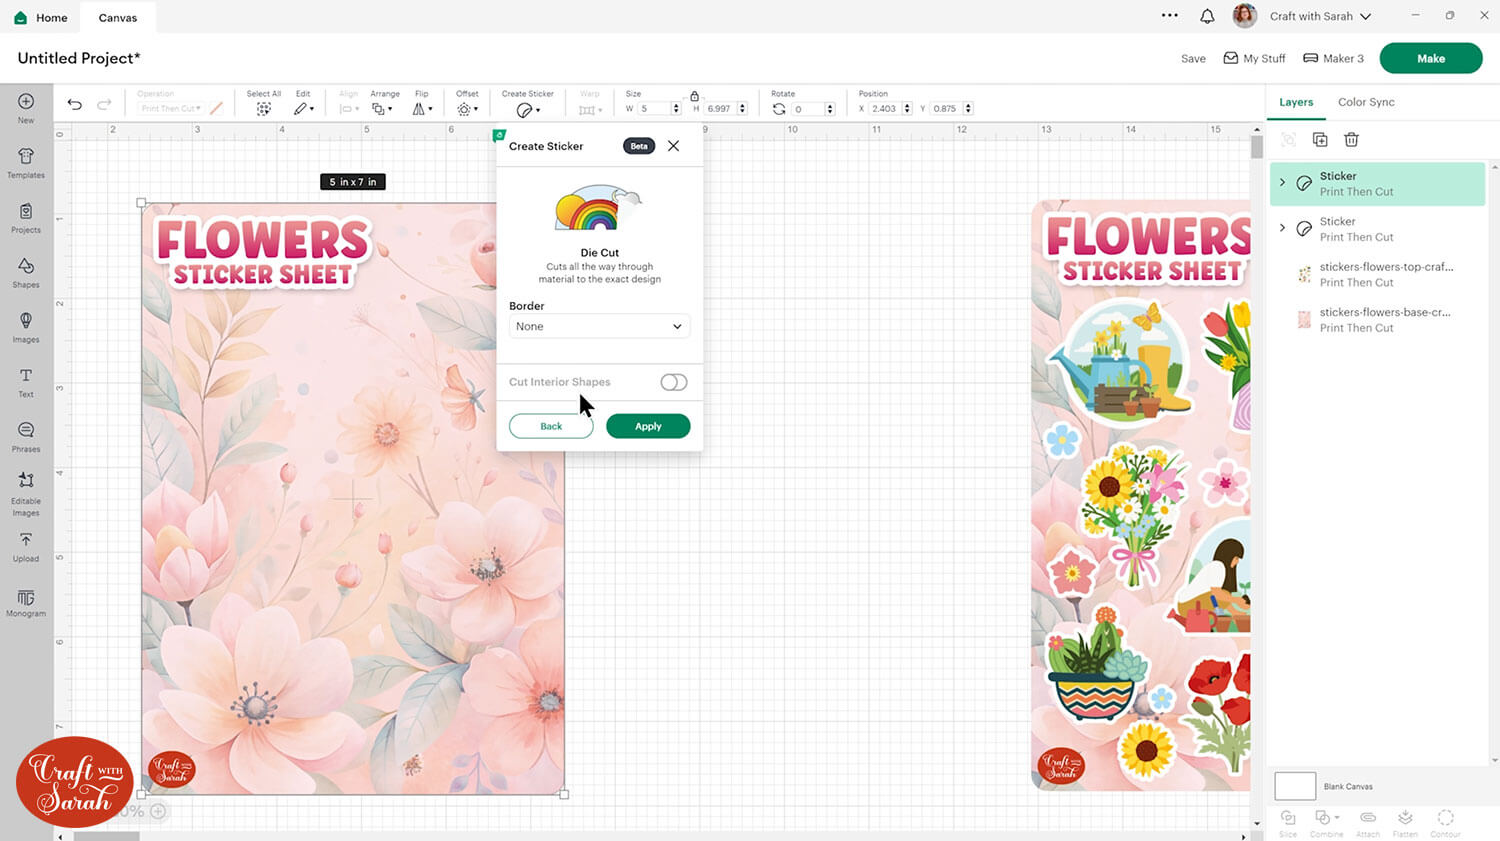
This time, choose the “Die Cut” option.
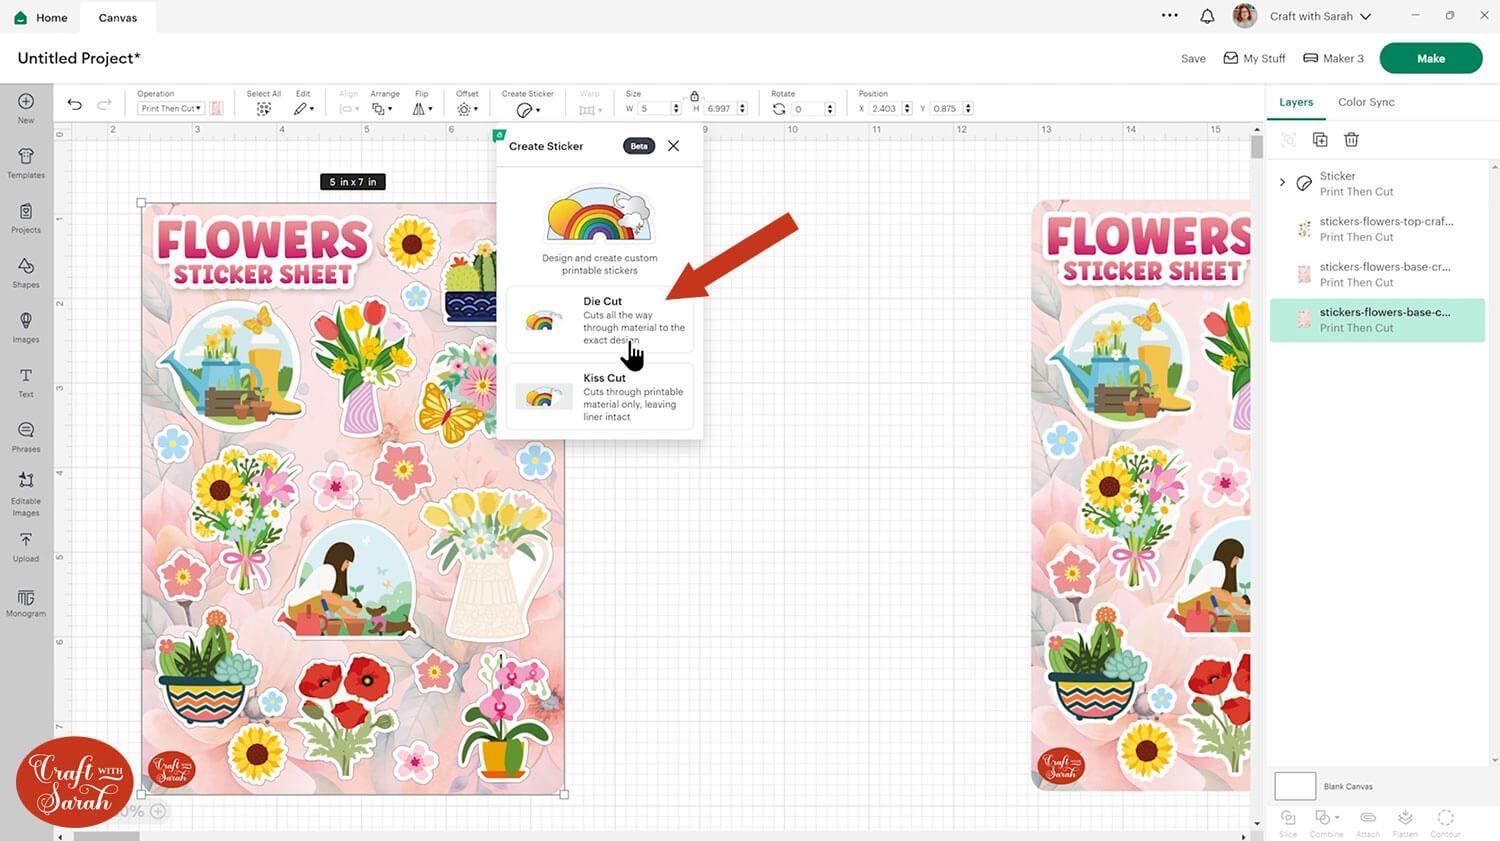
Select “None” for the Border.
Make sure “Cut Interior Shapes” is turned off.
Press Apply.
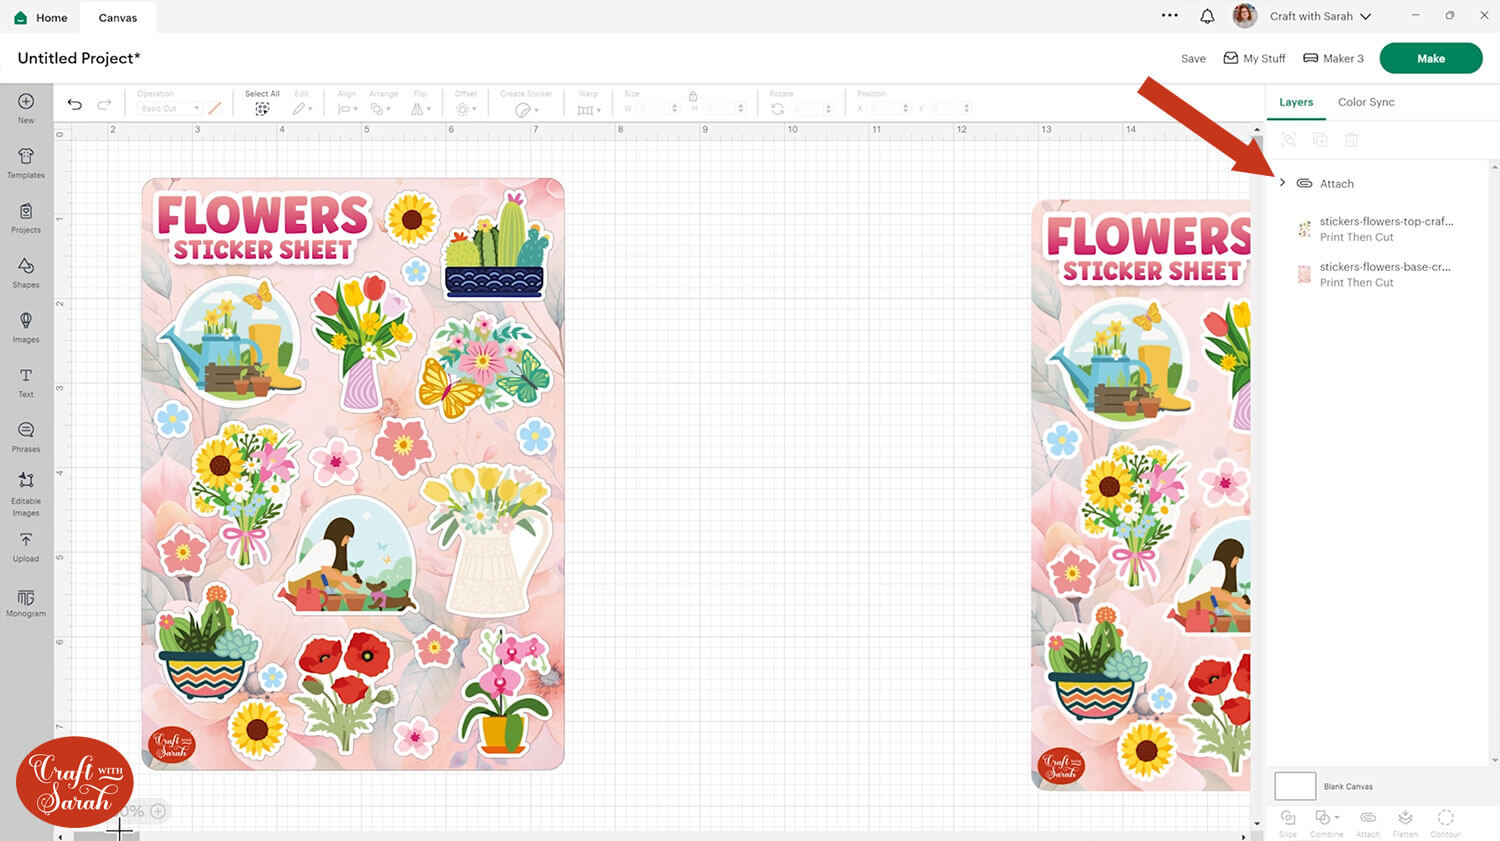
This will move the background above the stickers. Drag the layer back down to under the stickers.
Select the top and bottom sticker images and press “Attach” at the bottom of the layers panel. Attach is what tells the Cricut to print the stickers on top of the background.
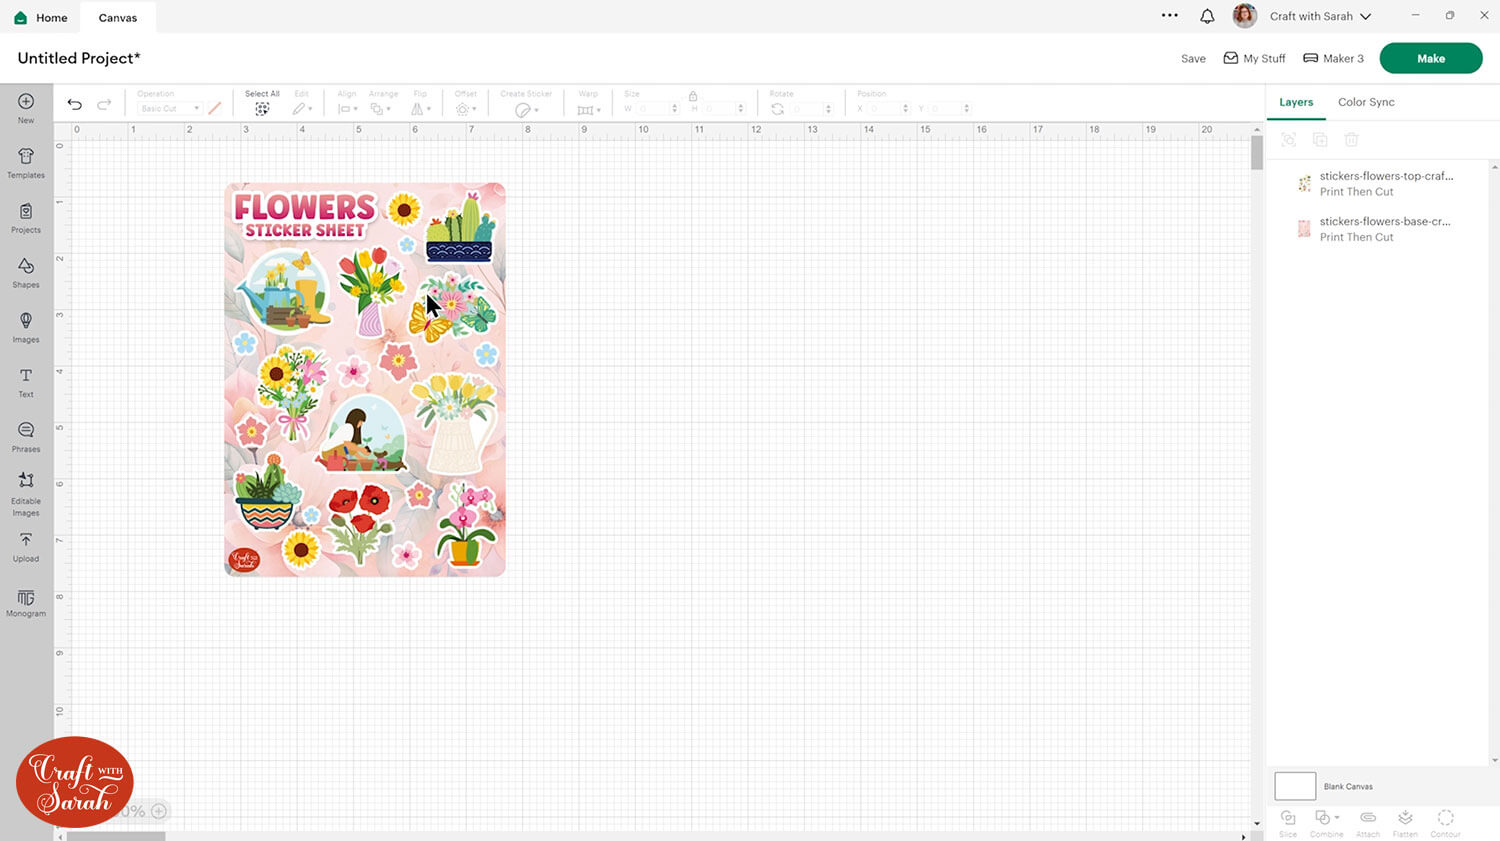
Here’s how it looks now it’s ready to cut:
NON-ACCESS/FREE VERSION – CUSTOM CUT SETTING
If you don’t pay for the Cricut Access subscription then you will need to set up the sticker sheet in a slightly different way.
The idea of this method is to use your Cricut’s very lightest cut setting to cut around the edge of the stickers to make sure you can peel them off the background but that they do not cut all the way through.
However, that would mean that the background layer ALSO gets cut with the lightest cut setting, so it wouldn’t cut around the edge of the sticker sheet correctly. Therefore, we need to make additional copies of the background shape so that the Cricut cuts those lines more than ones, to ensure it cuts through the background all the way.
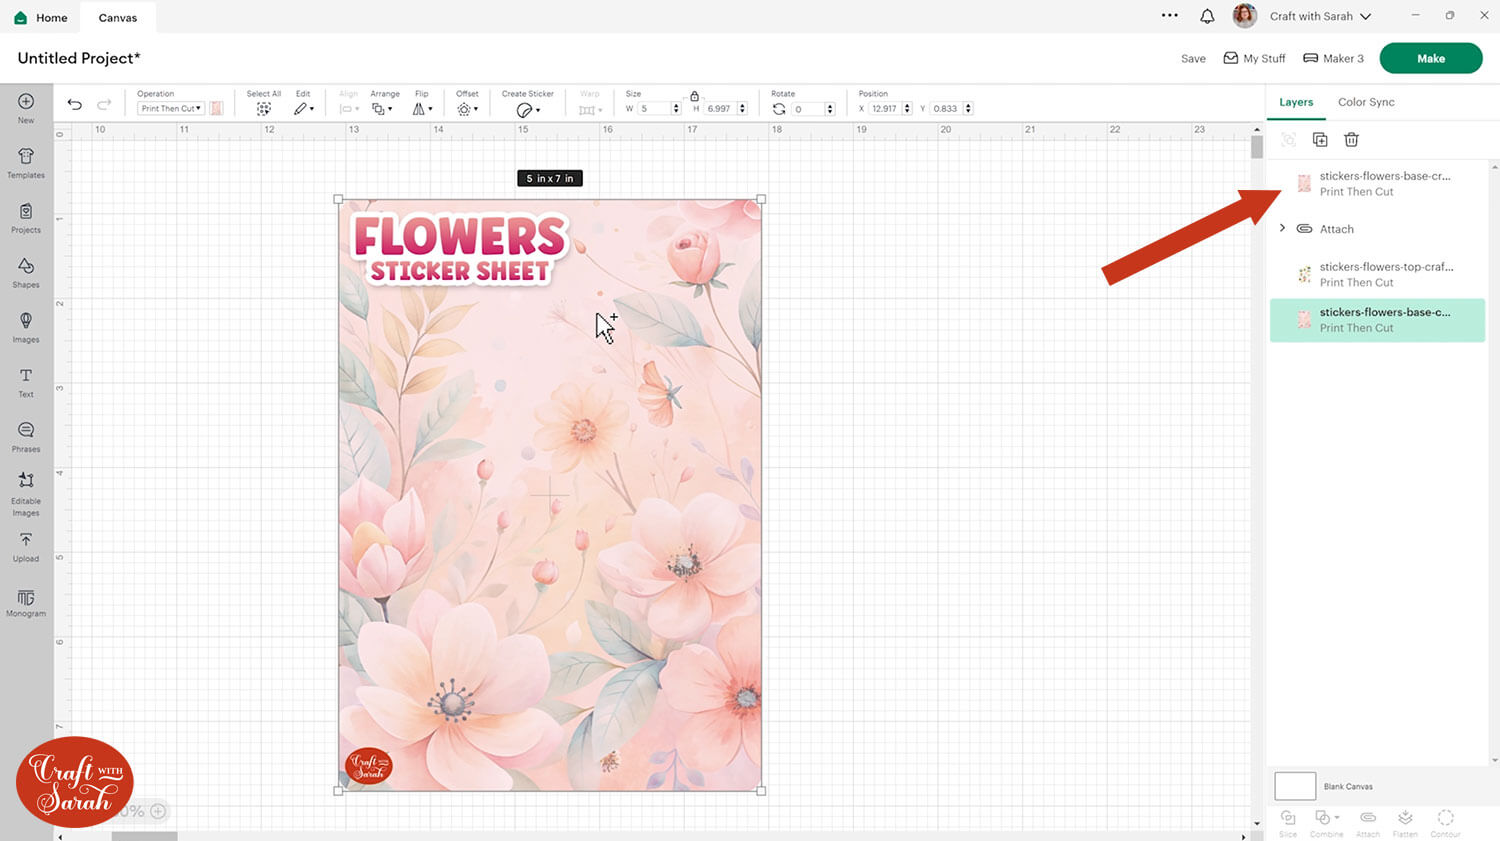
First, duplicate the background layer in place. This is a handy Design Space trick to know!
Press the Alt key on your keyboard (or Option key on a Mac) and then hover the mouse over the image. Your mouse cursor will change appearance to get a small “cross” symbol.
Click the background layer to make a copy in exactly the same place.
Click the duplicated layer to select it. Under the Operations dropdown, change it from “Print then Cut” to “Basic Cut”.
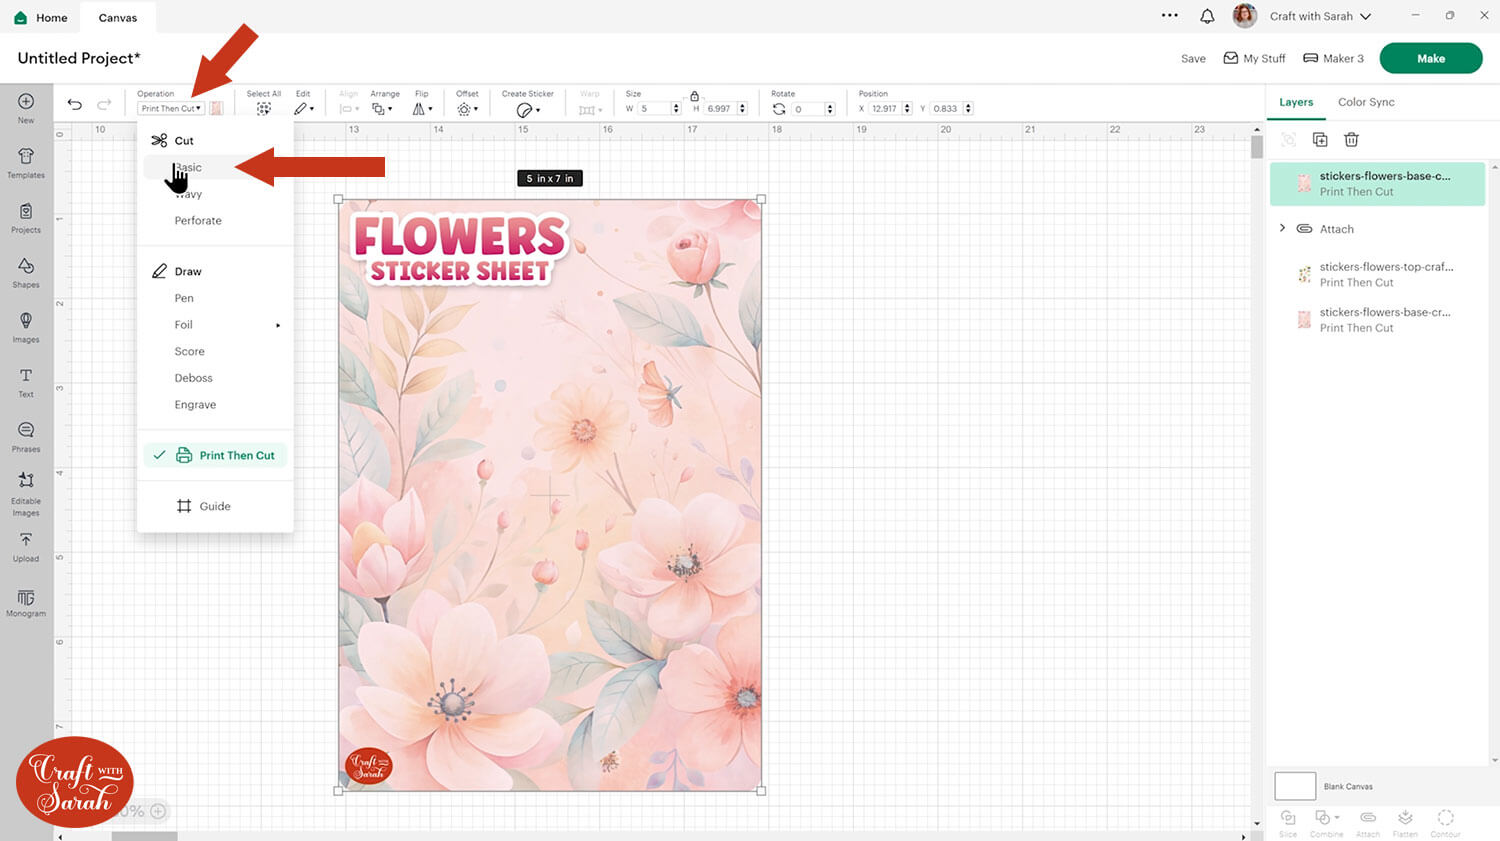
Change the colour to white.
Use the same “duplicate in place” trick to make three additional copies of the white rectangle.
Move all the white rectangles to the bottom of your layers panel.
You should now have the sticker images at the top, then the printed background image, then four white “cut” shapes.
Select all the layers and “Attach” them together.

Step 4) Cut the stickers
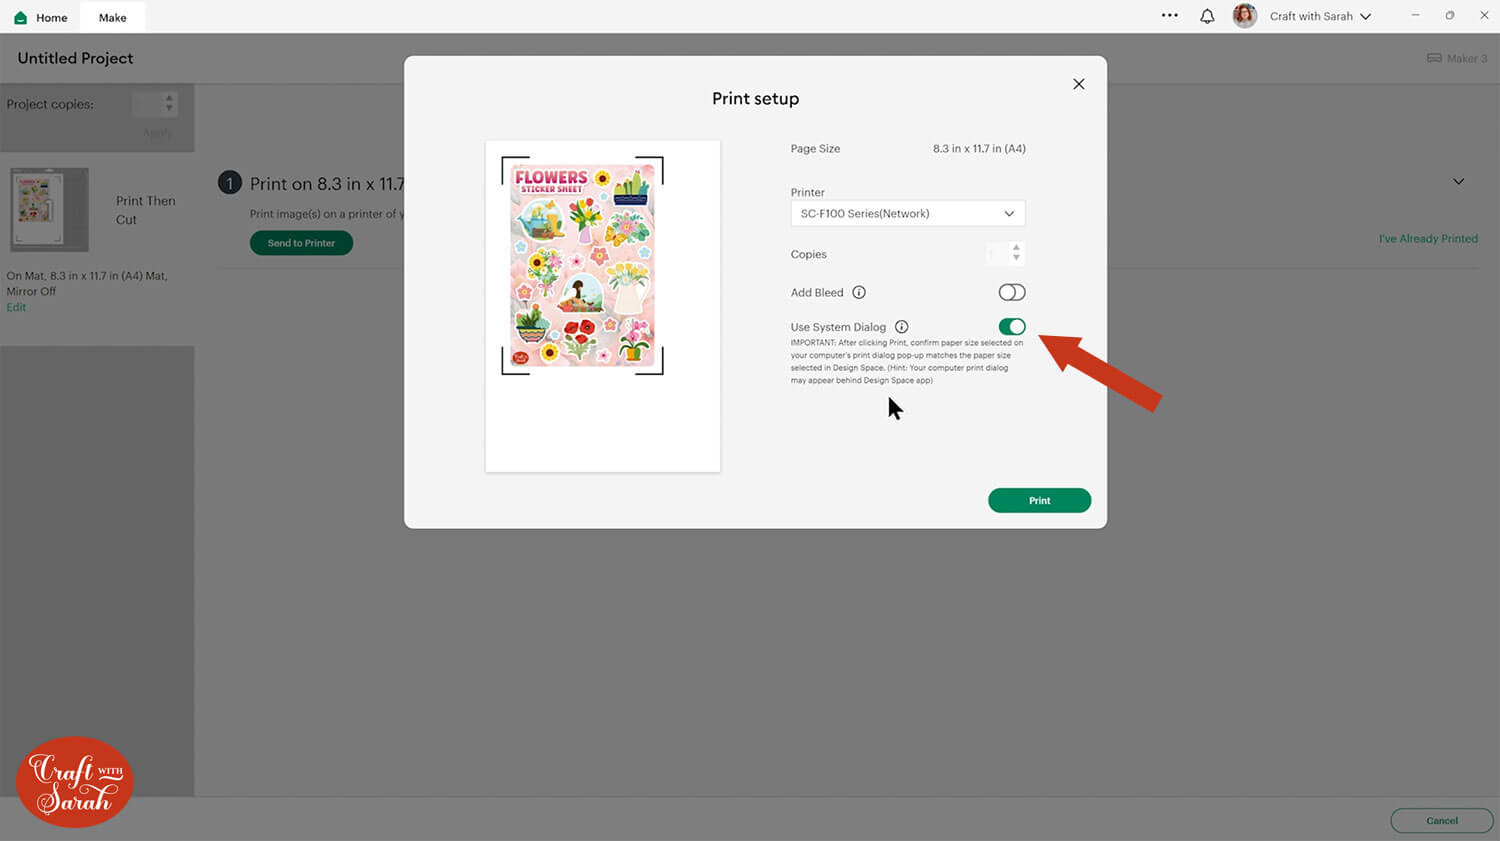
Save your project, then press “Make” on the top-right of your screen.
Click the “Send to Printer” button.
Make sure “Add Bleed” is turned OFF (as the stickers already have a white border), and “Use System Dialog” is turned ON.
When your printer settings box opens, choose a suitable paper type (e.g. Glossy Photo Paper) and select the highest quality print you can (it might be called “High” or “Best” but it varies for each type of printer).
NOTE: You may have to calibrate your Cricut for print then cut before you can print the stickers. If you get a popup box telling you to calibrate, make sure you do NOT have your sticker paper in the printer as you will need to print a test-sheet first which can be done on normal printer paper. Follow the on-screen instructions to calibrate your Cricut.
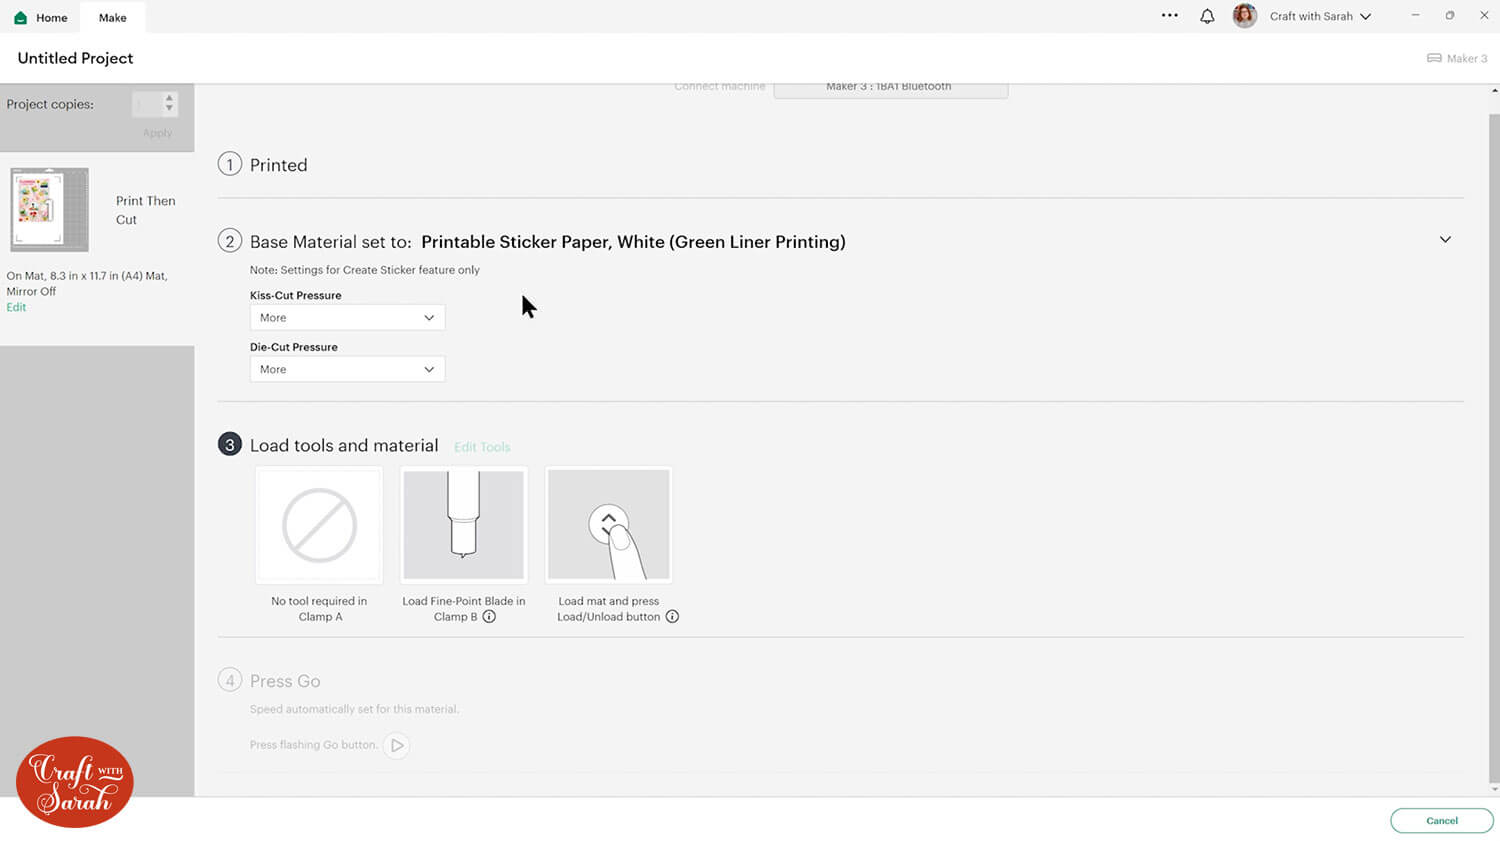
Now that the stickers are printed, it’s time to cut them out.
The cut screen will vary based on whether you are using the Cricut Access version or the non-Access version of the stickers.
CRICUT ACCESS VERSION – “CREATE STICKER” FEATURE
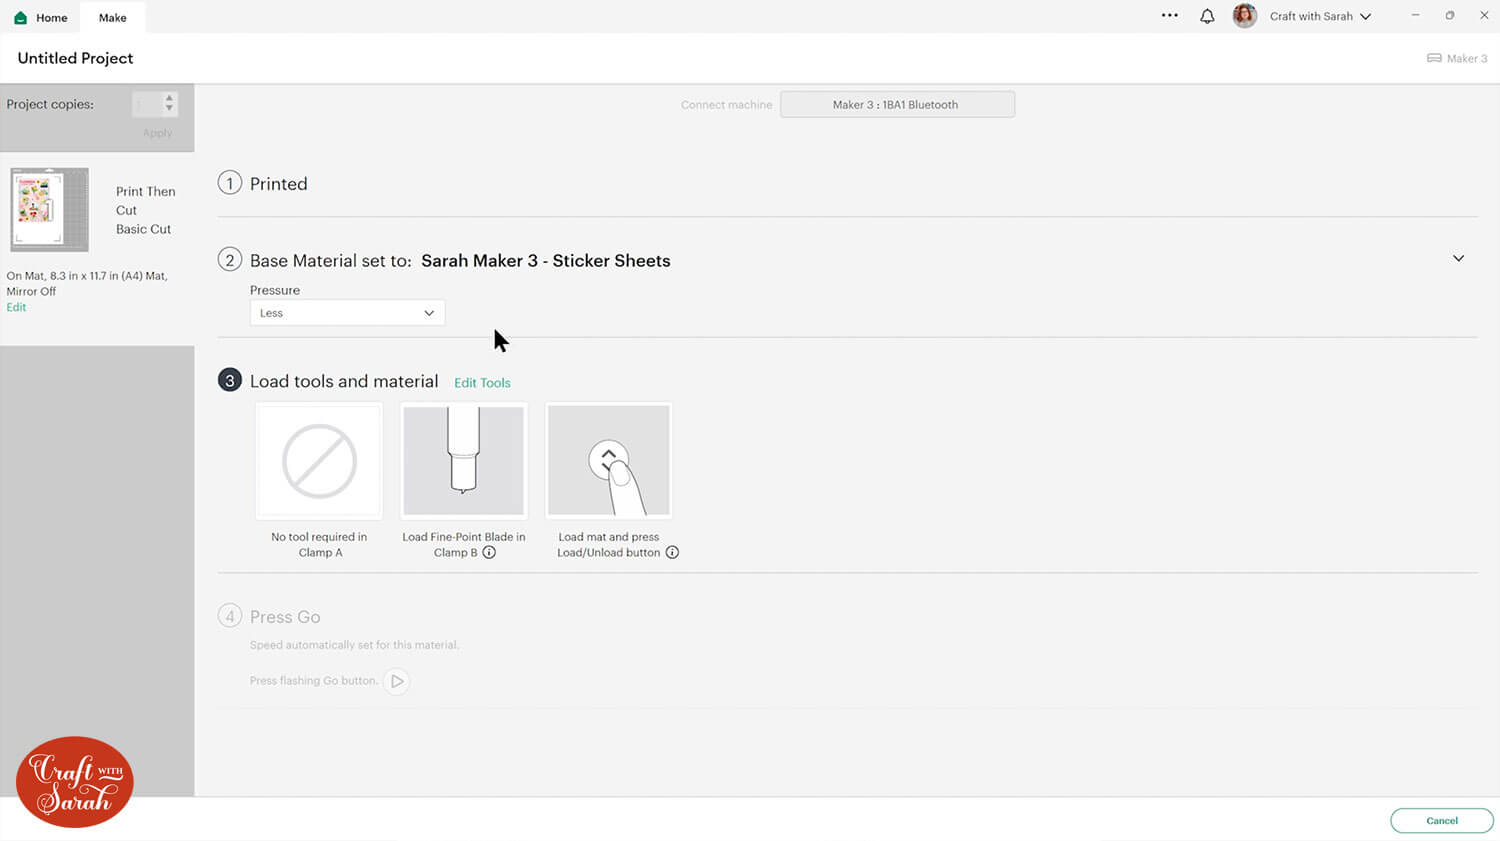
As this version used the “Create Sticker” feature, you are limited to only using sticker materials. Choose the one that best fits your material type.

For non-Cricut brand sticked paper, I find that the “Printable Sticker Paper, White” setting works well, with “Less Pressure” selected for the Kiss Cut.
I’m using Cricut’s white printable sticker paper for my stickers. I’ve selected “More Pressure” for both settings as I’ve found that tends to work better for me.
New to print then cut? Here’s a more detailed Cricut print then cut tutorial.
NON-ACCESS/FREE VERSION – CUSTOM CUT SETTING
For the alternate Non-Access version, you can choose any material type. It might take some trial and error before you get the stickers cutting correctly on your material, so don’t get frustrated if it doesn’t cut as expected on the first attempt.
I find the “Laser Copy Paper” material works well, with “Less Pressure”. Find it under “Browse All Materials”.
If that doesn’t work, and your stickers are cutting all the way through, then you can try making a custom cut setting.
Click the “Browse All Materials” button and scroll down to the bottom of the list of materials.
Click “Add New Material”.
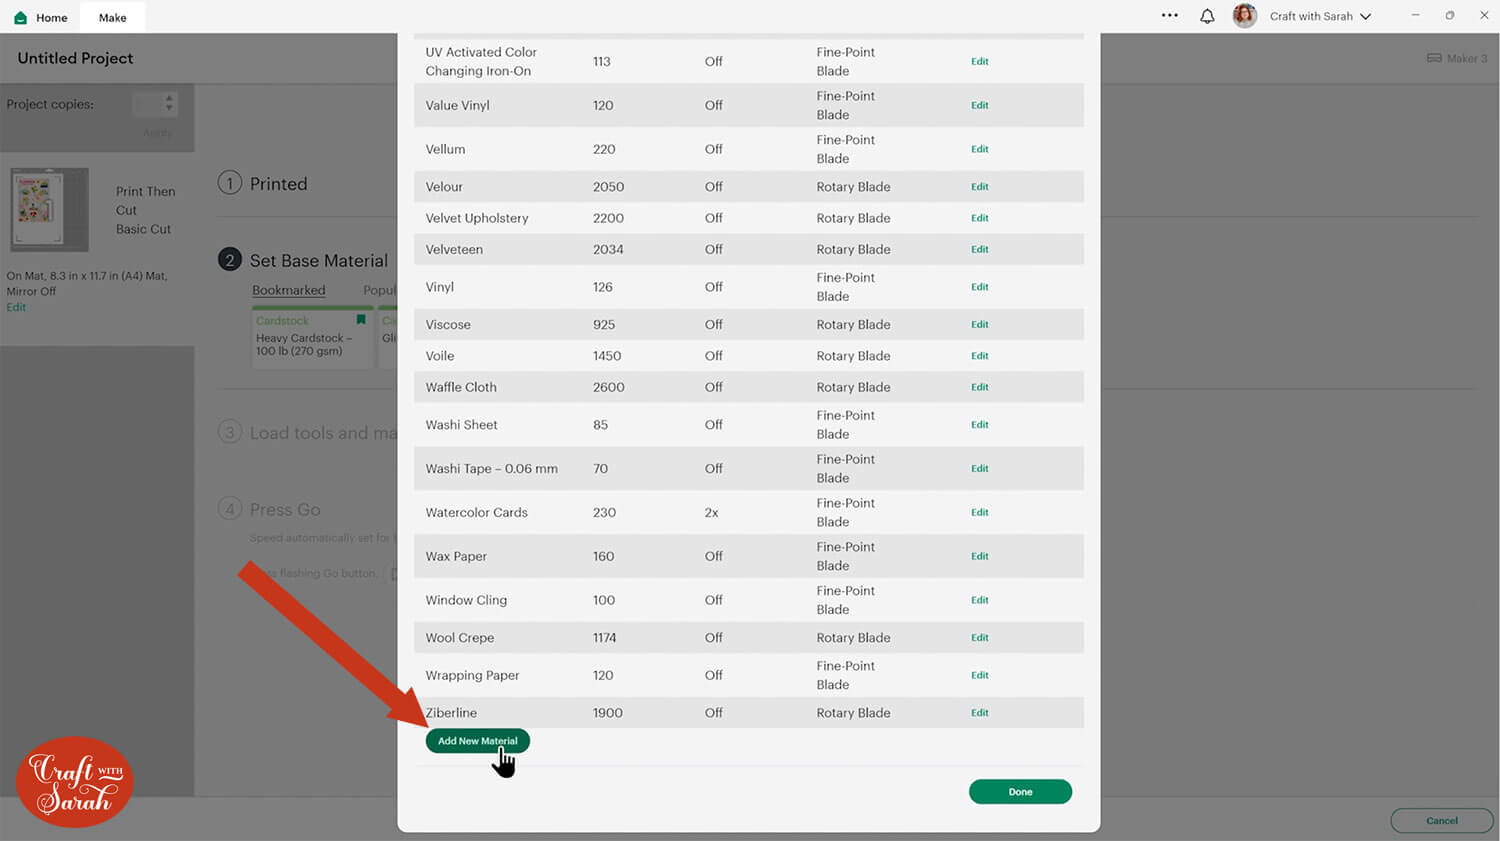
Give your new material a name. I like to add my name first to make it easy to find, and include the machine name so I know what machine this will be compatible with.
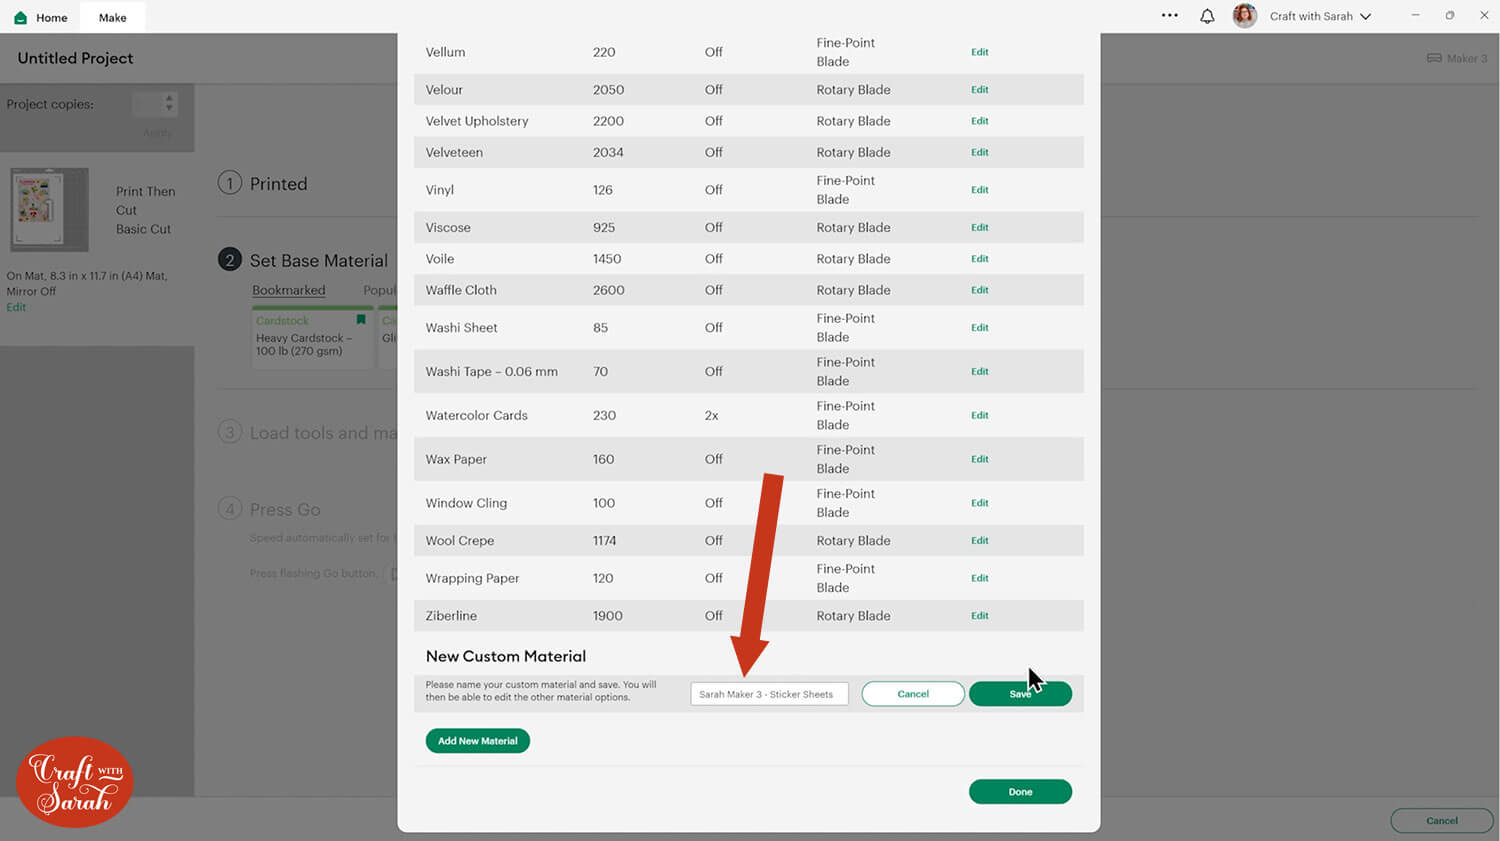
Drag the pressure as low as it will go, which is usually 70.
Leave the other settings the same.
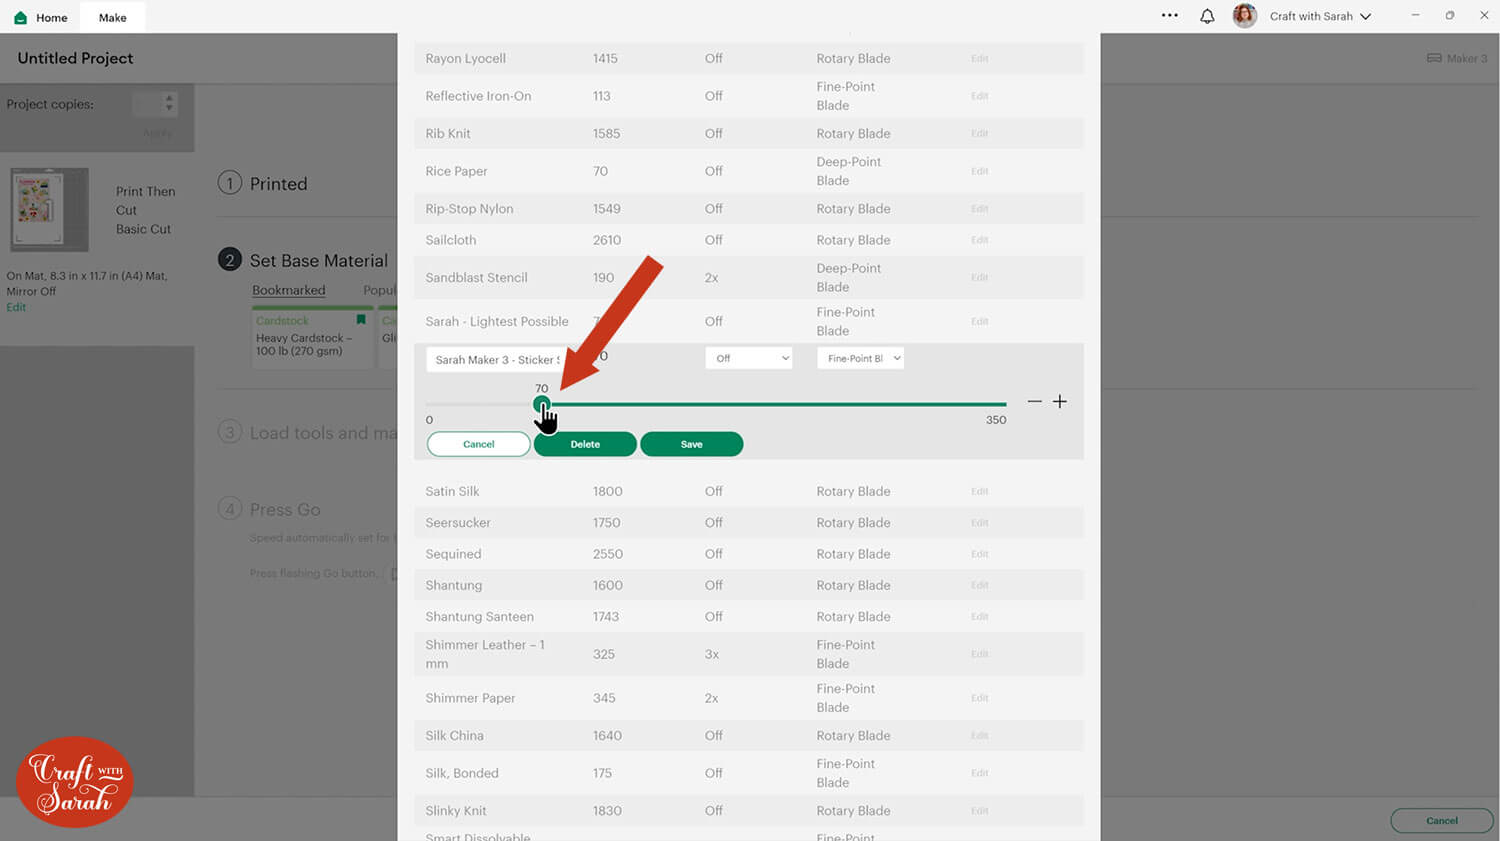
Save the material type and then select it under “Browse All Materials”.
Choose “Less” for the pressure to make it an even lighter cut.
Handmade stickers with a Cricut machine
It might take a few attempts and some tweaking of the cut settings before you get them perfectly cut out with your machine.
Hare are my stickers, cut from a range of different sticker materials:
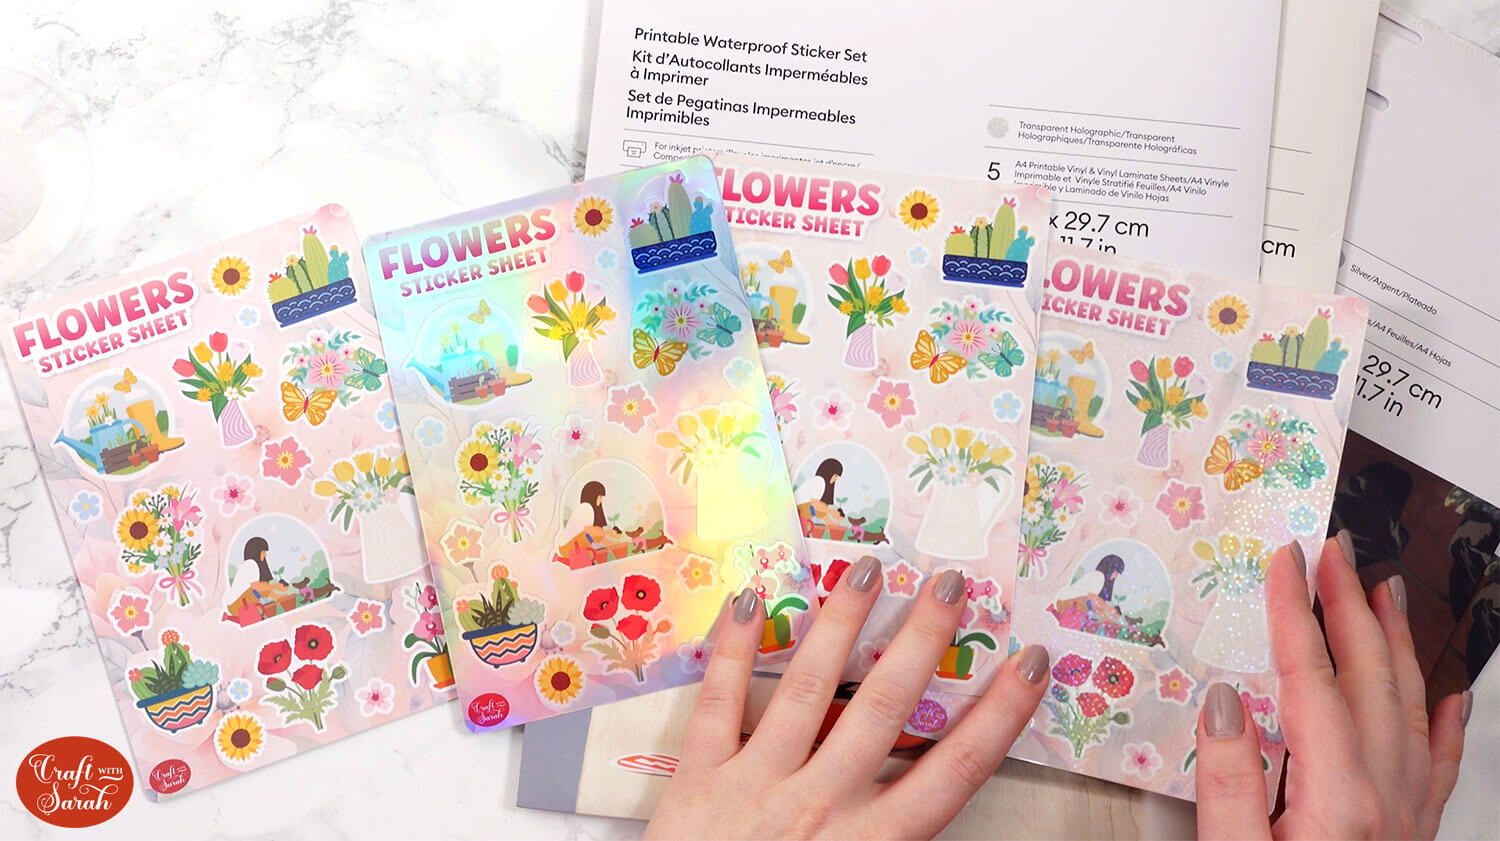
I used Cricut’s printable vinyl for some of them, with the “transparent” colour. The white paper would have been a better choice as the colours seem quite faded on the transparent colour sheets and it’s hard to see them.
However, overall I am very happy with how these stickers turned out, and have already started decorating…. pretty much everything I can find. 😅😂

Happy crafting,
Sarah x

