FCC 2024 Day 03: Flower Bookmarks

Welcome to day three of the Floral Craft Countdown, where I’m sharing 14 flower themed Cricut papercraft projects in 14 days.
Make beautiful floral bookmarks from cardstock and get your Cricut to draw the pictures using pens!
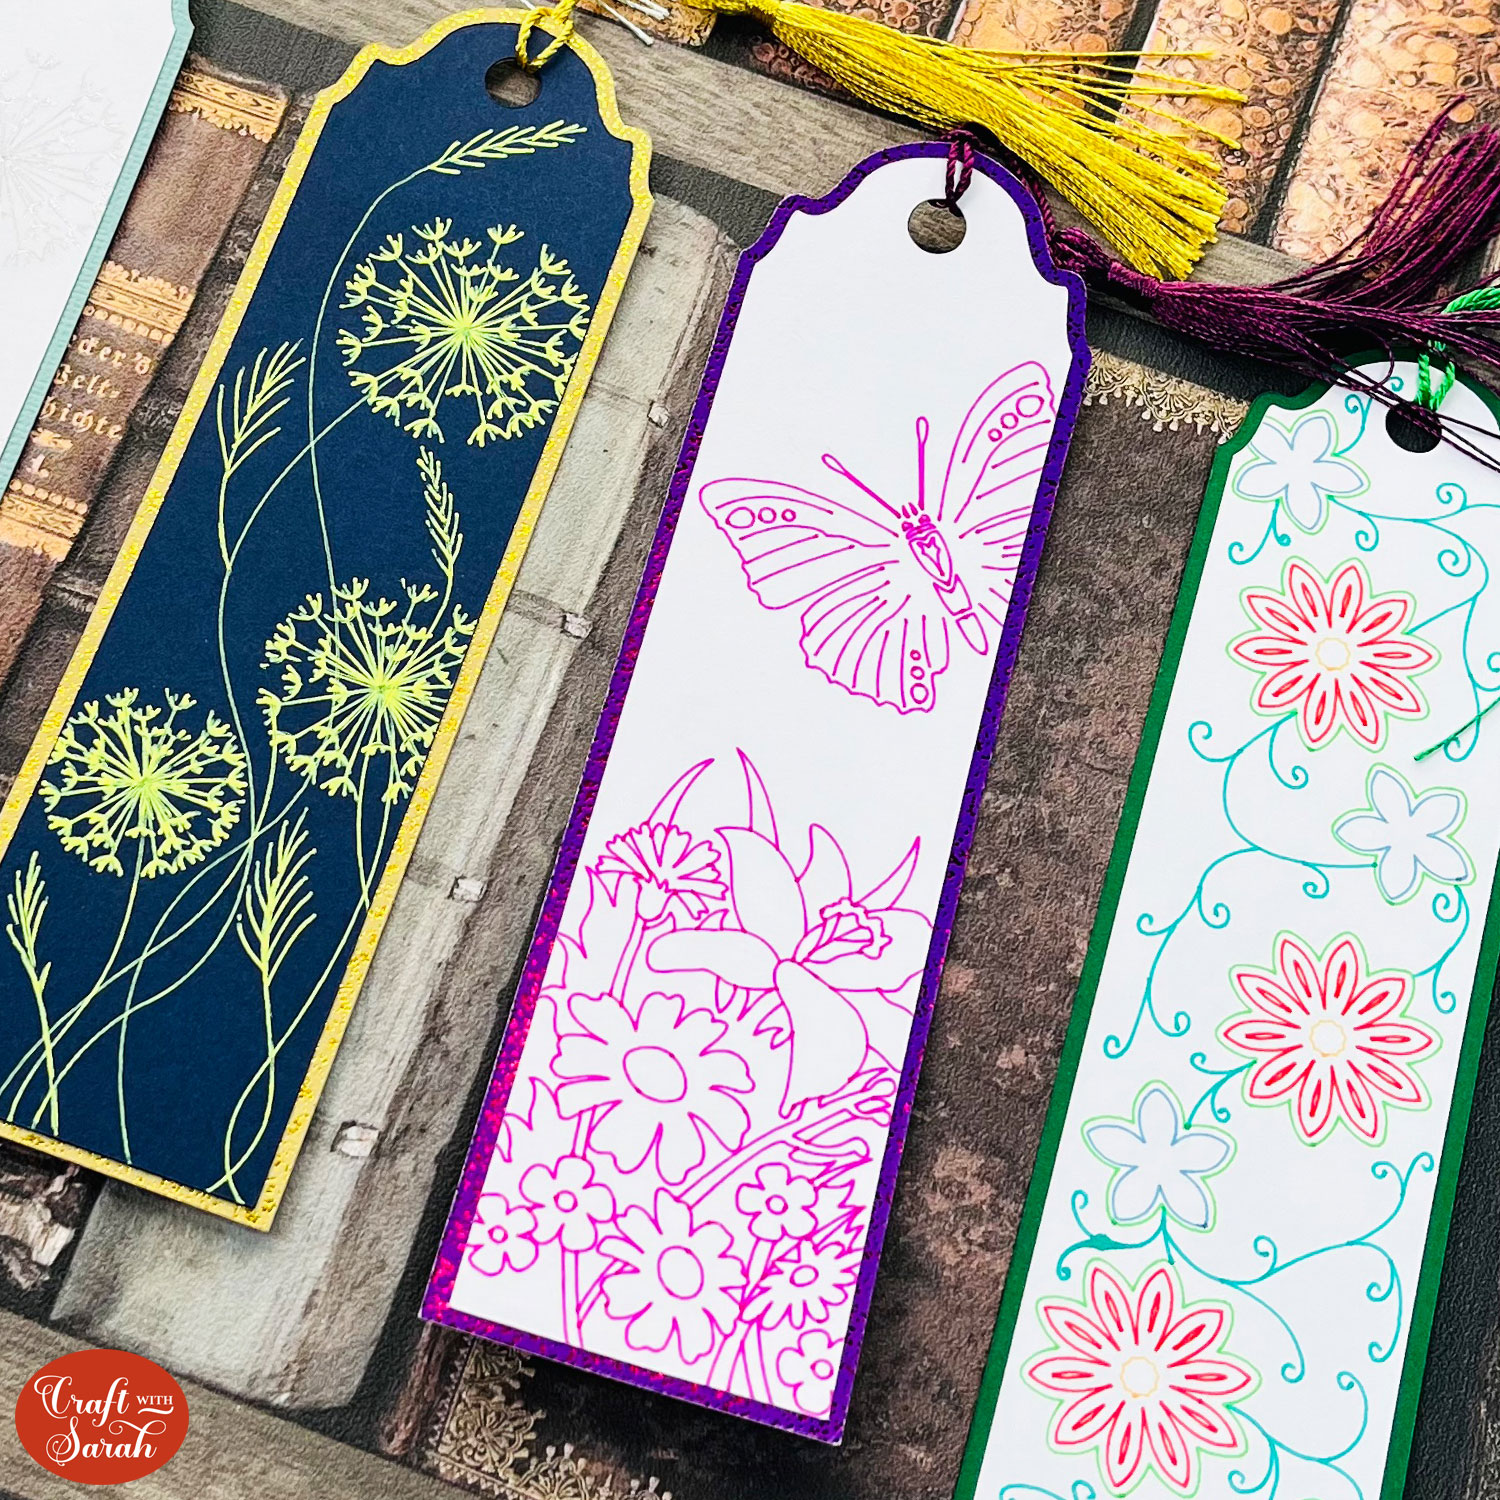
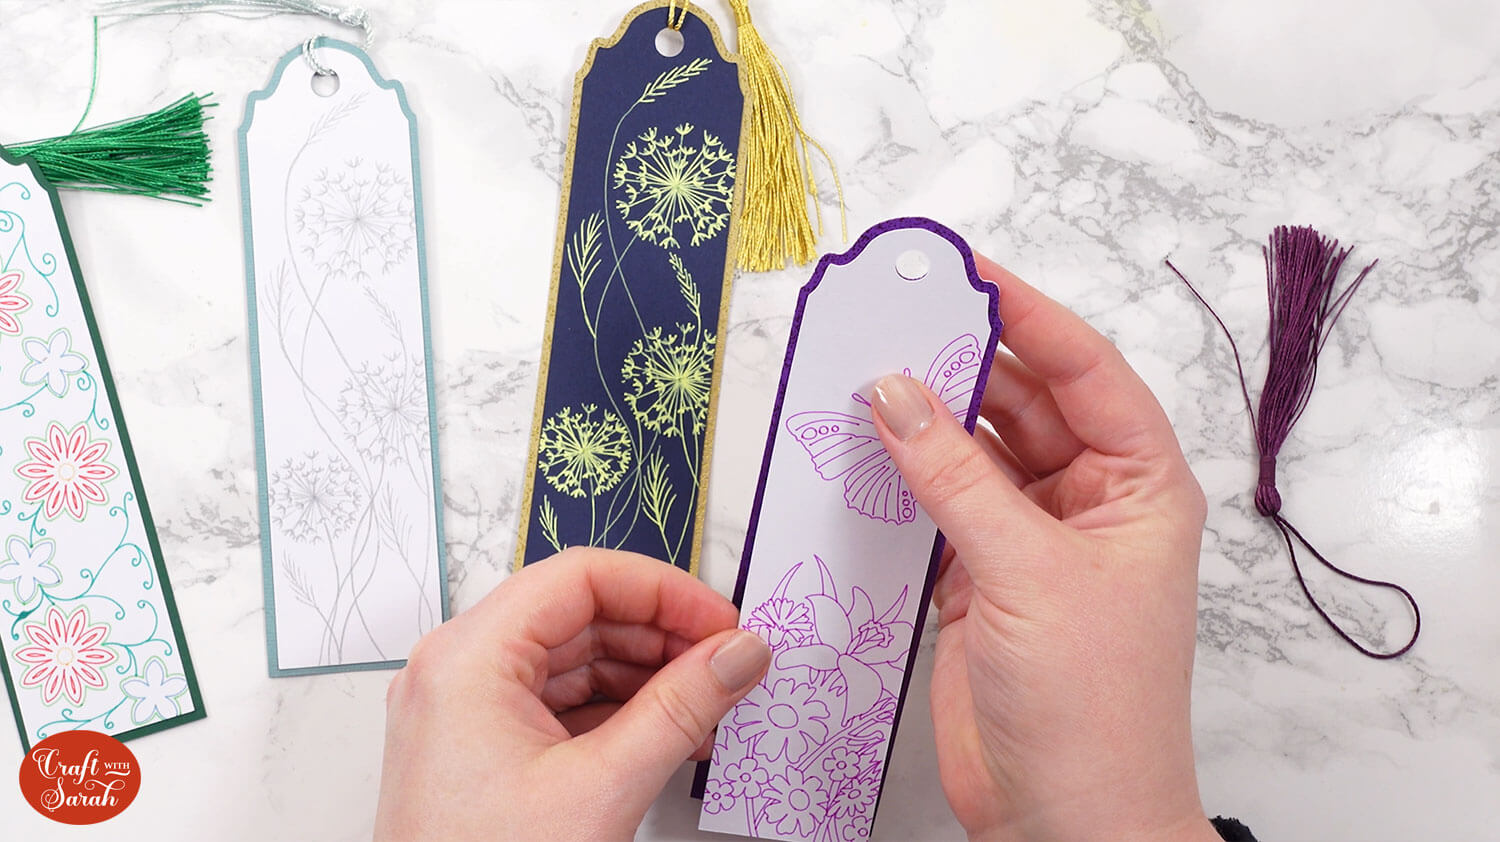
There are three designs to choose from: multicoloured flowers, dandelions and a butterfly with flowers. They make lovely little gifts for avid readers and you could even write a little message or quote on the back.
There are lots of different materials you can use to draw these on and of course there’s the full range of Cricut pens which gives you completely different looks.
See how to use Cricut pens to draw on the detailed floral designs and how different pens create different effects on your card.
This Project was part of the Floral Craft Countdown
Materials supply list
Here is a list of the materials that I used to make this project.
Please note that some of the links included in this article are affiliate links, which means that if you click through and make a purchase I may receive a commission (at no additional cost to you). You can read my full disclosure at the bottom of the page.
- Cricut machine
- Light blue Cricut cutting mat
- Coloured Card
- Glue (I like Bearly Art Glue and Collall)
- Cricut pens
- Bookmark tassels
This project is suitable for the following types of Cricut machine: Explore Air 2, Explore Air 3, Maker, Maker 3, Venture, Joy Xtra and Joy.
Foundation learning
If you're new to crafting with your Cricut, you may find the below links helpful.
They teach some of the skills mentioned throughout this tutorial.
- How to upload SVG files into Design Space
- How to make 3D layered Cricut projects
- The BEST way to frame papercraft projects
- How to mount multiple designs in the same frame with magic guides
- How to score with a Cricut (even without scoring tools)
- Print then cut tutorial
- Design Space tools (Combine, Attach, Slice, Weld, Flatten, etc.)
- Pattern fill tutorial (for making backgrounds & cutting images to a specific shape/size)
- Free envelope SVGs that can be sized to fit any card
- How to write inside cards with Cricut pens
- How to cut layered designs at a small size
- Design Space tips & tricks
- Cricut pens tutorial
Video tutorial
Watch the video below to see how to make this project. Keep scrolling for a written tutorial.
Written tutorial (with photos!)
Here’s how to make your very own flower bookmarks using a Cricut machine!
Step 1) Download the cutting file & upload to Design Space
Download the files using the box below.
Purchase the File(s)
This cut file is available as part of the Instant Access Bundle.
Or, purchase this design individually here

Before you upload the SVGs to Design Space, you need to unzip the download folder that they come in.
- How to unzip a folder on Windows computer
- How to unzip a folder on a Mac
- How to unzip a folder on an iPad/iPhone
- How to unzip a folder on an Android device
After unzipping, upload the SVG files into Cricut Design Space. These are the files which starts svg- in the filename.
Not sure how to do this? Here’s how to upload SVGs to Cricut Design Space. Make sure you upload the file which starts svg- in the filename!
Each bookmark is a separate SVG so you will need to upload each one individually to get them all onto your project.
Step 2) Format the pen layers
When you upload SVGs where you want to draw with the pen, Design Space doesn’t understand by default that we want it to draw some of these layers instead of cutting them.
You need to need to specifically tell Design Space which layers to be drawn with the pens.
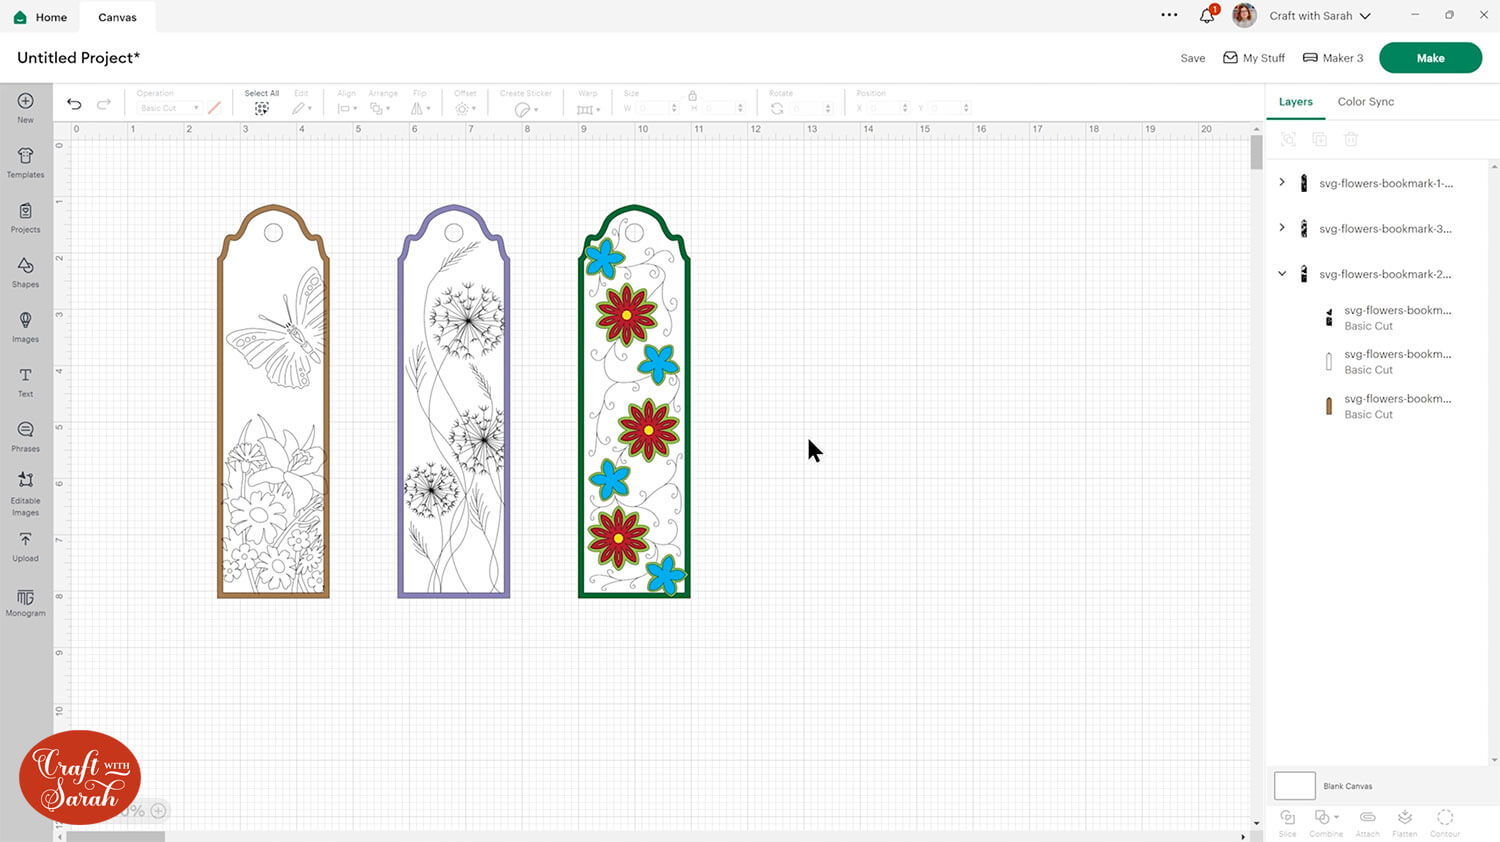
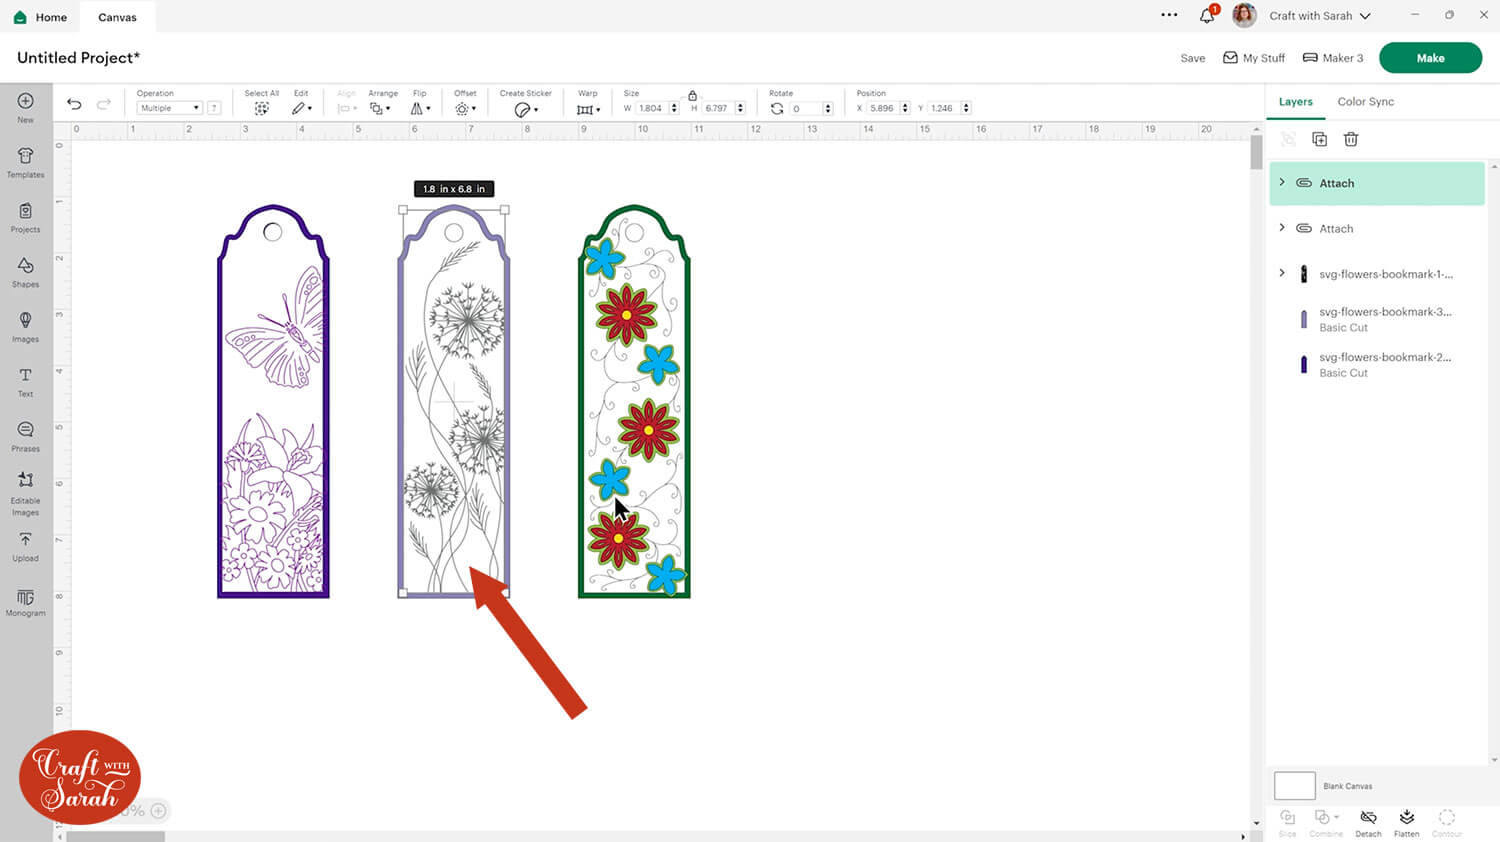
For each bookmark design, you can click on it and open up the layers panel by clicking the little arrow. You’ll see there are different layers – some for the base pieces of card that we will be cutting out, but some that need to be switched to “Draw” layers.
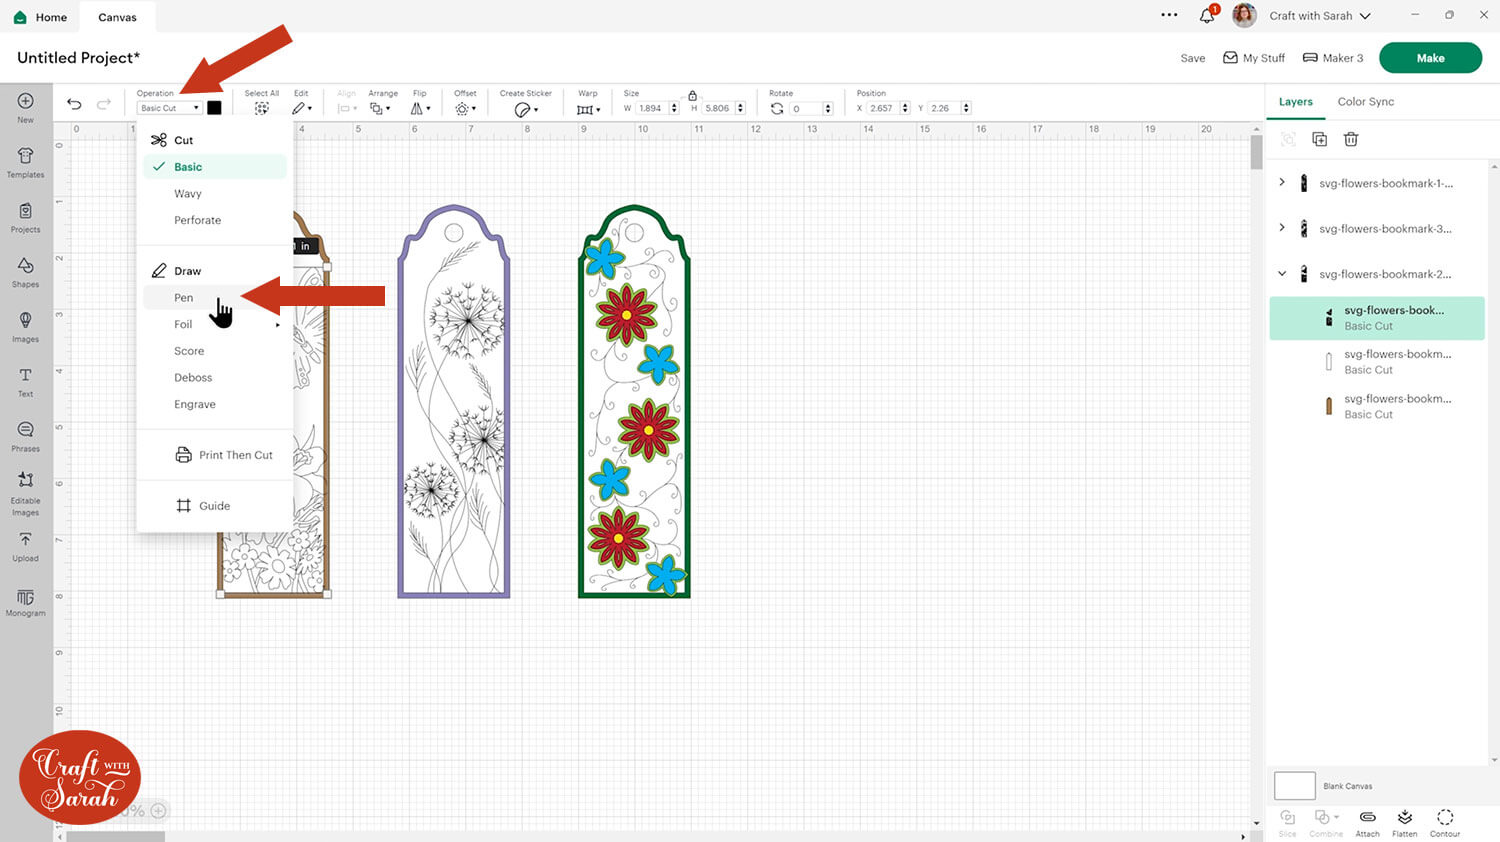
Click one of the decoration layers. I’m doing the butterfly design first.
Change the layer to “Pen” under the Operations dropdown menu.
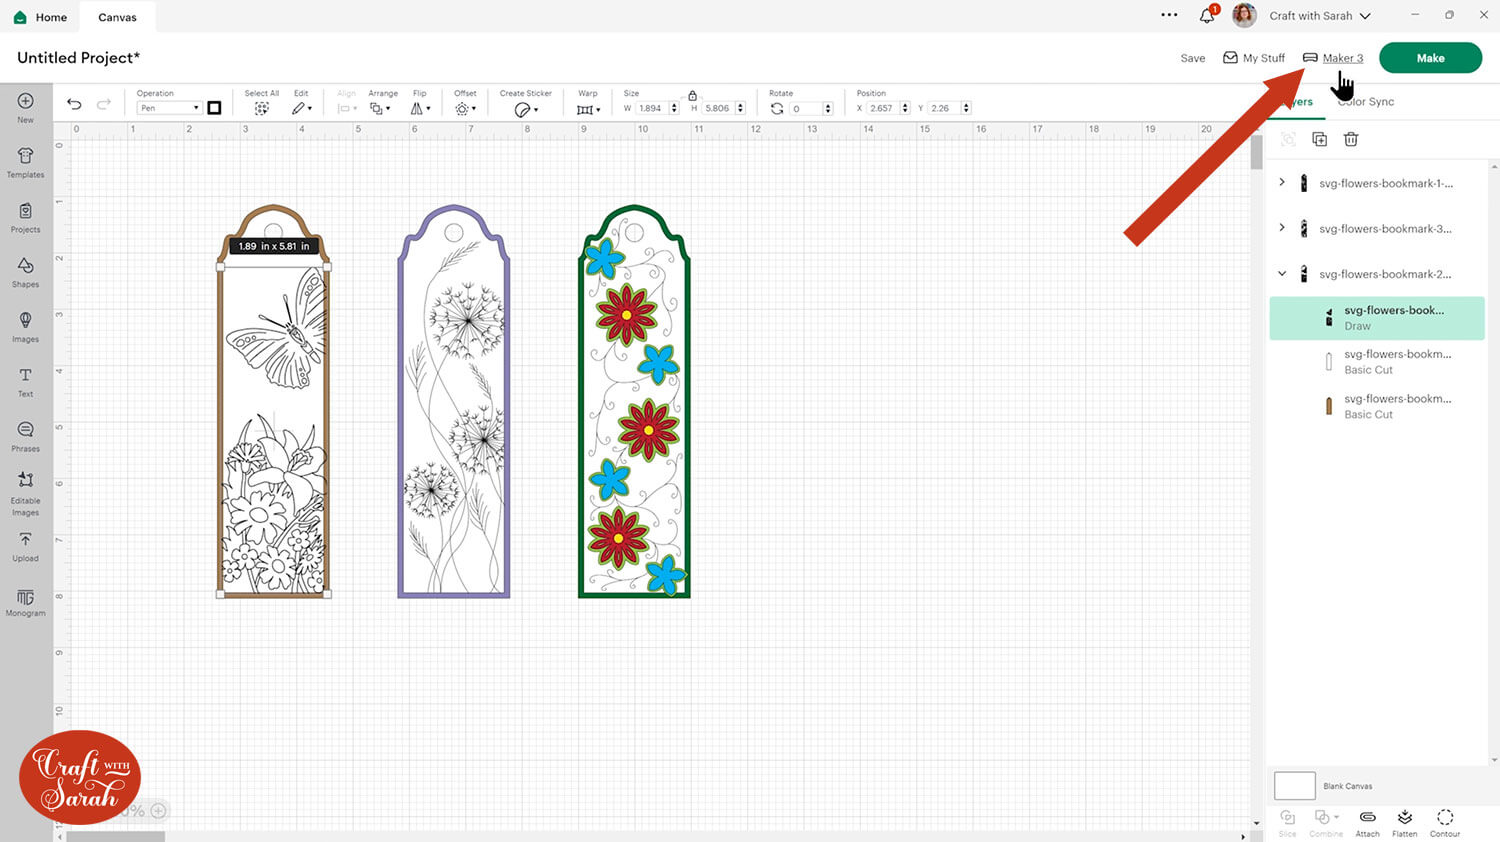
Make sure you’ve got the correct Cricut machine selected on the top-right of the screen because different types of Cricut machine need different types of pen.
You can then click the little colour box next to where it says pen and choose the type of pen and the colour you want to use.
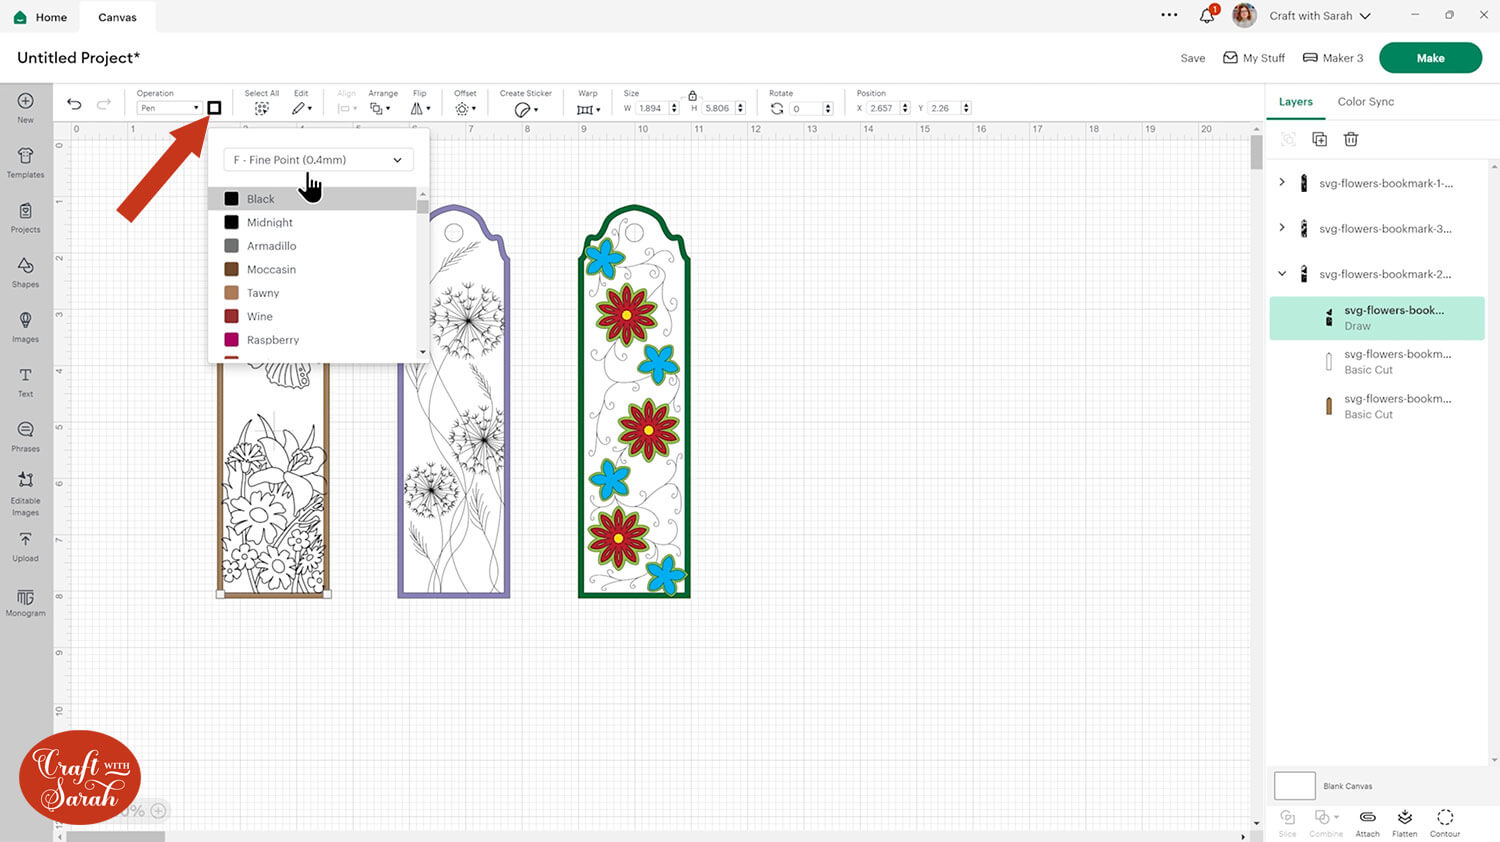
The designs are quite thin and delicate so out of all the choices I do recommend either the fine point or the extra fine point pens. If you are using a thicker pen, the lines will merge together and it might not quite look right.
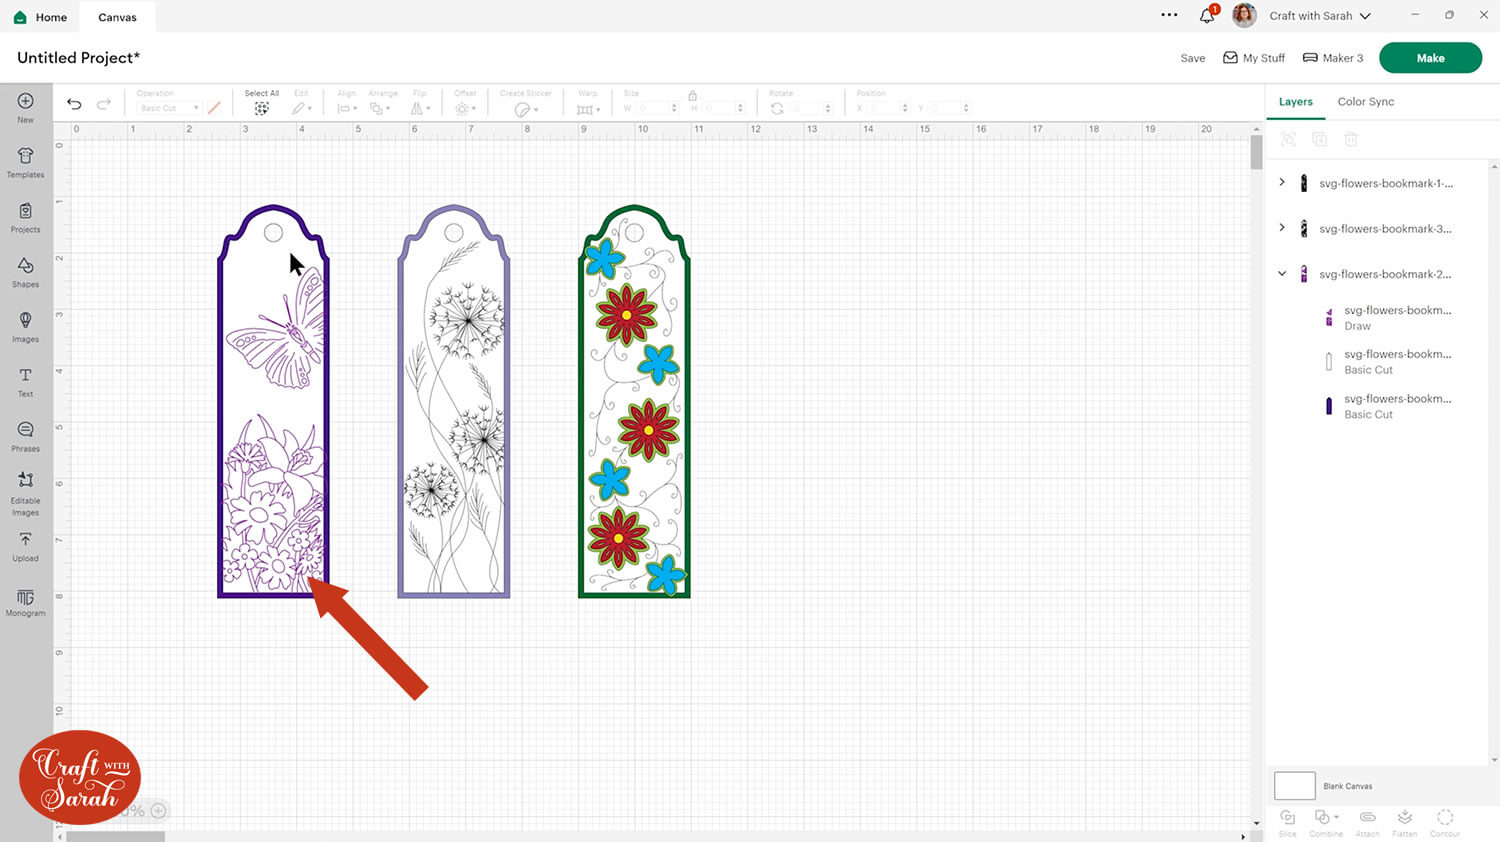
I changed the colour of my pen layer to purple and kept the white so that it’s nice and easy to see. You can change the backing layer by clicking the bottom layer in the group and changing the colour. I changed mine to a dark purple.
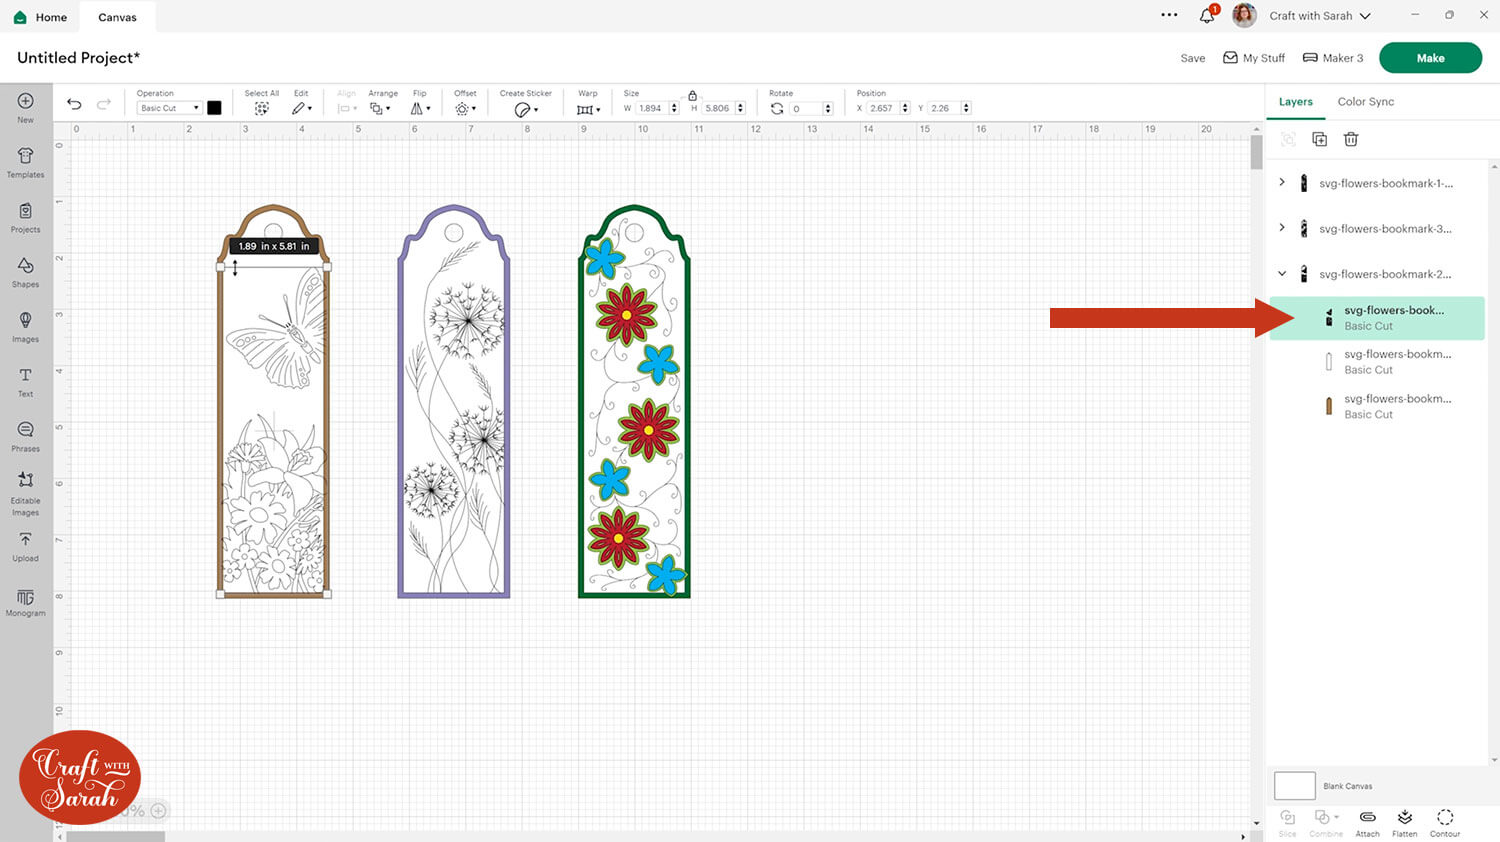
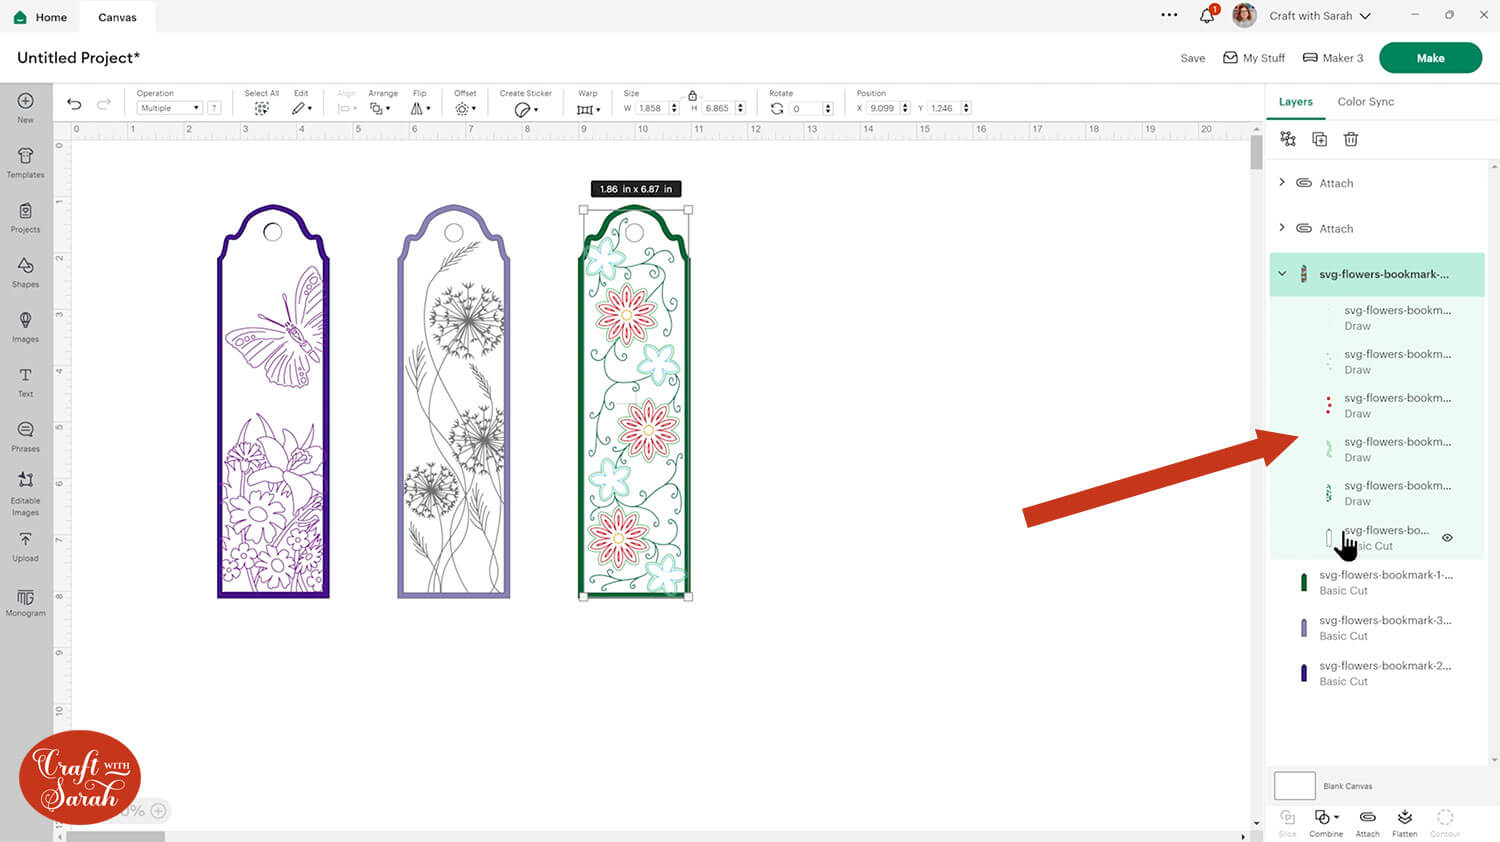
Click on the bookmark design and separate the layers by pressing the “Ungroup” button at the top of the layers panel.
We need to tell the Cricut to do the drawing on the bookmark shape underneath.
Select the pen layer and the bookmark shape underneath (only the one directly underneath – not the base bookmark in the other colour) and press “Attach” at the bottom of the layers panel.

Don’t worry that some of the drawings look like the go over the edge. This is intentional, so that you don’t end up with a little gap where the drawings stop before the edge of the cut.
The dandelion bookmark will work in the same way, so you will need to repeat the same formatting steps for that one. Change the draw layer to Pen, change the colours and attach it to the white layer underneath.
The multicolor flower bookmark works a little differently. At the moment, the flowers appear to be filled in, but when we change them to be a Pen layer they will turn into outlines.
Ungroup the layers to reveal another little group that contains all the layers that need to be changed to Pen.
Change all the layers to Pen and choose a suitable colour for each.
This is how it ends up:
Finally, Attach all those Pen layers to the white bookmark shape underneath.
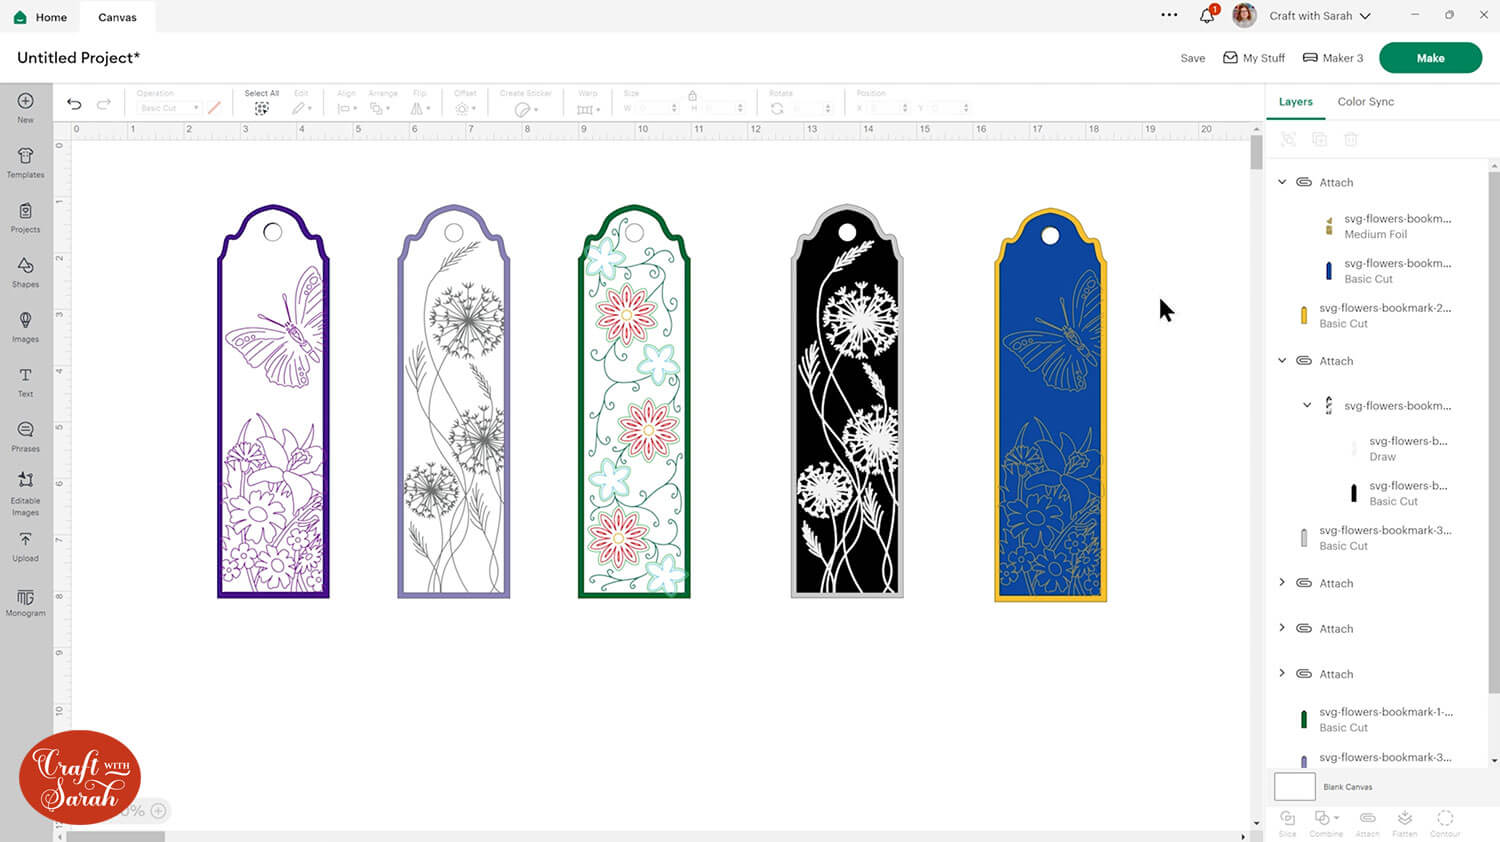
There are a few other things you could do with these bookmarks, for example, you could use the Cricut opaque pens to draw them onto really dark cardstock.
You can also use the Cricut foiling tool. To do this, you will need to change the operation type to Foil.
Using watercolour pens would be another lovely option.
For the image below, the dandelion bookmark on the right has been set up to use Cricut opaque pens and the dark blue butterfly bookmark is set up to use the Foil tool.
Step 3) Cut out the bookmarks
When you’re happy with how your bookmarks are looking, press Make to get everything drawn and cut out.
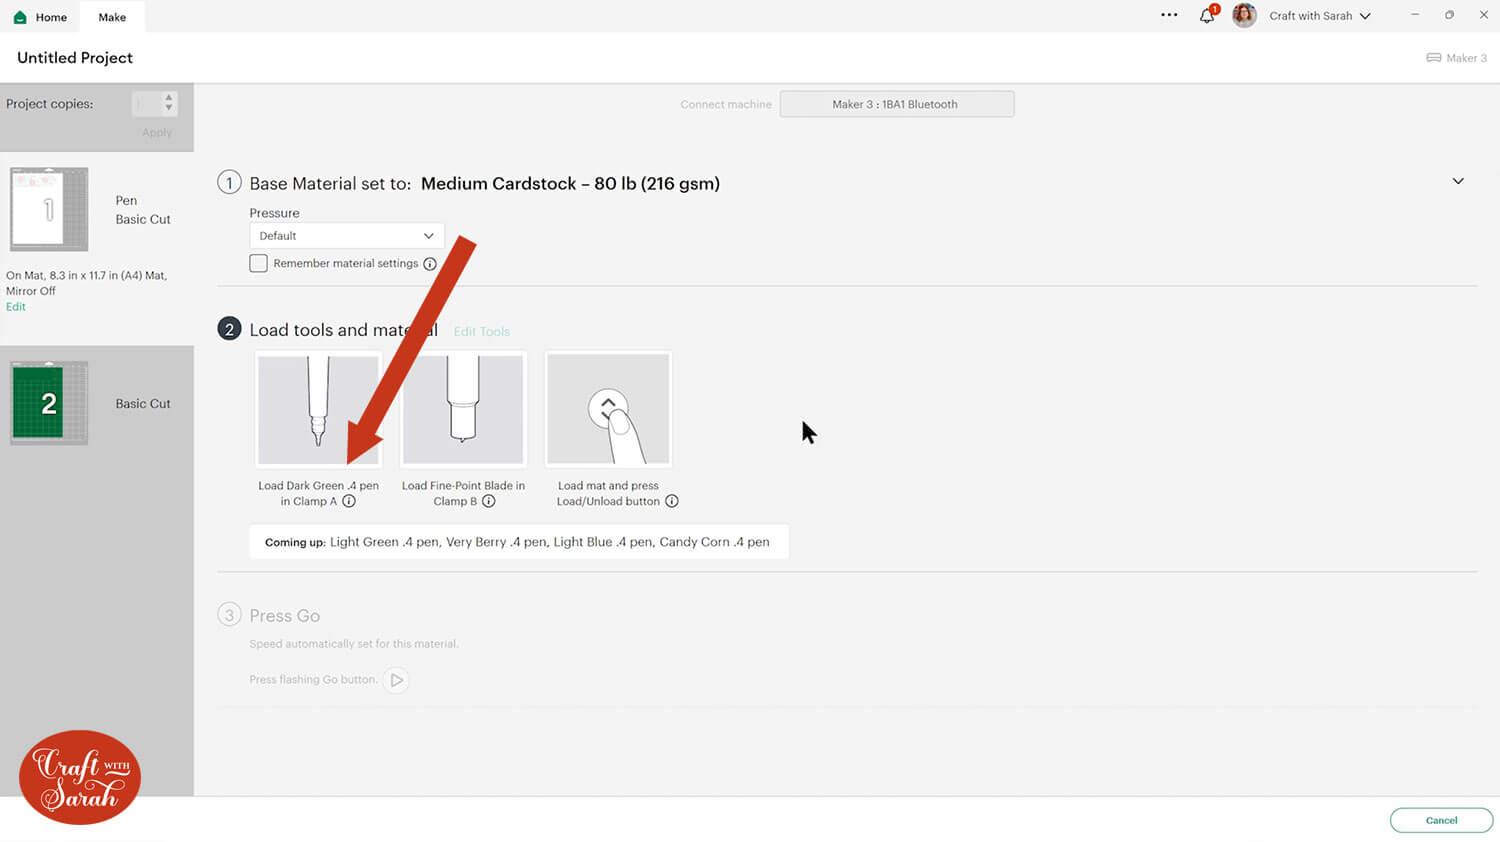
Pay very close attention to what pen the Cricut is asking you to put in, especially if you are using more than one colour or have multiple designs on one sheet. The Cricut doesn’t know what colour pen you are putting in, so it’s up to you to get it right!
If you get it in the wrong order, it means your image is going to end up in the wrong colours.
You also need to make sure that you are using the correct pens for your machine.
See the difference between the same colour pen for the larger machines and then the Cricut Joy in the image below.
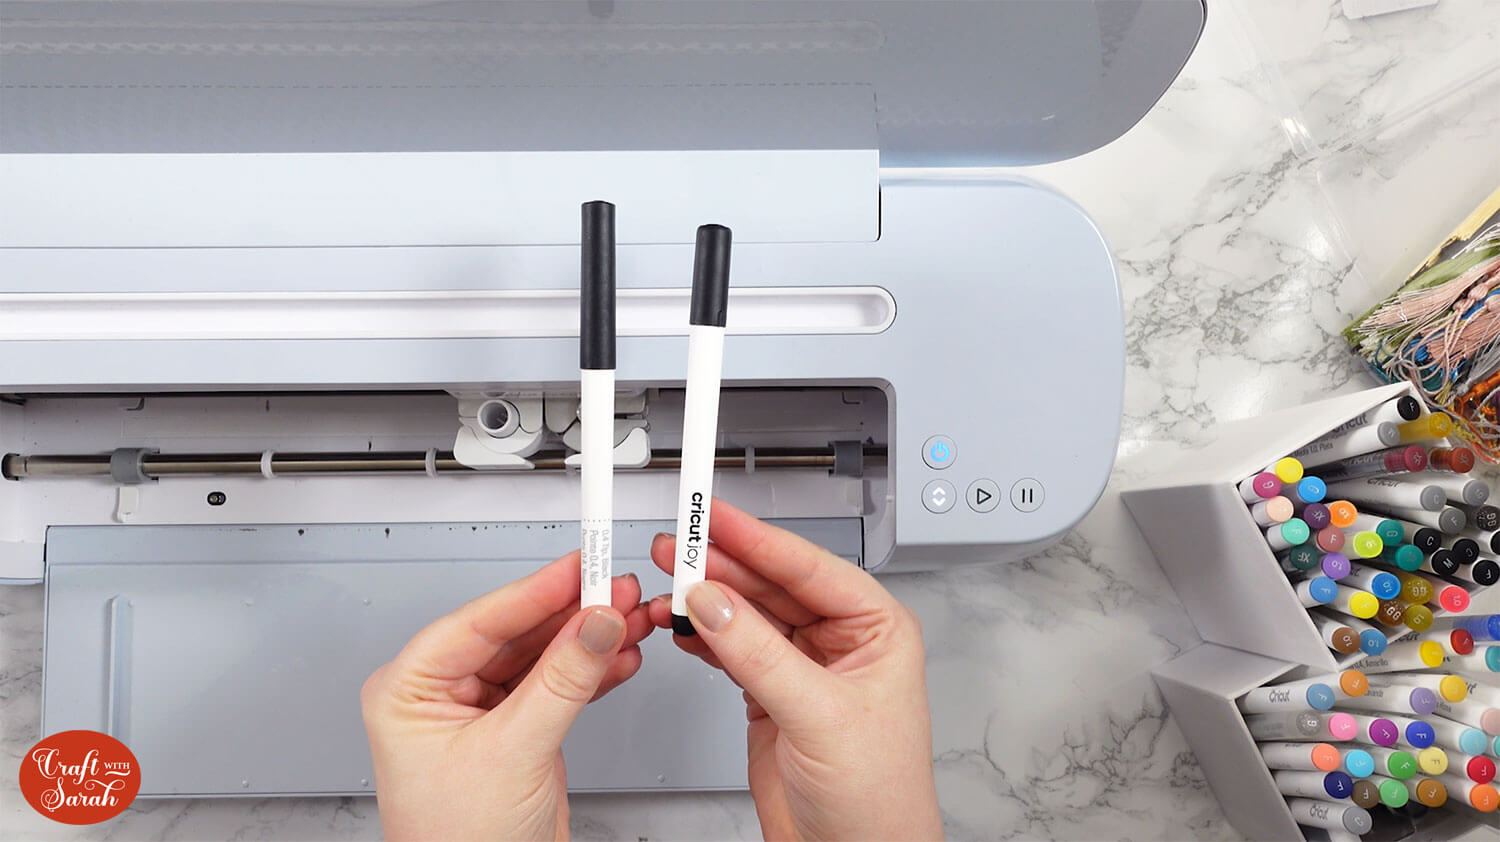
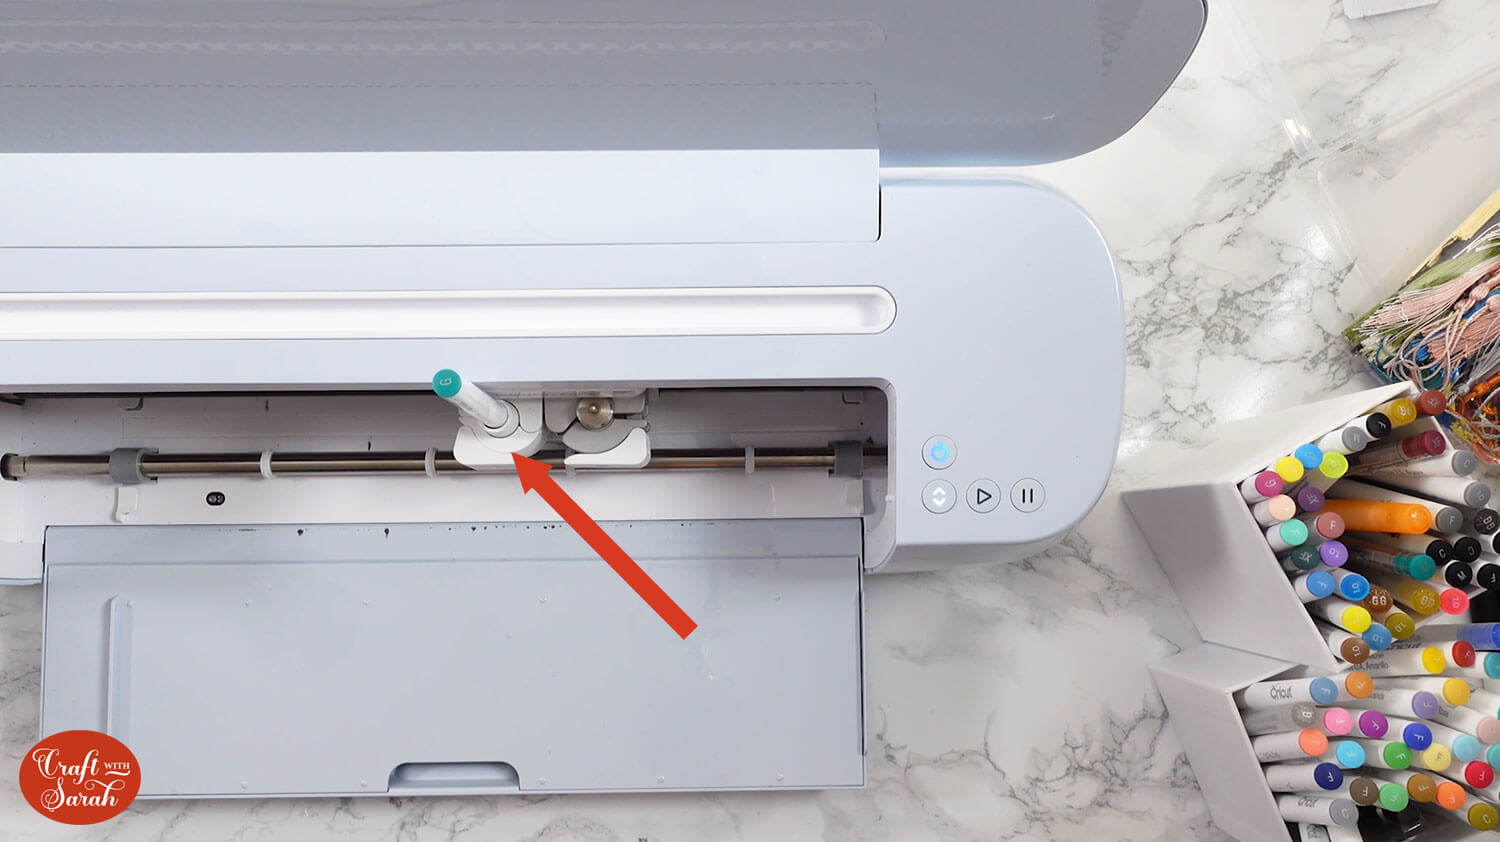
Place the correct pen colour in clamp A and push till it clicks into place. Then close the clamp.
If you are using one of the Cricut Joy machines then you will need to swap the blade out for a pen.
If you are making the multicolour bookmark design, once your Cricut has done the first colour, don’t eject the mat but look at the screen in Design Space and it will tell you what pen to put in next.
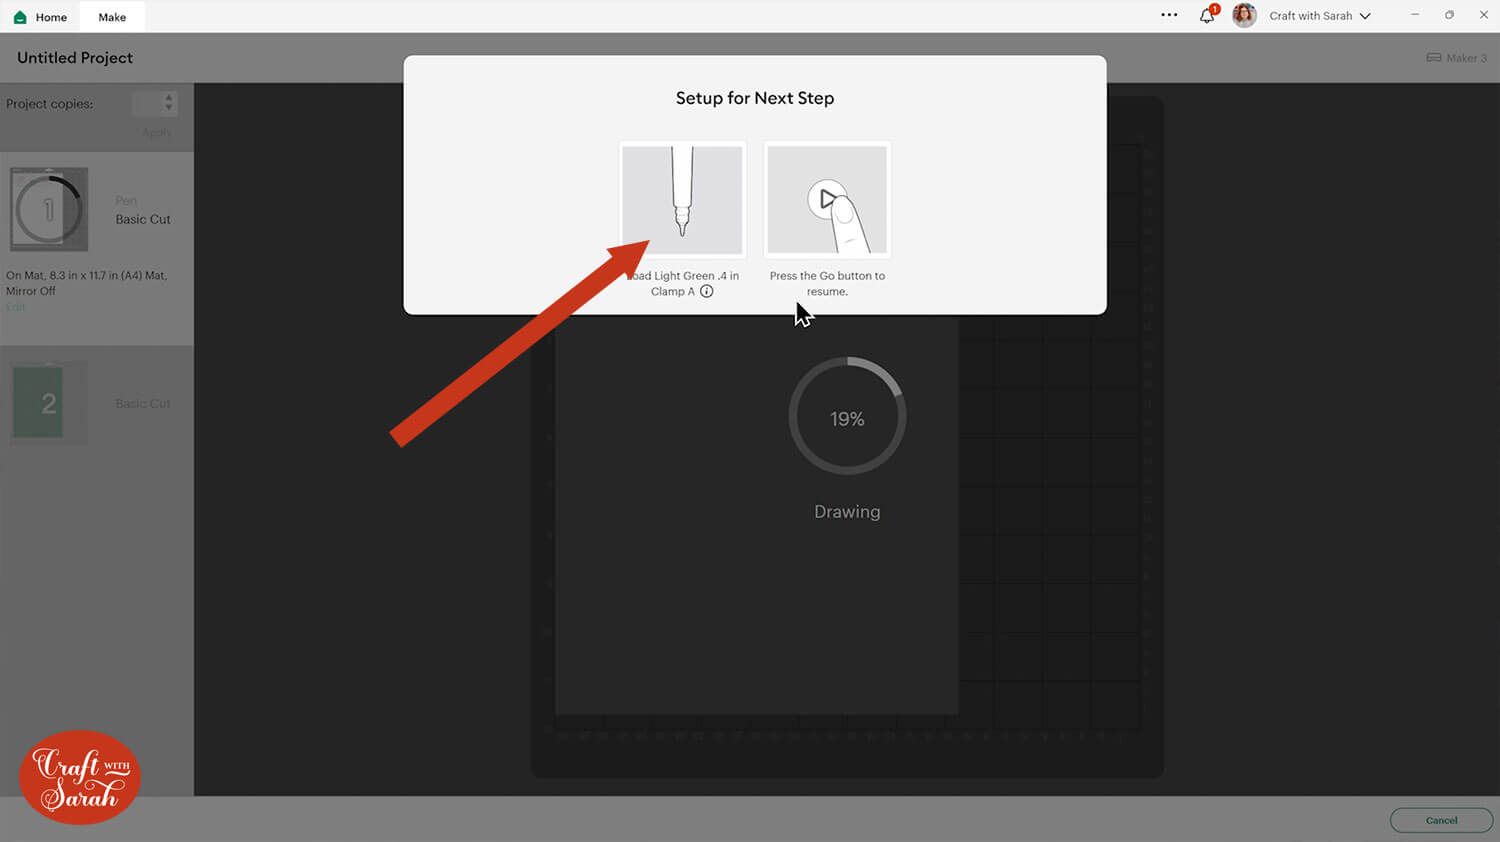
If you accidentally eject the mat then you will have to start the whole process again.
When your pen is in the machine and the clamp is closed, you can then press the Go button to begin drawing again.
Once it’s finished drawing, it will automatically start doing the cutting around the edge.
Step 4) Put the bookmark together
Here are my bookmarks all cut out. Three of them I’ve stuck together and I’ll show you how to put together the final one.
All you have to do is glue the smaller piece to the bigger one. Take care when lining up the holes to make sure they sit perfectly on top of one another.
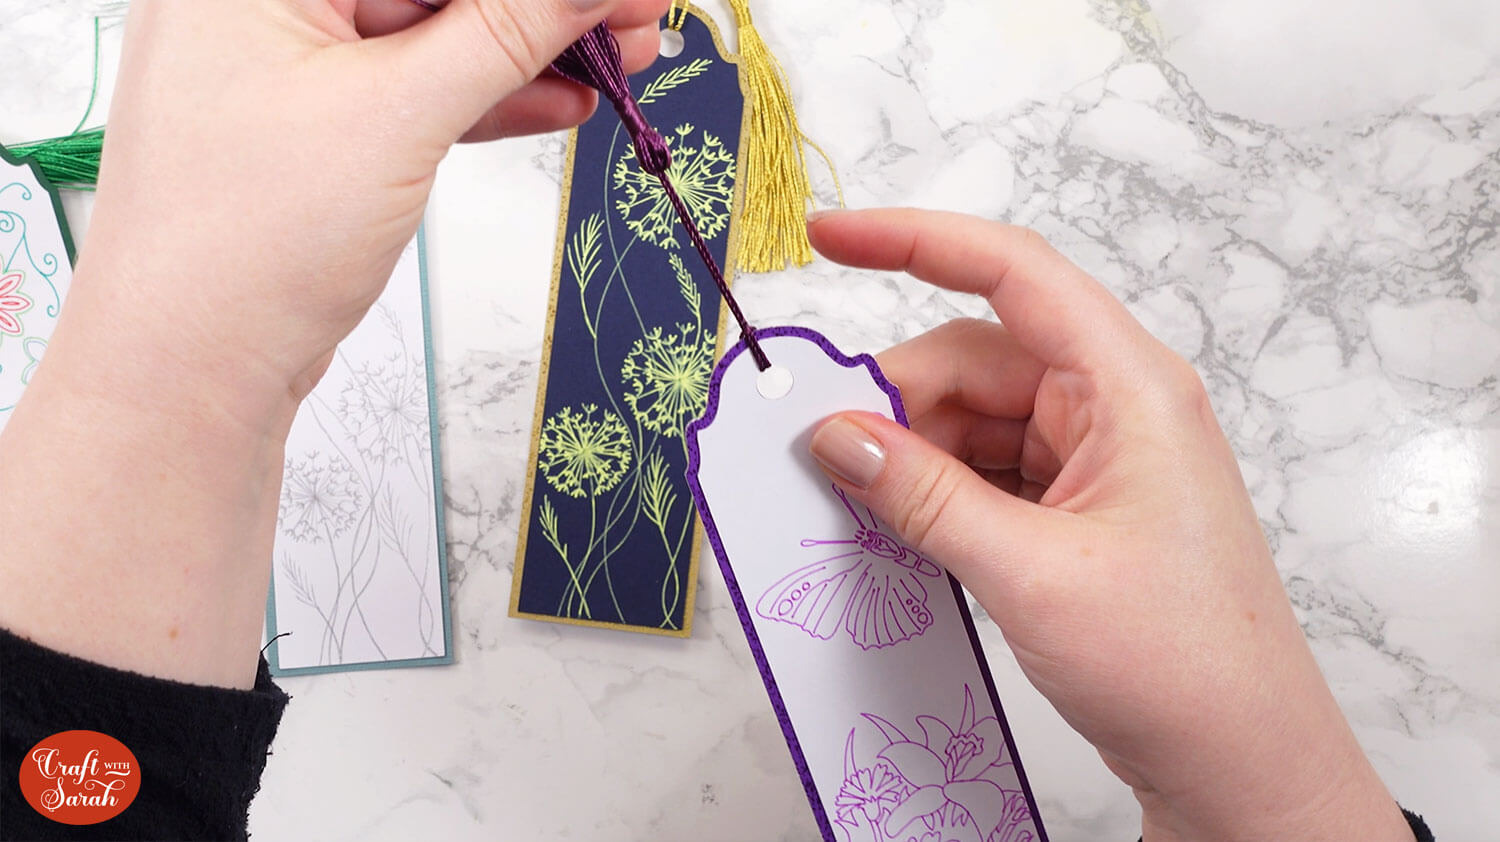
You can then add a tassel to the top.
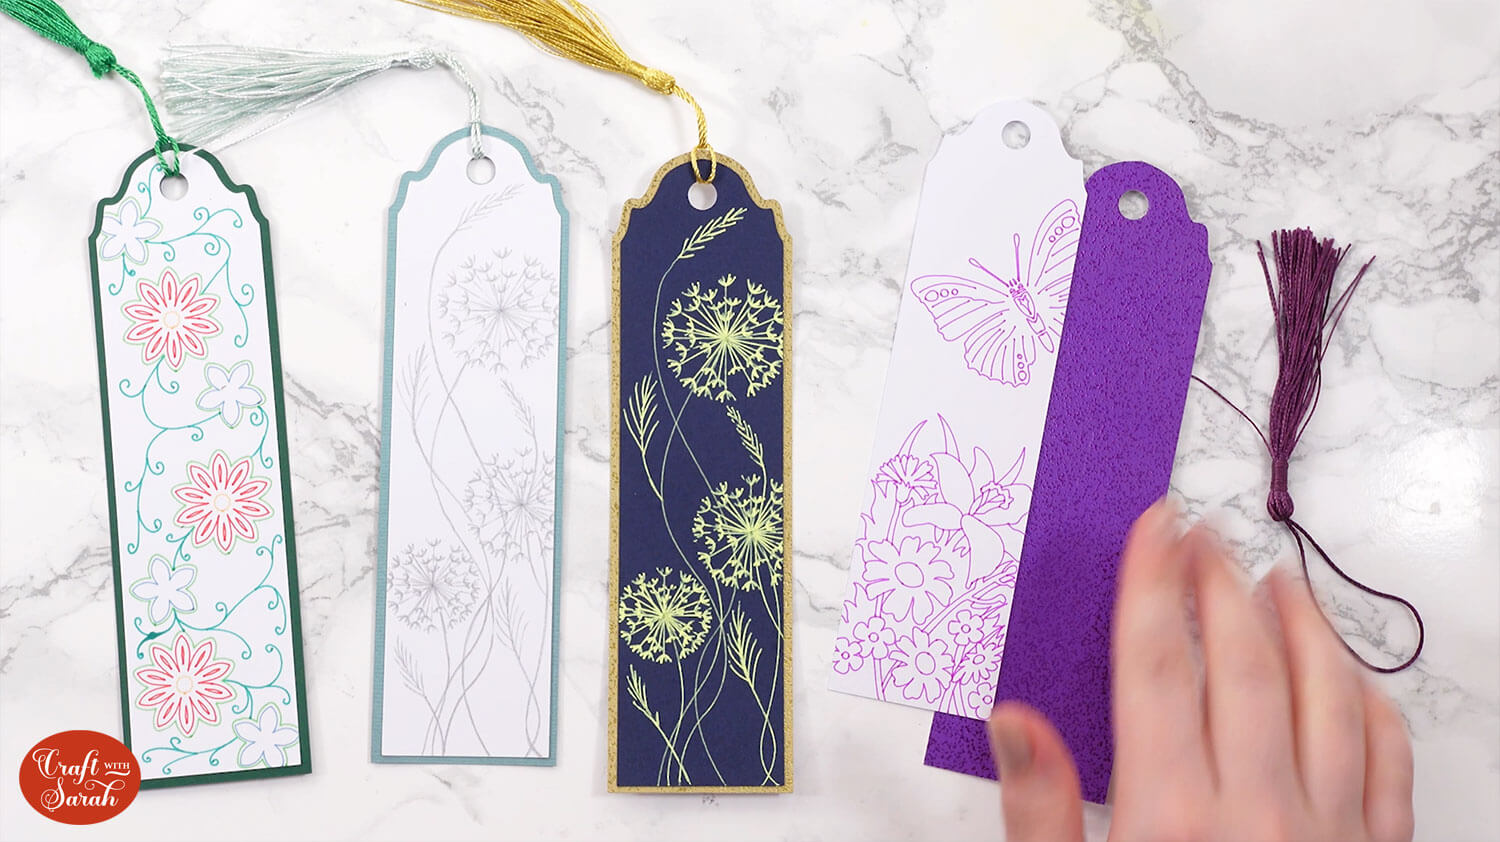
Floral Cricut bookmarks, drawn with pens
Now your bookmarks are finished and ready to be used!
If you wanted to make them a bit sturdier you could try laminating them (if you have a laminator), or you could get some of the holographic overlays that are often used to make stickers waterproof.
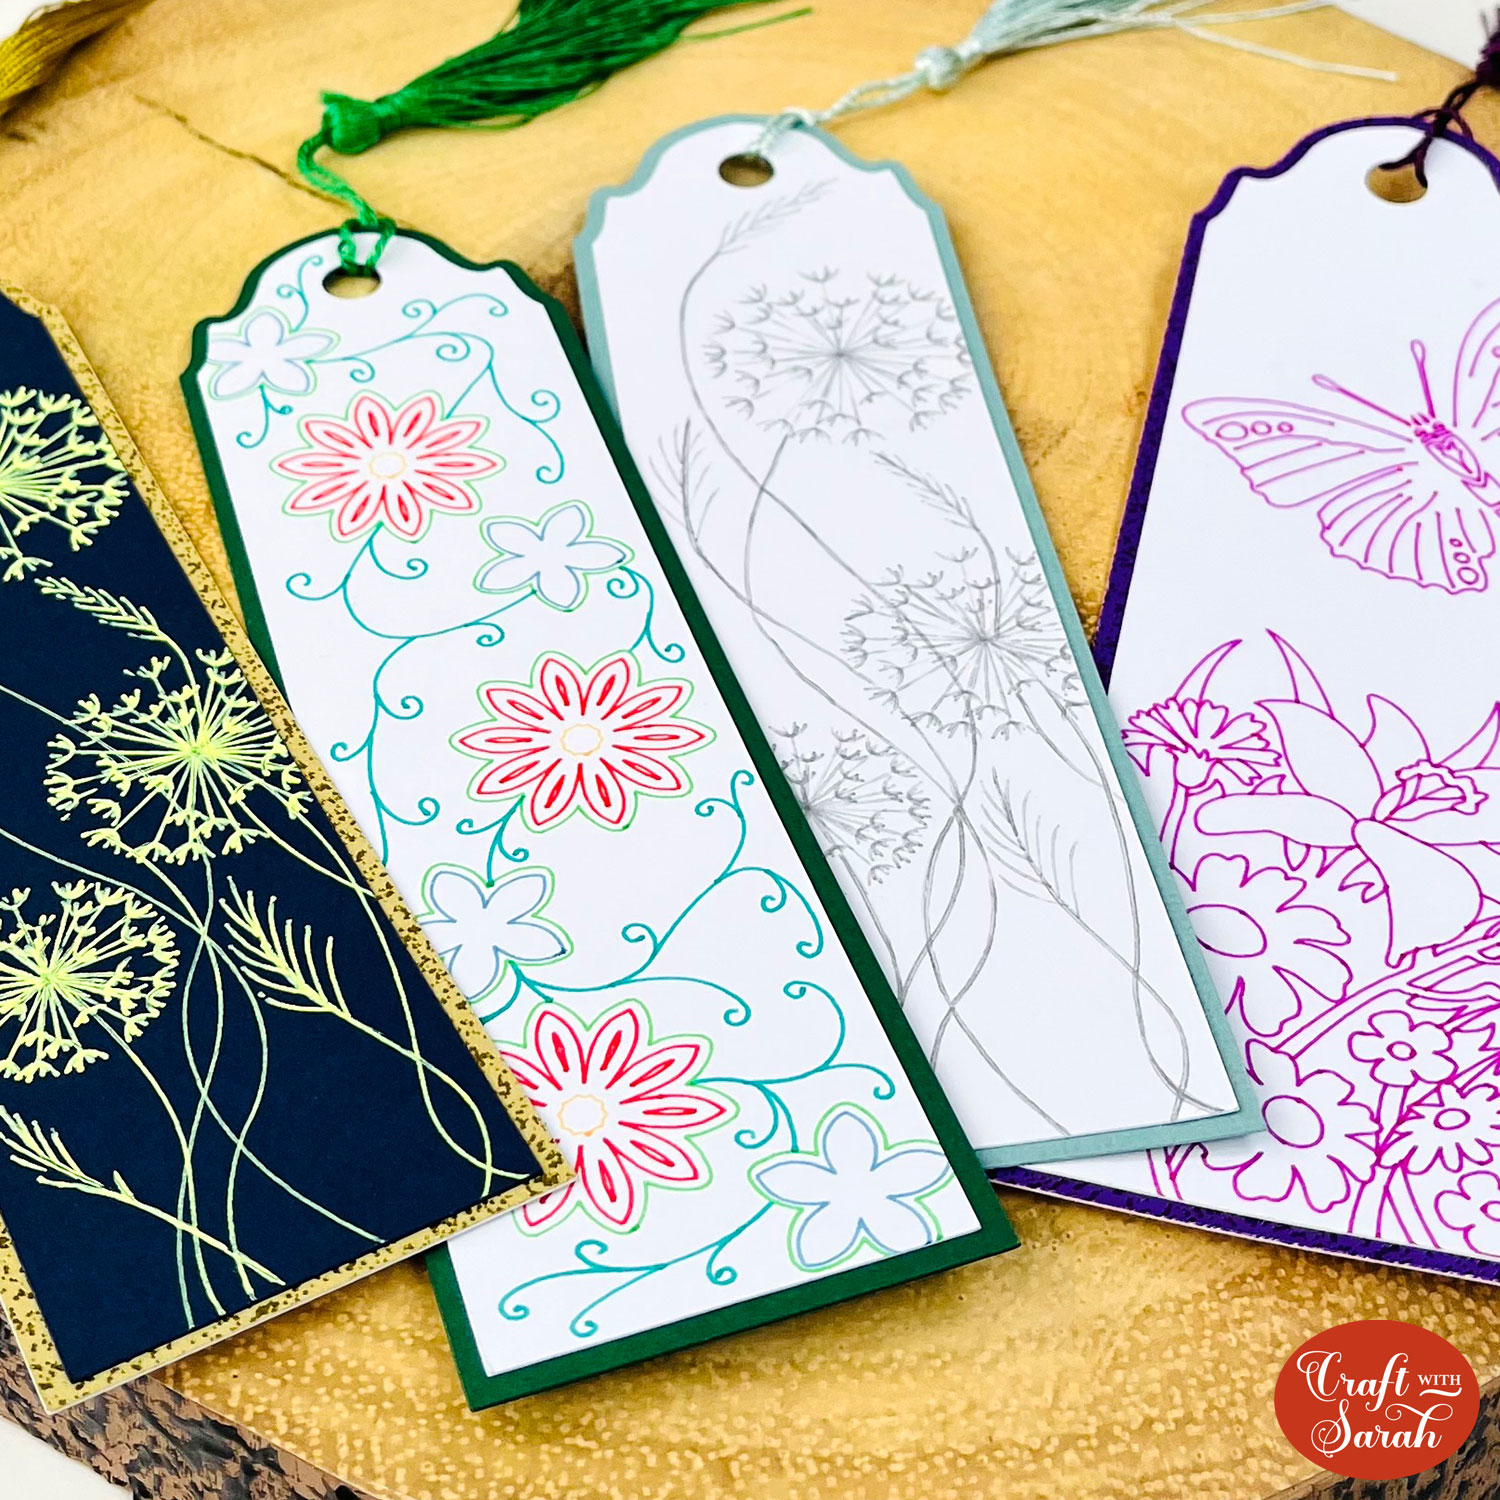
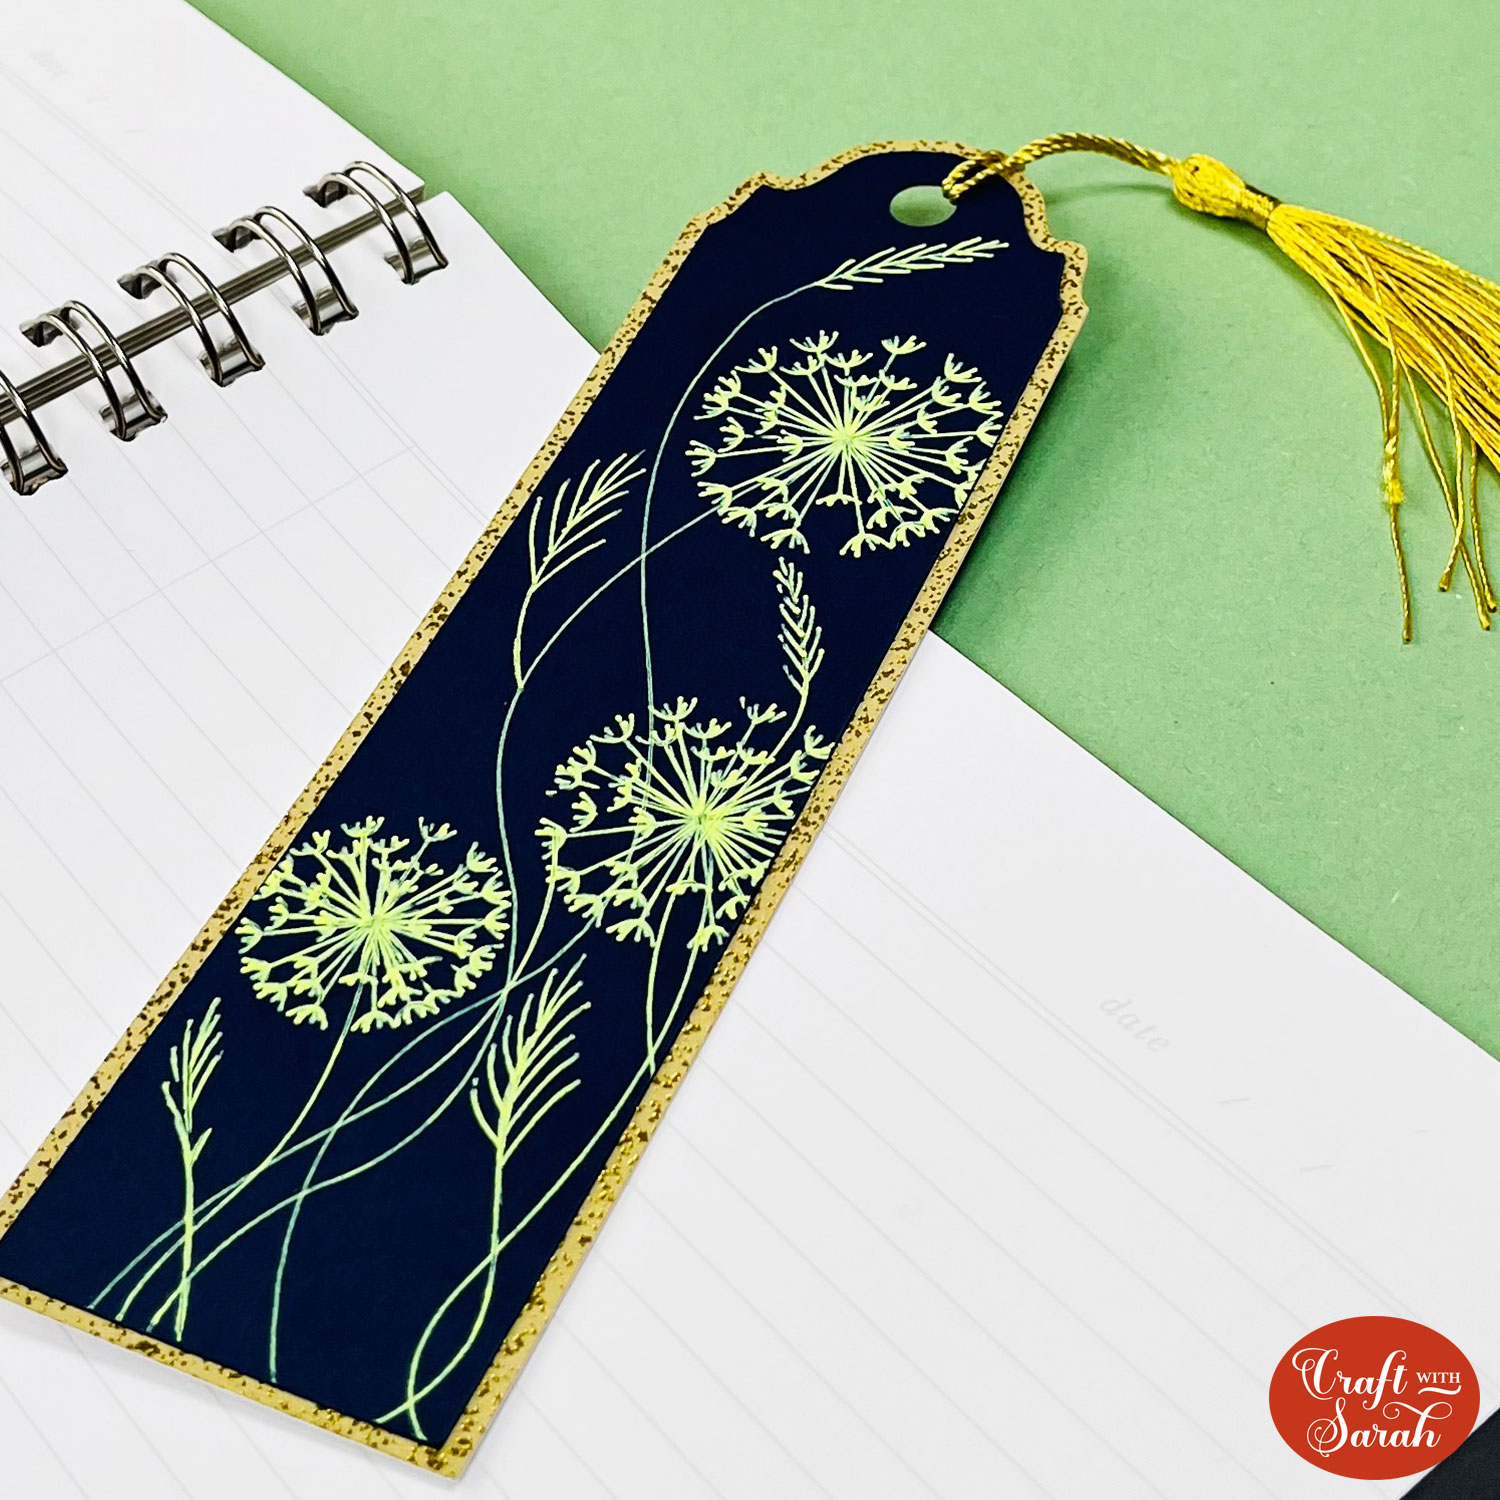
I can’t wait to use these bookmarks! I think the dandelion one is my favourite, the flowers look so delicate and pretty against the cardstock backgrounds, especially the one that I used a yellow opaque pen for.
Happy crafting,
Sarah x

