HCC 2024 Day 05: Coffin Cards
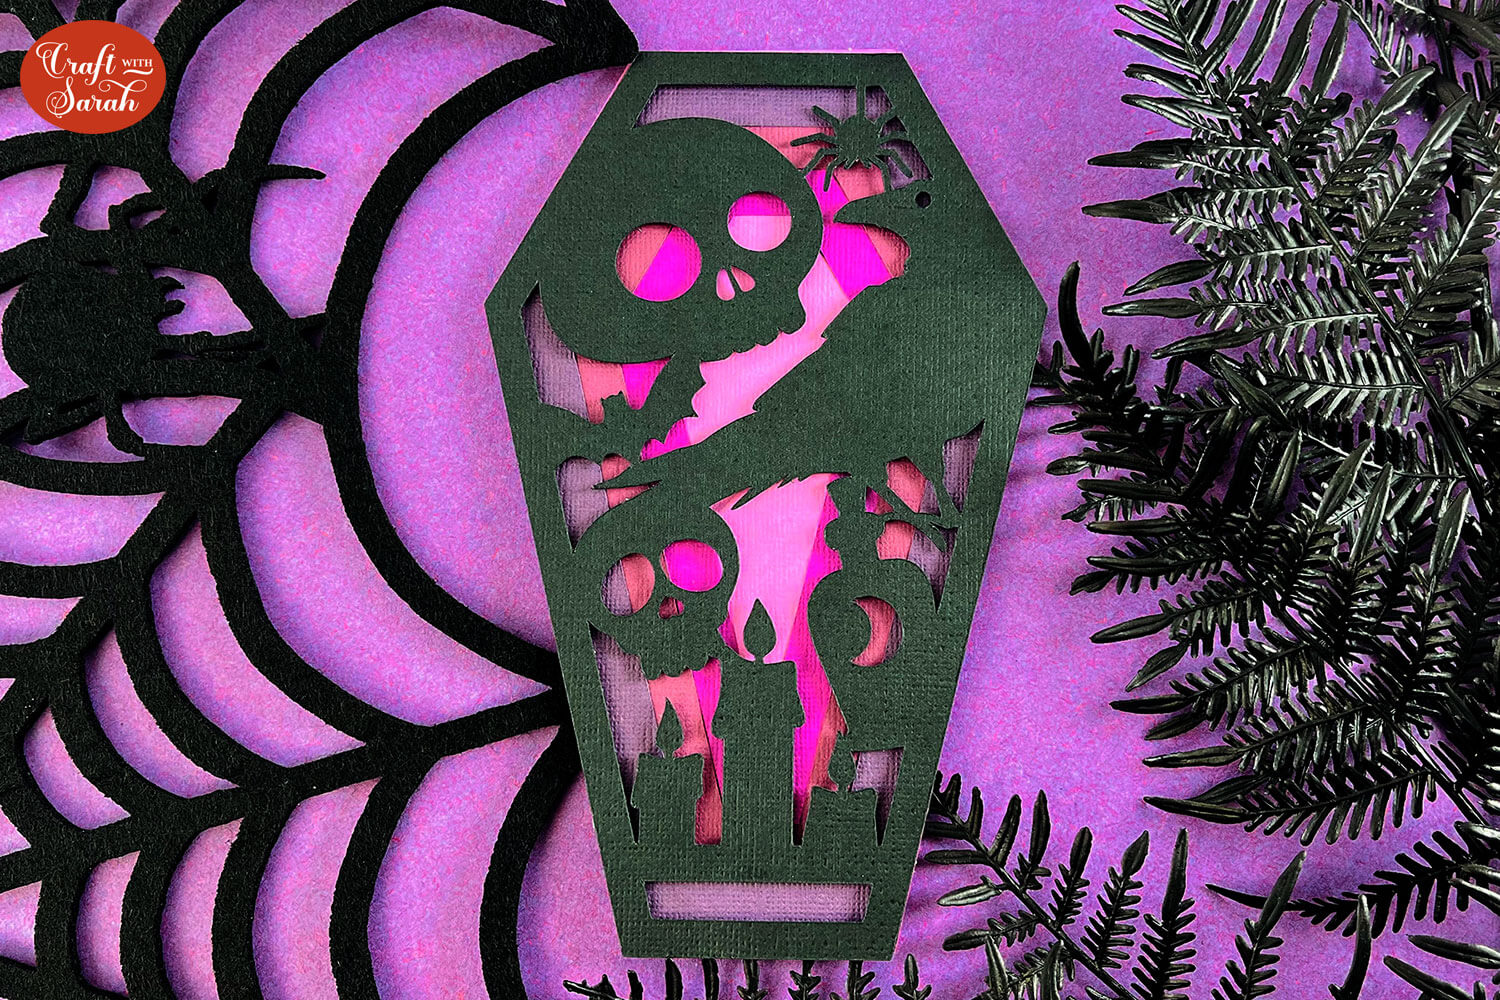
Welcome to day five of the 2024 Halloween Craft Countdown, where I’m sharing 20 spooky themed Cricut papercraft projects in 20 days.
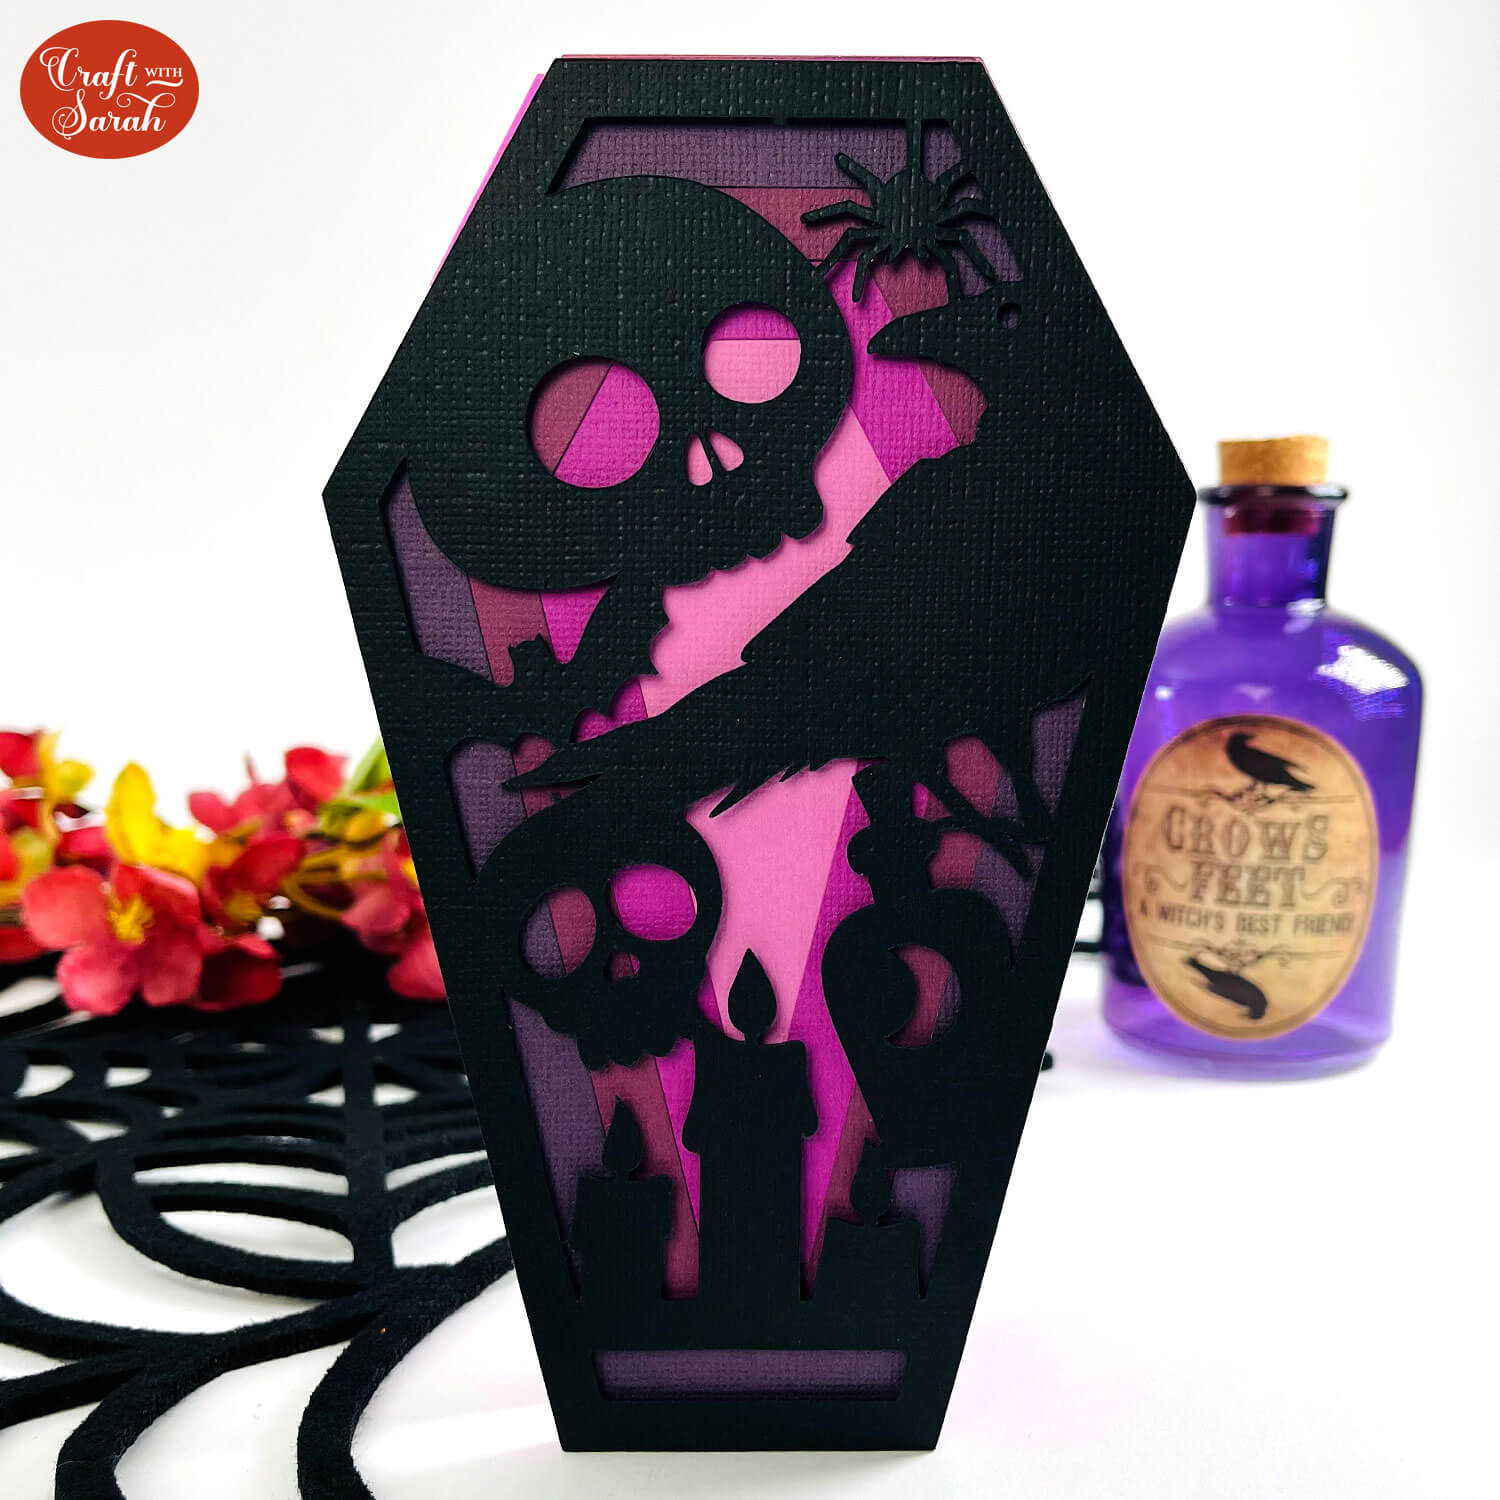
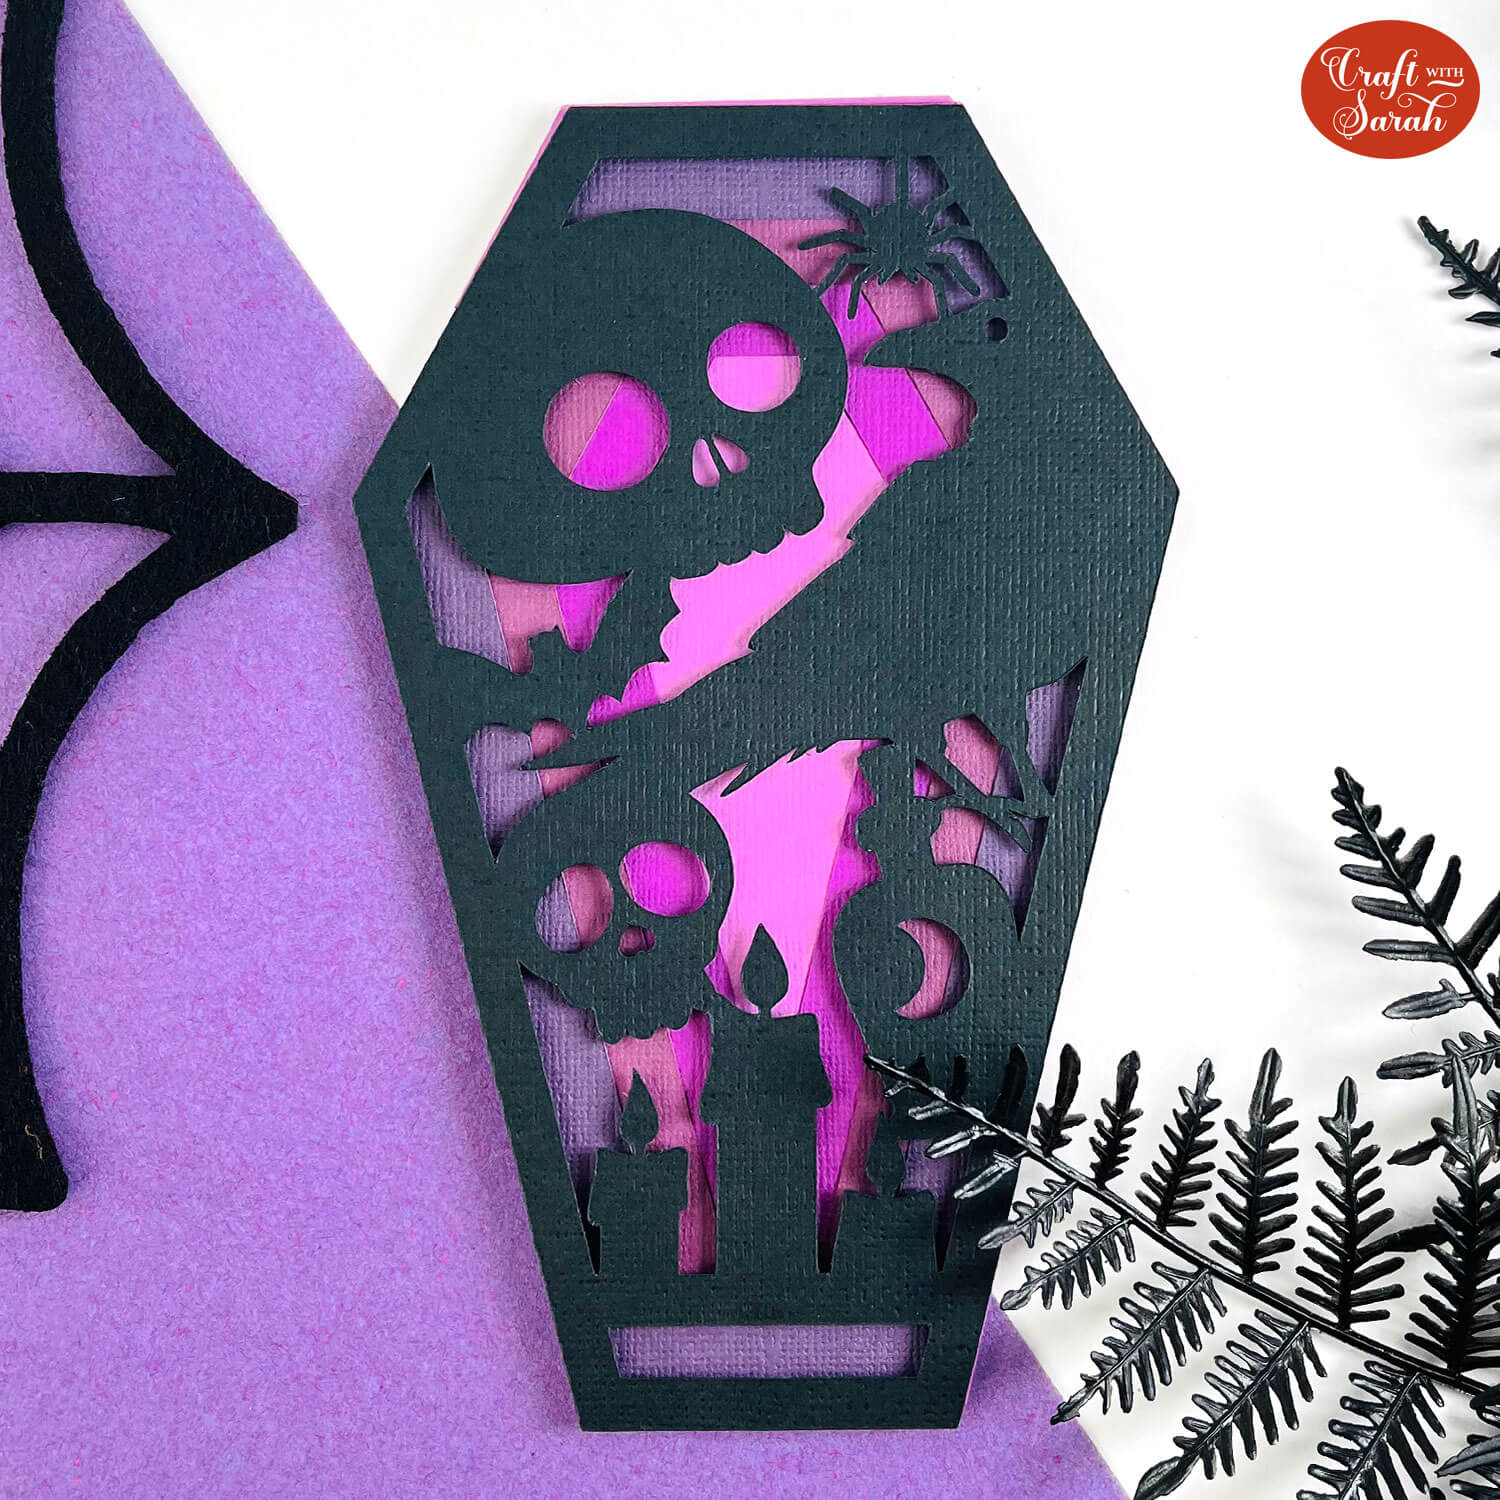
In today’s Halloween craft tutorial, I’ll show you how to create eerie coffin-shaped cards using your Cricut machine.
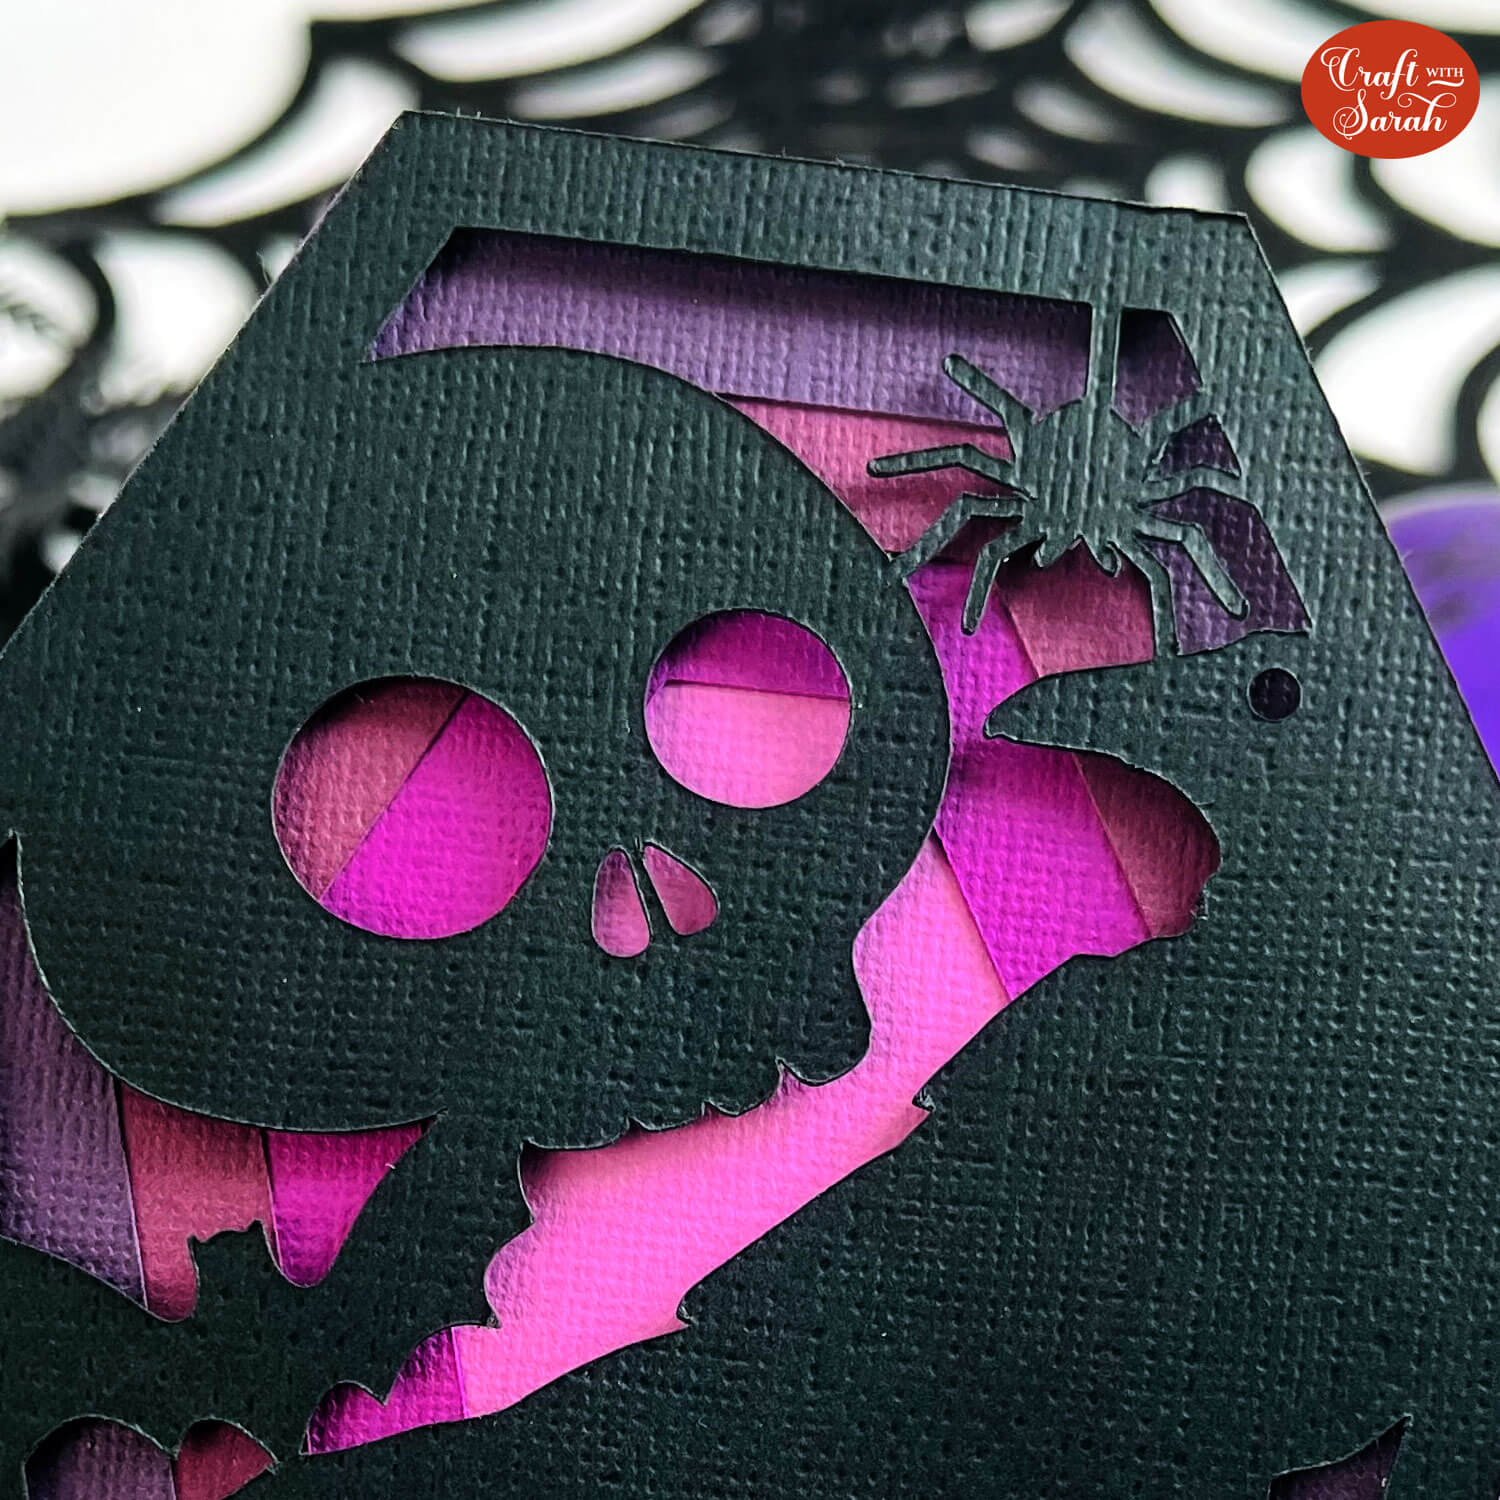
These unique cards feature gradient backgrounds that draw the eye to the center, adding an extra layer of intrigue to your spooky designs.
Along with a premade card ready for you to download and cut, I’ll also guide you through the steps to design your own custom coffin cards using Cricut Design Space.
This Project was part of the Halloween Craft Countdown 2024
Materials supply list
Here is a list of the materials that I used to make this project.
Please note that some of the links included in this article are affiliate links, which means that if you click through and make a purchase I may receive a commission (at no additional cost to you). You can read my full disclosure at the bottom of the page.
- Cricut machine
- Light blue Cricut cutting mat
- Coloured card
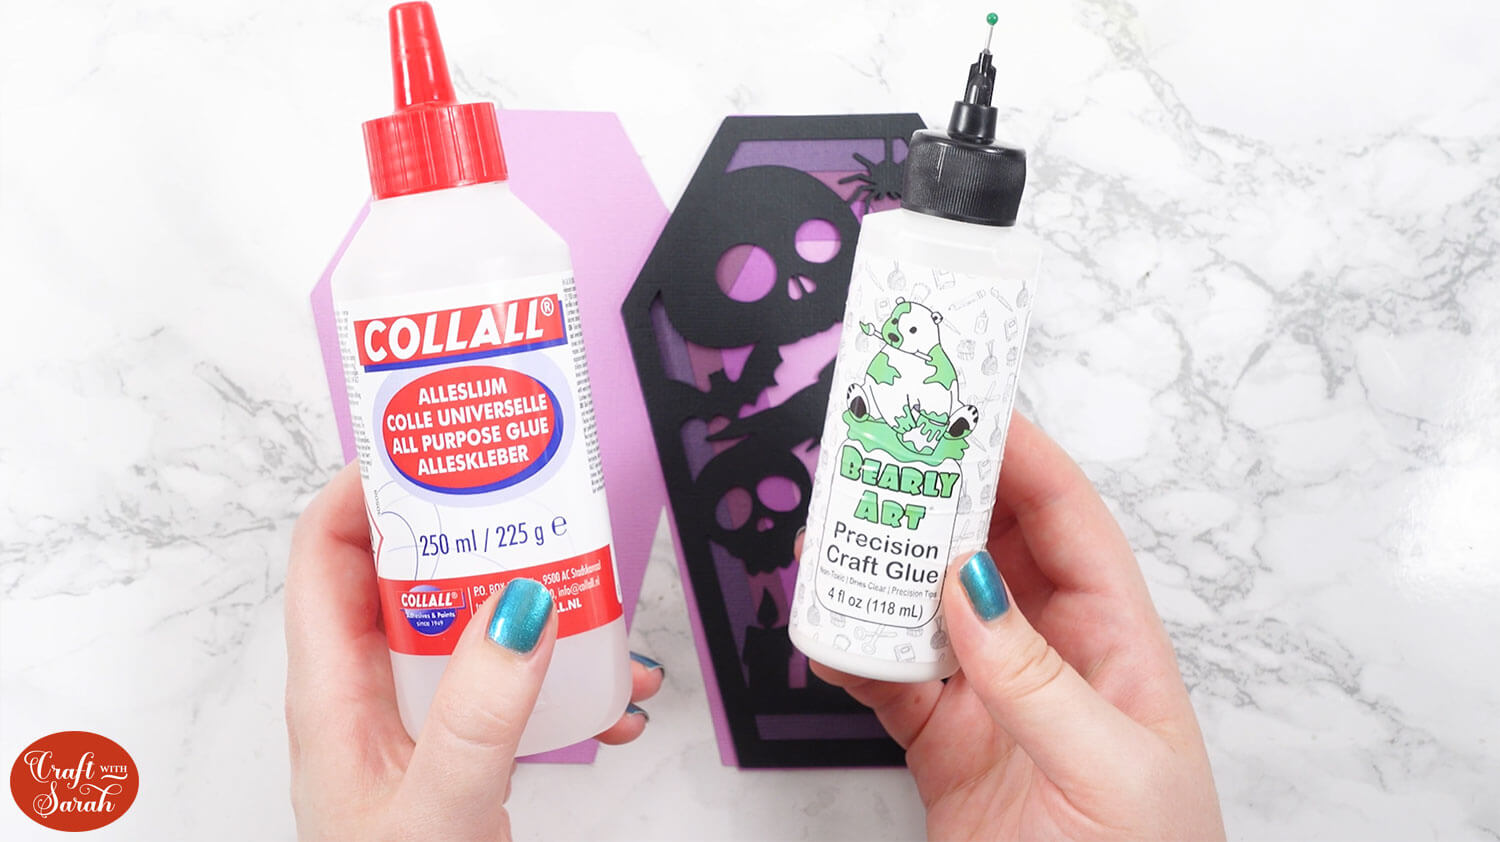
- Glue (I like Bearly Art Glue and Collall)
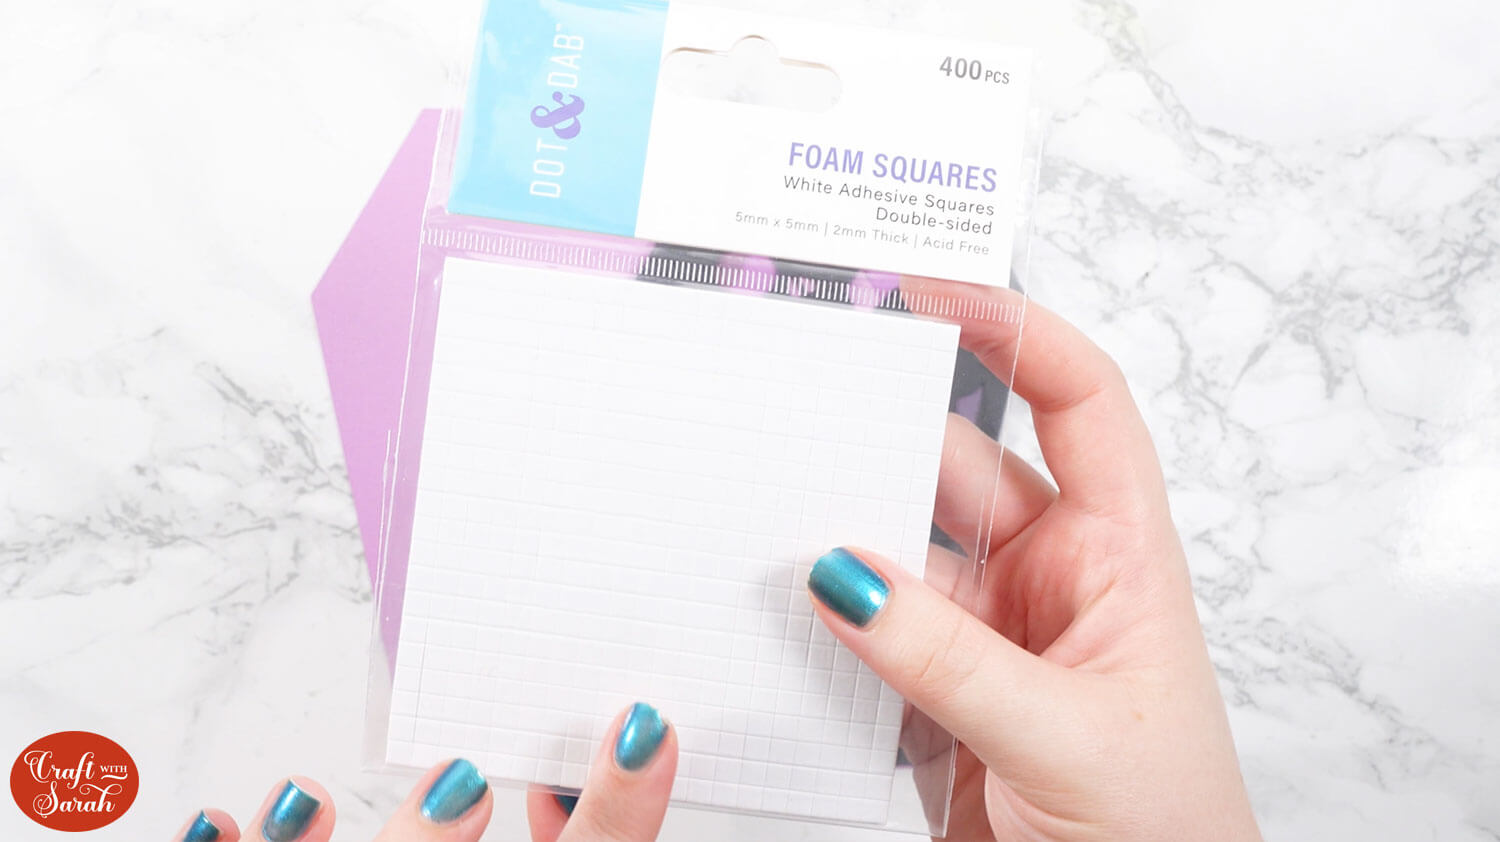
- 3D foam pads
- Cricut scoring wheel or scoring stylus (optional)
This project is suitable for the following types of Cricut machine: Explore Air 2, Explore Air 3, Maker, Maker 3, Venture, Joy Xtra and Joy. You will need to make the design smaller to cut on the Joy.
Foundation learning
If you're new to crafting with your Cricut, you may find the below links helpful.
They teach some of the skills mentioned throughout this tutorial.
- How to upload SVG files into Design Space
- How to make 3D layered Cricut projects
- The BEST way to frame papercraft projects
- How to mount multiple designs in the same frame with magic guides
- How to score with a Cricut (even without scoring tools)
- Print then cut tutorial
- Design Space tools (Combine, Attach, Slice, Weld, Flatten, etc.)
- Pattern fill tutorial (for making backgrounds & cutting images to a specific shape/size)
- Free envelope SVGs that can be sized to fit any card
- How to write inside cards with Cricut pens
- How to cut layered designs at a small size
- Design Space tips & tricks
- Cricut pens tutorial
Video tutorial
Watch the video below to see how to make this project. Keep scrolling for a written tutorial.
PART ONE: Making the pre-designed coffin card
Here’s how to make Halloween coffin cards using a Cricut machine.
Step 1) Download the cutting file & upload to Design Space
Download the files using the box below.
Purchase the File(s)
This cut file is available as part of the Instant Access Bundle.
Or, purchase this design individually here
Before you upload the SVG to Design Space, you need to unzip the download folder that it comes in.
- How to unzip a folder on Windows computer
- How to unzip a folder on a Mac
- How to unzip a folder on an iPad/iPhone
- How to unzip a folder on an Android device
After unzipping, upload the SVG file into Cricut Design Space. This is the file that starts svg- in the filename.
Not sure how to do this? Here’s how to upload SVGs to Cricut Design Space. Make sure you upload the file which starts svg- in the filename!
Note that there are two SVG files included. The one with the word “blank” in the filename is for Part 2 of this tutorial where I show how to design your own cards.
For Part 1 of this tutorial, you’ll need the SVG that does NOT have the word “blank” in the filename.

Step 2) Add a score line
If you have a scoring tool or scoring wheel for your Cricut machine, it’s a good idea to add a score line to the middle of the base card to make it easier to fold in the correct place.
If you don’t have a way to score with your Cricut, move on to Step 3.
Click the card and Ungroup the layers to separate them.
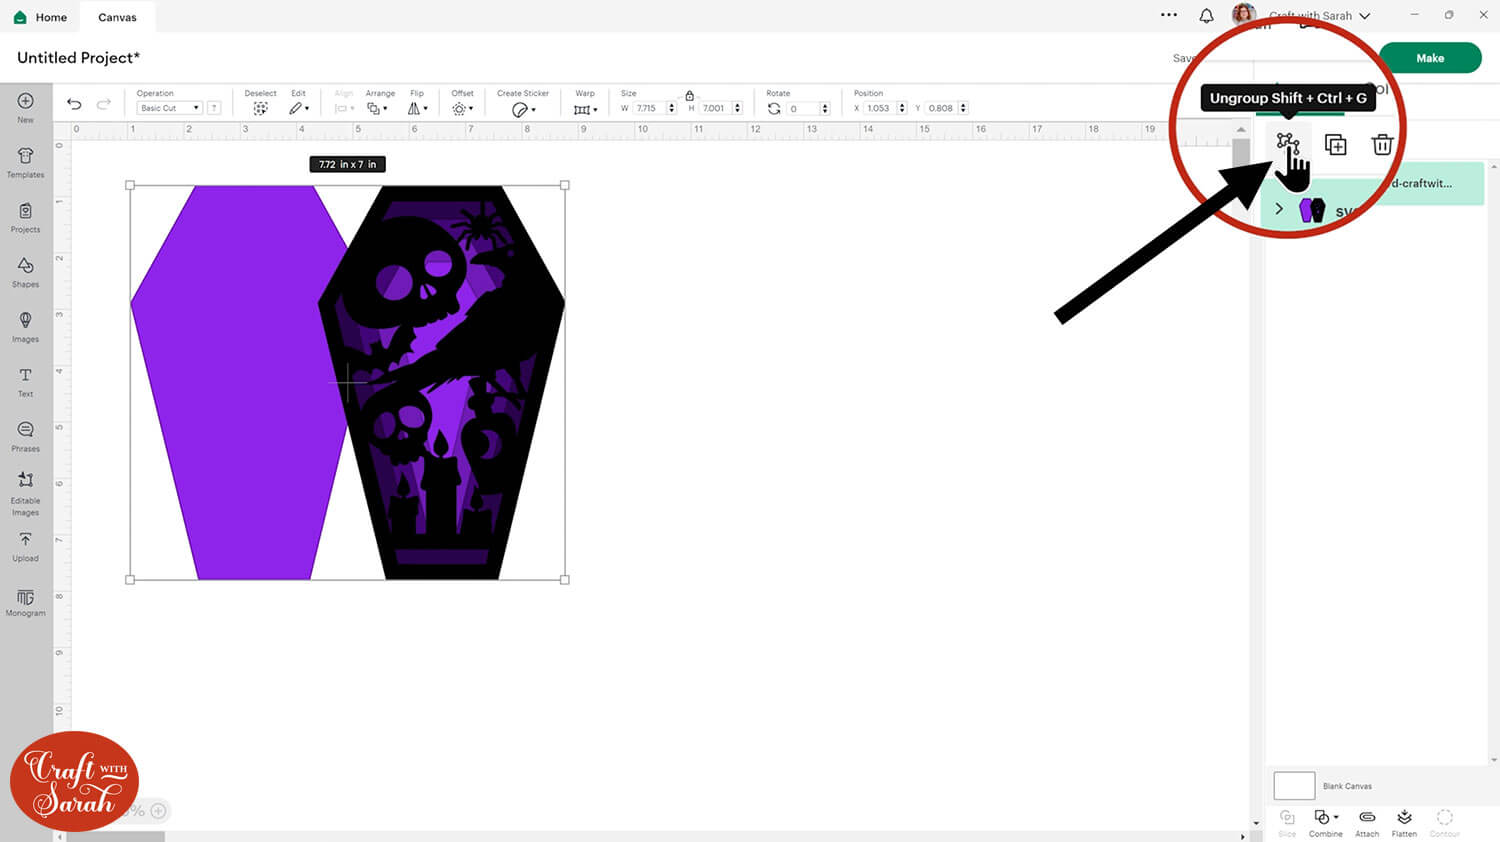
Select the base card and drag it down the Canvas so it’s underneath everything else.
Click “Shapes” and insert a Score Line. Position it roughly in the middle of the coffin base card and drag the score line so that it is just taller than the section where the two coffin shapes join.
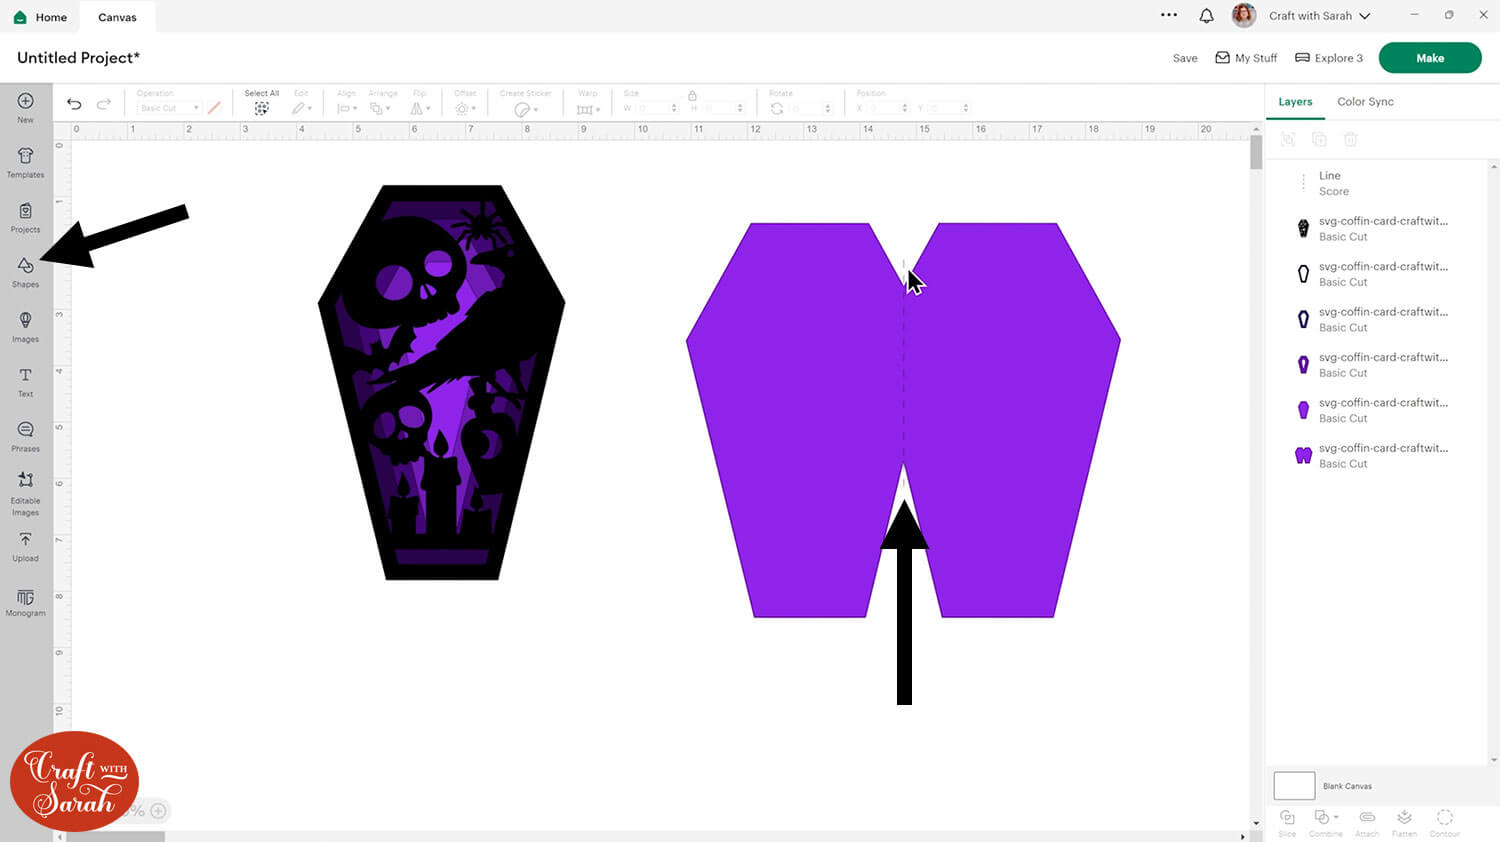
Select the score line and the base card, then click “Align” and “Align Horizontally” to put the score line exactly in the middle of the card.

Select the score line and the base card, then press “Attach” at the bottom of the layers panel.
Attach is what tells the Cricut that we want it to do the score line down the middle of the base card.
Move the base card down to the bottom of the layers panel and drag it back into position.
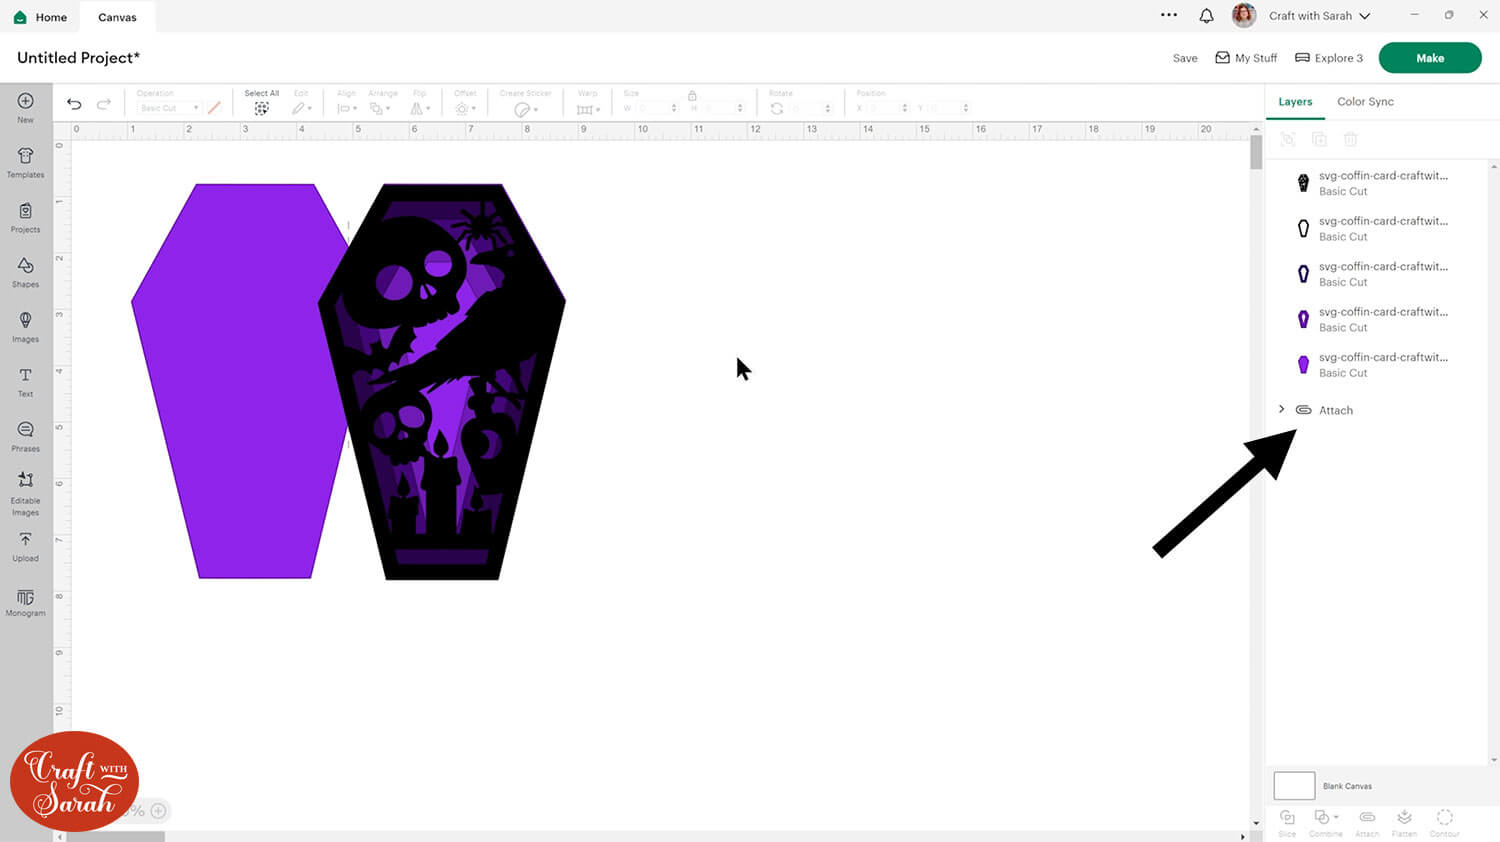
This is a good time to change the colours if you are planning on cutting them differently to what’s on the screen.
Step 3) Cut the project from cardstock
When you’re happy with how the project is looking in Design Space, click “Make” to begin the cut process.
To change the paper size, go into the dropdowns over on the left side of the screen and choose the paper size that you want to use. You need to change it for every single colour.

To save space on your cardstock, you can move things around by clicking and dragging. Make sure when you’re moving things about that nothing overlaps because otherwise, it won’t cut out properly.
TIP: New to cutting cardstock with a Cricut? Check out this in-depth tutorial which goes through every step of the process, including tips for getting the best quality cuts from your Cricut.
Click “Continue” and then choose your material type.
Follow the instructions on-screen to cut out all the different pieces of card.
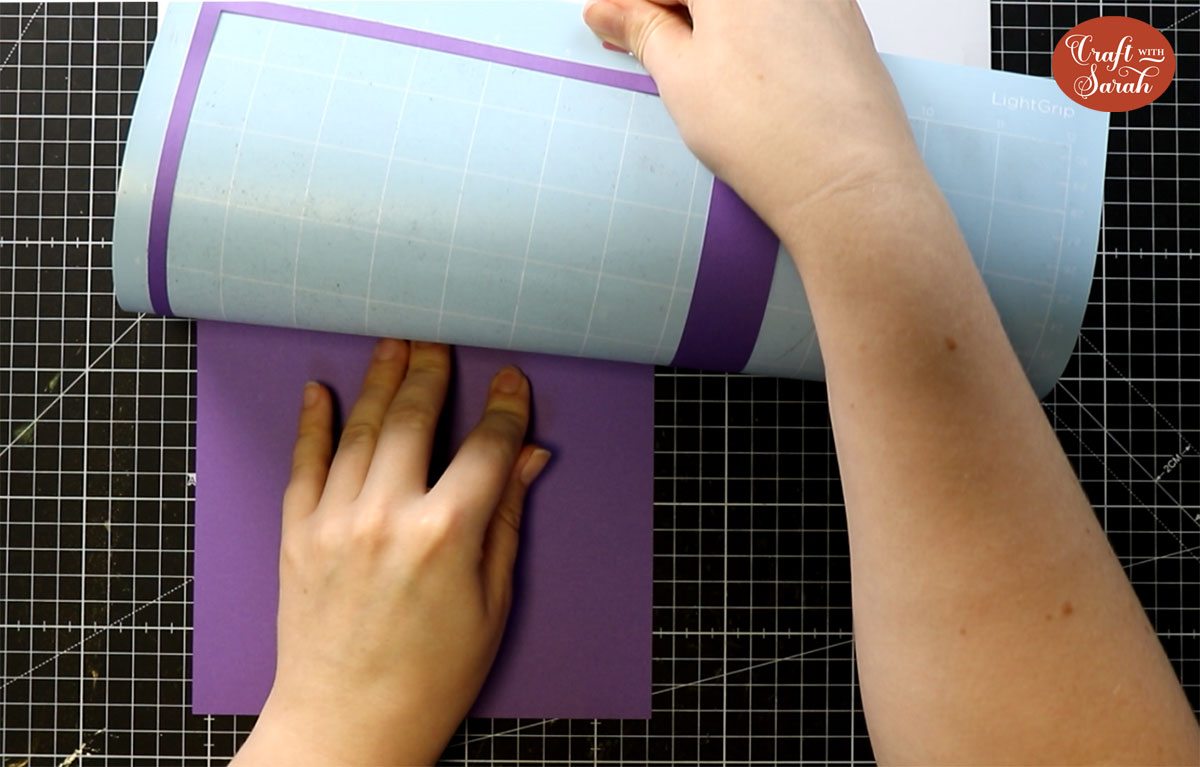
Tip: When taking the card off the mat, turn the mat upside down and peel the mat away from the card. Use one hand to keep the card pressed flat against your work surface. This ensures the card stays flat when it comes off the mat.
Step 4) Stick the card together
My favourite glues to use on papercraft projects are Bearly Art Glue and Collall All Purpose Glue.
These are great because they don’t “warp” or bend the cardstock like some glues do. You can use as much of it as you want and the card stays perfect – and it dries perfectly clear too!
Bearly Art Glue comes with a tiny nozzle to make it easy to apply glue to small areas of card. The Collall glue doesn’t come with this, so it’s easiest to decant it into needle tip applicator bottles so that you have more control.
The foam pads that I use are from “Dot & Dab”, but any foam squares will work. If yours are big then you may need to cut them smaller with scissors to fit inside the edges of the layers.
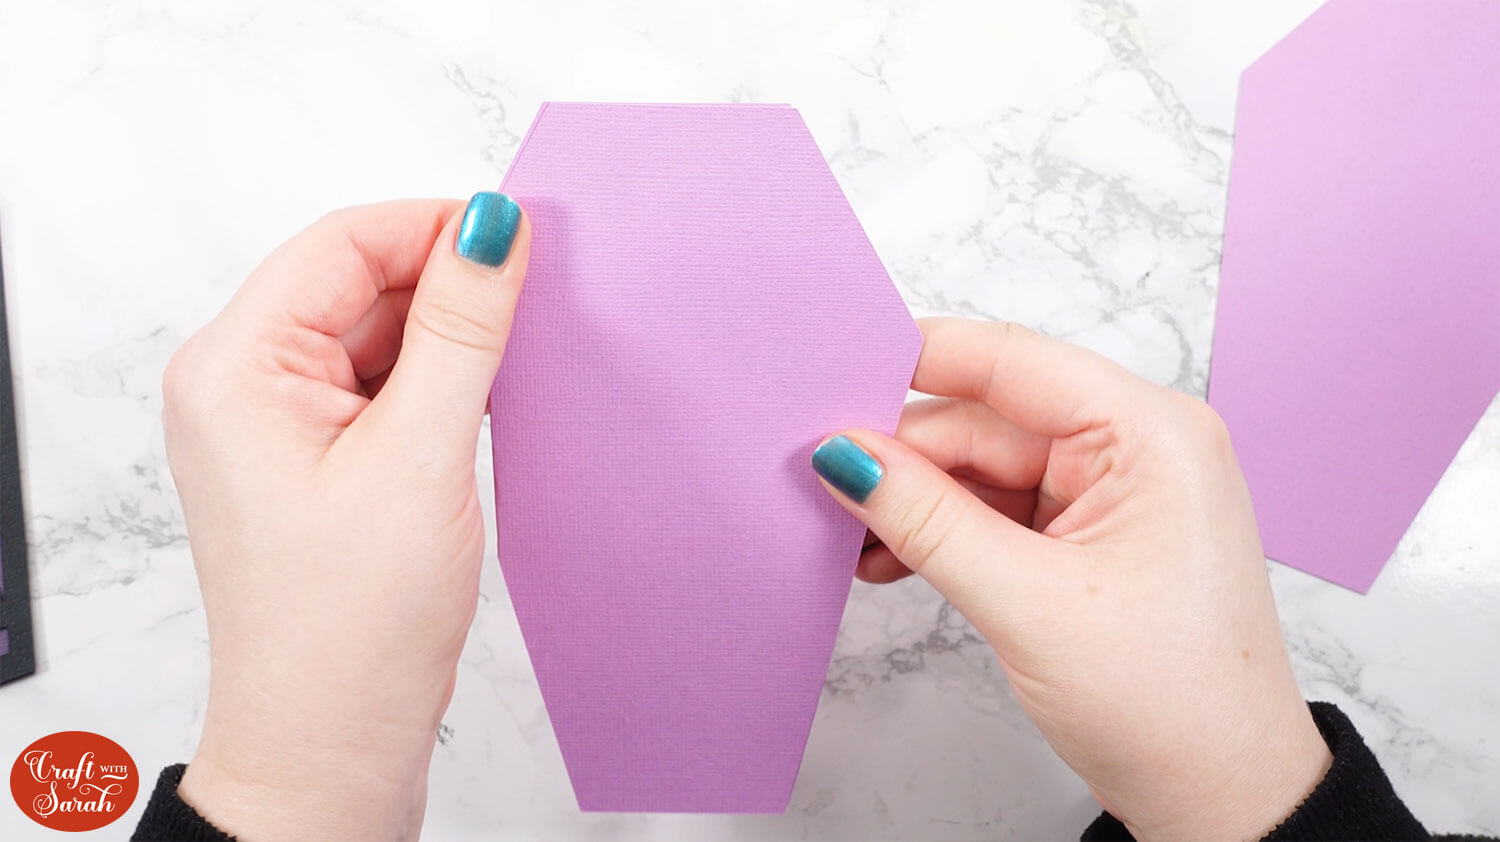
Fold the base card in half along the score line.
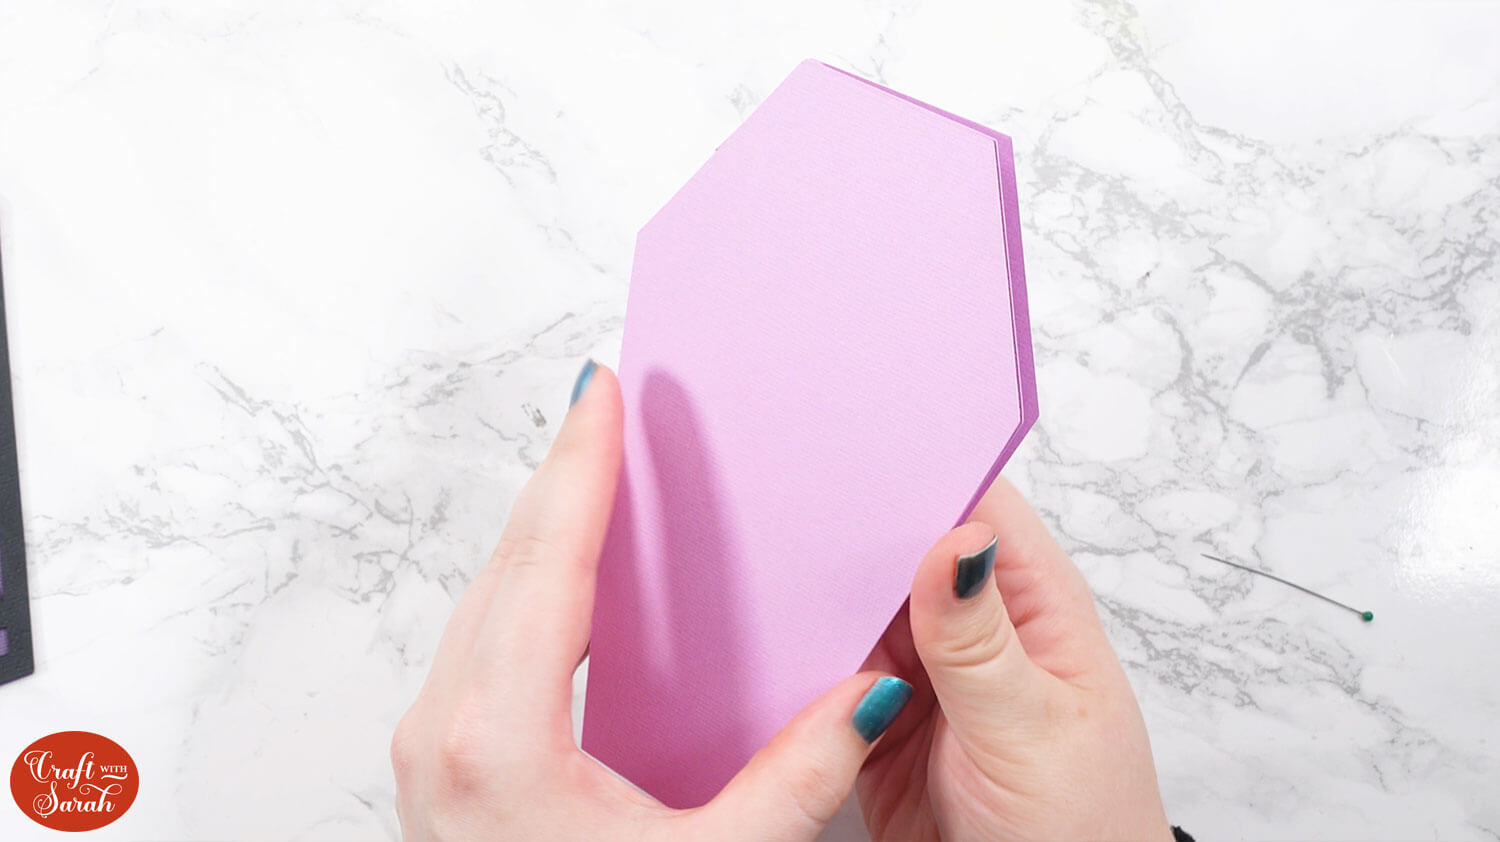
Glue the coffin shape that’s the same colour as the base card on top. This will overlap the base card on the left to complete the shape of the coffin that’s currently not there due to the score line.
Glue on the coffin shape with the smallest hole in the middle.
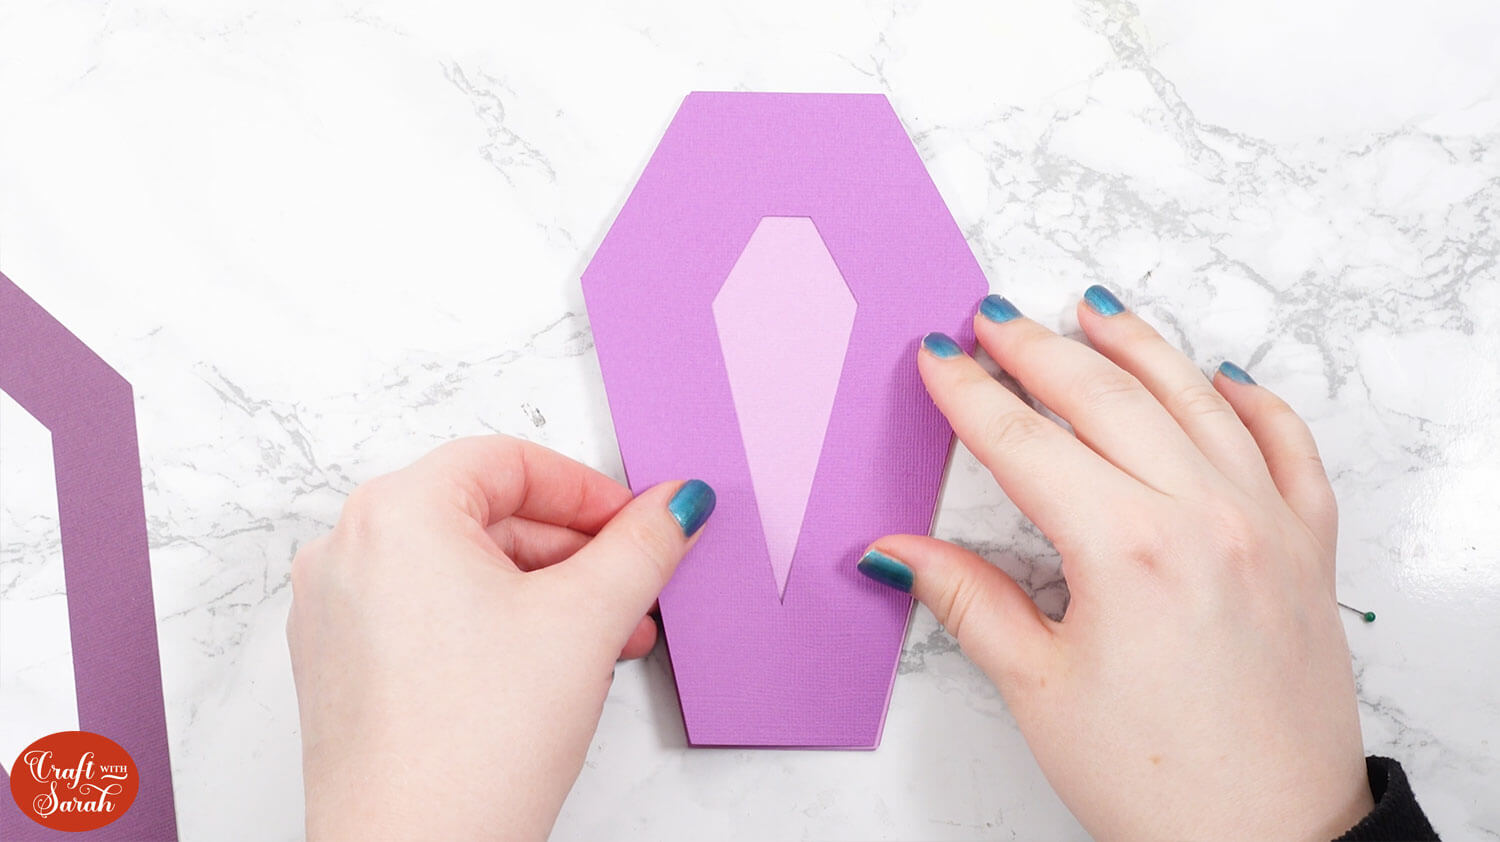
Glue on the coffin shape with the middle sized hole in the middle.
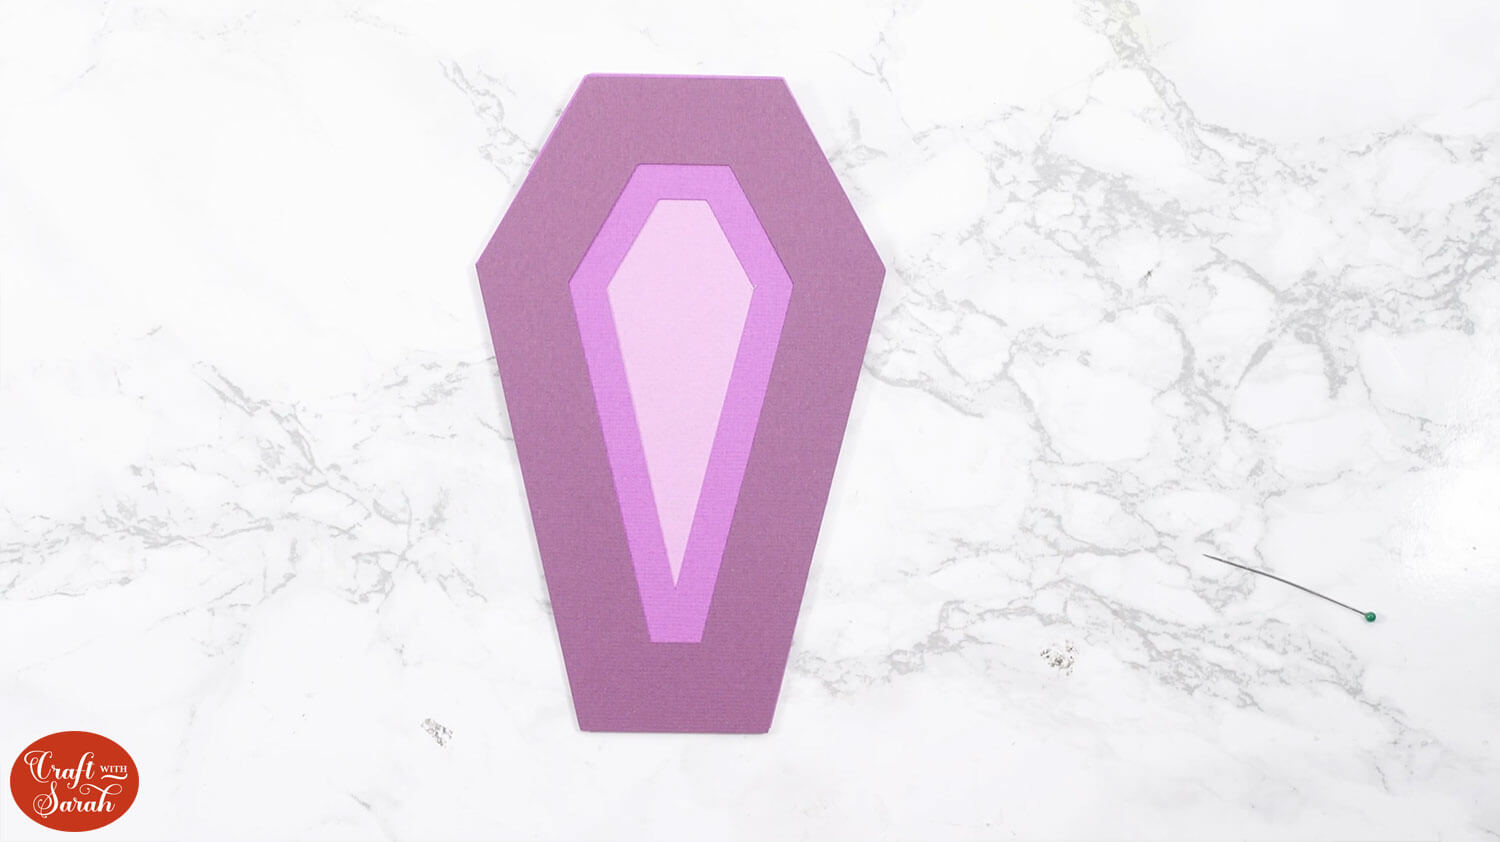
Glue on the coffin shape with the largest hole in the middle.
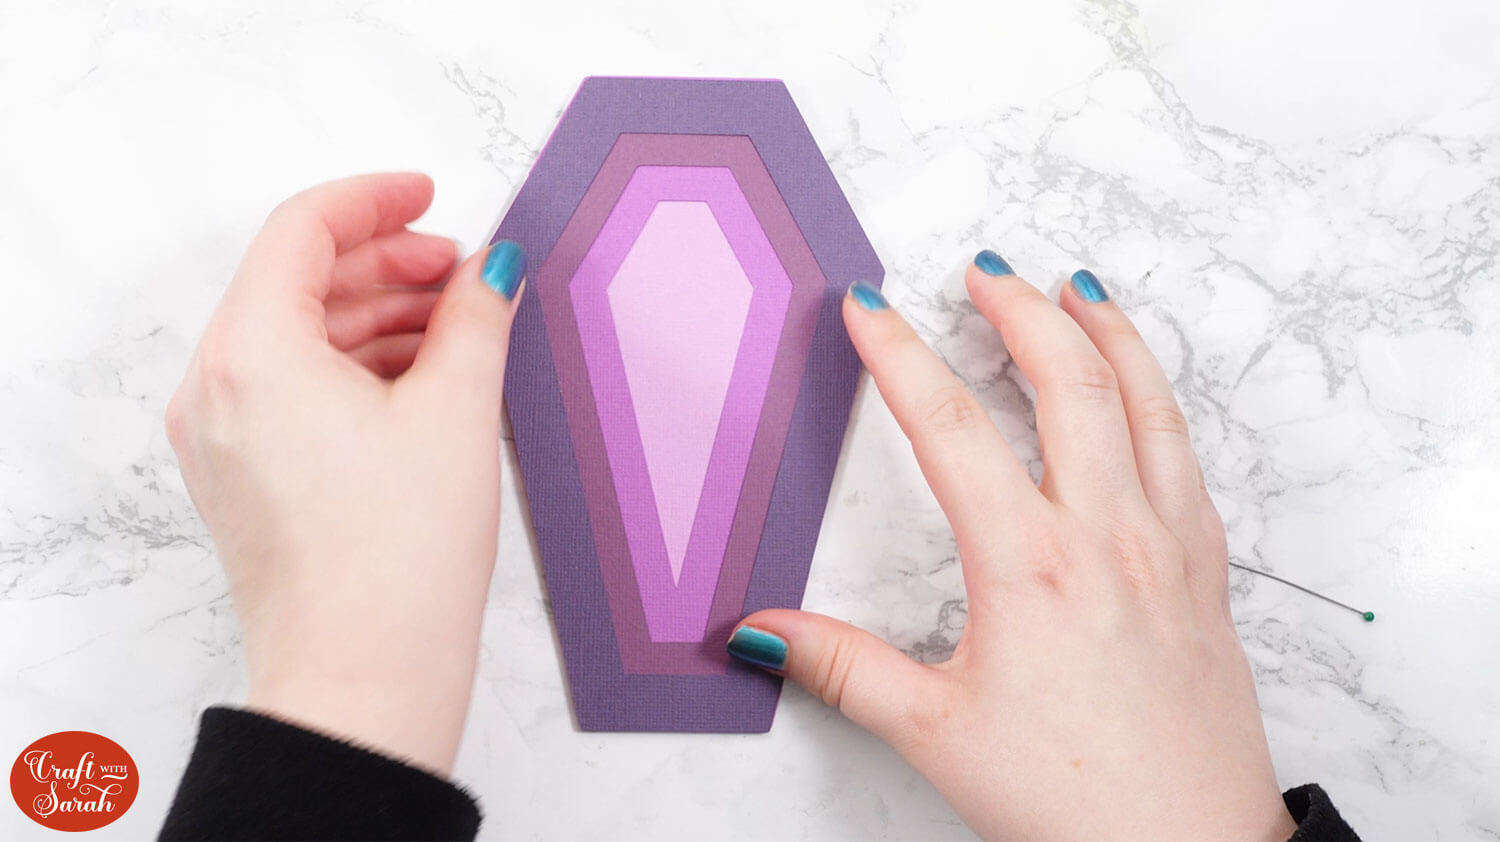
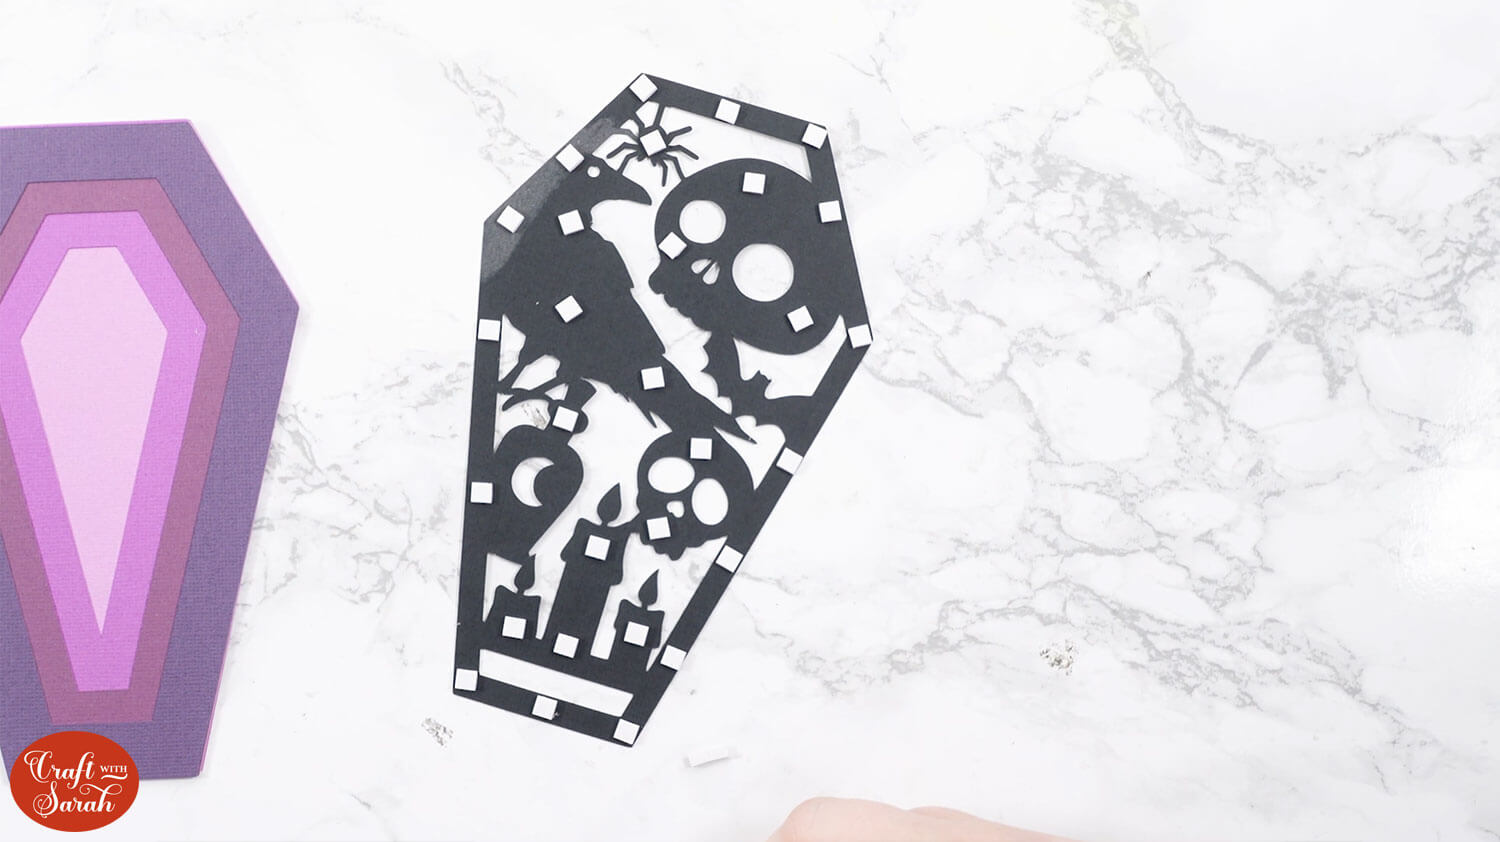
Use foam squares to attach the black layer with the decorations inside the coffin outline.
Make sure you put some foam squares in the middle of the piece of card, not just around the edge.
And that’s it, your coffin card is all finished!
PART TWO: Design your own coffin cards
Now that you know how to make these coffin cards, how about designing your own?
Step 1) Upload the blank template
Start a new project in Design Space and upload the SVG file from today’s download that has the word “blank” in the filename.
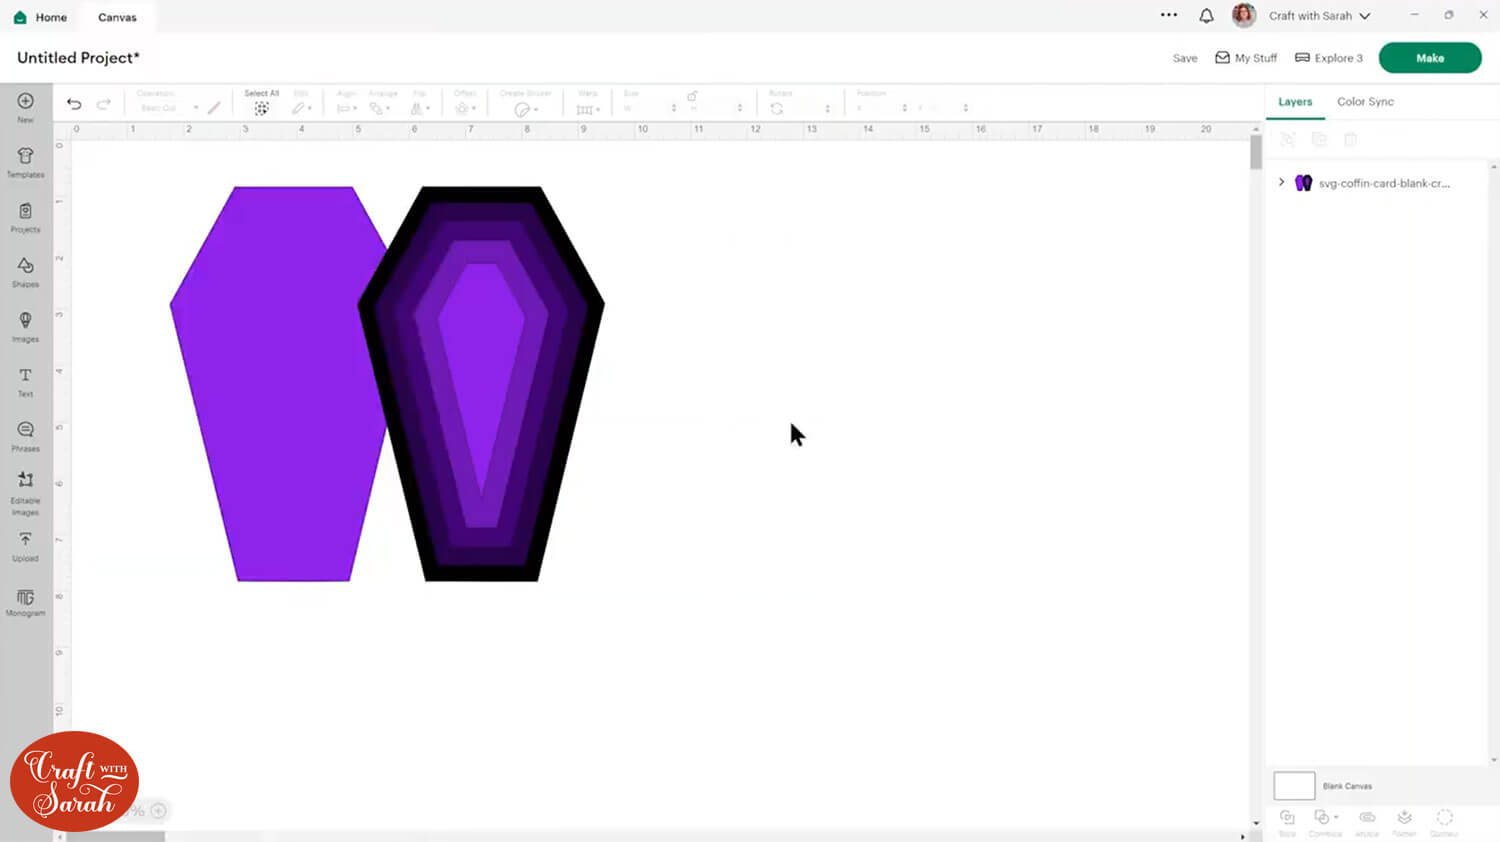
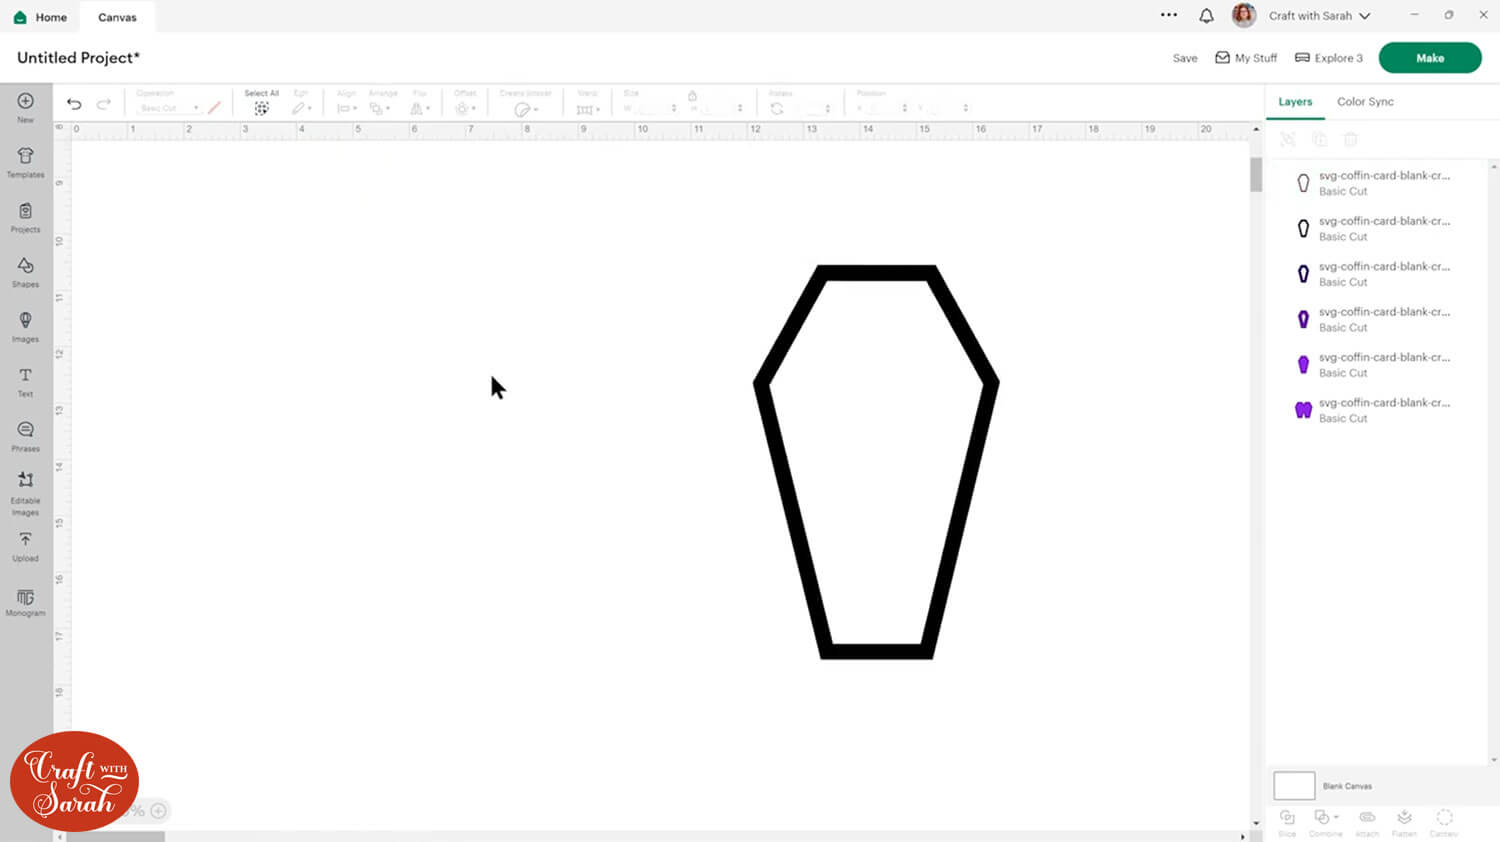
Ungroup the layers and drag the coffin outline (black layer) down on the project so it’s underneath everything else. This will give us more room to work with on the screen.
Step 2) Select your images
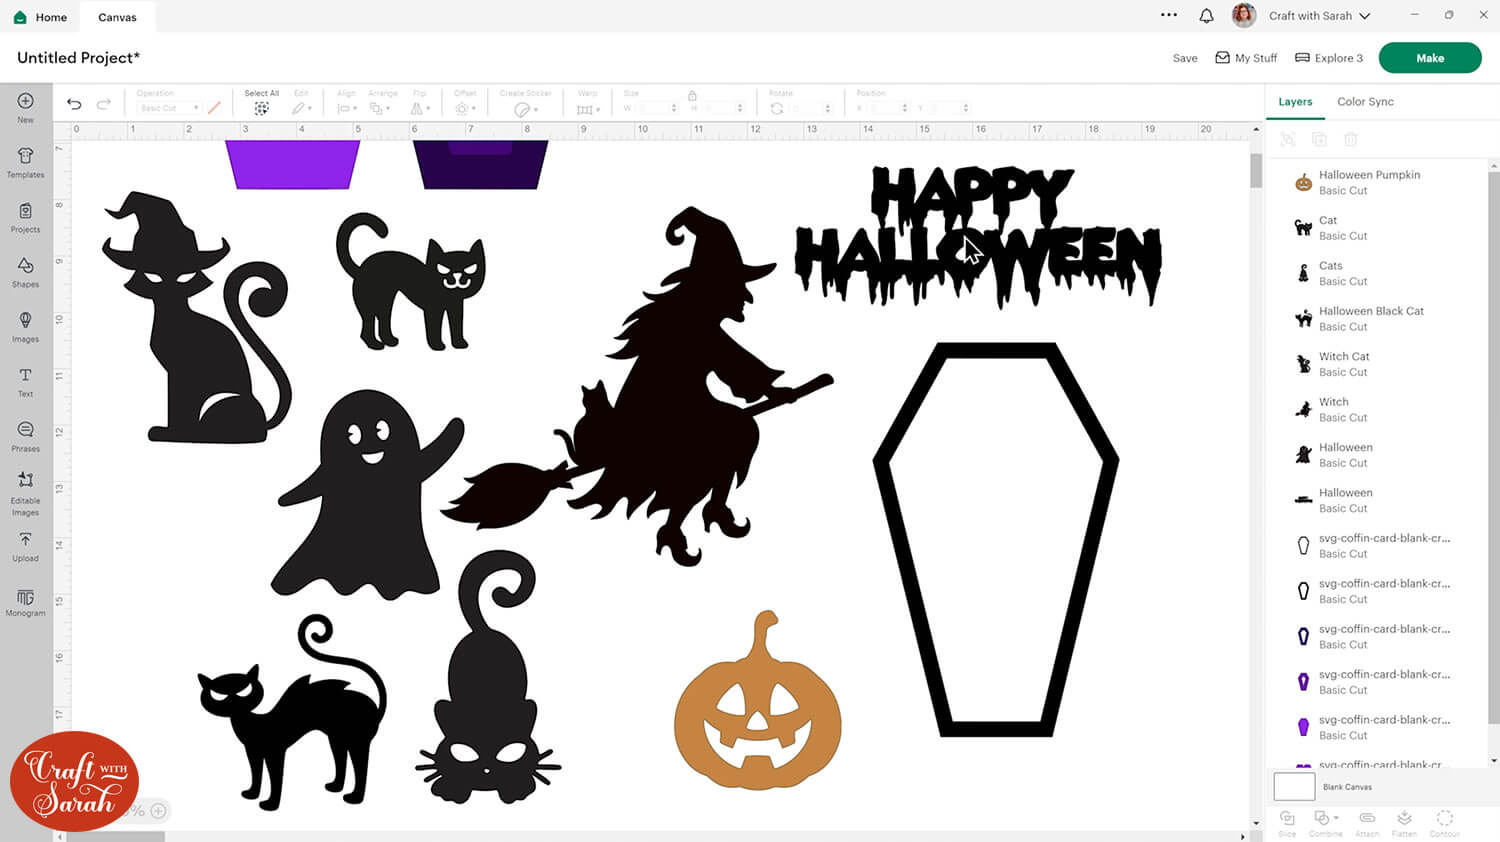
Select the images that you want to use on your card.
I am using Cricut Access images for my coffin card, but you can use any SVGs that you have uploaded to Design Space.
If you are using Cricut Access, it can help to narrow down the suitable images by choosing “Cut” in the “Operation Type” filter and “Single” in the “Image Layers” filter.
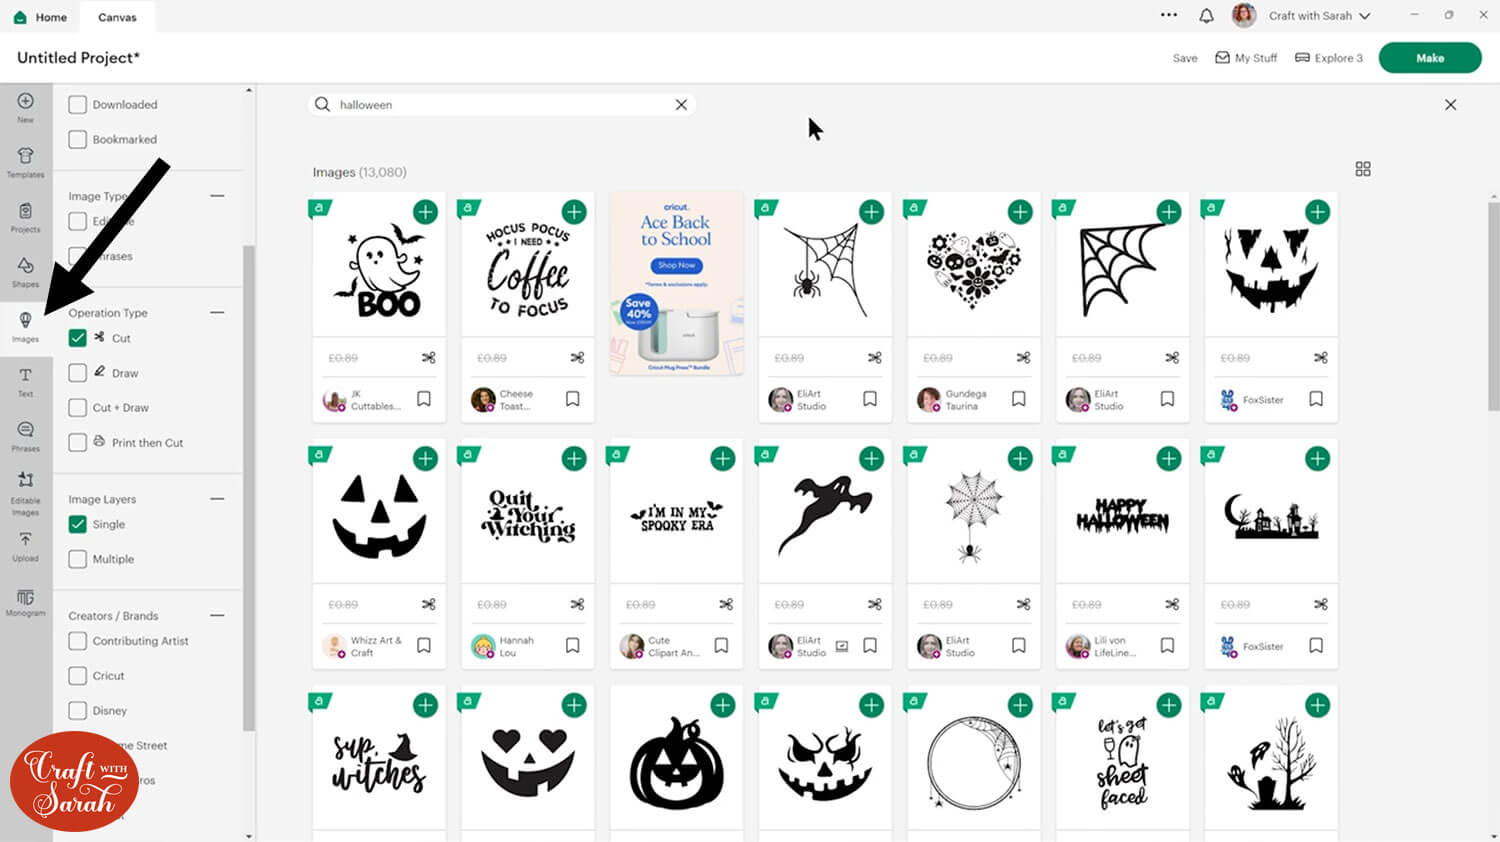
You want to choose images which are bold or have thick lines to make it easier to cut from cardstock.
It is important to choose images where everything is touching so that it can be connected to the card.
Step 3) Position the images
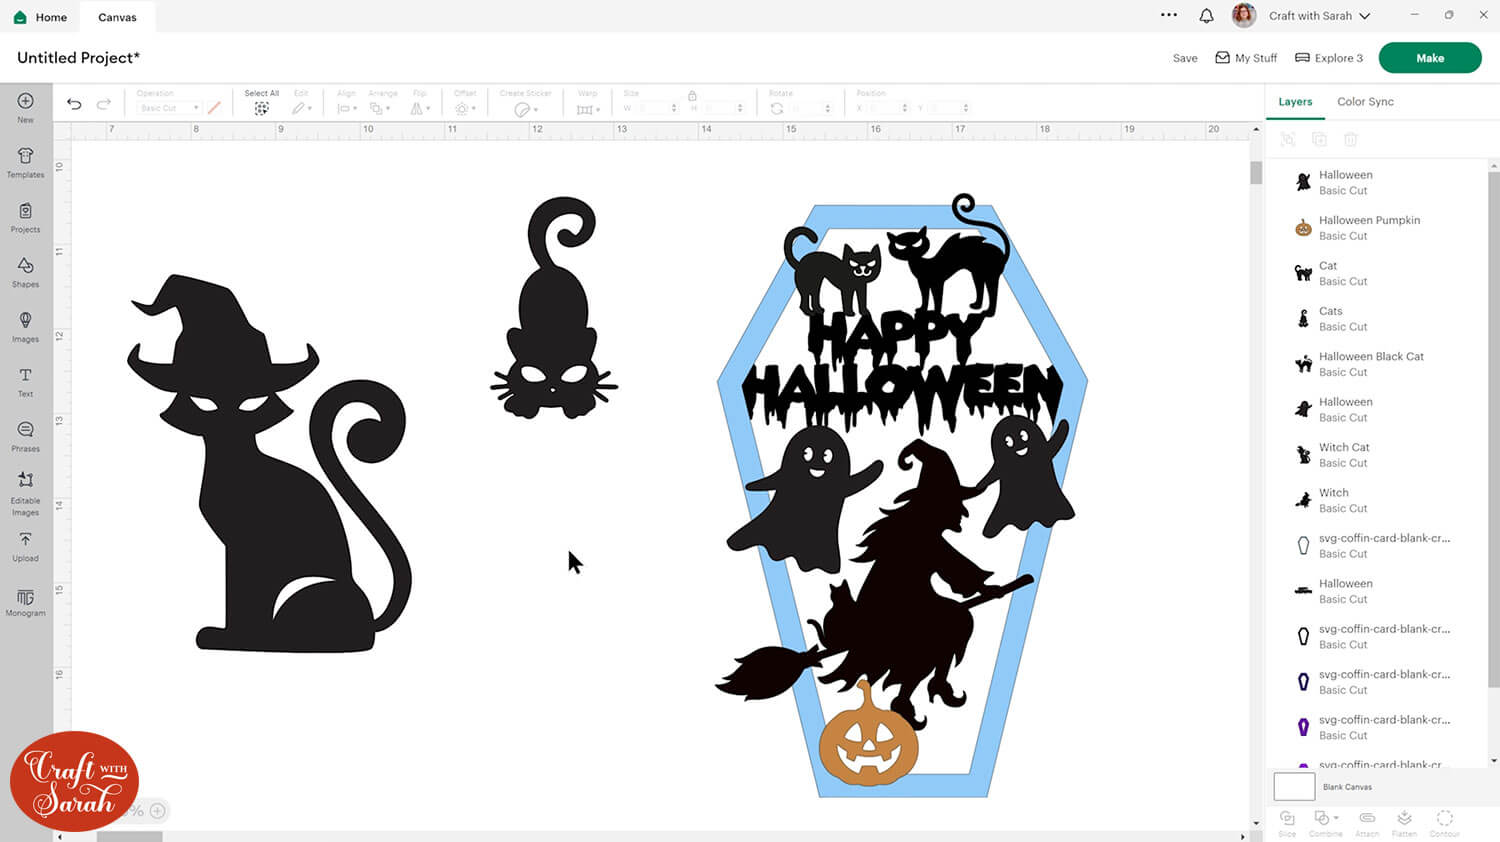
Position the images inside the coffin shape. It’s ok if some parts of the images go “outside” the outline at this point, as we can trim off those parts later.
I’ve changed the colour of my coffin outline to blue to make it easier to see.
Make sure all the images are touching either the coffin shape, or other images, so that everything will be “connected” once we join them together.
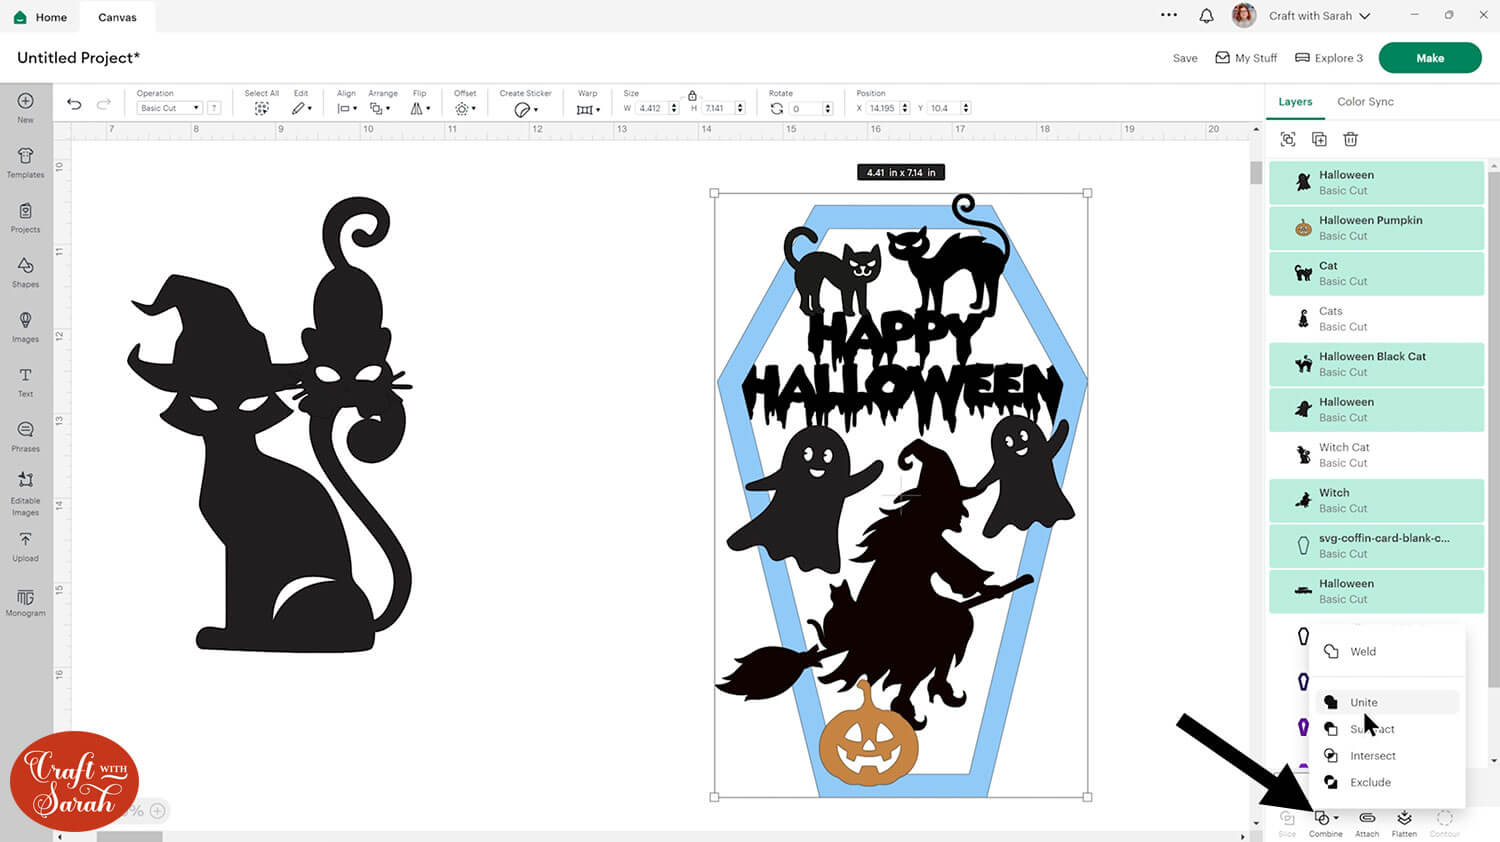
To get a better idea of how it will look when cut, select everything, change the colour to black and press “Combine > Unite”.
My card is looking good, but there are some parts going outside the coffin outline that I need to remove.
If you have “United” your layers, then you need to separate them again by clicking “Combine > Undo Unite”.
Change the coffin outline so that it’s a different colour to everything else.
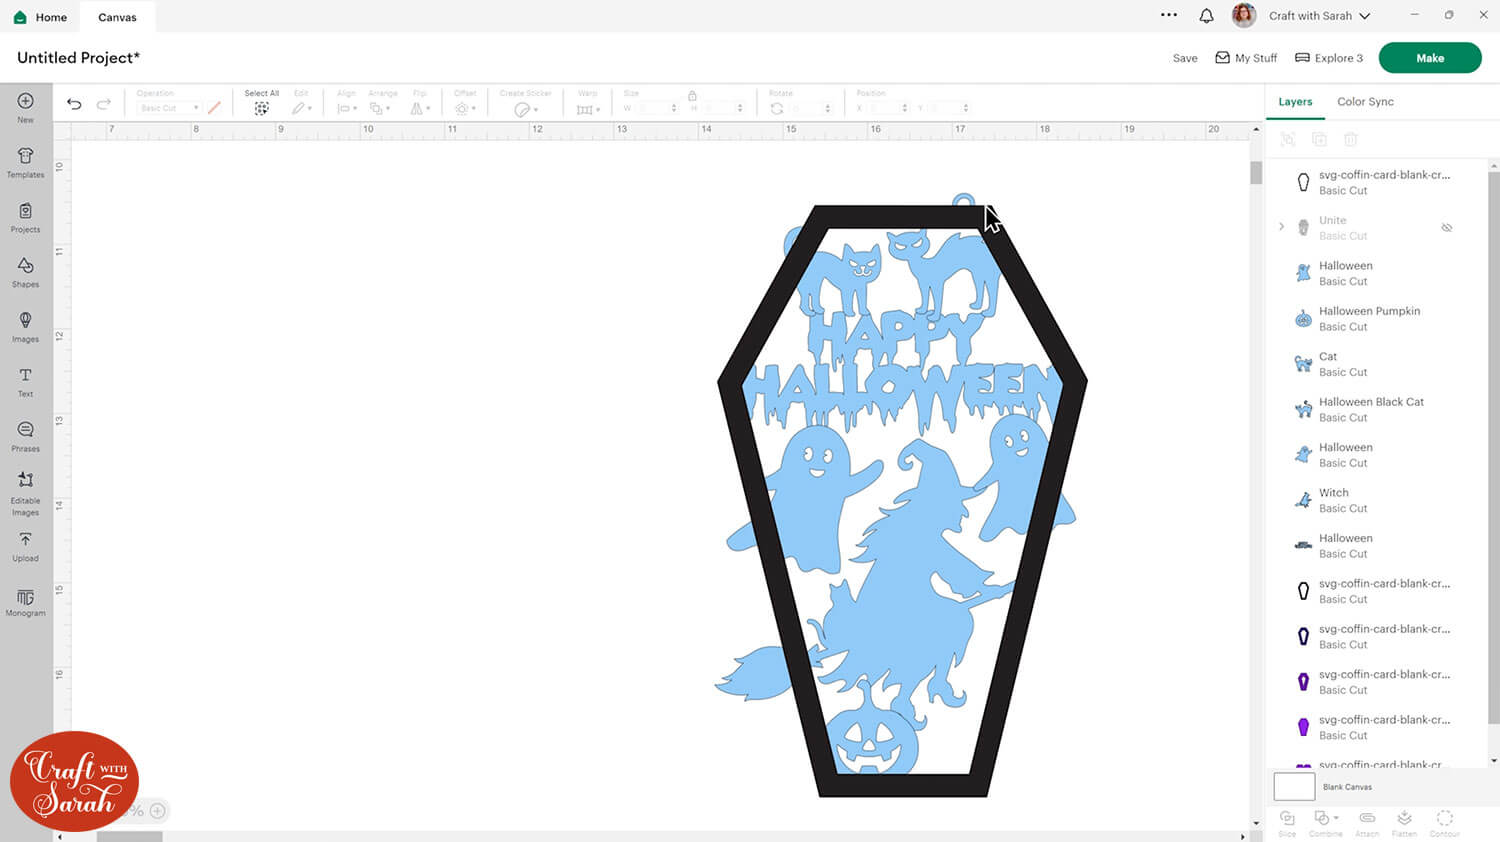
Select all the images (but NOT the outline) and press “Combine > Weld” to join them into one layer. Your images will NOT be editable after this point, so make sure you are definitely happy with your layout!
It’s a good idea to duplicate the images BEFORE Welding them and then hide the duplicate. That way, you have a copy with all the layers/images separate in case you want to come back to this point in the future.
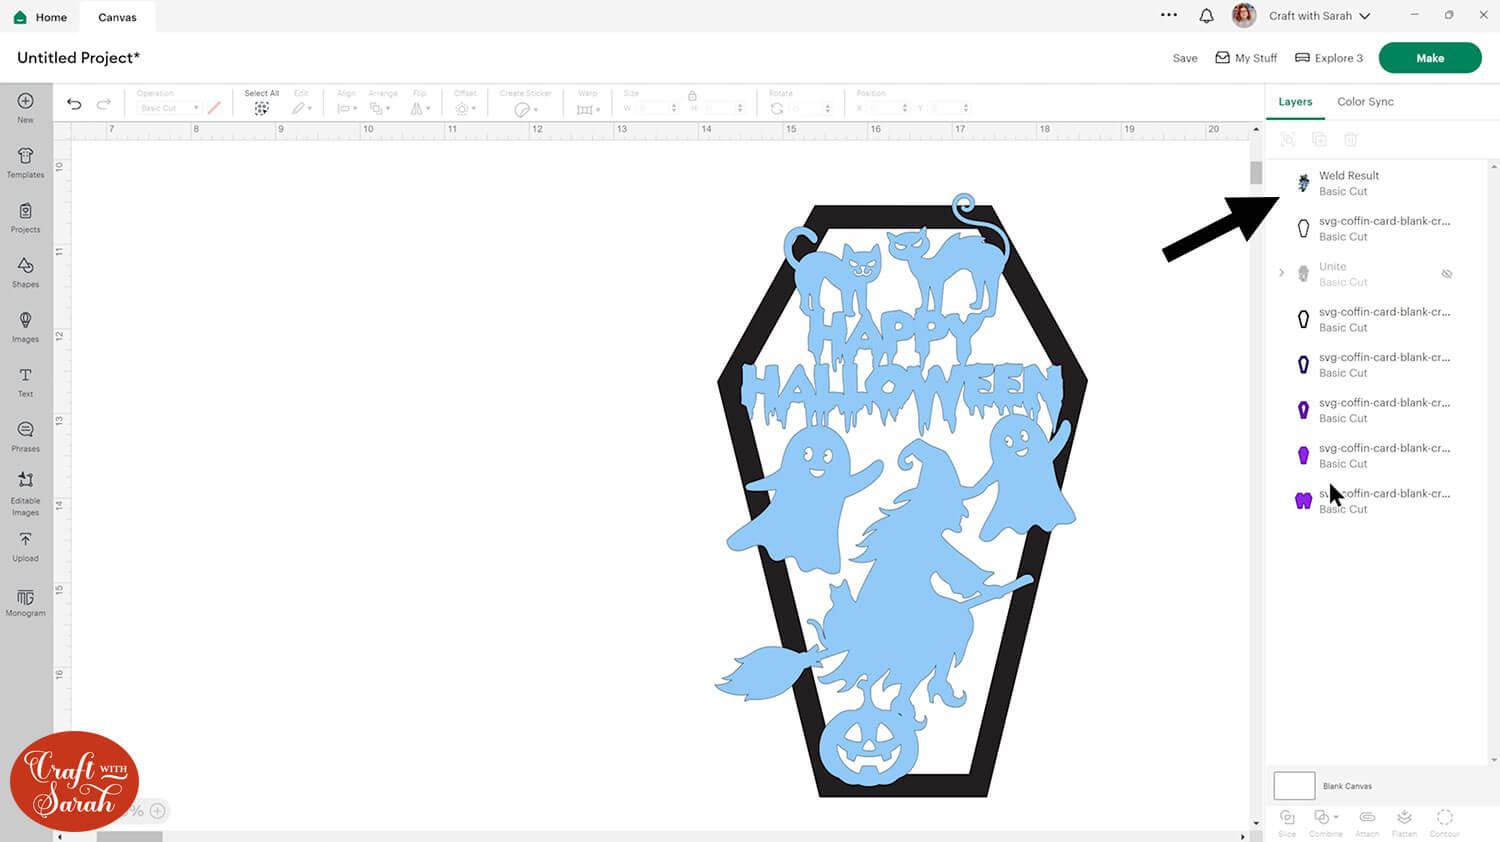
Insert a square and position it over any parts of an image that are going outside the coffin shape. You may need multiple squares.
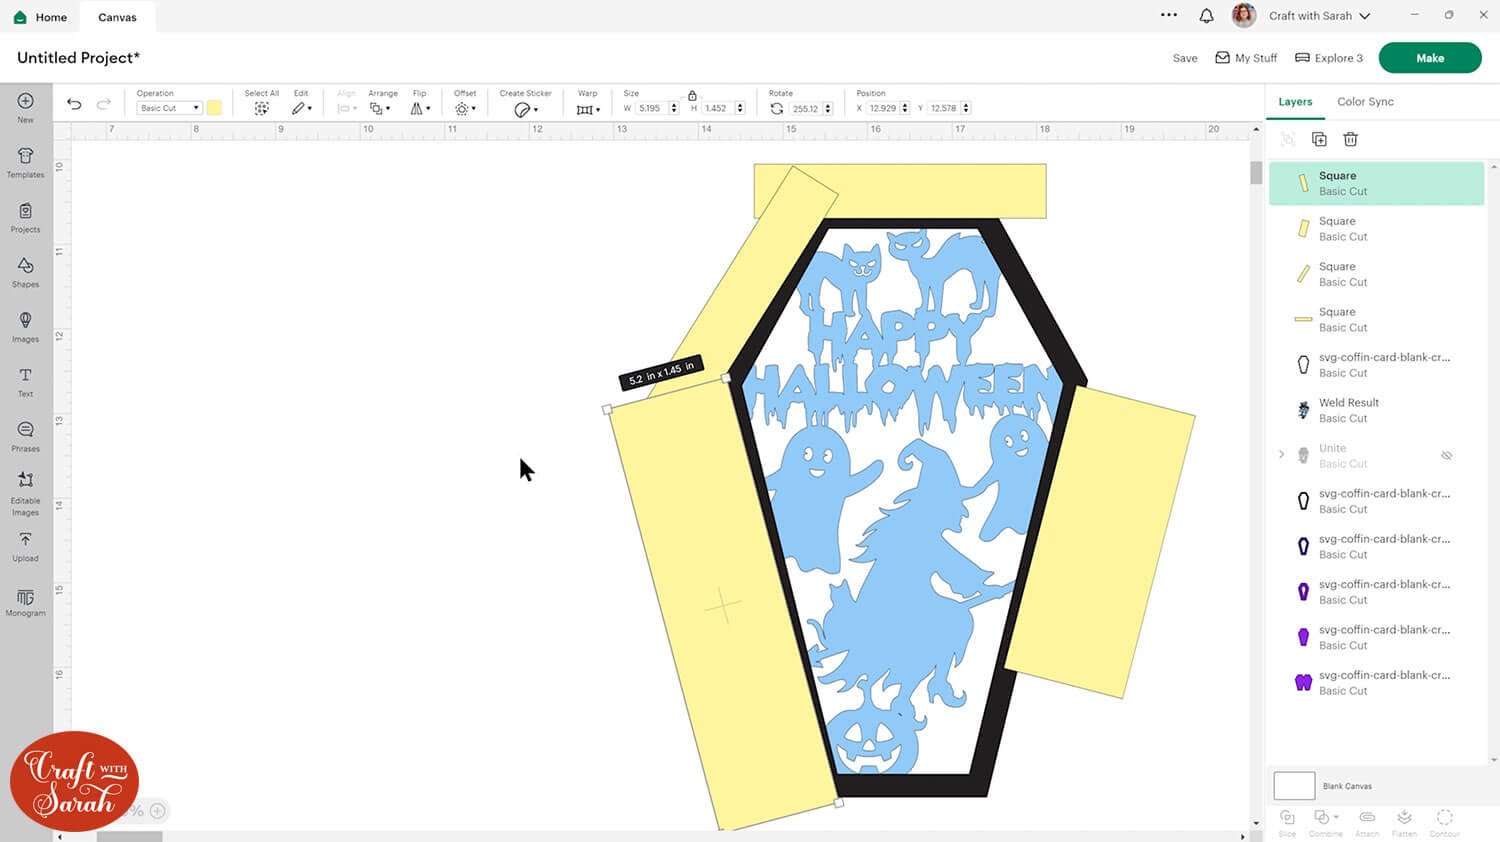
Select all the square and “Weld” them together.
Select the square layer and the image you want to cut, then press “Slice”.
Delete the offcuts.
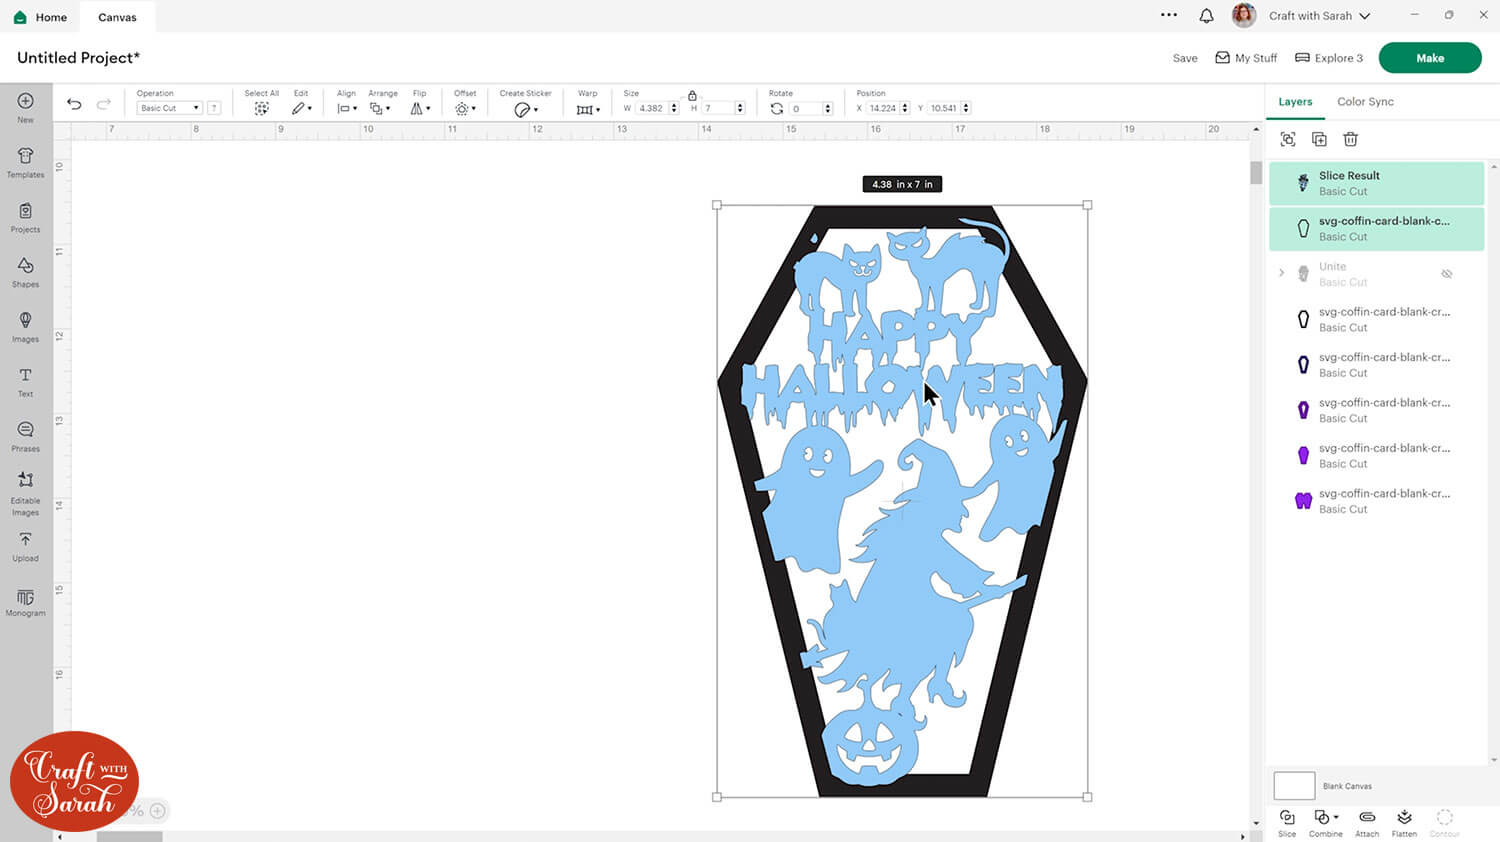
To join all the images to the outline so that it cuts as one piece, select everything and press “Weld” at the bottom of the layers panel.
Change the coffin shape to a light colour. This will make it easier to see if there are any little gaps that need removing.
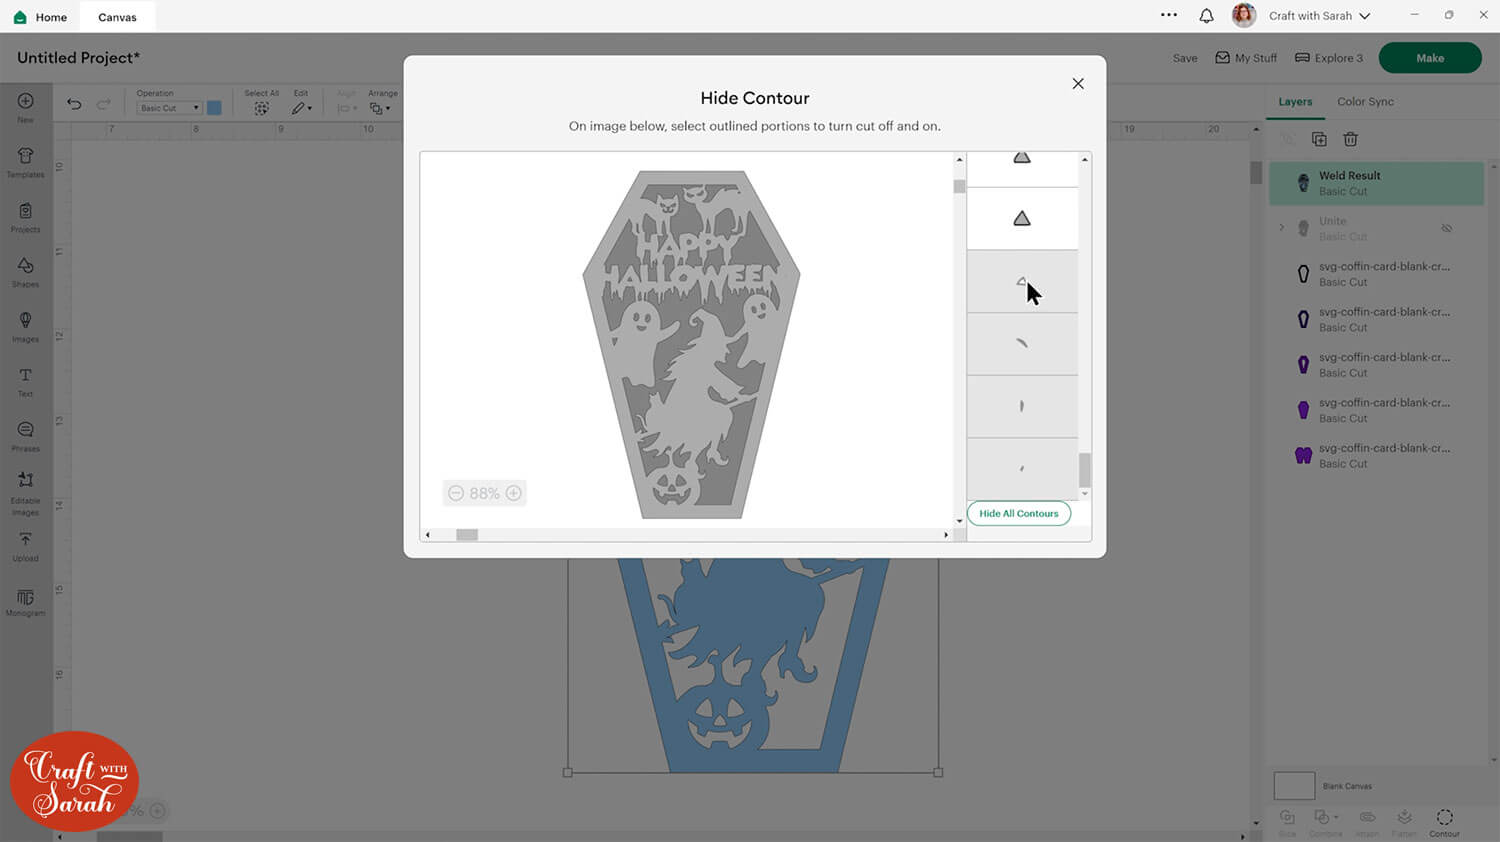
At the moment, my design has some tiny cuts next to some of the images that the Cricut would struggle with.
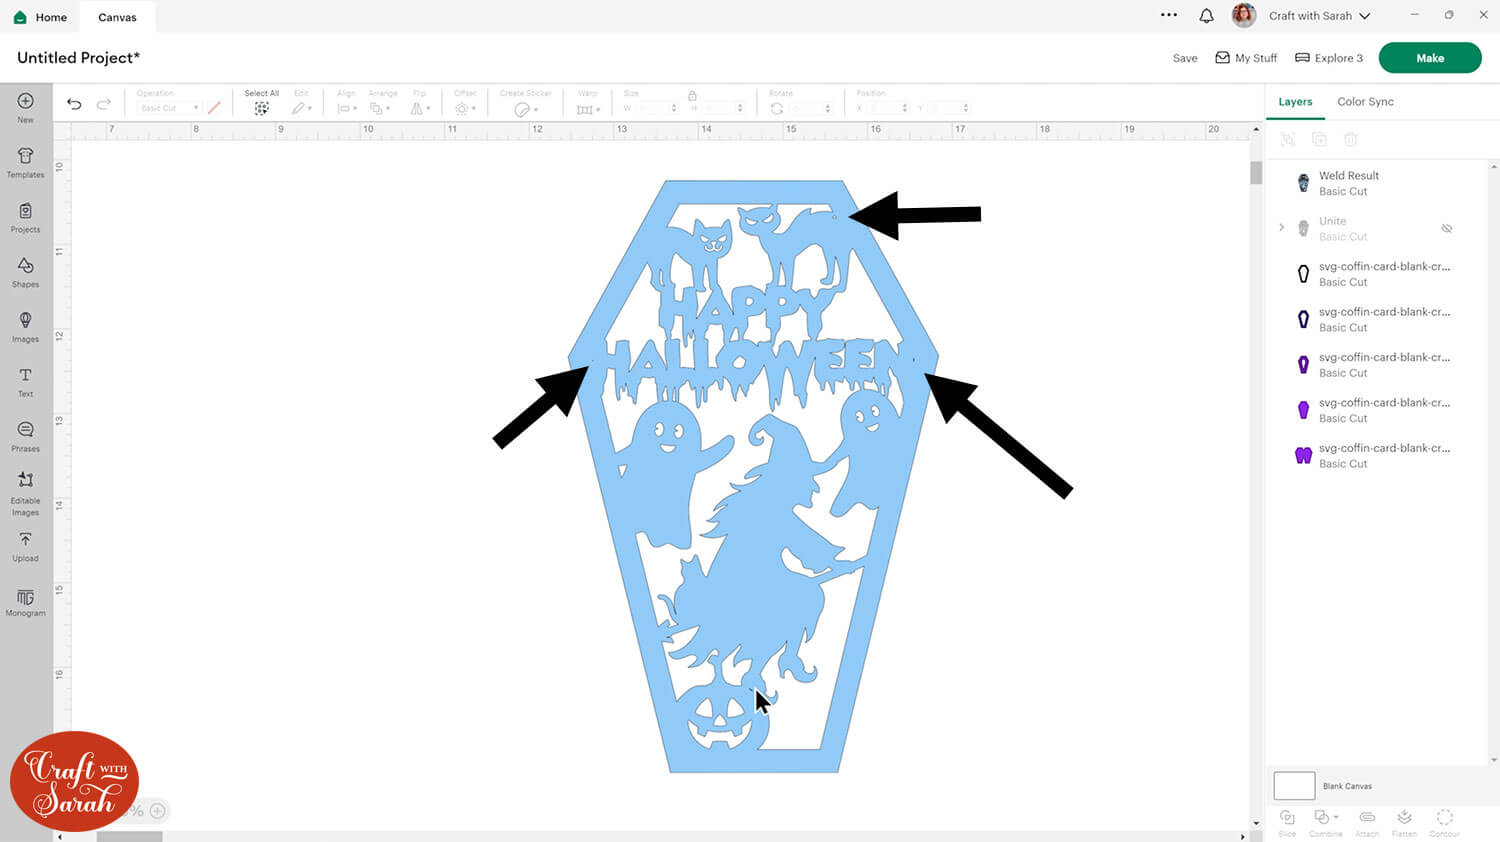
To fix this, click the design and then press “Contour”.
Find the small gaps in the Contour list and click to hide them.
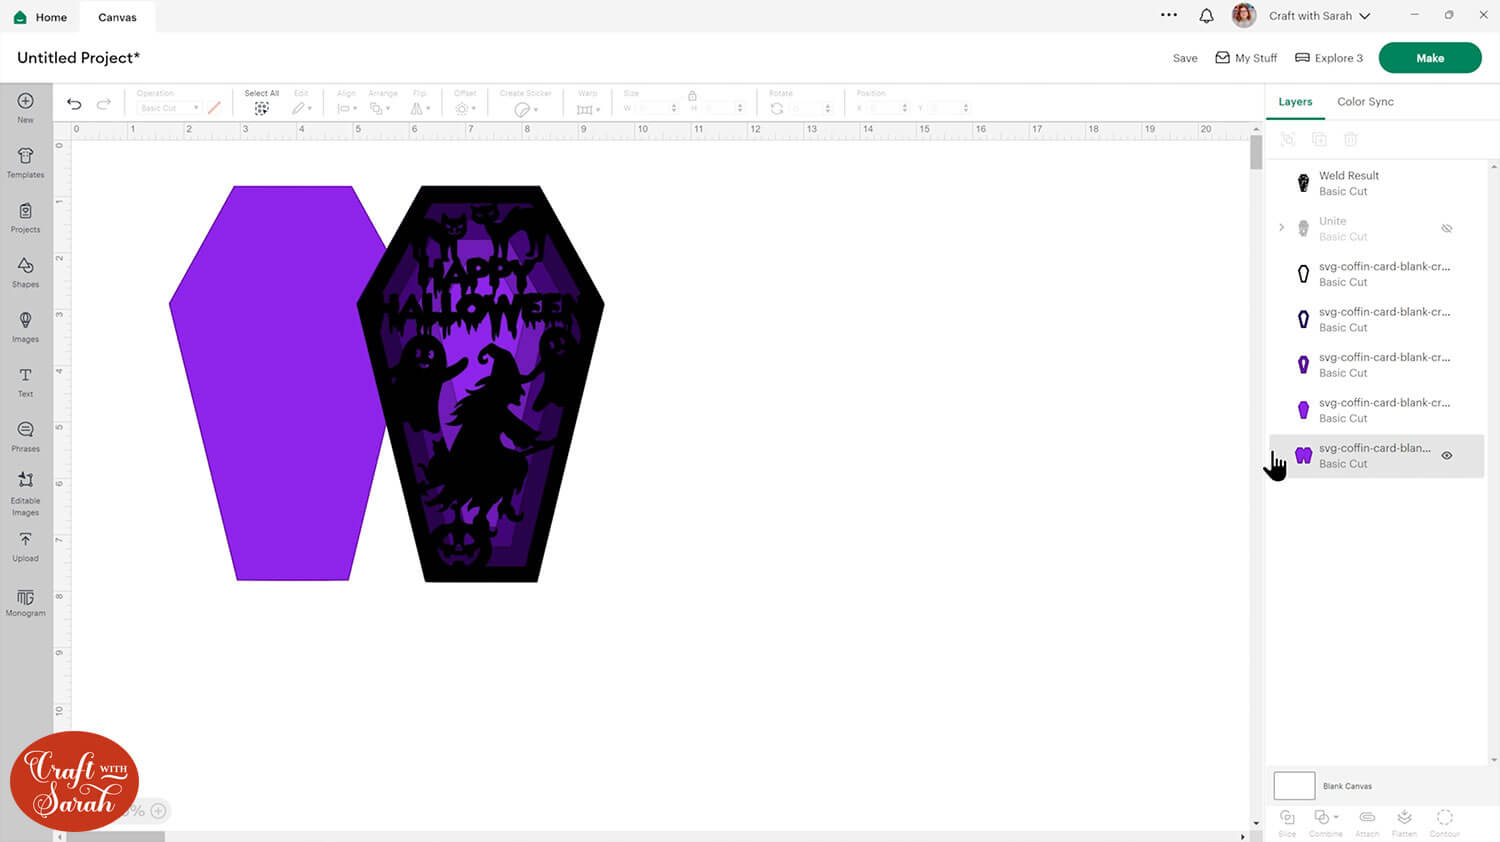
Change the colour back to black and position it over the top of your original card layers.
That’s it – your custom coffin card is all finished and ready to cut.
Don’t forget to save the project!!
Coffin shaped Halloween cards
With your coffin-shaped cards finished, you’ve crafted some truly unique Halloween greetings that are sure to stand out.
The gradient backgrounds and custom designs add a special touch to your creations.

I hope you enjoyed making these cards and feel inspired to experiment with your own designs in Cricut Design Space.
Note: These cards are 7 inches tall so they will fit in a 5×7 inch envelope, but as they are only around 3.5 inches wide they may seem a little bit “lost” inside. To make your own custom envelopes to perfectly fit these cards, check out this envelope tutorial with free SVGs.
Happy crafting,
Sarah x

