ECC Day 02 🌼 Bunny Cutout Cards
Welcome to Day 2 of the Easter Craft Countdown!
Today we’re making these two Easter bunny cutout cards, with matching envelopes.
They’re really pretty, but best of all they come together really quickly once they’re cut, making them perfect for last minute Easter cards.
This Project was part of the ECC Day 02 🌼 Bunny Cutout Cards

Materials supply list
Here is a list of the materials that I used to make this project.
Please note that some of the links included in this article are affiliate links, which means that if you click through and make a purchase I may receive a commission (at no additional cost to you). You can read my full disclosure at the bottom of the page.
- Cricut machine
- Light blue Cricut cutting mat
- Cricut scoring stylus or scoring wheel (optional)
- Coloured Card and patterned paper (for the envelope)
- Collall All Purpose Glue
- Needle Tip Applicator Bottle
- 3D foam pads
- Extra embellishments, for example peel-off stickers (optional)

Video tutorial
Watch the video below to see how to make this project. Keep scrolling for a written tutorial.
Written tutorial (with photos!)
Here’s how to make your very own bunny cutout cards and envelopes using a Cricut machine!
Step 1) Download the cutting file(s) & unzip the downloaded folder

Before you upload the SVGs to Design Space, you need to unzip the download folder that they come in.
- How to unzip a folder on Windows computer
- How to unzip a folder on a Mac
- How to unzip a folder on an iPad/iPhone
- How to unzip a folder on an Android device
Step 2) Upload the SVG files into Design Space
Open up Cricut Design Space and start a new Project.
Click “Upload” and then find your unzipped version of the downloaded files for this project.

Double-click into the “SVG Files” subfolder and then upload your chosen card design.
I’m going to show the steps with the first card (the side-edge card), but it works the same for both of the bunny card designs.
Make sure you upload the files which start svg- in the filename!!
This is how it should look after you have uploaded the file:
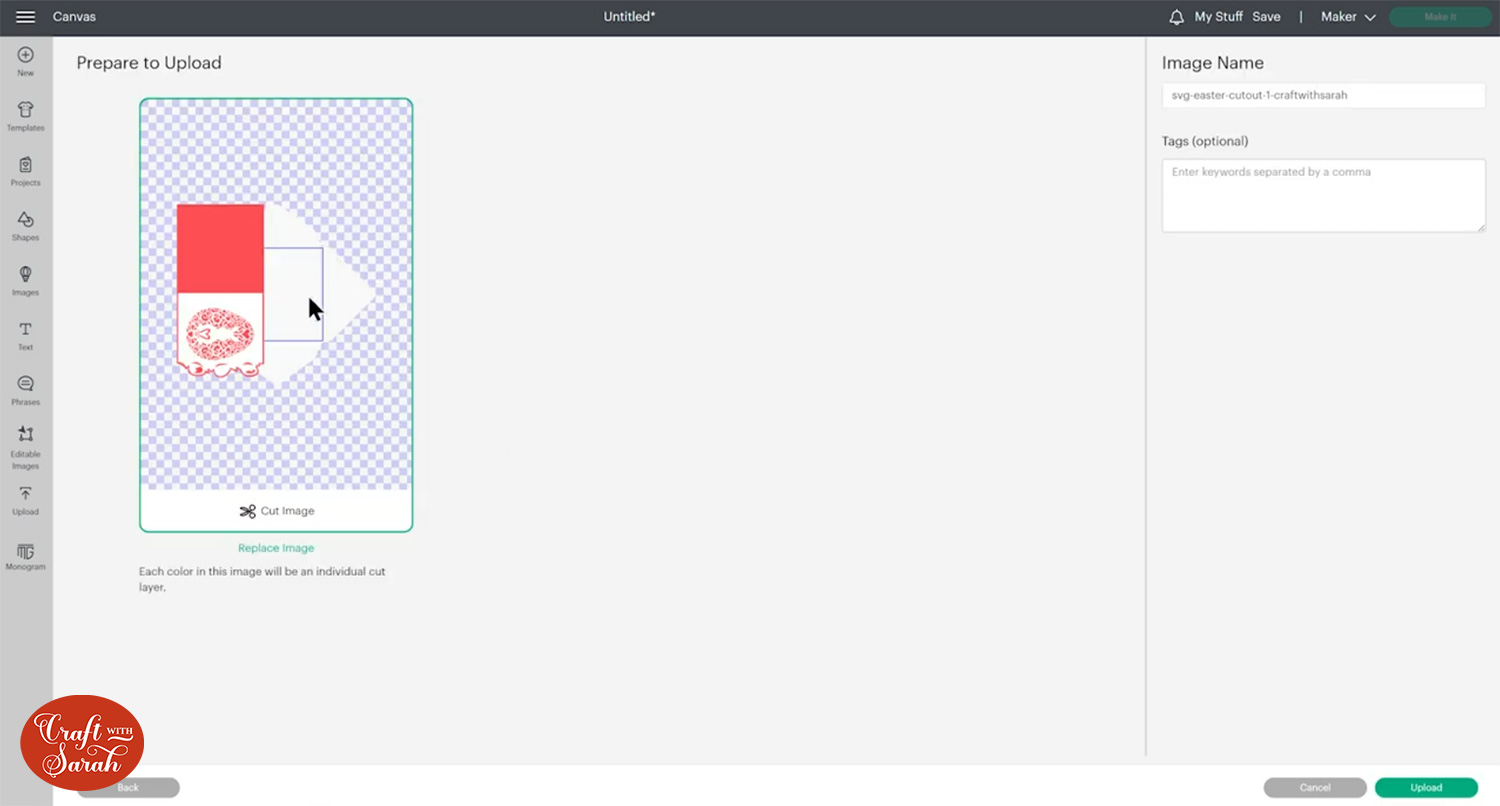
The envelope is included as part of the SVG file.
After uploading, the design will show in your “Recently Uploaded Images”.
Click on it and then press “Add to Canvas” to put it onto your Project.

Step 3) Check the card size
The card designs will load onto your Canvas similar to this:

All the layers are grouped together.
We need to do a little bit of work in Design space before the card is ready to cut out.
Sometimes the card loads in at an unsuitable size (sometimes too big, sometimes too small – it’s a Design Space quirk that unfortunately I couldn’t work out how to resolve!)
First, click the base layer of the card in the layers panel to check the size of it.

If you want to make a larger or smaller card, resize the whole Group of layers (including the envelope!) by drag-and-dropping the corner of the design to change the size.
To make it easier, click “Shapes” and make a square or rectangle the same size as the front of the card that you want to make.
You can then use that as a guide when resizing the card to make it match that template.

Make sure you resize the envelope at the same time as the card, otherwise the card won’t fit in it!
Delete the extra square/rectangle when you are done resizing.
Step 4) Format the envelope
Click the design and press “Ungroup” at the top of the layers panel to separate out the layers.
Select all the pieces that make up the envelope and move them to the right of your screen to separate them from the card.

Click the envelope in the layers panel and press “Ungroup” to separate the layers.

If you do NOT have a scoring wheel/stylus for your Cricut then delete the blue square layer and move on to Step 5.
If you DO have a scoring wheel or stylus, double-click on the layer name of the blue square in the layers panel and change the name to “score”. This is just for our reference to make the layer easier to find once we’ve formatted it.
Rename the layer underneath to “attach to this”

Click the blue square layer and then change it to a Score line in the Operations dropdown menu.

Select the “score” layer and the layer underneath it that we called “attach to this” and then press “Attach”.
This will join the score line to the bigger shape underneath.
IMPORTANT – Make sure you ONLY select those two layers when you are Attaching, NOT the “flaps” of the envelope.
Your layers should be looking like this:

Click the Attached layers and click “Arrange” > “Send to Back” to move it to the bottom of the layers panel.
This will make it appear like your score line has disappeared, but don’t worry – it’s still there, it’s just now appearing behind the “flaps” of the envelope.
Step 5) Re-colour the card
I like to change the card on-screen to the colours I’ll be cutting it with, to check I’m happy with how the colours go together before using my cardstock.
To do this, click each layer of the card one-by-one and change the colour in the “Colours” box.

Step 6) Add a score line to the card
This step is optional, but it makes it easier to fold the card in the correct place.
Click the card and “Ungroup” the layers if they are still in a group.
Click “Shapes” and create a score line.
Make it the same width or height as the card and rotate it if needed.
Select the score line layer and the base card layer and press “Align” and then “Center” to put the score line exactly in the middle of the card.
With those two layers still selected, click “Attach”.

Step 7) Cut the card and envelope
Save your Project, then click “Make It”.
Your envelope should be looking like this, with all the flaps “separate” from the main envelope piece:

If your flaps are joined on to the main envelope piece, click “Cancel” and check that they are not Attached to the main piece.
You can change move things about on the page by clicking-and-dragging.
My Design Space had put one of the envelope flaps on another sheet of paper, but I wanted them all to be cut on the same one.
To do this, click the three little dots on the piece you want to move, then “Move Object”.

Select the other mat of the same colour.

Now you can move and rotate the shapes around to get them all to fit. Make sure nothing overlaps!!
If you cannot get the final shape to fit, move it back onto the second mat.
Mine ended up fitting quite nicely though!

Follow the steps through to get everything cut out from cardstock.
I like to use patterned paper (scrapbook paper) for my envelopes as it’s not as thick/heavy as cardstock.
Step 8) Make the card
These cards are very simple to make!
Fold the base card down the score line, then use glue or foam squares to attach the bunny cutout piece to the front.
I used glue for mine.

For the other card, gently bend the card upwards along all of the single-line cuts to make a “popout” effect.

Glue it to the coloured rectangle underneath.

Use foam squares or glue to stick this to the card.
If using foam squares, make sure you add some in the middle as well as around the edge, otherwise it will “droop” down in the middle.

Step 9) Decorate the cards
The cards look lovely as they are, but you may wish to add extra decorations or embellishments.
I used some silver and gold peel-off stickers to add sentiments and other Easter imagery.

I love adding peel off stickers to cards as they are a quick and affordable way to add some sparkle!

Step 10) Make the envelope
Fold up the score lines on the main envelope piece.

Use double-sided tape or glue to attach all the “flaps” to the main envelope piece.

Stick three of the flaps together. Leave the fourth one unstuck so you can put your card inside!

The moment of truth has arrived… does your card fit? 😀

There you have it – your paper cut Easter cards are all finished!
For more free greetings card SVGs, check out these tutorials:
- Beautiful flower greetings cards
- Design your own side-edge cards
- Valentine’s Day cards
- Layered Christmas cards
- St Patrick’s Day cards
Happy crafting,
Sarah x

