CCC 2024 Day 04: 3D Christmas Trees
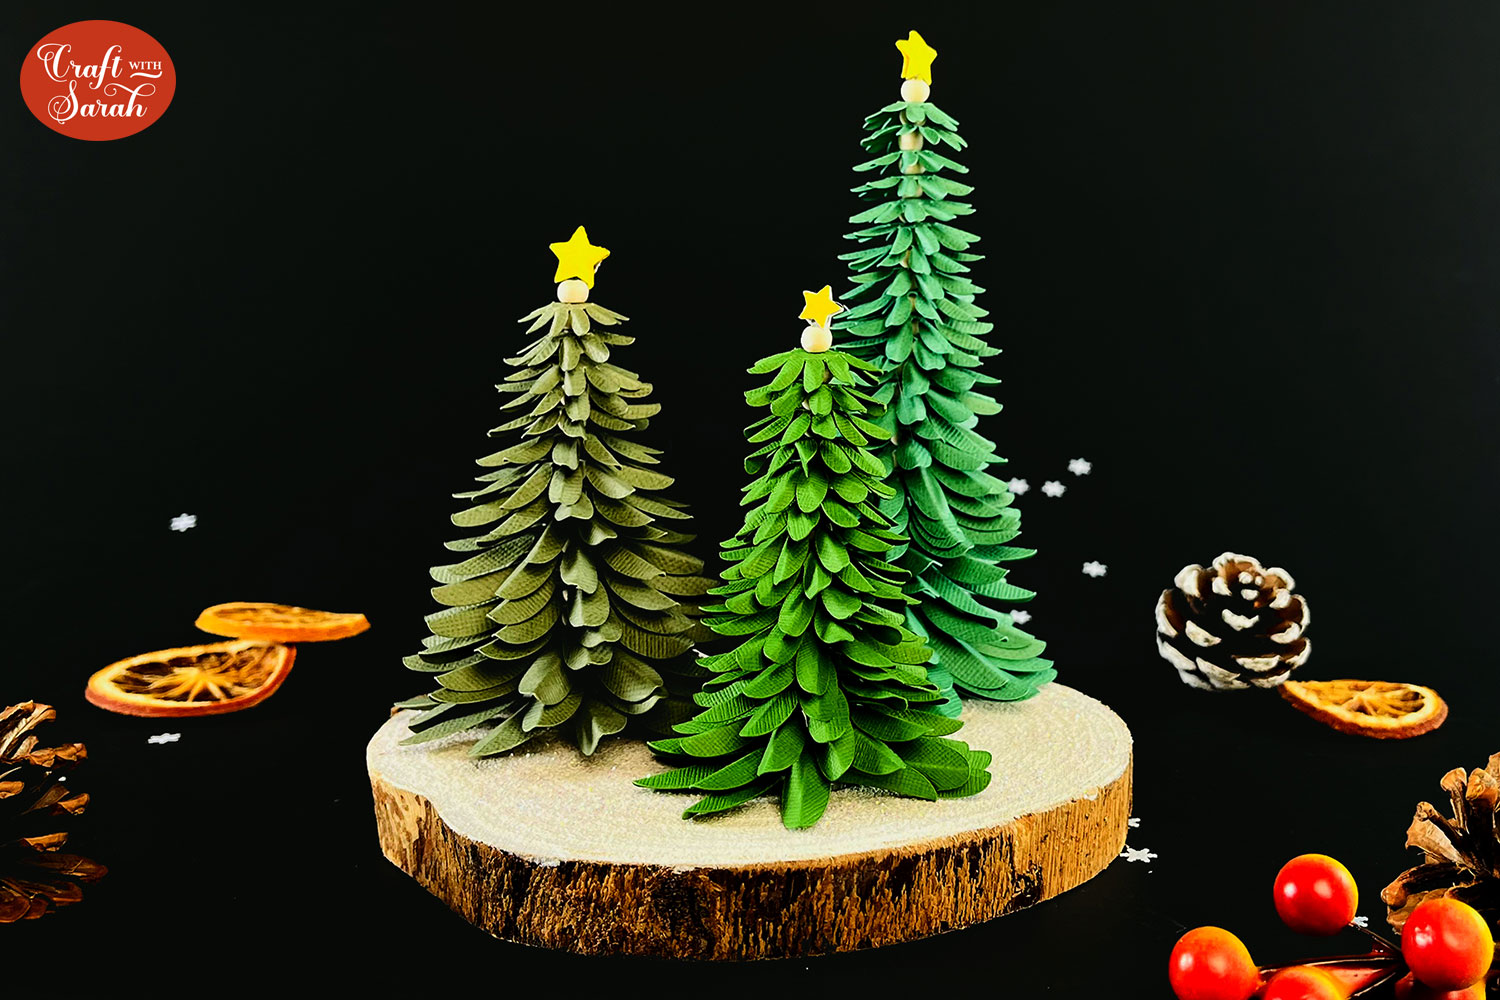
Welcome to day four of the 2024 Christmas Craft Countdown, where I’m sharing 20 festive themed Cricut papercraft projects in 20 days.
If you’re looking for a Christmas centrepiece, you’re going to love today’s project! I’m sharing these rustic 3D trees which I’ve mounted onto a wooden base.
I painted my base white and added glitter for a snowy effect and made the tree in several different sizes to create a wintery Christmas scene.
These trees look super impressive and complicated, but they’re actually really easy to put together once they’re all cut out.
This Project was part of the Christmas Craft Countdown 2024
Materials supply list
Here is a list of the materials that I used to make this project.
Please note that some of the links included in this article are affiliate links, which means that if you click through and make a purchase I may receive a commission (at no additional cost to you). You can read my full disclosure at the bottom of the page.
- Cricut machine
- Light blue Cricut cutting mat
- Cricut scoring wheel or scoring stylus
- Scraper tool or something similar with a hard, straight edge
- Green card and yellow card
- Hot glue gun and glue sticks
- Small wooden beads (mine are 6mm)
- Florist wire (I used 18 Gauge / 1.25mm Diameter)
- Wire cutters
- Wooden base (mine is from Hobbycraft)
- White paint (I used acrylic)
- White glitter
This project is suitable for the following types of Cricut machine: Explore Air 2, Explore Air 3, Maker, Maker 3, Venture, Joy Xtra and Joy. You will need to make the design smaller to cut on the original Joy.
Foundation learning
If you're new to crafting with your Cricut, you may find the below links helpful.
They teach some of the skills mentioned throughout this tutorial.
- How to upload SVG files into Design Space
- How to make 3D layered Cricut projects
- The BEST way to frame papercraft projects
- How to mount multiple designs in the same frame with magic guides
- How to score with a Cricut (even without scoring tools)
- Print then cut tutorial
- Design Space tools (Combine, Attach, Slice, Weld, Flatten, etc.)
- Pattern fill tutorial (for making backgrounds & cutting images to a specific shape/size)
- Free envelope SVGs that can be sized to fit any card
- How to write inside cards with Cricut pens
- How to cut layered designs at a small size
- Design Space tips & tricks
- Cricut pens tutorial
Video tutorial
Watch the video below to see how to make this project. Keep scrolling for a written tutorial.
Written tutorial (with photos!)
Here’s how to make 3D paper Christmas trees using a Cricut machine!
Step 1) Download the cutting file & upload to Design Space
Download the files using the box below.
Purchase the File(s)
This cut file is available as part of the Instant Access Bundle.
Or, purchase this design individually here
Before you upload the SVG to Design Space, you need to unzip the download folder that it comes in.
- How to unzip a folder on Windows computer
- How to unzip a folder on a Mac
- How to unzip a folder on an iPad/iPhone
- How to unzip a folder on an Android device
After unzipping, upload the SVG file into Cricut Design Space. This is the file which starts svg- in the filename.
Not sure how to do this? Here’s how to upload SVGs to Cricut Design Space. Make sure you upload the file which starts svg- in the filename!
The SVG for this 3D tree comes in two different versions. It’s the same tree design, so just by looking at it you can’t see the difference, but the layers are formatted differently in each file version.
If you’re using one of the larger Cricut machines like the Explore Air 2 or 3, the Maker or the Maker 3 and you have 12×12 in cardstock then the easiest one for you to use is the one that is called svg-3D-christmas-tree-joined-together-craftwithsarah.svg.
In this file, the green shapes and score lines are joined together as one individual layer which means you’ve only got one score line to change in Design Space.
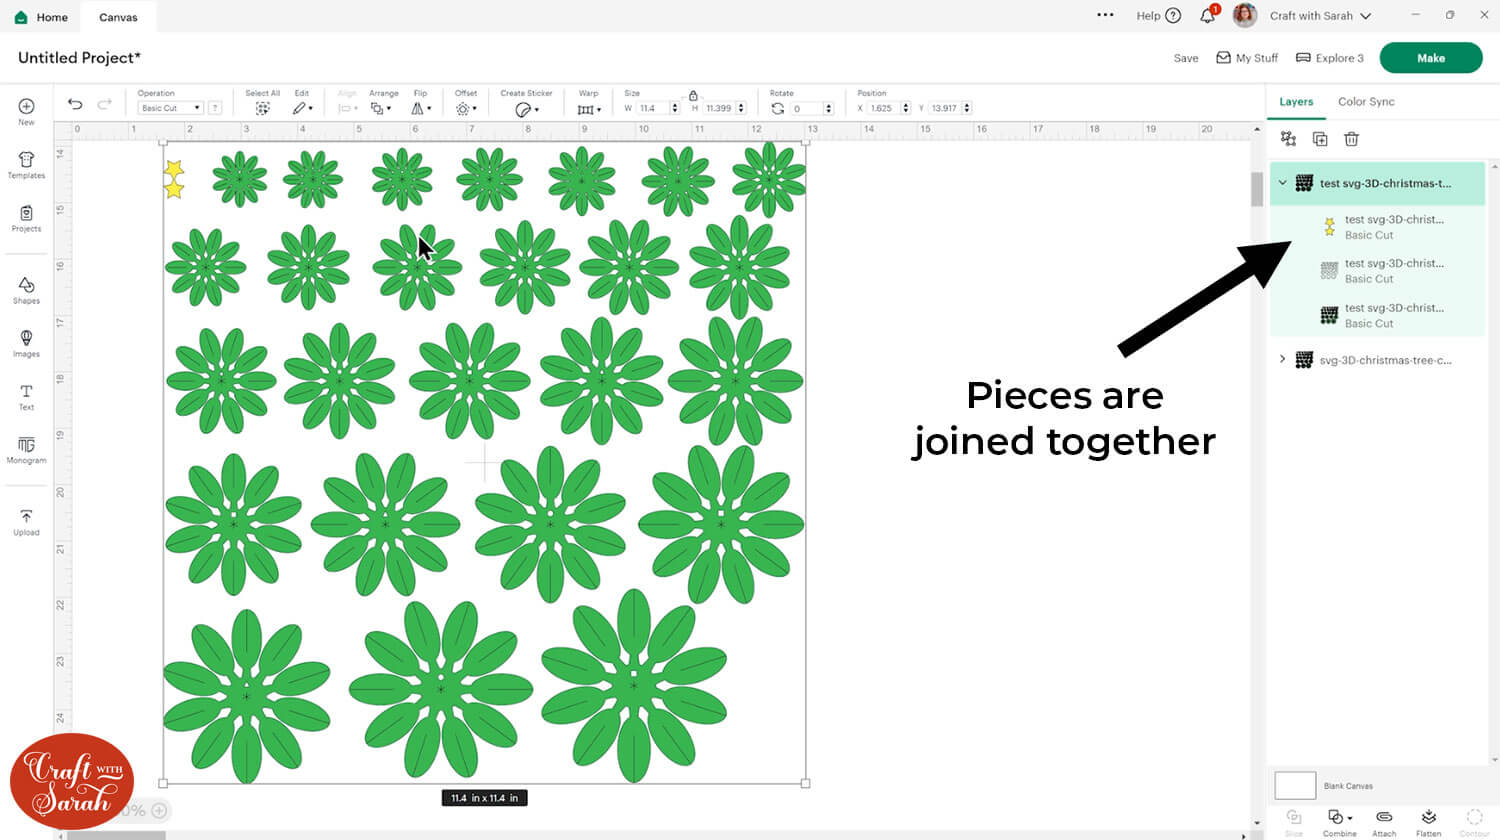
If you have one of the smaller Cricut machines like the Joy or Joy Xtra or maybe you have a larger machine but no 12×12 cardstock, the above version won’t work for you as it’s too big.
If that’s the case, you would need to use the other file which has all the pieces separate. This is the file called svg-3D-christmas-tree-separate-craftwithsarah.svg.
When you Ungroup the layers in this version, you will see that there’s a lot more going on in the layers panel.
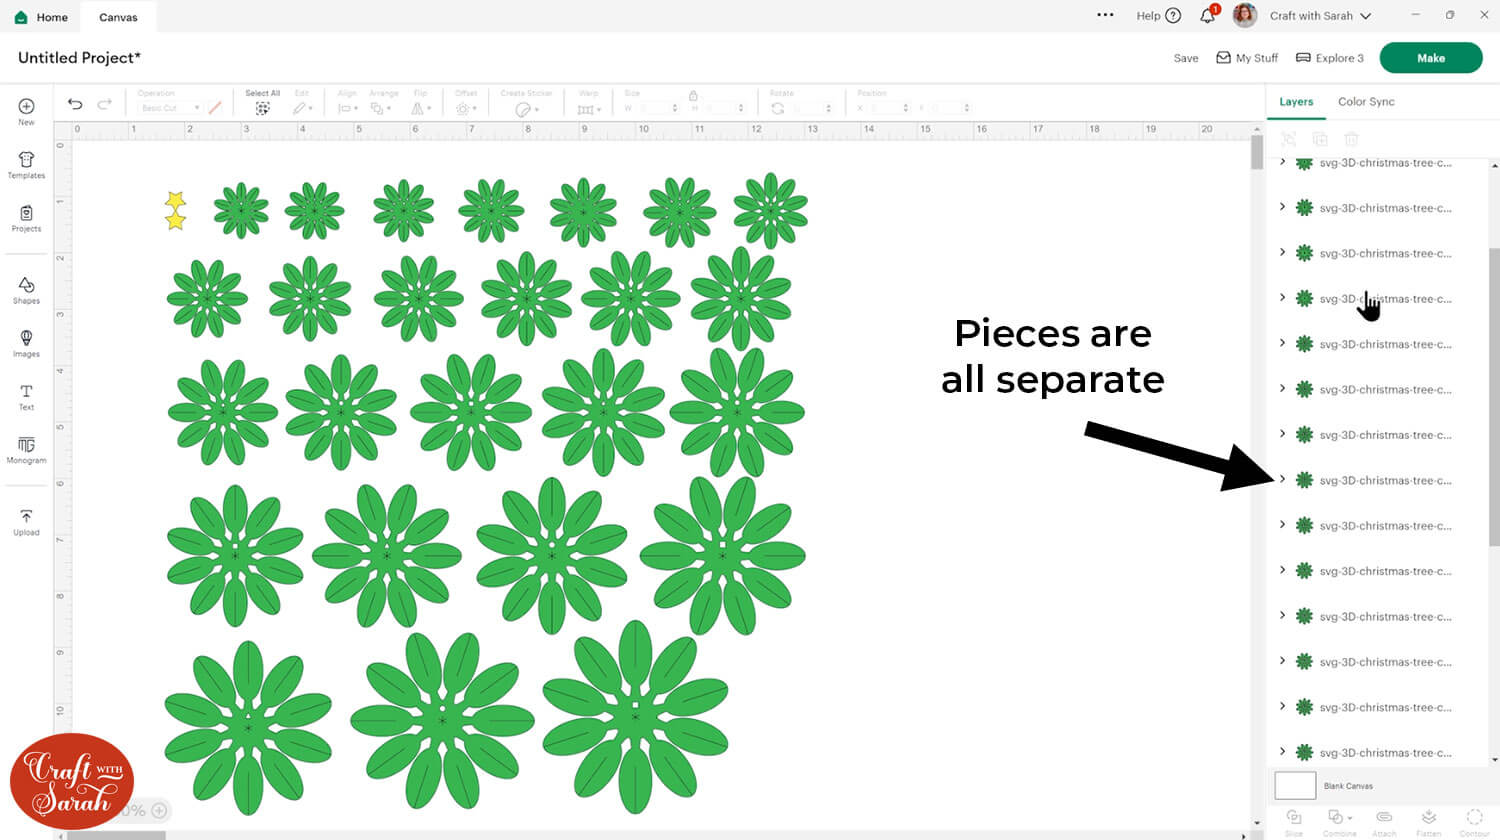
Each green piece is a separate layer, as are all of the score lines. With this version, you will need to format the score lines for each individual shape which is more time consuming but it gives you great flexibility as to the type of machine and cardstock that can be used.
Step 2) Format the score lines
If you are making this project with a Cricut Joy or Joy Xtra, or if you don’t have a scoring tool, here is a tutorial on how you can still score with those type of machines.
Design Space doesn’t automatically understand that we want to score some of the layers instead of cutting them, so we need to tell it what to do.
Click the design on your canvas and Ungroup the layers.
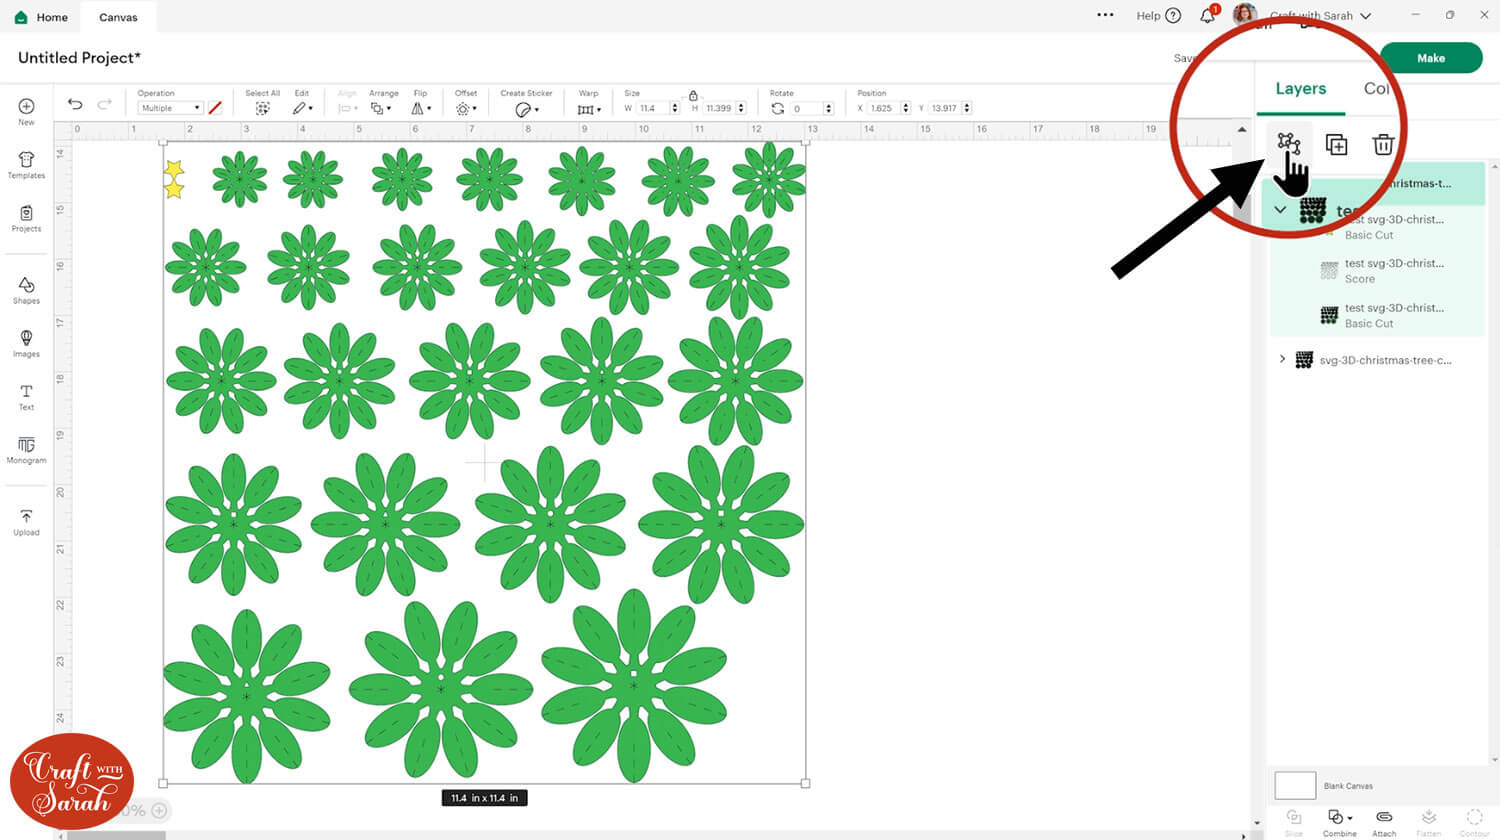
If you are using the “joined together” file version then this part will be quick for you!
Click on the middle layer and change it to “Score” in the layers panel.
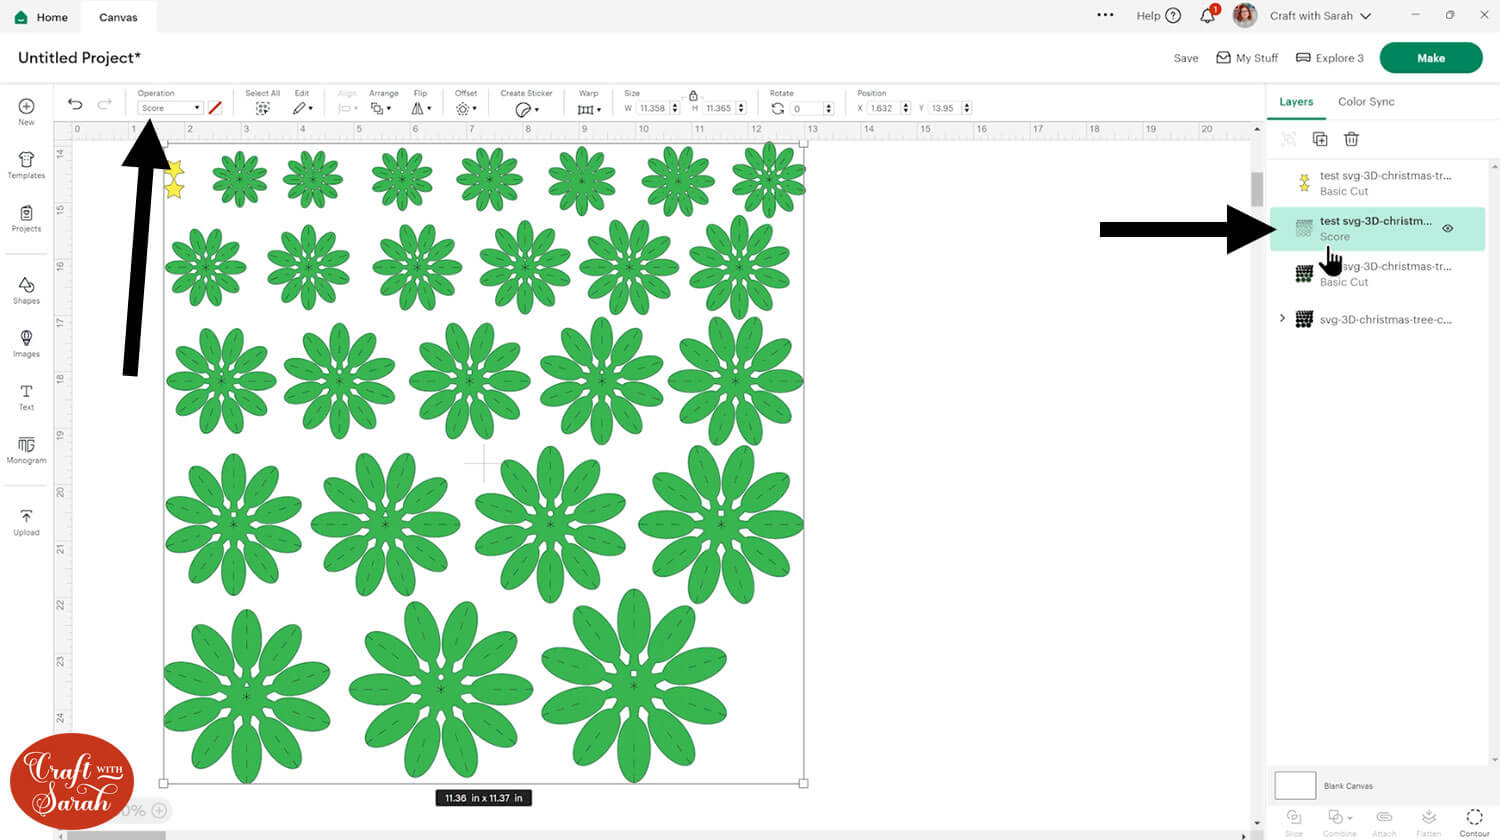
Select the Score layer and the green layer underneath and press “Attach” to join them together.
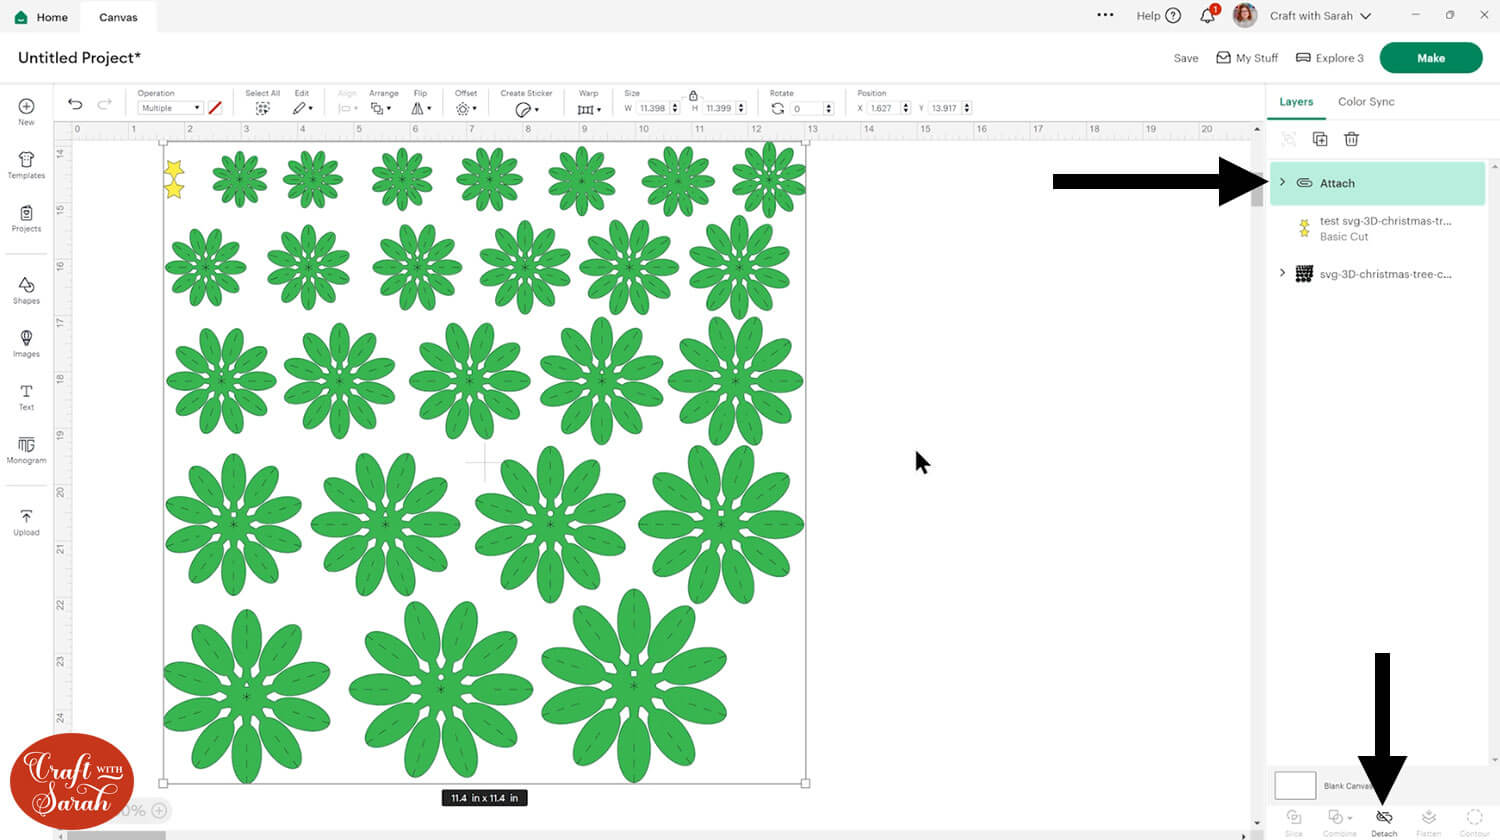
And that’s it!
However, if you are using the separated file version then unfortunately yours will take longer to do.
Ungroup the design and then you will see that each of the green pieces of the tree is a separate “mini-group” within the layers panel.
Click the first one and open up the group by clicking the arrow in the layers panel.
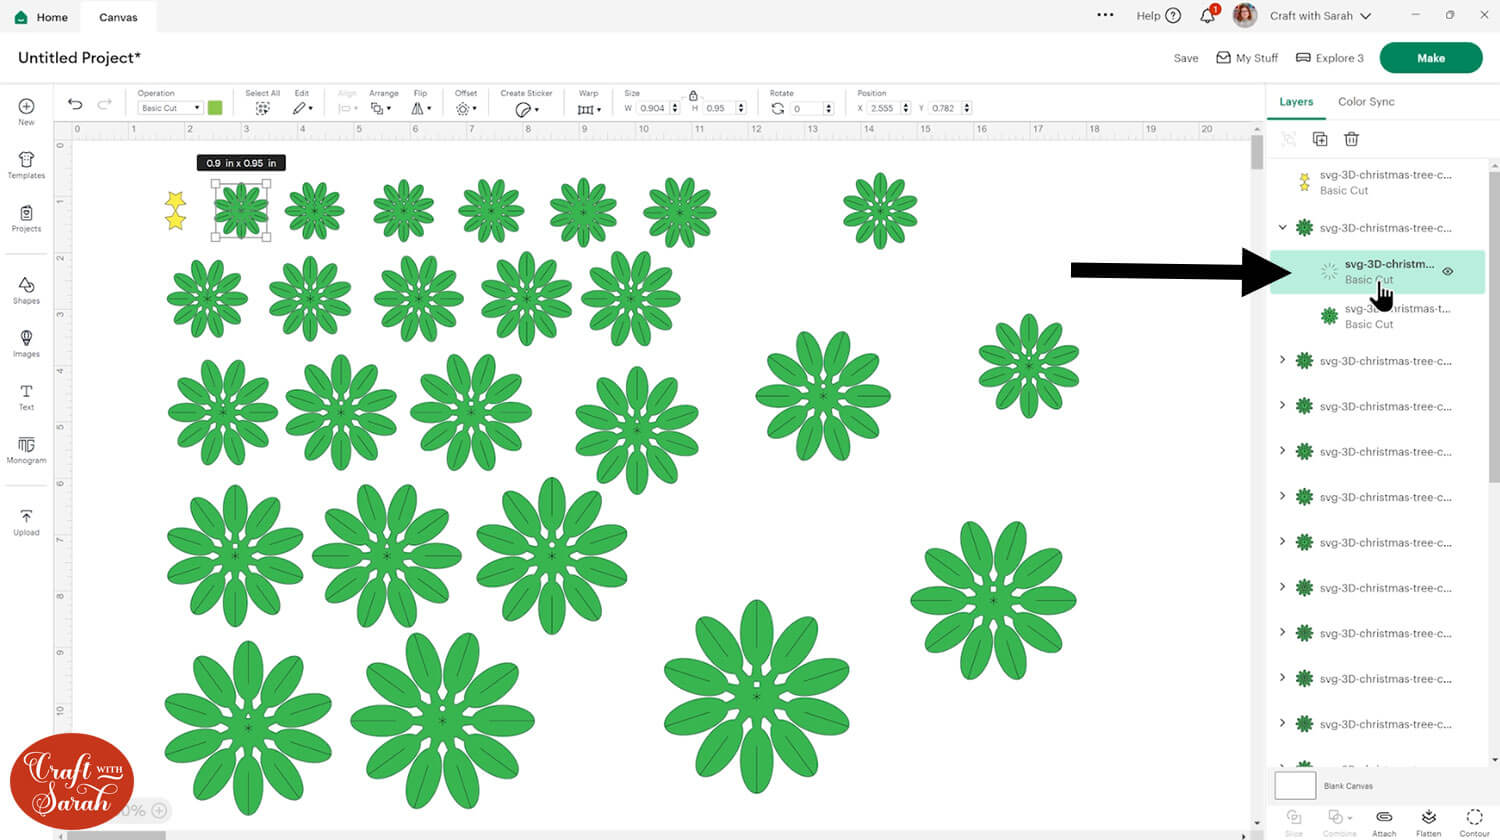
Click the layer that looks like single lines and change it to “Score”.
Select the mini-group and “Attach” it so that the score lines end up attached to the green piece underneath.
Then, repeat this for each individual piece of the tree.
It might be time consuming, but once you’ve formatted the lines you can save your project and you won’t have you won’t have to format the lines again if you want to make more trees in the future.
It is possible to make the 3D Christmas trees without the score lines, it would just mean that you don’t have the guideline to fold each piece exactly in the middle.
If you don’t want to use the score lines you can select the layers and delete them.
Step 3) Cut out all the layers
When you’re happy with how the project is looking in Design Space, click “Make” and follow the instructions on-screen to cut out all the pieces.
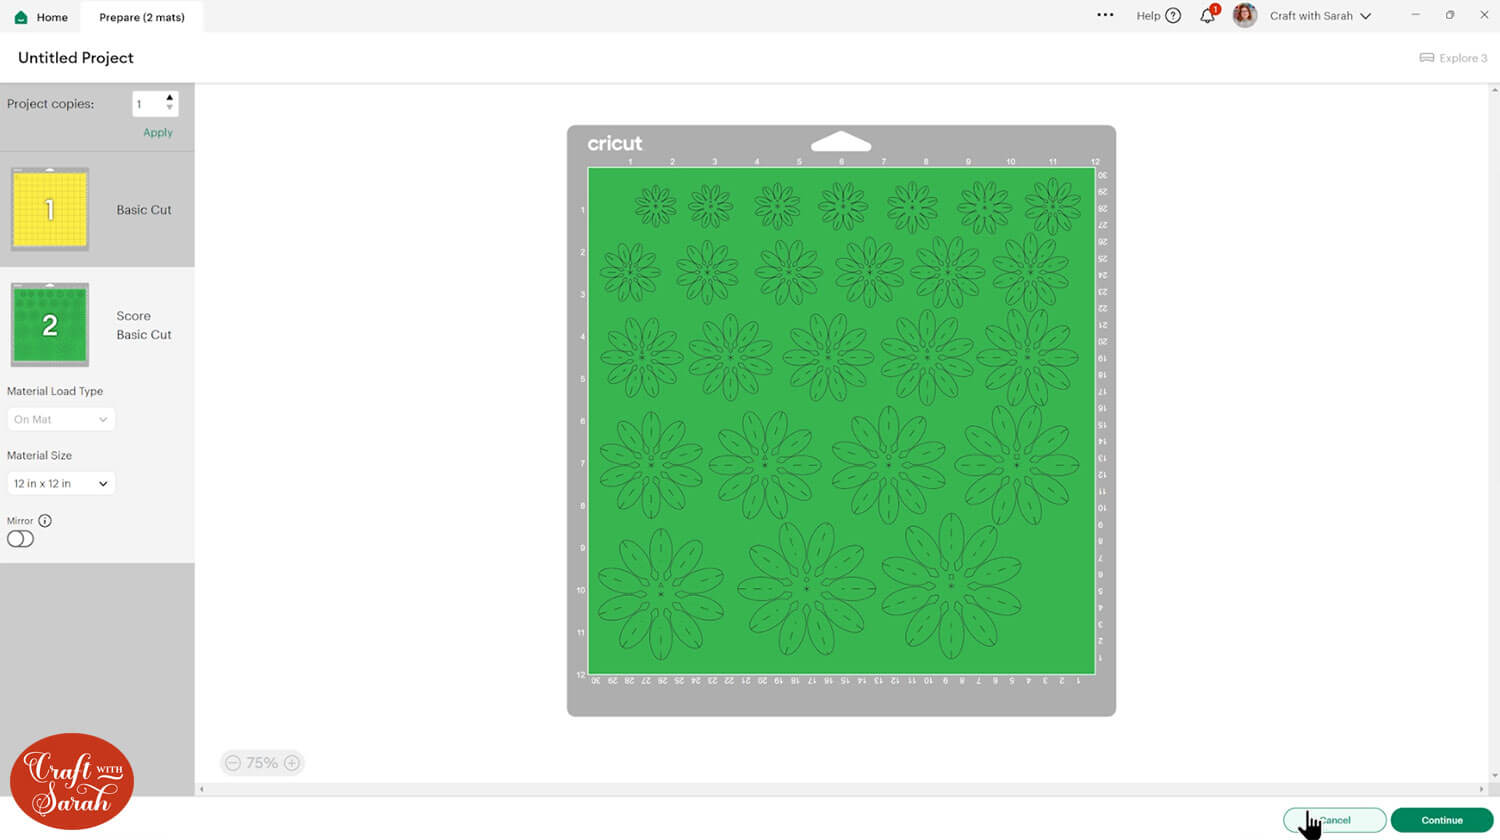
I cut three copies of the same size of tree, in three different shades of green. I will make my trees different sizes by leaving out some of the layers when building them to make them smaller, but I still wanted to cut all the pieces so I could decide on the exact sizes while making them.
TIP: New to cutting cardstock with a Cricut? Check out this in-depth tutorial which goes through every step of the process, including tips for getting the best quality cuts from your Cricut.
Step 4) Prepare the wooden base
For the base of my trees I used a wooden slice. It would have looked lovely if I’d have put my trees straight on top, but I wanted to create a snowy effect.
To do this, I painted the top white with acrylic paint and a sponge. It needed two coats as the first one soaked into the wood a little bit when it was dry.
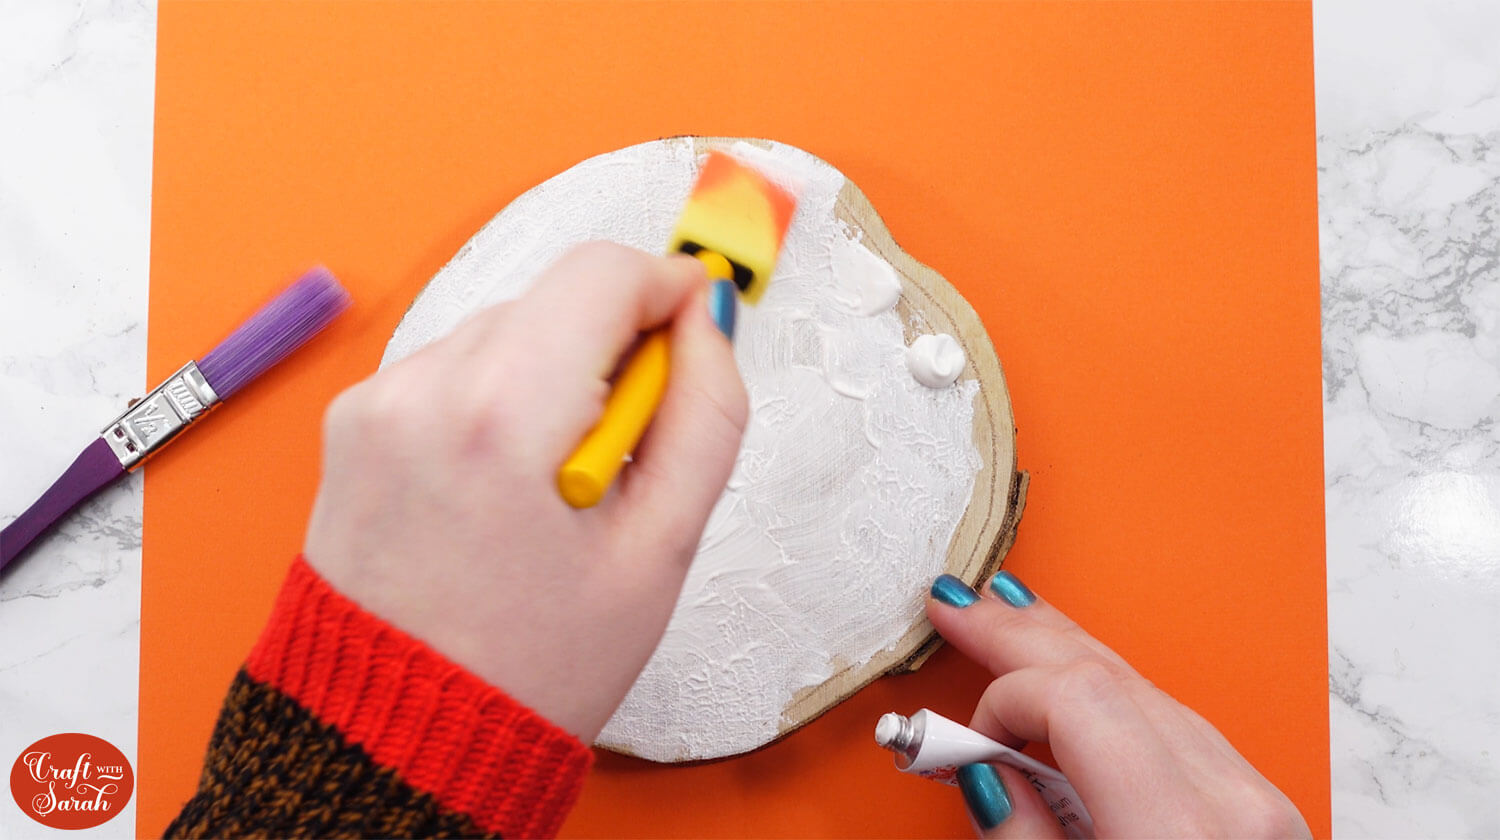
Add glitter on top while the paint is wet to finish off the snowy effect.
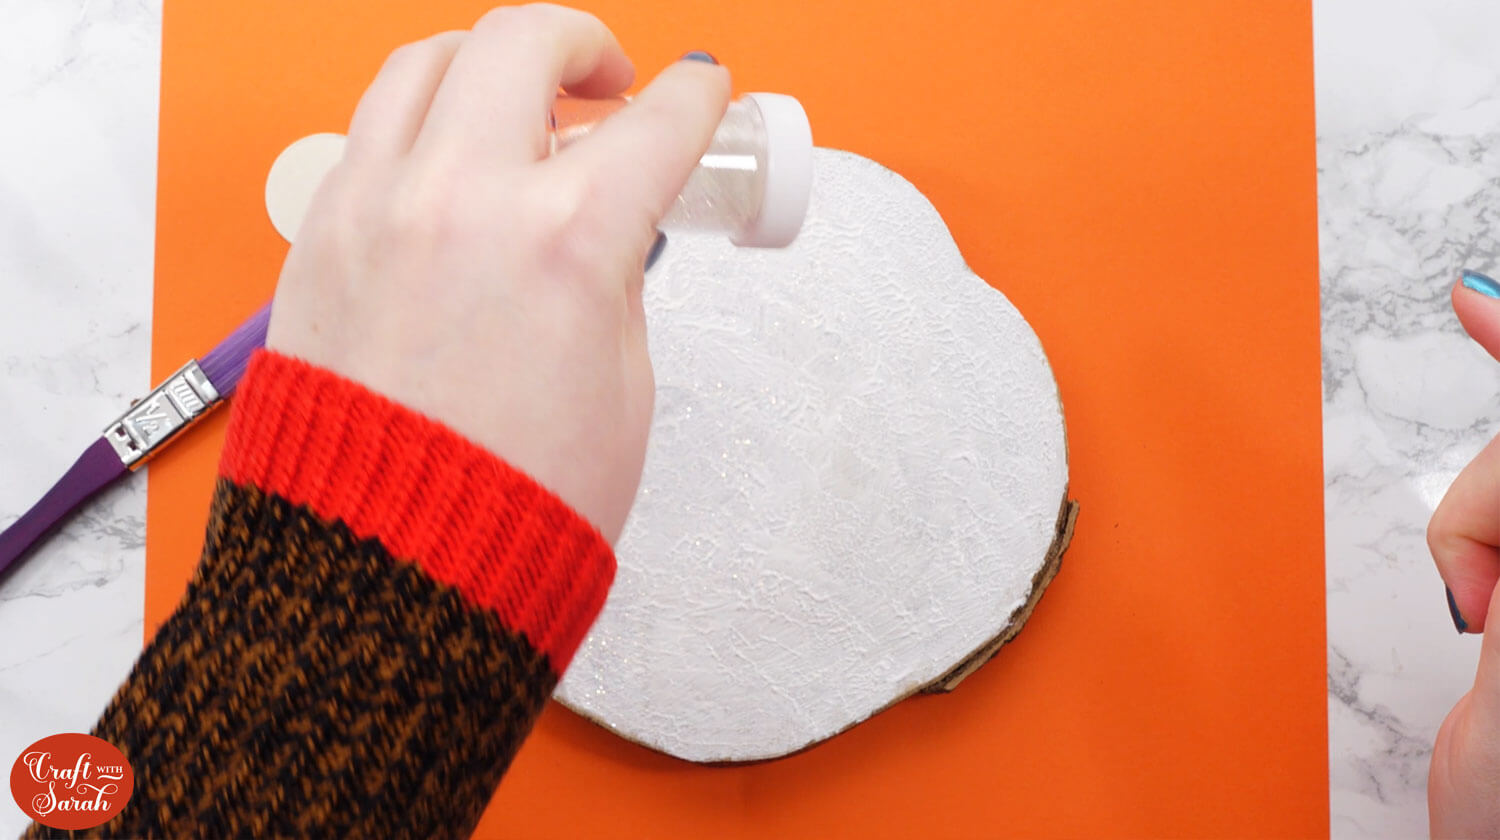
Leave to to dry while you put your 3D trees together.
Step 5) Fold along the score lines
You’ll notice that each of the pieces of the tree have a little shape cut out of them.
There are three different shapes: squares, circles and triangles.
This is to help you know the order to put these together in. The biggest will be at the bottom of the tree and then the smallest will be at the top.
Place all the tree pieces in order by alternating the shapes. Starting with the largest, they should go square, circle and then triangle and this will be repeated.
The little crosshatch in the middle is for the wire to go through.
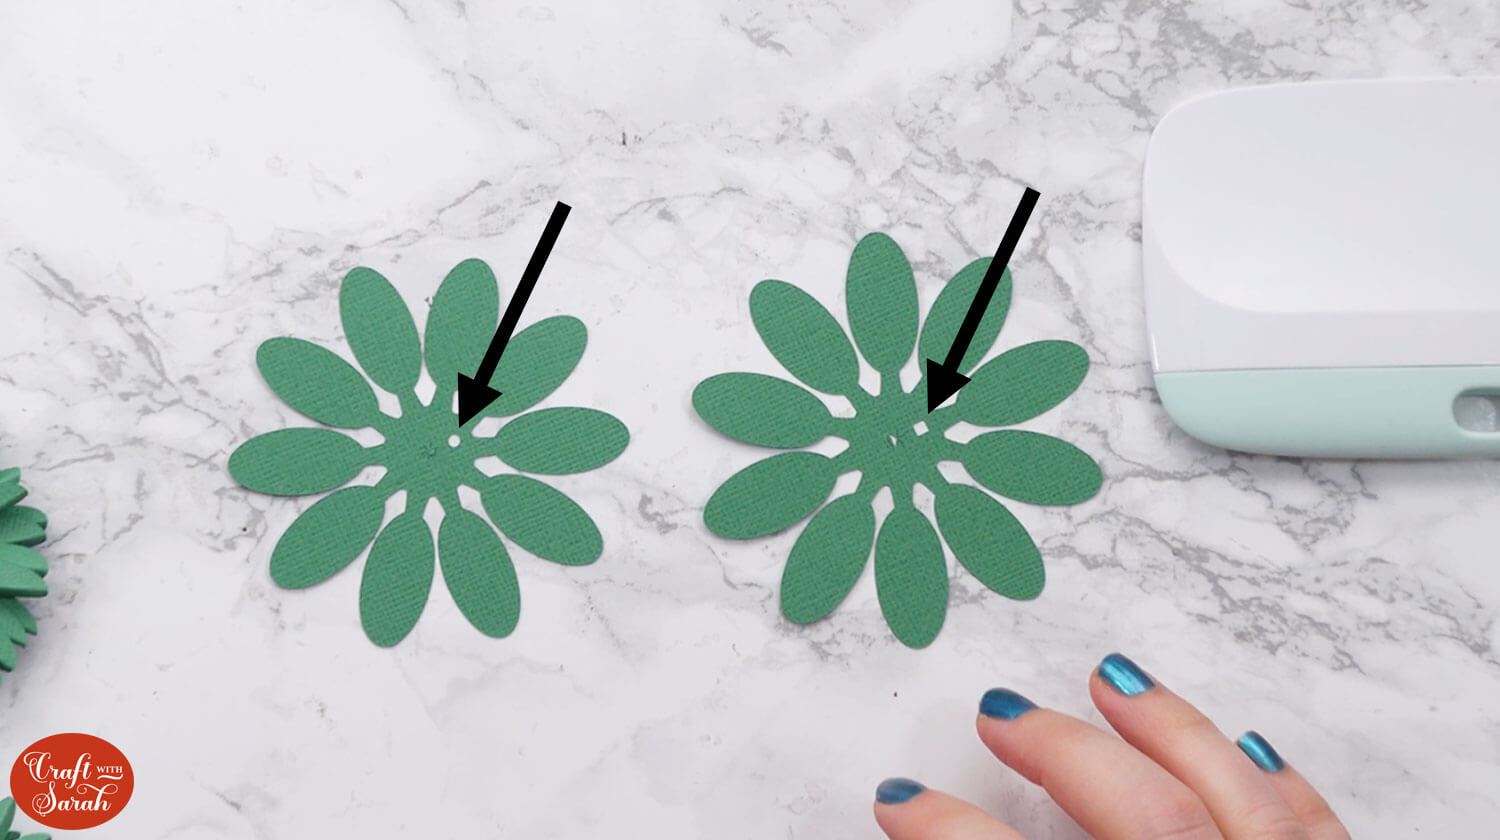
Take a Cricut scraper tool or similar and use the straight edge to help fold along the score lines so that you end up with a shape folded in half.
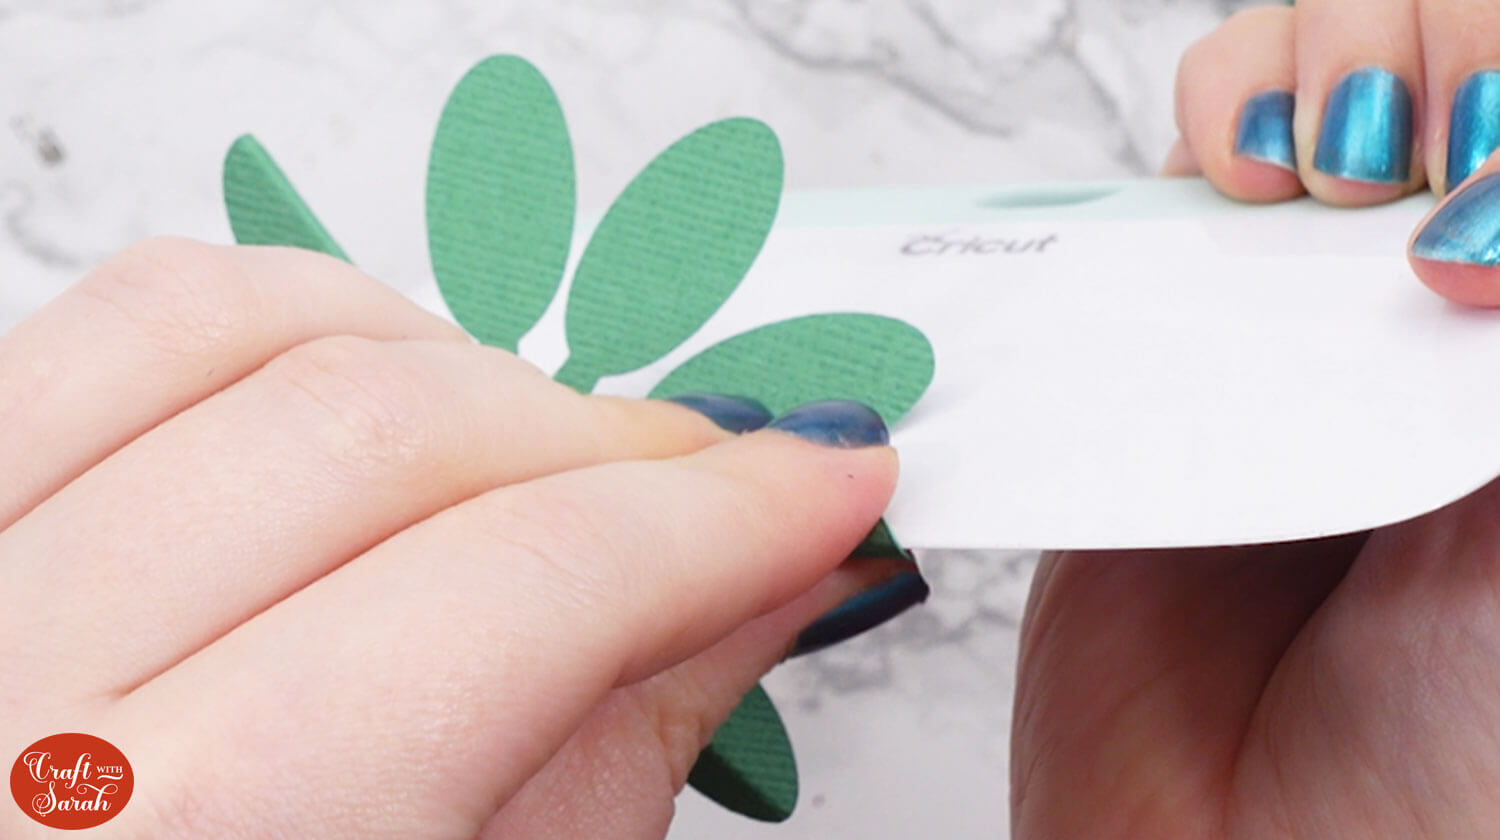
Fold up all of the green pieces.
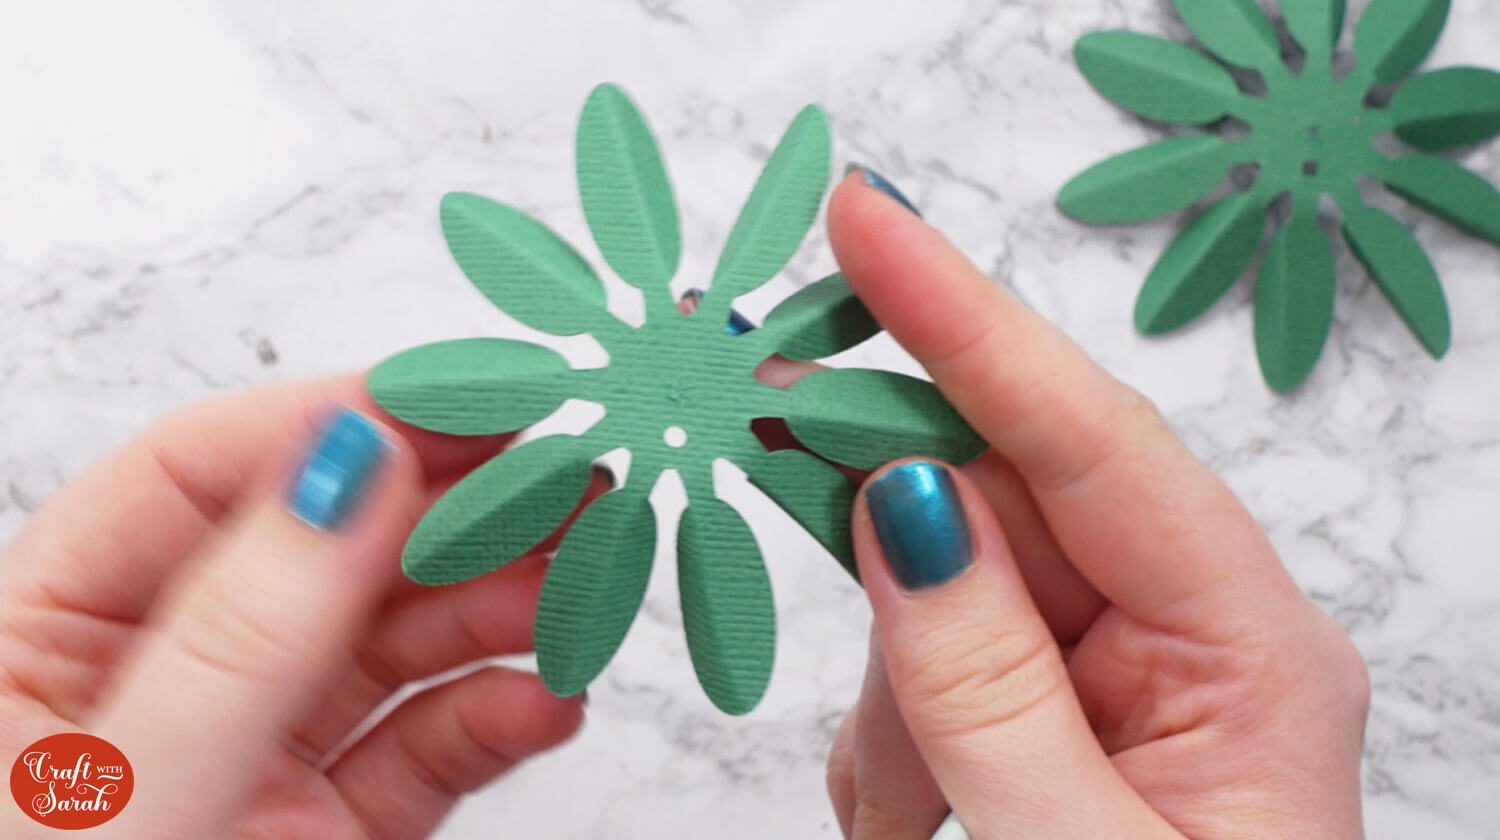
Don’t worry if you don’t get it exactly in the middle as it just needs to be folded vaguely in half.
This is fairly easy on the largest pieces of the tree but it does get more challenging as the pieces get smaller.
Step 6) Put the trees together
For this part, you will need a thick, but bendable, wire. You will also need a hot glue gun and some beads. If you don’t have any beads, you could use a dab of glue from your glue gun between each piece. This will help to spread out the pieces to make a realistic tree.

Take your wire, get your glue gun hot and take the little star piece which you can fold in half.
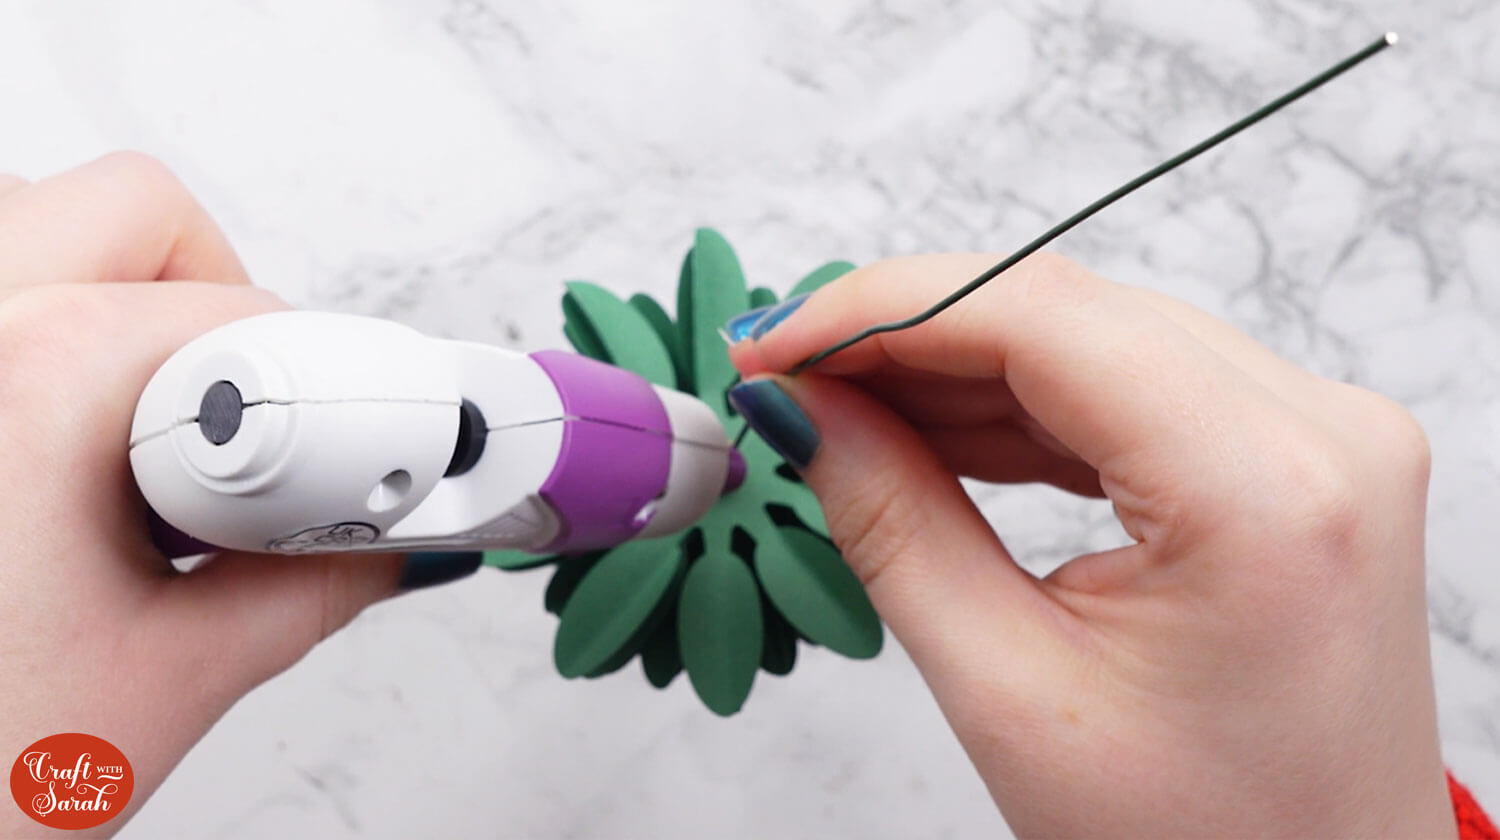
Get one of the ends of the wire and add a little bit of glue around it.
Take the star and push it onto the glue and gently press it down together so that both sides touch and stick together, making sure you don’t burn your fingers!
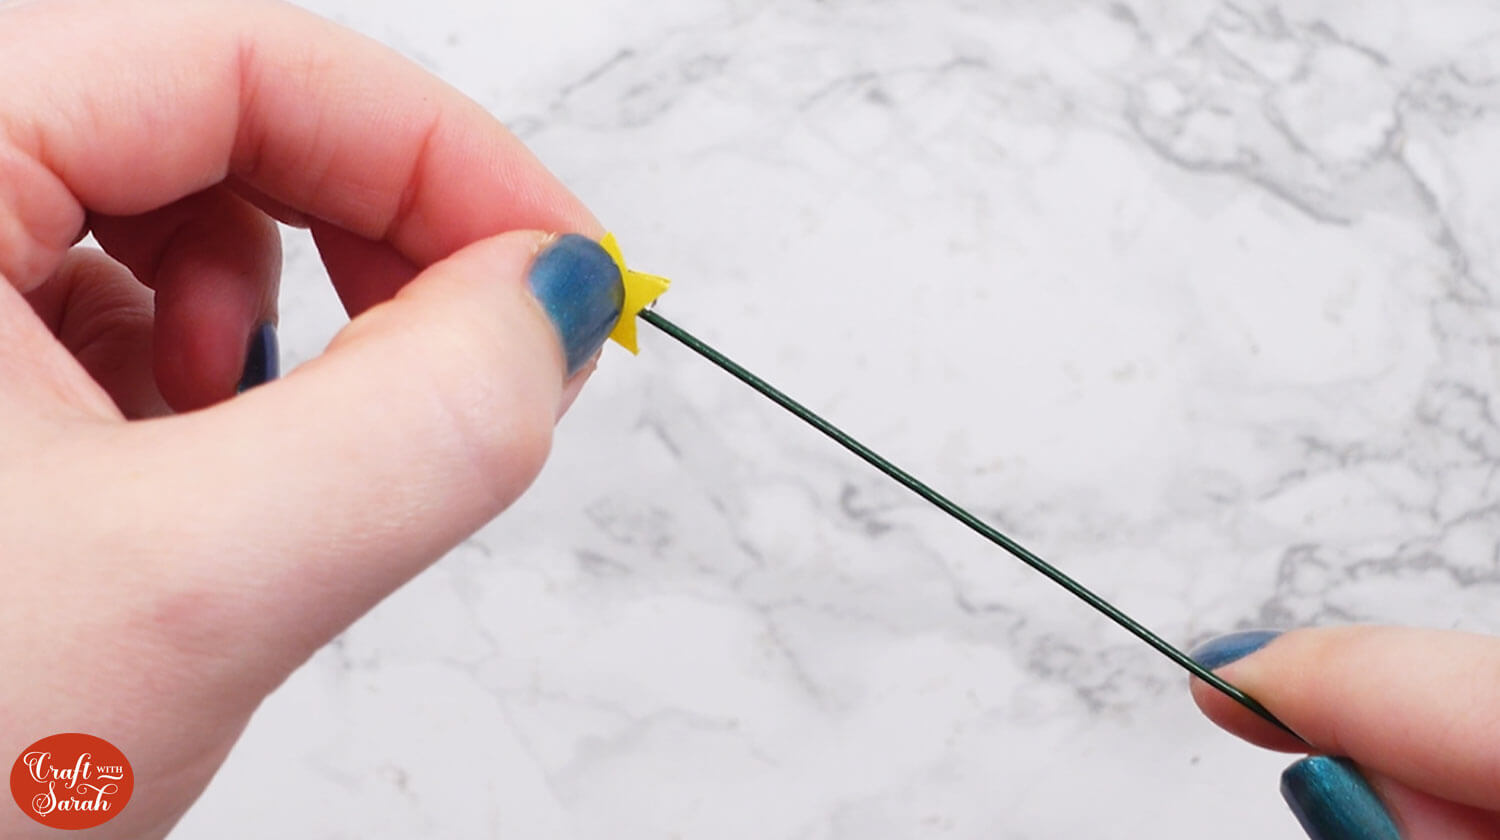
Take a bead and thread it onto your wire. If you prefer, you can start with a piece of tree rather than a bead underneath the star.
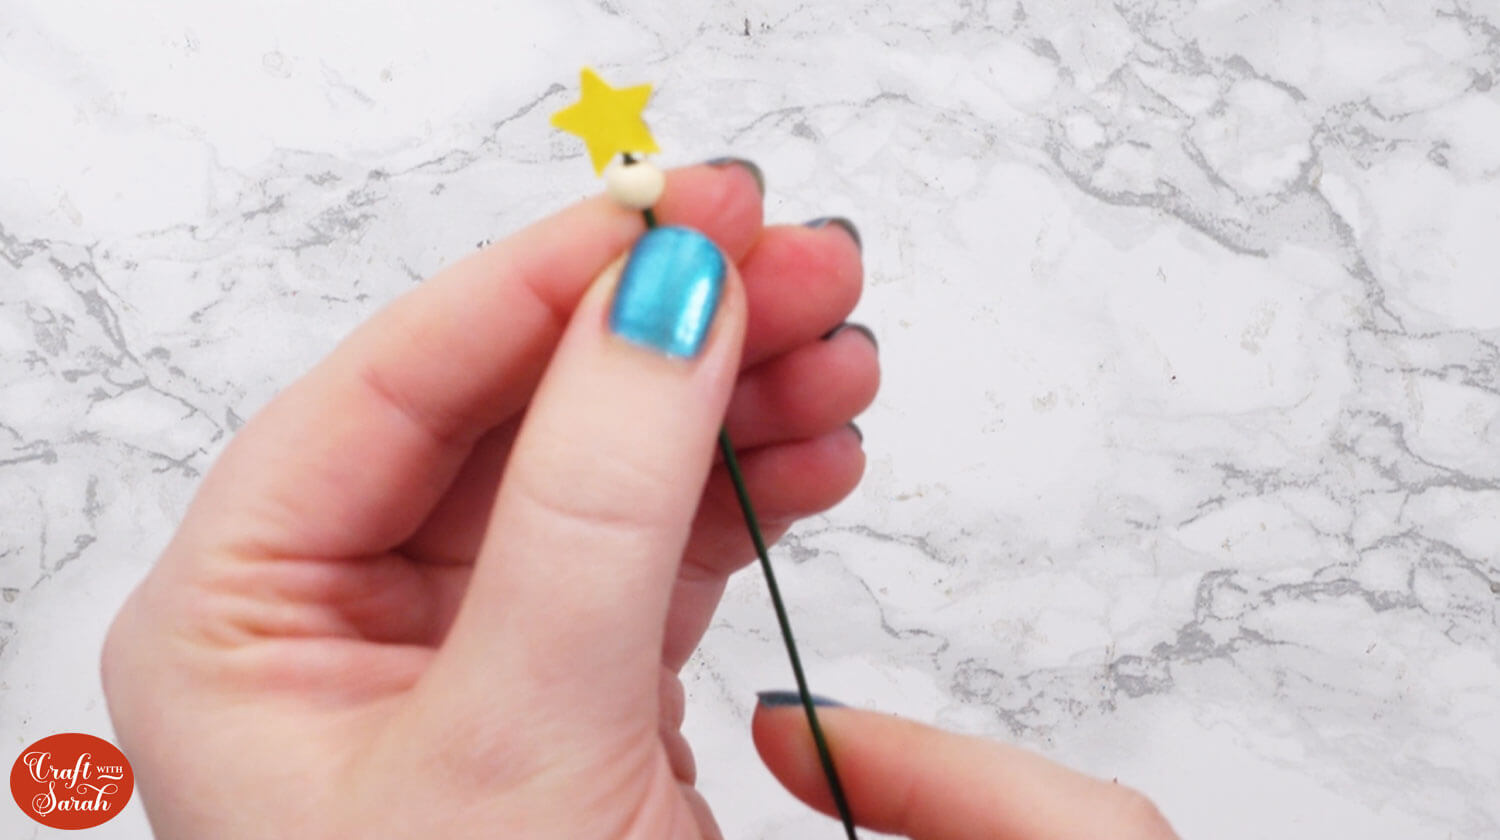
Then take the very smallest piece of the tree and poke the wire through the crosshatch in the middle. You want it so all the lines we folded are all pointed downwards.
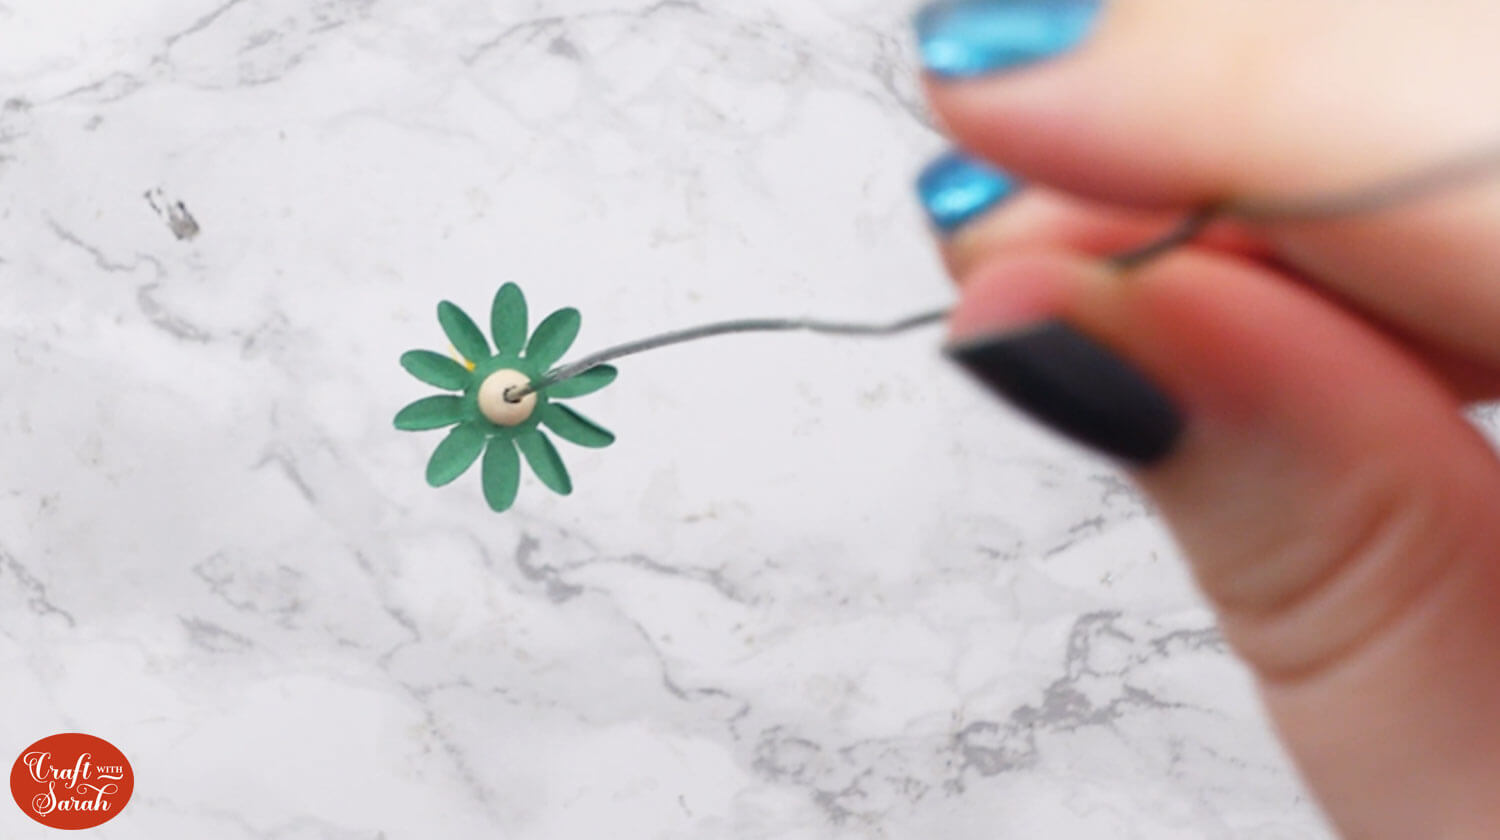
Add another bead, and thread the next largest piece on.
Don’t worry if some of your folds come out of line when you’re threading the pieces on as you can correct this at the end when the rest of it is finished.
Continue to add the pieces in ascending size order with a bead or a blob of glue between them.
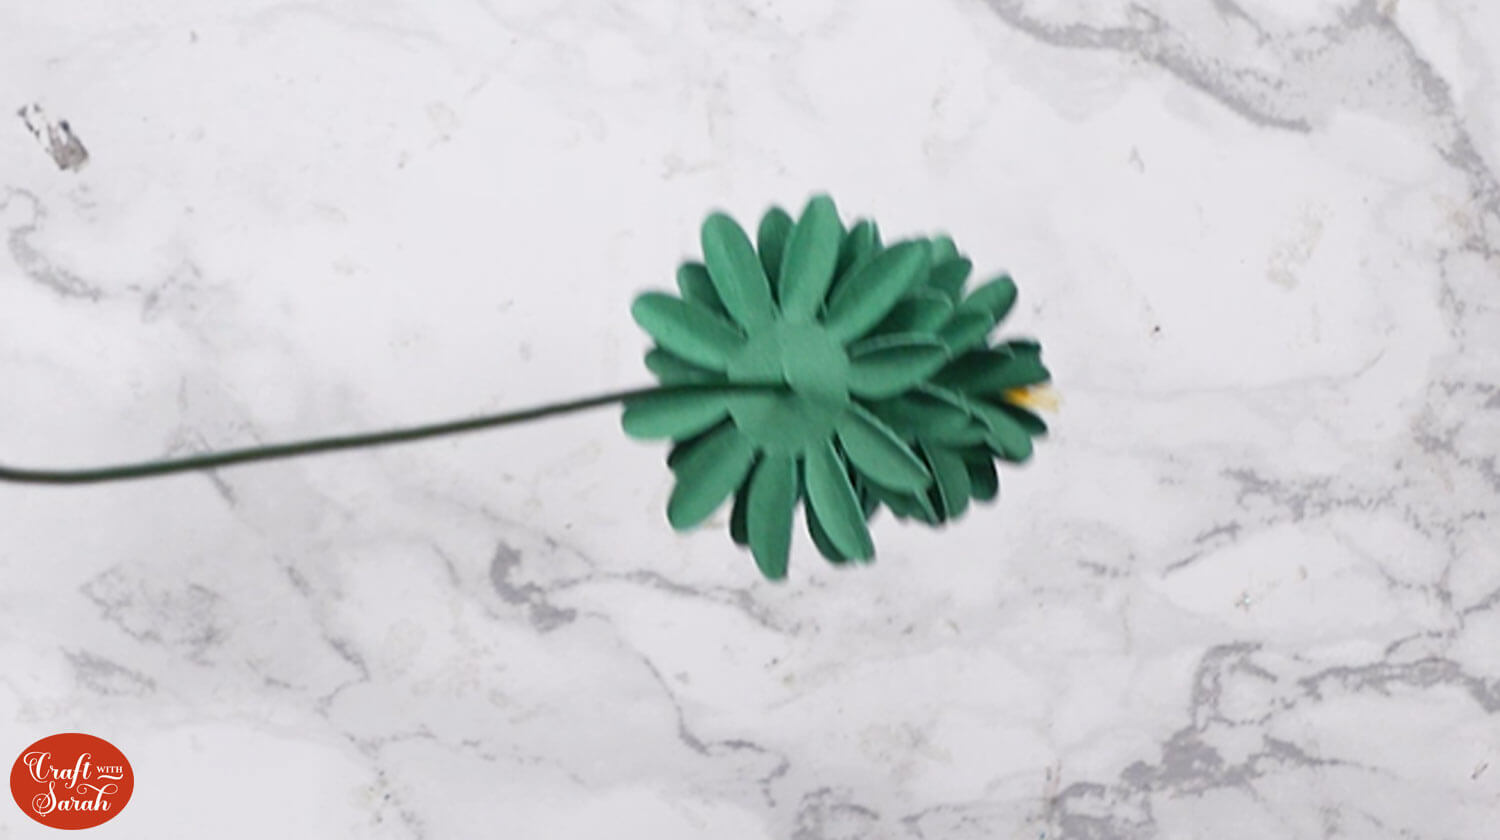
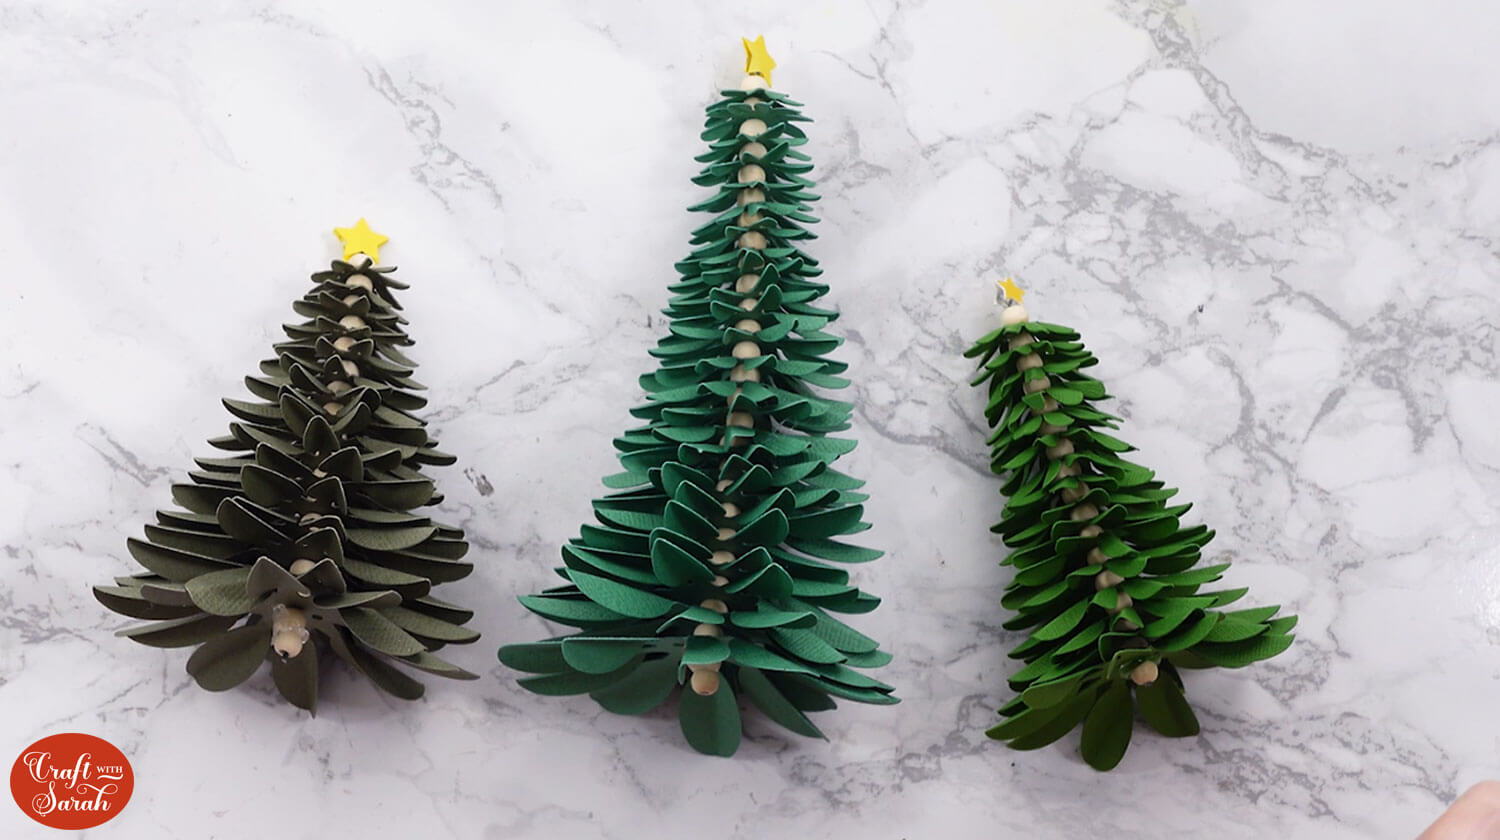
Tip: To alter the size of the tree, leave out some of the pieces to make it smaller.
Once you have got to the largest piece of your tree on the wire, finish it off with one final bead.
Add some glue from your glue gun around the wire and press another bead into the glue to seal everything onto the wire and stop the pieces from falling off.
Take your wire cutters and cut as close to that final bead as you can.
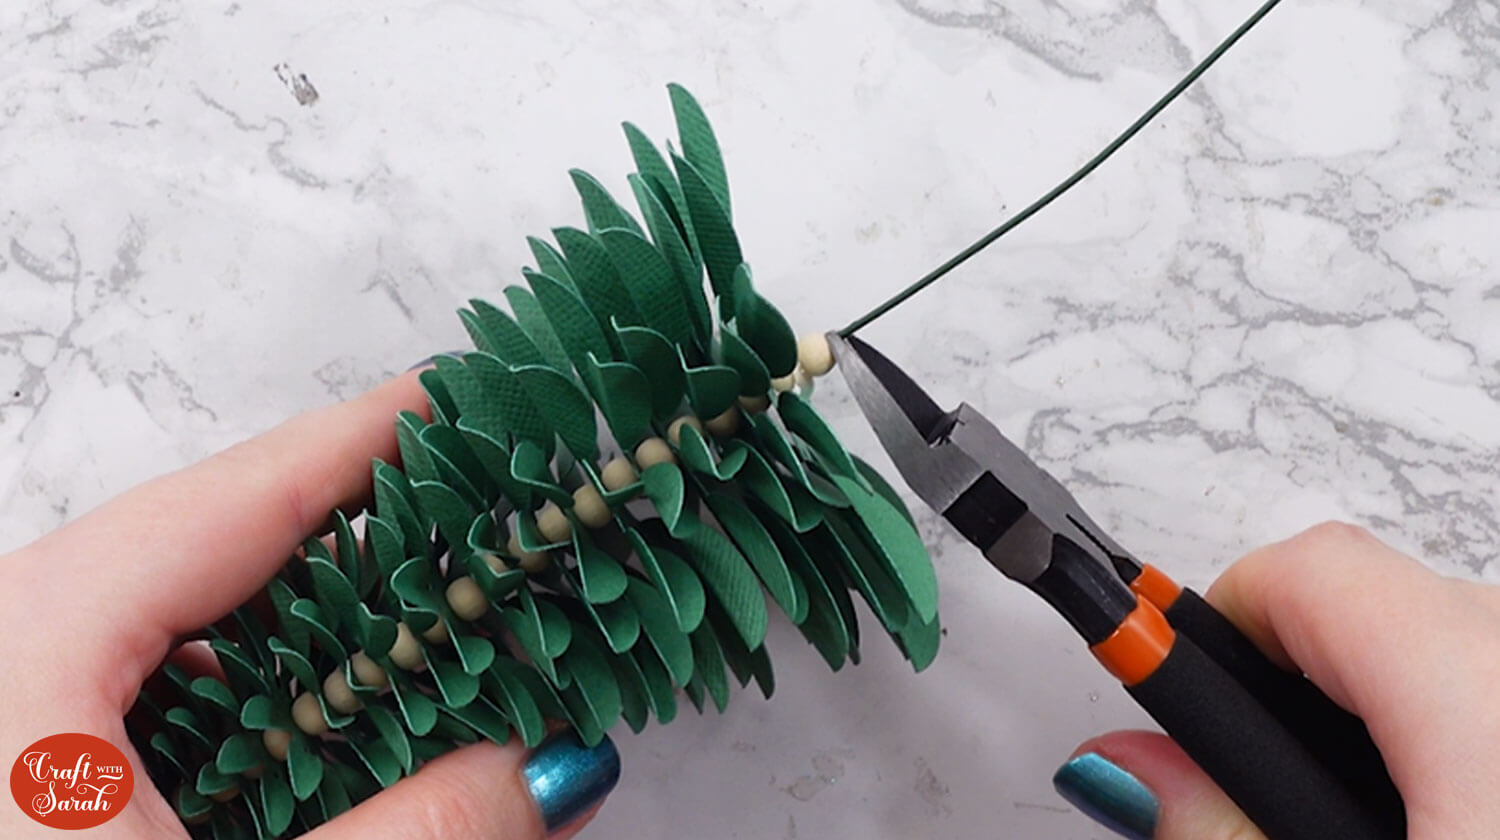
You can ruffle up the pieces of the tree to get them into a better position.
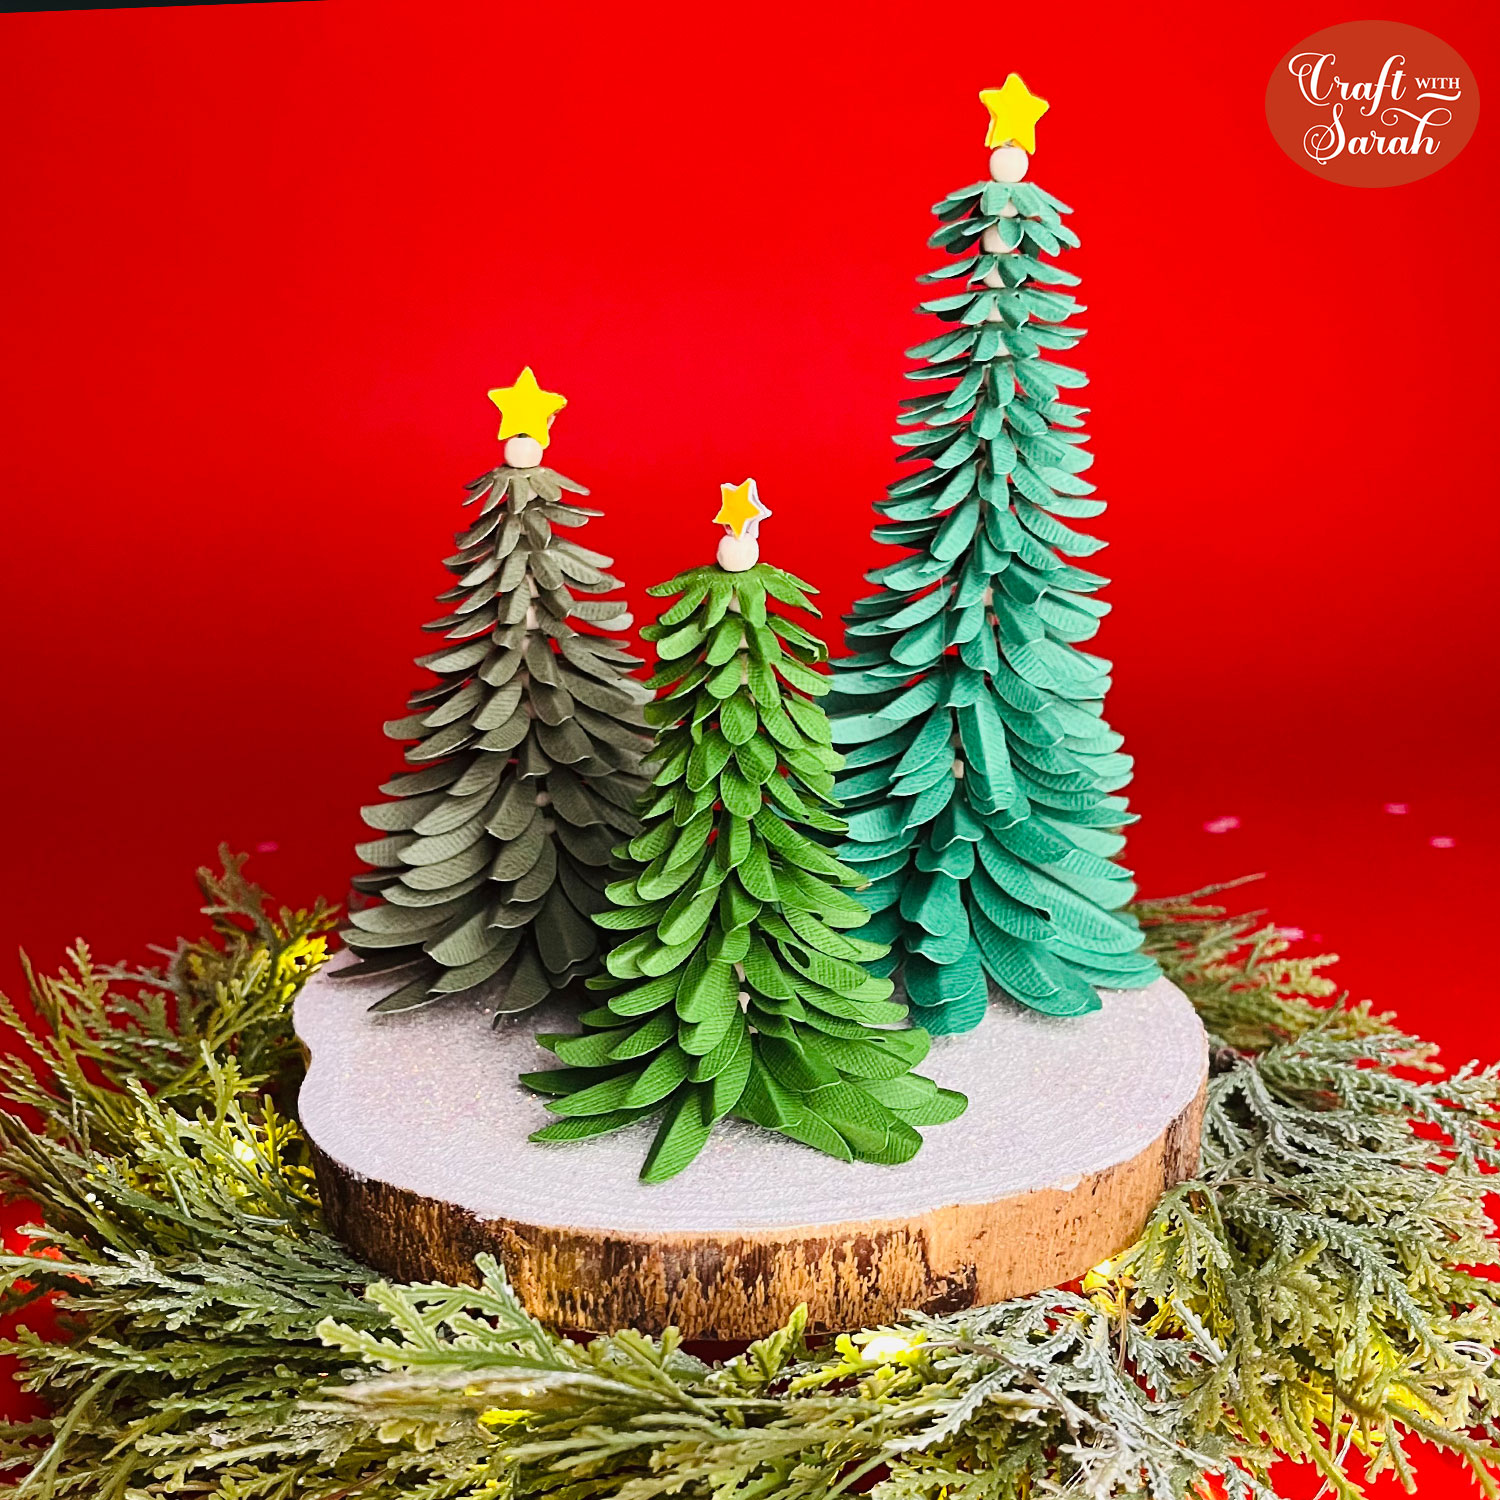
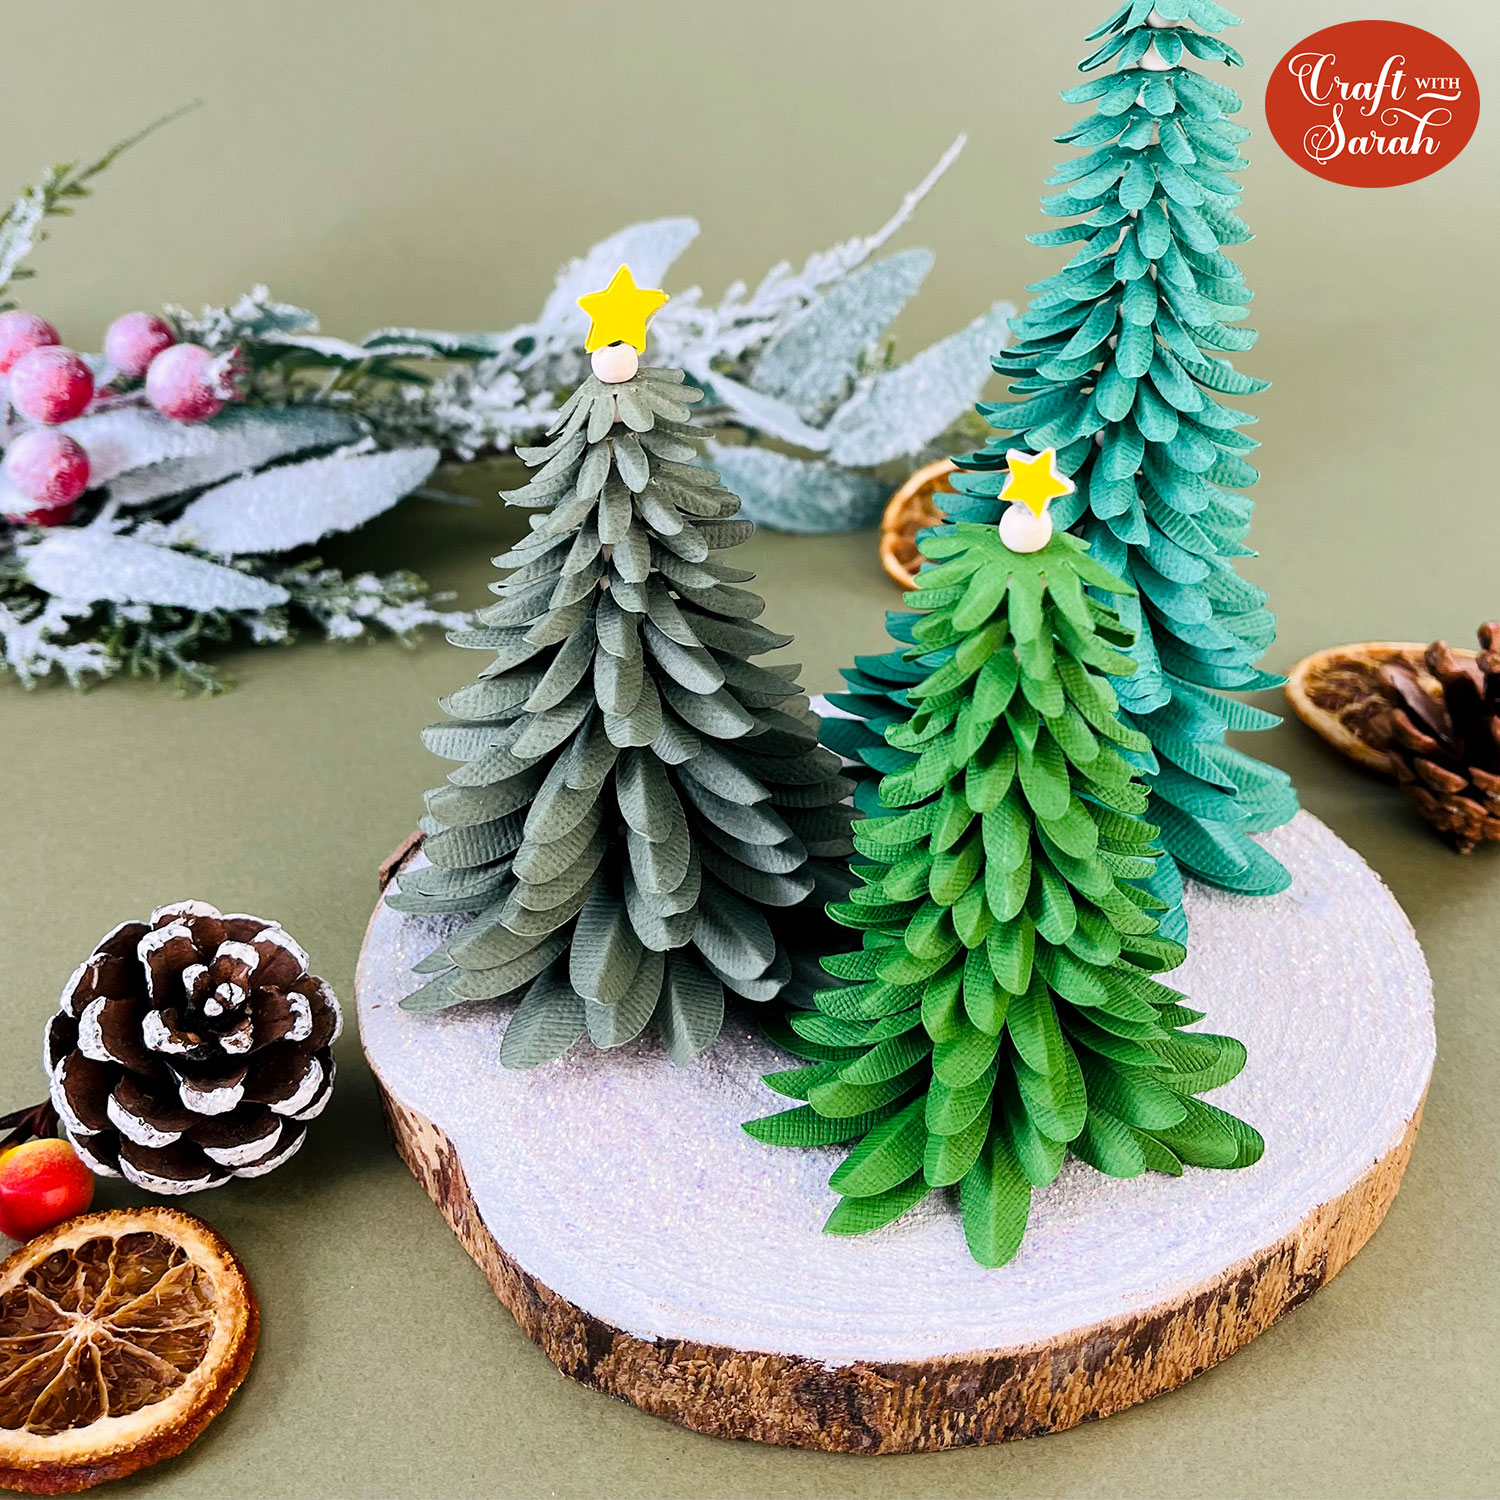
Here’s how my three trees look in their different sizes:
Step 7) Stick the trees onto the base
When all your trees are finished, add a big blob of hot glue to the bottom of them to stick them to your centrepiece base.
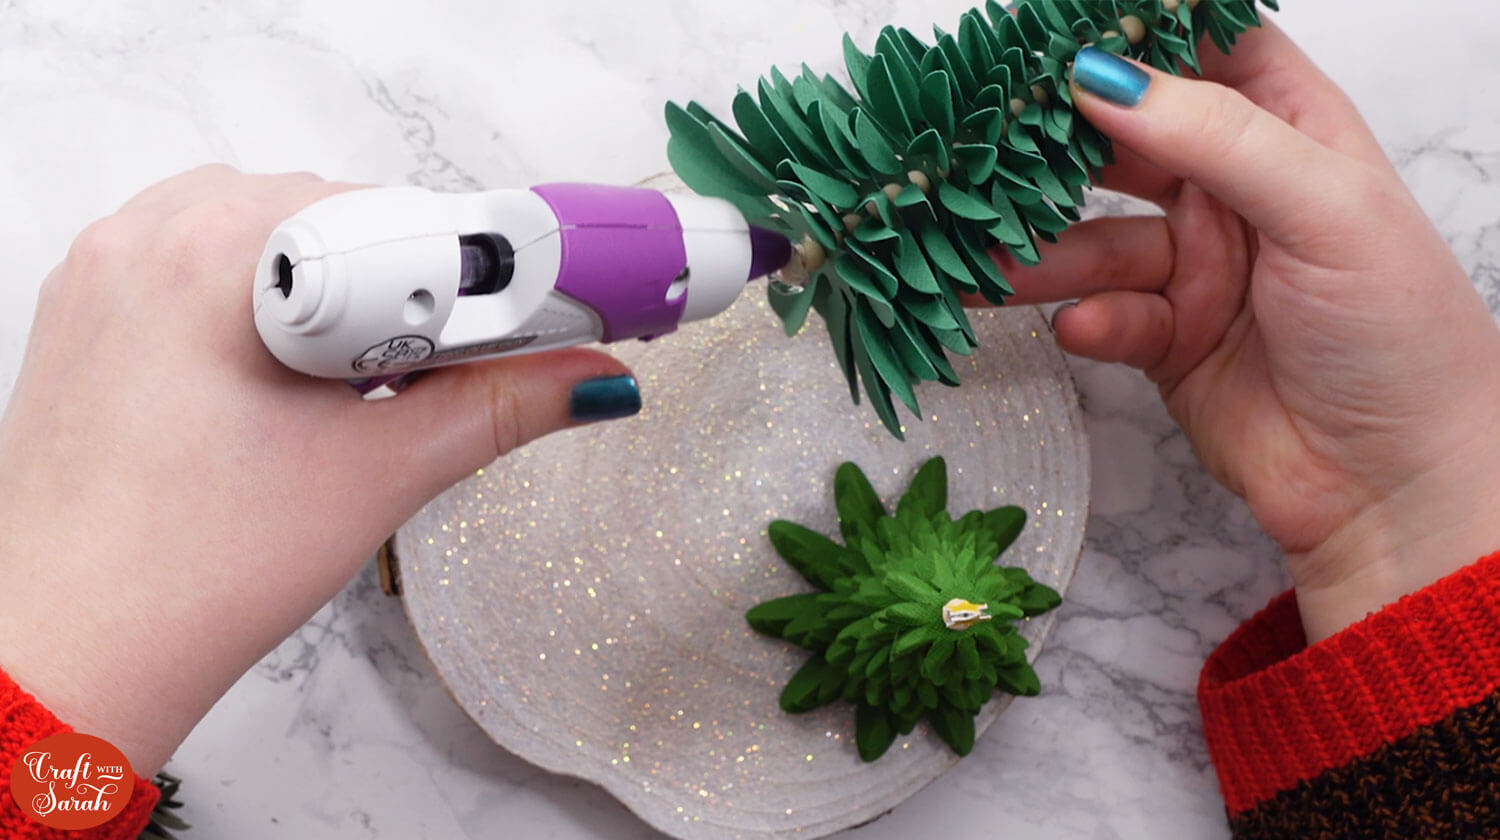
Now that all your Christmas trees are stuck on, your festive 3D centrepiece is finished!
Rustic fir trees centrepiece
I hope you enjoy making these delightfully rustic decorations.
This Christmas tree centrepiece will look beautiful on your dining table this Christmas, or it would make a special gift for a loved one.

I love how the base sparkles beautifully like fresh snow on a cold morning on a winter’s day.
Happy crafting,
Sarah x

