HCC 2024 Day 02: 3D Slot-Together Cauldron
Welcome to day two of the 2024 Halloween Craft Countdown, where I’m sharing 20 spooky themed Cricut papercraft projects in 20 days.
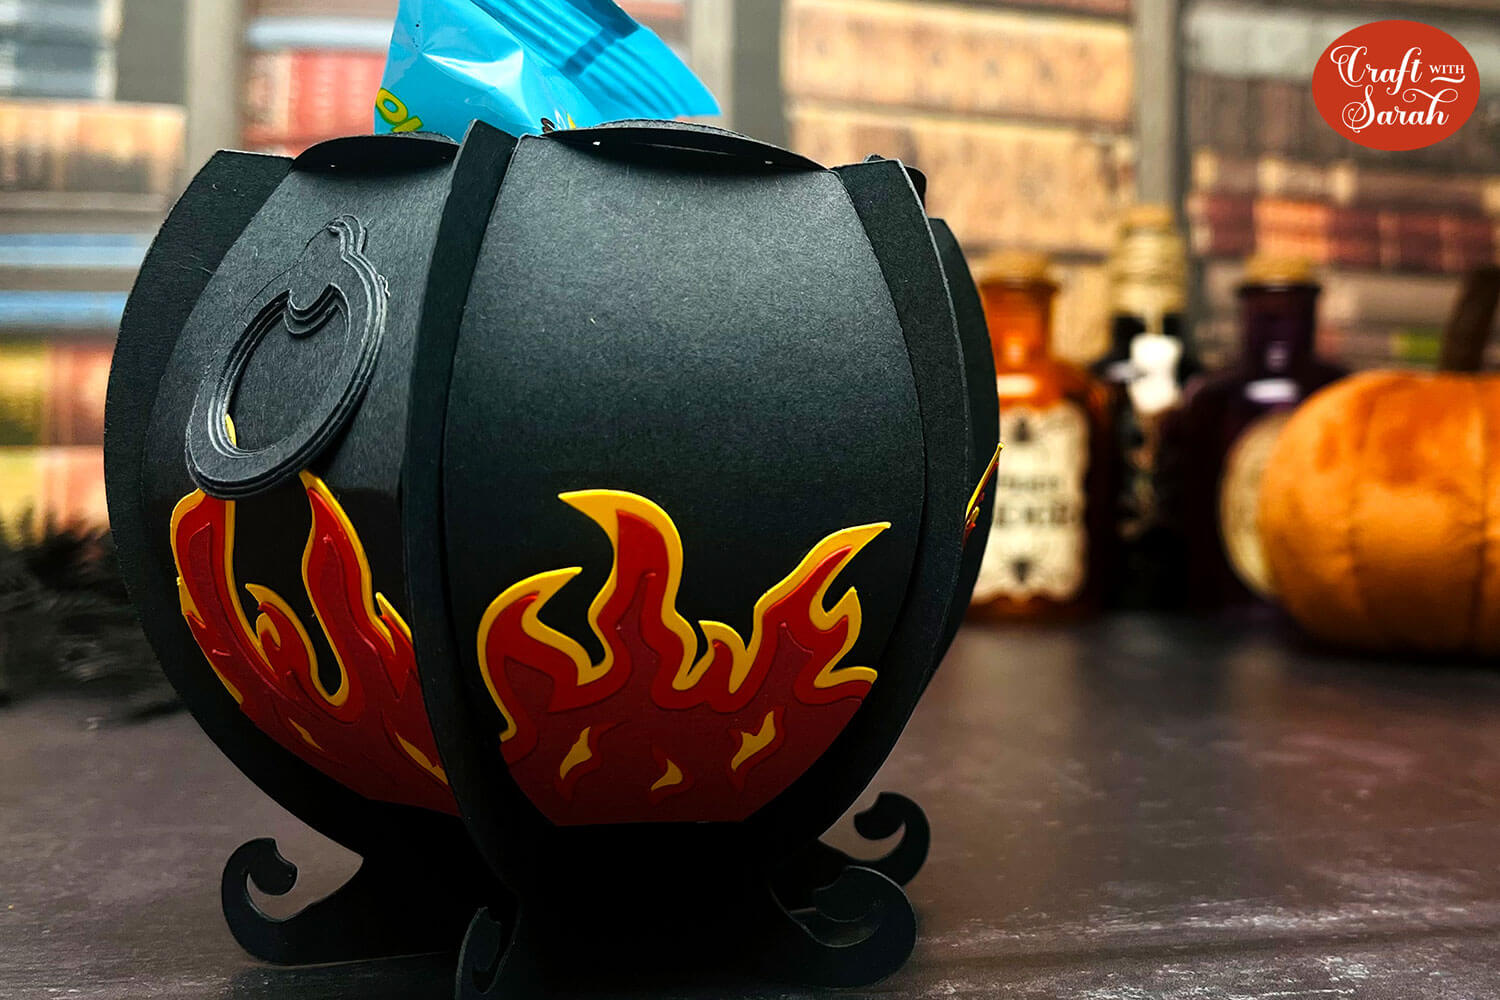
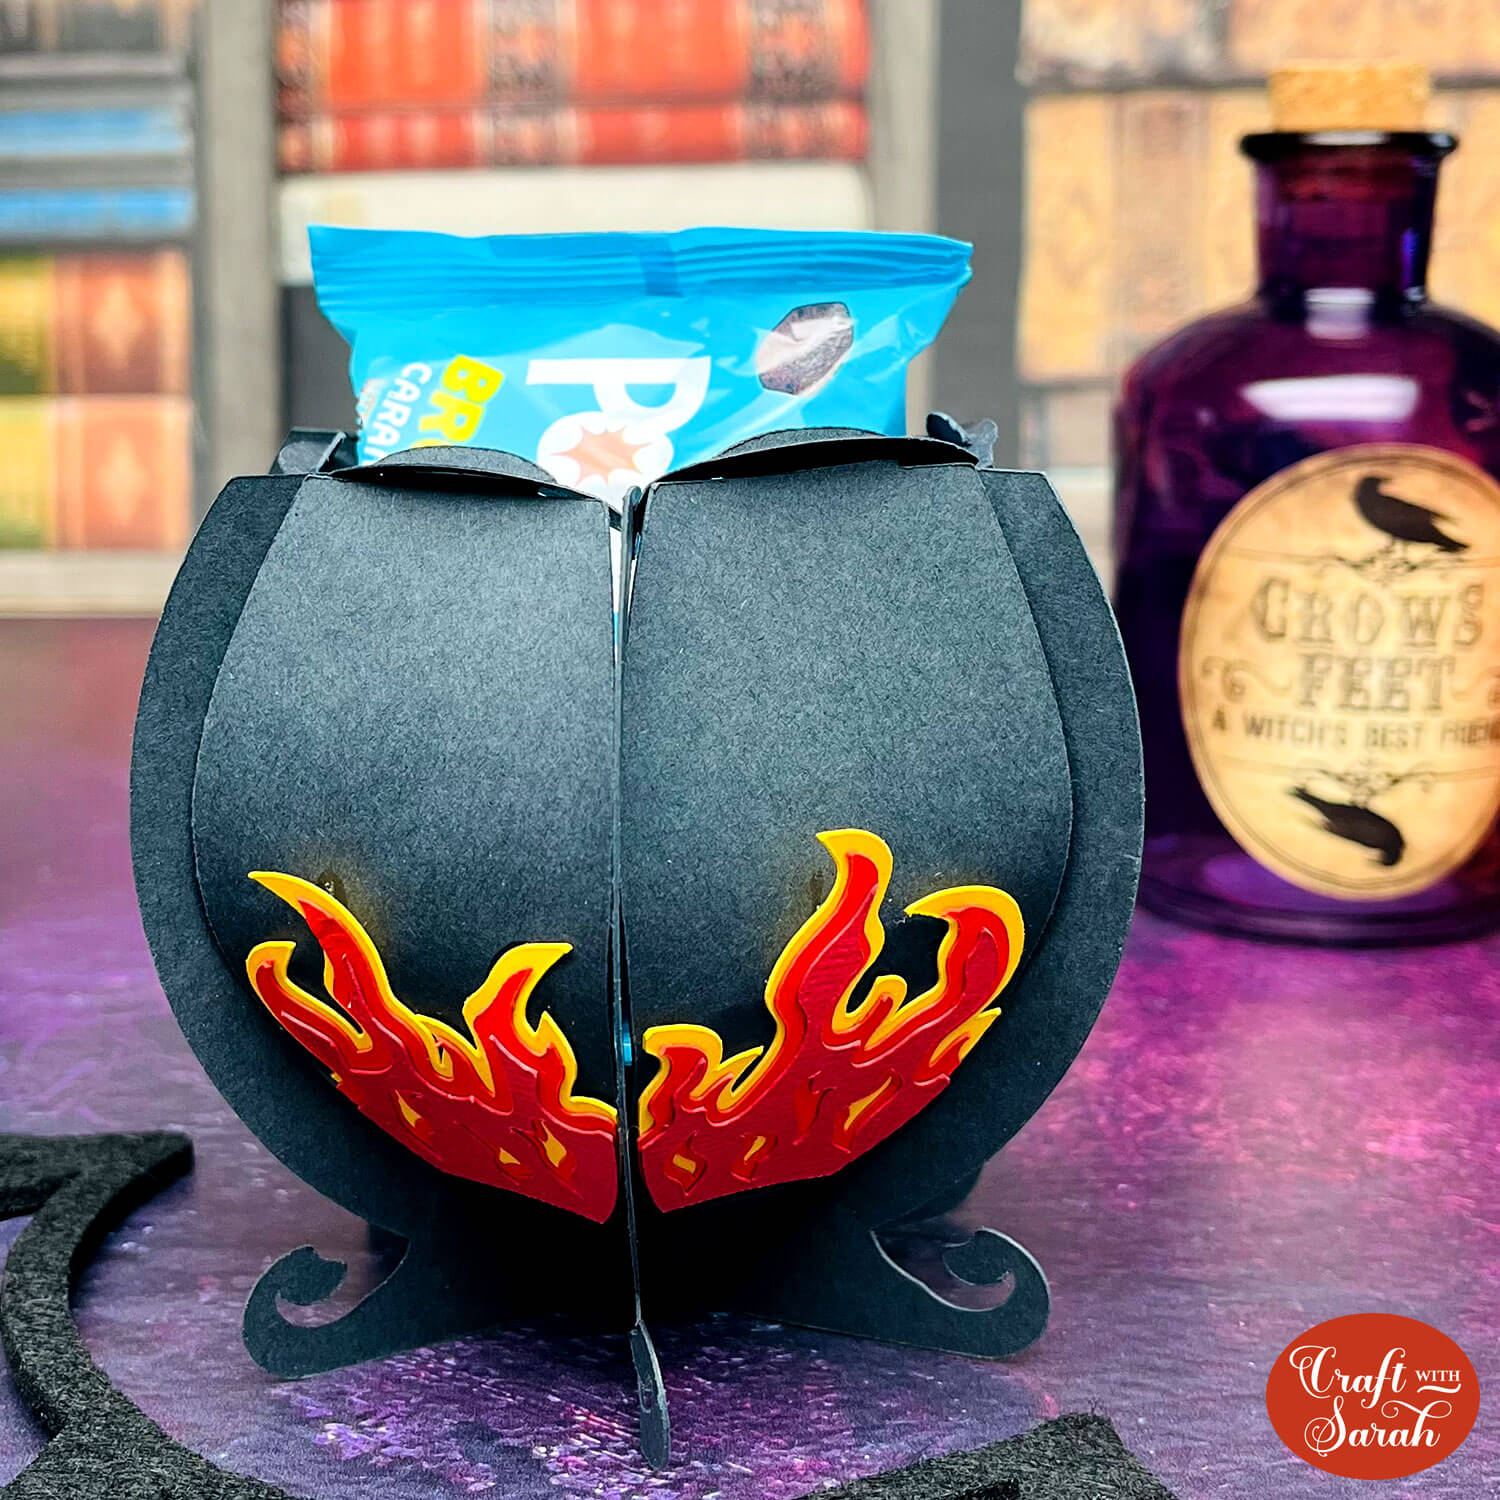
Today we are making a slot-together, three-dimensional cauldron.
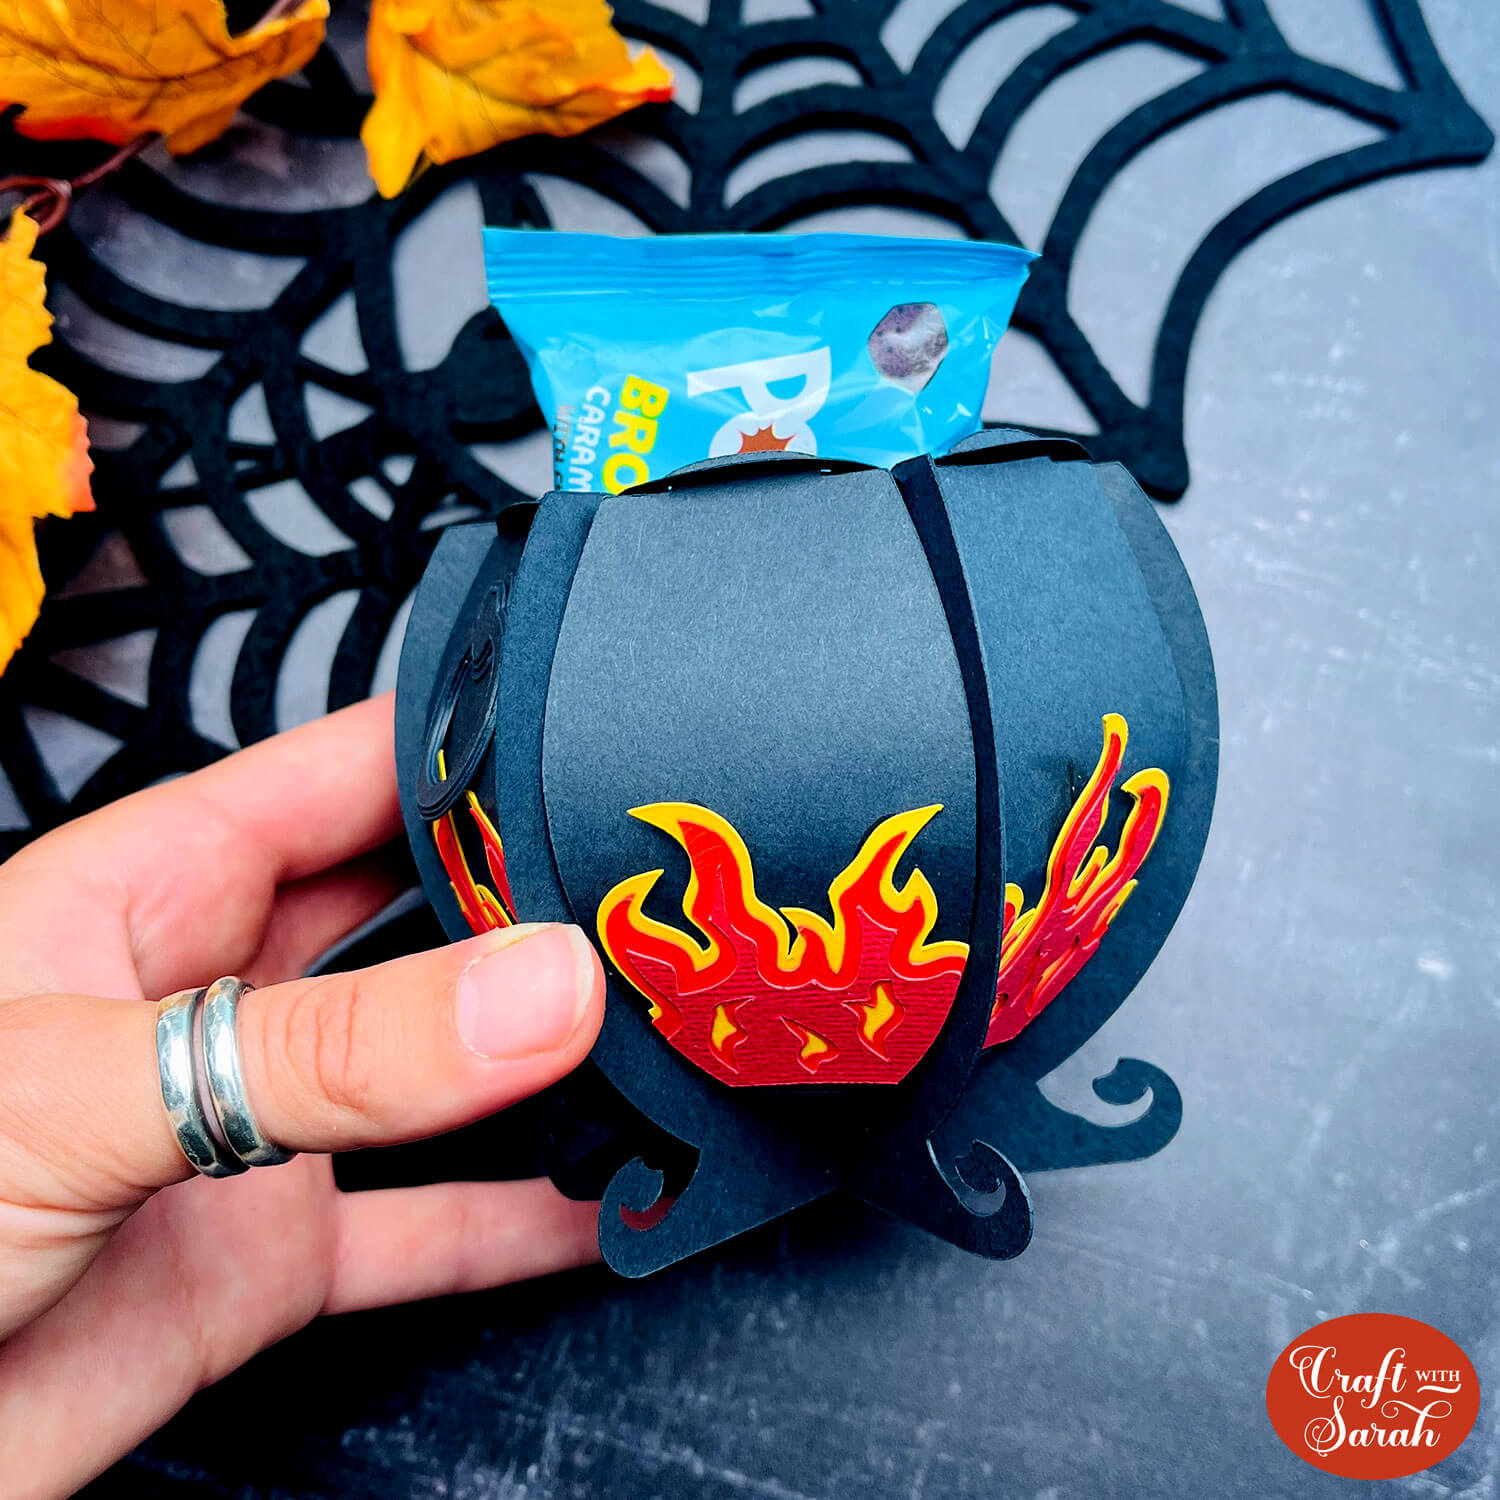
It’s cut from different pieces of cardstock that all get slotted together to make the final product and it’s got some lovely little flames along the bottom to make it look like you’re bubbling up a potion inside.
This can be used as a treat box – as you can see, I put some cookies inside – or you could add some lights instead to give it an eerie glow out of the top.
This Project was part of the Halloween Craft Countdown 2024
Materials supply list
Here is a list of the materials that I used to make this project.
Please note that some of the links included in this article are affiliate links, which means that if you click through and make a purchase I may receive a commission (at no additional cost to you). You can read my full disclosure at the bottom of the page.
- Cricut machine
- Light blue Cricut cutting mat
- Coloured Card
- Glue (I like Bearly Art Glue and Collall)
This project is suitable for the following types of Cricut machine: Explore Air 2, Explore Air 3, Maker, Maker 3, Venture and Joy Xtra and Joy. You will need to make the design smaller to cut on the original Joy.
Foundation learning
If you're new to crafting with your Cricut, you may find the below links helpful.
They teach some of the skills mentioned throughout this tutorial.
- How to upload SVG files into Design Space
- How to make 3D layered Cricut projects
- The BEST way to frame papercraft projects
- How to mount multiple designs in the same frame with magic guides
- How to score with a Cricut (even without scoring tools)
- Print then cut tutorial
- Design Space tools (Combine, Attach, Slice, Weld, Flatten, etc.)
- Pattern fill tutorial (for making backgrounds & cutting images to a specific shape/size)
- Free envelope SVGs that can be sized to fit any card
- How to write inside cards with Cricut pens
- How to cut layered designs at a small size
- Design Space tips & tricks
- Cricut pens tutorial
Video tutorial
Watch the video below to see how to make this project. Keep scrolling for a written tutorial.
Written tutorial (with photos!)
Here’s how to make a 3D Halloween cauldron using a Cricut machine.
Step 1) Download the cutting file & upload to Design Space
Download the files using the box below.
Purchase the File(s)
This cut file is available as part of the Instant Access Bundle.
Or, purchase this design individually here
Before you upload the SVG to Design Space, you need to unzip the download folder that it comes in.
- How to unzip a folder on Windows computer
- How to unzip a folder on a Mac
- How to unzip a folder on an iPad/iPhone
- How to unzip a folder on an Android device
After unzipping, upload the SVG file into Cricut Design Space. This is the file which starts svg- in the filename.
Not sure how to do this? Here’s how to upload SVGs to Cricut Design Space. Make sure you upload the file which starts svg- in the filename!
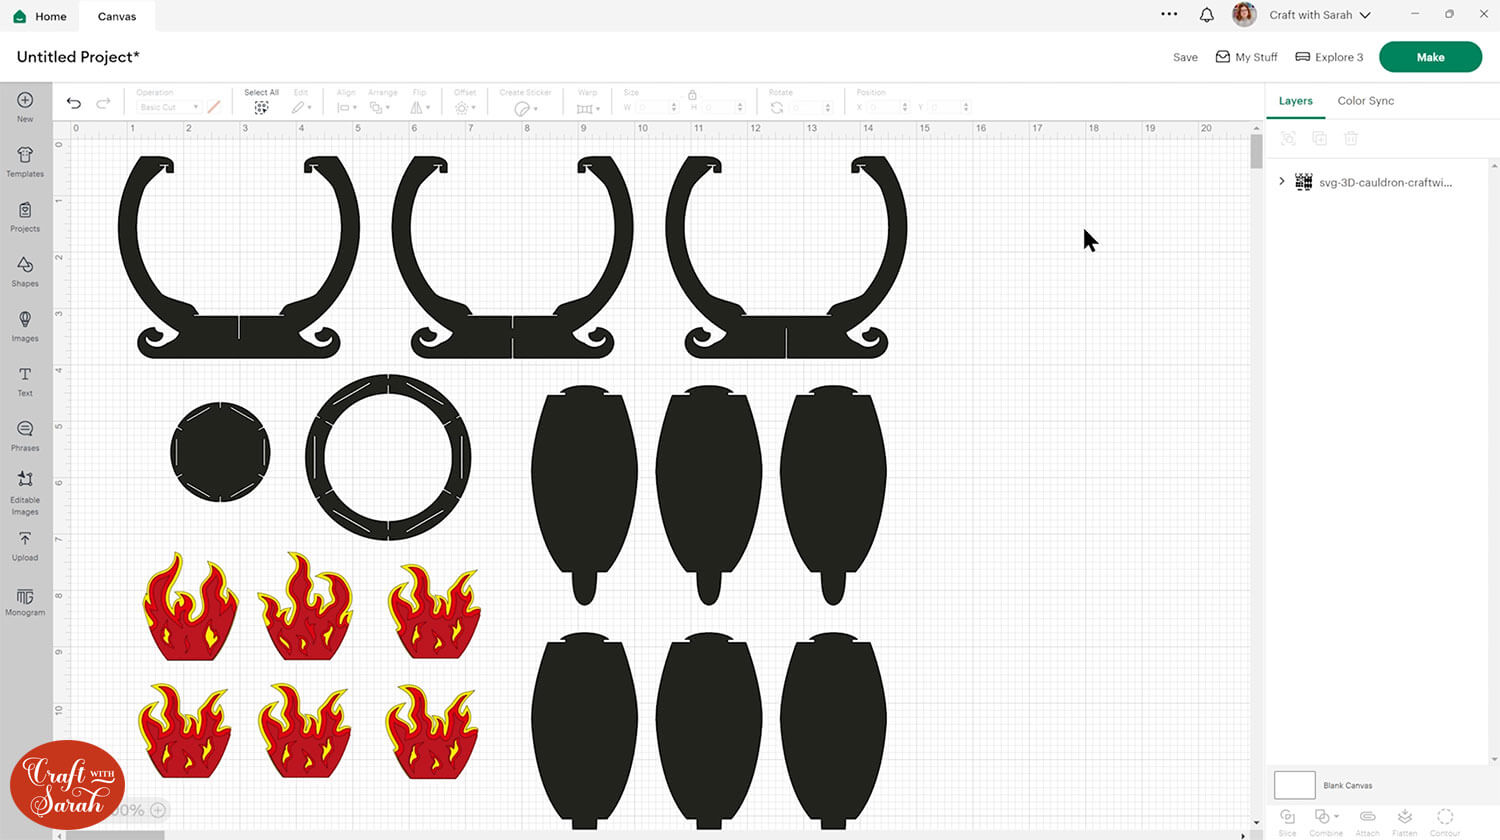
Step 2) Size and cut the SVG
The design should load in at around 14 x 14 inches which is a great size for putting a few treats inside.
However, if want to resize it, start by pressing the “Ungroup” button at the top of the layers panel.
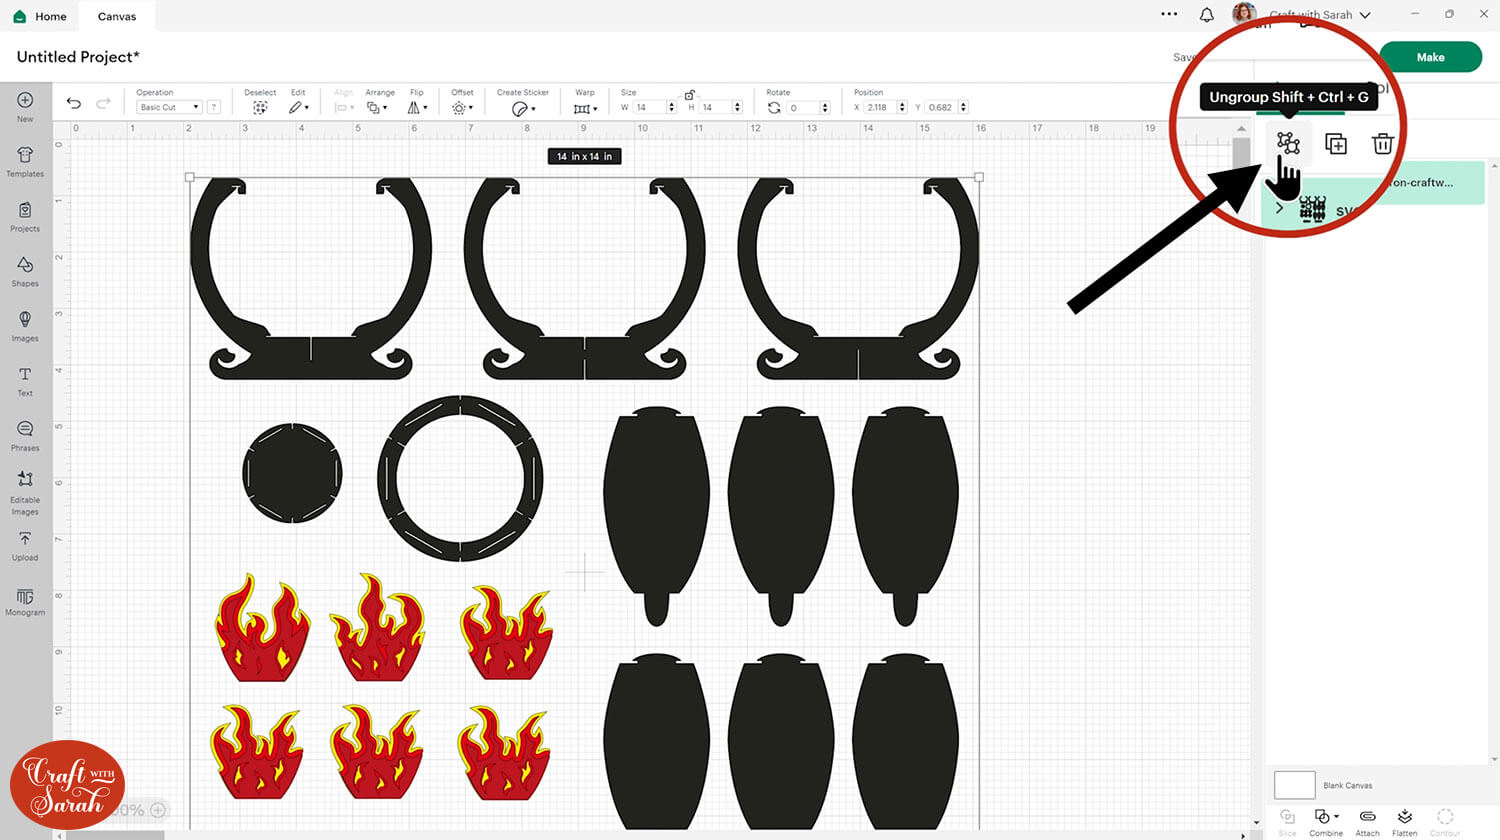
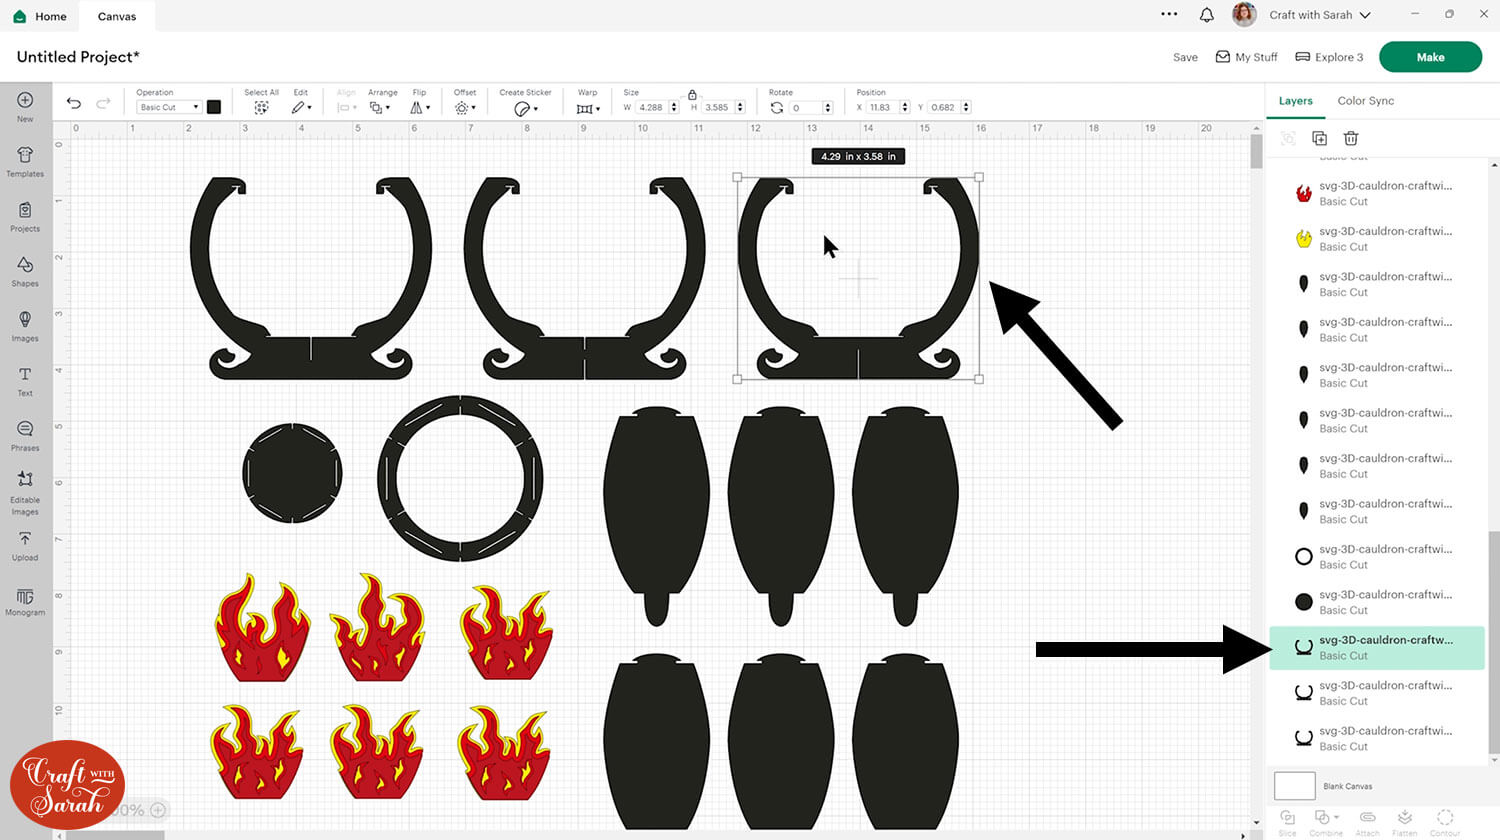
Then, scroll down the layers panel until you find one of the structure pieces.
Click it and the width and height will be roughly the size that your cauldron will end up. This will give you an idea of how much bigger or smaller you’d like to make it.
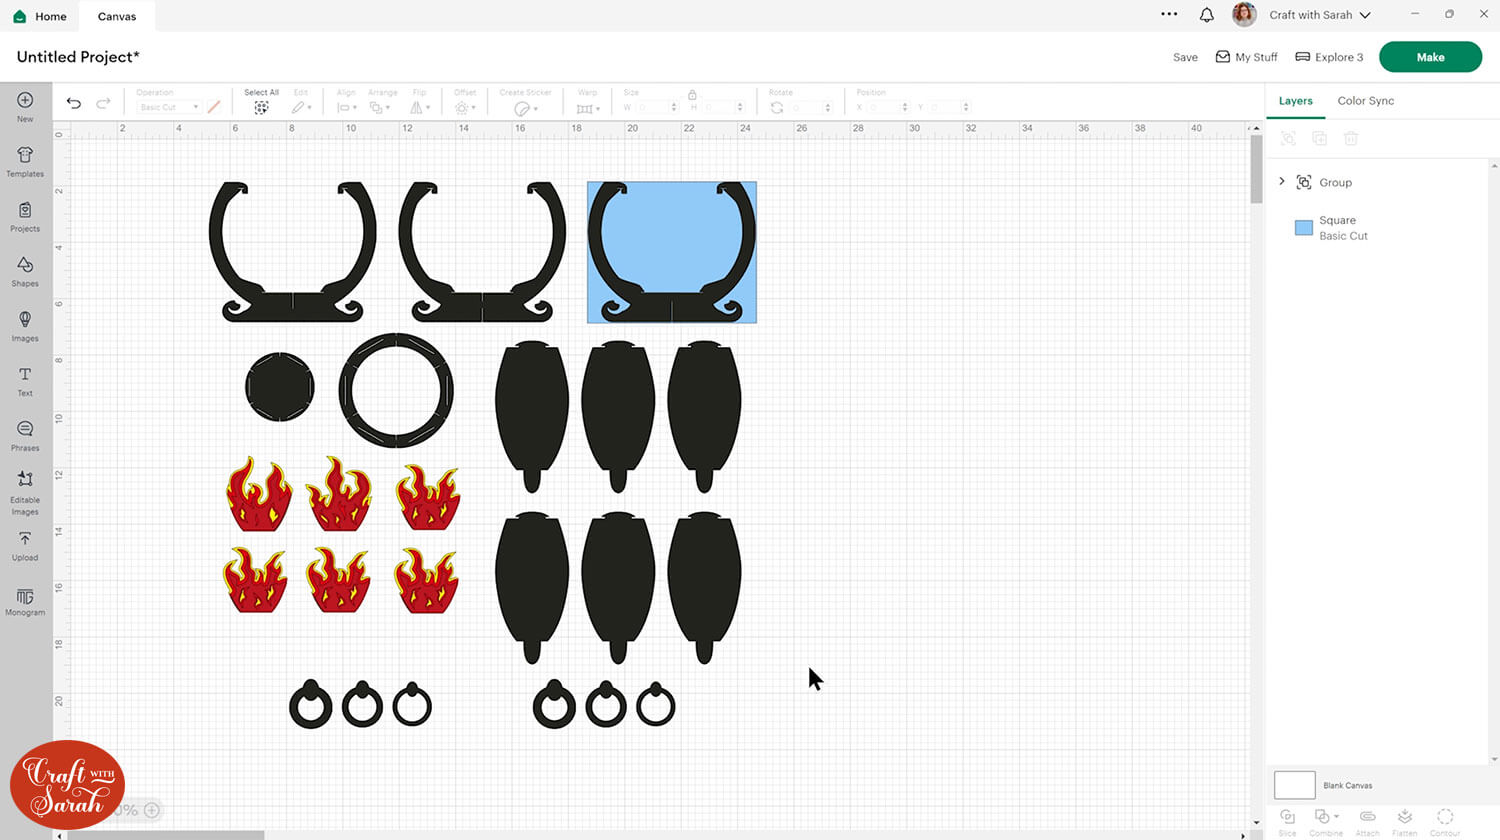
Press “Select All” and group again.
Insert a square, make it the size you would like your cauldron to be and send it to the back so that the cauldron pieces appear on top.
Then you can drag the whole design until one of the cauldron pieces matches your square.
TIP: Make sure the padlock icon above the width/height boxes is CLOSED before you resize. If it appears “open”, click it with your mouse to close it.
Don’t forget to delete the square when you’re finished sizing!
Step 3) Cut out all the pieces
When you’re happy with how the project is looking in Design Space, click “Make” and follow the instructions on-screen to cut out all the pieces.
To change the paper size, go into the dropdowns over on the left side of the screen and choose the paper size that you want to use. You need to change it for every single colour.
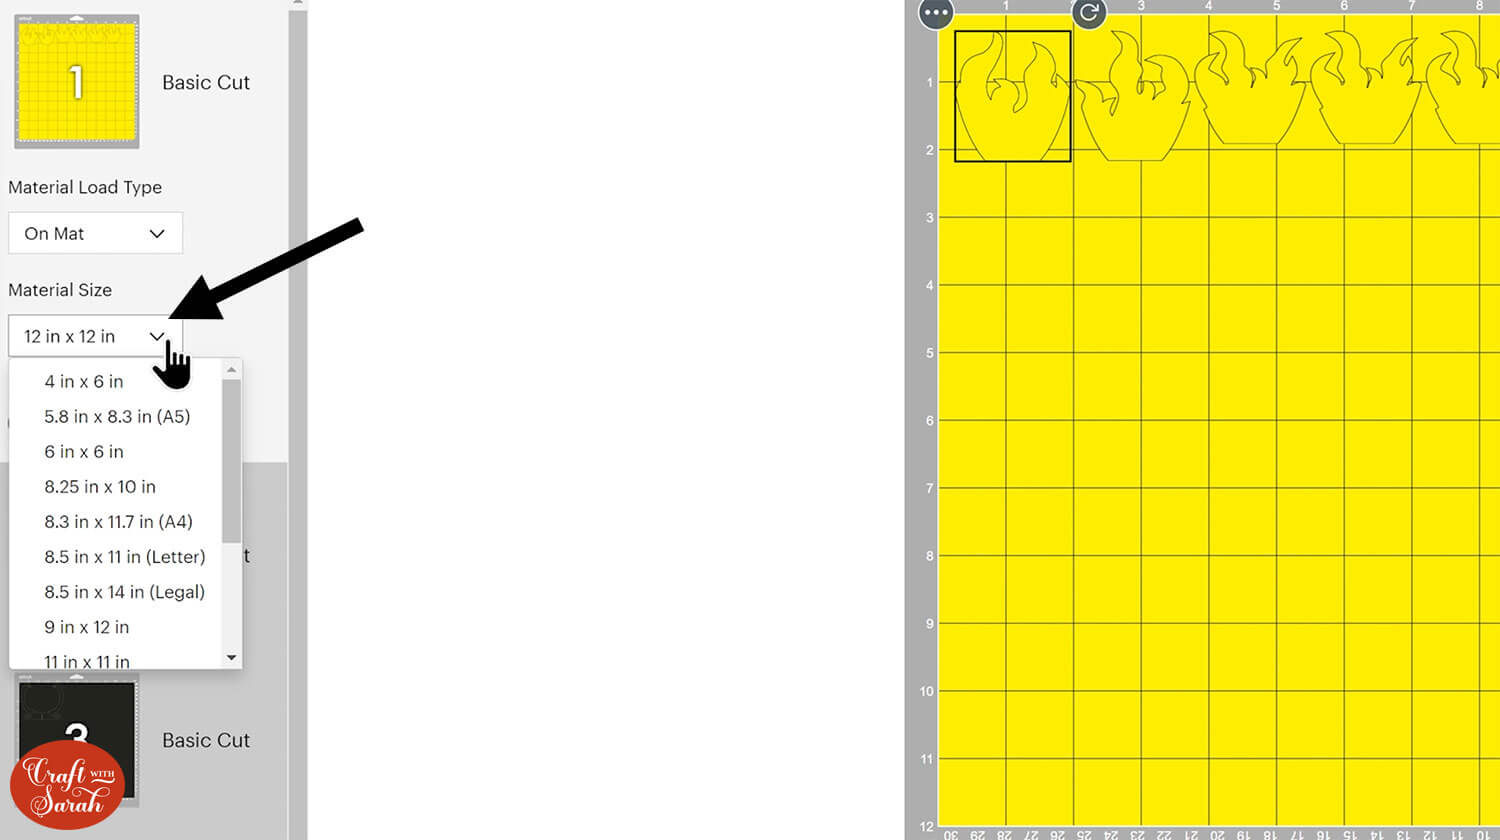
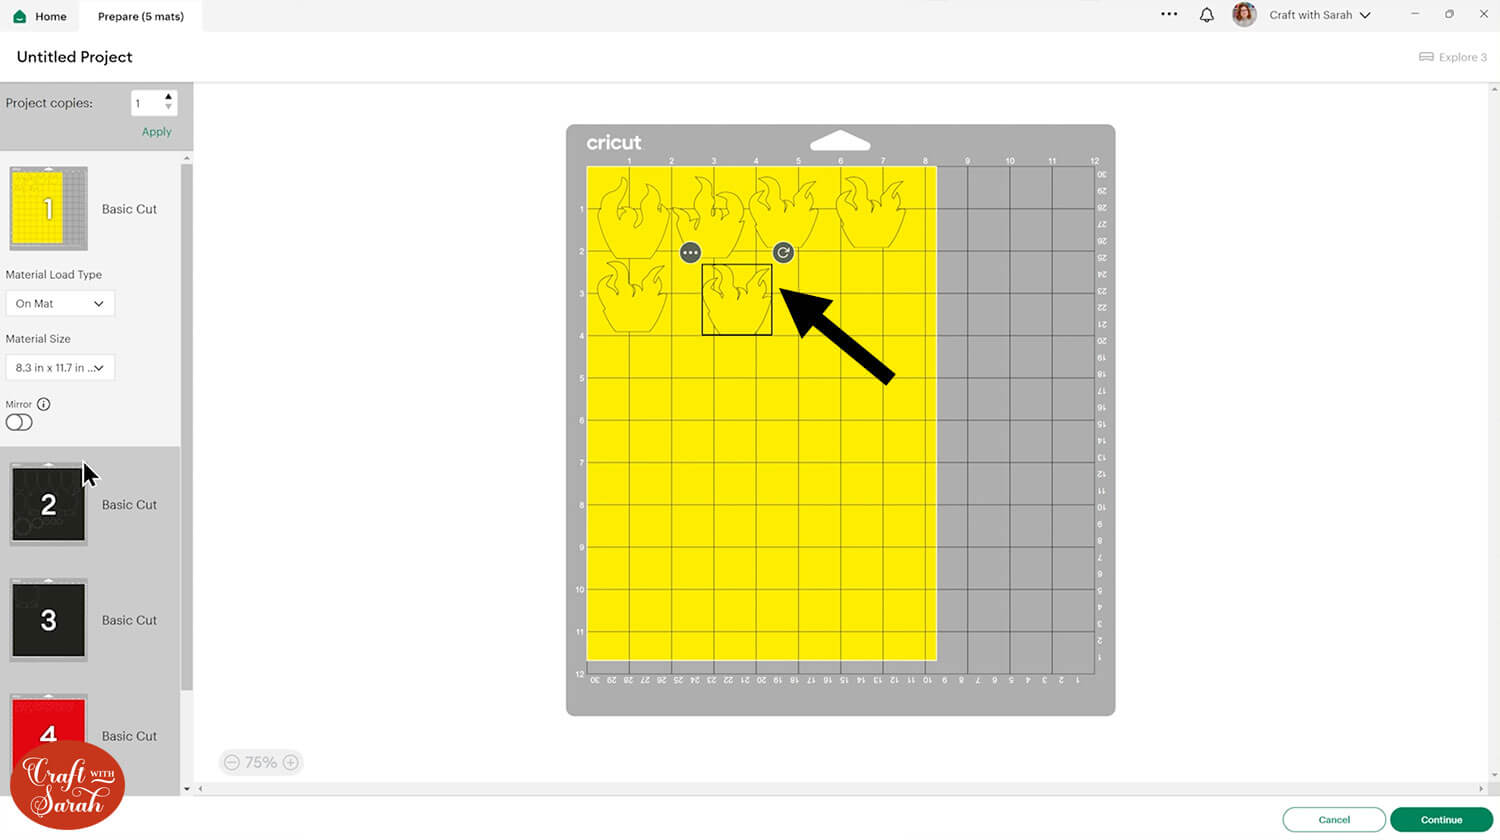
To save space on your cardstock, you can move things around by clicking and dragging. Make sure when you’re moving things about that nothing overlaps because otherwise, it won’t cut out properly.
TIP: New to cutting cardstock with a Cricut? Check out this in-depth tutorial which goes through every step of the process, including tips for getting the best quality cuts from your Cricut.
Step 4) Stick the fire pieces together
There are three different flame designs which make up the layered fire.
Each one has flames that are slightly different so make sure the three layers are the matching layers for that particular fire.
It’s easiest to lay all the pieces in place before you start gluing, to make sure they are in the correct order.
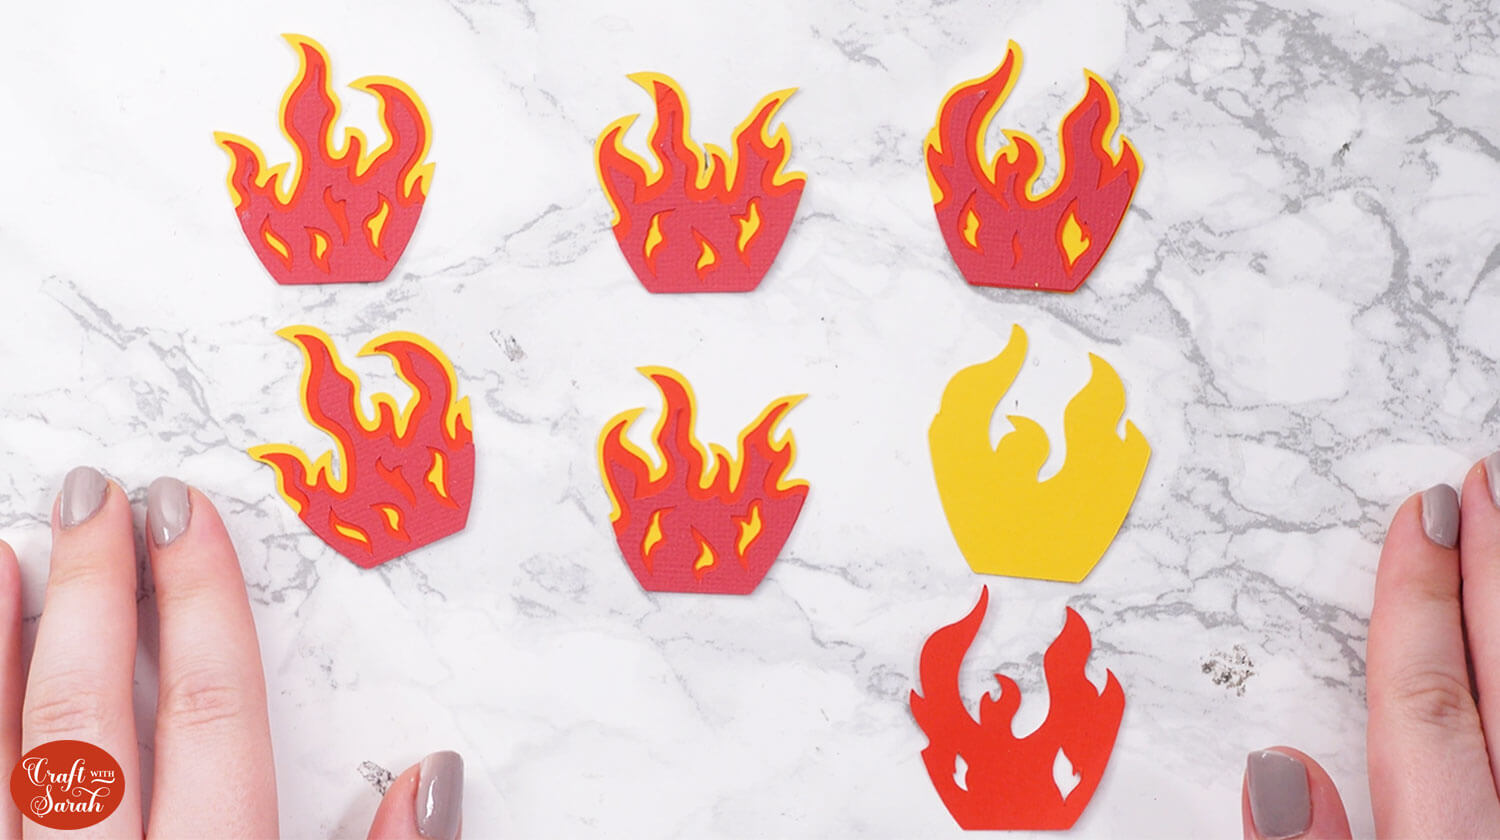
The biggest flame will be on the bottom, then stick the next size on top using glue and finally the smallest flame on top.
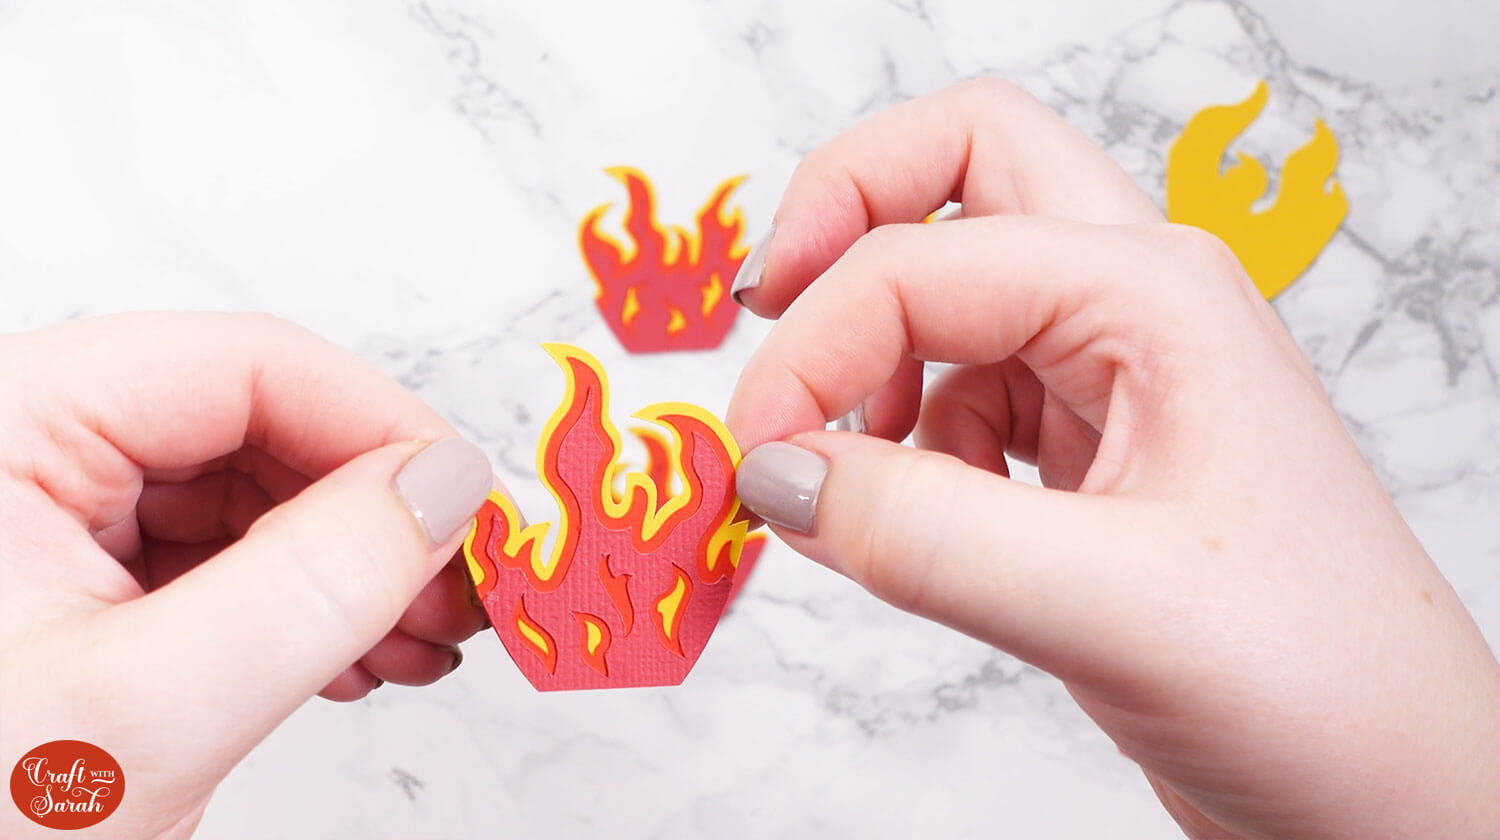
Repeat for all size flame pieces.
Step 5) Assemble the cauldron base
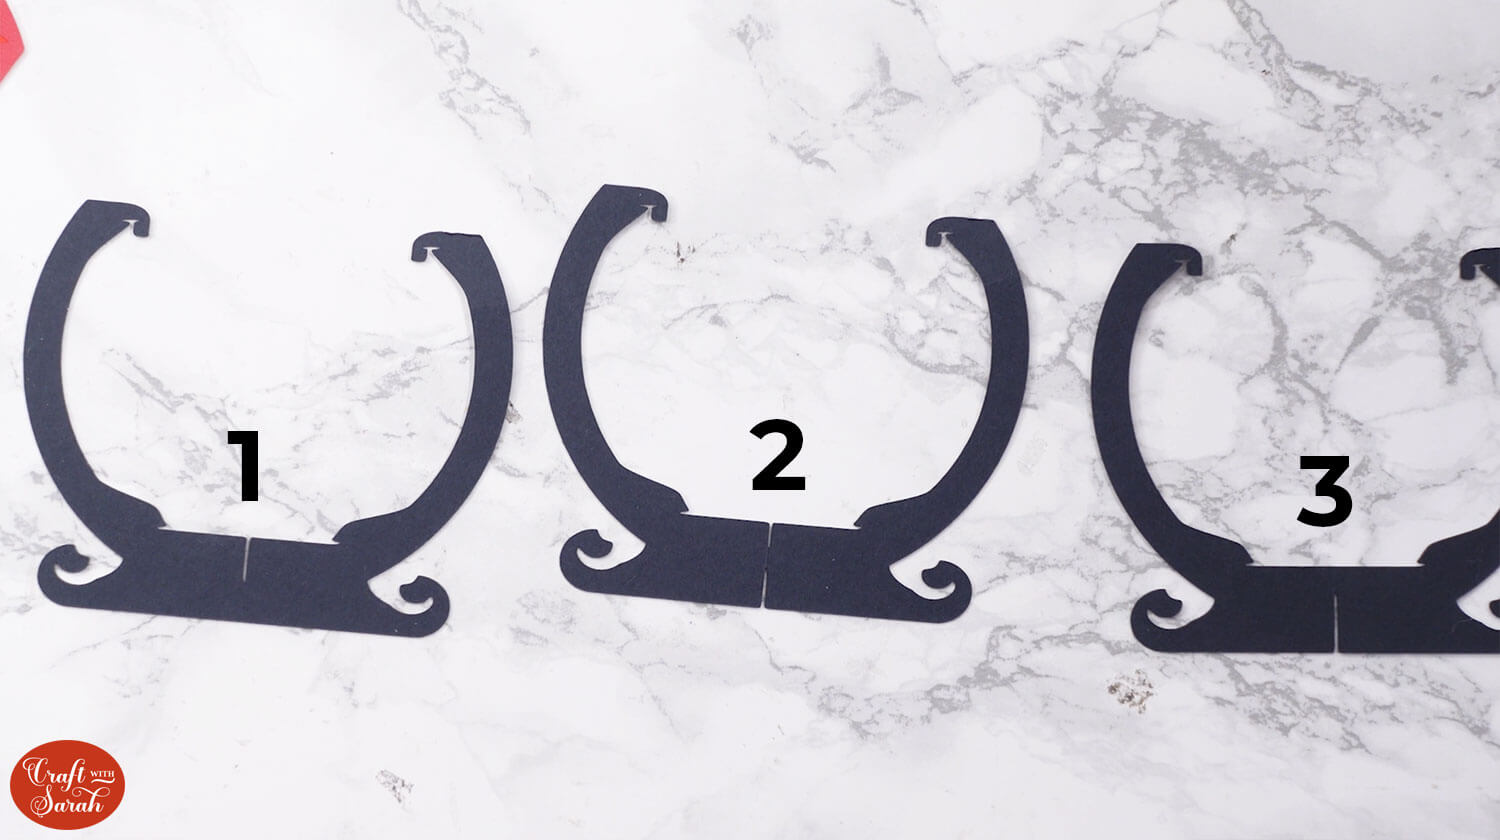
Take your three structure pieces of the cauldron make sure you have them in this specific order:
- Number 1 has a slit in the top section of the cauldron base
- Number 2 has a slit in the top and the bottom
- Number 3 has a slit in the bottom
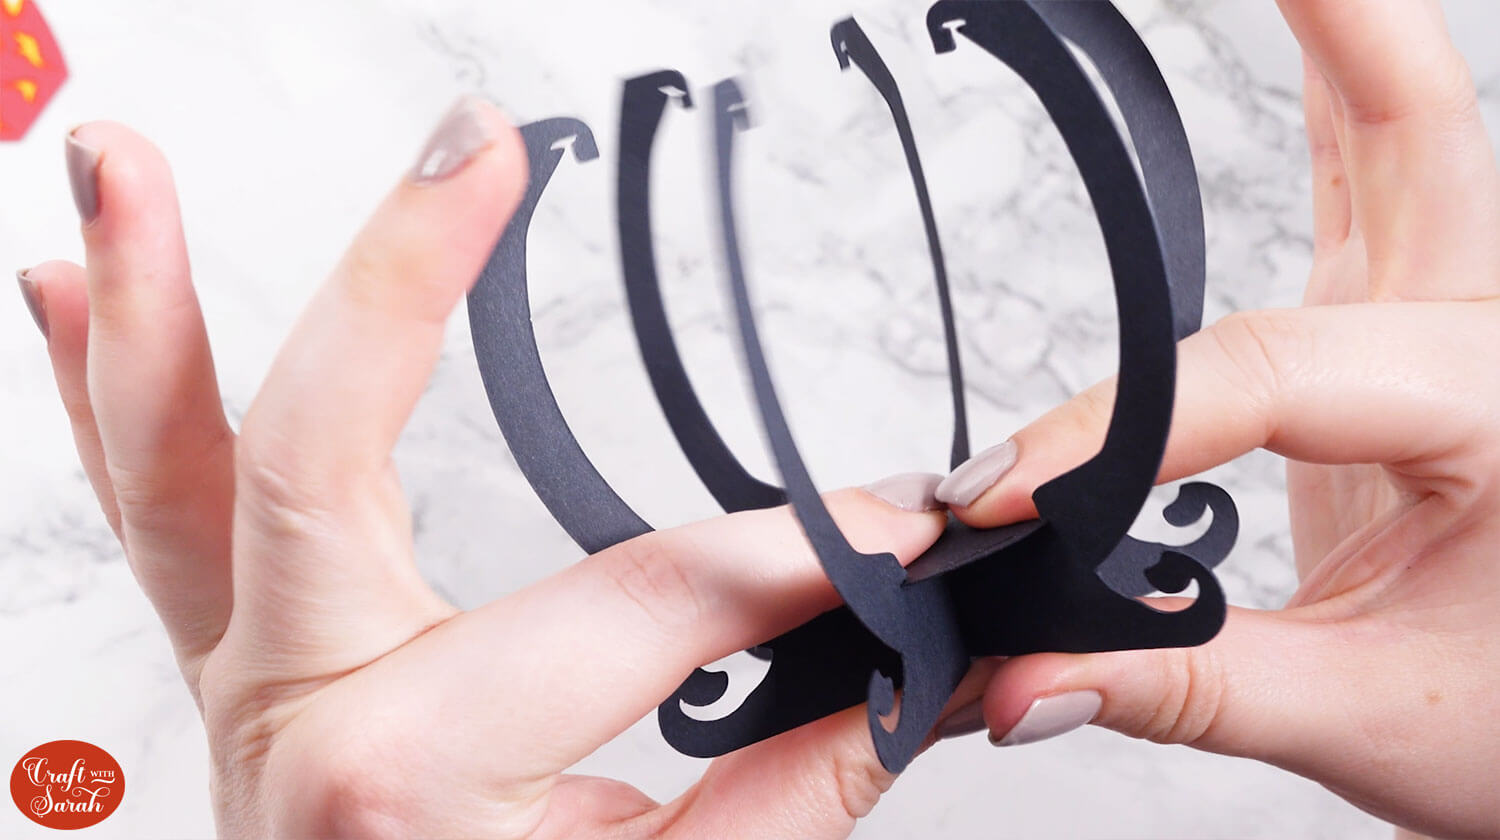
Take piece number 1 and 2. Slot the bottom of the cutouts in piece 2 over the cutouts in piece 1 until it reaches the bottom. You end up with a cross shape.
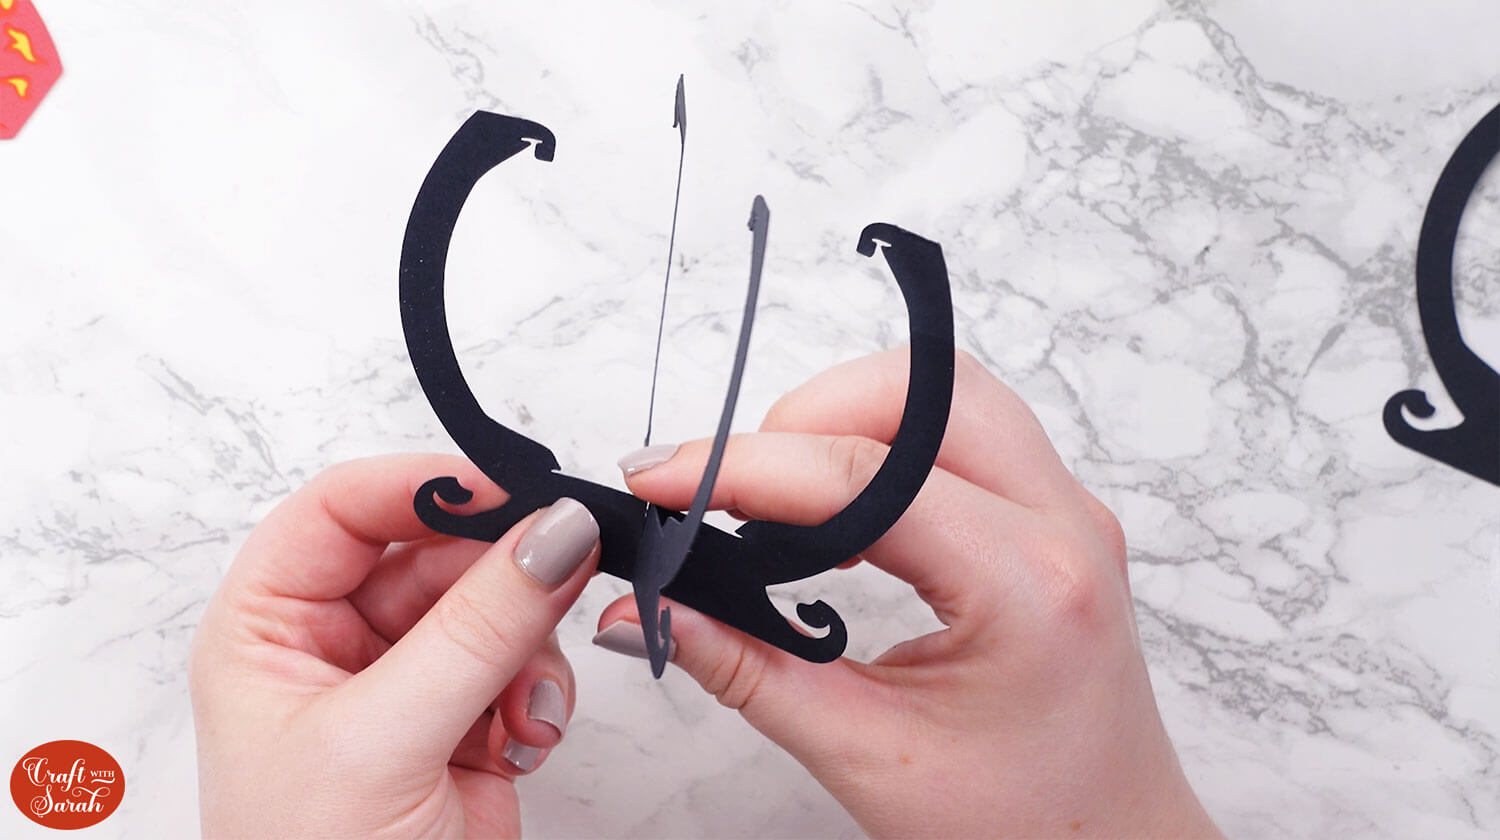
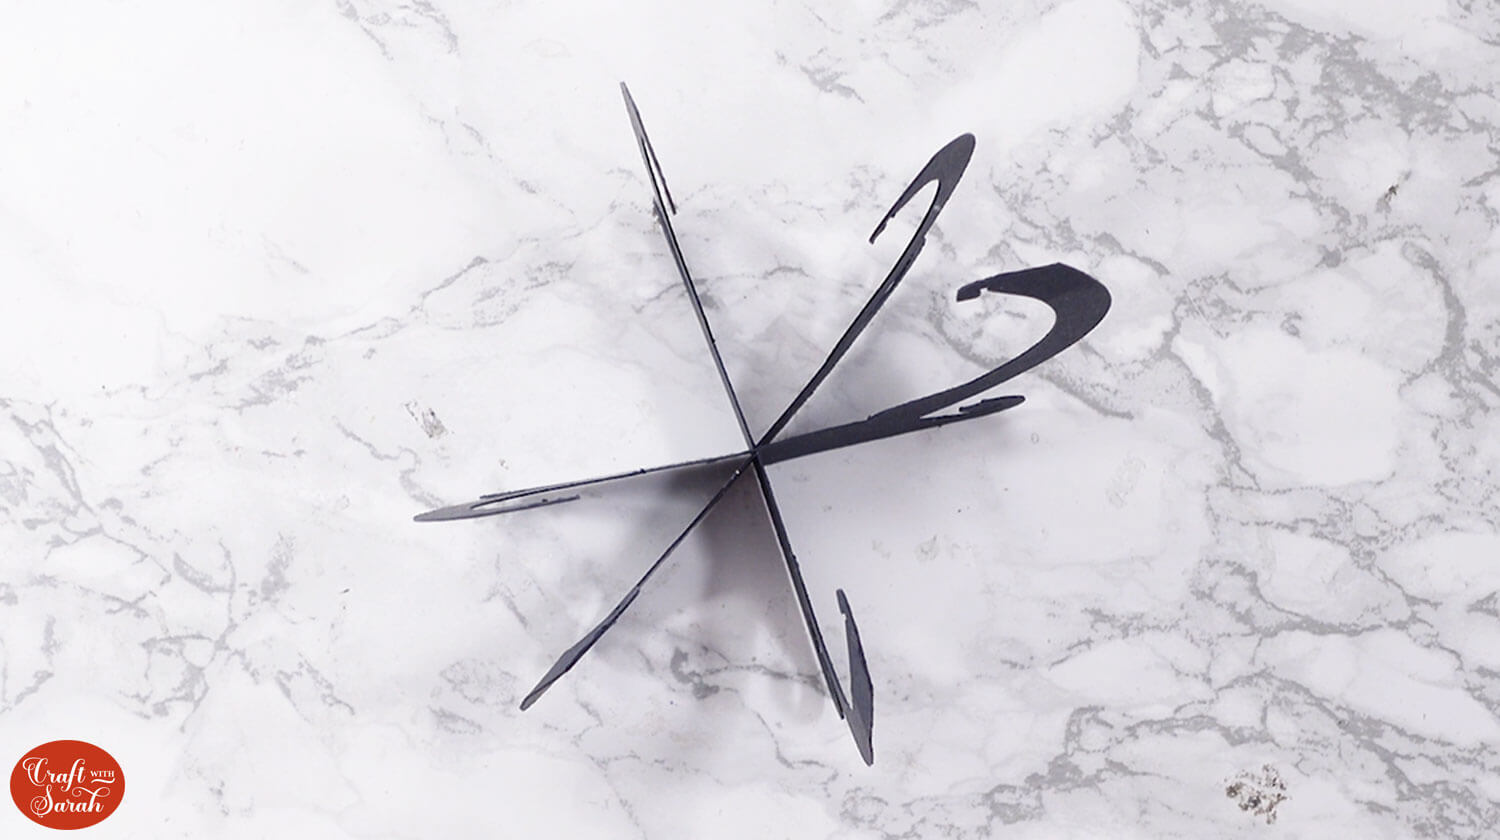
Hold them flat against each other and then slot in the third structure piece which will slide over both of them until it gets to the bottom.
It should open up so you end up with a six-sided shape that will stand up by itself.
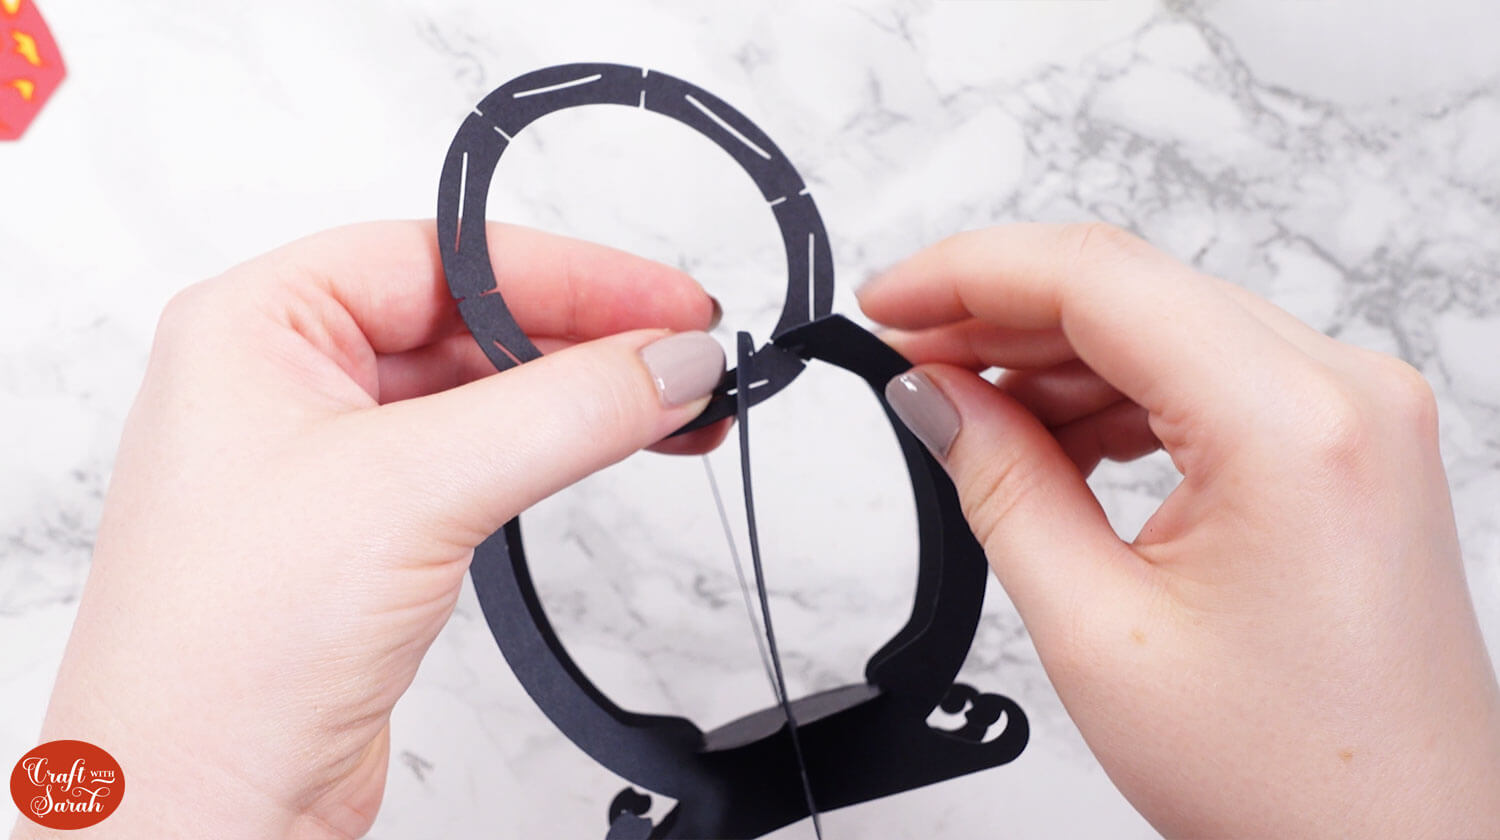
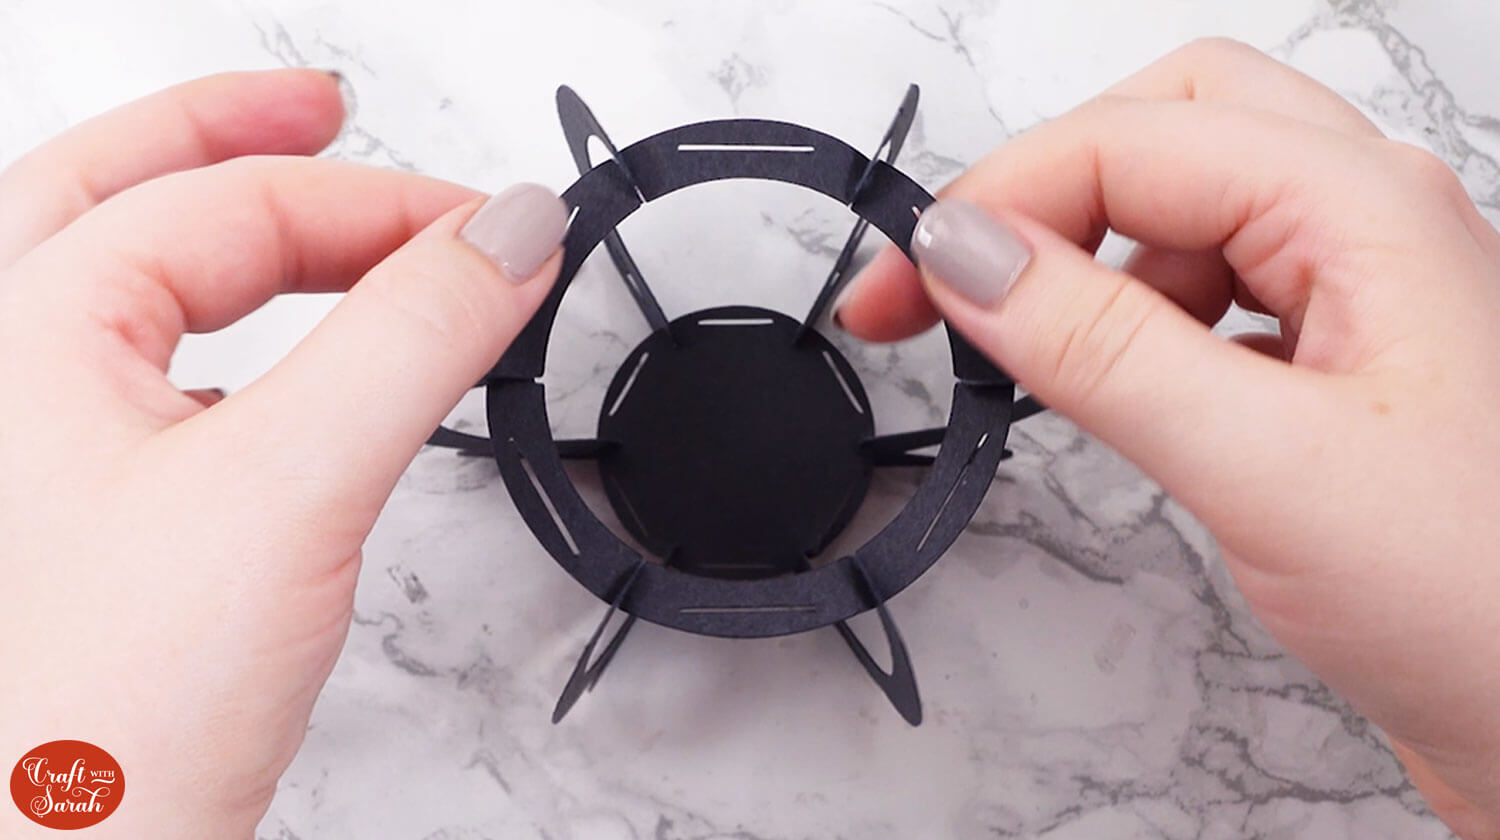
To give the cauldron stability, there are two circles. The smaller circle goes in the bottom and the larger circle goes in the top.
Note: This is the opposite way round to my usual slot together designs, so make sure you get this right!
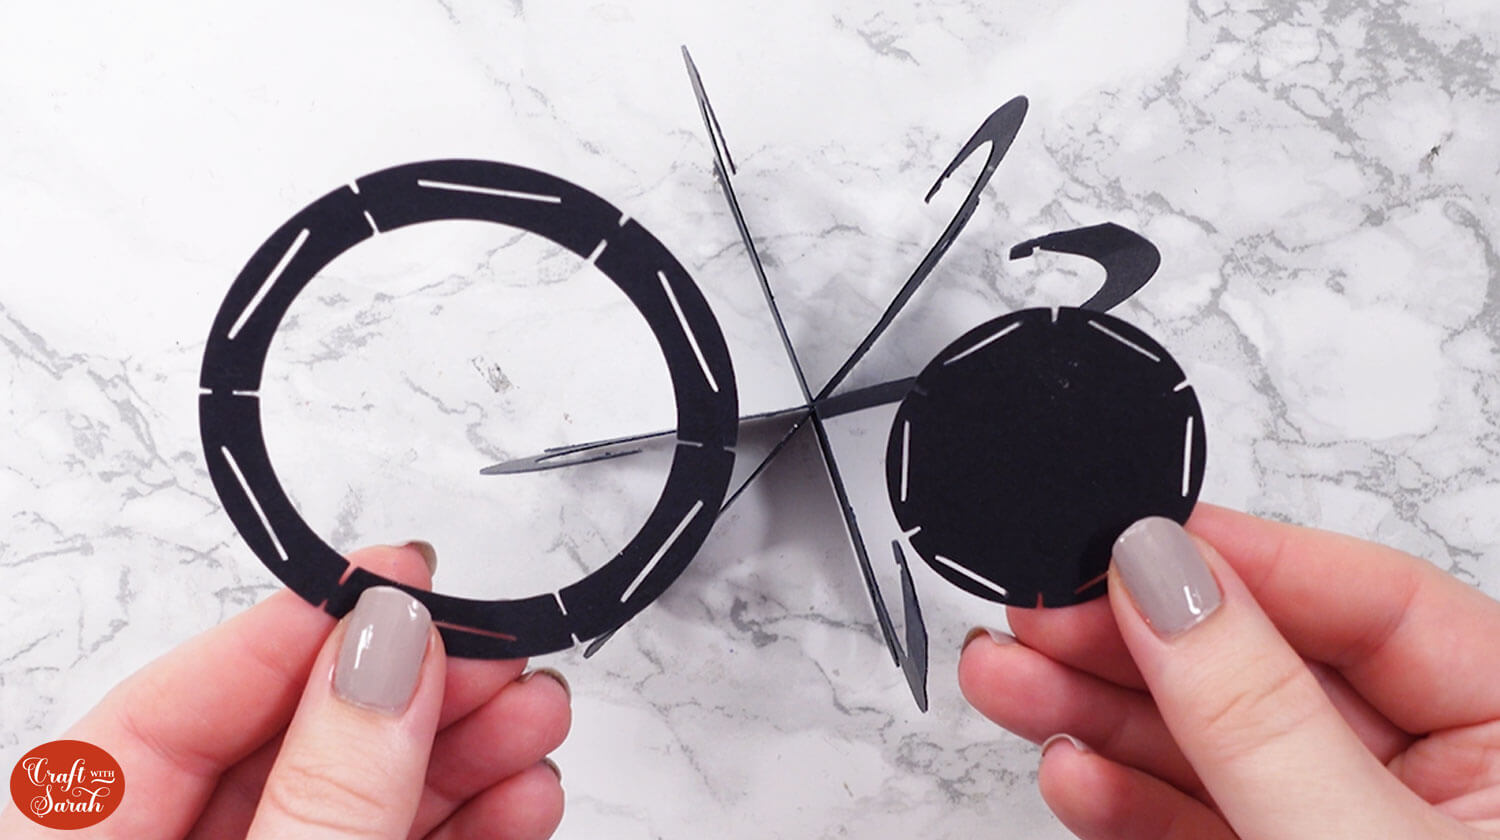
Start with the smaller circle and use the slits to slot into the gaps on the cauldron. Take care not to rip anything as you go along.
Take the larger circle and use the slits to slot them into the top of cauldron. The edges of the cauldron structure hook into the circle to hold it in place securely – a little bit like a coat hanger.
Step 6) Add the sides to the cauldron
Take the six side panels and place them so that the short tab is at the top and the longer, thinner tab is at the bottom.
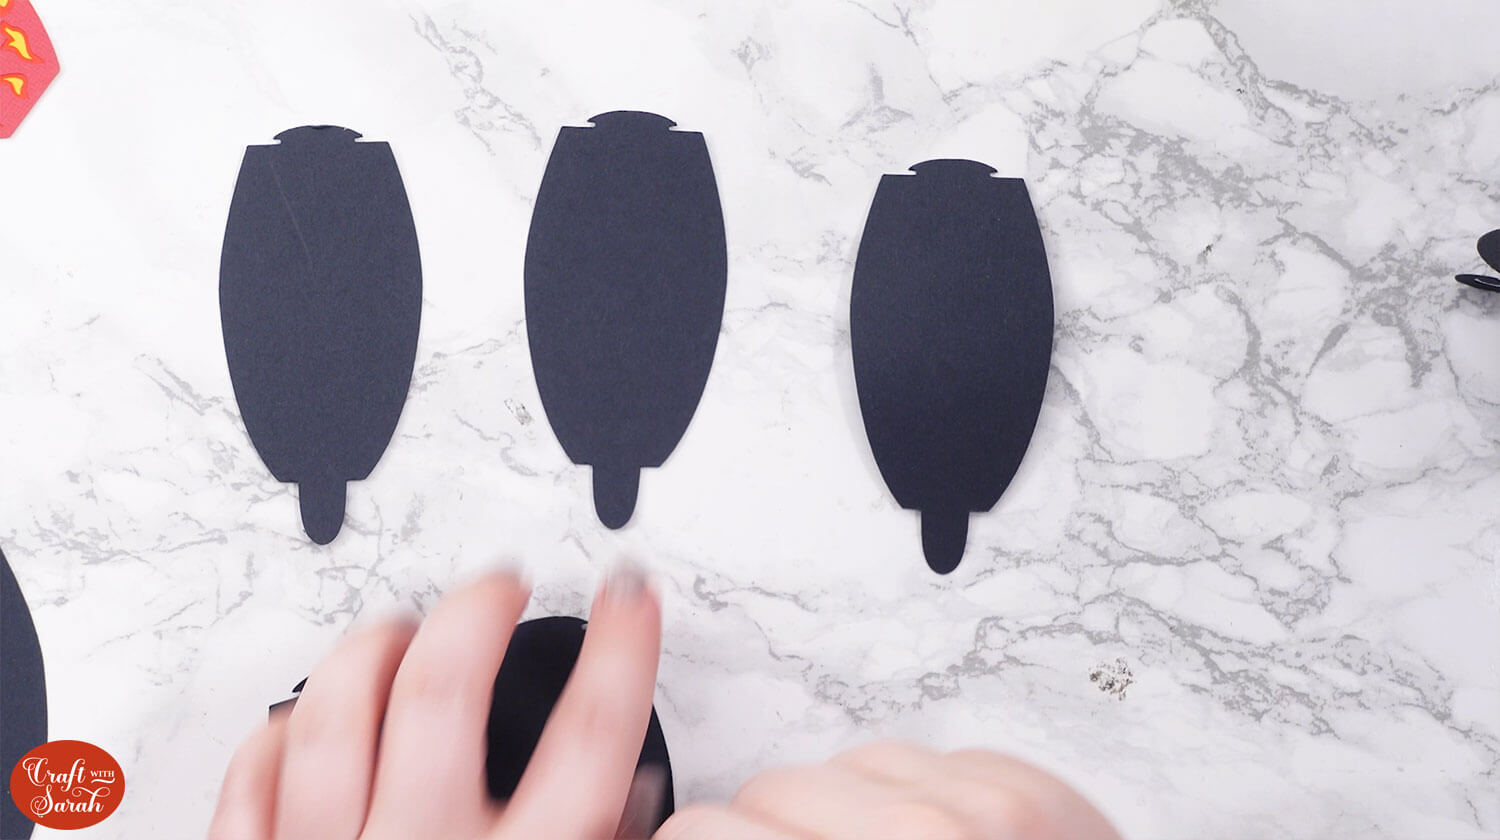
Glue the flames you assembled earlier to the side pieces of the cauldron.
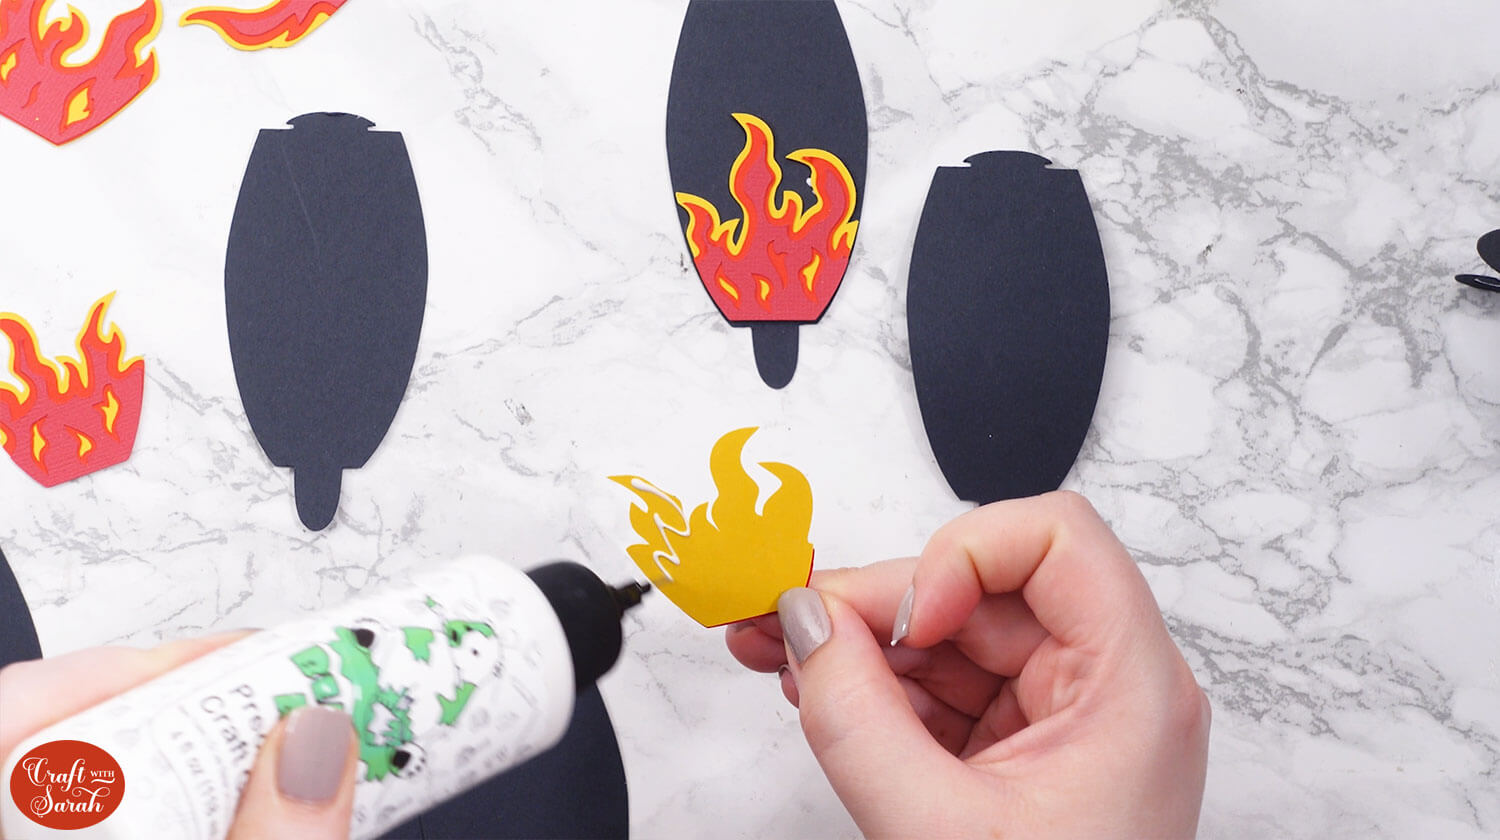
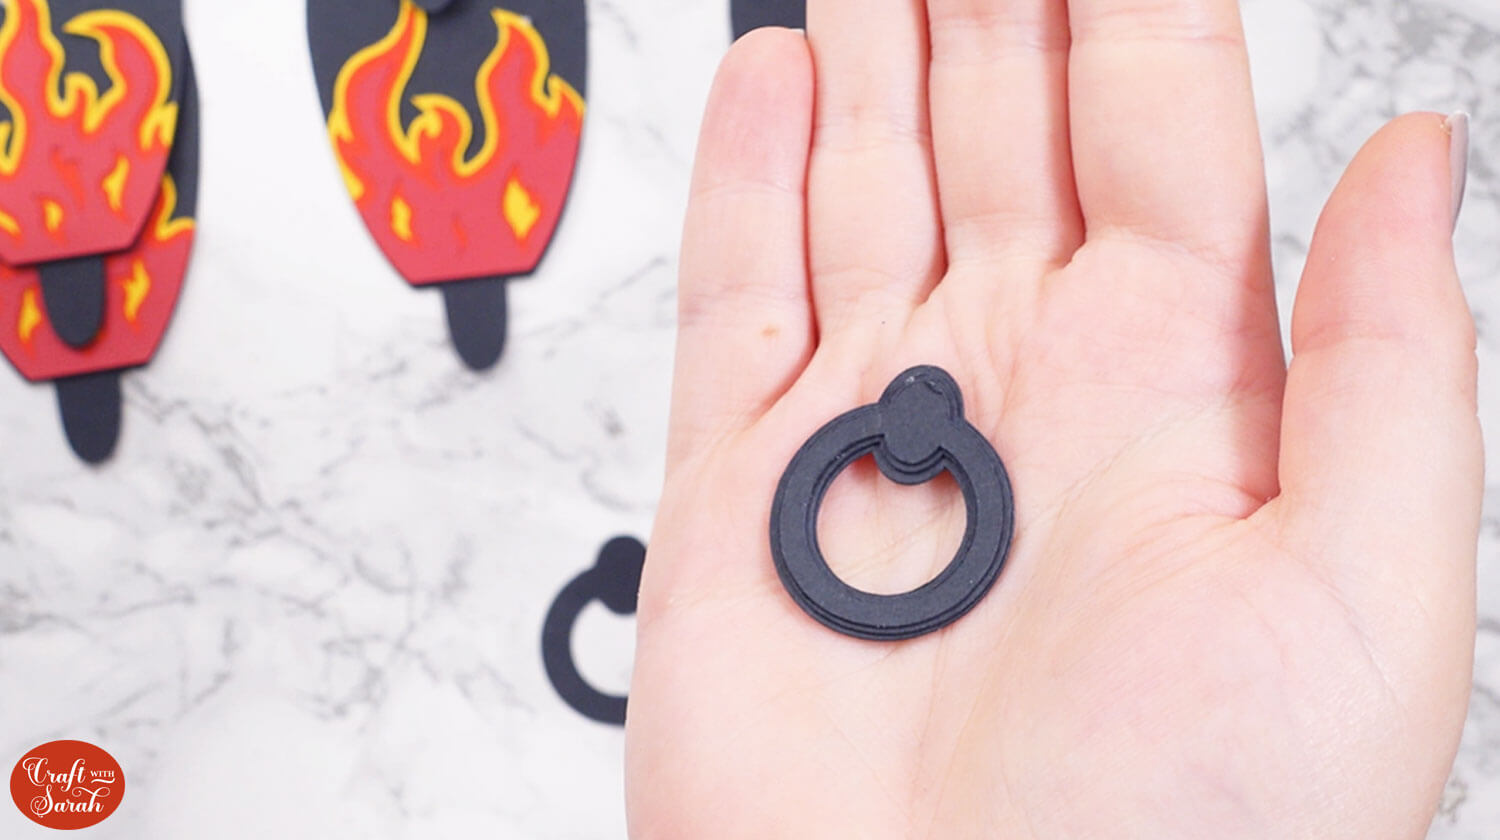
Take the cauldron handles and lay them so that you have three slightly different sizes for each handle.
Glue the two handles together starting with the thickest on the bottom, then the slightly thinner one and finally the thinnest on top.
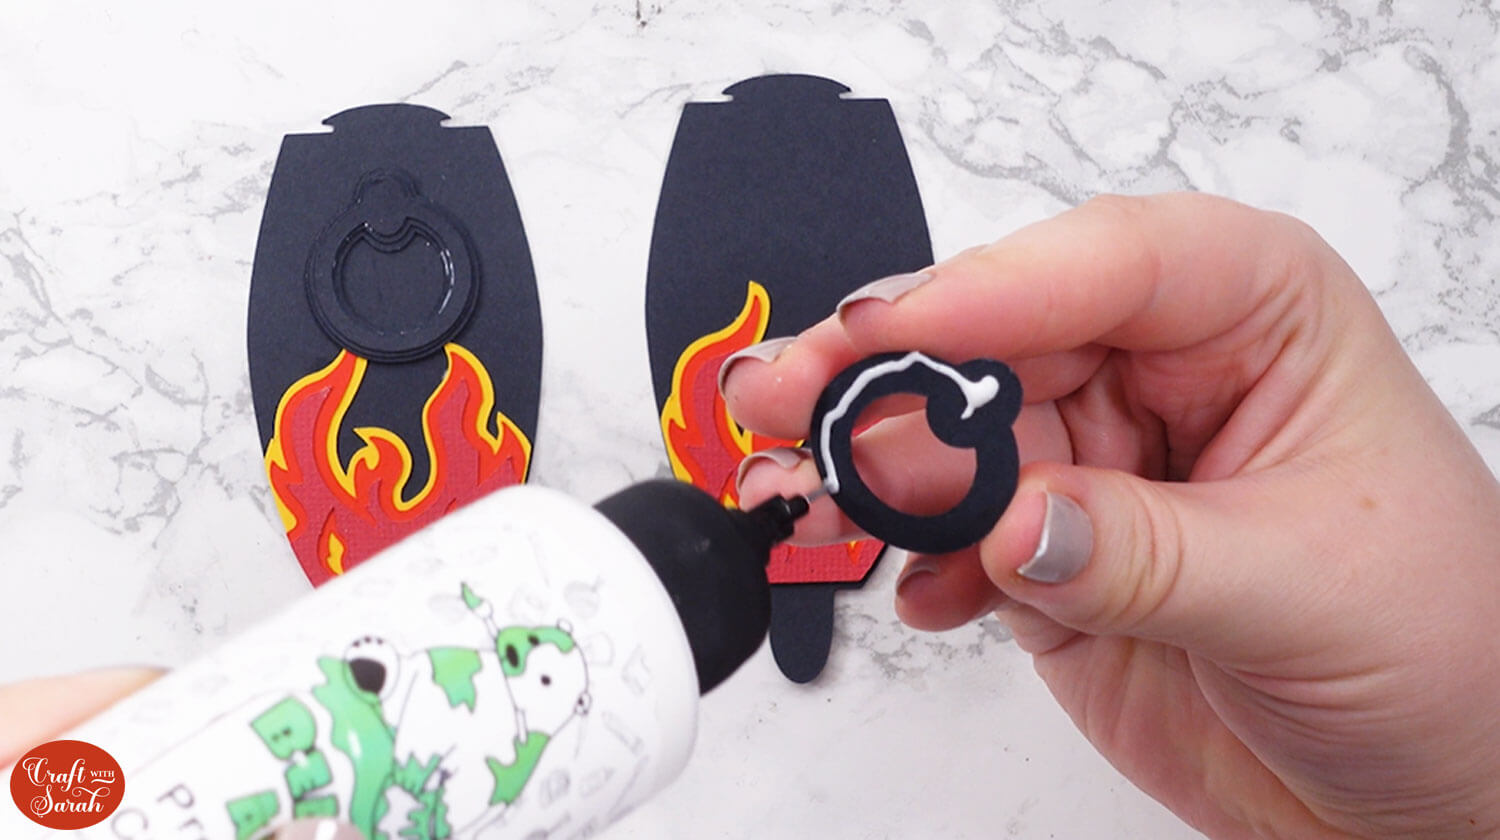
Choose two of the side panels that have the same flame design on them and glue one handle to each of them.
Gently bend the side pieces and use the slots at the top and bottom of the cauldron to attach the sides by placing the short tab in at the top first, then thread the longer tab through the bottom.
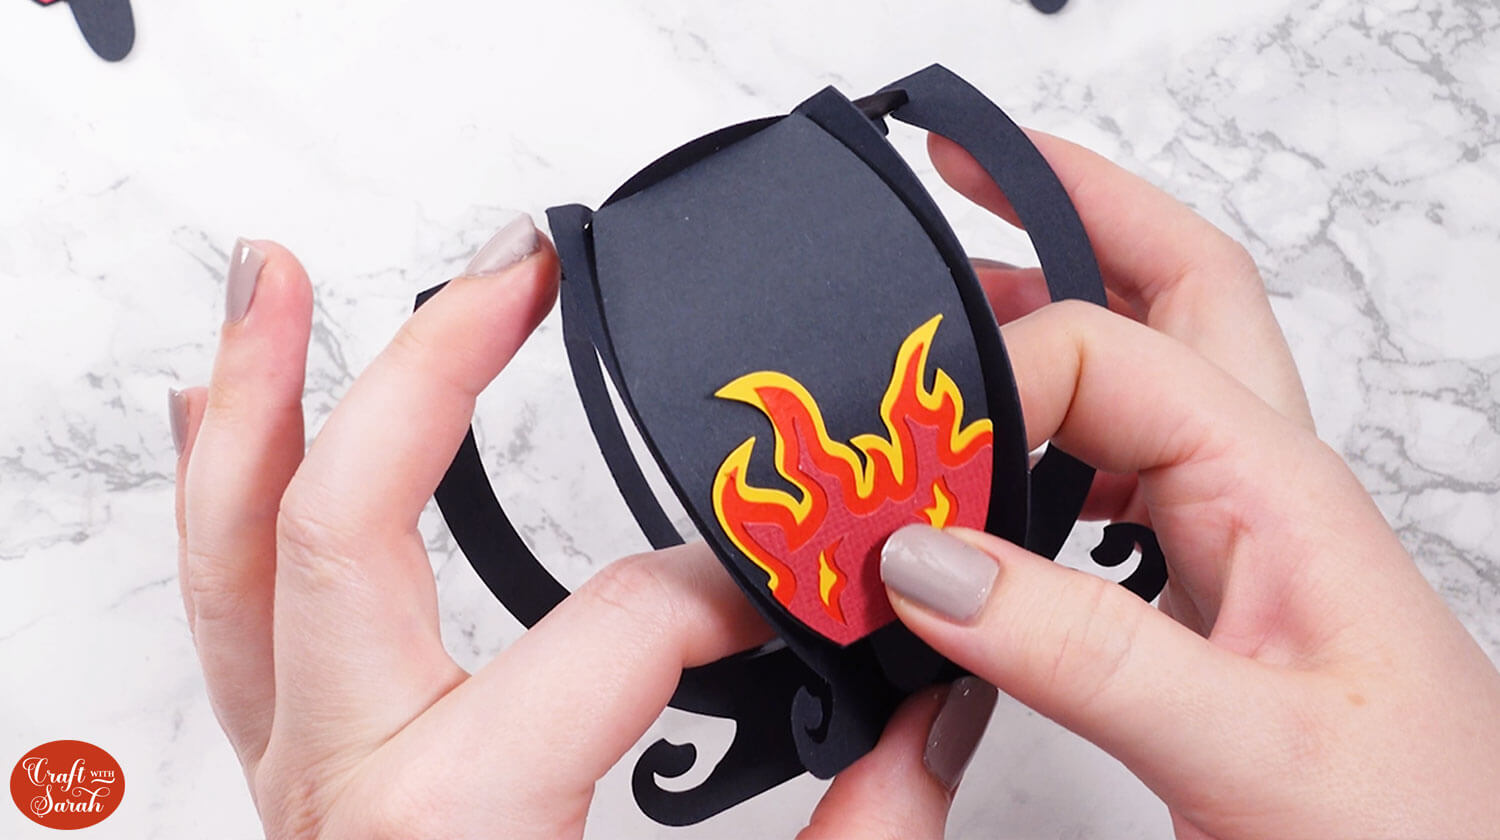
Alternate the flame patterns and make sure you have the handles on opposite sides of the cauldron.
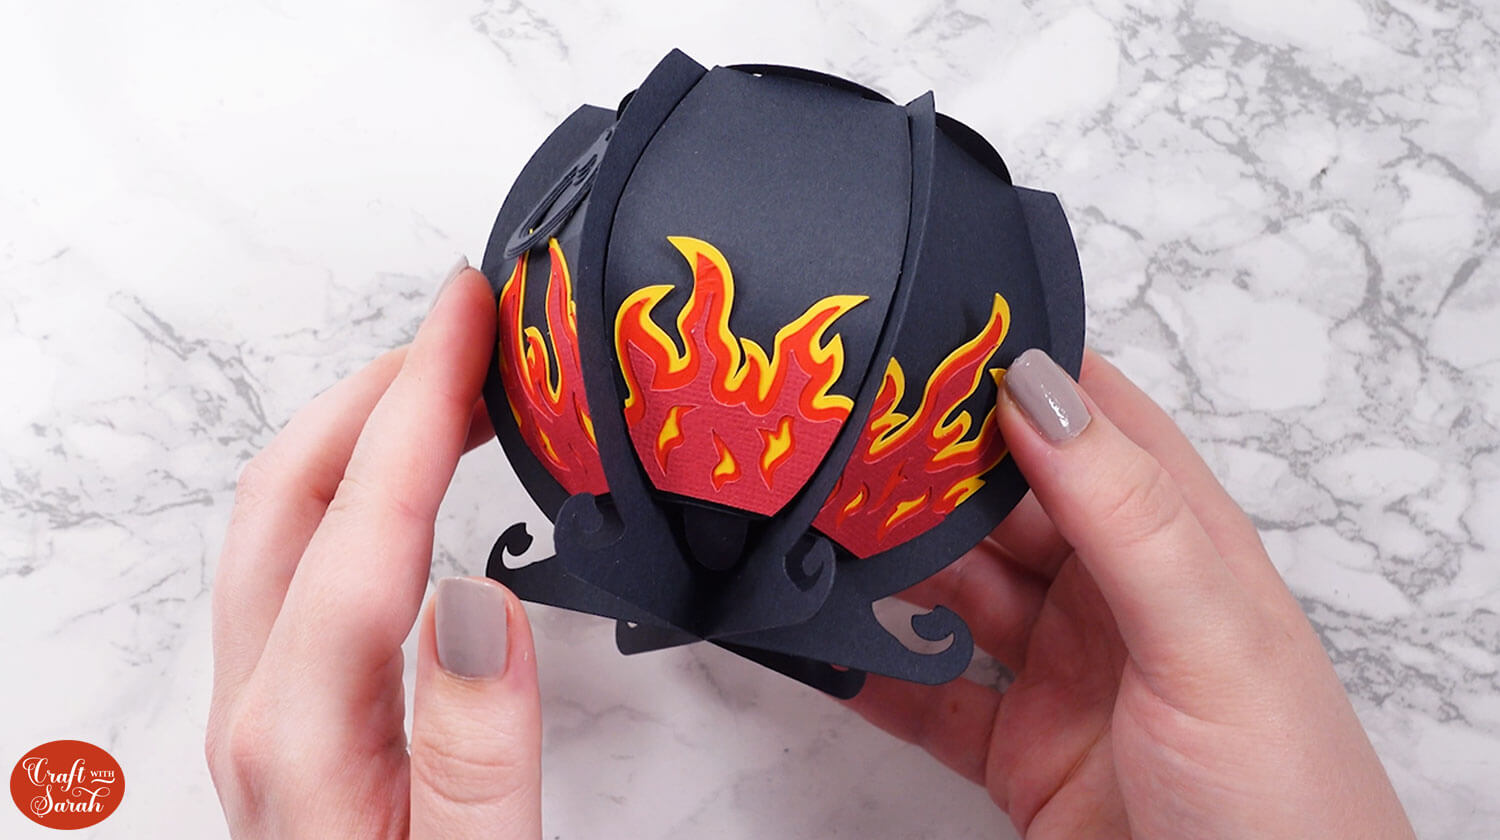
Now your cauldron is finished! All that’s left to do is fill it up with some of your favourite treats!
Halloween cauldron slot-together design
I hope you enjoyed this tutorial on how to make a 3D cauldron from cardstock, for Halloween.
These would be a lovely take-home gift if you are hosting a Halloween party, or you could make them for your children with their favorite treats placed inside.

Happy crafting,
Sarah x

