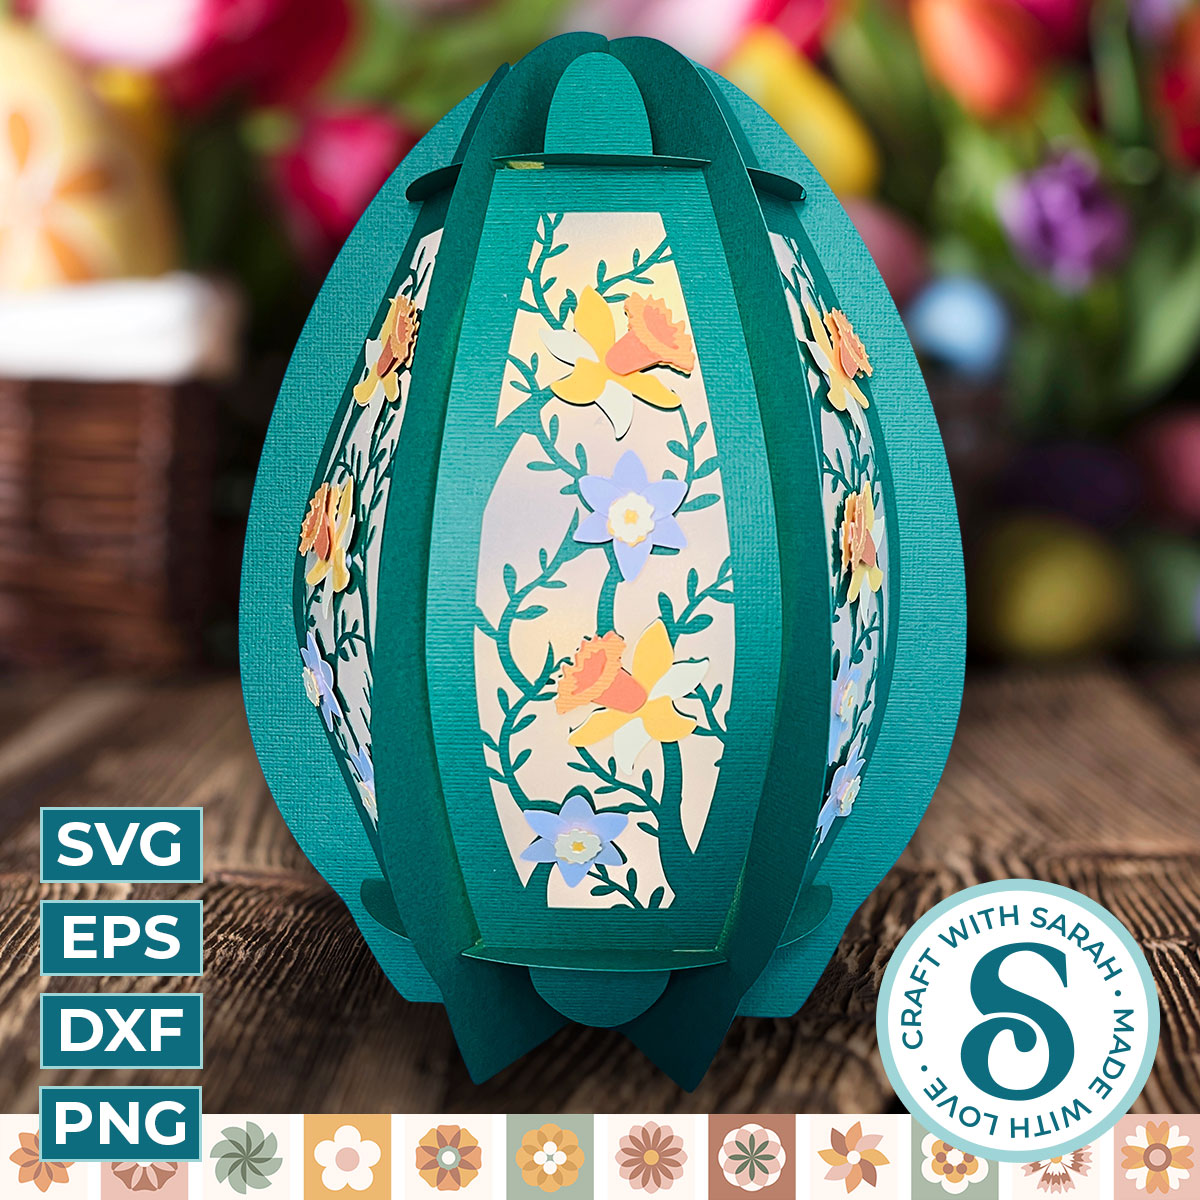
Spring Daffodils Easter Egg Lantern
A 3D slot-together egg lantern showing beautiful spring daffodil flowers on an intricate leaf background.
There are two different side panel designs that will each appear three times to make up the six sides around the edge of the egg.
Use foam squares to attach the daffodil heads to the lantern sides for a little bit of optional dimension.
By default, the egg luminary will cut to be just over 10 inches tall when assembled. However, you can resize it to make a smaller or larger egg.
The lantern goes together using a clever slot-together technique which means that the "lantern structure" part doesn't require any glue.
This means that it can easily be taken apart so that it can be stored flat.
Add battery-powered fairy lights, battery candles or submersible LED lights inside the lantern to create a beautiful glow.
Use vellum, tracing paper or other transclucent materials to cut the windows to go inside the window panels. This helps to diffuse the light for a more even glow and helps to hide the lighting mechanisms.
This product comes with an optional light tower stand template to add inside the lantern to ensure the fairy lights fill the entire space.
Links to written and video tutorials for similar lanterns are included.
The video below shows how to assemble this style of luminary design. All of our Easter egg lanterns go together using the same method as shown in the video.
About this Product
This is a digital download product. Nothing will be physically sent to you in the post/mail.
After purchase, you will be given a link to download the files. They are all contained in one download link as a zip folder.
You must unzip the downloaded folder before you can use the files.
If you are using a phone/tablet then you may need to install an app/program to allow you to unzip files.
This product comes in four file versions: SVG, DXF, EPS and PNG.
PDF hand-cutting version ARE included, in both colour and black-and-white.
Sublimation/printable versions are NOT included.
For Cricut and ScanNCut machines, use the file that starts svg- in the filename.
If you have a Silhouette machine and you're using the free version of Silhouette Studio then you need to use the DXF file (starting dxf- in the filename).
If you are using any of the paid upgrades to Silhouette Studio then use the SVG file.
All Craft with Sarah customers have the opportunity to join my customer-only Facebook group where you can share your projects and get Cricut and Design Space help, including monthly LIVE Design Space training.
The product download folder contains the link to follow to join the group. This bonus is only included with paid products, not free downloads.
Please familiarize yourself with the Craft with Sarah terms of use before purchase. Purchase/download of this product assumes acceptance of and agreement to these terms.