Adorable Lindor Lindt Holder SVGs for Christmas | DIY Chocolate Stocking Fillers
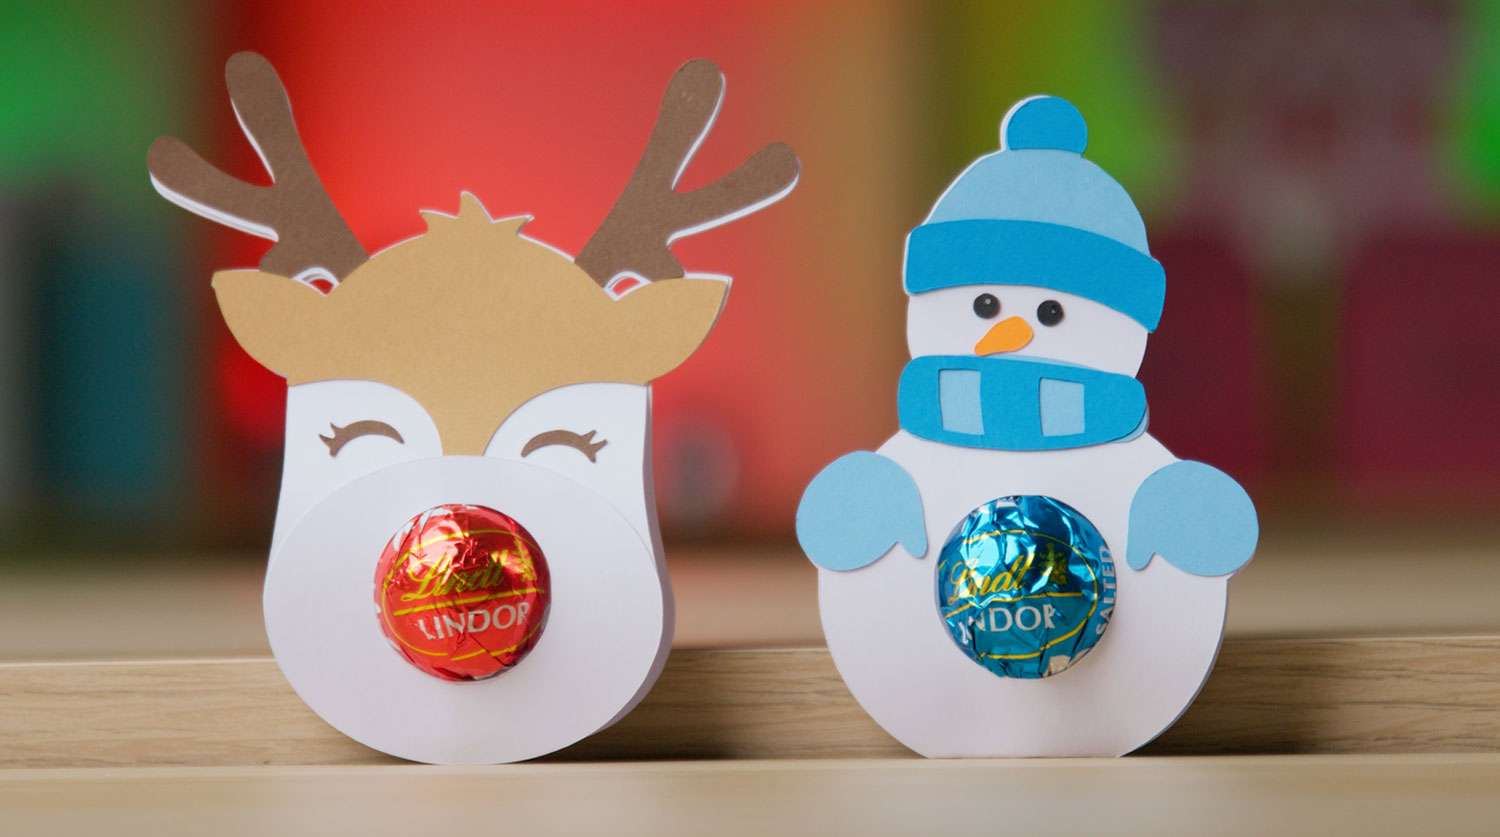
This craft project is one for the chocoholics among you. It’s these adorable snowman and reindeer Lindor Lindt holders!
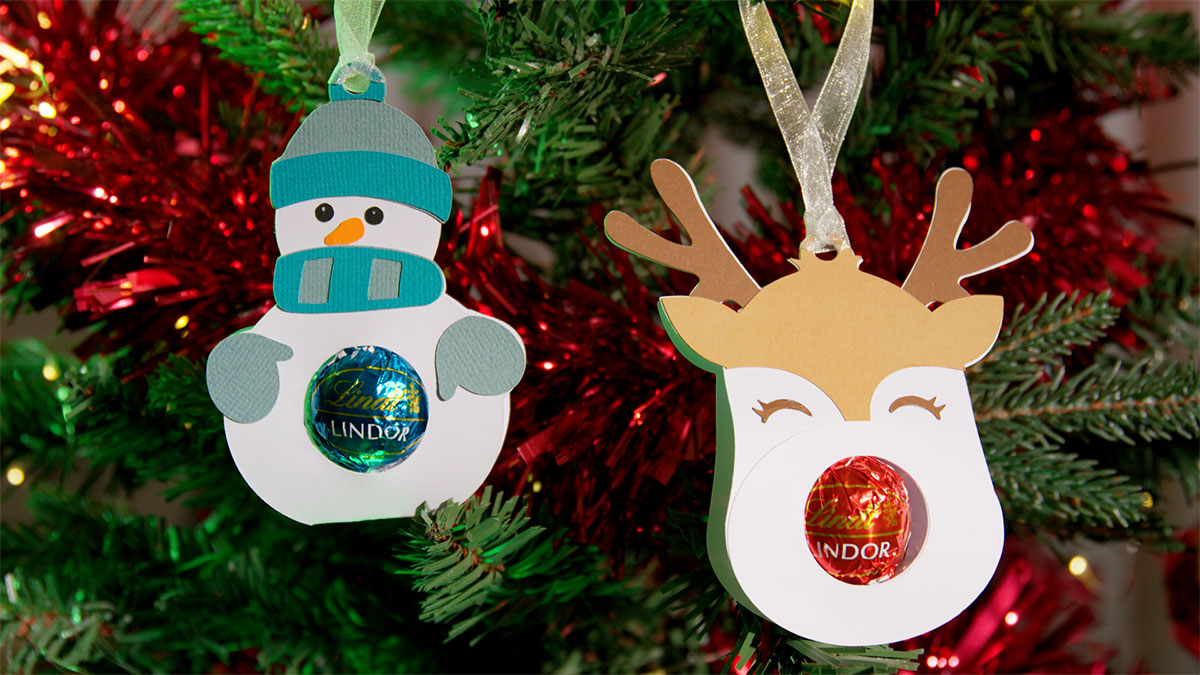
Two versions of each design are included. One can be given as a little stocking filler gift on its own and the other version has a little hole at the top to thread ribbon through to make Christmas tree decorations.
This project is part of 2021's Christmas Craft Countdown.

DIY Lindor Lindt chocolate holders tutorial
These designs each hold one of the Lindor Lindt chocolates which in my opinion are the best chocolates out there.
In fact, I had a bit of a tough time making the samples for this project because somehow the chocolates just kept disappearing… I don’t know what was happening but eventually I managed to do it and here they are!
Watch the video below to see how to use my Lindor Lindt chocolate holder SVGs. Keep scrolling for a written tutorial.
Materials list to make paper chocolate holders
Here is a list of the materials that I used to make this project:
Please note that some of the links included in this article are affiliate links, which means that if you click through and make a purchase I may receive a commission (at no additional cost to you). You can read my full disclosure at the bottom of the page.
- Cricut Maker
- Light blue Cricut cutting mat
- Cardstock in various colours
- Collall All Purpose Glue
- Needle Tip Applicator Bottle
- Double sided tape runner
- Lindor Lindt chocolates (regular and Salted Caramel)
How to make snowman & reindeer Lindt holders for Christmas
Here’s how to make your very own snowman & reindeer chocolate holders using a Cricut machine!
Step 1) Download the file & unzip the downloaded folder
Use the box below to download the cutting files for this project. Please note that this is not a free file.
It is part of the Christmas Craft Countdown which is a collection of 20 exclusive Christmas themed craft projects.
This design is part of the 2021 Christmas Craft Countdown.

Just want this file without signing up for the Christmas Craft Countdown? Purchase it here
If you have already purchased the Christmas Craft Countdown,
please login to your account.
Before you upload the SVGs to Design Space, you need to unzip the download folder that they come in.
- How to unzip a folder on Windows computer
- How to unzip a folder on a Mac
- How to unzip a folder on an iPad/iPhone
- How to unzip a folder on an Android device
Step 2) Upload the SVG file into Design Space
Open up Cricut Design Space and choose the SVG file that you want to upload.
Within the folder for this project there are four different SVG files – there are two snowmen and two reindeer.
The difference is that one version has a little hole at the top that you could thread a ribbon through it to hang it on a Christmas tree and the other version doesn’t have that hanging bit, so if you just wanted to give it as little favour or a gift then that would be the version to use,
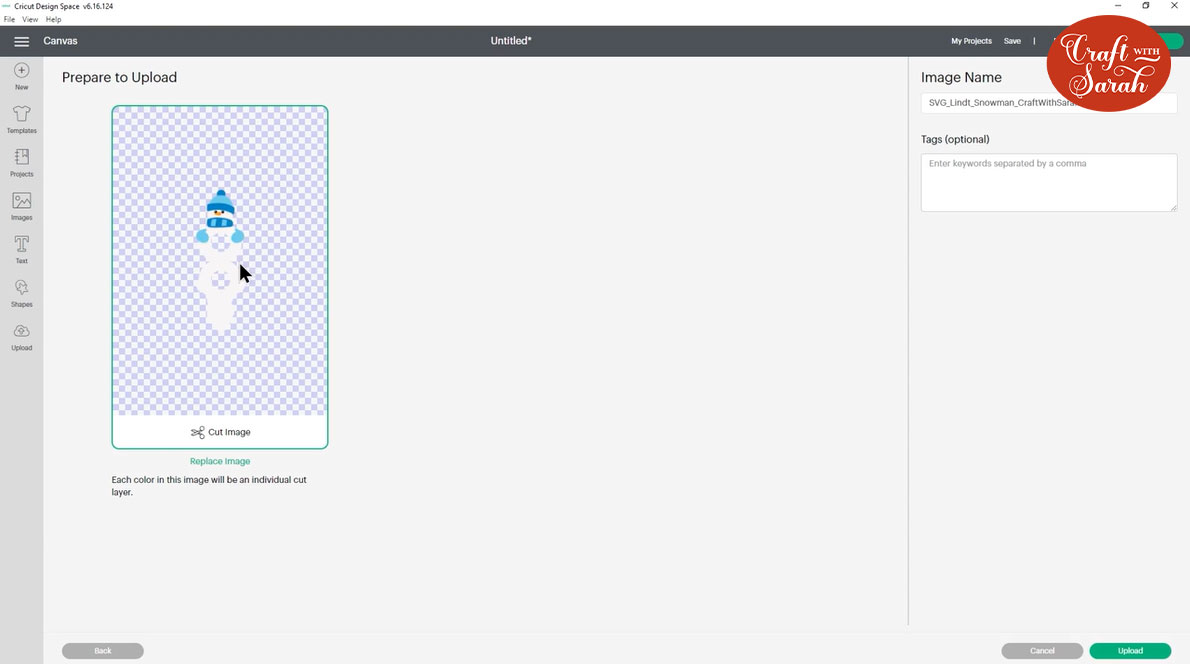
Make sure you upload the file which starts SVG_ in the filename!!
This is how it should look after you have uploaded the file:
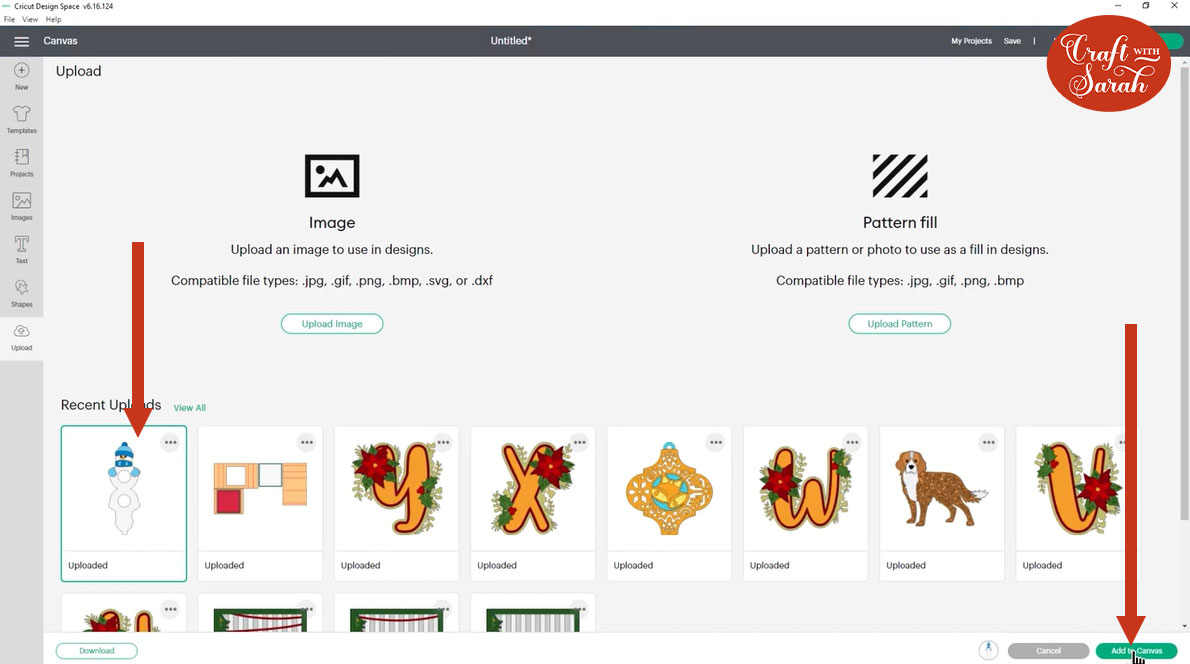
After uploading, the design will show in your “Recently Uploaded Images”. Click on it and then press “Add to Canvas” to put it onto your Project.
Step 3) Check the size of the designs
The SVGs should load in at the correct size needed to cut them out and put the little chocolate in the middle, but it’s a good idea to check the sizes before cutting them out.
The reindeer should be 4.006 inches wide and 8.585 inches tall. Remember, it’s going to be folded in half so your final height will actually be half of that.
The snowman should be 2.787 inches wide and 8.196 inches tall.
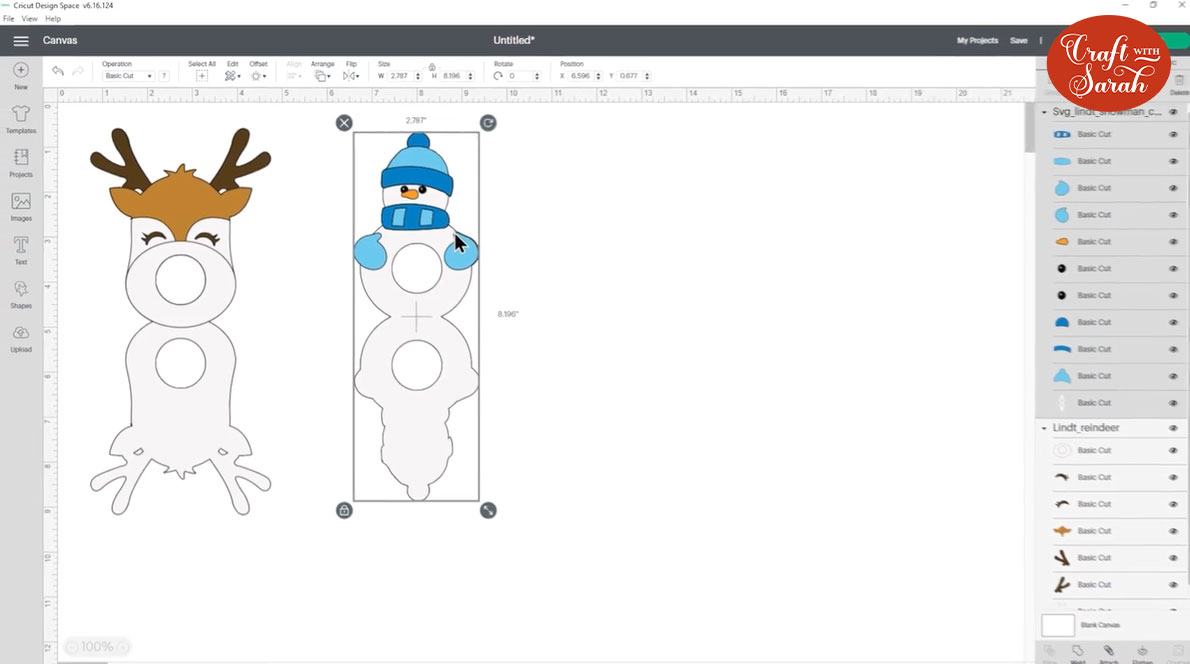
You can make them a little bit bigger or smaller than that if you want, but remember that the size of the circle in the middle has been specifically designed to fit those Lindor chocolates so if you change the size too much then you might find that they won’t fit anymore.
If you’re using a different kind of chocolate or candy then you might need to play about with the size until you get it to cut out exactly as you need it to so that it will hold your sweet in the middle without it falling out.
When the sizes are correct, cut everything out from cardstock.
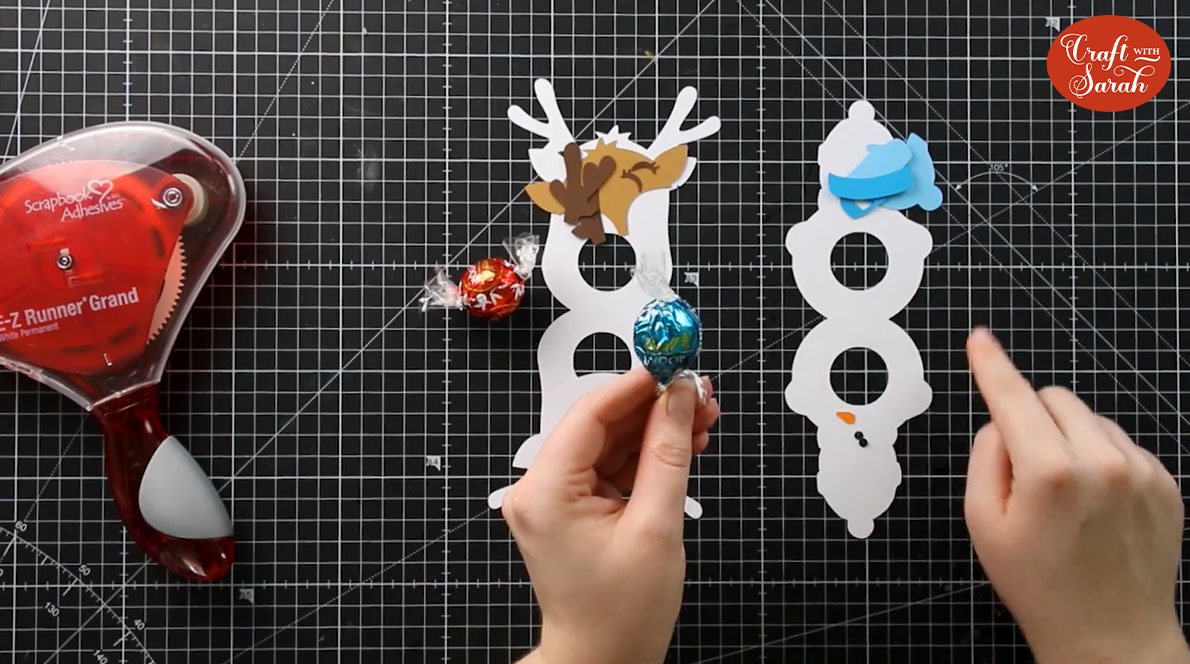
Step 4) Stick the details onto the chocolate holders
Fold the main shapes in half and then glue on the detailed parts.
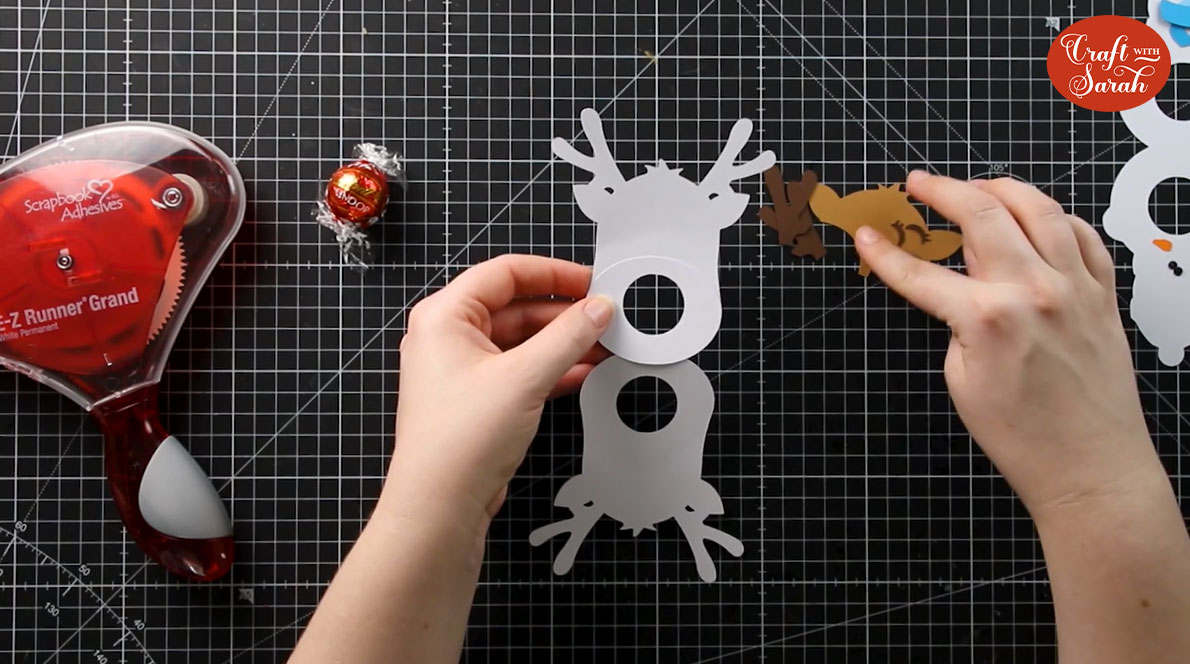
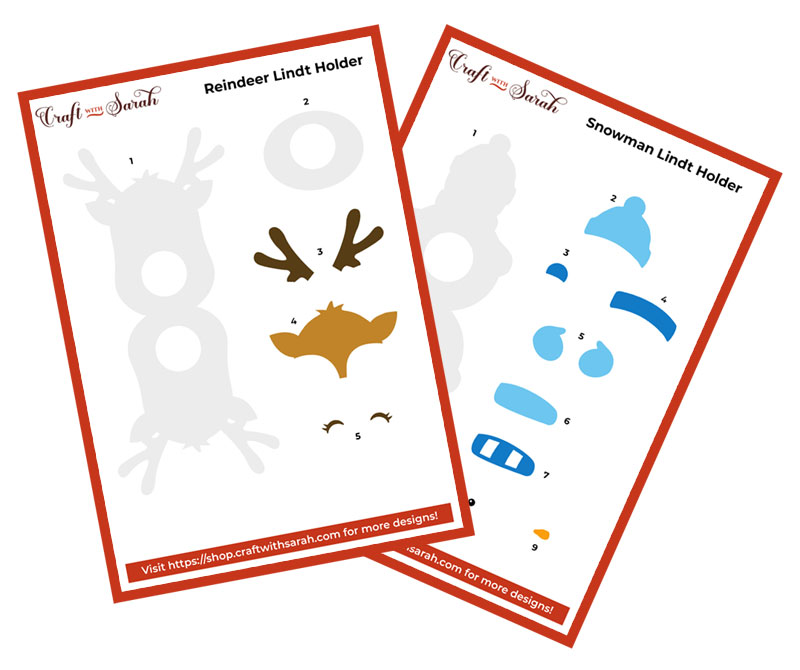
Included in the download folder for this design is a PDF file called “Assembly Instructions.pdf”.
Open that on your computer and use it as a guide to see the order to stick the layers together in.
This PDF file can be printed if you don’t craft near to a computer.
Step 5) Add the chocolates
When the glue is dry, it’s time to add the chocolates!
Position the chocolate inside the middle of the sweet holder and use double-sided tape to close it at the top and seal the chocolate in place.

If you are making the treat holders with the holes in the top then thread some ribbon through and tie a knot so that you can hang them on your Christmas tree as decorations.

I hope you enjoyed this tutorial on how to make a DIY snowman and reindeer Lindor Lindt chocolate holders for Christmas.
This project is part of 2021's Christmas Craft Countdown.
Happy crafting,
Sarah x
