DIY Gift Tags: Design Your Own SHAKER Gift Tags!
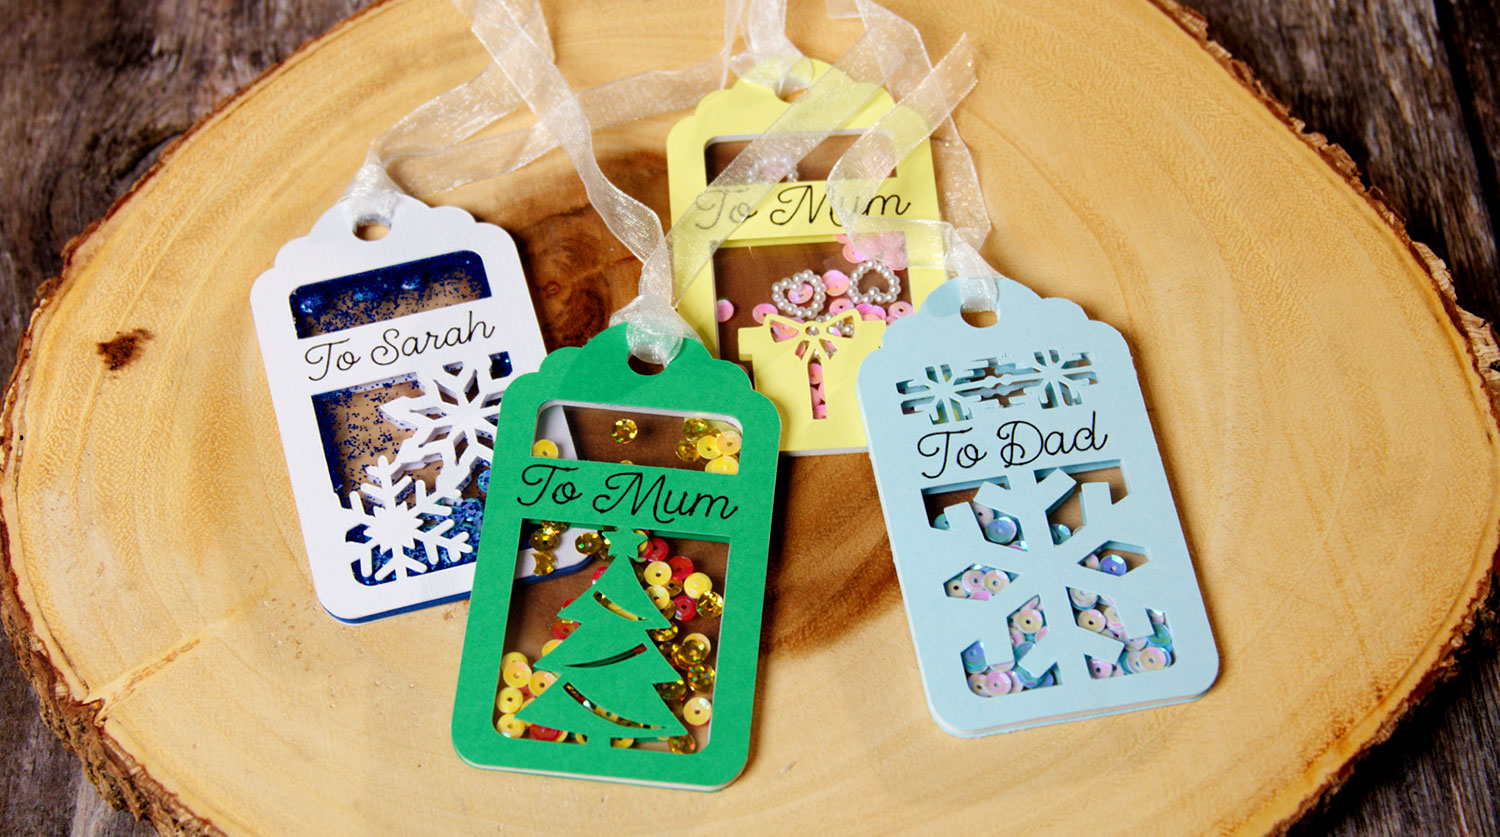
Decorate your Christmas presents with DIY gift tags for that extra special personal touch.
Welcome to Day 17 of the Christmas Craft Countdown, where I’m revealing a new Christmas craft project every day for 20 days.
Today we’re going to be making some shaker gift tags. This is a wonderful way to add some extra sparkle to your gifts this Christmas.
I’ll show you how to make your own designs in Cricut Design Space but there are several pre-made ones that you can download too.
This project is part of 2021's Christmas Craft Countdown.
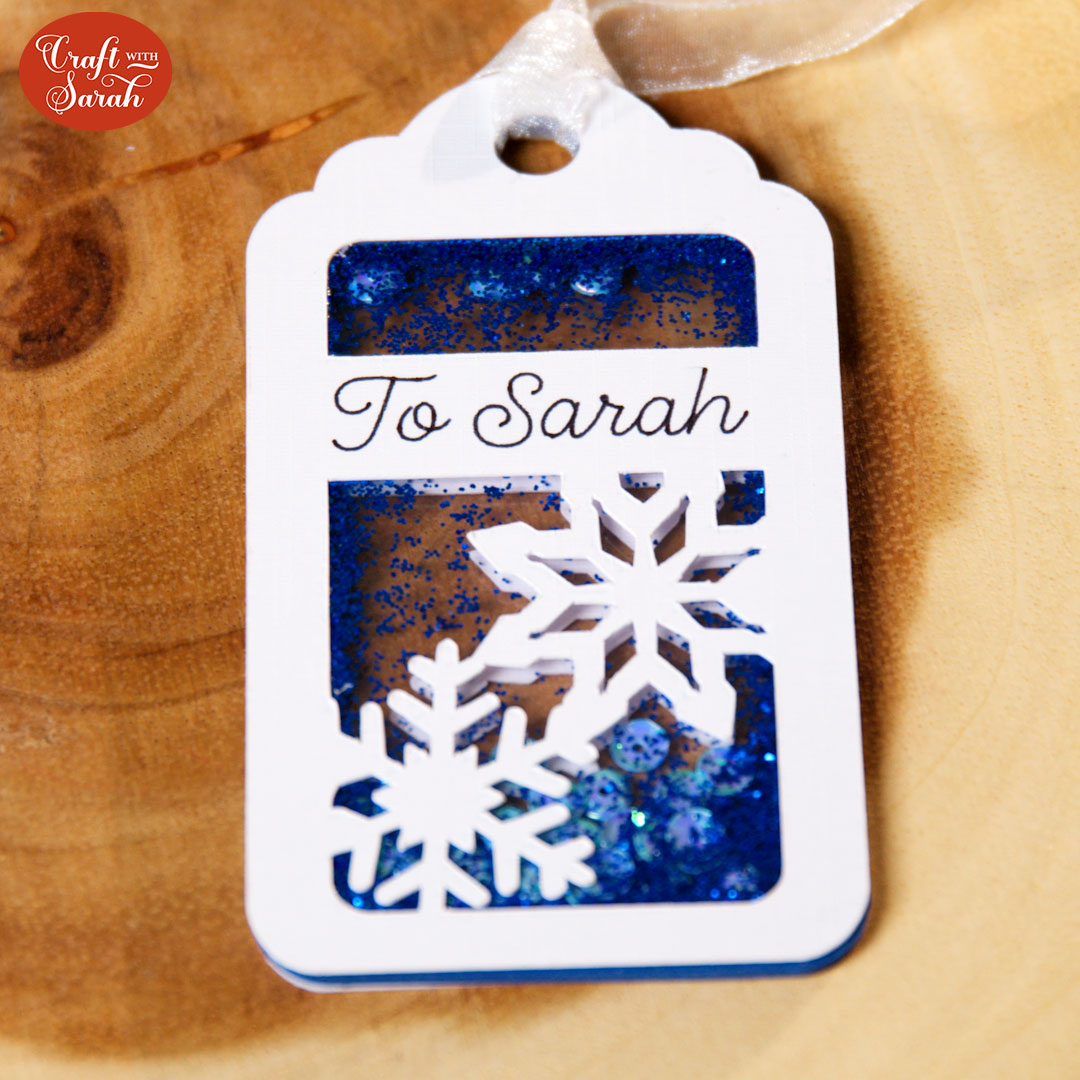
How to design DIY gift tags
Watch the video below to see how to make DIY gift tags. Keep scrolling for a written tutorial.
This video was recorded using Design Space version 6.17.143. Later versions of Design Space may look different.
Materials list to make a shaker gift tags
Here is a list of the materials that I used to make this project:
Please note that some of the links included in this article are affiliate links, which means that if you click through and make a purchase I may receive a commission (at no additional cost to you). You can read my full disclosure at the bottom of the page.
- Cricut Maker
- Light blue Cricut cutting mat (for vinyl)
- Acetate
- Sequins
- Extra fine glitter
- Collall All Purpose Glue
- Needle Tip Applicator Bottle
- Fun foam OR foam tape (optional)
- Strong grip Cricut mat (for foam – optional)
- Cricut knife blade (optional)
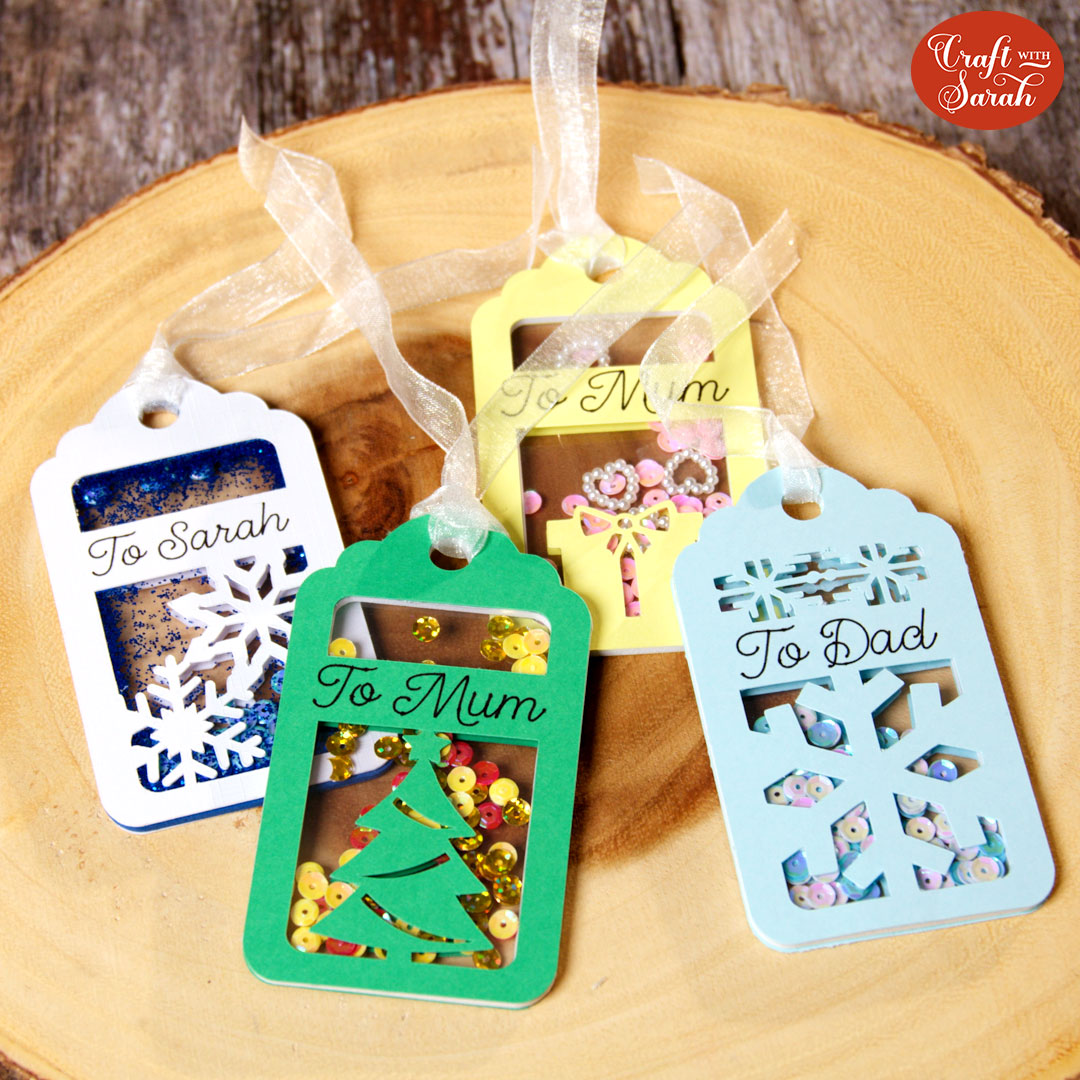
How to make DIY gift tags for Christmas
Here’s how to make your own DIY gift tags filled with glitter and sequins for the ultimate festive cheer!
Step 1) Download the file & unzip the downloaded folder
Download the gift tag files using the box below.
Use the box below to download the cutting files for this project. Please note that this is not a free file.
It is part of the Christmas Craft Countdown which is a collection of 20 exclusive Christmas themed craft projects.
This design is part of the 2021 Christmas Craft Countdown.

If you have already purchased the Christmas Craft Countdown,
please login to your account.
Before you upload the SVG to Design Space, you need to unzip the download folder that it comes in.
- How to unzip a folder on Windows computer
- How to unzip a folder on a Mac
- How to unzip a folder on an iPad/iPhone
- How to unzip a folder on an Android device
The download folder for today’s project includes several different SVG files. The one I’ll use for this tutorial is the blank template that has space for you to add your own images. If you would prefer to use the pre-made designs then you can scroll straight down to Step 4.
The pre-made designs are: snowflakes, Christmas tree and present/gift designs.
Step 2) Upload the gift tag file
Upload your chosen gift tag file to Cricut Design Space.
Make sure you choose the file which starts SVG_ in the filename!

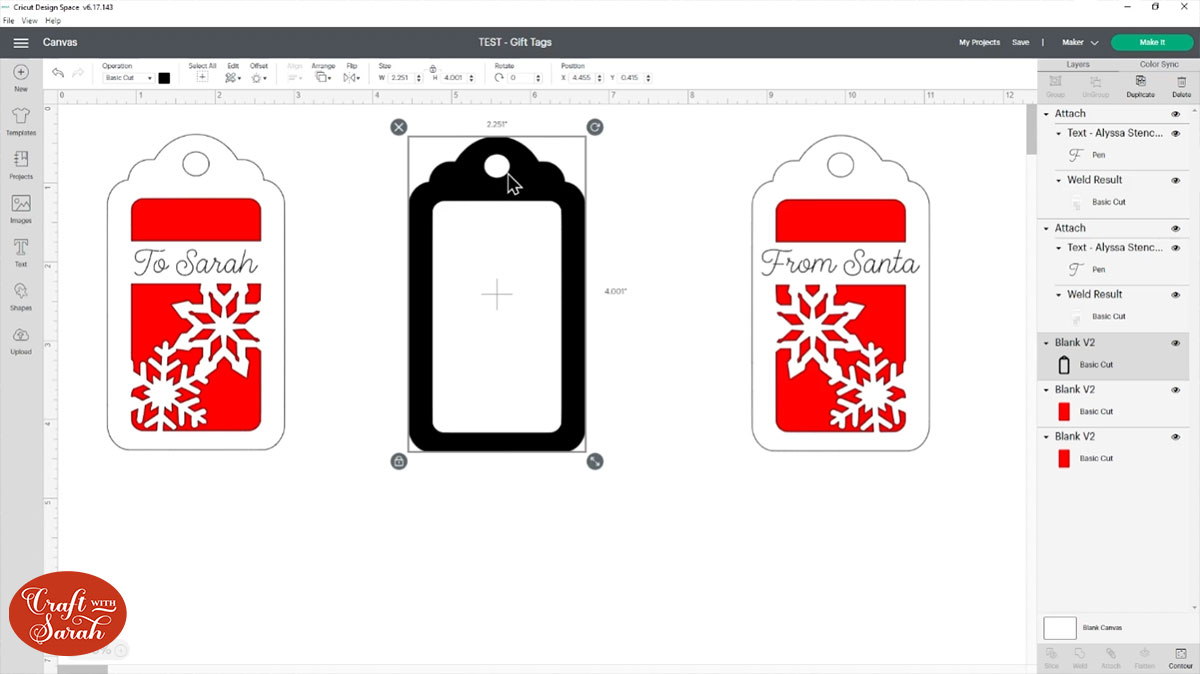
Add the design to your project and resize it to the size that you want to cut your gift tag. Mine is 4 inches tall and 2.25 inches wide.
Let’s have a look at the different layers that are included…
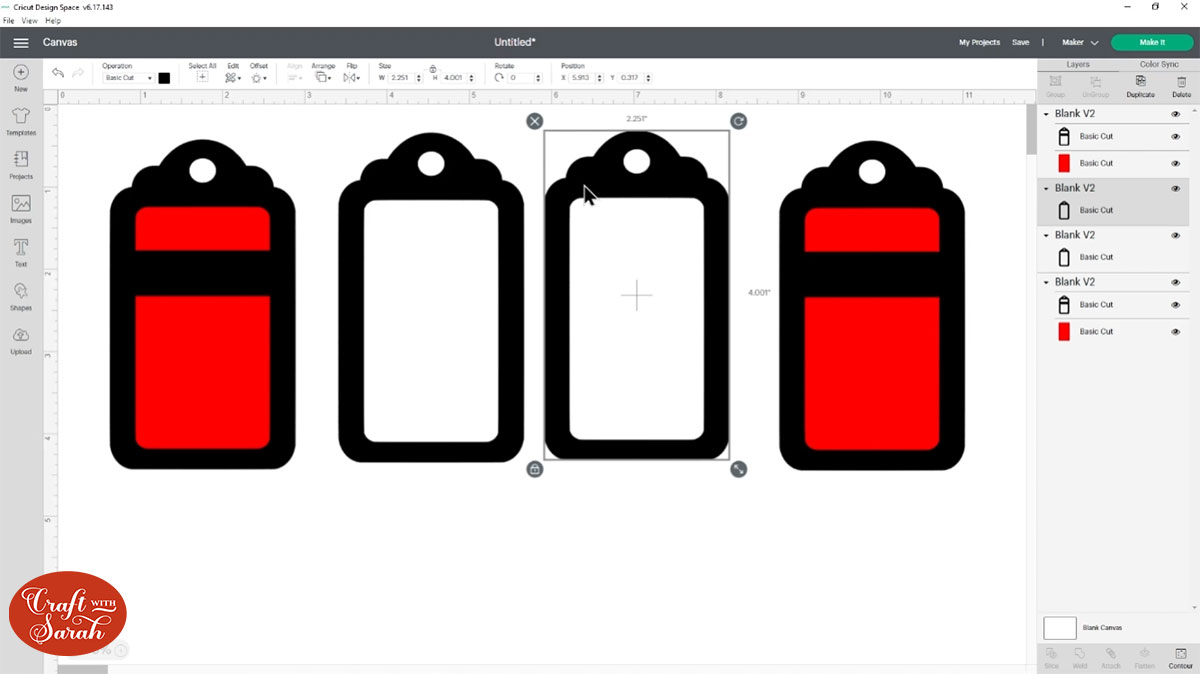
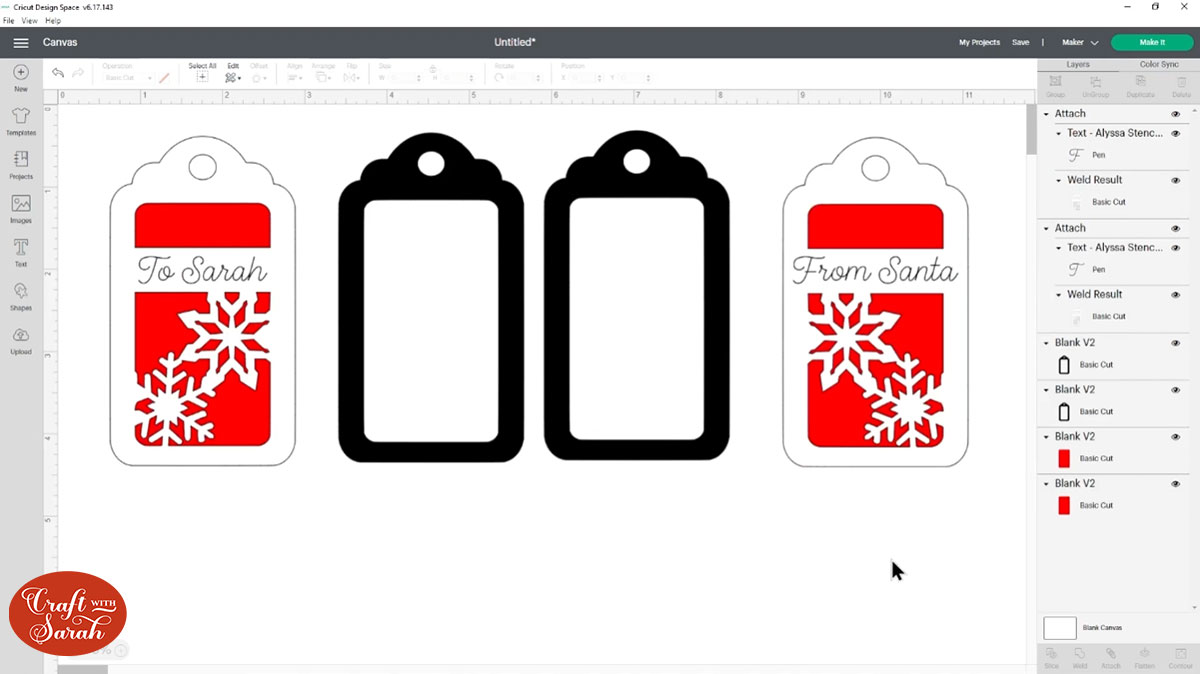
The gift tag design is made up of the following:
- A front and back piece for the design
- Two red rectangles which will be cut from acetate
- Two “middle pieces” which are used to add depth – more on this later!
Step 3) Add images to the front of the gift tag
Go into “Images” and find some Christmas pictures to use.

You want to choose an image that’s fairly simple and one that doesn’t have a lot of cutouts in the middle that would likely come apart when cut from cardstock.
I’ve chosen two snowflake images so now I can resize them and position them on top of the tag.
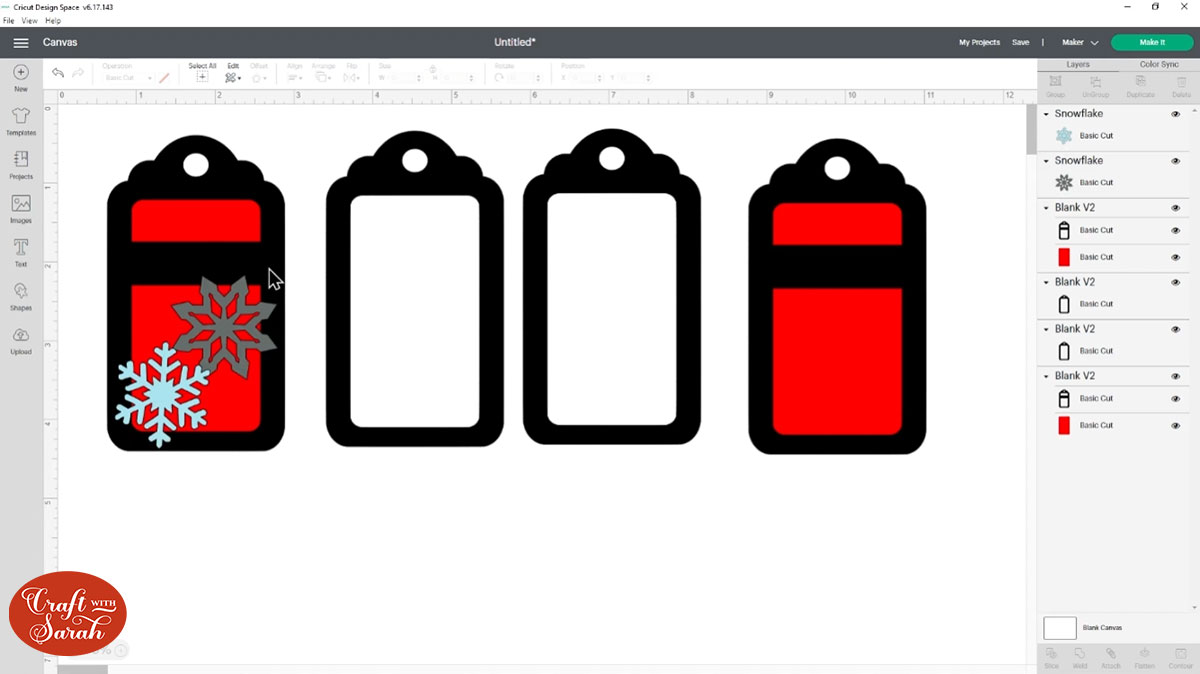
You want to try and make sure if you’re using multiple pictures that they’re touching because it will just give it more stability and also they need to be overlapping the black of the outline of the gift tag but don’t let them go outside the edge.
We need to join all these layers together so that they cut as one piece.
To do that, click one of your pictures, press Shift on your keyboard and choose any other pictures you have added, plus the gift tag piece.
Click “Weld” to join the layers together.

It should look something like this…
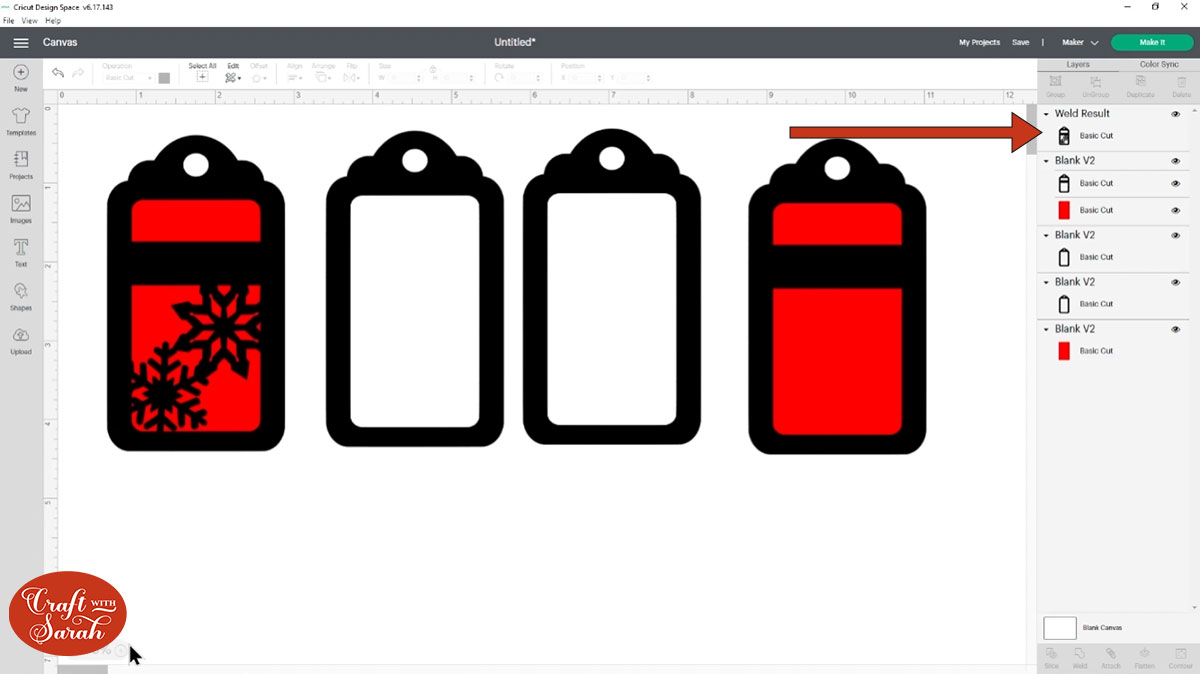
There are some teeny tiny gaps in the edges of the snowflake which would be difficult for the Cricut to cut.
To remove these, click the gift tag and then press “Contour”.
Click into the tiny piece to fill them in with the solid colour.
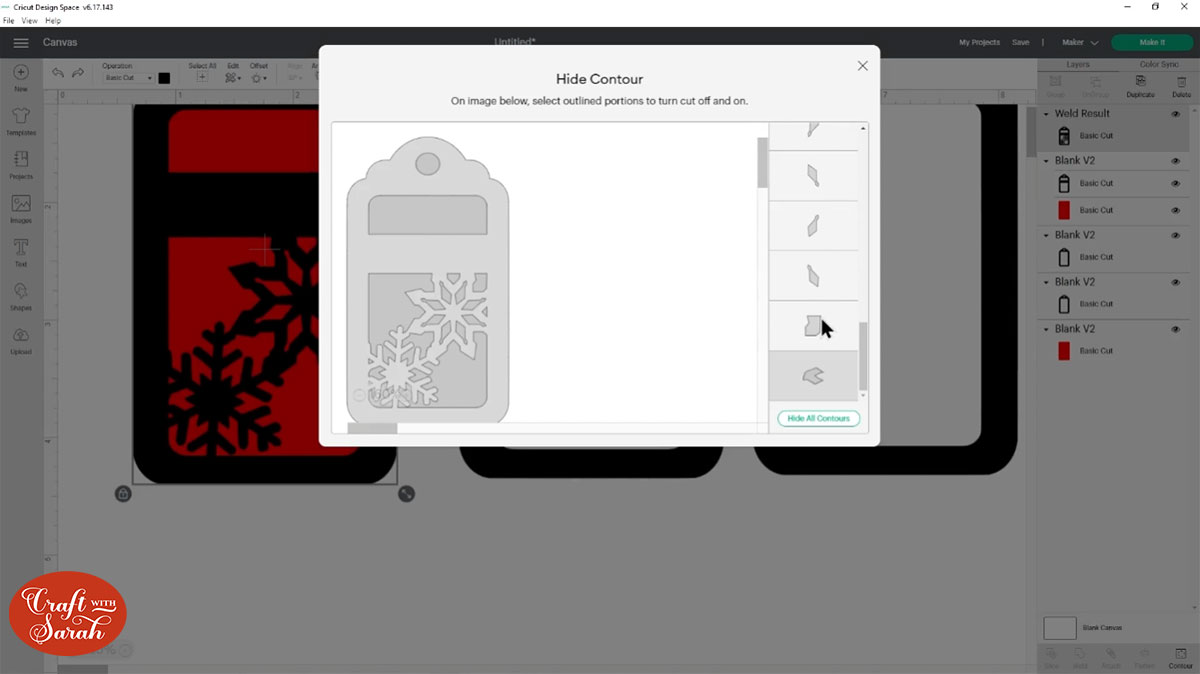
Contour being buggy and filling in the wrong pieces? Watch the video at the top of the page for how to fix it!
Step 4) Add the text
This step is optional based on if you want your Cricut to draw on the wording for the gift tags or if you would prefer to write it yourself.
I like getting the Cricut to write the words as my handwriting isn’t very pretty!
I’ll put “To Sarah” on the front and then “From Santa” on the back.
Go into “Text” and type out your wording.

Highlight the words and then go into the “Fonts” dropdown near the top of the screen.
Click into the “Filters” link and then select the “Writing” option. This changes the fonts so that you only see the ones that the Cricut can draw with a pen.
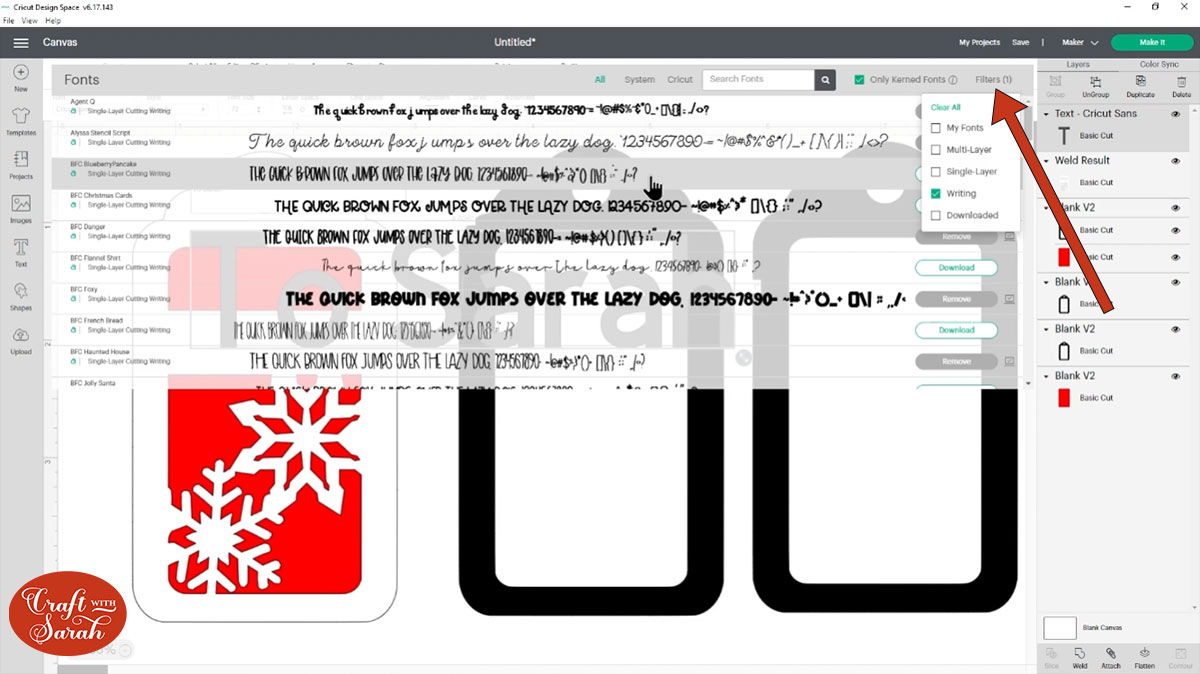
Choose you font then resize the text to fit on the gift tag.
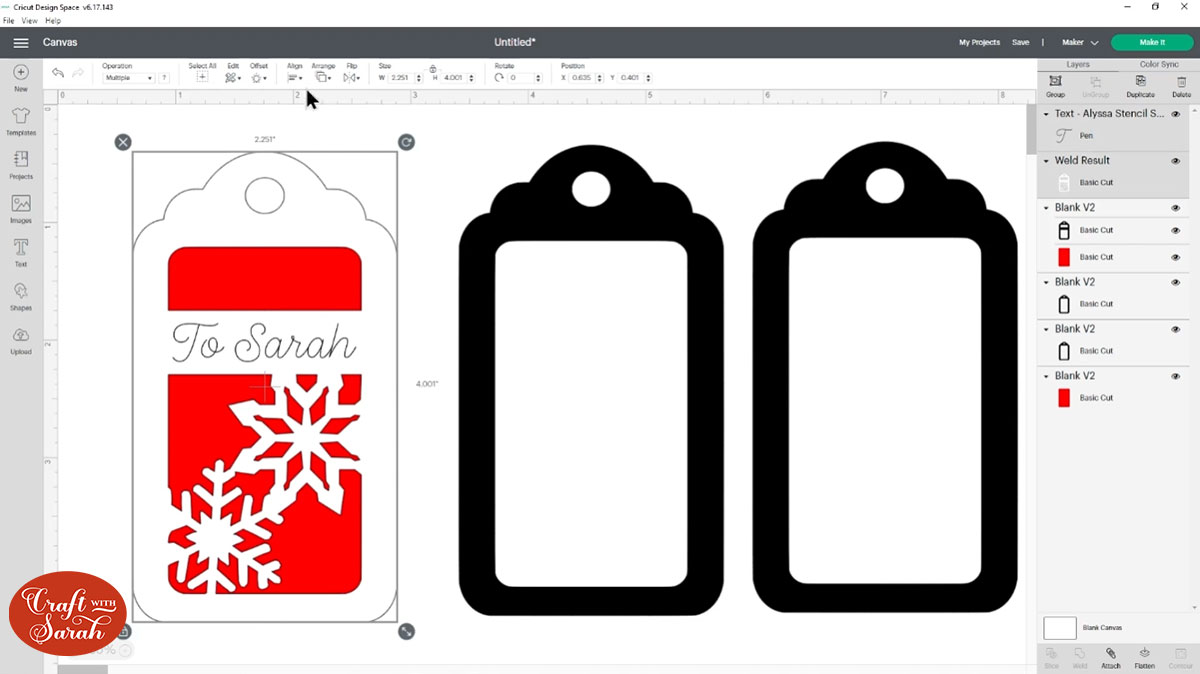
Line the text up perfectly by clicking the text layer, pressing shift on your keyboard to also select the gift tag piece, then go to “Align” > “Center Horizontally”.
That makes sure the text is lined up in the middle of the gift tag.
Next we need to tell the Cricut that we want it to draw the text on top of the gift tag. To do that, select both layers and press “Attach”.

If you want to decorate the other side of the gift tag too then its easiest to delete the “empty” piece on the screen and then click the one you have already decorated and Duplicate it to make a copy.
You need to “Flip” the duplicated version horizontally so that the patterns face the other way, otherwise they won’t line up when we stick it all together once it’s been cut out.
Step 5) Decide on how to “space” out the shaker elements
We need to add some space inside the gift tag to give the sequins and glitter space to move about.
There are three different ways to do that.
The first way is to cut two sheets of cardstock which would go in the middle of the pieces we have just worked on.
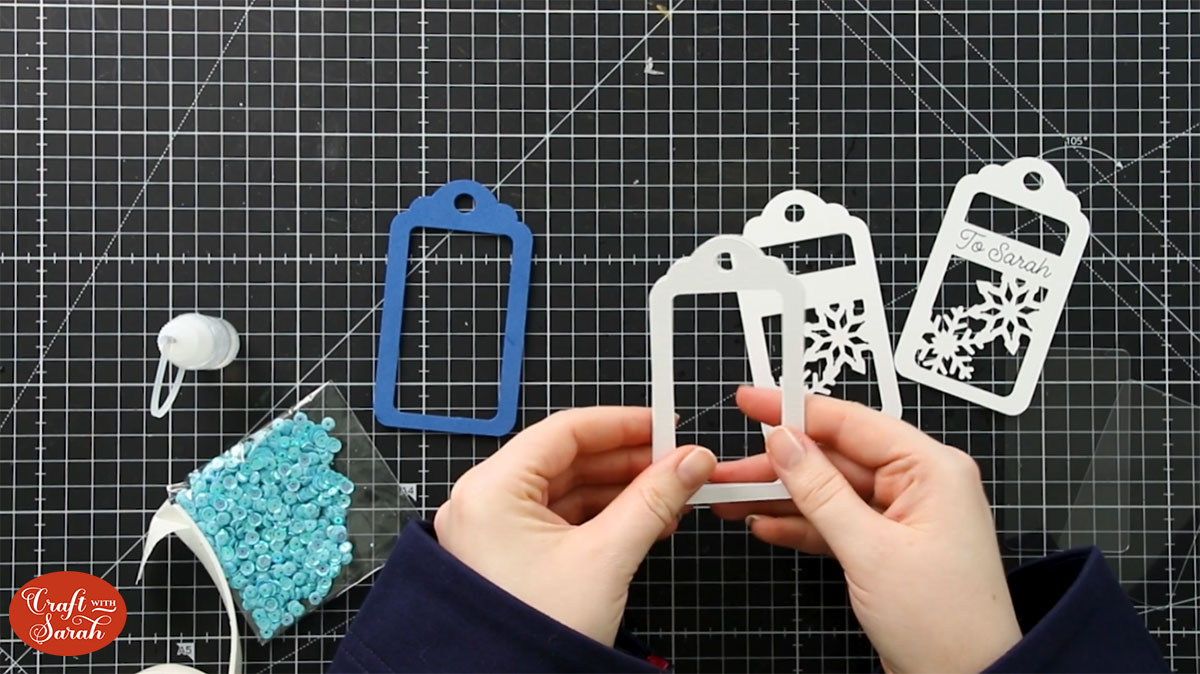
Another way you can do it is to use some foam tape. Stick your foam tape all the way around the edge and then that will create the depth between the two sides to let the sequins move about. This does work quite well but it is a little bit fiddly to cut this to size and you need to make sure there are absolutely no gaps in there otherwise all of your glitter will come out.
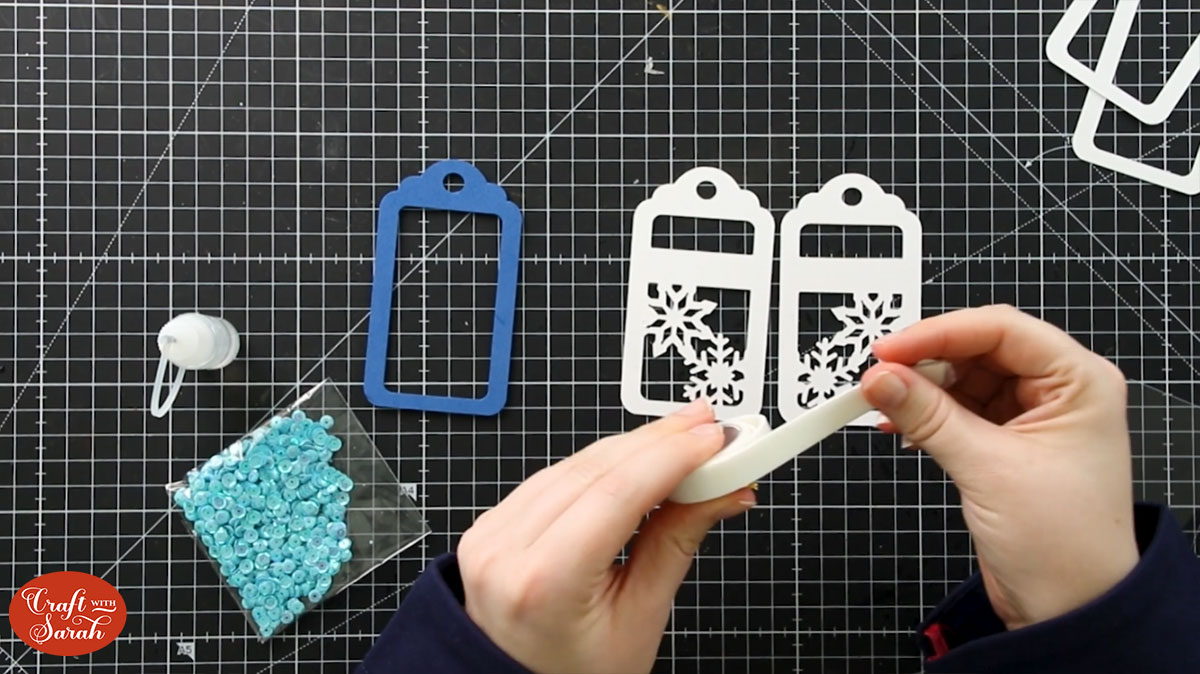
The third way, which I think is the best way, is to cut one of the middle pieces from craft foam and this is nice and thick just like the foam tape and then that will sit in the middle of the two bits and we’ll have our acetate in there and then that creates the depth to let the sequins move.
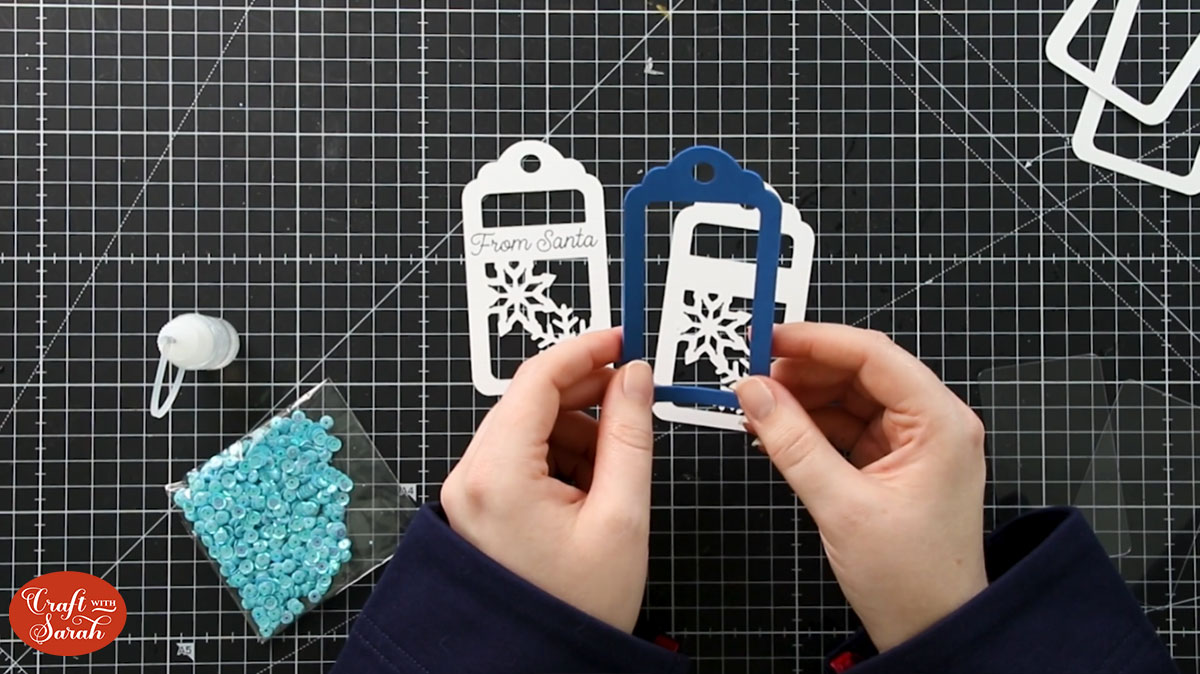
Decide on the method you want to use and then delete the middle pieces of the design in Design Space if they aren’t needed.
I’m going to use the third method, so I need to delete just one of the middle pieces and cut the remaining one from foam.
Related post: How to cut craft foam on a Cricut
Click “Make It” and cut everything out. Don’t forget to cut the red squares from acetate!
Step 6) Stick the gift tag together
I’ve got my front and my back here with the writing on and then you can see why we flipped the design in Design Space it means that these snowflakes perfectly line up on the front and the back.
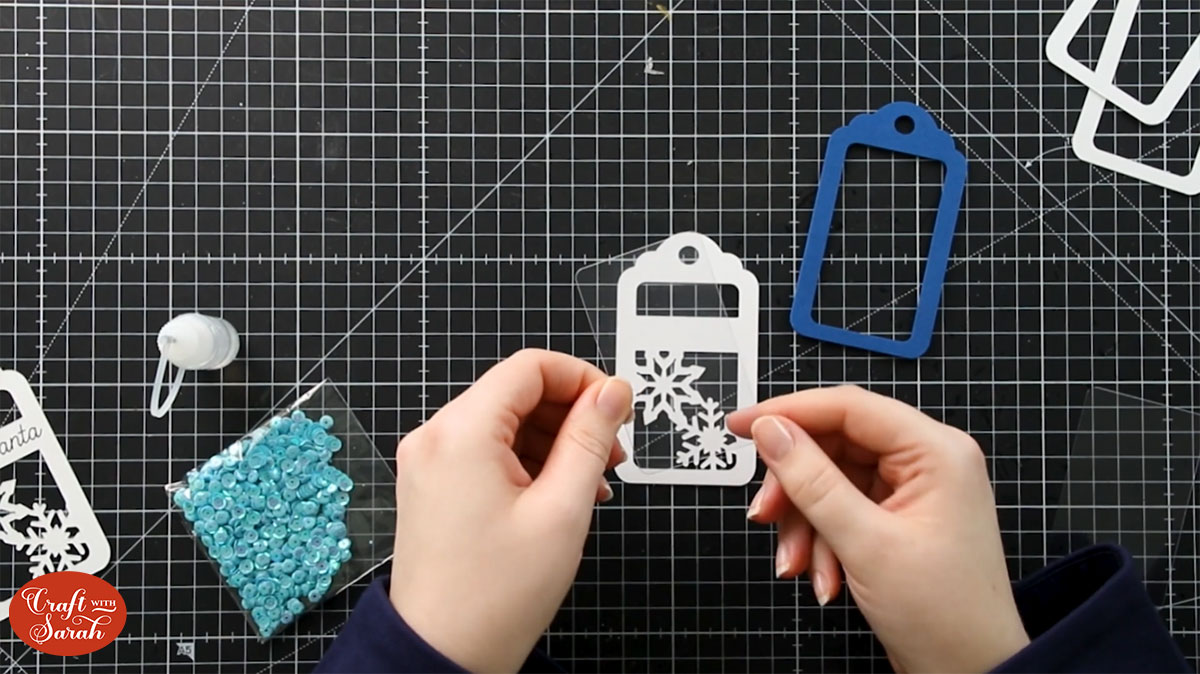
I’m going to get one of the sides and turn it upside down so that I can’t see the writing on there and then I need to first put my acetate in.
Put glue all the way around the back of the cutout window. Make sure there are NO gaps in the glue, otherwise that will leave a space for the glitter to escape.
Stick the acetate on top and press down the glue to make extra-super-duper-sure that there aren’t any spaces.
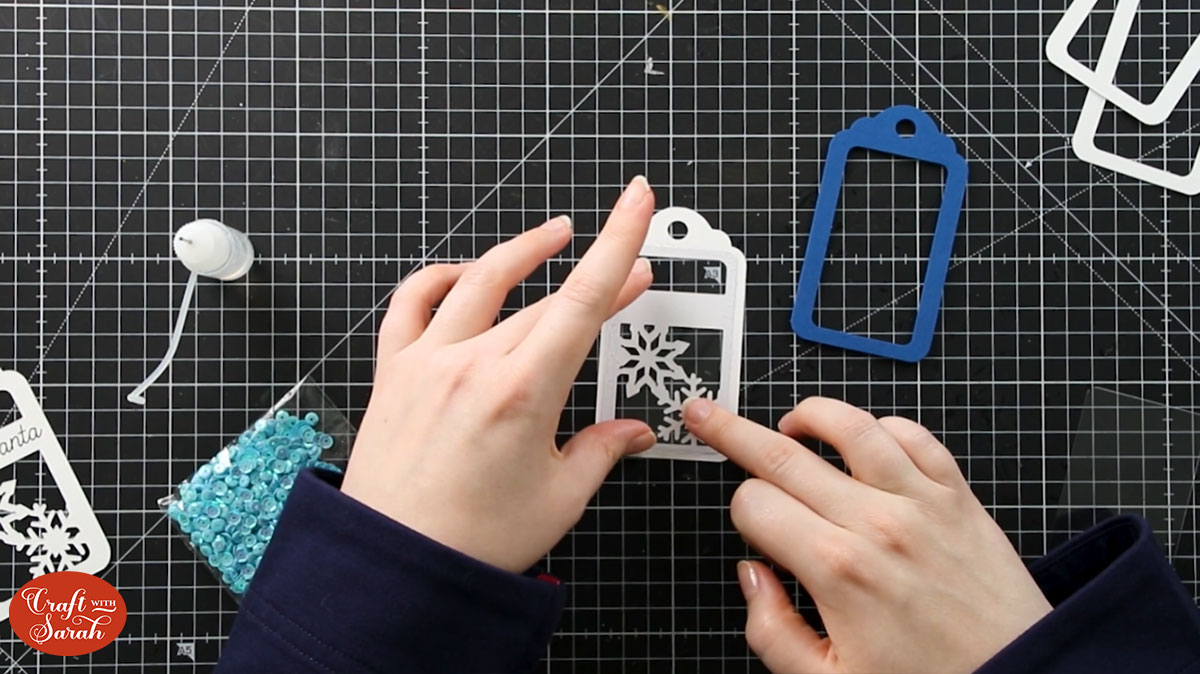
Repeat the same with the other side of the gift tag.
Glue your spacer to one half of the gift tag.
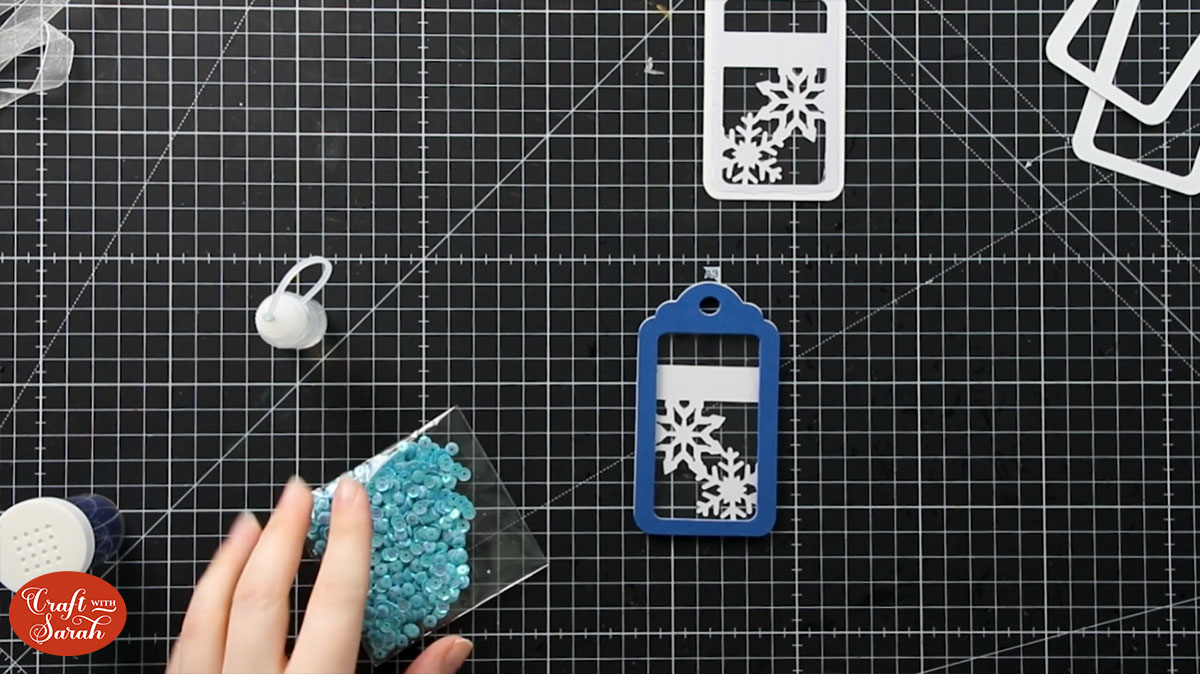
Fill the gap with sequins (and glitter if you are brave!).
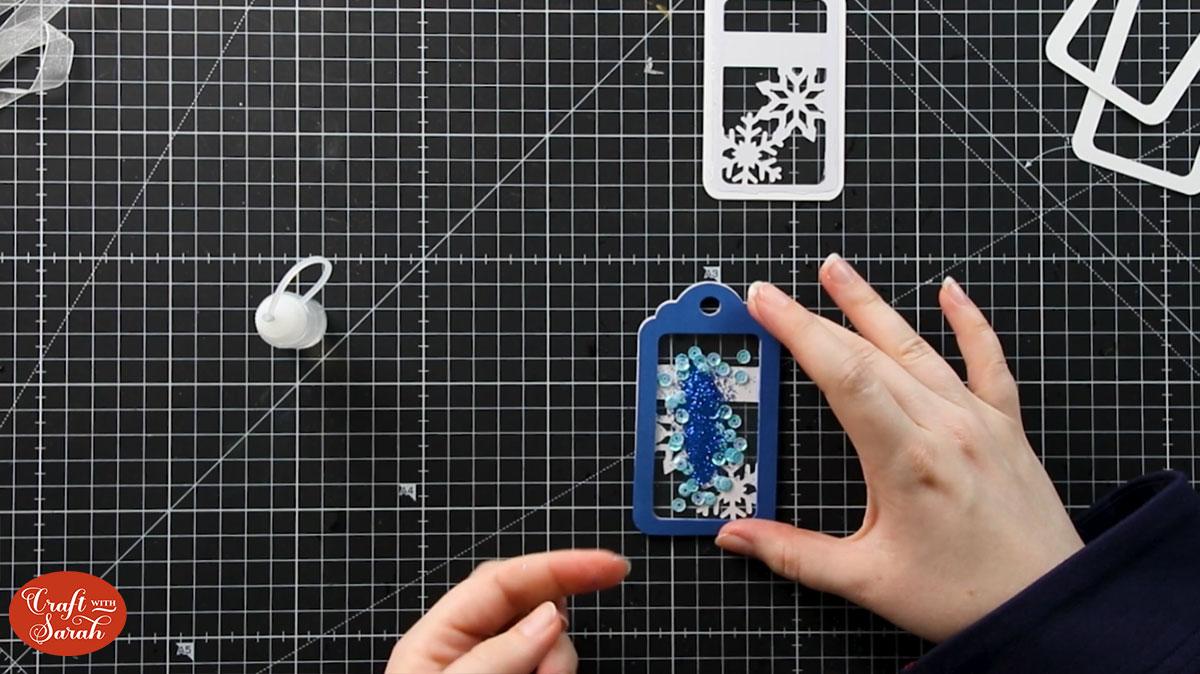
Glue the other piece of the diy gift tag onto the back. Again, make sure there aren’t any gaps in the glue!
Finally, thread some ribbon through the hole in the top and there you go – your DIY gift tag for Christmas is all finished!

I hope you enjoyed this tutorial on how to make shaker gift tags with a Cricut machine.
This project is part of 2021's Christmas Craft Countdown.
More shaker craft tutorials
Want to make more shaker crafts?
- Part 1: Simple shaker cards
- Part 2: Shaped shaker cards
- Part 3: Complex shaker cards
- Part 4: Rainbow Shaker Card
Happy crafting,
Sarah x
