
CMC 2024 Day 05 ✂️ Gift Card Holders

It’s Day 05 of the 2024 Card Making Countdown!
Hello and welcome to Day 5 of the Card Making Countdown, where I’m showing you how to make 10 different types of card with your Cricut machine in 10 days.
Today we’re making gift card holders!
Looking for a way to make your gift cards extra special? Gift cards make great presents but they often look a bit boring and need jazzing up a little. 😀
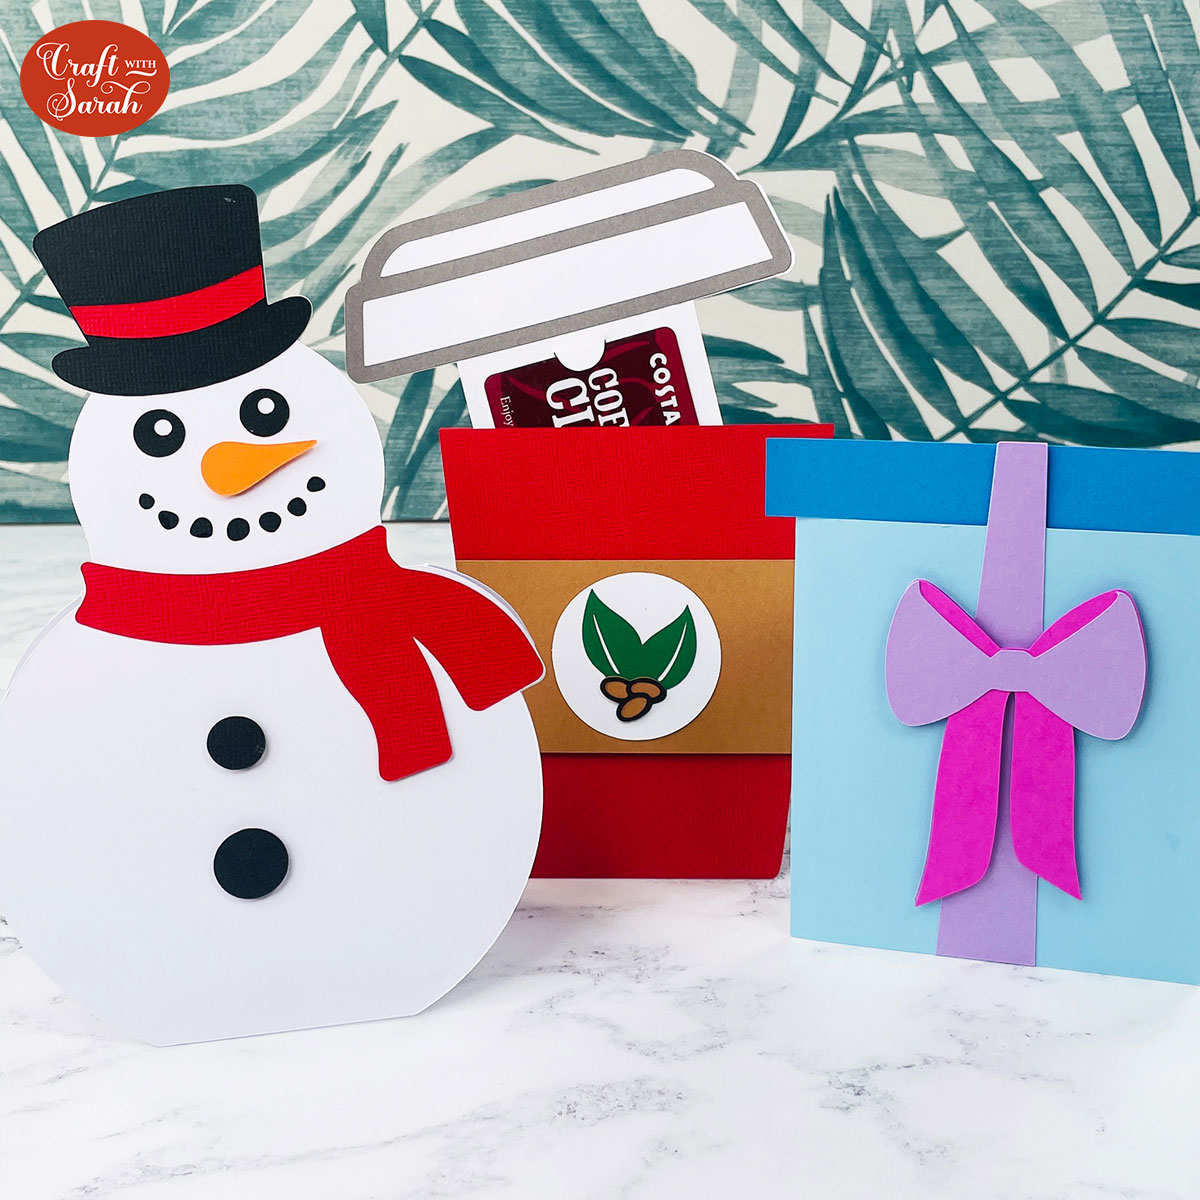
I’ve made these beautiful cards which have a little secret inside as they open up to reveal a gift card. Two different designs are included for you as part of today’s download. But remember, they’re only available for free for 24 hours, starting at 9am EDT on 5th June 2024.

I hope you enjoy these gift card holders, as well as the segment on how to make your own custom gift card holders using any image in Cricut Design Space.
This project was part of 2024's Card Making Countdown.
Materials supply list
Here is a list of the materials that are required to make this project.
Please note that some of the links included in this article are affiliate links, which means that if you click through and make a purchase I may receive a commission (at no additional cost to you). You can read my full disclosure at the bottom of the page.
- Cricut machine
- Light blue Cricut cutting mat
- Cricut scoring wheel or scoring stylus
- Cardstock in a range of colours
- Glue or double-side sticky tape (I like Bearly Art Glue and Collall brands of glue)
- Foam squares/pads
This project is suitable for the following types of Cricut machine: Explore Air 2, Explore Air 3, Maker, Maker 3, Joy Xtra and Joy.
Foundation learning
If you’re new to crafting with your Cricut, you may find the below links helpful.
They teach some of the skills mentioned throughout this tutorial.
- How to upload SVG files into Design Space
- How to score with a Cricut (even without scoring tools)
- Print then cut tutorial
- Design Space tools (Combine, Attach, Slice, Weld, Flatten, etc.)
- Pattern fill tutorial (for making backgrounds & cutting images to a specific shape/size)
- Free envelope SVGs that can be sized to fit any card
- How to write inside cards with Cricut pens
- How to cut layered designs at a small size
- Design Space tips & tricks
- Cricut pens tutorial
Video tutorial for gift card holders
Watch the video below to see how to make gift card holders with a Cricut machine.
The first part of the video shows how to use the pre-made gift card holder designs that are included as part of today’s project.
The second part of the video shows how to design your OWN gift card holders from scratch within Cricut Design Space.
If you prefer to read rather than watch, keep scrolling!
PART ONE: Cricut gift card holders using pre-made templates
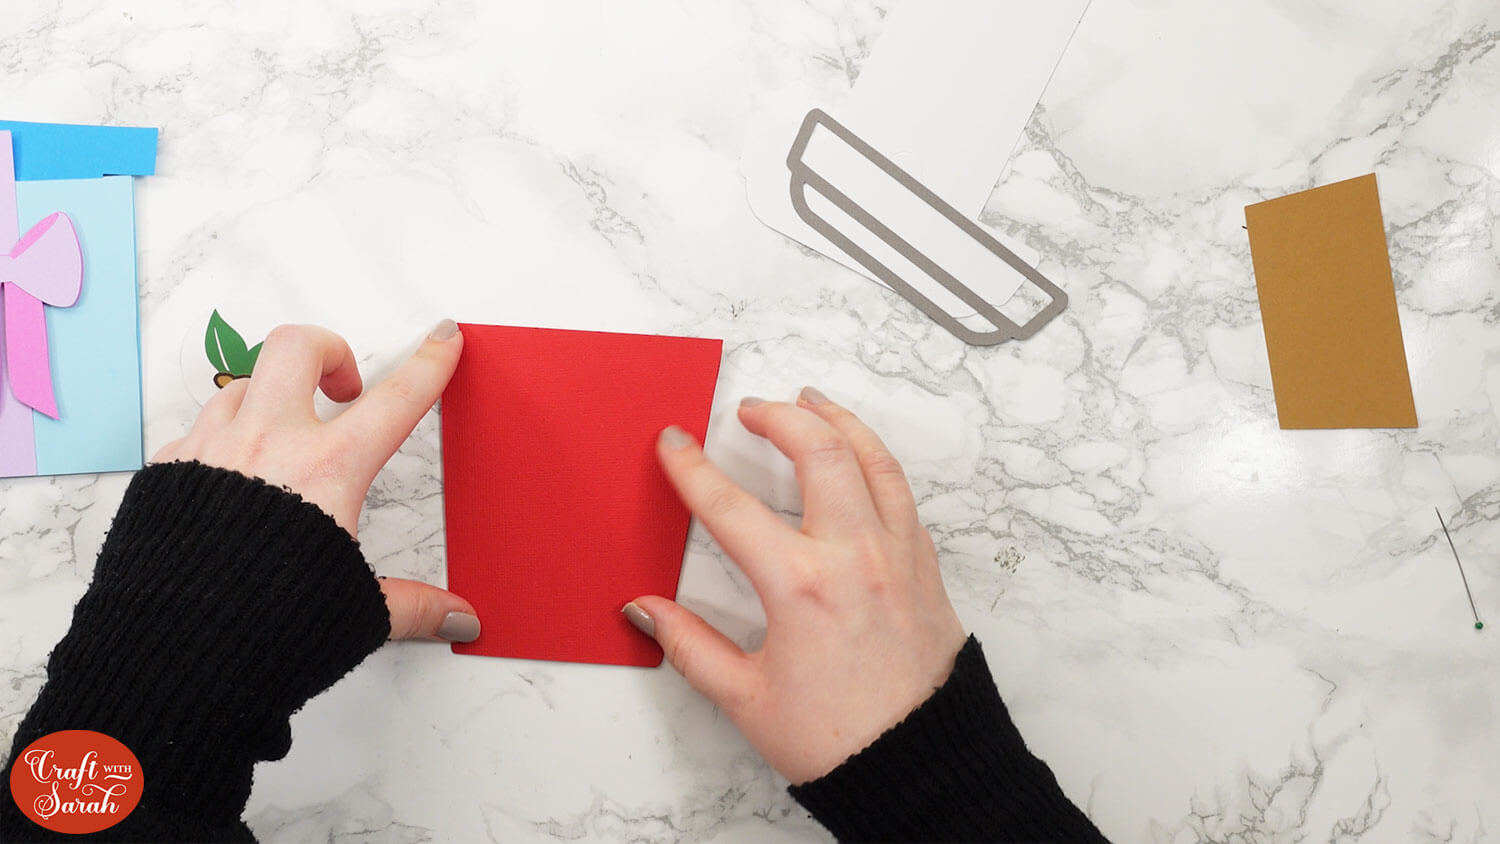
Here’s how to make your very own gift card holders with a Cricut machine, using the coffee cup shaped design from today’s Countdown project.
I’ve also included a present-shaped holder, which is based on an existing birthday template, but the version included with today’s Countdown project is a little different, as the present opens up into a greetings card.
Scroll further down this page for how to design your own gift card holders.
Step 1) Download the file(s) & upload to Design Space
Download the files using the box below.

Before you upload the files to Design Space, you need to unzip the download folder that they come in.
- How to unzip a folder on Windows computer
- How to unzip a folder on a Mac
- How to unzip a folder on an iPad/iPhone
- How to unzip a folder on an Android device
Choose your preferred design and upload the SVG file into Cricut Design Space.
TIP: Make sure you upload the files which start svg- in the filename. Not sure how? Here’s how to upload SVG files into Cricut Design Space.

Note that your SVG doesn’t have the grey rectangle on the right-side of the screen. I created that while I was practicing the steps to take in the video recording and then I forgot to delete it 🙂
Step 2) Add a score line (optional)
There are a couple of things we need to do to the design before we cut it and to make sure it fits the gift card correctly.
First, we need to add a score line to the main card to make it a little bit easier to fold.
Don’t have a scoring tool? Here’s how to do Cricut scoring without one!
Click the design and separate the layers by pressing the “Ungroup” button at the top of the layers panel.
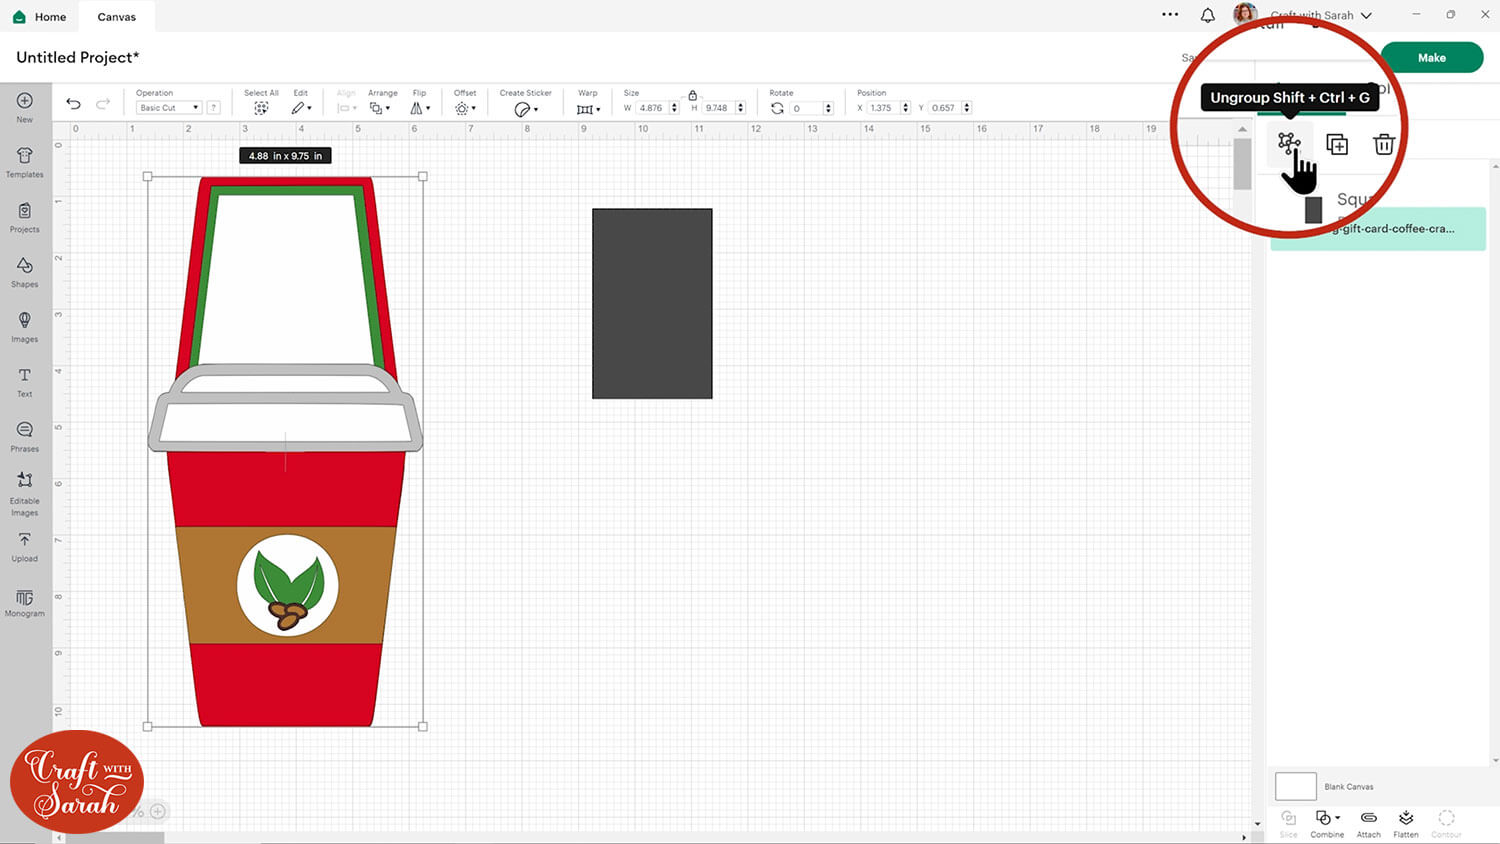
Look down the layers to find the base and move it over to the side.
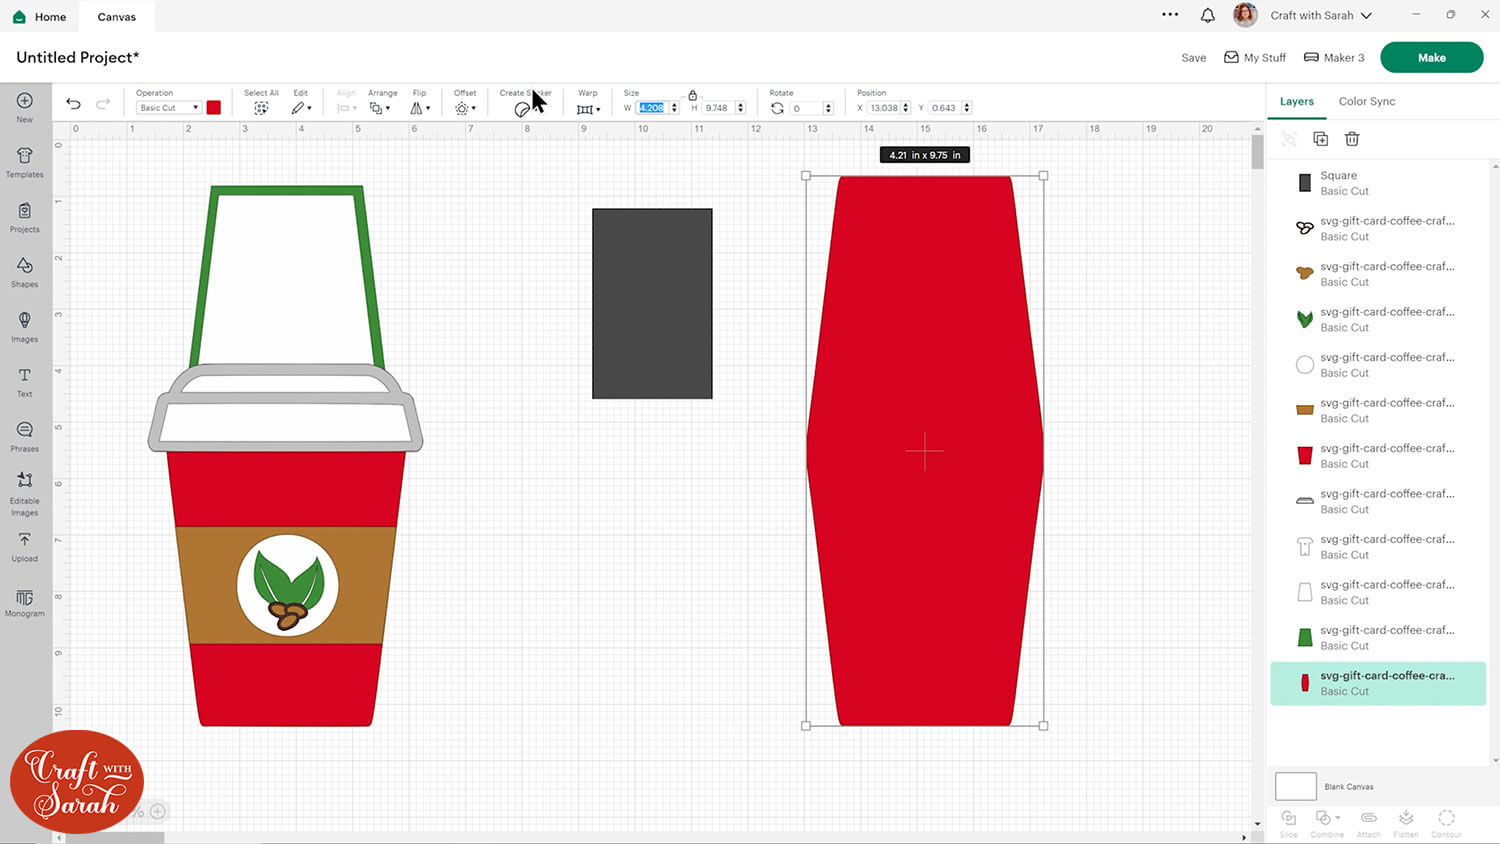
Copy the width of the base card by selecting it with your mouse and pressing CTRL and C on your keyboard or Command C on a Mac.
Then go into shapes and choose a score line. Change it to the same size by doing CTRL and V on your keyboard or command V on a Mac.
Rotate it by 90° to make it horizontal.

Select the card base layer and the score line and press Align > Align Center to put the score line exactly in the middle.
With both layers still selected, click the “Attach” button at the bottom of the layers panel.
Attaching the layers will move them to the top of the layers panel. Click the base card and press Arrange > Send to Back to move it back to the bottom.
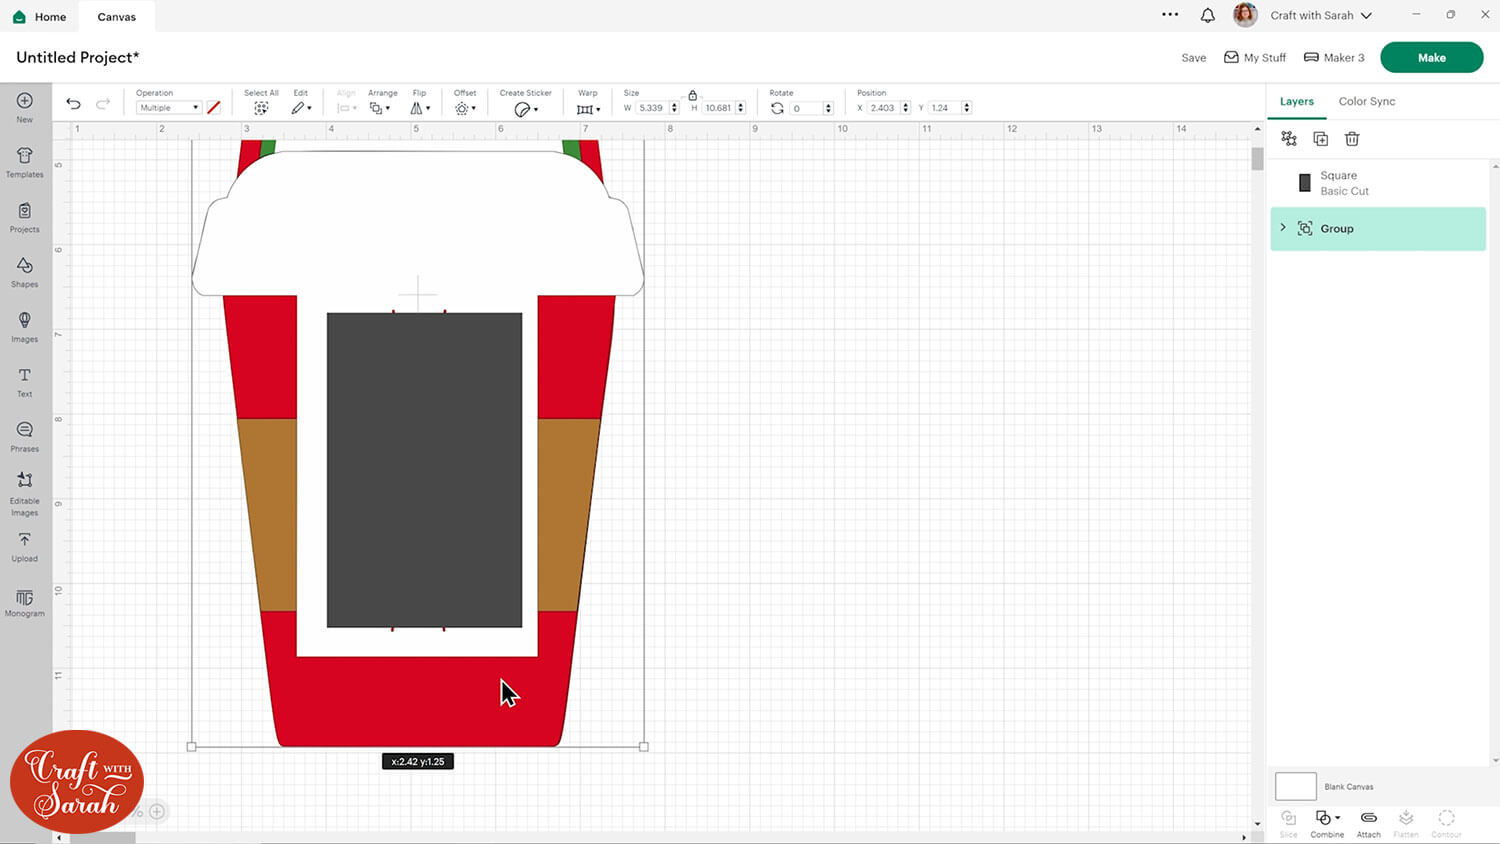
Step 3) Size to fit your gift card
Next we need to check the size of the project, to make sure your gift card will fit inside.
Look down the layers until you find one which is a white layer which has the gift card holder shape on it. Click and drag that up to the top.

Now we can drag a box around the whole of the gift card holder and group it so that it can be resized altogether.

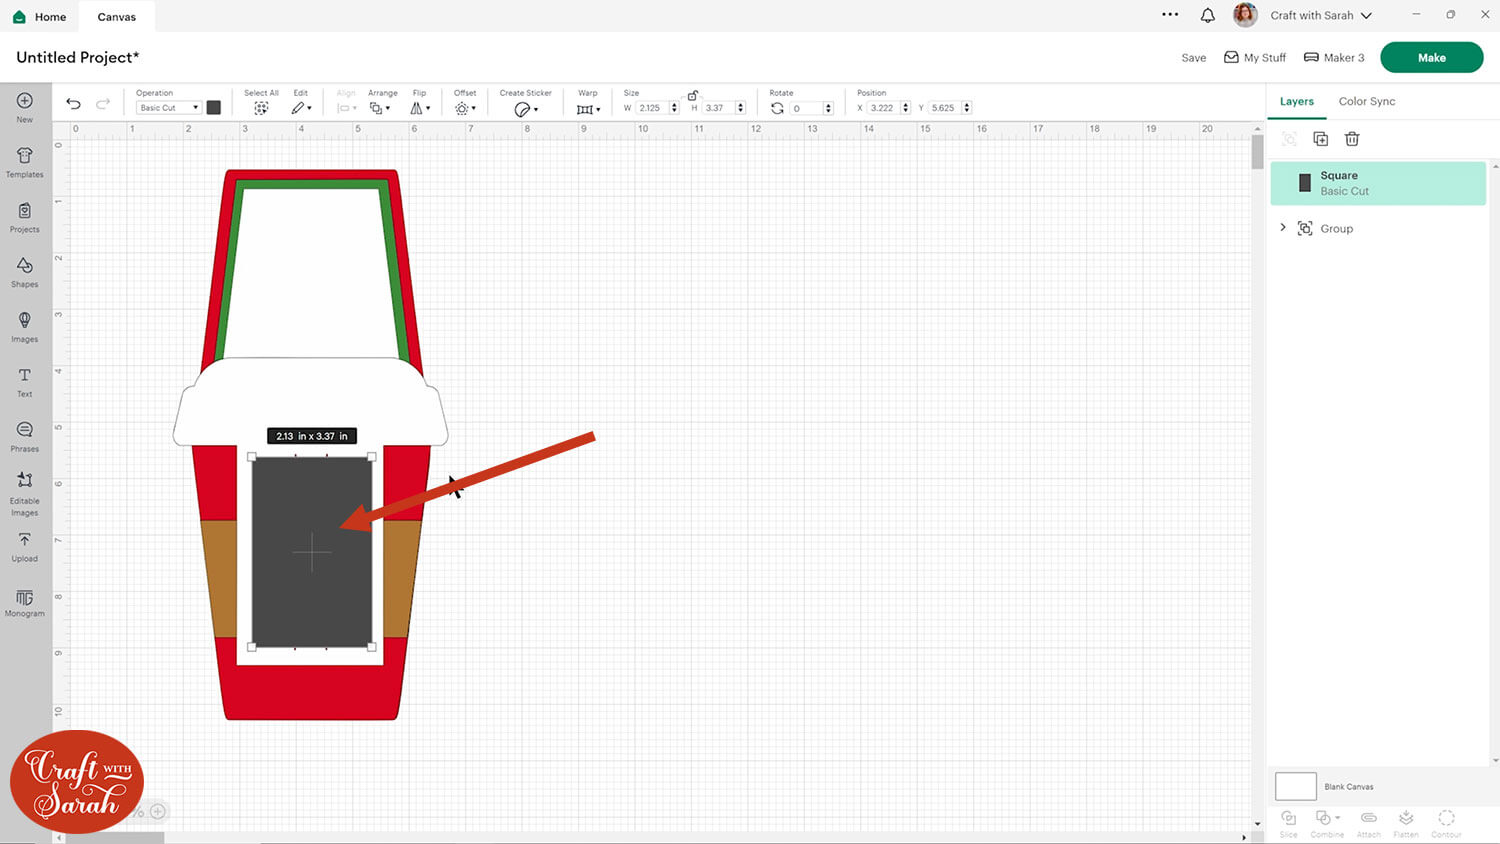
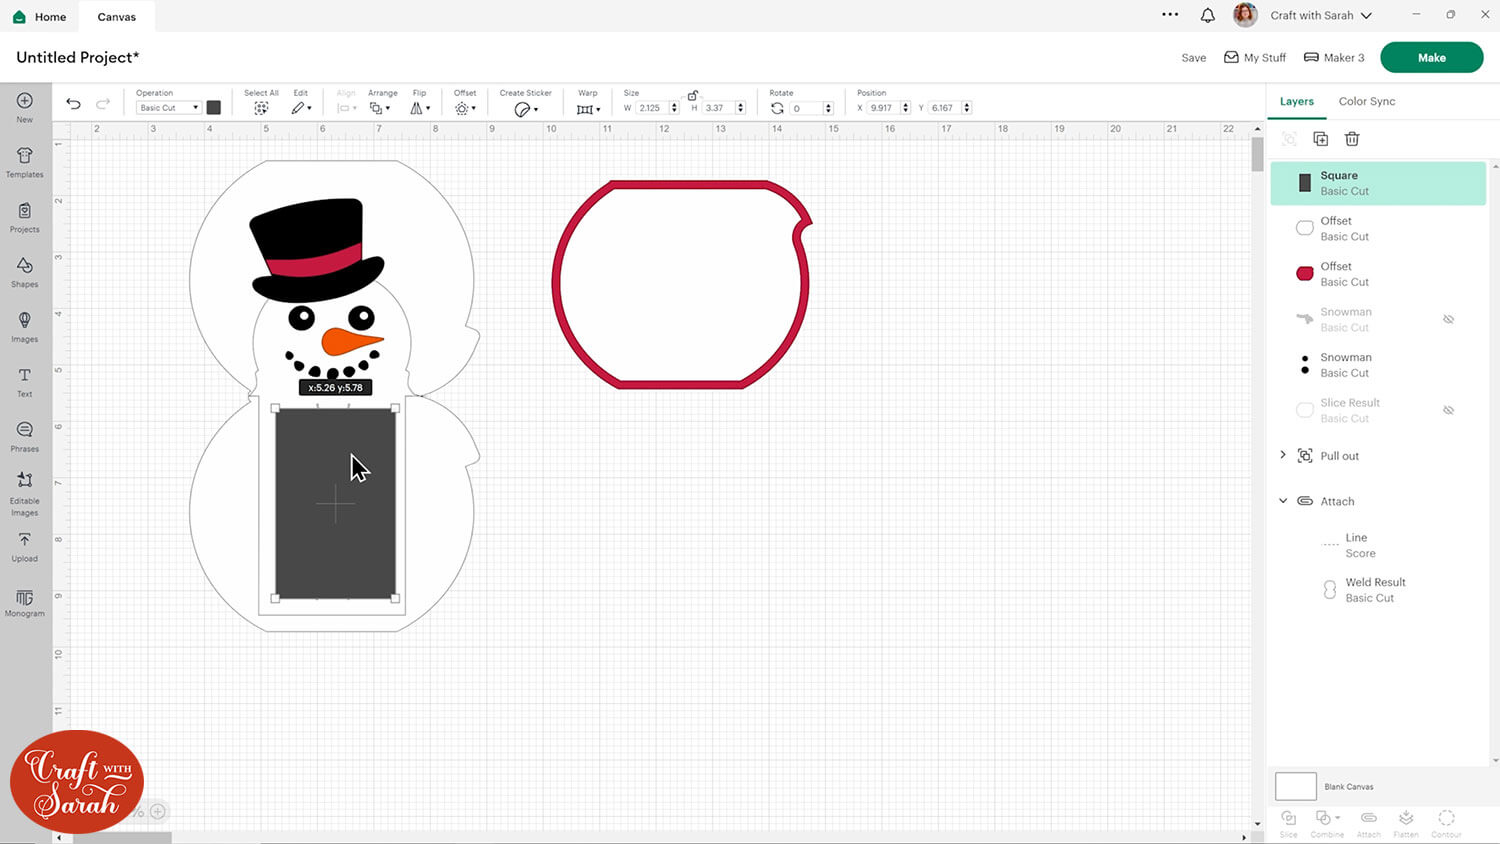
To check that the gift card will fit, go into “Shapes” and choose a rectangle.
I set mine to the standard size for gift cards which is 2.125 inches on the shorter side and 3.37 inches on the taller side. That’s the grey rectangle that you can see on my screenshots.
Position the rectangle over the slits in the gift card piece and then make sure you can see a little bit of gap at the top and the bottom where the little semicircles are showing through.
For example, this gap is perfect so this is actually fitting my gift card just fine. I wouldn’t need to resize it.
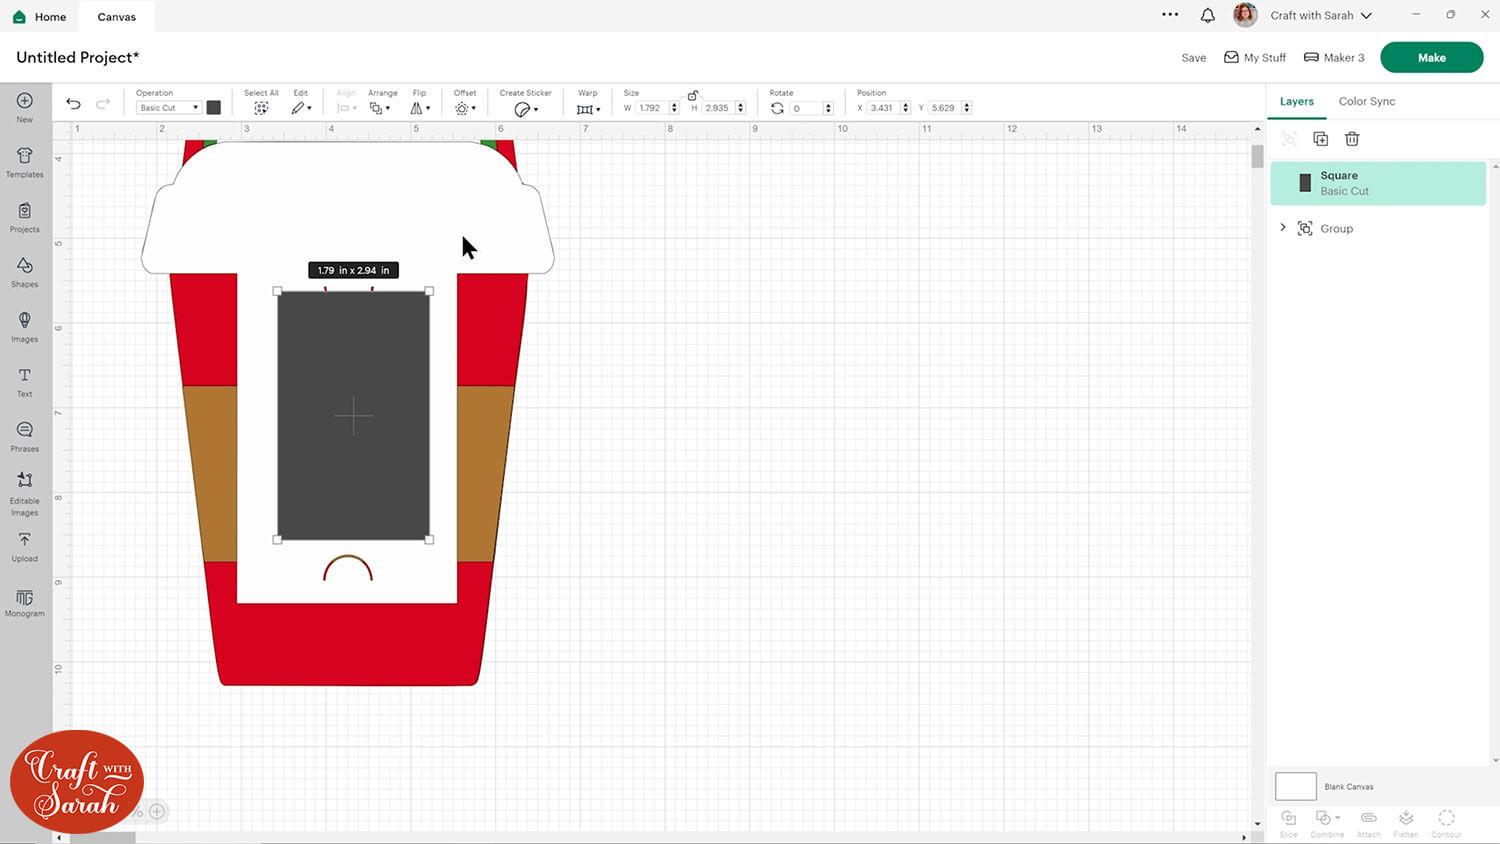
If you found that your semicircles were hidden by the rectangle, such as in the image below, then you need to make the design larger.
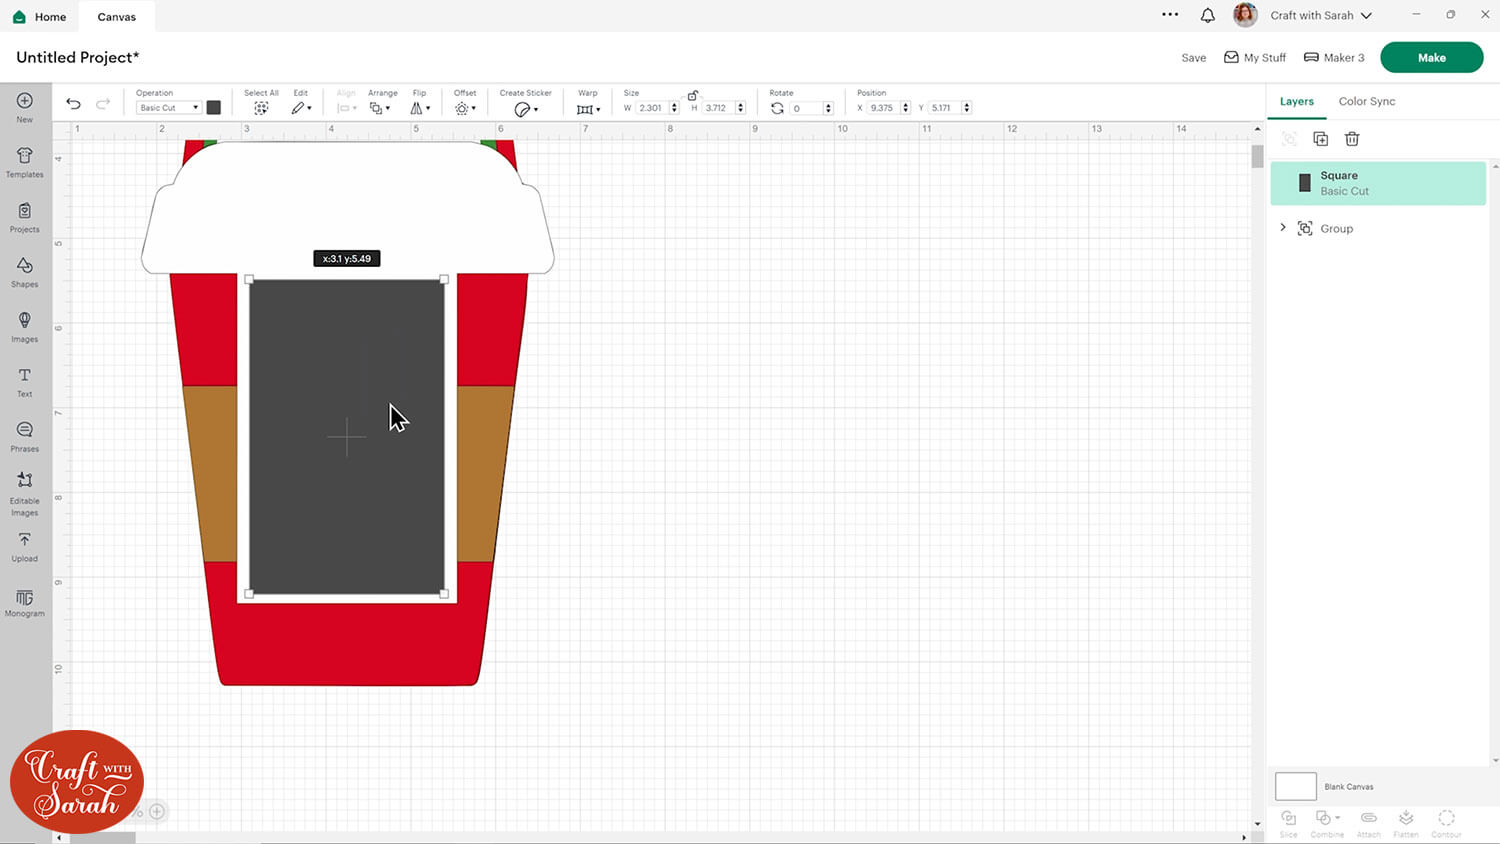
Position the rectangle so that you can see the semicircle at the top. Select the whole gift card holder group and, with the padlock icon closed, increase the size until you can see a small gap at both the top and bottom.
Make sure that the gift card shape reaches into both of the semicircles. The example on the image below would be too small to fit in the gift card and it would just fall out.
Step 3) Cut the project & stick together
Now that the sizing is correct, you can change the colours if you’d like to, save the project and then click “Make” and follow the on-screen instructions to get everything cut out.
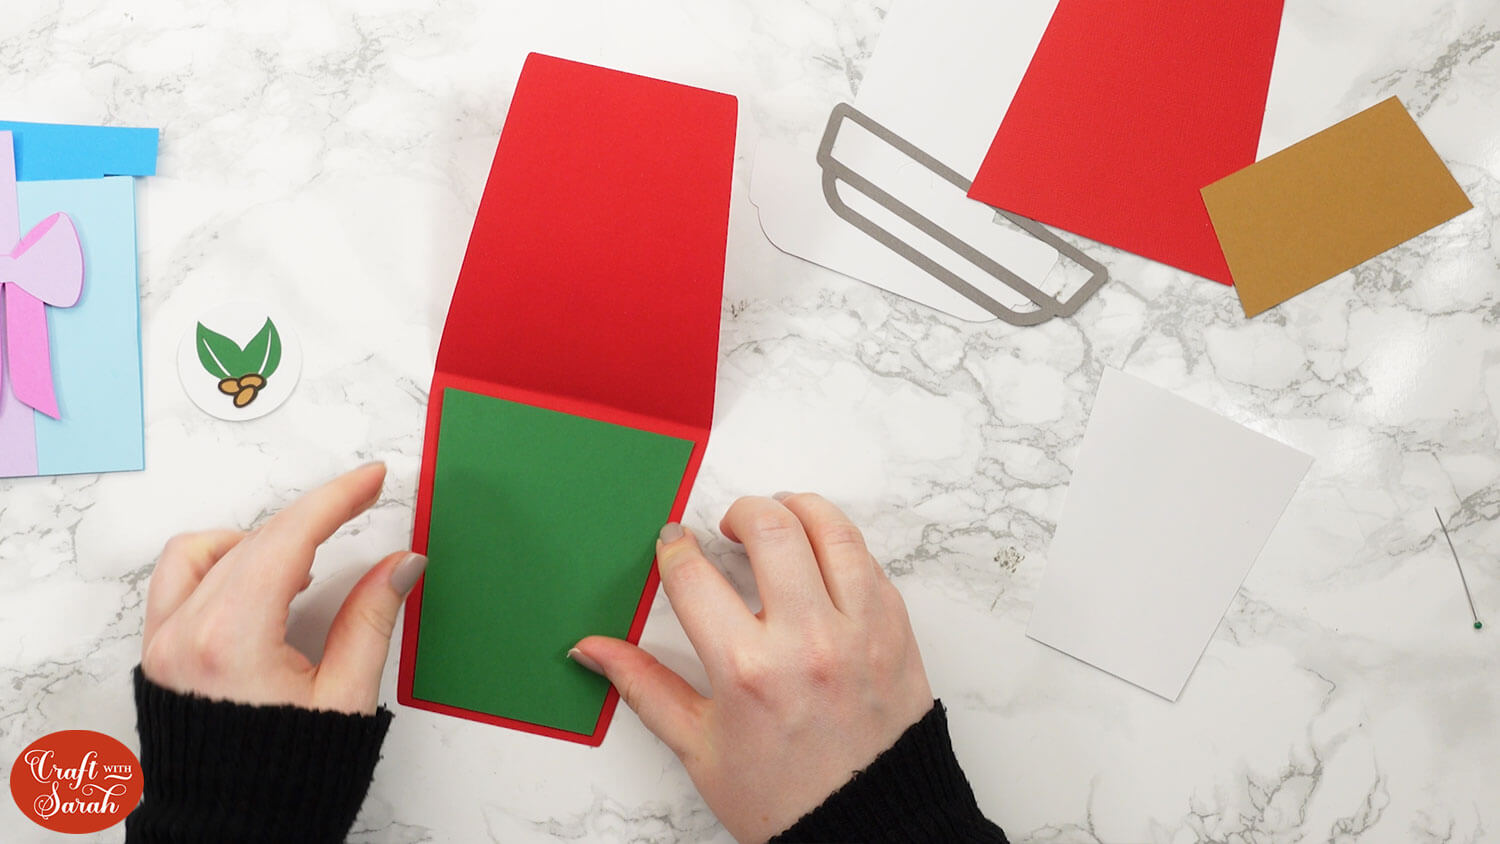
Fold down the score line on the base piece.

Make sure the bottom ends up nice and flat so it’s going to stand up nicely.
Next, we’ll glue the inside pieces. These give the back of the card some extra stability, otherwise it may be a bit front-heavy with the gift card placed inside, which could stop it from standing up properly.
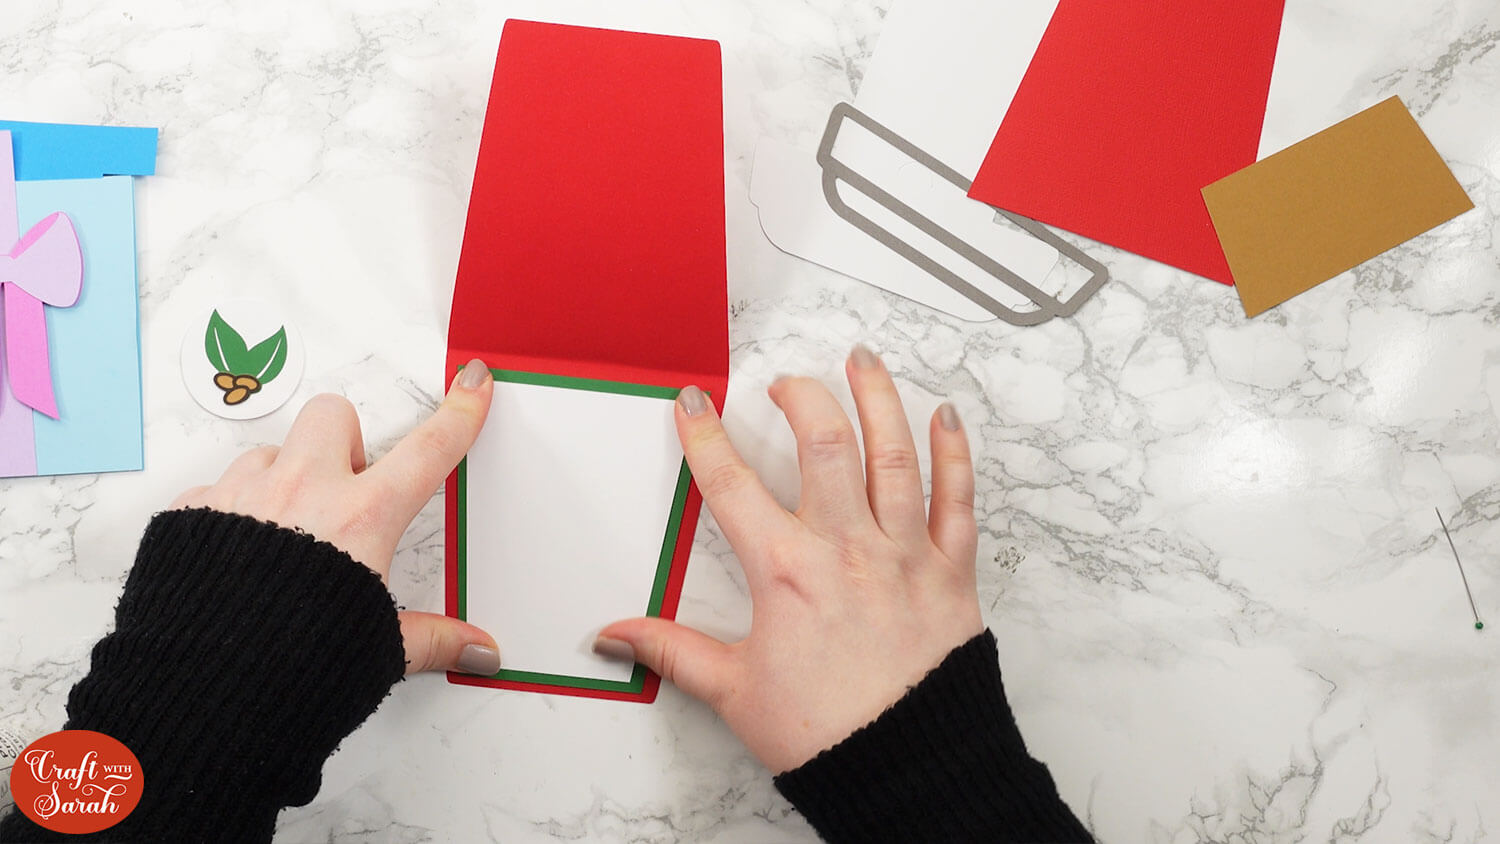
Now we can move on to the front. Take the other main piece and glue along the very edge except from at the top. If you glue the top then your gift card wont fit in.

Stick it to the front of the card, push it down gently to avoid spreading the glue too much, and leave to dry.
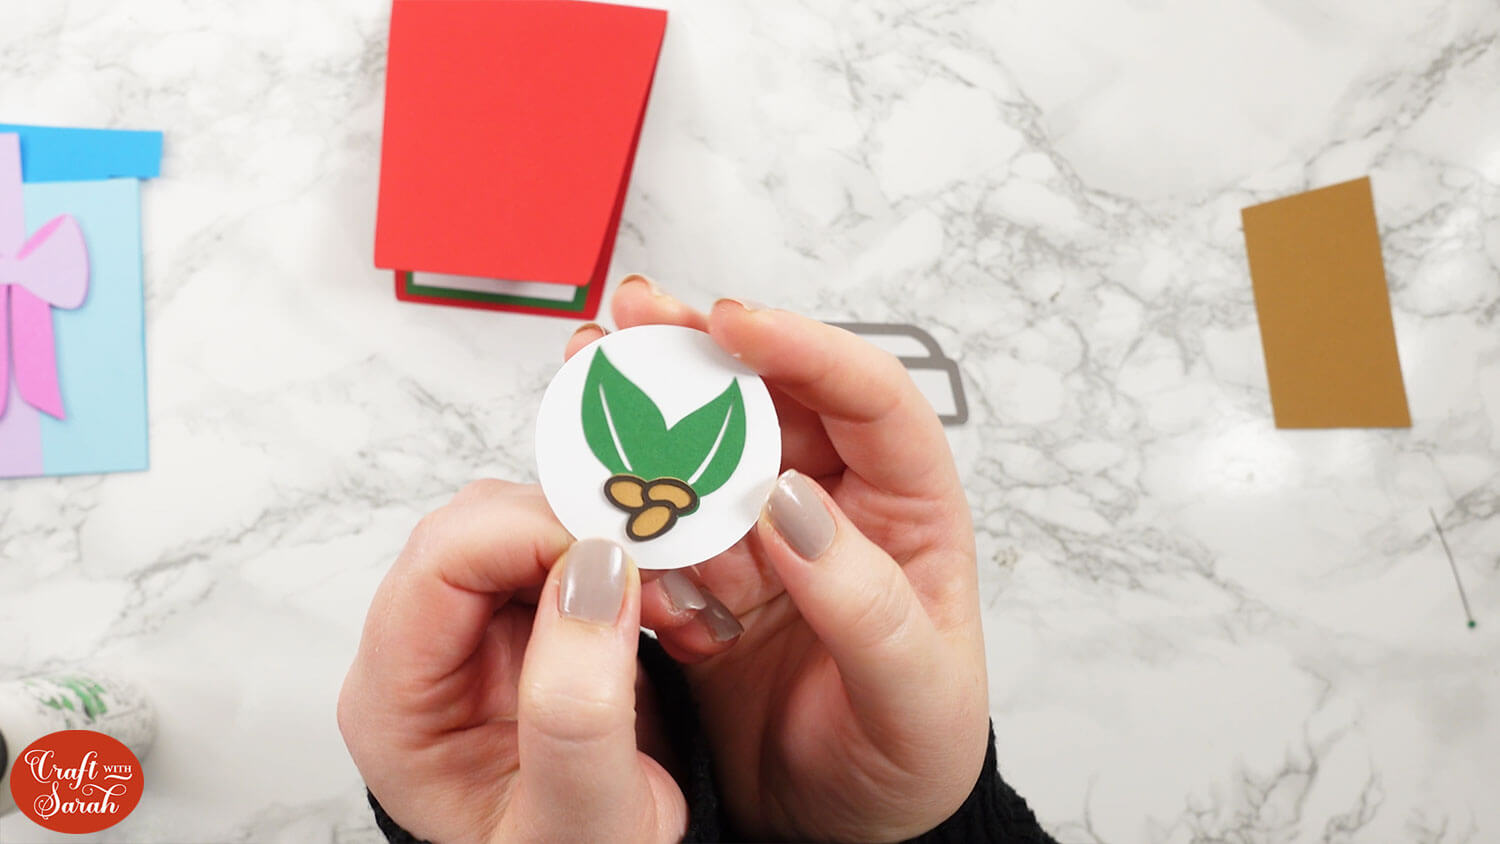
While that’s drying, glue the detail onto the top of the coffee cup lid.
Glue the coffee beans and leaves to the white circle.
For the cup sleeve, I used foam squares to give it some dimension. You can glue it if you prefer.
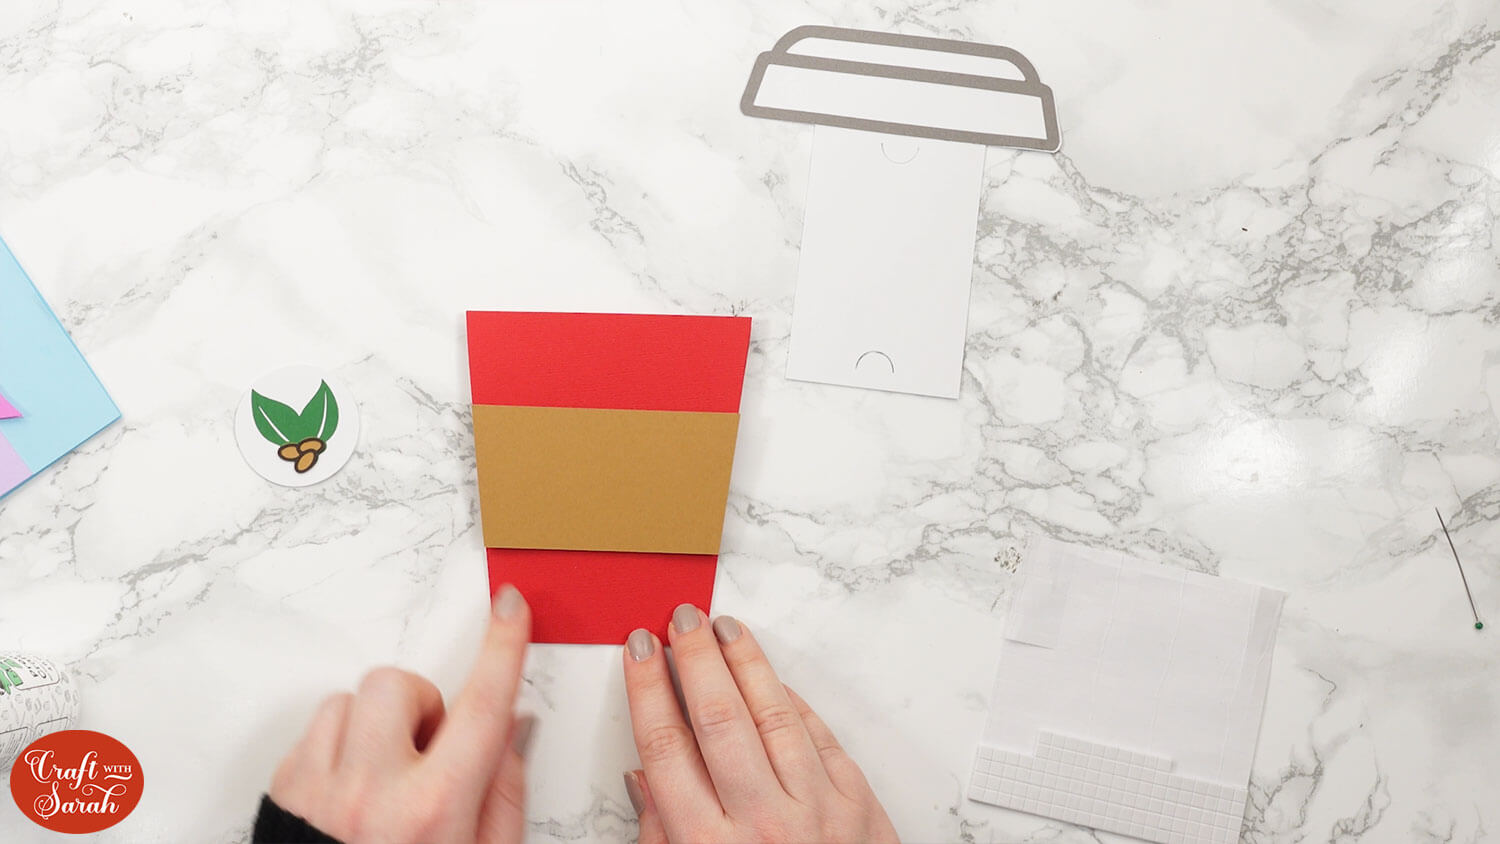
Glue the circular piece with the coffee beans on to the front of the cup.
Glue the grey detail piece to the top of the cup to the white piece that holds the gift card.
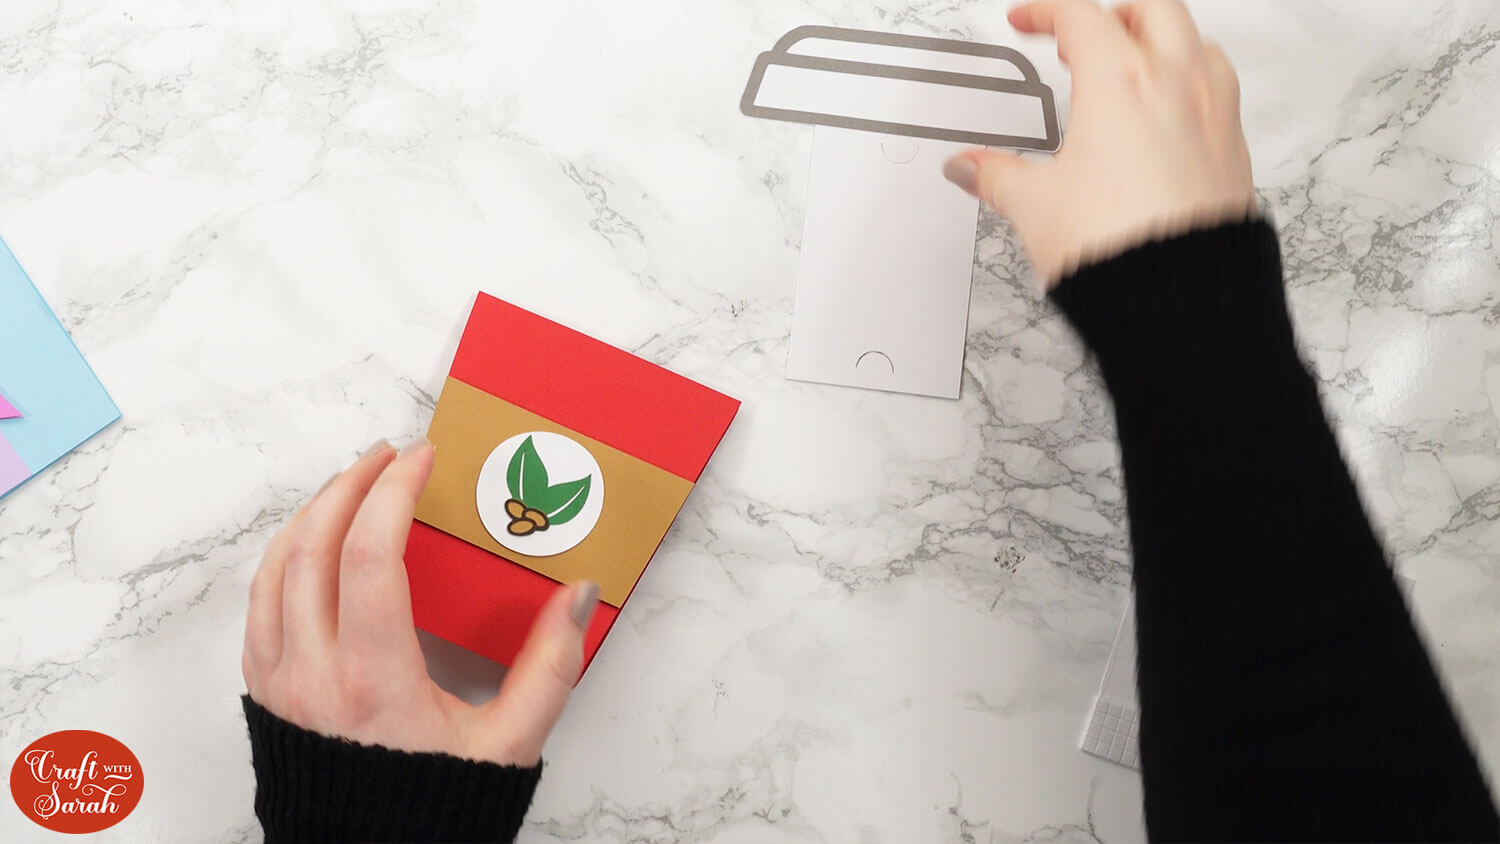
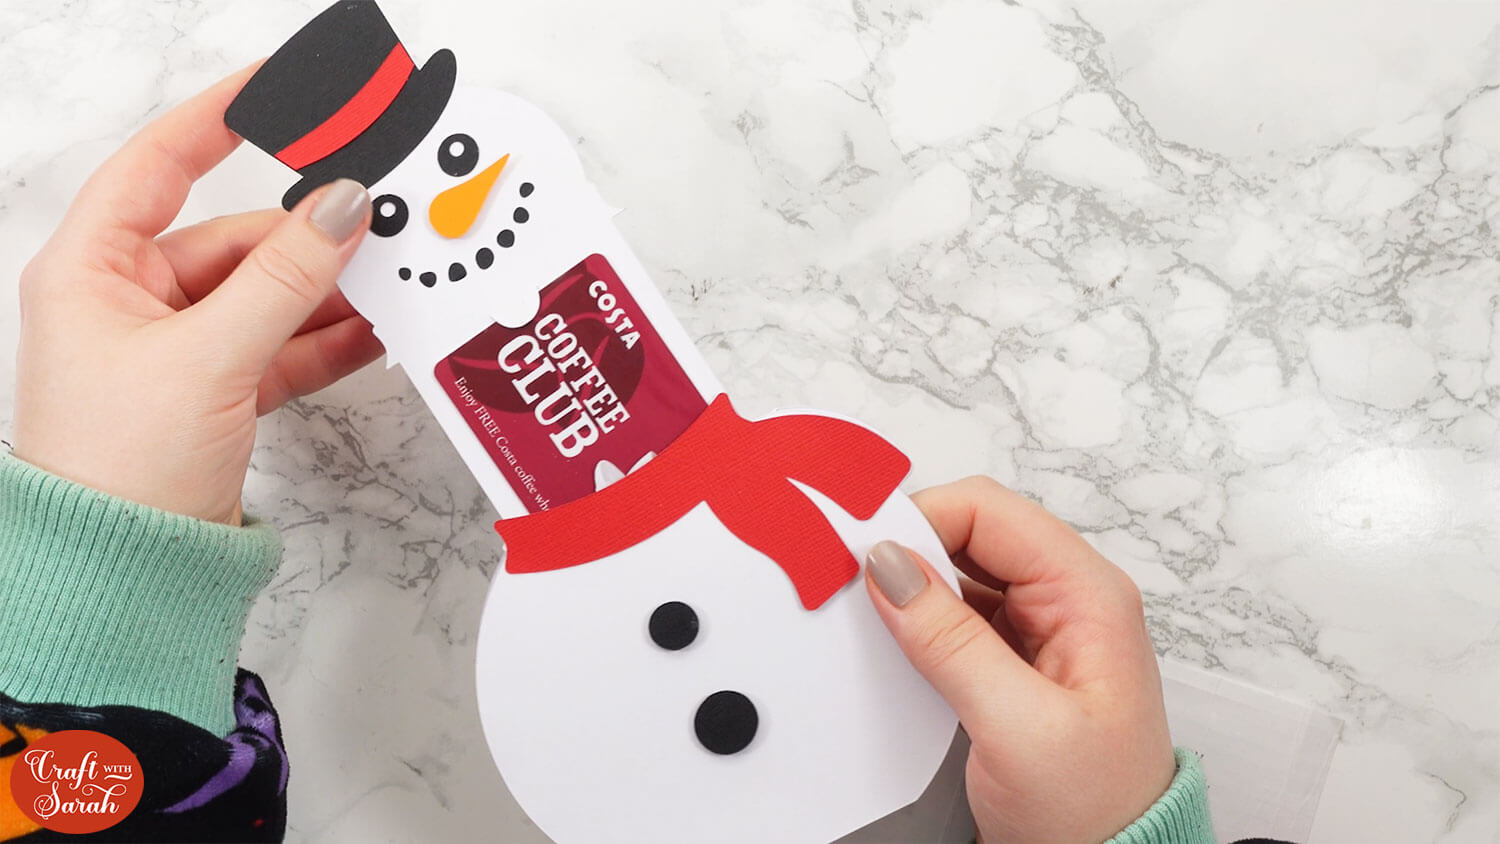
Now use the slits in the coffee cup lid to slide your gift card in securely.
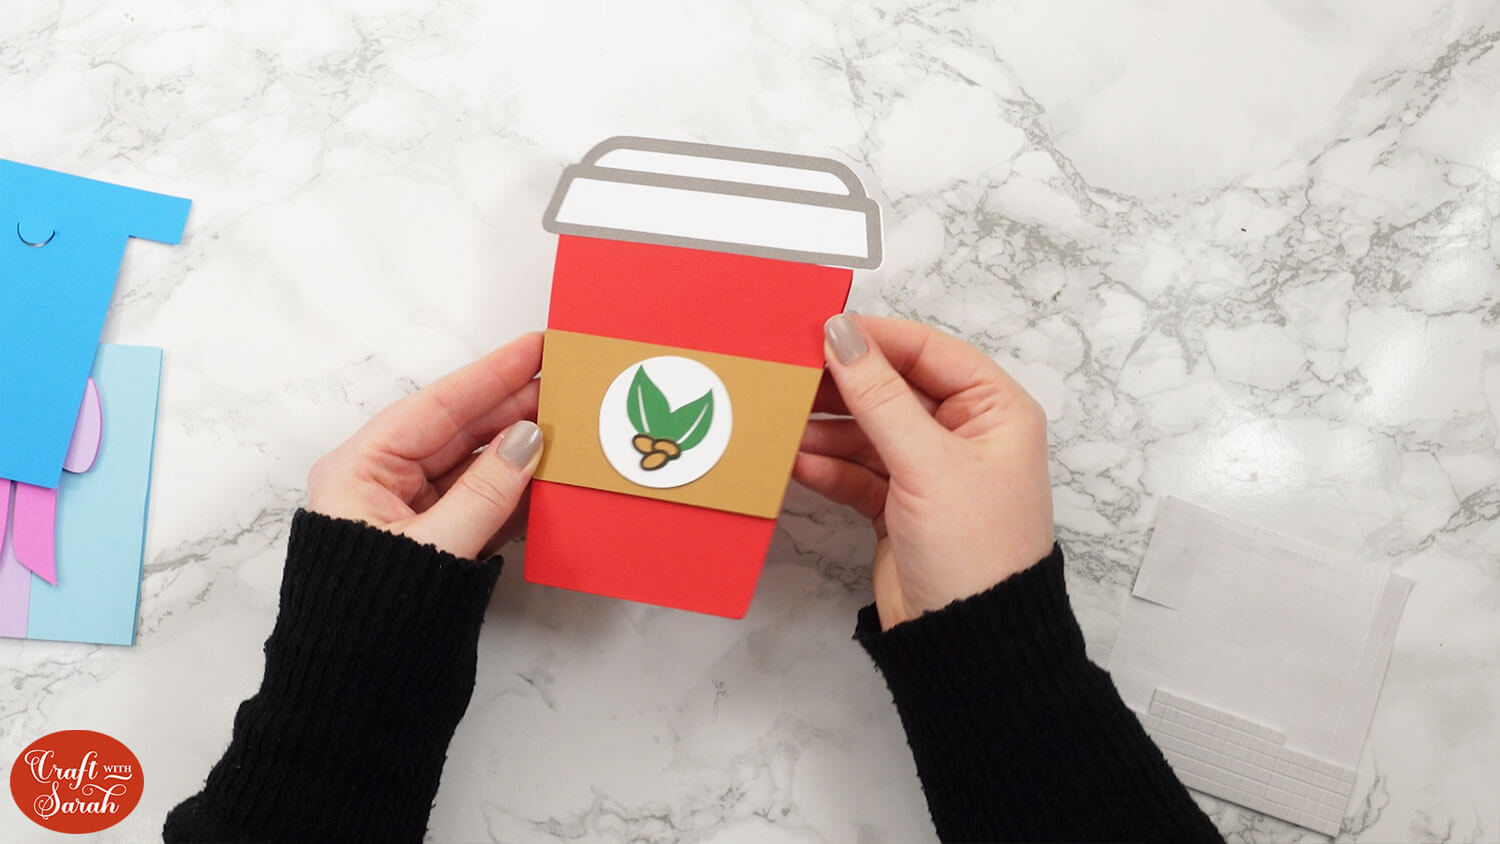
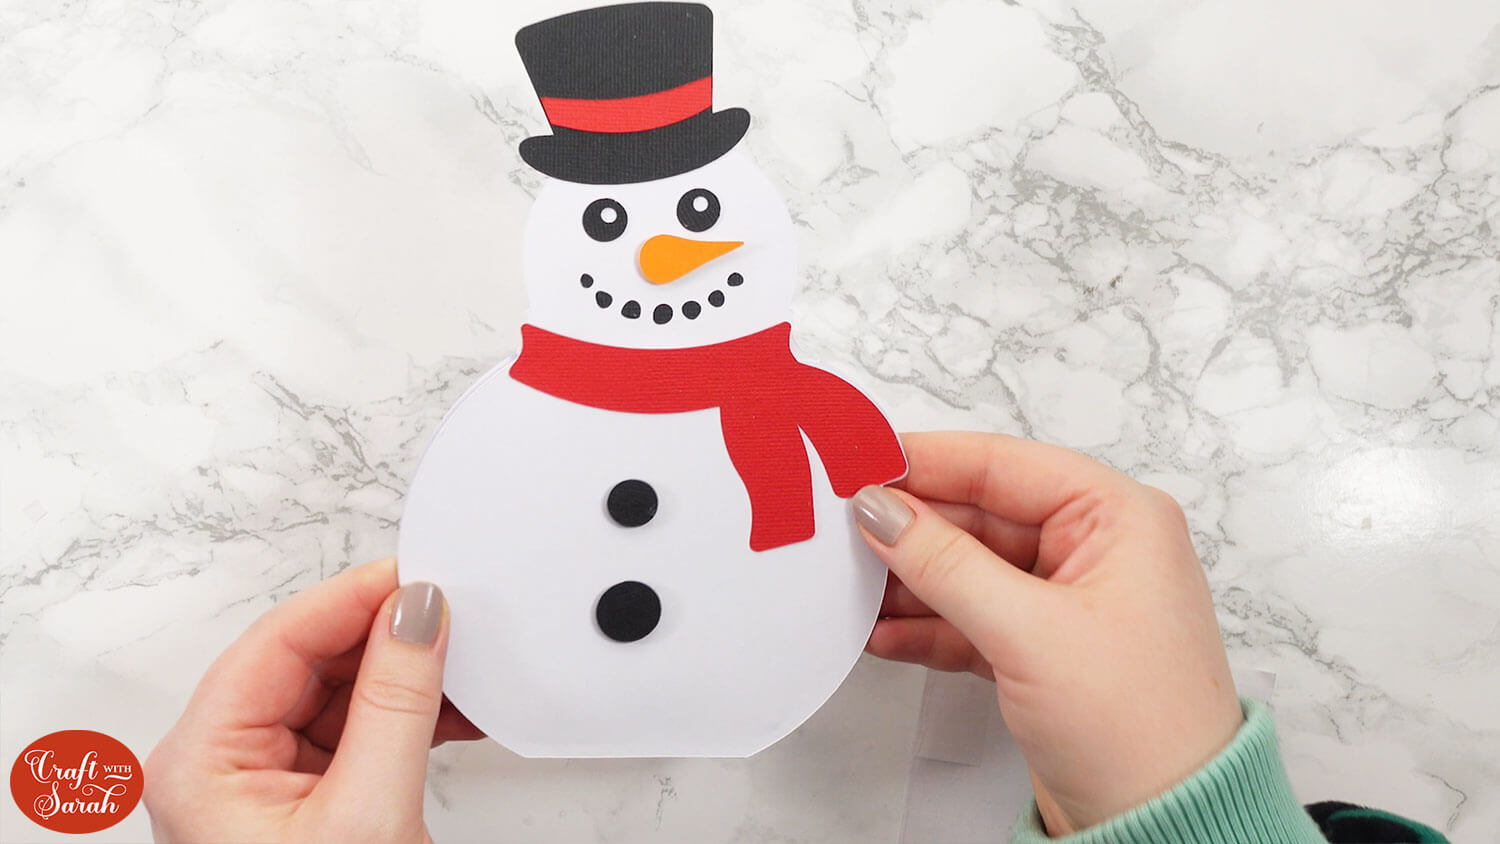
Now your gift card holder is finished!
Are you ready to design your own gift card holder with a different image? Keep scrolling!
PART TWO: How to design custom gift card holders
This next section is on how to design your own gift card holder, completely from beginning to end, in Cricut Design Space.
Step 1) Choose your image
Go into “Images” and search for a design or theme for your gift card holder. If you don’t have Cricut Access then you can upload a SVG instead.
When using the image search, you may find it helpful to change the operation type to “Cut Only” and change the material to “Paper/cardstock”.
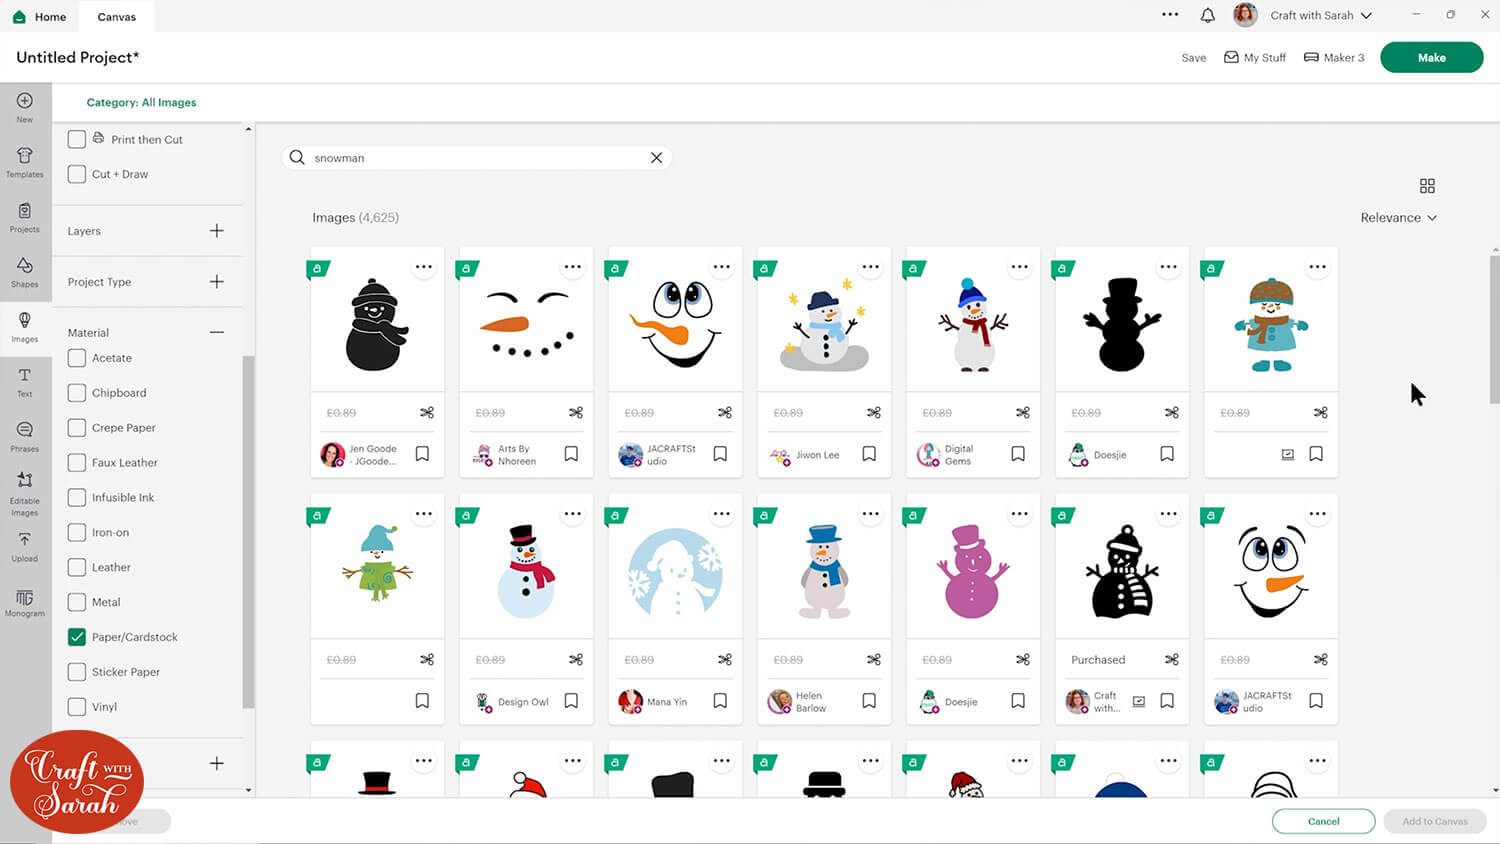
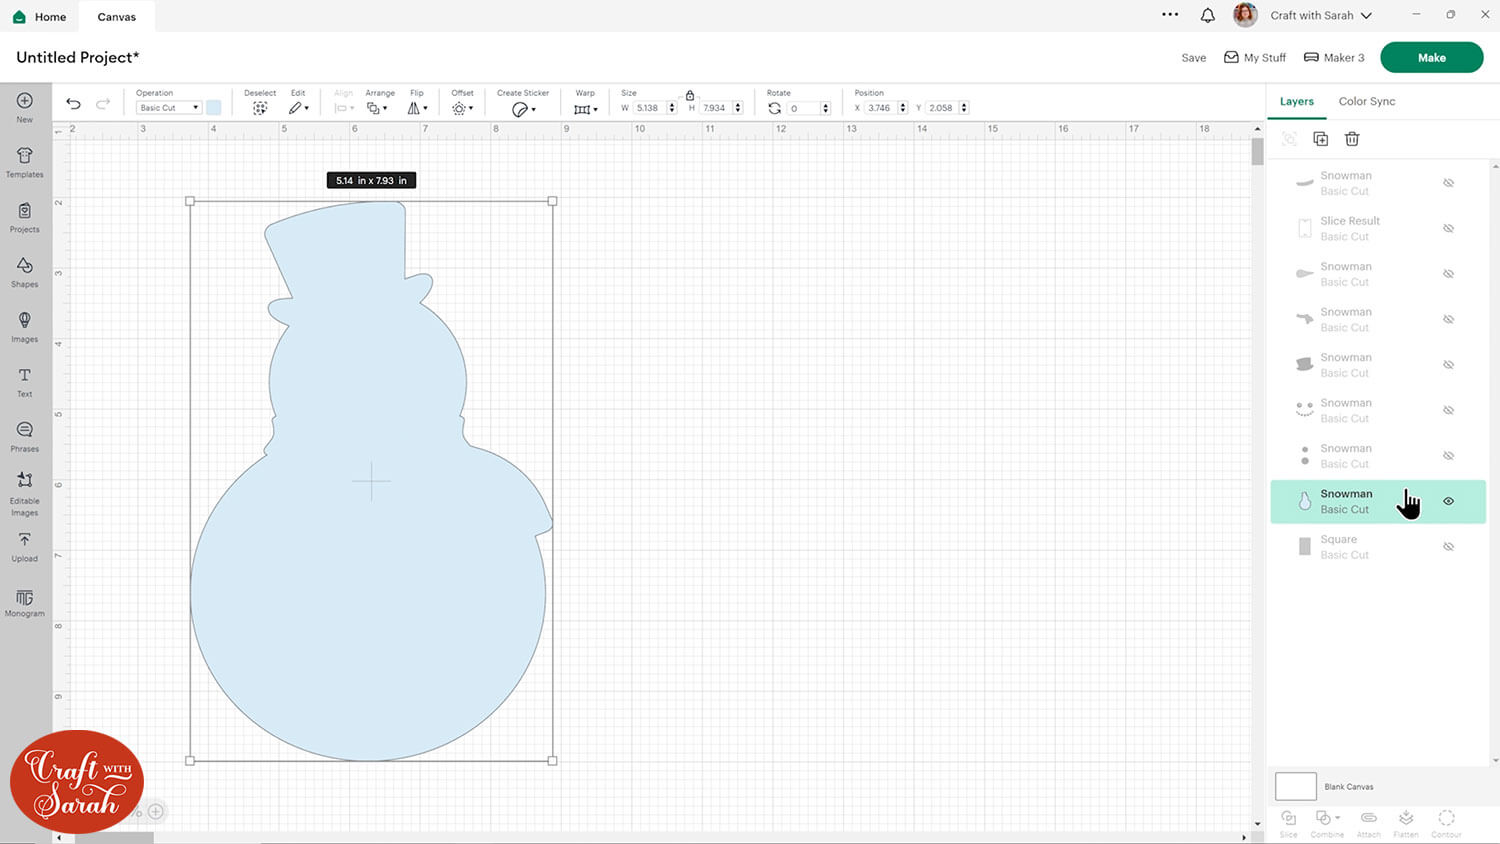
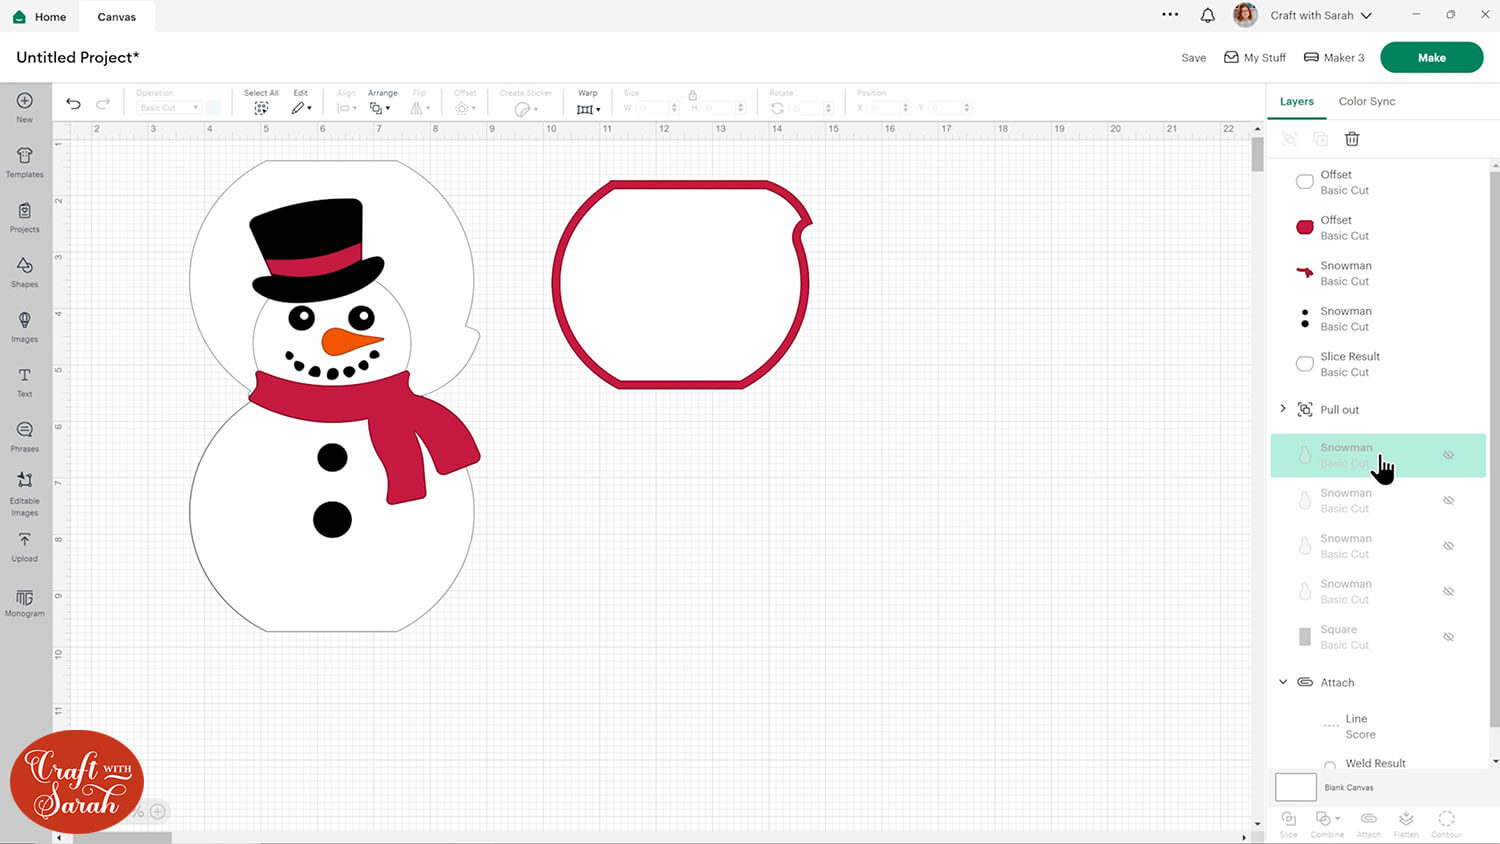
I went looking for snowman images and searched for one which would be easy to cut the head off and make into a gift card shape.
Watch the video towards the top of this page for a walkthrough of several different images, including detailed descriptions of why each one would or wouldn’t be suitable to turn into a gift card holder.
In general, you’re looking for simple images that are wide enough to fit the gift card in, that have a part on them that would look natural to “cut” apart to create the bit that pulls out – for example the top of the coffee cup, the head of a snowman, flowers in a flowerpot or the top of a gift/present box.
It is easier to choose an image that has a flat base so that it will stand up as a card without any tweaking of the image. We can do a bit of extra work to make the bases suitable if they aren’t flat – I’ll show you how to do that.
Select a few different images and then look at the layers to see which one would be most suitable.
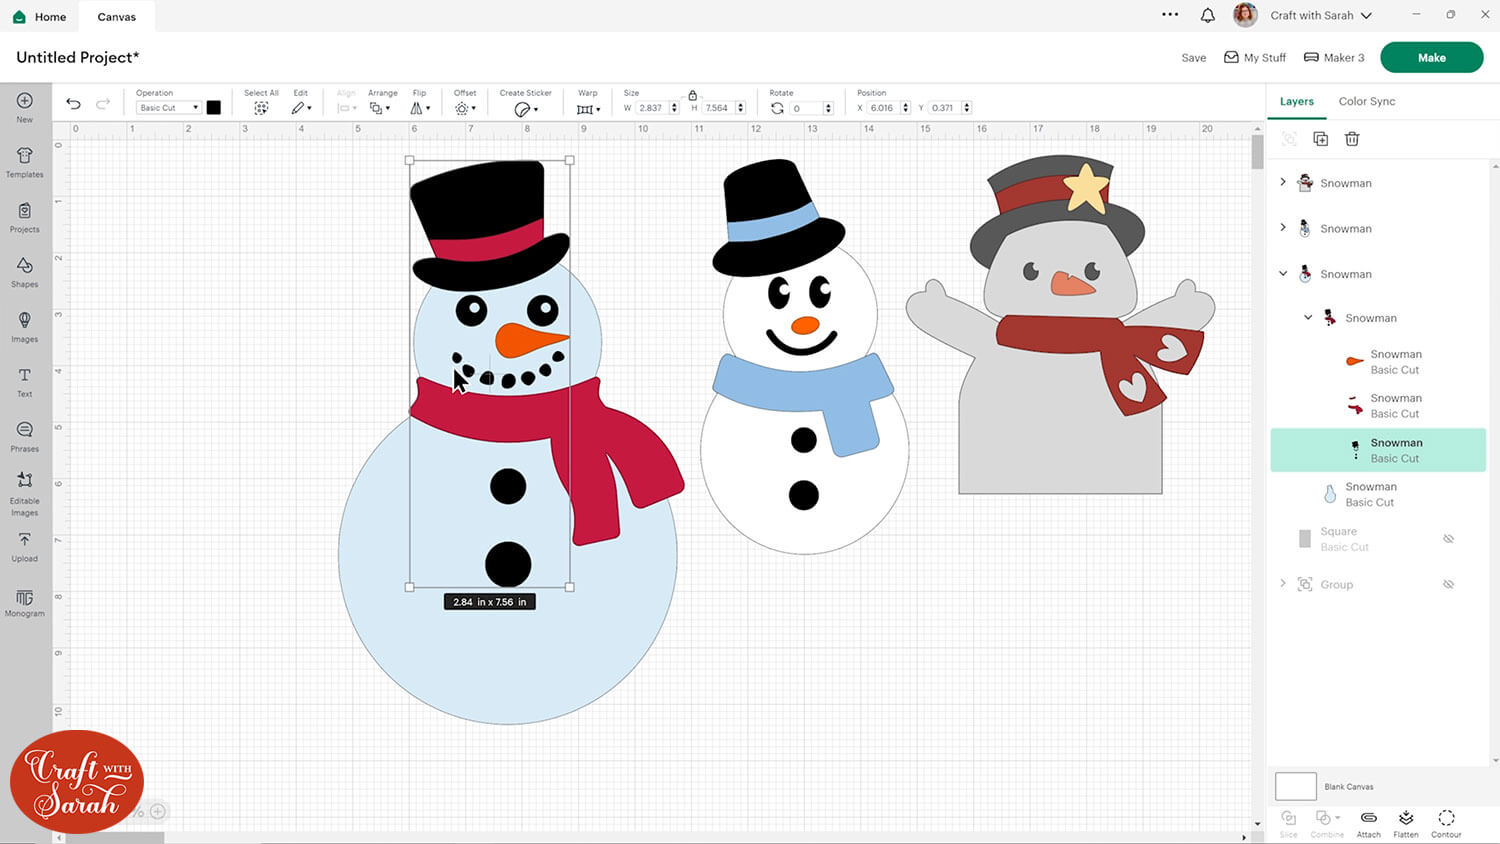
I decided to go for the snowman on the left due to the simple layers and because the snowman’s body was wide and deep enough to fit the gift card.
Step 2) Create the gift card holder
Take the gift card piece from the coffee cup design to use in this new one.
You’ll need to cut off the top of the coffee cup outline as you won’t be needing that bit.
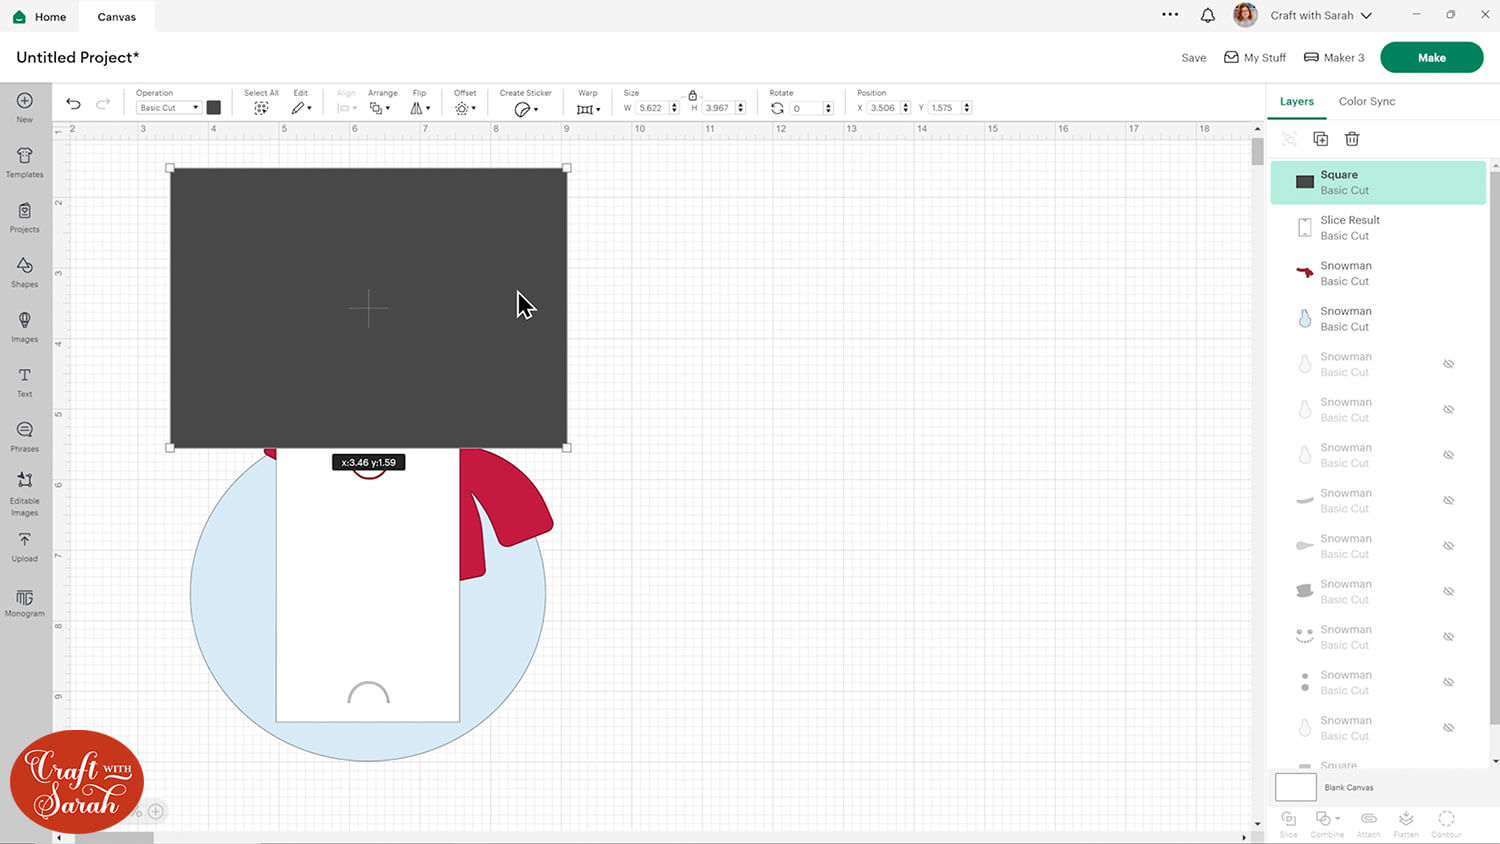
Go into “Shapes” and choose a square. Pull it down so that it just covers the top of the coffee cup lid.
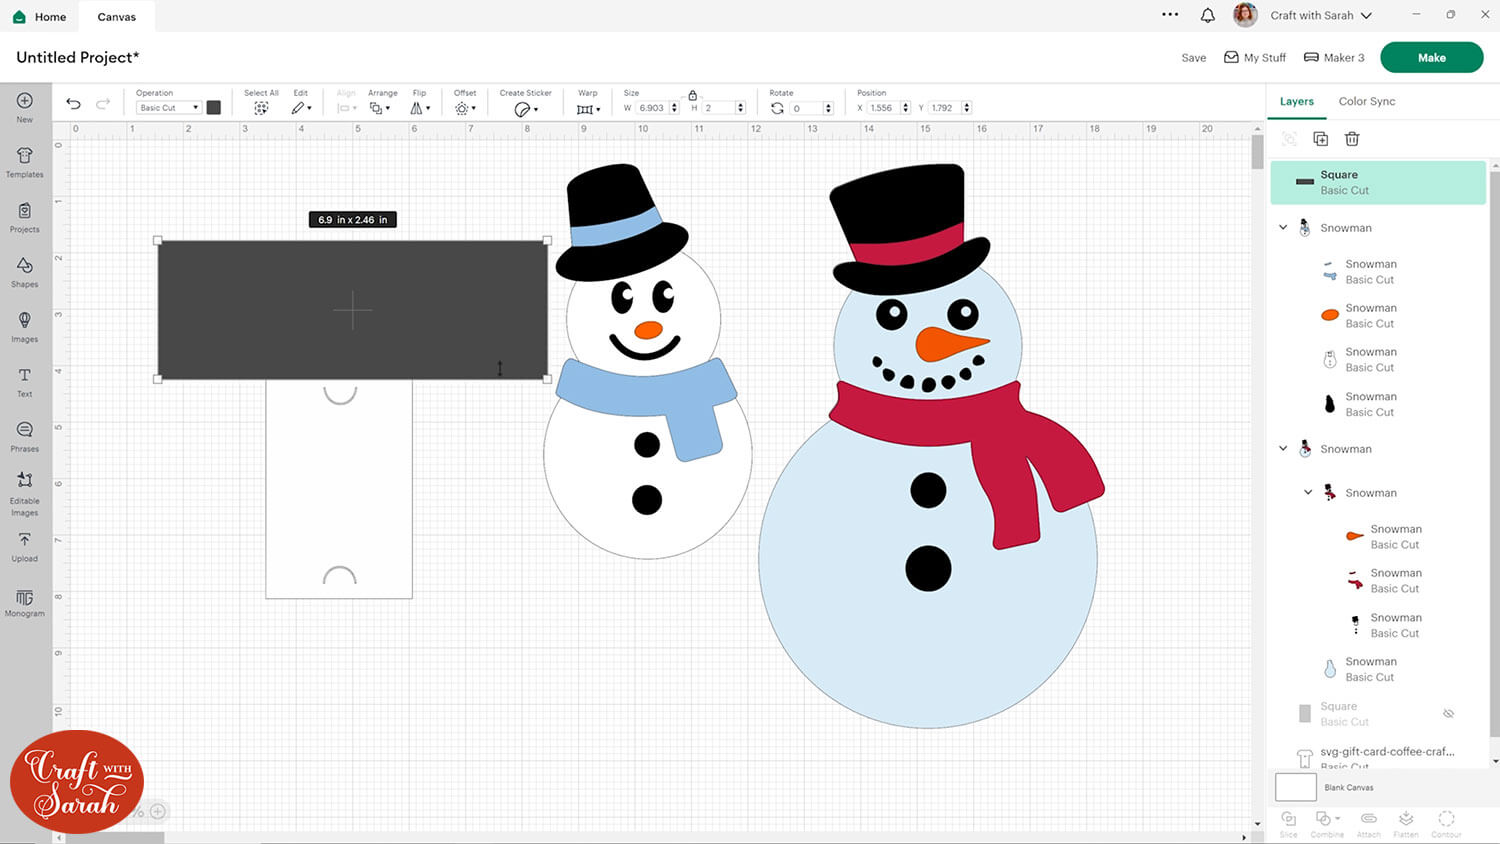
Change it to a Guide layer using the Operations dropdown so that it’s easier to see where to place it.
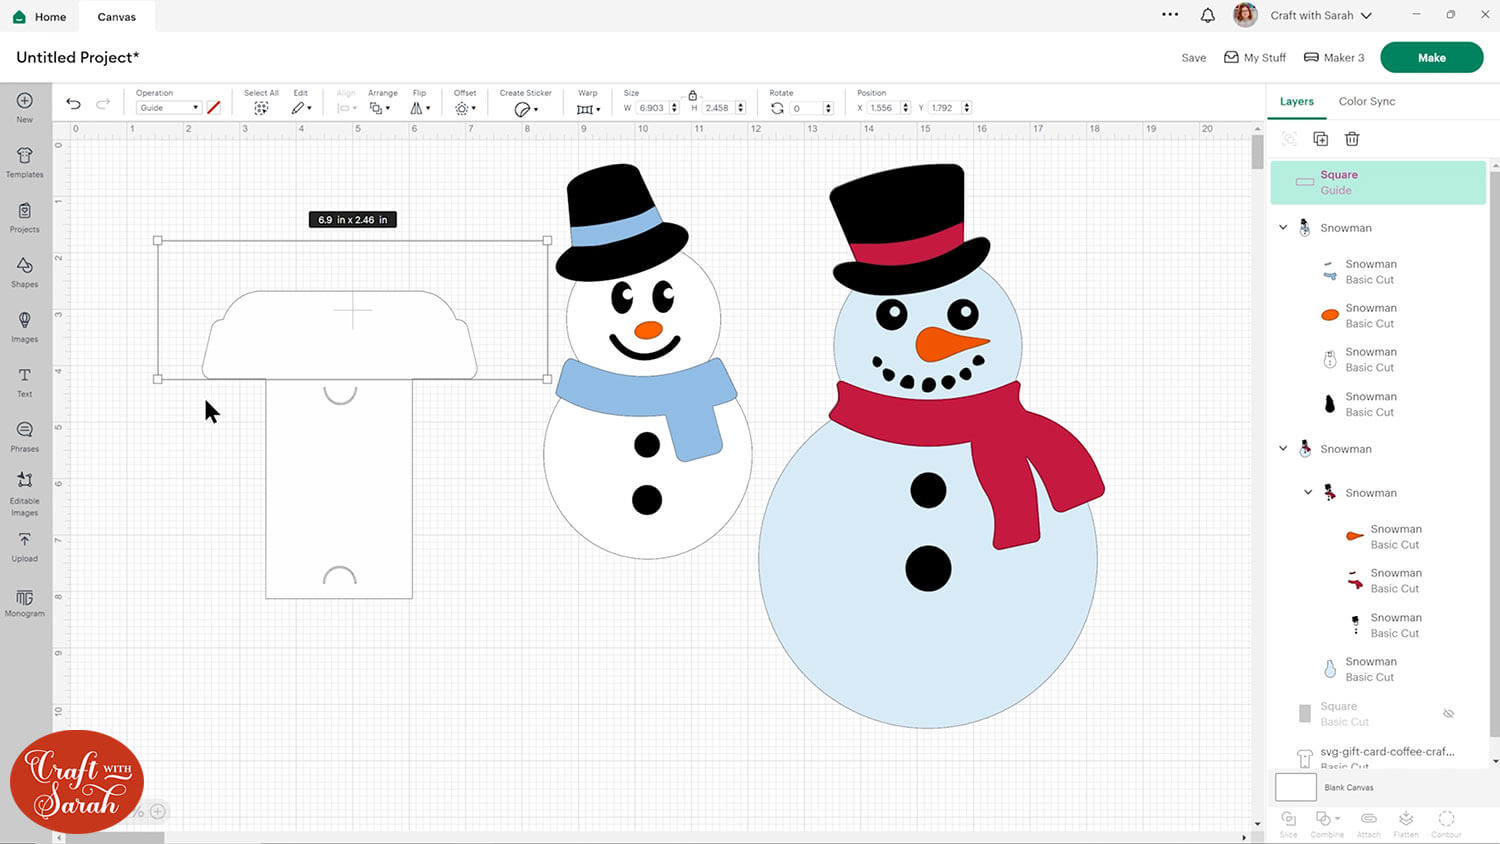
Select the guide and the gift card holder and press Slice.
Delete the excess and you should be left with just this piece.
Decide if you want the card to fold at the top or down the side.
It’s going to be easier for this snowman if the card opens up along the top, as the fold line can be covered by the scarf.
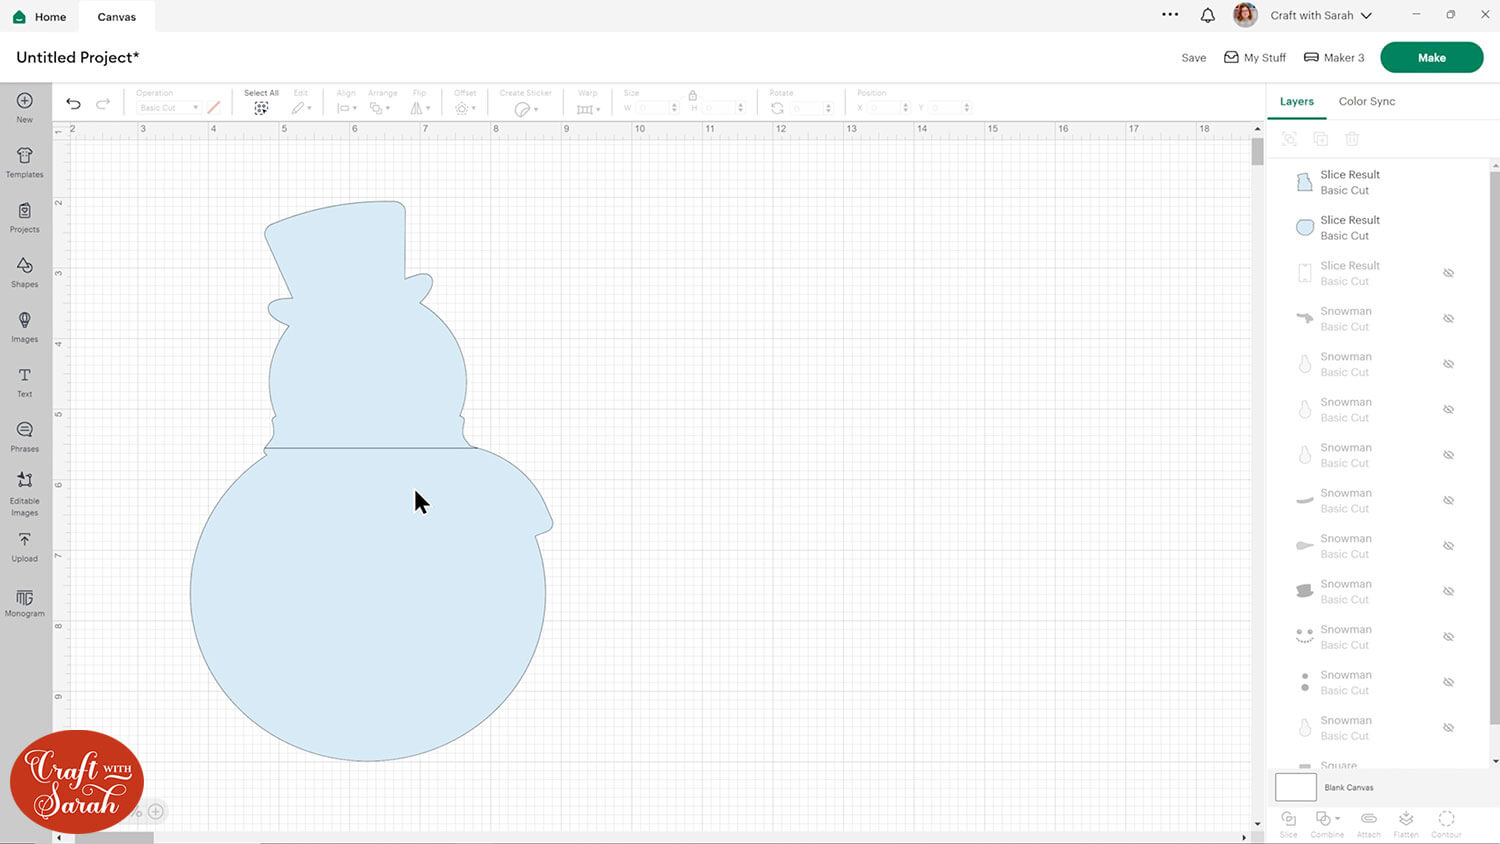
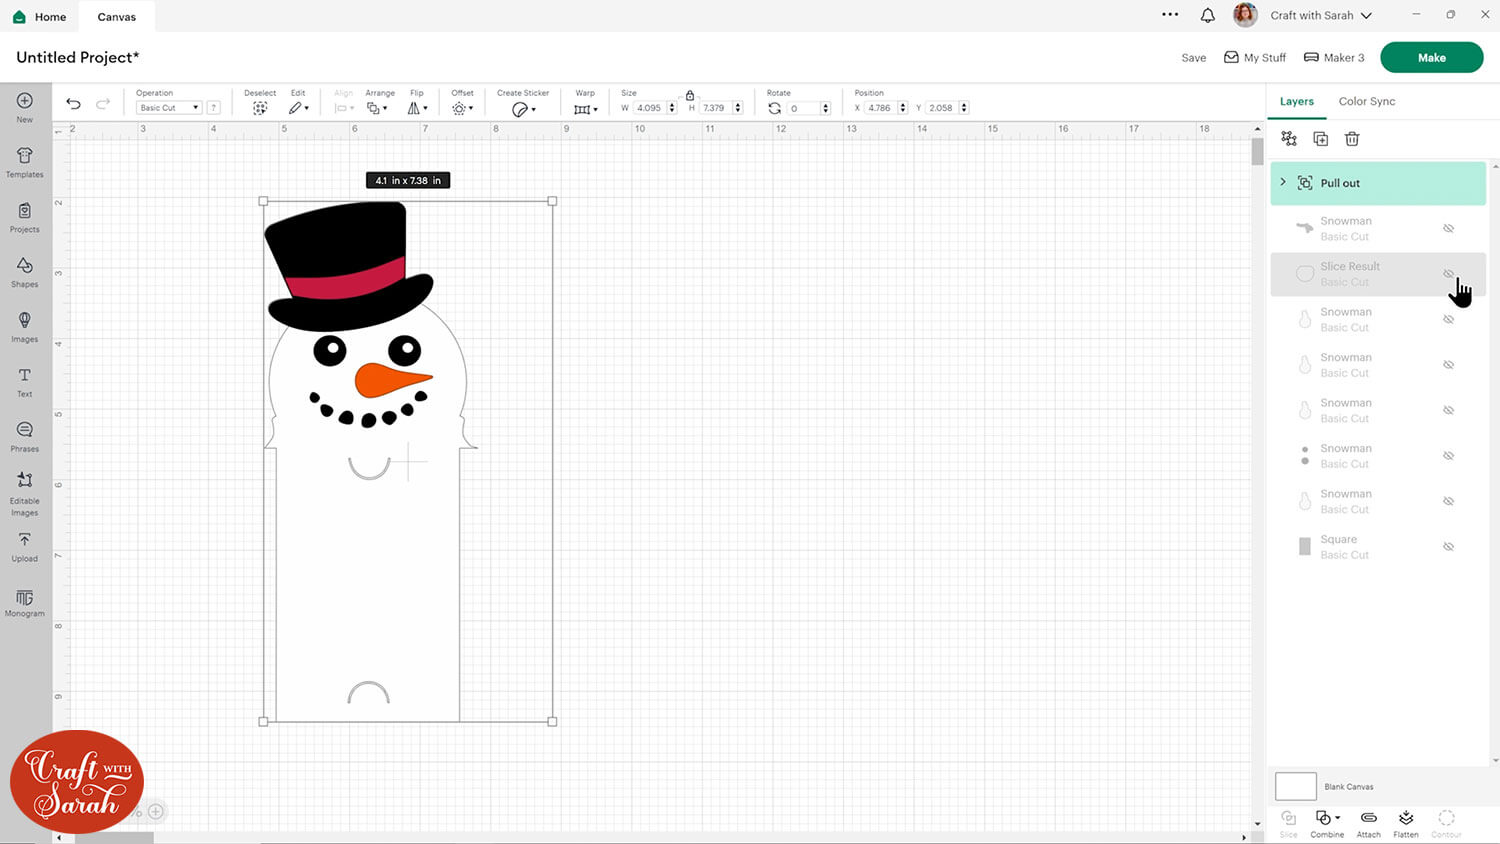
Ungroup the layers. The bottom layer of this design will be easy to work with as it has the whole silhouette of the snowman.
However, the scarf and hat ribbon shapes are currently joined together as the same layer.
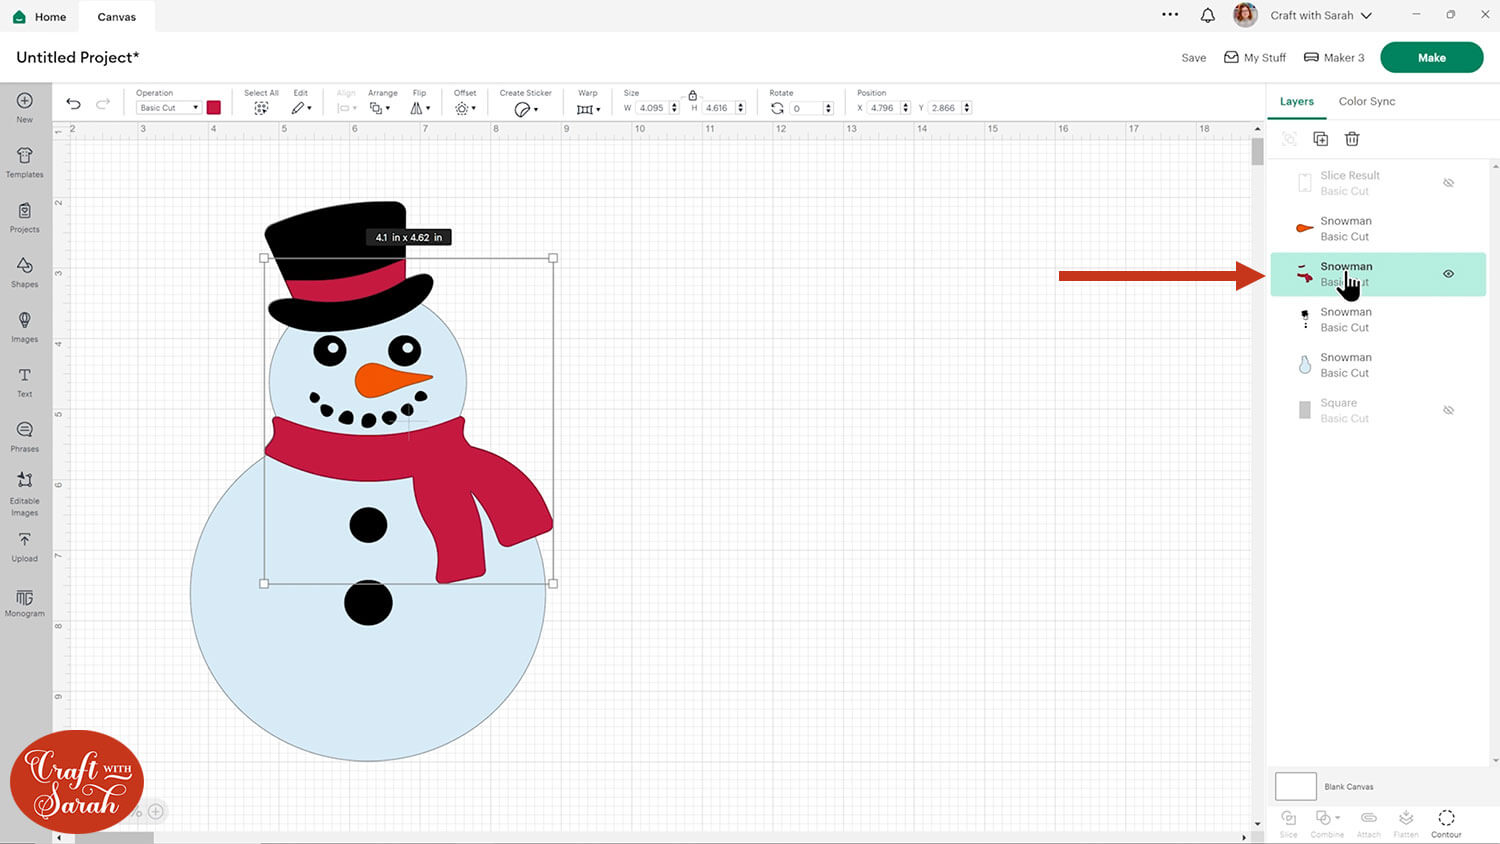
To separate them, click the layer and Duplicate it to make a copy. Use “Contour” to remove one of the shapes from one of the layers.
Remove the opposite piece from the other layer.
Now, the scarf and the hat ribbon are separate layers.
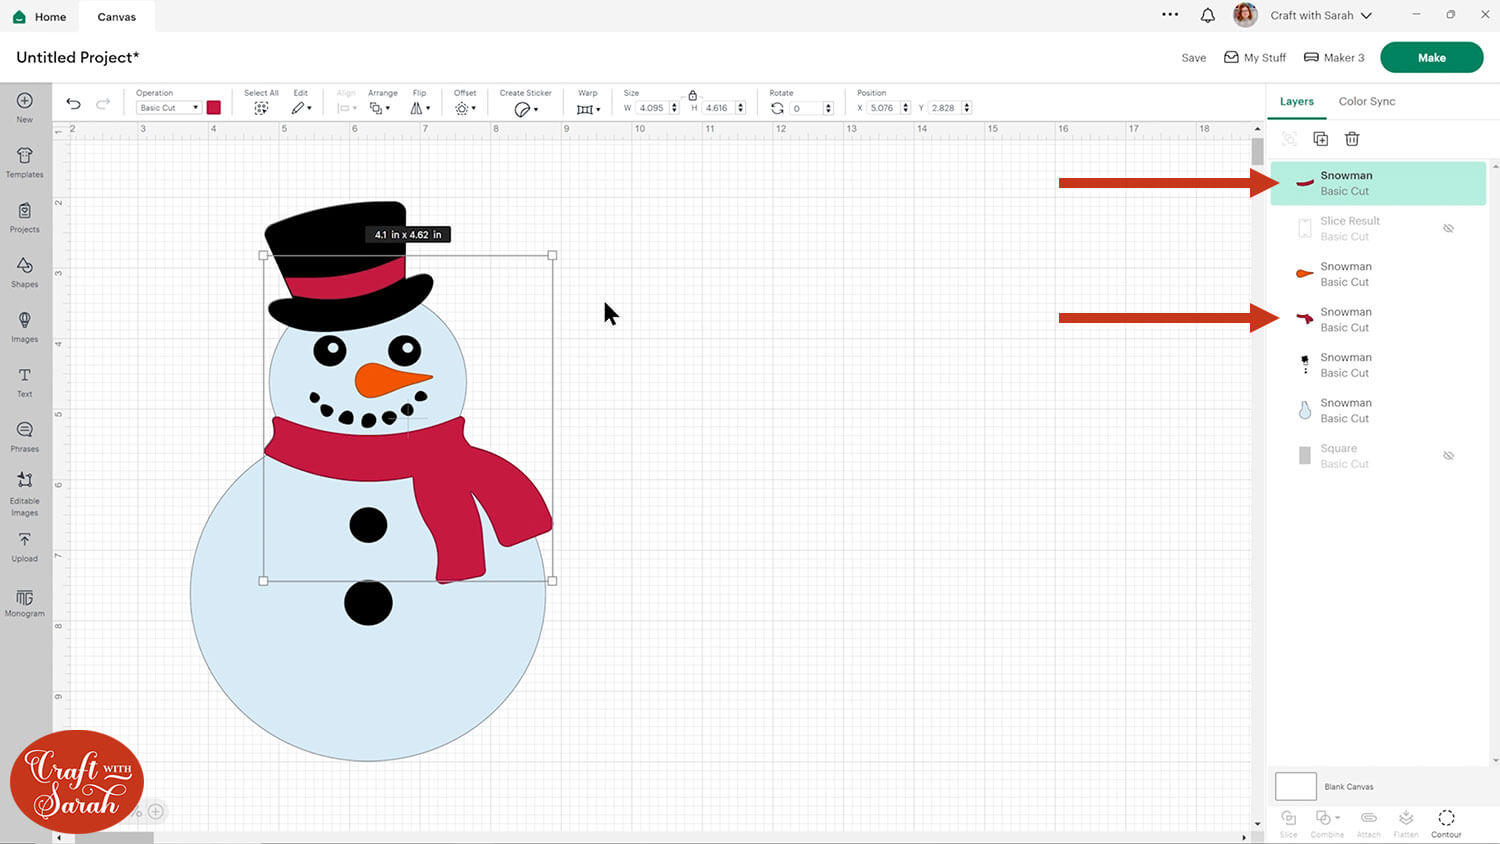
Repeat this for any other layers where you want to separate the pieces.
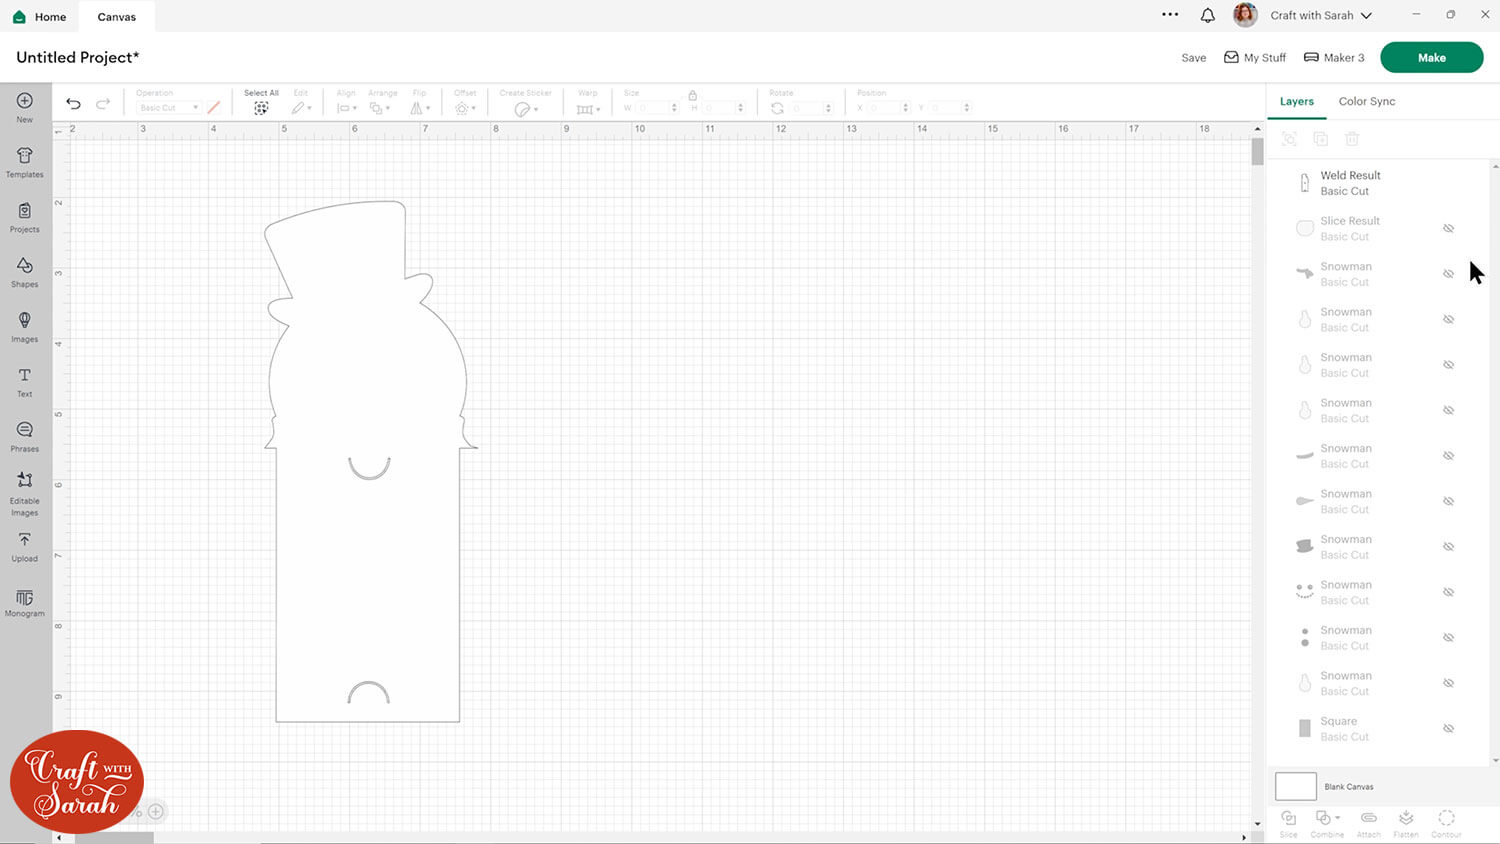
I moved the black hat away from the other bits, and also separate out the mouth, the eyes and the coal for his tummy, making four black layers in total.
Hide all the pieces so you can just see the main shape of your image.
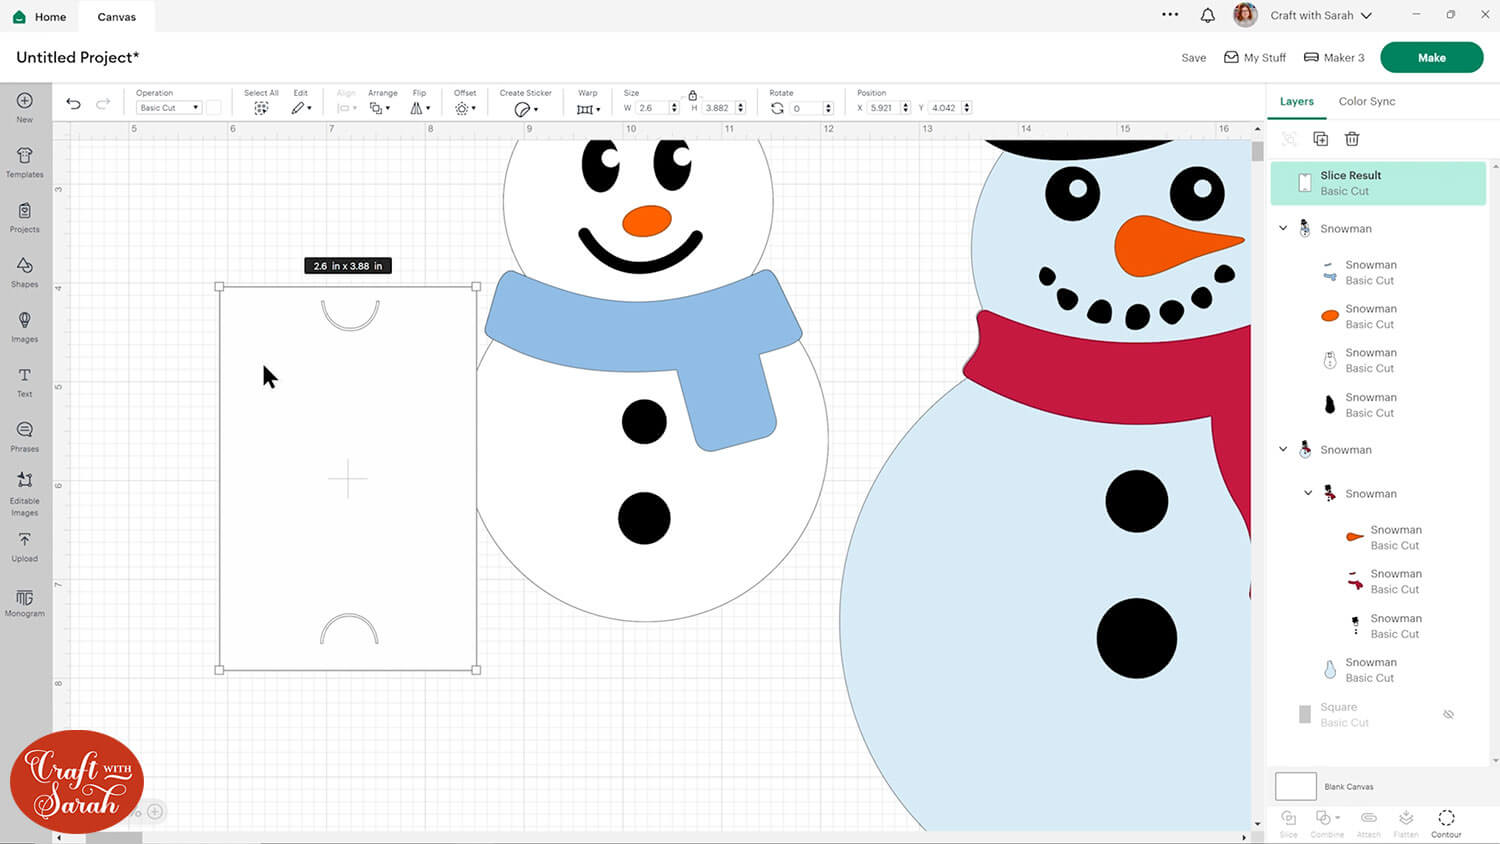
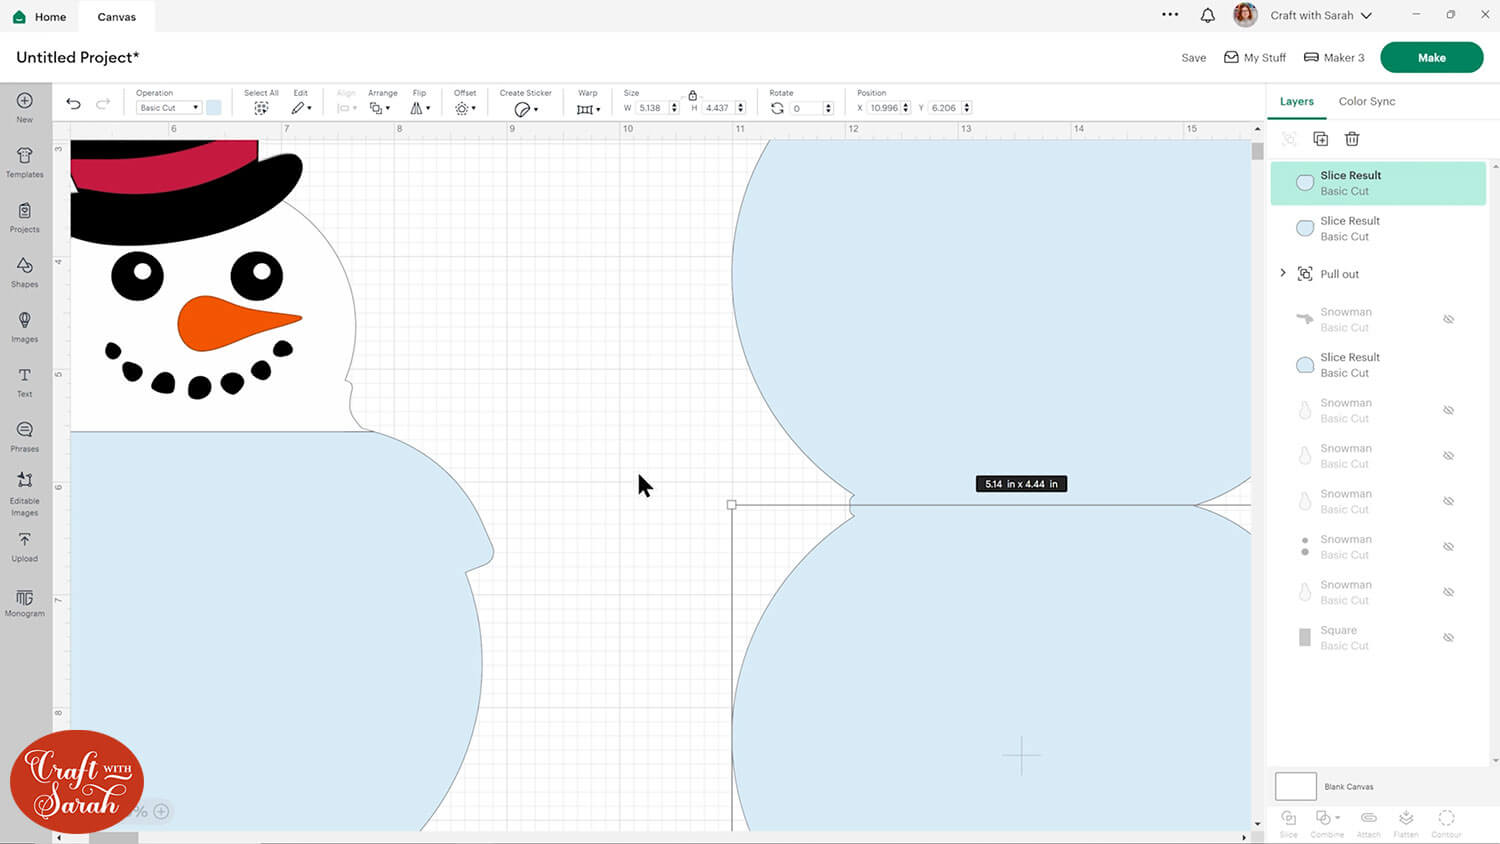
Go into shapes and choose a square.
Use the bottom edge to determine where the snowman will be cut.
I turned the scarf on for some context to help me.
You can turn on the gift card layer to help you.
When you’re happy with where you want to cut the design, select the bottom layer and the rectangle and press “Slice”.
Delete the grey and keep both of the snowman pieces.
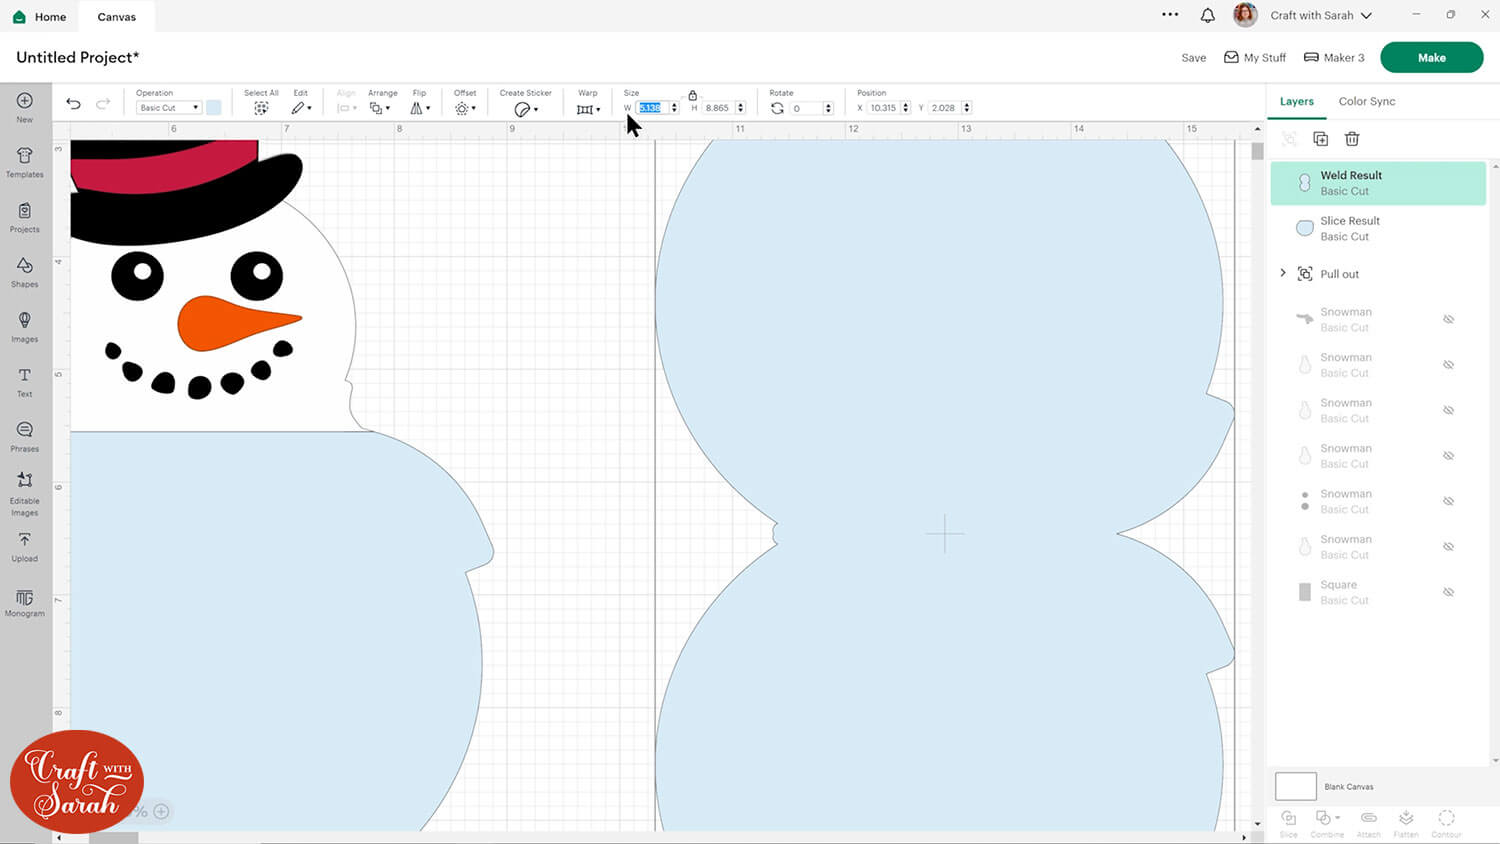
Join the gift card holder shape to the top part of your gift card holder by lining it up, selecting both layers and pressing “Combine > Weld”.
Add on any details that will be glued to this top section.
I decided to cut the mouth of the snowman out of the white so that I can stick a black rectangle behind it to fill in the gaps, rather than having all the tiny little pieces of his mouth cut out as little circles.
IMPORTANT – your card needs a flat bottom to ensure it can stand up. My snowman does NOT have a flat bottom! To fix this, place a rectangle over a small area of the bottom of the image and Slice it out, then delete the excess. I forgot to do this when I was making my gift card, which is why the images below are still rounded at the bottom. If you are following along with this tutorial, it would be much easier to make the bottom edge flat NOW!!
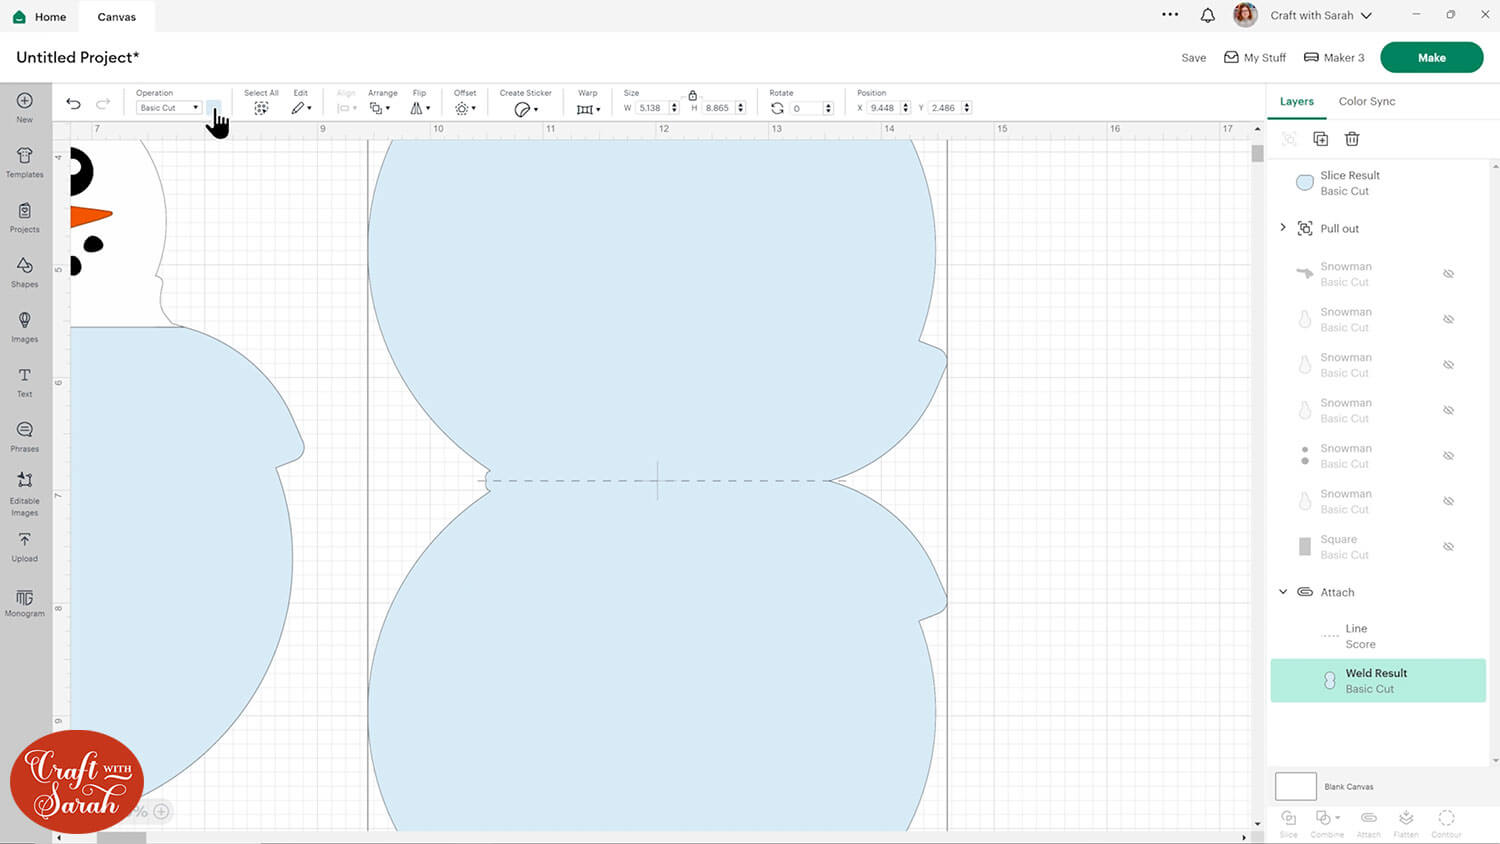
Duplicate the bottom section of your gift card holder twice.
Flip one of them vertically and position it so that it is just touching the top of the other copy. There needs to be a slight overlap, but as small as you can make it.
Select both and press Align > Align Left to make sure they are lined up.
Select both pieces and press “Combine > Weld”. They should now be joined together into one continuous piece.
Add a score line and rotate it 90 degrees so that it is horizontal.
Select the score line and your card base and go “Align > Center” to put the score line in the middle of the card.
Size the score line to fit the card, then “Attach” it to the card.
Move this to the bottom of the layers panel.
Create some shapes to glue inside the card. Not only does this make it prettier inside, but it gives the back of the card a bit more weight to balance out the gift card.
Finally, add a rectangle the same size as your gift card, and resize the holder so that it will fit.
Save the project, then press “Make” and get everything cut from cardstock.
Step 3) Stick it together
The exact steps will vary based on your specific gift card, but you can now stick all the pieces together with a combination of glue and foam squares.
Delightful gift card holders to make with a Cricut
I hope you enjoyed this tutorial on how to use my pre-made gift card templates, as well as how to design your own!
Now you can make your own custom gift card holders for any occasion!
Don’t forget to check back tomorrow for the next Card Making Countdown project.
Happy crafting,
Sarah x