
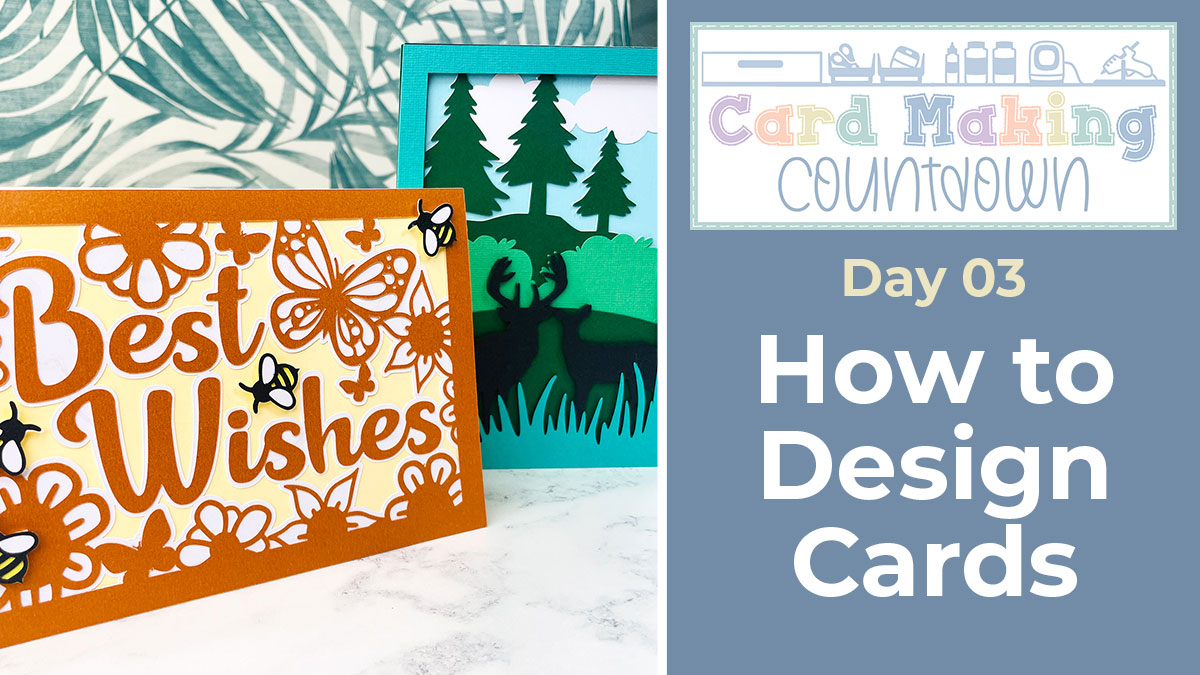
CMC 2024 Day 03 ✂️ Design Your Own Layered Cards
It’s Day 03 of the 2024 Card Making Countdown!
Hello and welcome to Day 3 of the Card Making Countdown, where I’m showing you how to make 10 different types of card with your Cricut machine in 10 days.
Today’s Countdown project is a Design Space tutorial on how to create your own layered cards.
See how to create two different types of layered card, including how to choose the best images, how to place them together, how to create layers and how to finish everything off to ensure that it cuts beautifully.
Tomorrow’s Countdown project will build on the skills learned in this video, so I strongly recommend watching it all the way through.
I’ve included some flower, butterfly and bee cut files for you as part of today’s download. But remember, they’re only available for free for 24 hours, starting at 9am EDT on 3rd June 2024.
Note: This video is similar to one of the classes in my Lovely Layering class, however it was important to include it in this Countdown as tomorrow’s project requires a custom card front. You’re going to love tomorrow’s project!
This project was part of 2024's Card Making Countdown.
Materials supply list
Here is a list of the materials that are required to make this project.
Please note that some of the links included in this article are affiliate links, which means that if you click through and make a purchase I may receive a commission (at no additional cost to you). You can read my full disclosure at the bottom of the page.
- Cricut machine
- Light blue Cricut cutting mat
- Cricut scoring wheel or scoring stylus (optional)
- Cardstock in a range of colours
- Glue or double-side sticky tape (I like Bearly Art Glue and Collall brands of glue)
- Foam squares/pads
This project is suitable for the following types of Cricut machine: Explore Air 2, Explore Air 3, Maker, Maker 3, Joy Xtra and Joy.
Foundation learning
If you’re new to crafting with your Cricut, you may find the below links helpful.
They teach some of the skills mentioned throughout this tutorial.
- How to upload SVG files into Design Space
- How to score with a Cricut (even without scoring tools)
- Print then cut tutorial
- Design Space tools (Combine, Attach, Slice, Weld, Flatten, etc.)
- Pattern fill tutorial (for making backgrounds & cutting images to a specific shape/size)
- Free envelope SVGs that can be sized to fit any card
- How to write inside cards with Cricut pens
- How to cut layered designs at a small size
- Design Space tips & tricks
- Cricut pens tutorial
Video tutorial for DIY layered cards
Watch the video below to see how to design your own layered cards in Cricut Design space.
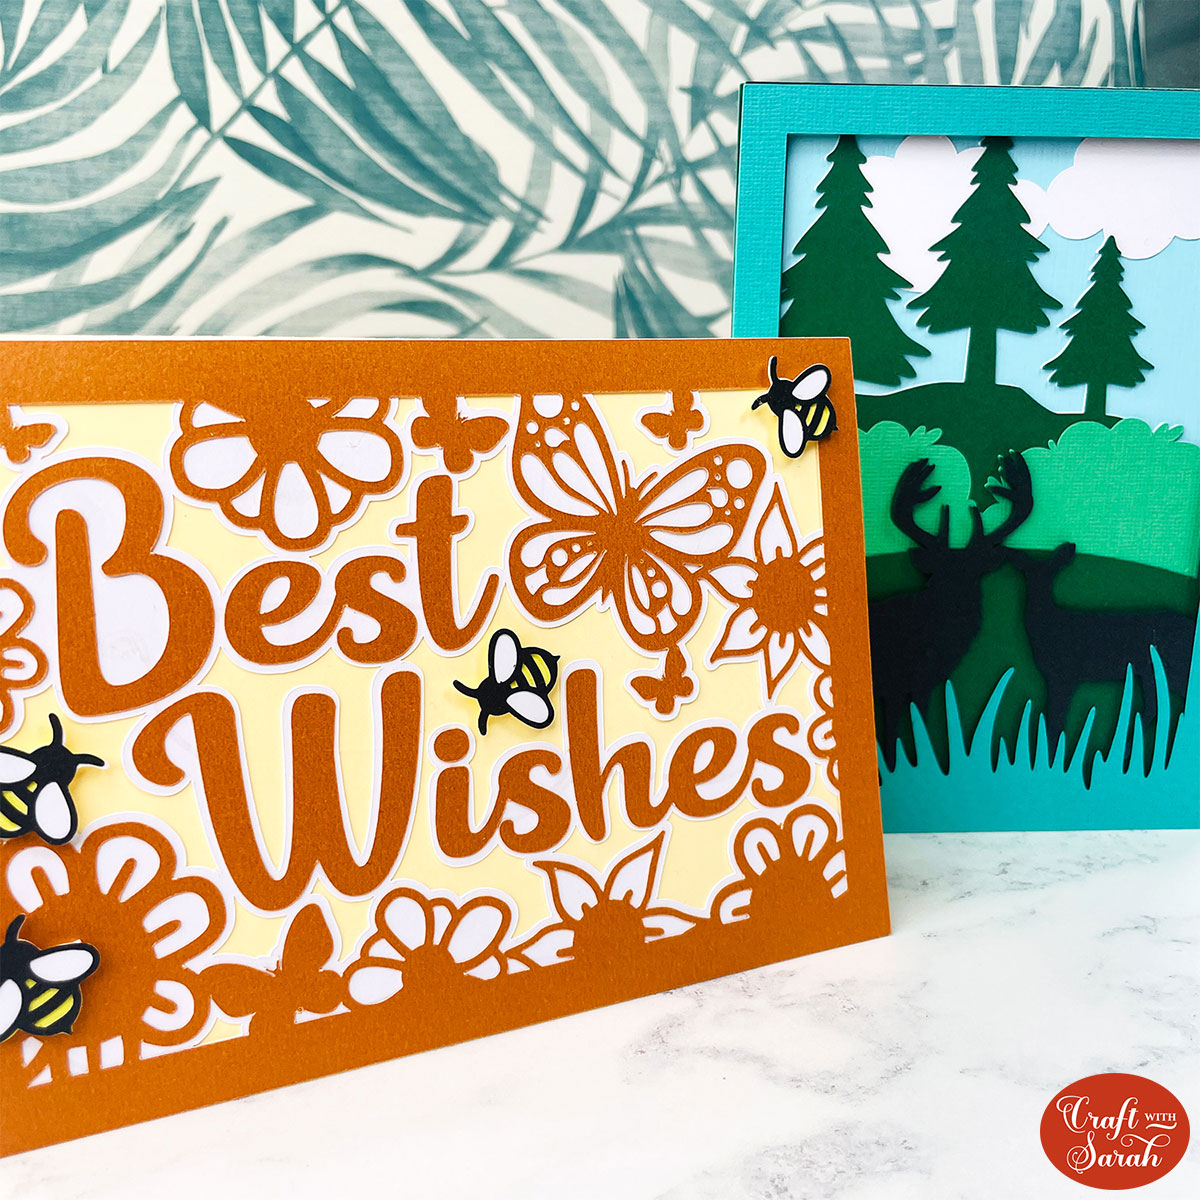
The first part of the video shows how to use text on the front of the card as a greeting, with flower, bee and butterfly decorations around the edge.
The second part of the video shows how to choose images or SVGs to make custom scenes on your handmade cards, all within Cricut Design Space.
If you prefer to read rather than watch, keep scrolling!
PART ONE: Flower & text greeting cards
Here’s how to design your very own layered cards in Cricut Design Space, using the SVG download from today’s Countdown project.
These cards are based on the ones in the photo below, which are some of the very first free SVGs I ever shared on my website.
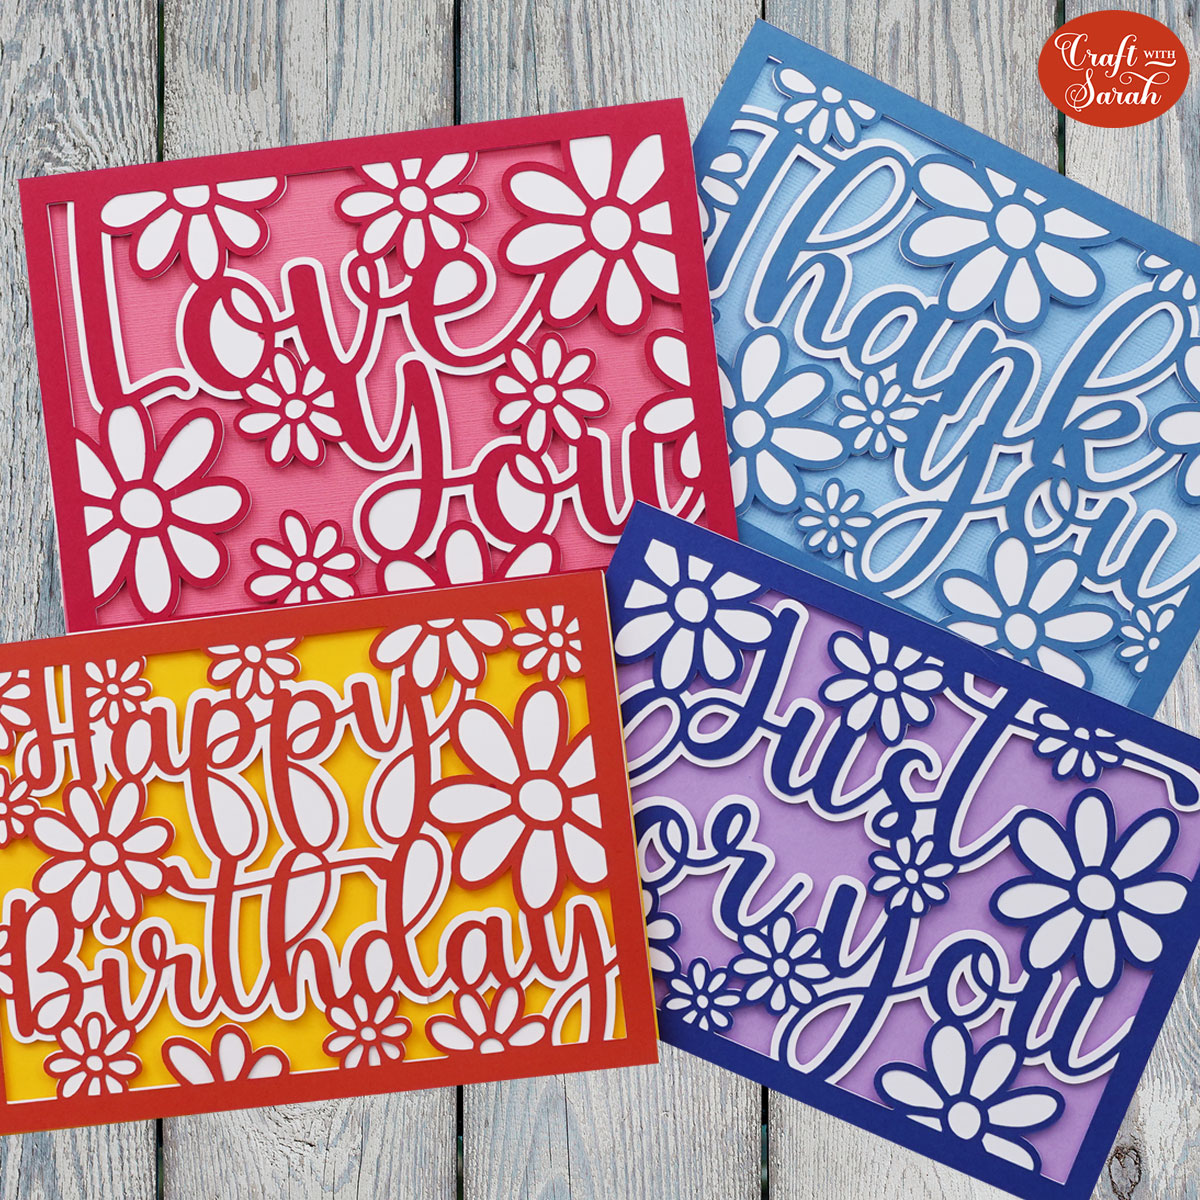
Even now they’re still in the top five downloaded designs pretty much every single month.
Scroll further down this page for how to design more “scenic” cards.
Step 1) Download the file(s) & upload to Design Space
Download the files using the box below.
Before you upload the files to Design Space, you need to unzip the download folder that they come in.
- How to unzip a folder on Windows computer
- How to unzip a folder on a Mac
- How to unzip a folder on an iPad/iPhone
- How to unzip a folder on an Android device
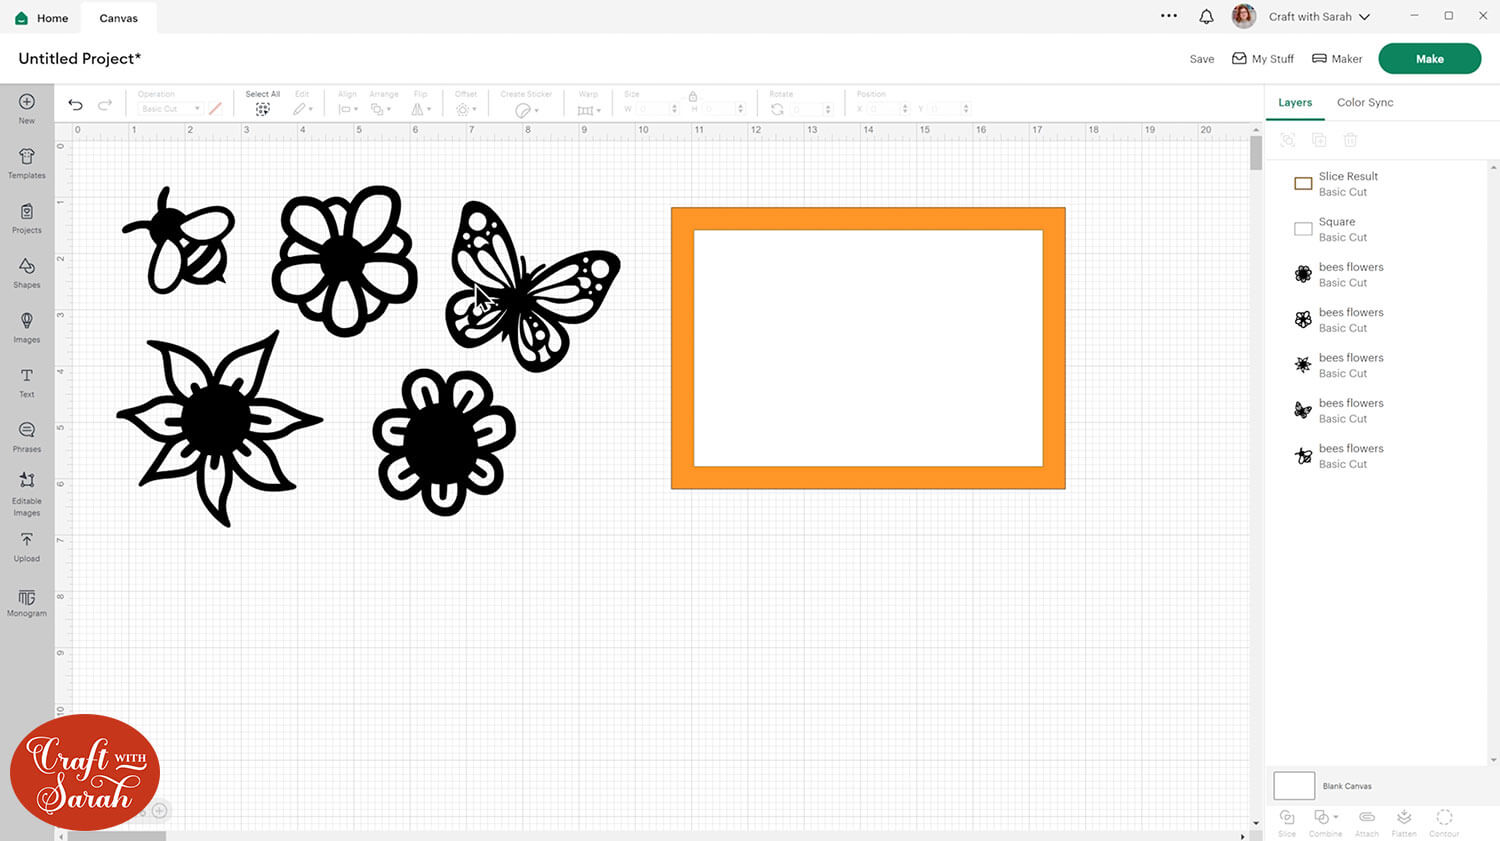
Upload the SVG file to Design Space.
Click the design and Ungroup the layers.

Step 2) Create the card base
Decide what size you want your card to be. I’m going to make a 5×7 inch card.
Go into Shapes and choose a square. Untick the padlock box above the width and height box and make the square 5×7 inches.
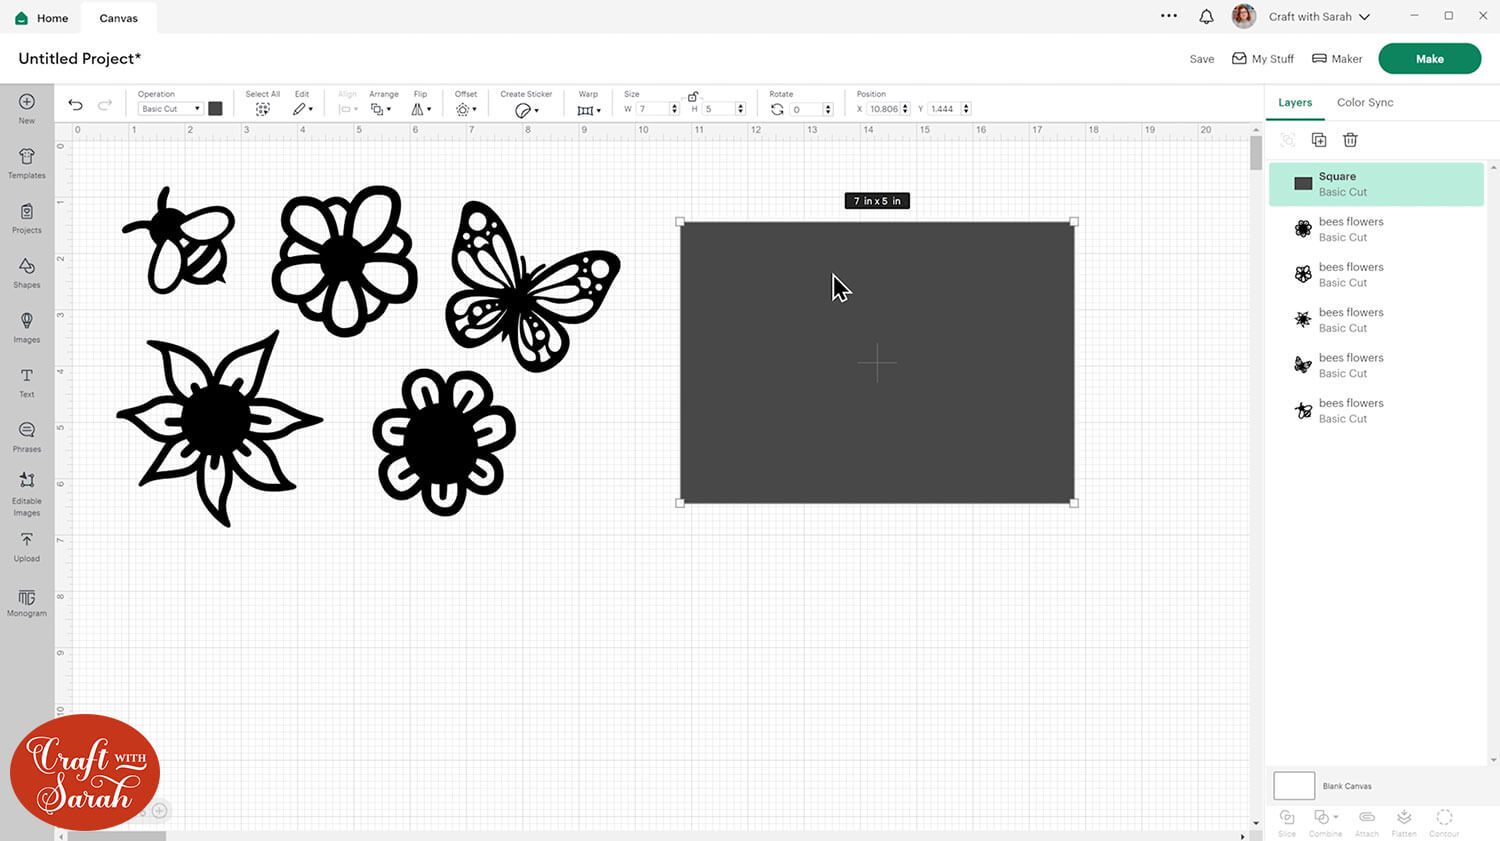
This will be the very bottom layer, which I have made white for now.
Duplicate the rectangle or square (if you are making a square card) by pressing the “Duplicate” button.
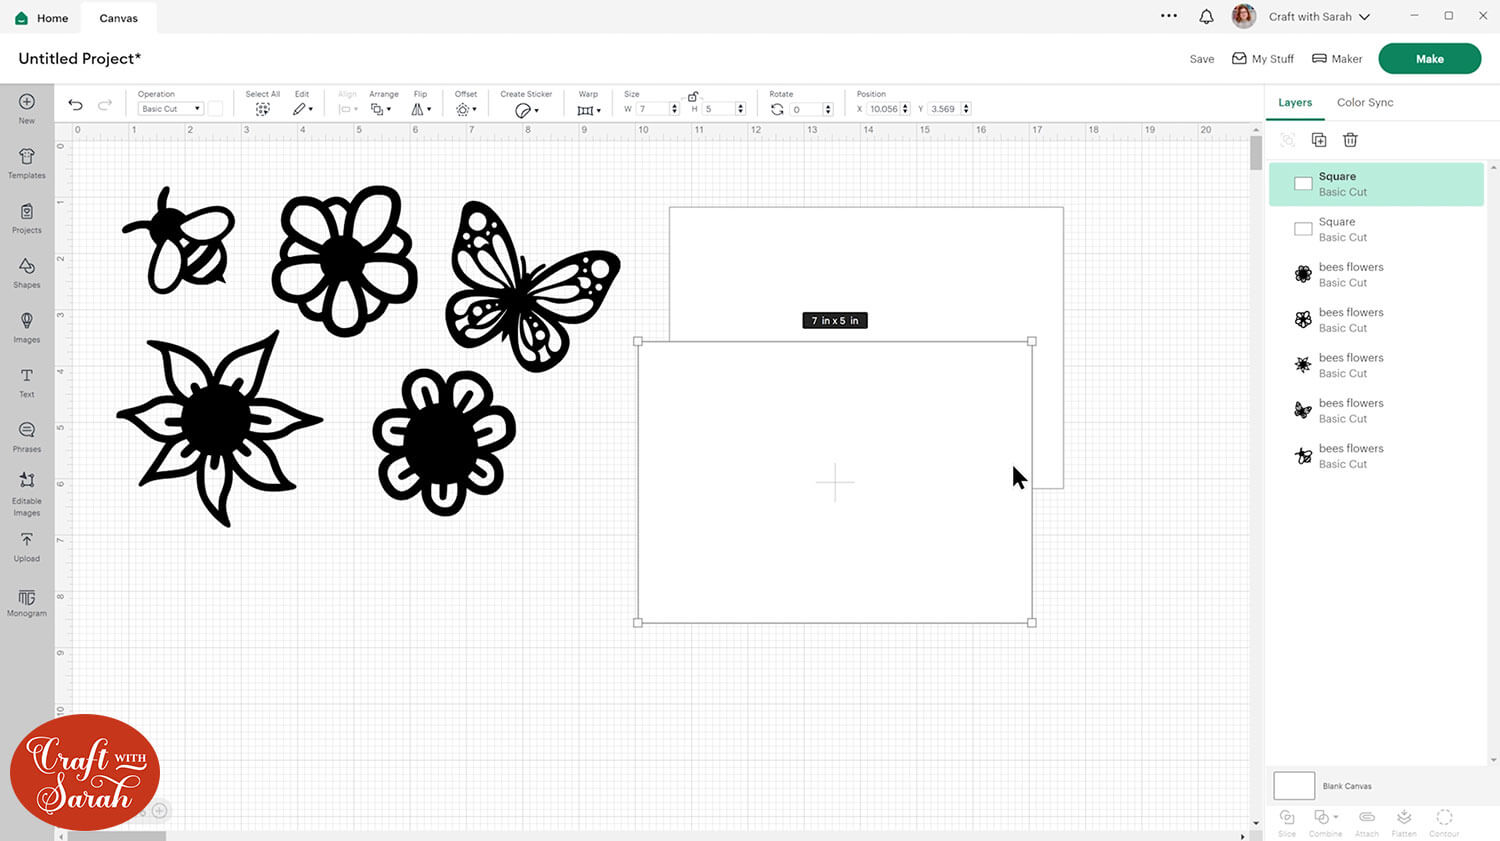
This will be the start of our layering so we need to turn this into a border to go around the edge of the card.
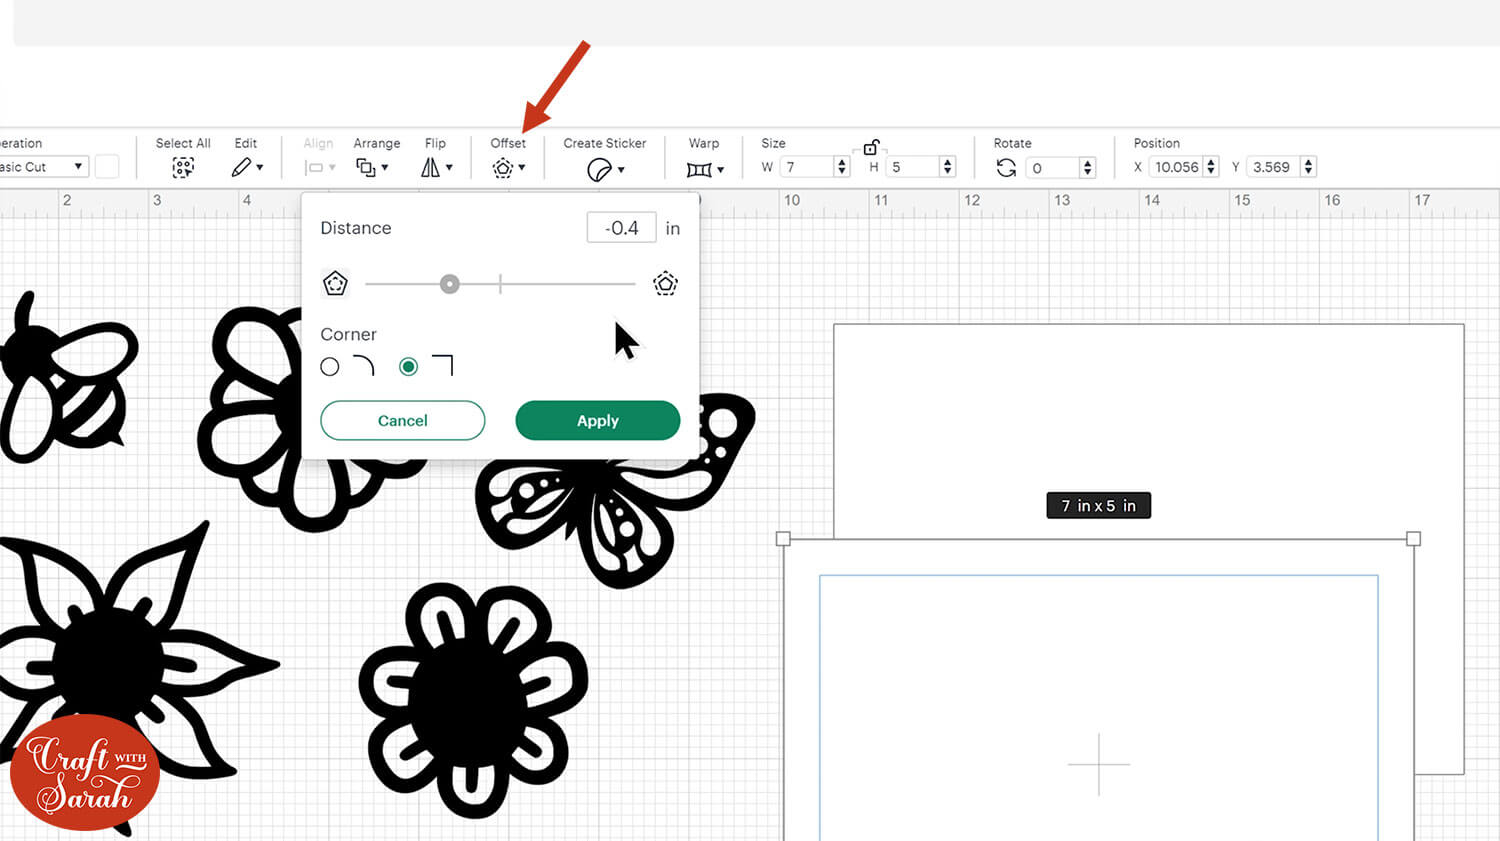
Click “Offset” and tick the sharp corner option.
Drag the slider down so that it’s a negative amount. We want a nice, thick border as this is what will join all our pictures together.
I set mine to -0.4 and pressed Apply.
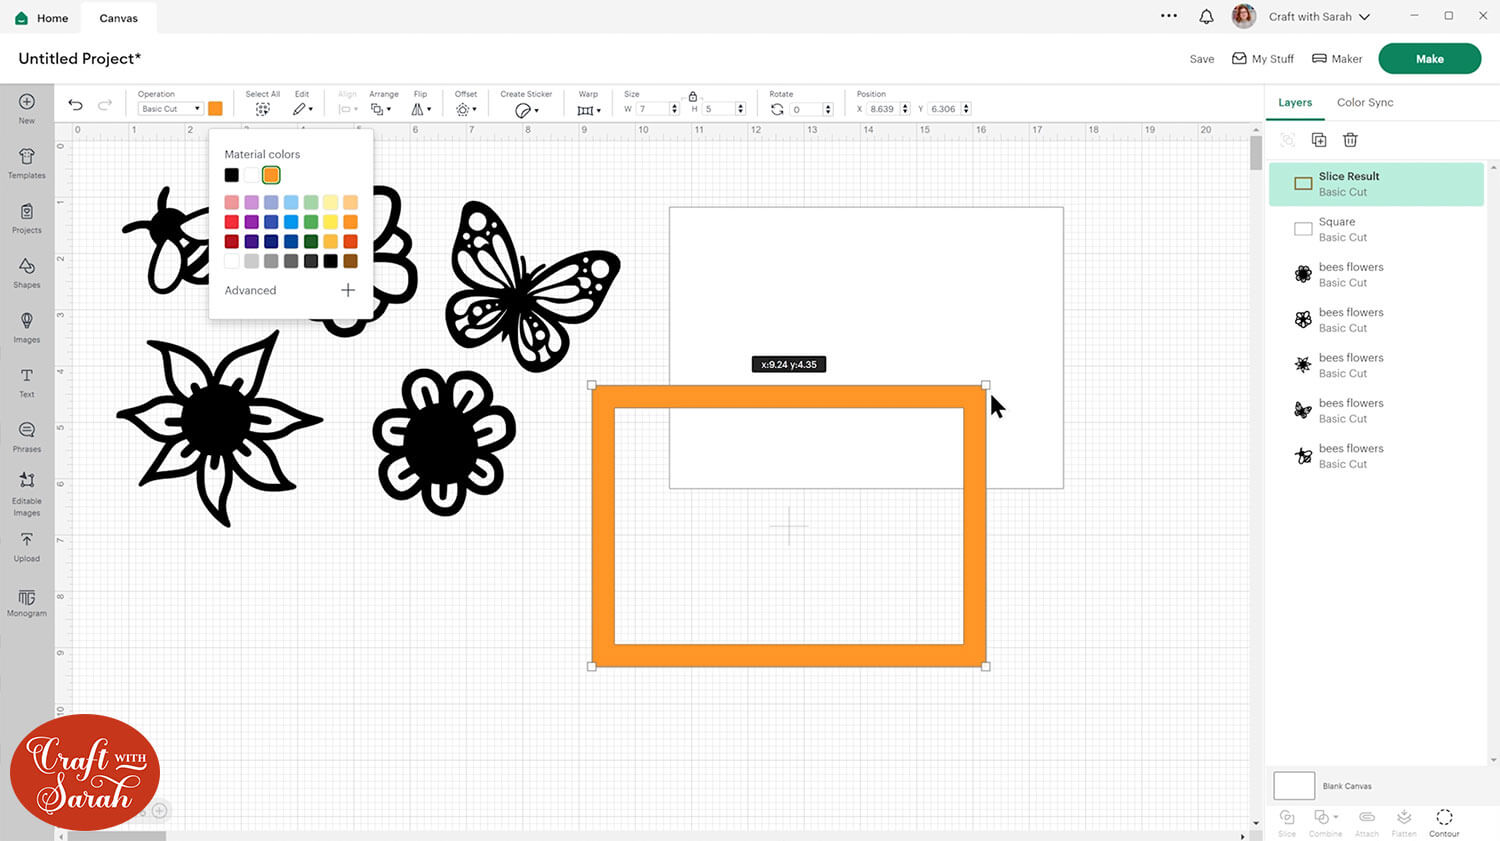
Drag a box around those two rectangles (the duplicated white one and the offset that you put in the middle) and then click the “Slice” button at the bottom of the layers panel.
This will cut the smaller rectangle out of the larger one.
Delete the middles and then you’ll be left with an outline. Change the color to something nice and bright so it’s easier to see.
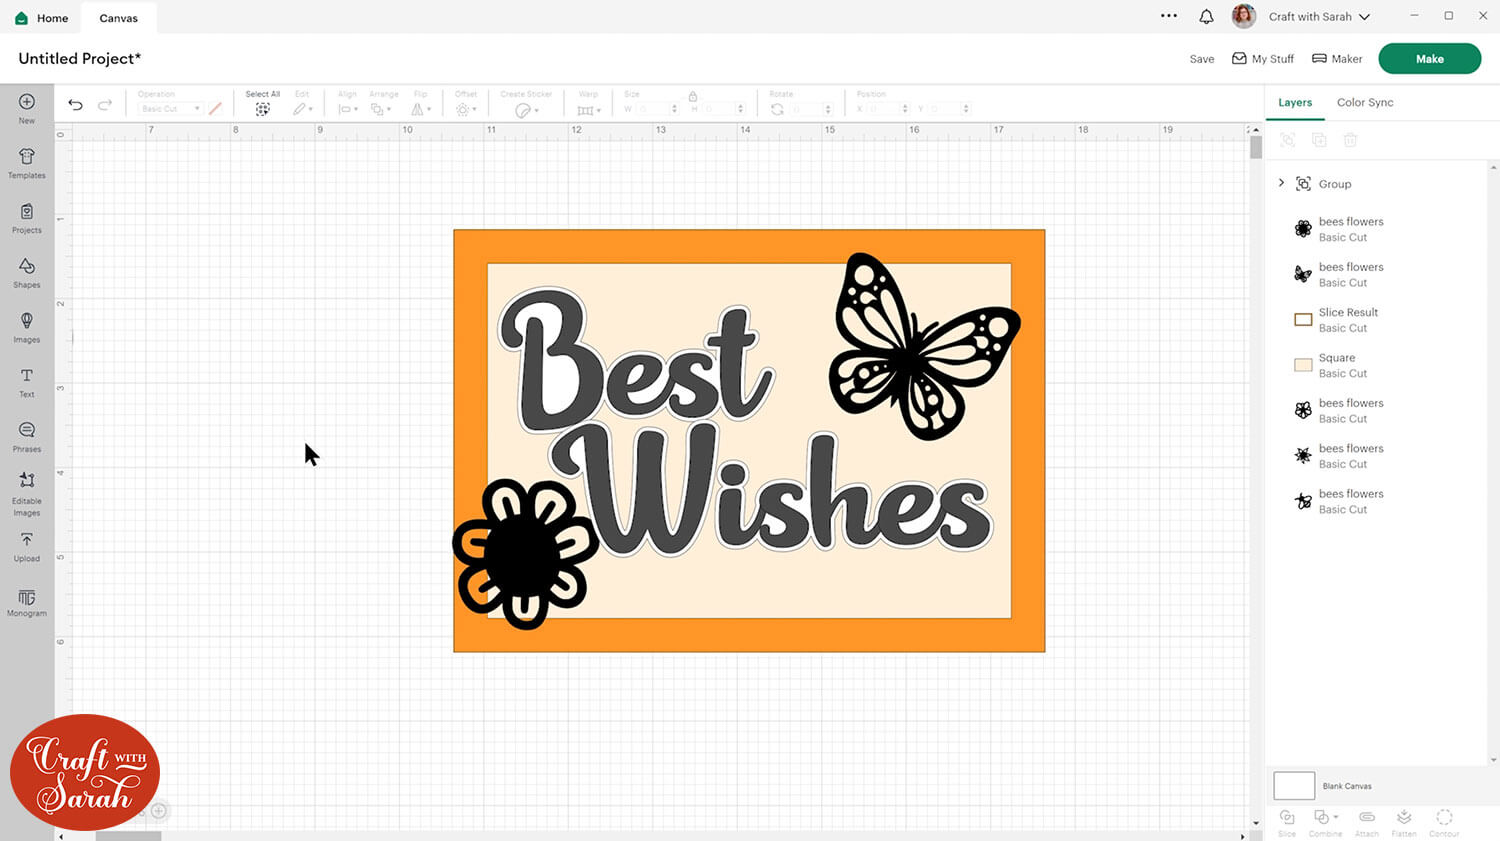
Position them on top of one another and now we can start adding our pictures and text.
Step 3) Add the text greeting
Go into “Text” and type out your greeting. I chose to write “Best Wishes”. If using multiple words, type them out separately as different layers so that you can play around with the positioning a bit more.
I chose a Cricut Access font called “Double Whipped” which is perfect for cardstock as it is thick and the letters are touching so that you don’t have to glue them on individually.

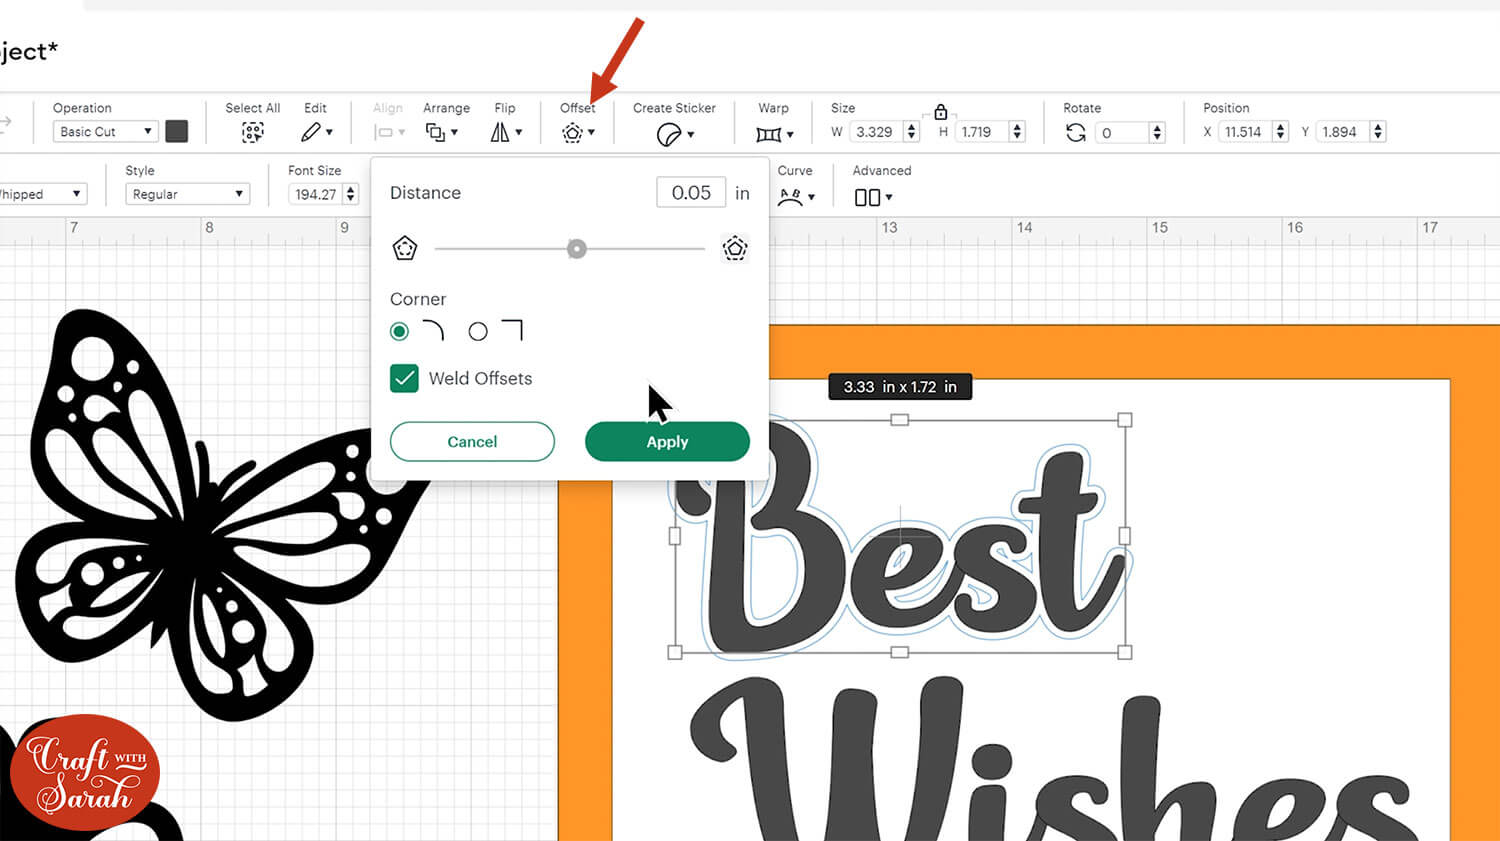
Give your text a border by clicking into Offset. This time we want to go back to the curvy edges and you will need a positive number.
It doesn’t need to be as thick this time, we just need a little white outline so that the text is easier to read. My offset was 0.05.
With the offset selected, go into “Contour” and take out any of the tiny pieces/gaps by clicking them within the popout window.
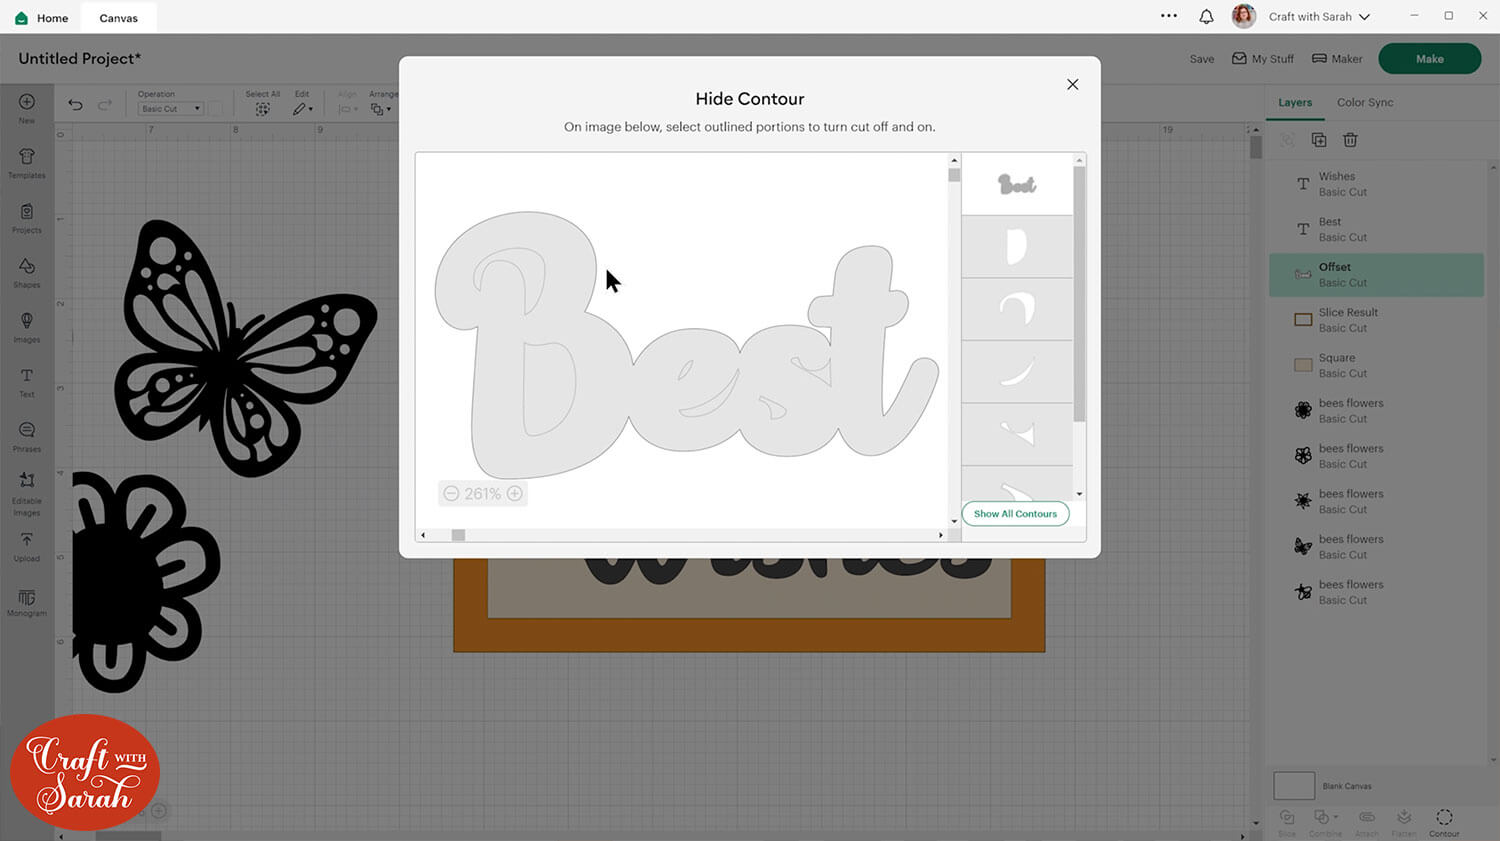
Repeat the same process for the second part of your text if you have one. Make sure it has the same size offset as the first word.
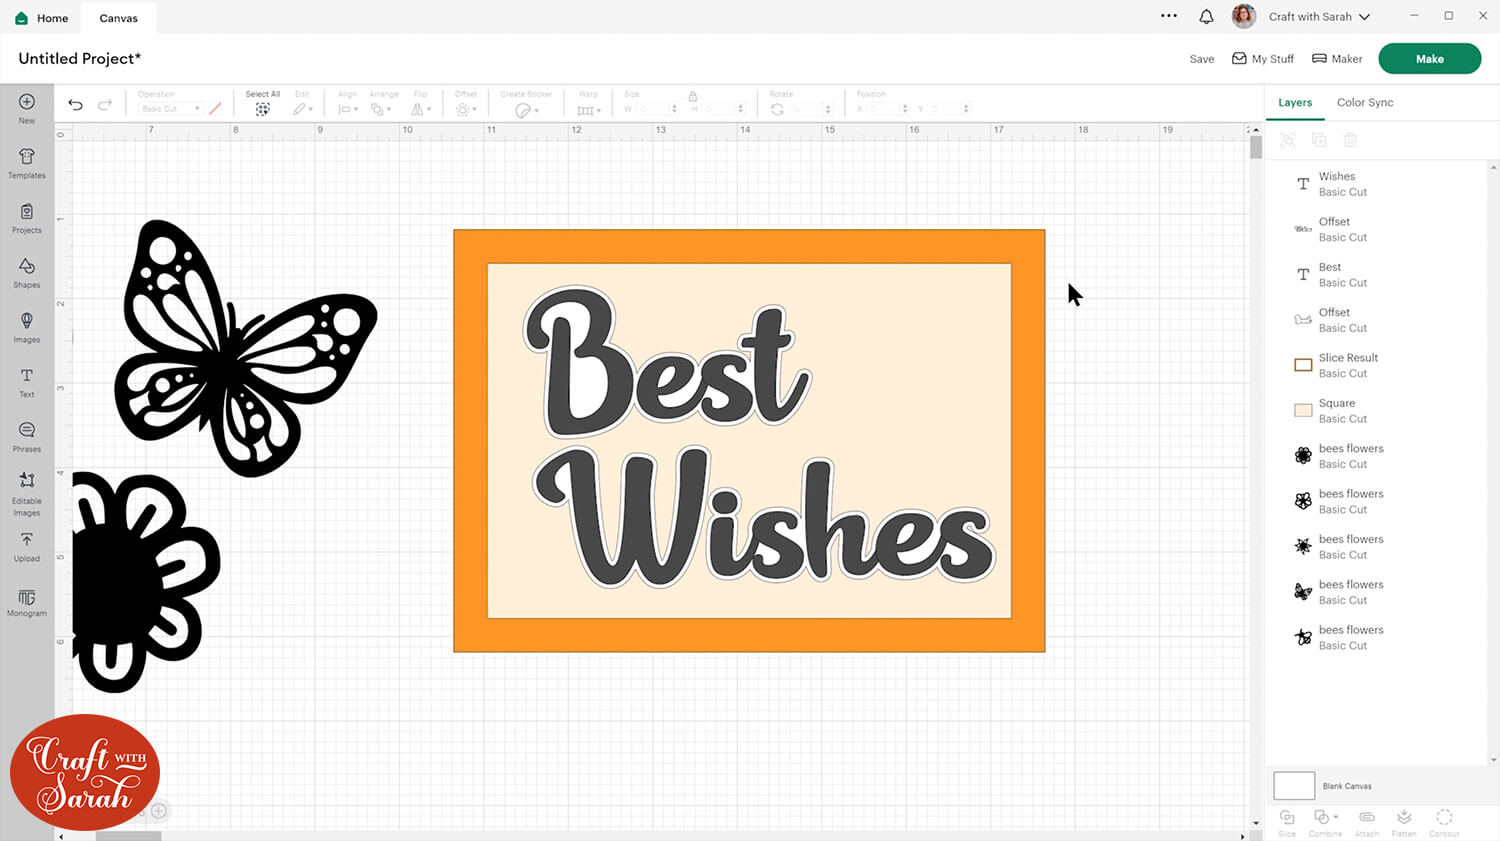
Step 4) Add the images
Once you have your text vaguely in place, you can start adding pictures.
You might find that the SVGs are underneath the card base. If that’s the case, select all the pictures and press Arrange > Bring to Front.
Start by placing the pictures in different places around the card to get an idea of how it may look.
I moved my text slightly so that the two words were just touching. At this point, I was happy with how my text was looking so I selected both of the words and their Offset layers and Grouped them together so that I didn’t accidentally move them.
At this point, you don’t need to worry about the colours. Focus on trying to get a layout that you are happy with.
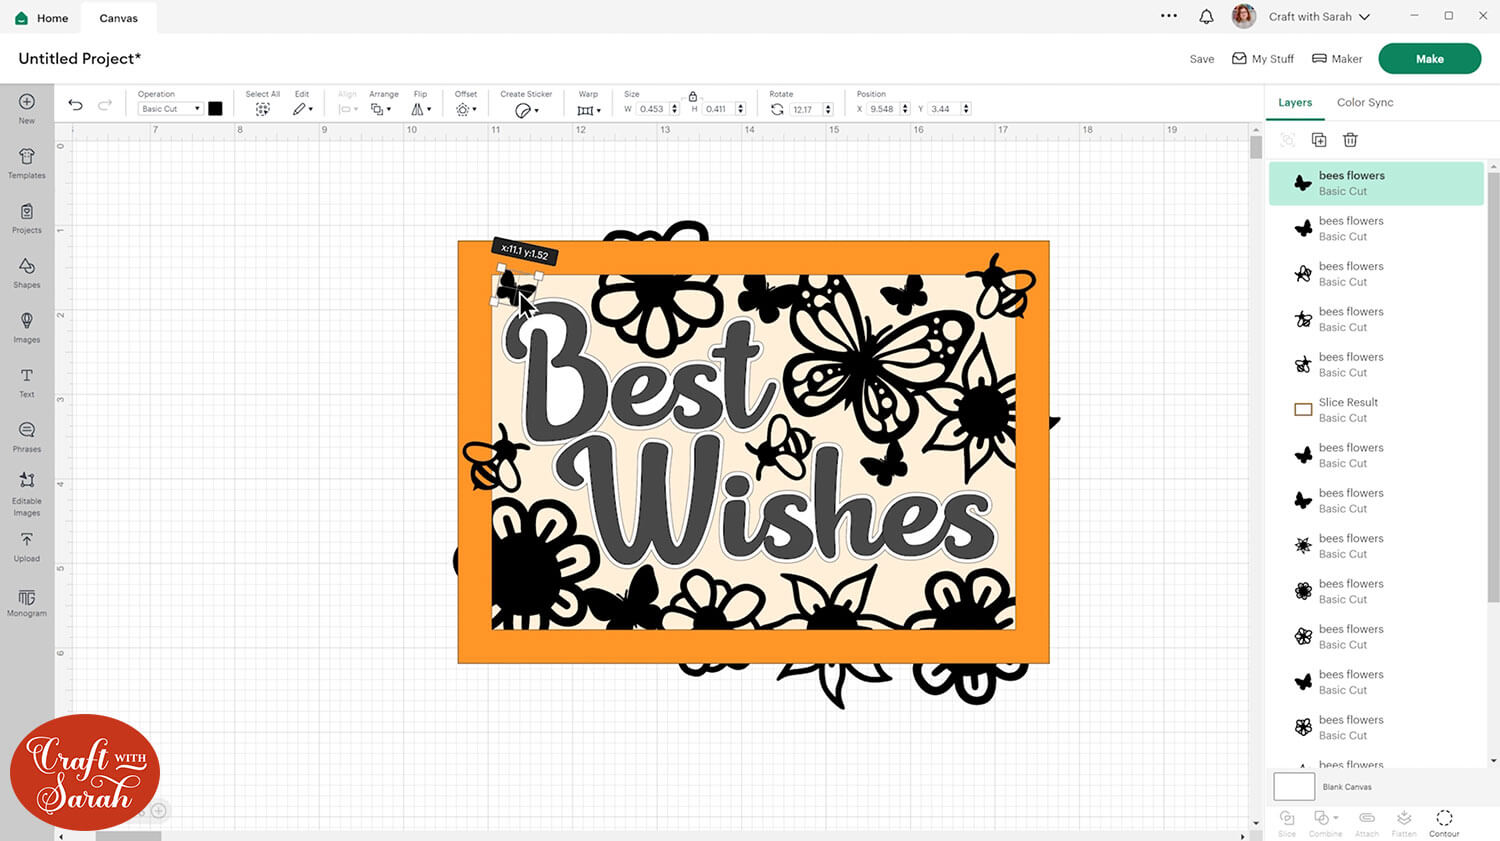
Place the pictures so that they are touching the border and close to the text. They do not need to completely touch the text at this point as we will add an offset layer to them later, but they should be quite close to it so that the offset layers will reach the text when we add them at the end.
We won’t be doing our offsets till we are finished sizing otherwise we will change the size of our pictures but the offset won’t be sized correctly.
Don’t worry if your pictures are touching each other.
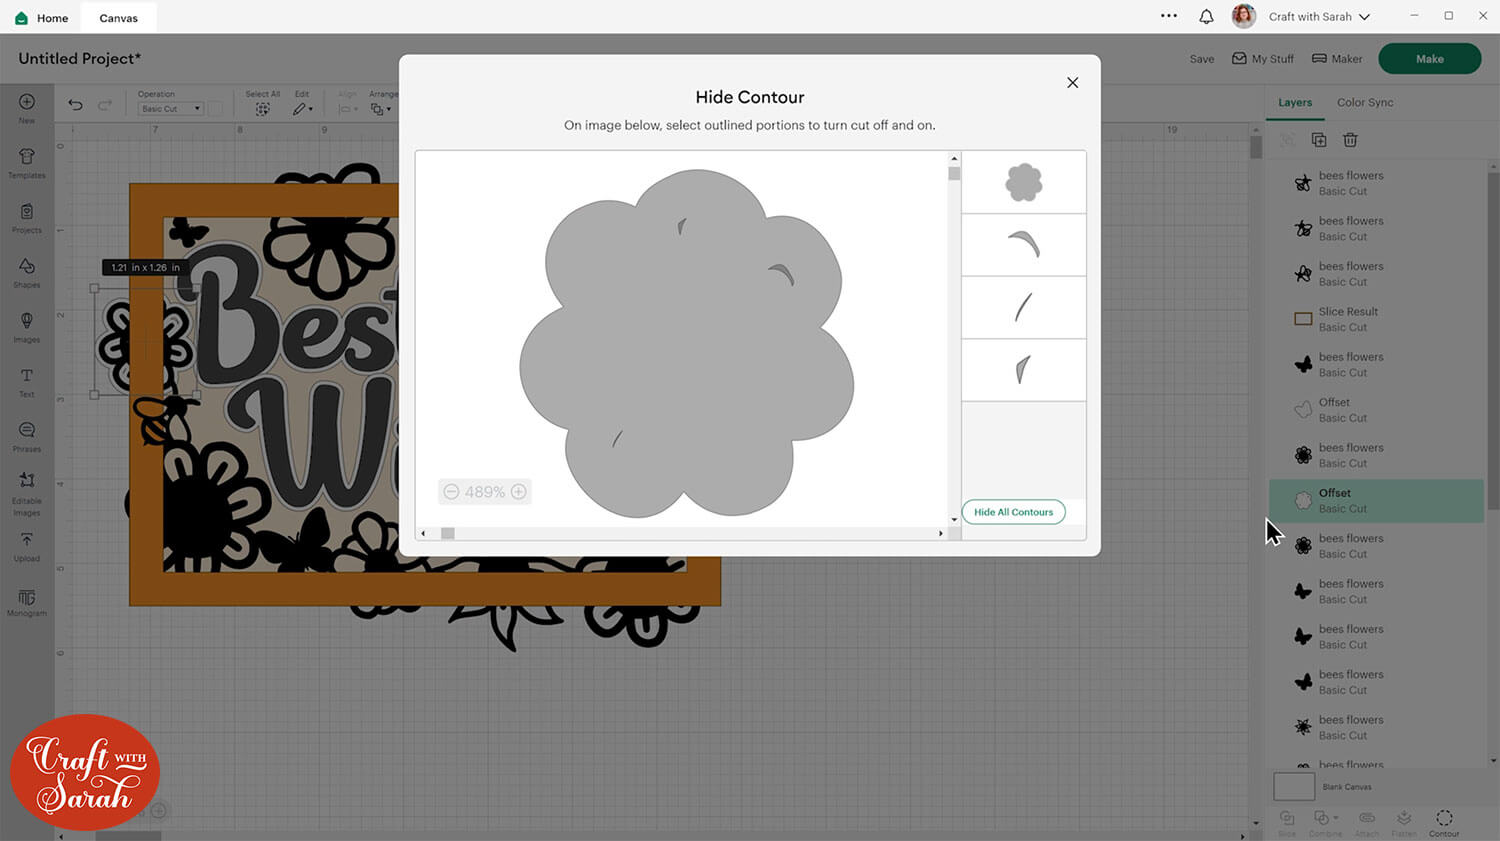
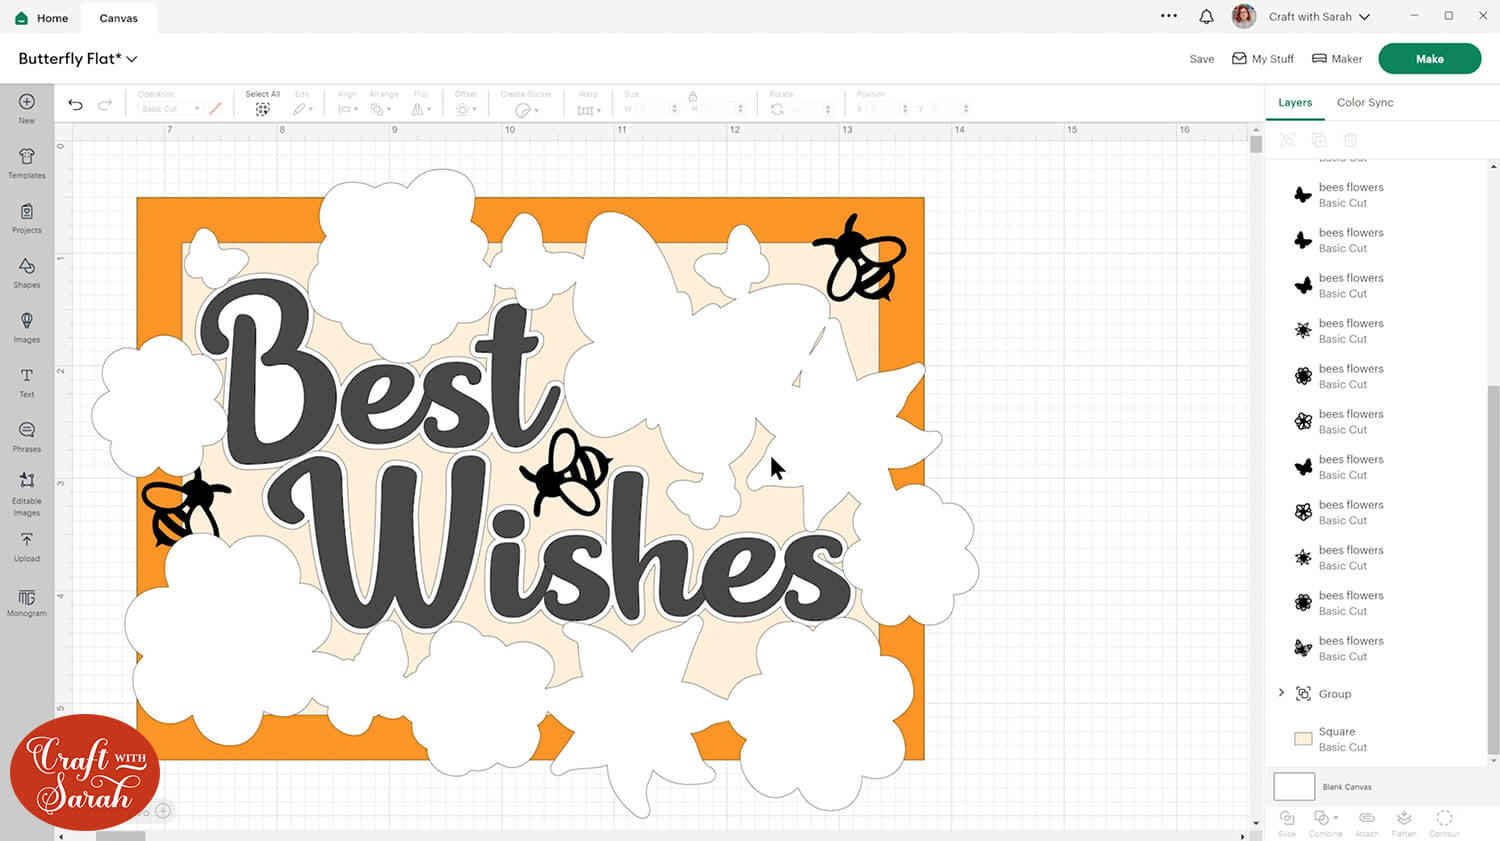
You can fill in space by duplicating the pictures. If you would like to make them small, they may get hard for the Cricut to cut BUT you can click the design and go into Contour and press Hide All Contours to make a silhouette which you can get away with making much smaller.
That’s what I did for the butterfly on the top-left of the design in the image below.

You want the outlines of your pictures to be touching in places so that they will end up all joined together. That way when you cut the top layer of the card, it will cut as one piece.
NOTE: I am keeping the bumble bees separate from the flowers and not having them touch anything, as I want to cut them in different colours to everything else and raise them up with foam squares so that they “pop” out from the front of the card.
Don’t worry If you have bits hanging off the edge, we will cut those off at the end.
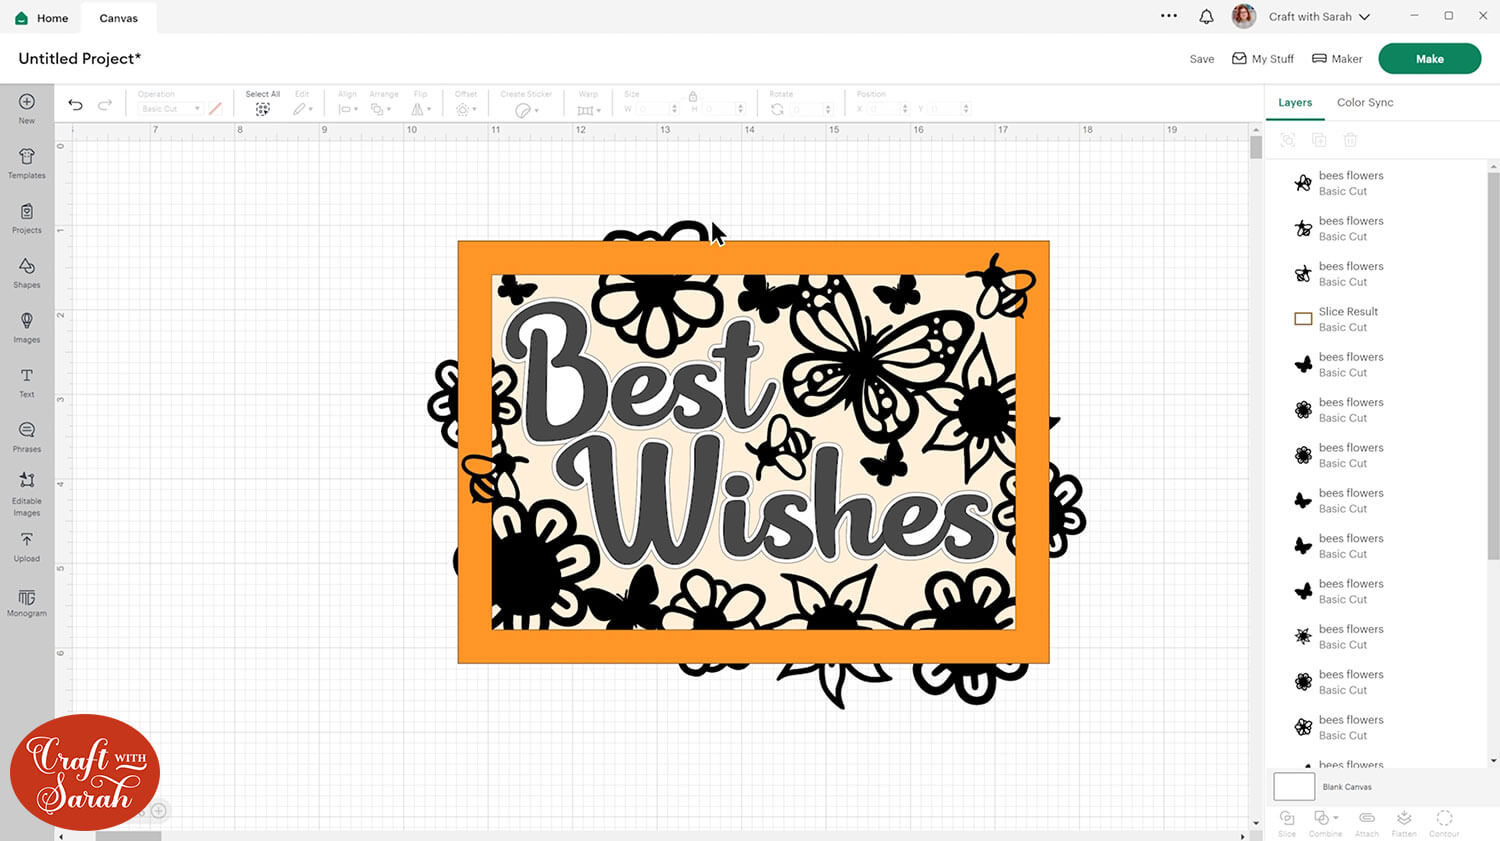
If you want to get a slightly better idea of how it’s looking you can move your border to the very top.
Keep going till you have filled the spaces in. Don’t be afraid to take your time on this, especially if you are new to designing in Design Space.
You may need to add some pictures to the ends of the text so that it joins the text to the edge of the card.
Select everything, Group the layers and then Duplicate the group to make a copy. Hide the duplicate one as it’s just in case you want to go back and change the positioning after the next few steps are complete.
Step 5) Add a offset layer
Now we need to add an offset to everything to create out white layer that will sit in the middle.
Select one of your pictures, give it an offset the same size as the one on your text and press apply.
Change the colour to white.
Add the same offset to all the different pictures individually. The reason we are doing them individually is so that the pictures can be moved around if they need to be. We might need to move them to make sure all the offsets are touching, so that the final card layer will cut as one piece.
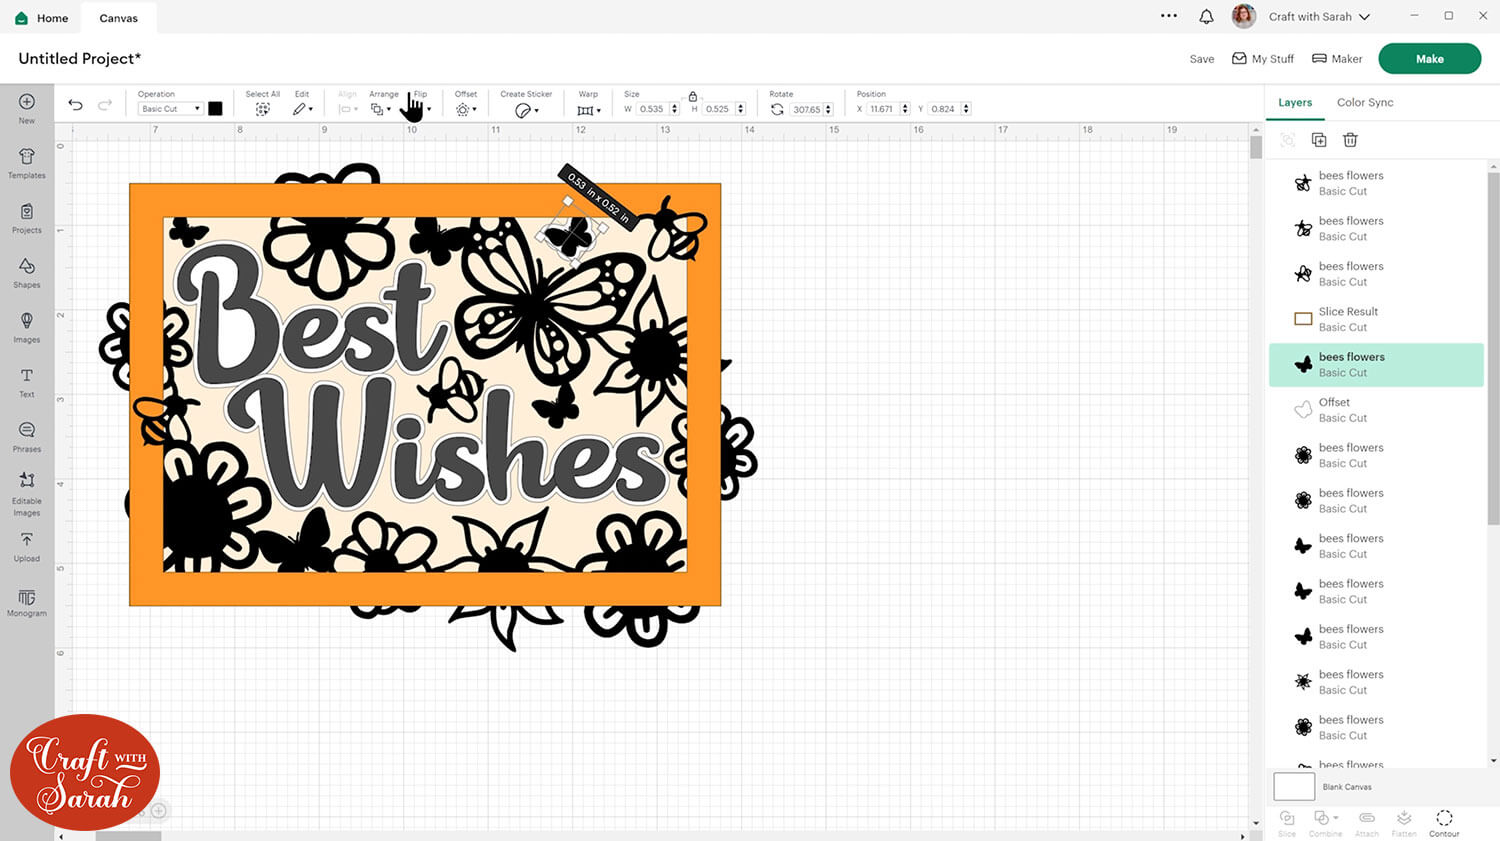
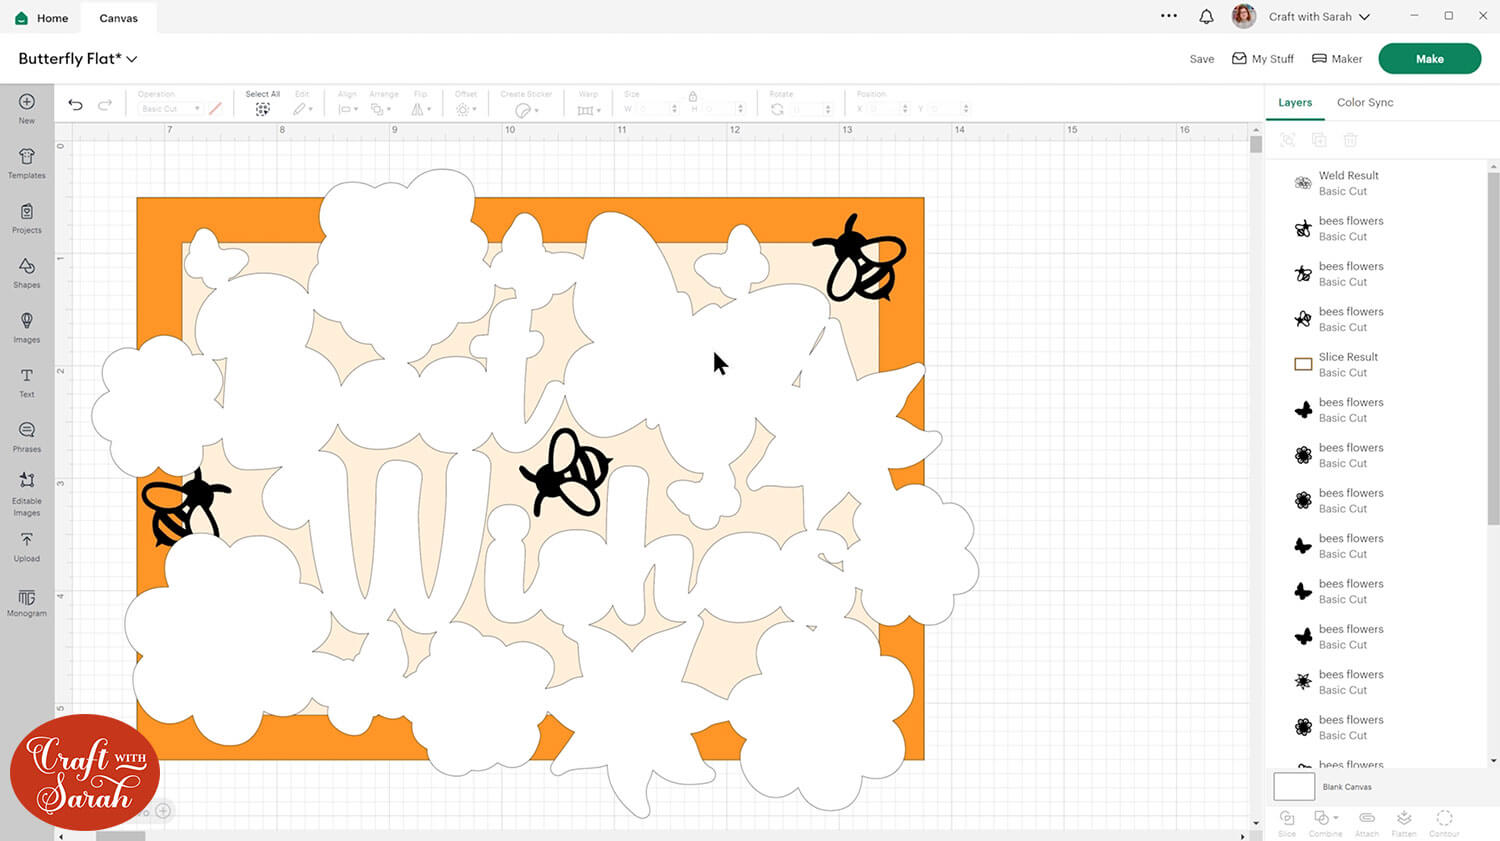
If you notice little gaps or holes in the offset (like in the below image) then you will need to go into Contour and press Hide All Contours.
Here is my card with all the offsets except from on the bees as I will be sticking them on separately.
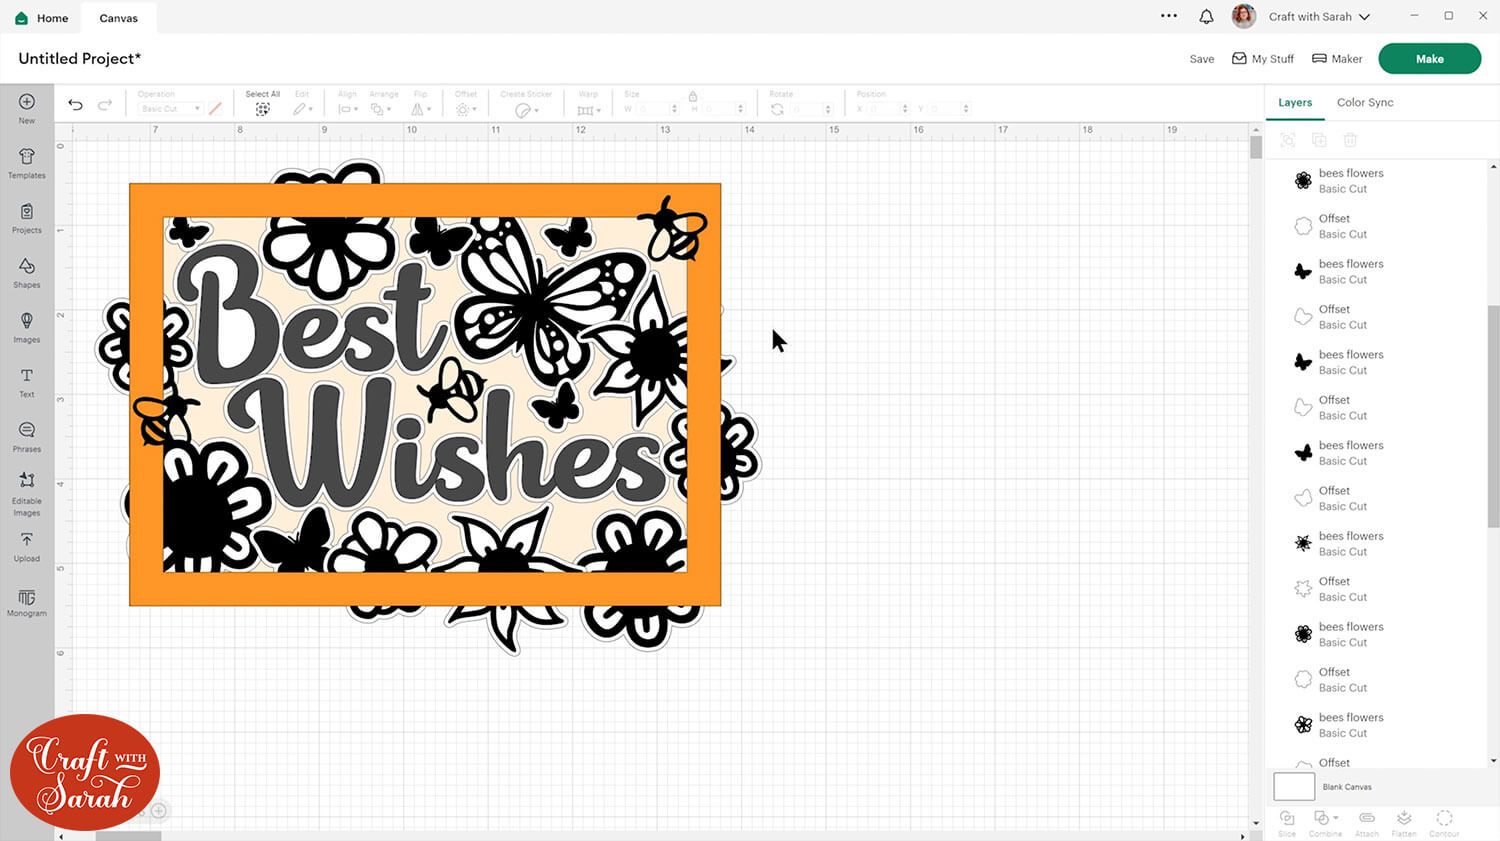
Now we need to check the positioning of everything. It may help to zoom in using the + button on the bottom-left of the screen.
We need to check that we’ve got enough overlap so that everything’s going to be joined together, and also that there aren’t any little spaces/gaps between anything that would be too small for the Cricut to be able to cut.
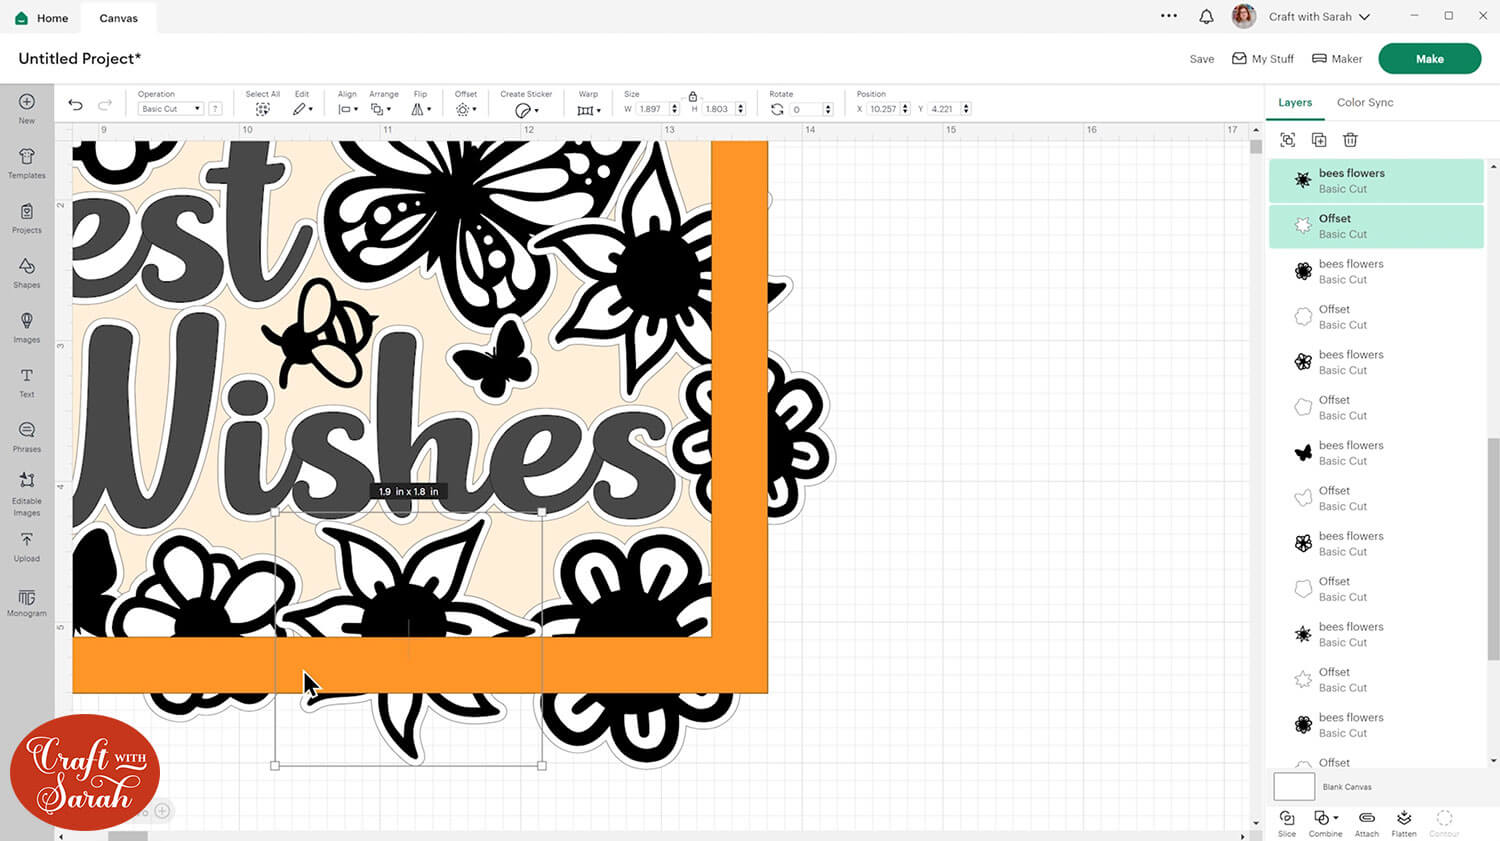
If you do have any little gaps between the pictures then you will need to move them so that they are overlapping. Make sure you have both the picture and the offset selected in the layers panel when you do this.
Don’t worry if your offset is now going over some of the black layer of the other pictures. When we merge them later, the black layer will go on top.
Gaps like this are ok to leave as we can fill them in later with the Contour tool:
Try to avoid resizing as your offset will get out of proportion. If you do need to resize something then you can delete the offset, resize the picture and then do the offset again.
TIP: Don’t forget to save your work! Save one version of it at this point, then immediately go to “Save As” again and call it something different (e.g. V2). The first version that you saved has all the layers separate in case you ever want to change bits. The second version that you saved is the one we will continue working on.
Step 6) Join the pieces together
Now that you are finished with the card design, you can delete the “Duplicated” version of the card that was made earlier in this tutorial.
It’s now time to merge the layers together.
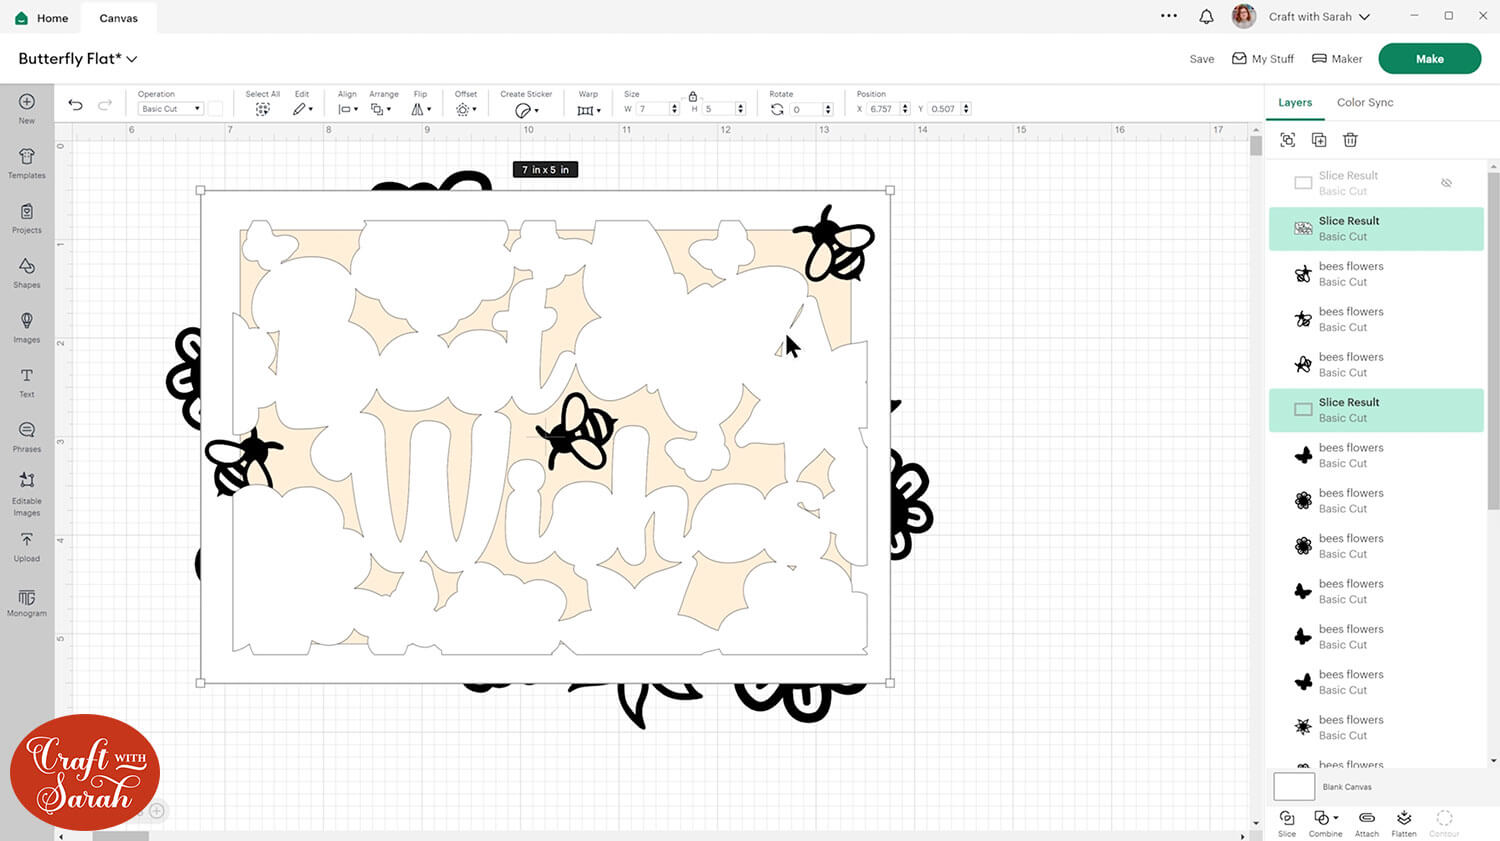
Click on one of the offsets in the layers panel, hold down the shift key on your keyboard and click all the offset layers to select them all.
With all of the offsets selected go “Combine > Weld”.
This will join them into one piece.
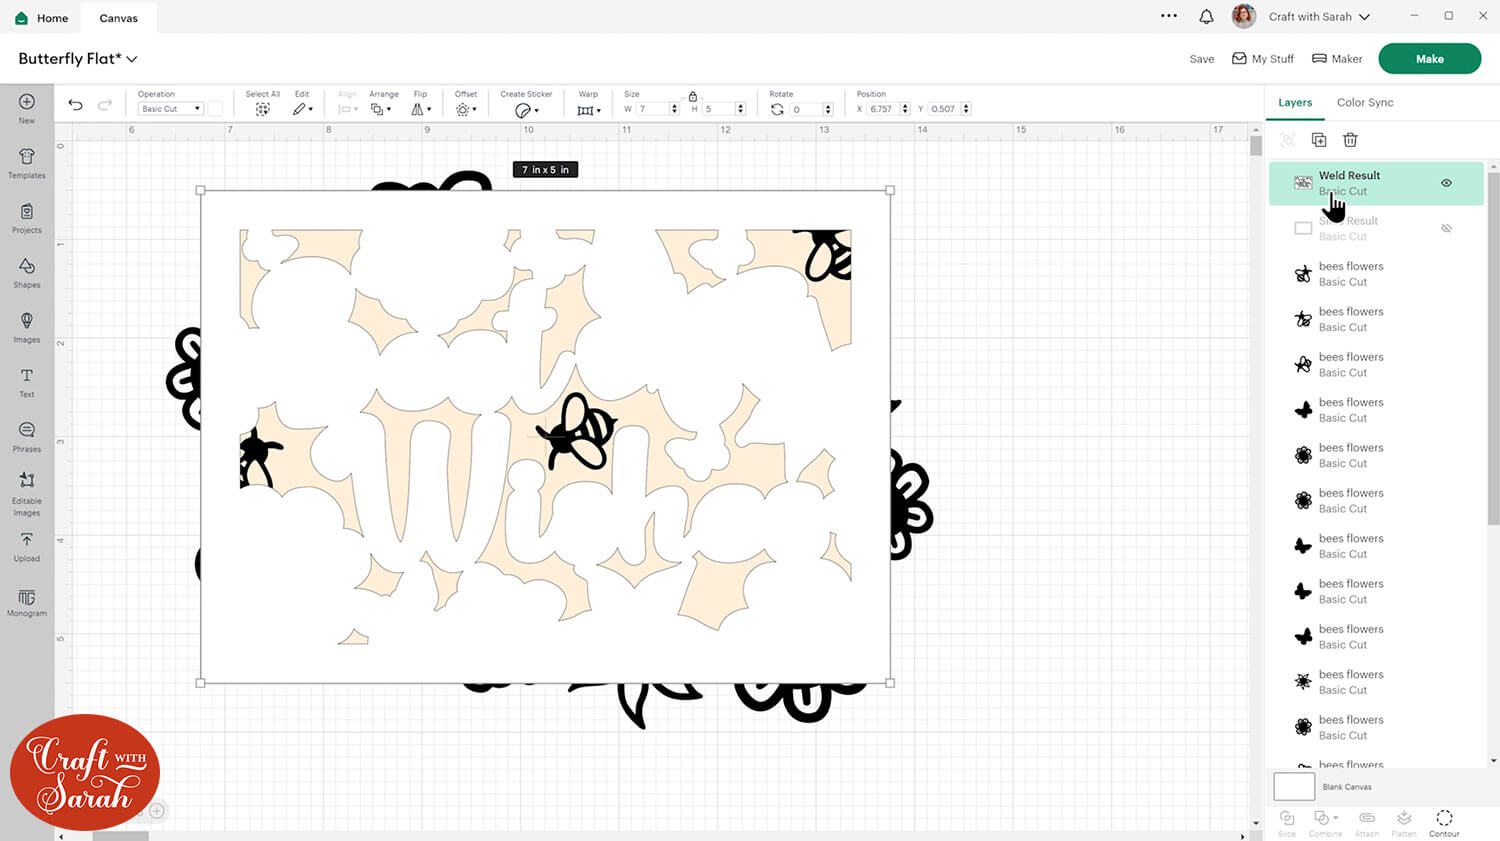
Ungroup the text, select the text offset and the welded piece you just created, and press “Combine > Weld” again.
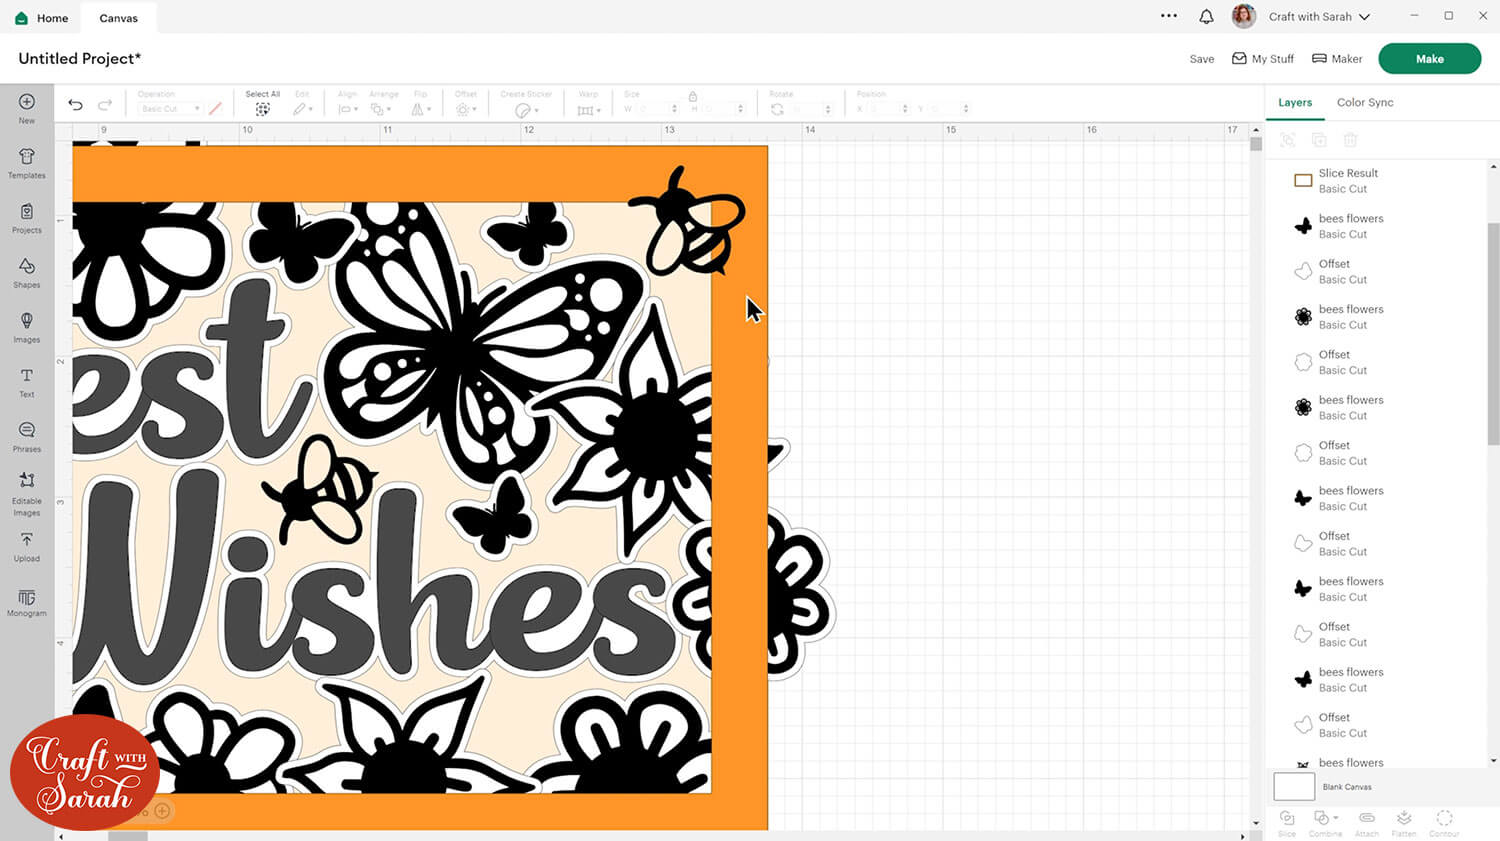
The next thing we will do is cut off everything that’s going outside of the border.
Go into “Shapes”, choose a rectangle and resize it so that it’s covering up everything that’s going outside of the border.
Duplicate it and do the same on each four edges till it looks like this.
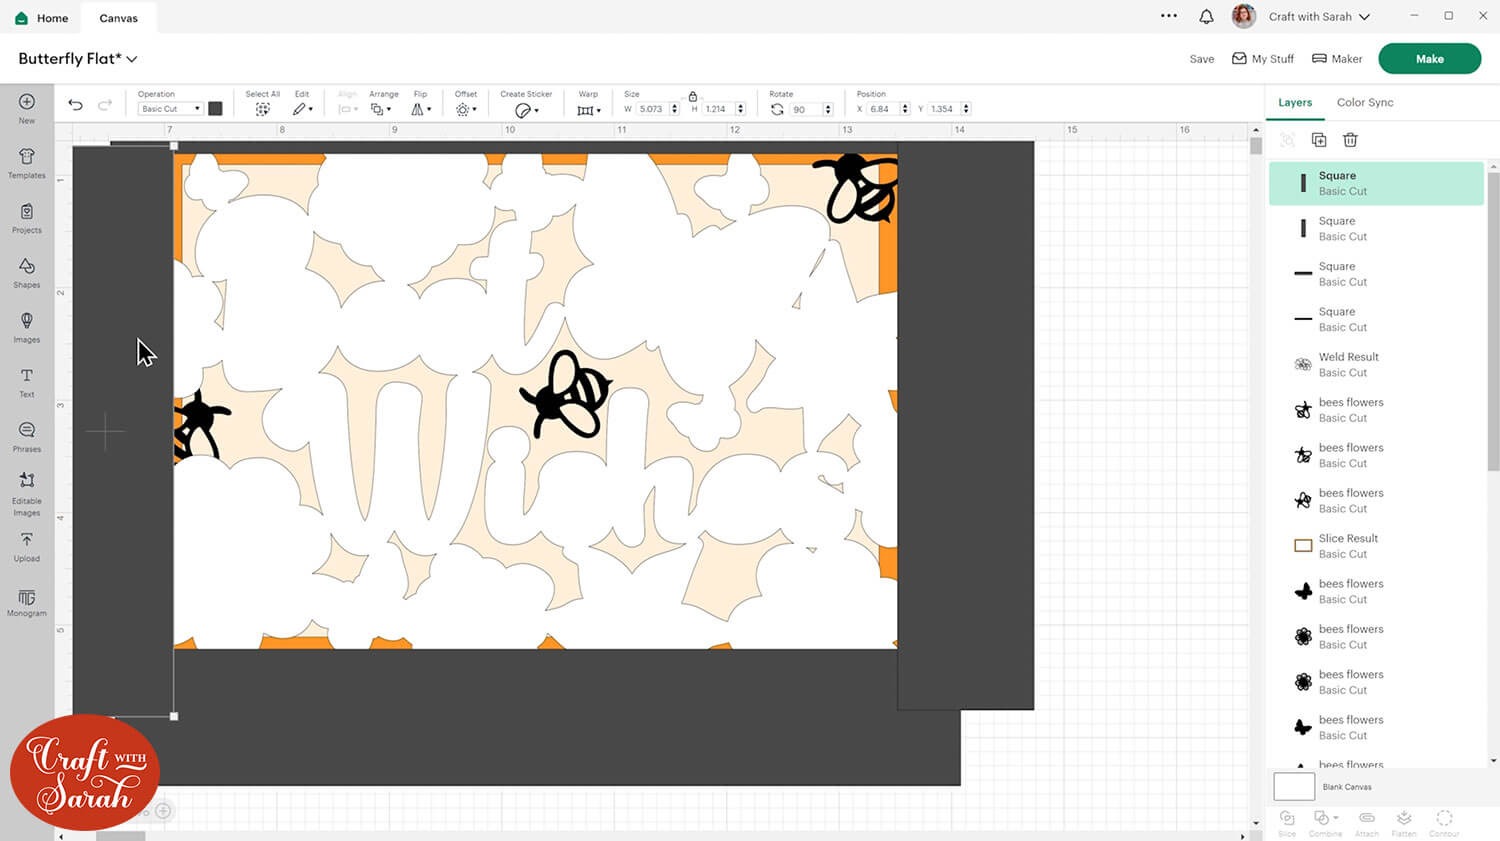
Select all four rectangles and press “Combine > Weld” to join them into one piece.
Now select the welded rectangles and the white layer and press “Slice”.
Delete the outside bits that go over the edge of the frame.
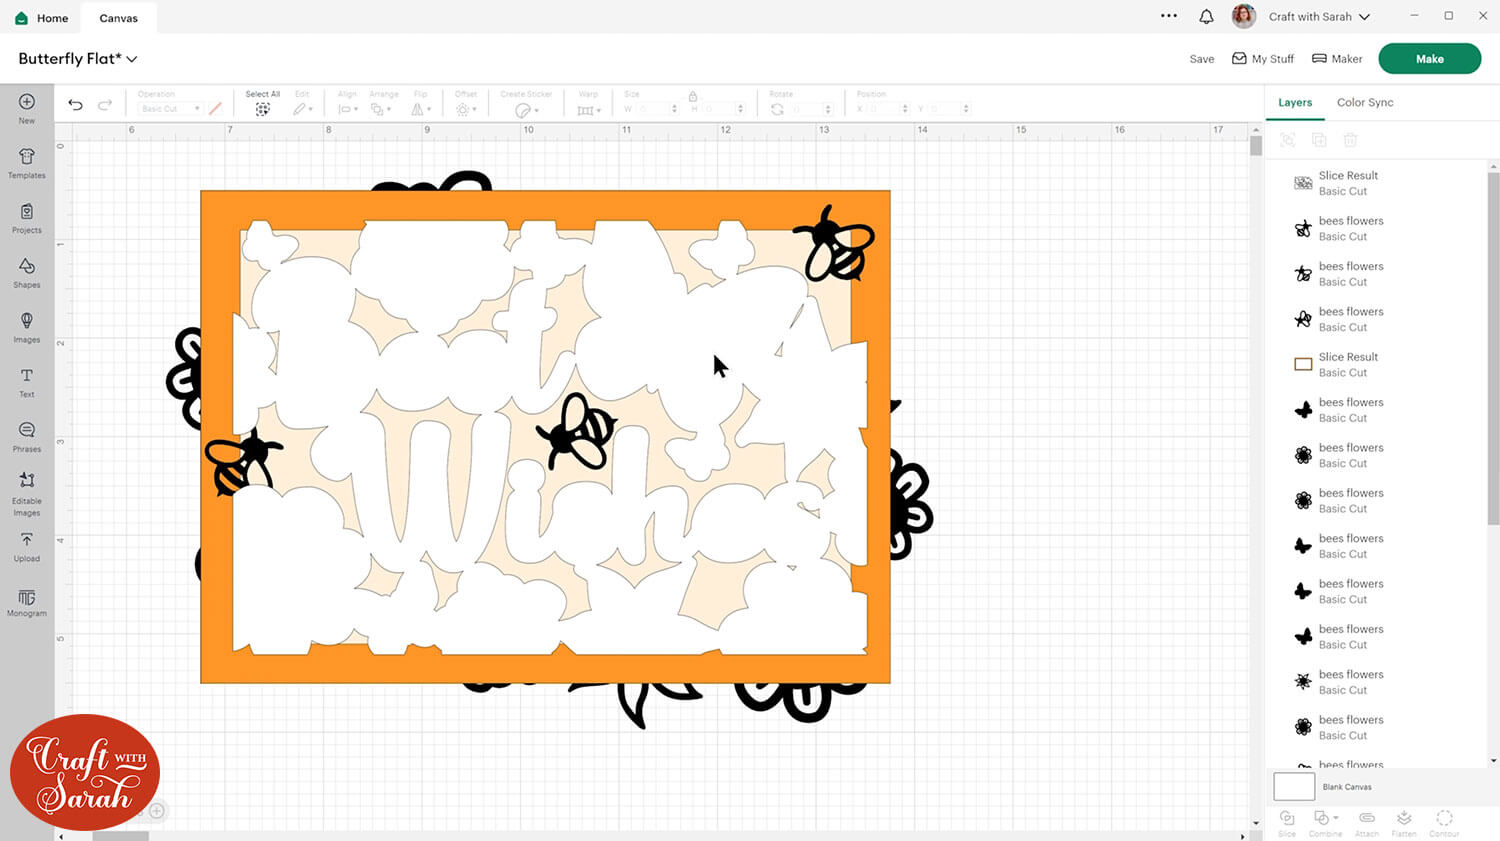
Duplicate the border/frame layer in place by holding down the ALT key and clicking once on the frame (click it on the main Canvas, not in the layers panel).
Hide this copy and make the original border layer white.
Weld the white frame layer to the already-welded white offset layer.

Now use the Contour tool to fill in any tiny gaps that don’t add to the overall effect.
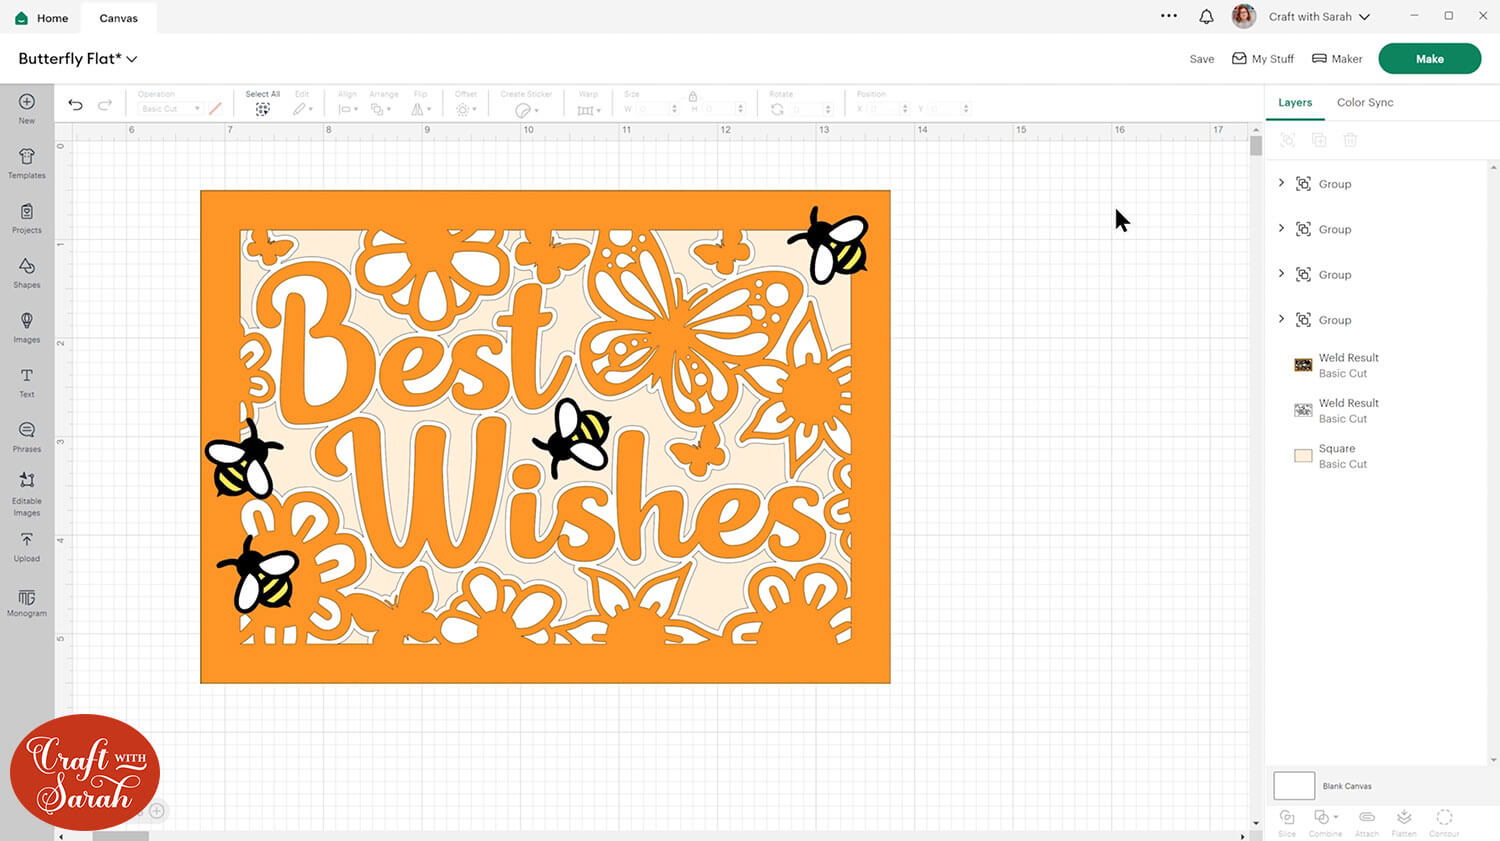
Repeat the same steps to Weld together all the black pieces of the design. I did NOT Weld the bumble bees, as I want them to be cut separately.
Now you will be able to see how your card is looking so far.
Step 7) Add extra details to the card (optional)
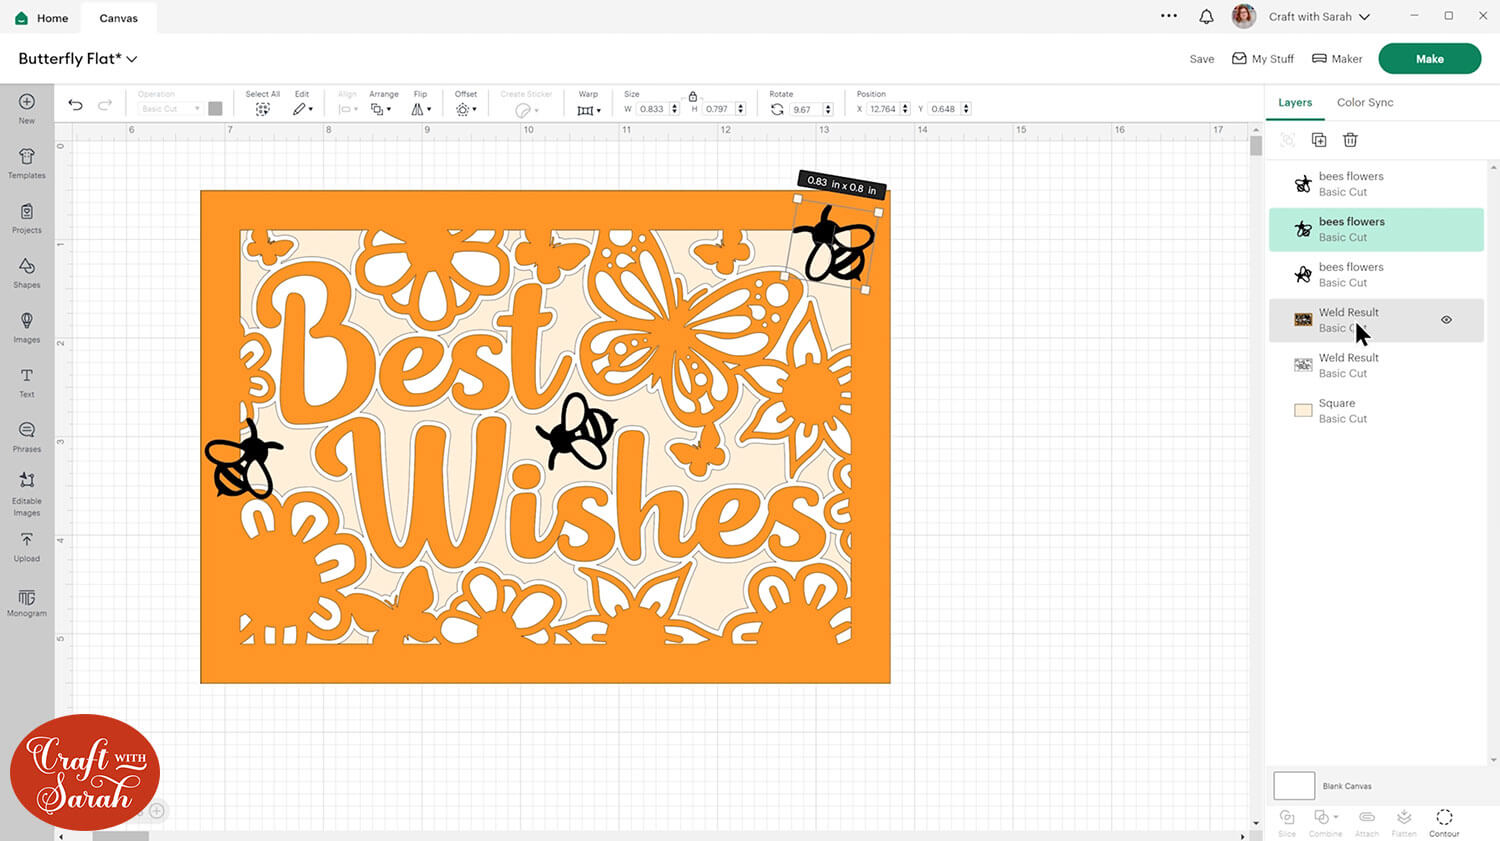
If you added extra details to your card, like I did with the bees, it’s now time to finish those off.
I wanted to cut my bees from yellow, white and black to fill in the gaps in the body and wings.
To do this, first duplicate one of the bees in place on the Canvas.
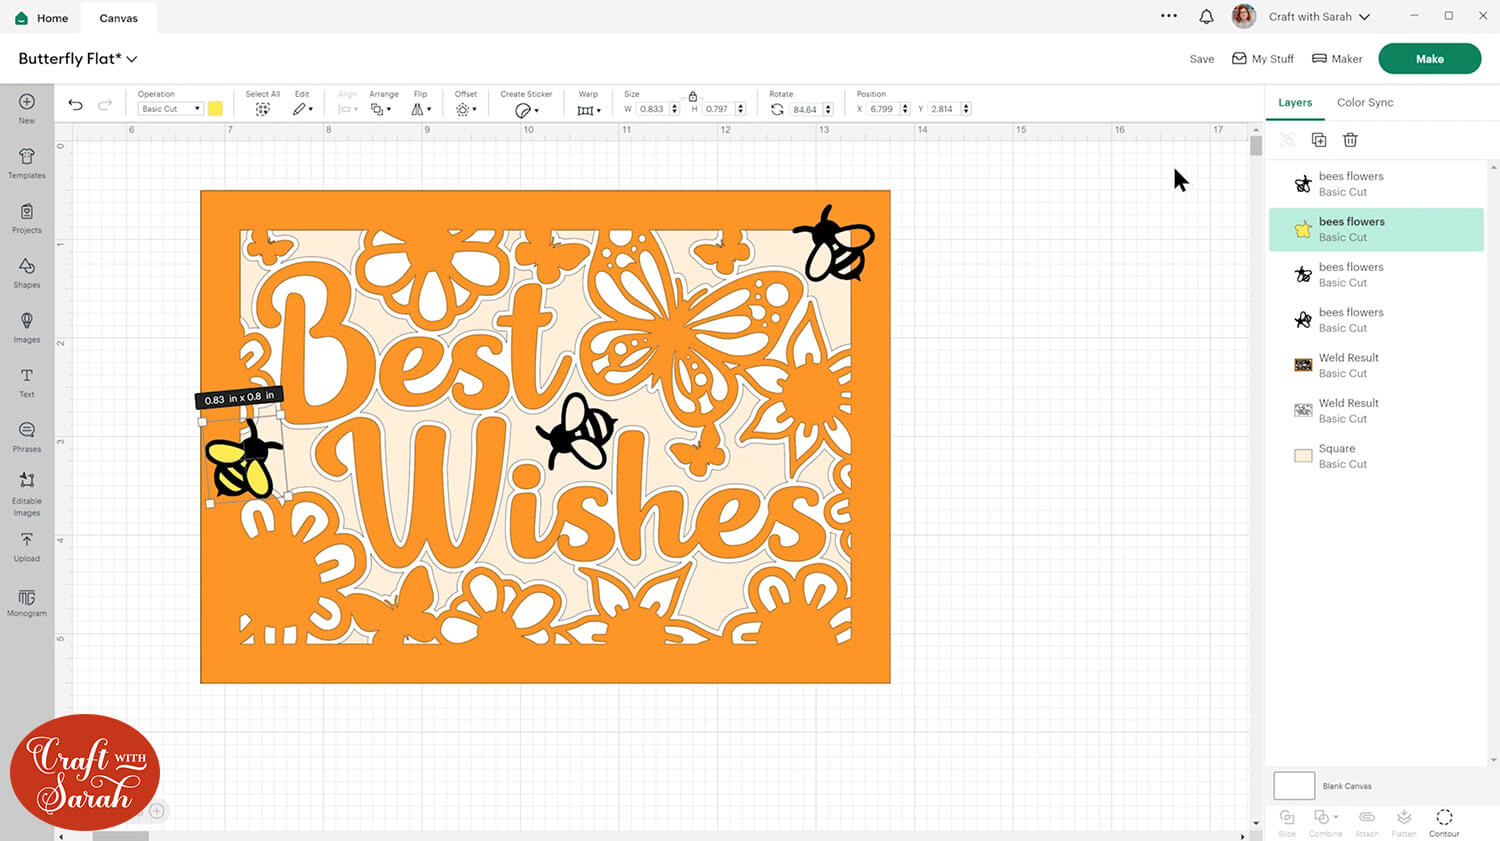
Choose the bottom layer, change it to yellow and press “Contour”, then “Hide all Contours”.
Duplicate the black layer in place again, change it to white and Contour out the wings.

Repeat for the other bees, or if they are all the same size then you can delete the other bees and copy the first one, then re-position. It’s a little quicker that way.
Step 8) Create the base card
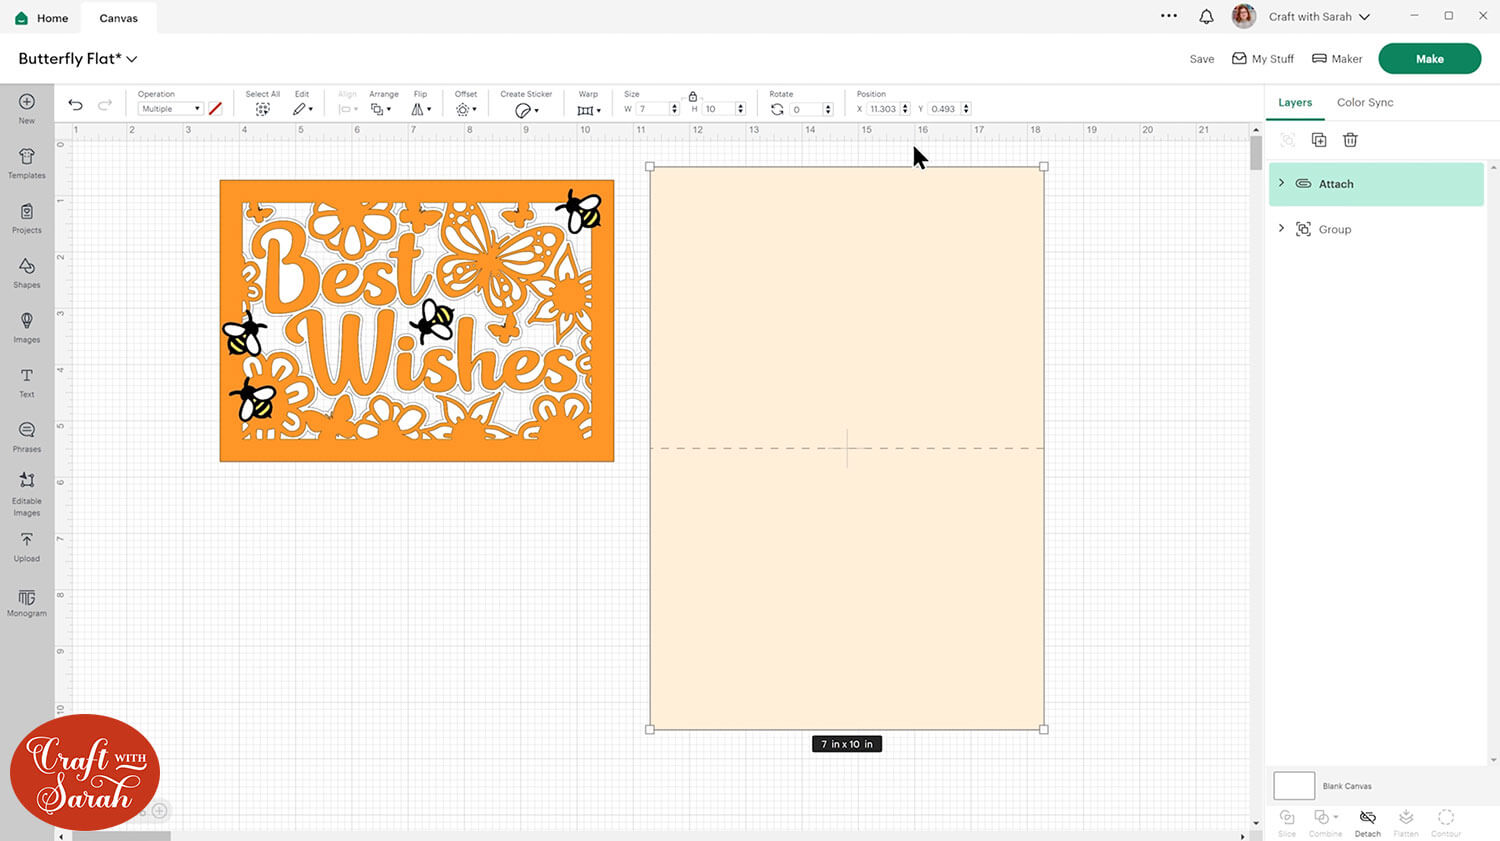
The final step of designing this card is to turn the bottom layer into the base card.
Click it and resize to 10 x 7 inches.
Go into “Shapes” and choose a score line.
Make the score line 7 inches and rotate it 90 degrees.
Select the score line and the card base and press “Align > Center” to put the score line in the middle, then press “Attach” to join them together.
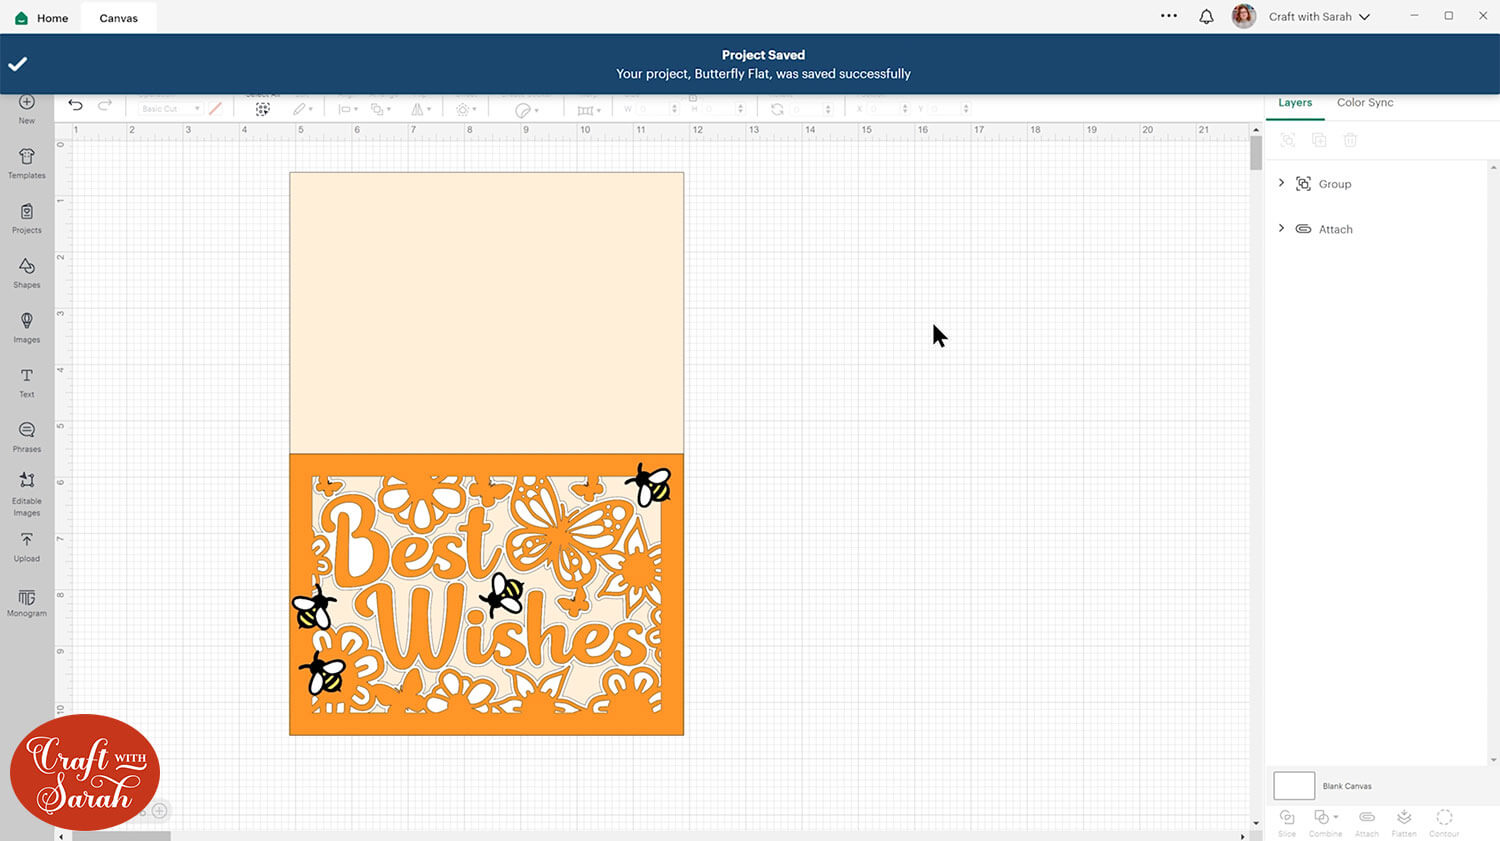
Move it back into place underneath the other layers, and there you have it – your card is ready to cut!
Make sure you save the project again!
Step 9) Cut the card and stick it together
Press “Make” and follow the on-screen instructions to get everything cut out with your Cricut.
Stick the pieces together with a mixture of glue and foam pads/squares.
Here’s how it ended up:

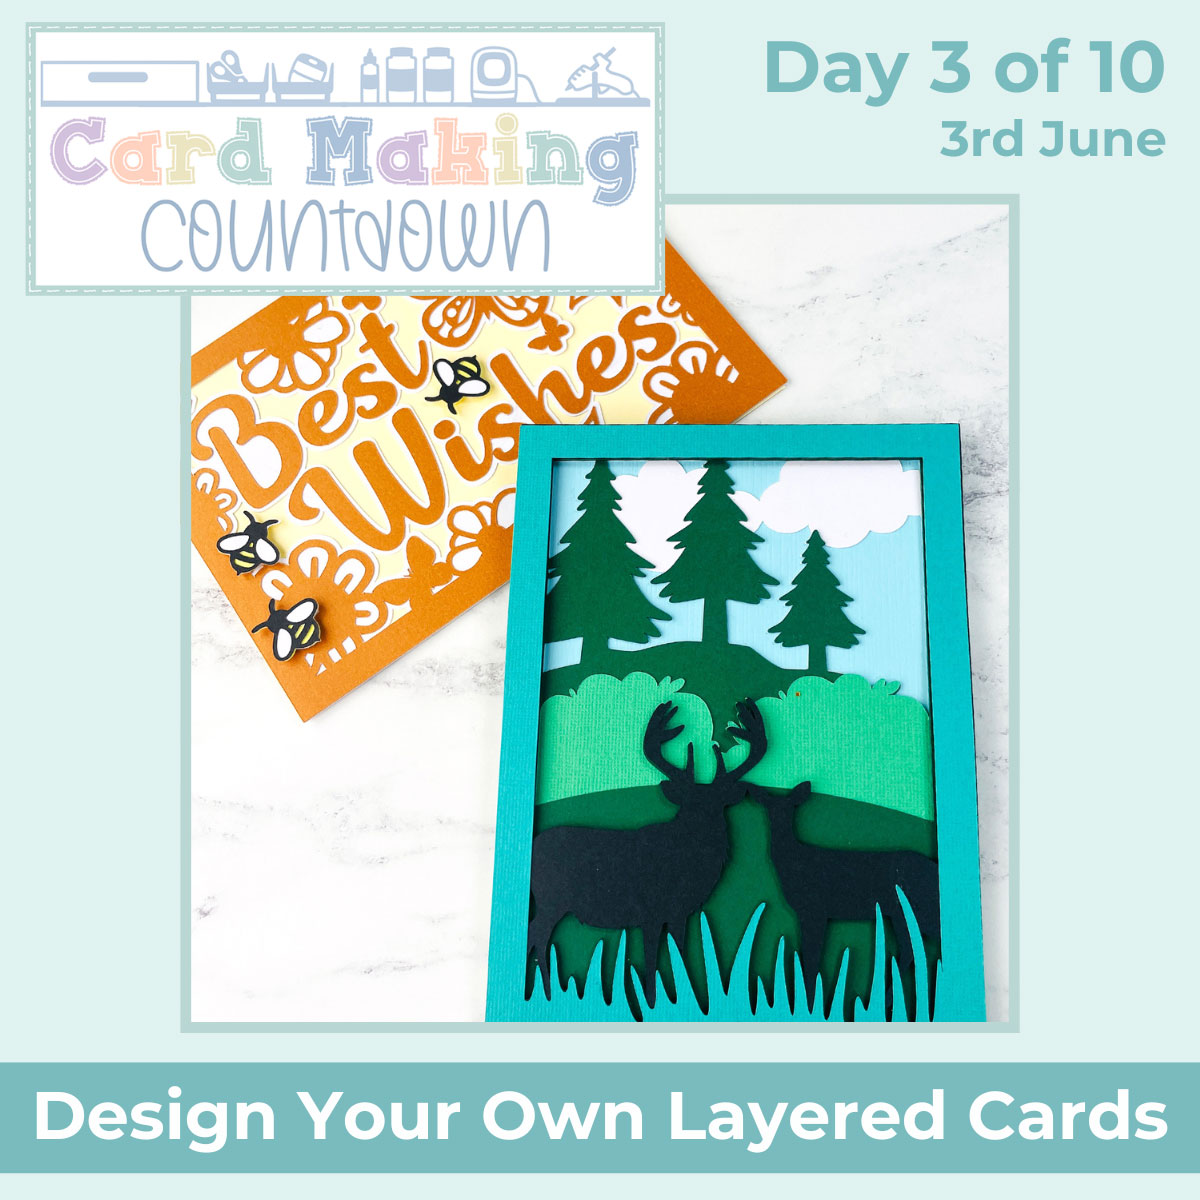
PART TWO: Creating scenic layered cards
Now, let’s take things one step further and create a layered scene on the front of the card.
Step 1) Choose your images and create the frame
I’ve already made a base rectangle with the inset border for the frame, as per the same steps in Part One of this tutorial.
I have also selected some images from Cricut Access to use. I recommend spending some time choosing your images to match the type of scene that you’d like to create on your card.
I wanted to create a woodland scene with a nice blue sky, trees and shrubs.
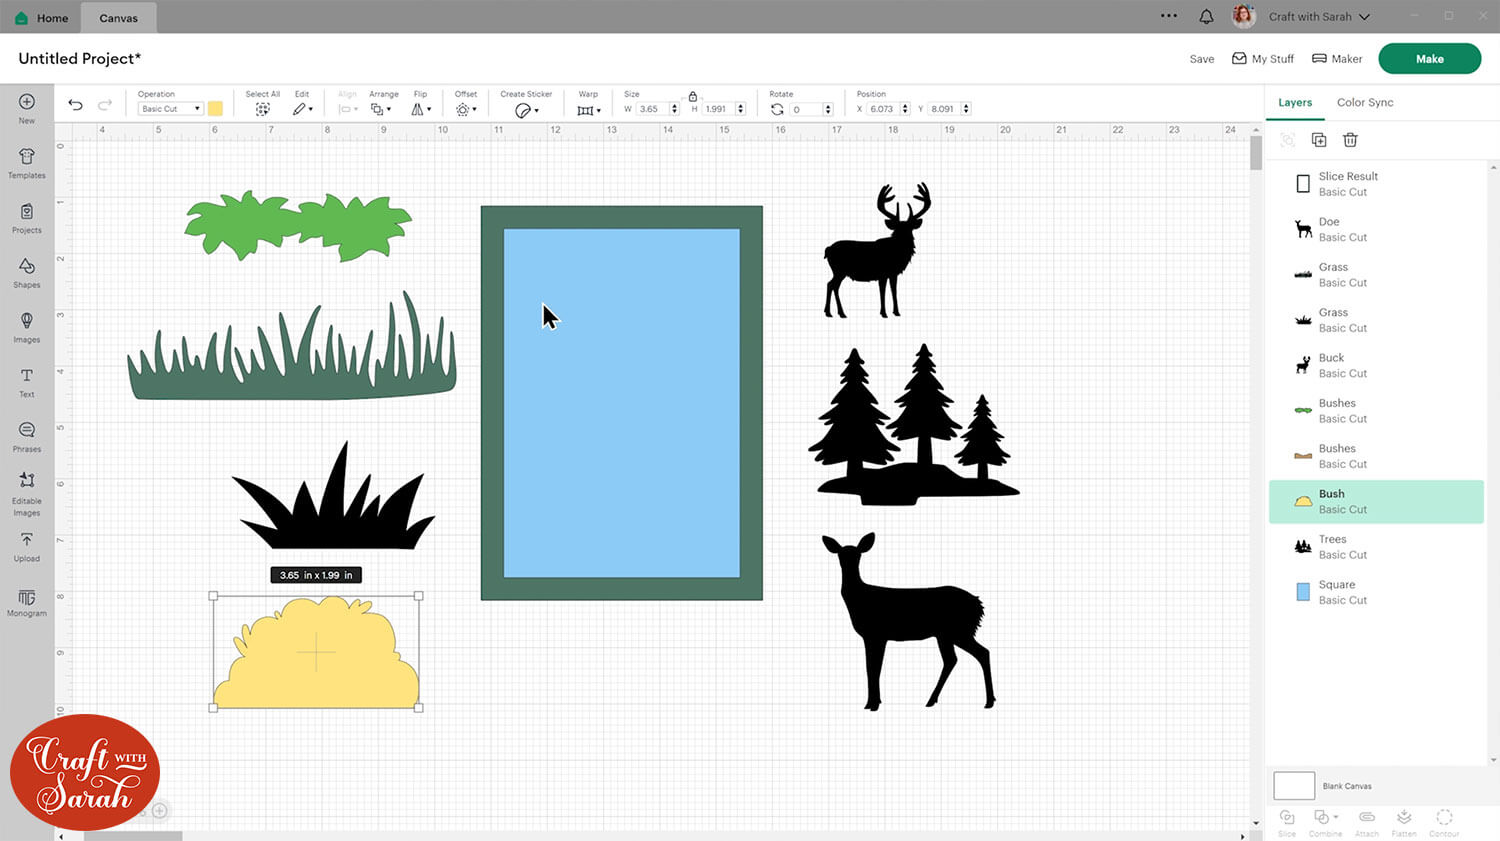
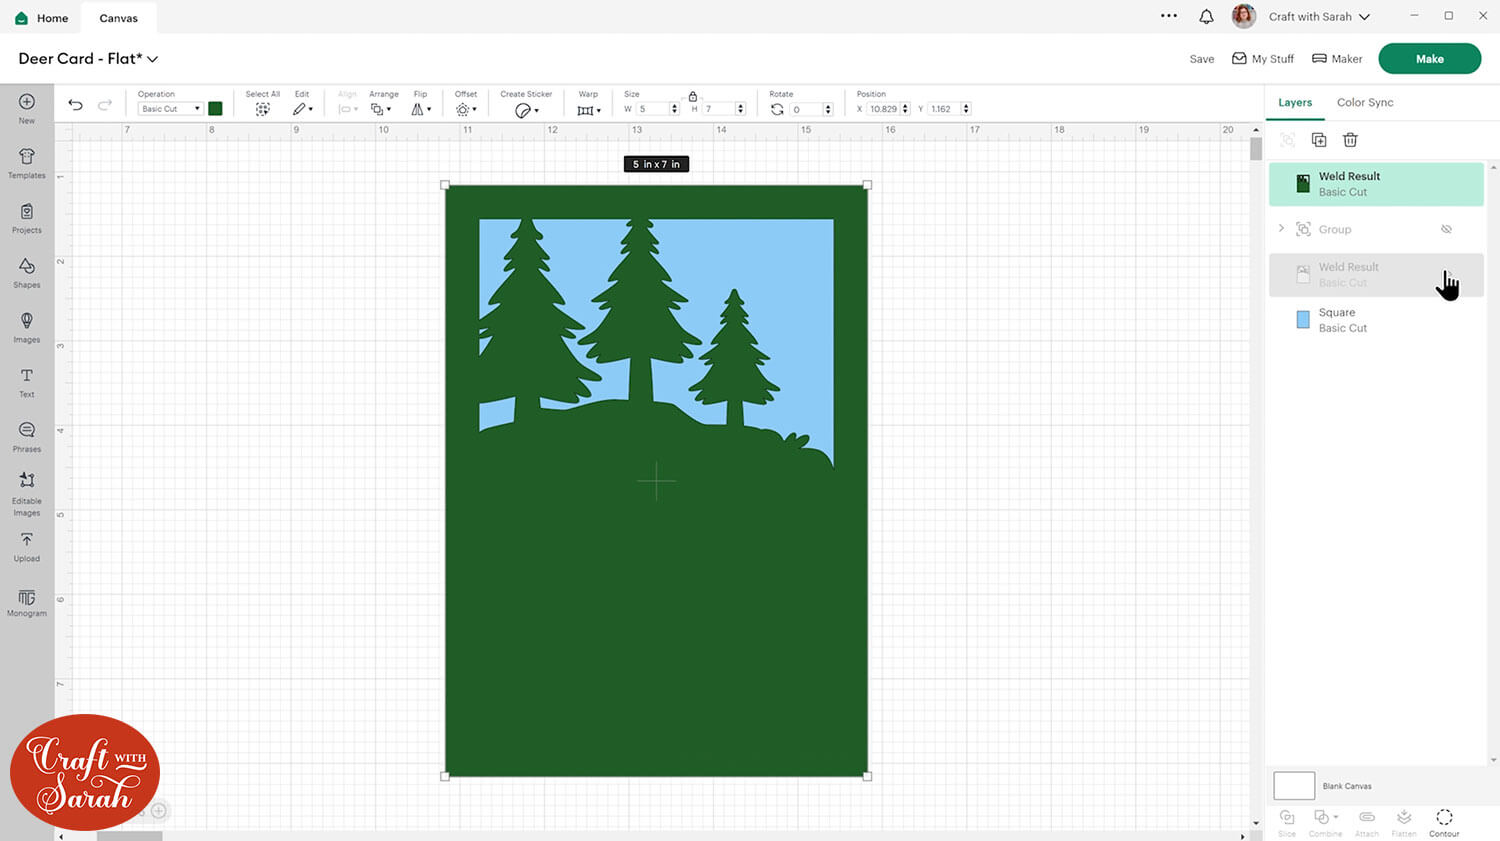
Step 2) Position the images
Start by placing the images into your rectangle to get an idea of how things might look.
Remember that for each layer of the card, the images should touch/overlap so that it will cut as one piece of card.
For example, look at how the two clouds touch in the image below, as well as the heads of both the deer.
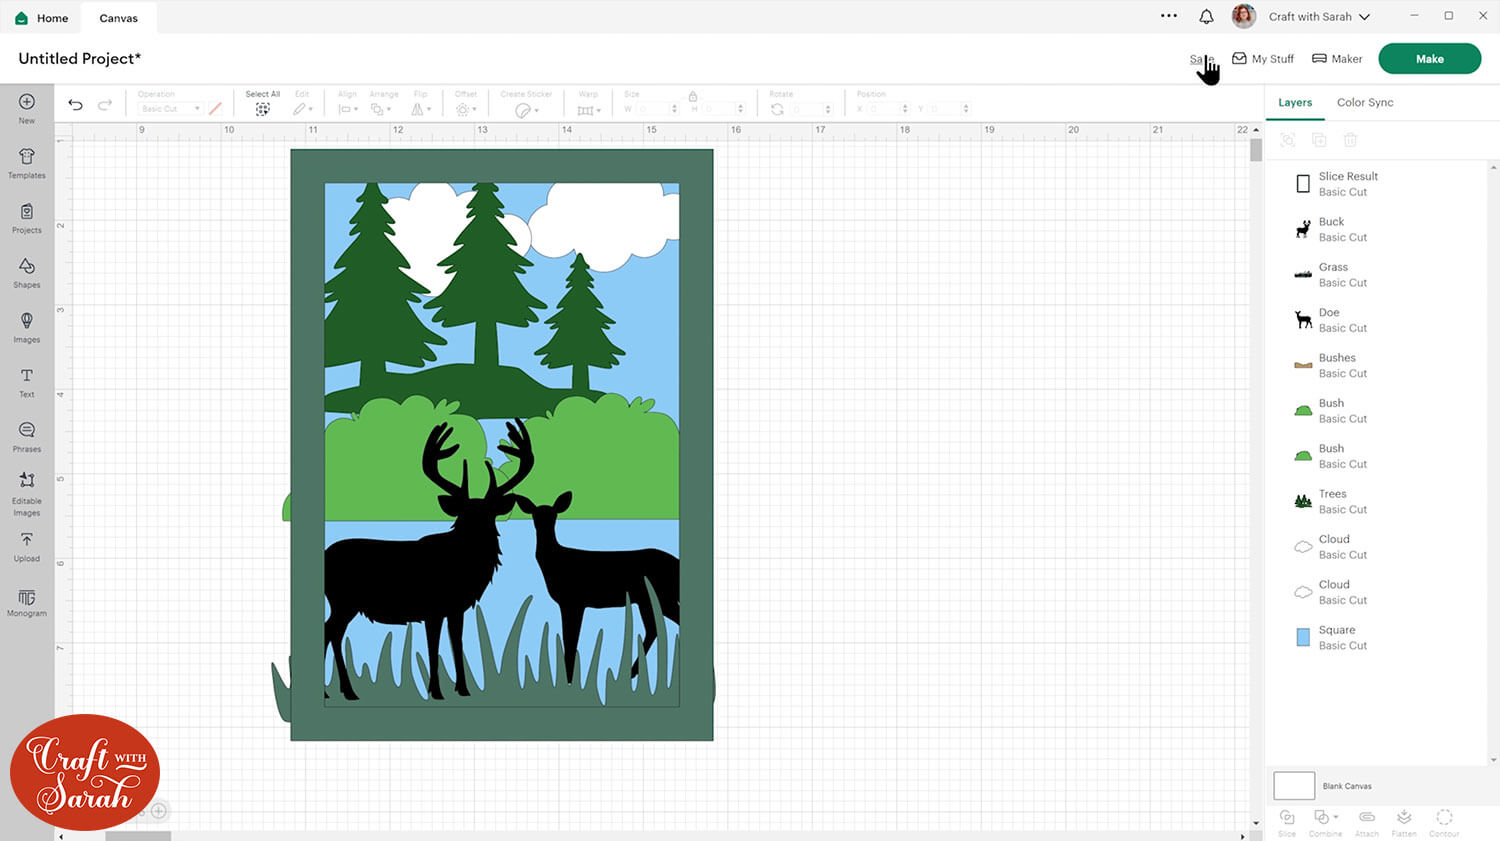
Don’t worry if there are gaps in the design that show the wrong colour through, for example the sky going right down to the feet of the deer, as we’ll fix that later when we merge the layers together.
Step 3) Join the layers together
Save your Project and make a copy so that you can move them about again if you want to change it in the future.
Now you can start merging the layers together.
First, use the technique we used earlier with the rectangles to slice off any excess that is hanging over the border.
Do this for each image individually.
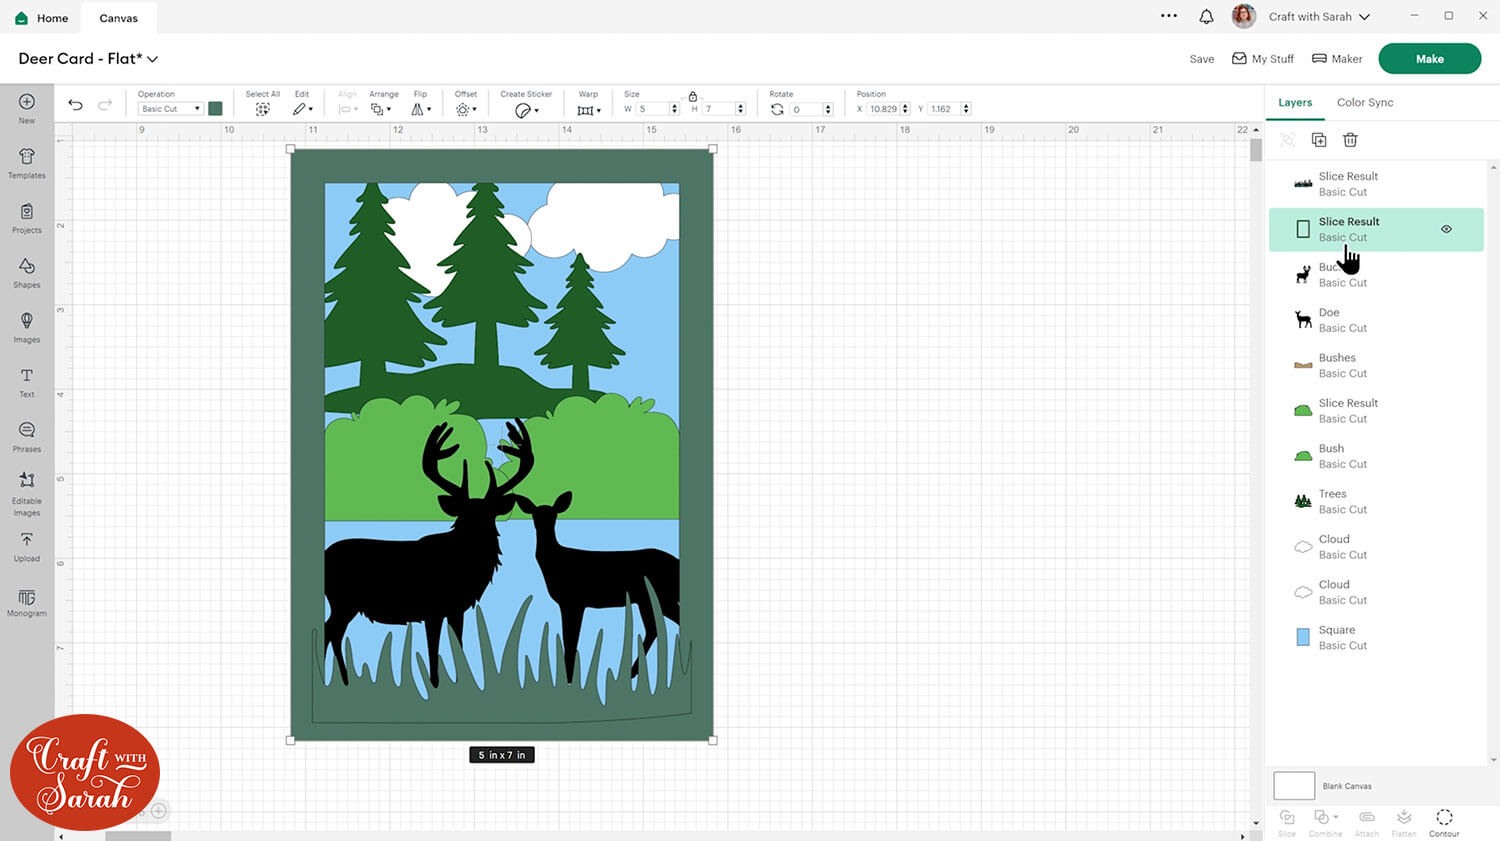
Group everything apart from the very bottom 5×7 inch recangle, make a copy and hide the copy.
With the Group that’s still showing, press “Combine > Weld” to join it into one layer.
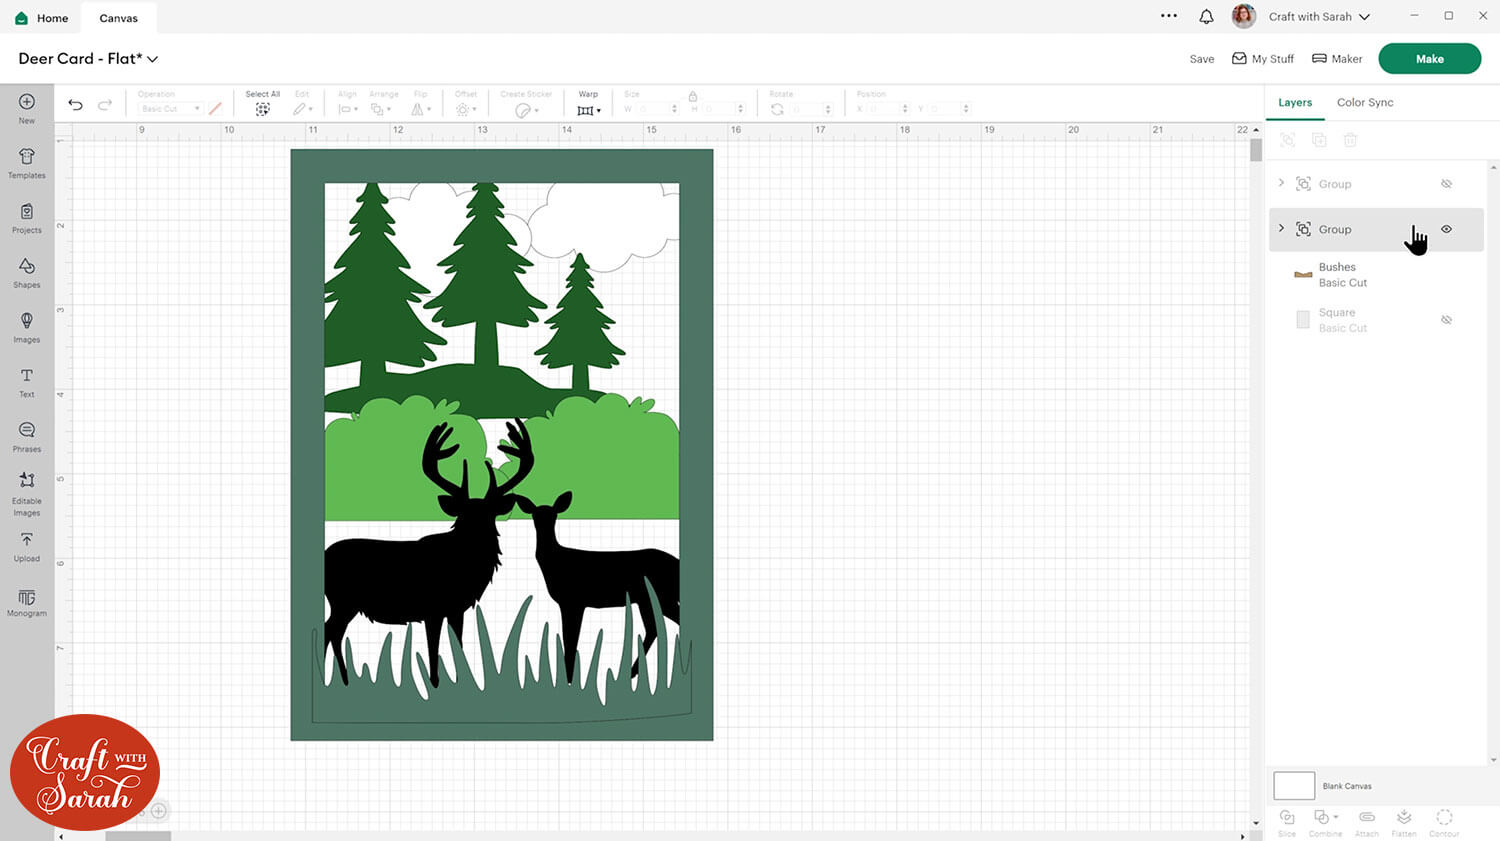
Contour out any small gaps, as well as filling in any space that shouldn’t be left as the base card colour (i.e the blue sky that was appearing by the feet of the deer)

That is the first layer done.
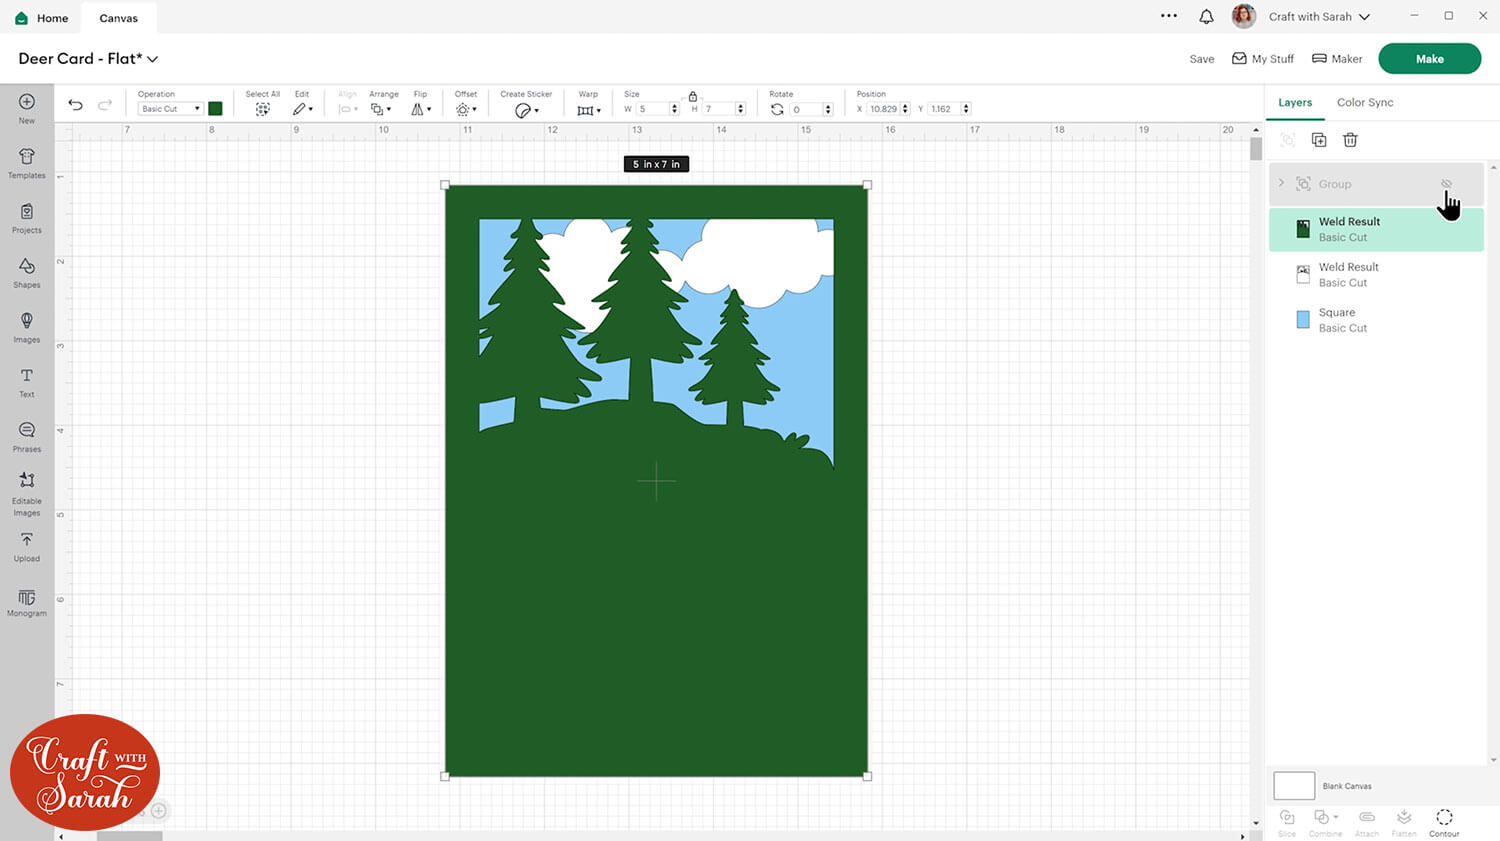
Make the hidden group visible again. Find the cloud pictures in that group and delete them, since we have already created the layer that will have the clouds on it.
Duplicate the Group in place again and hide one.
This time we are making the layer with the trees.
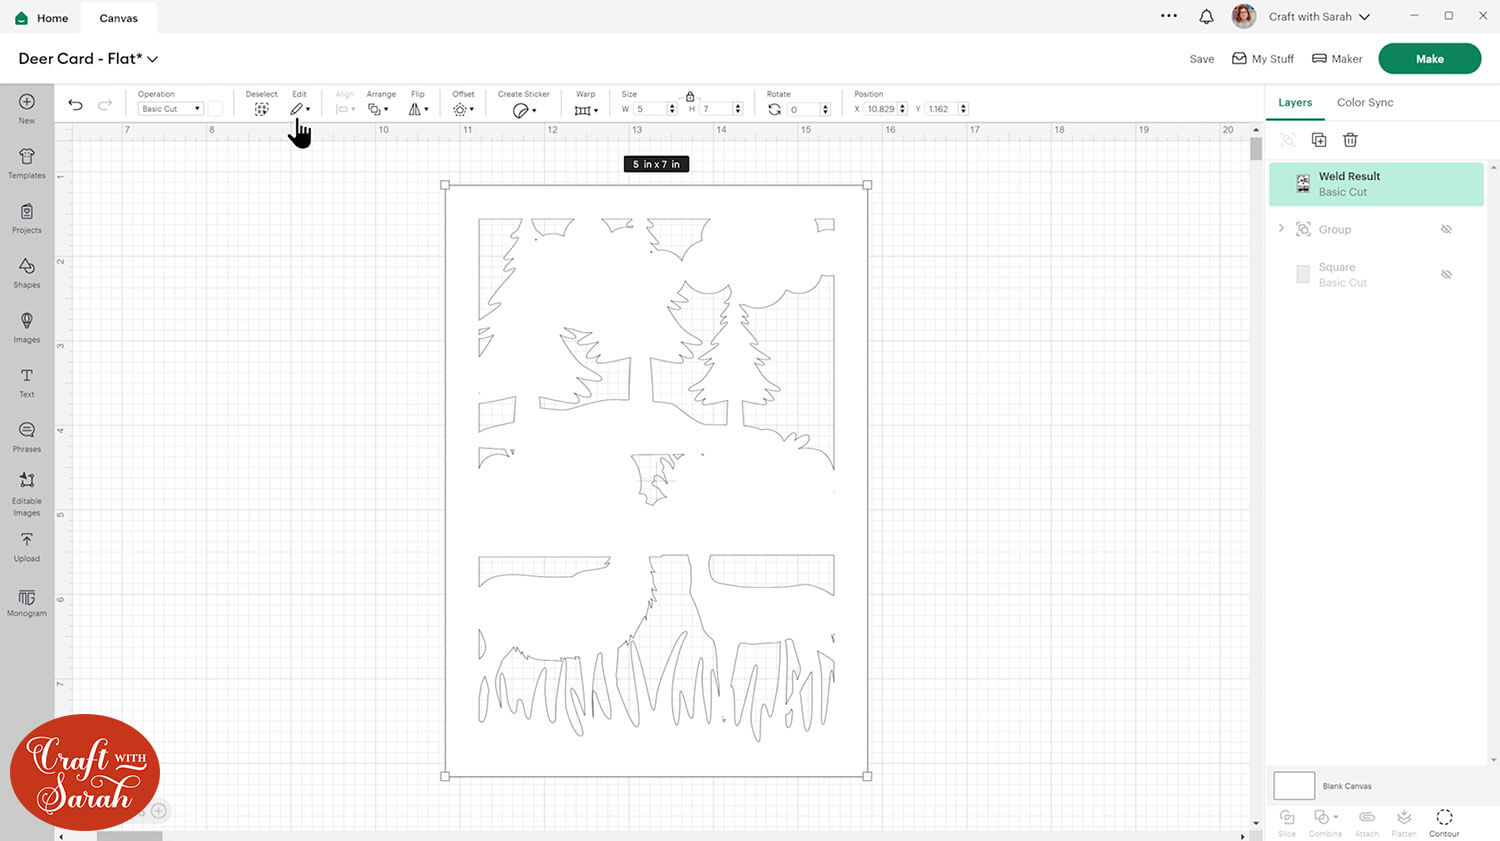
Press “Combine > Weld” to join them and then Contour out any gaps or open space that you wish to fill.
Here’s how it looks if the cloud layer is turned back on:
Repeat these steps for all the layers of your card.
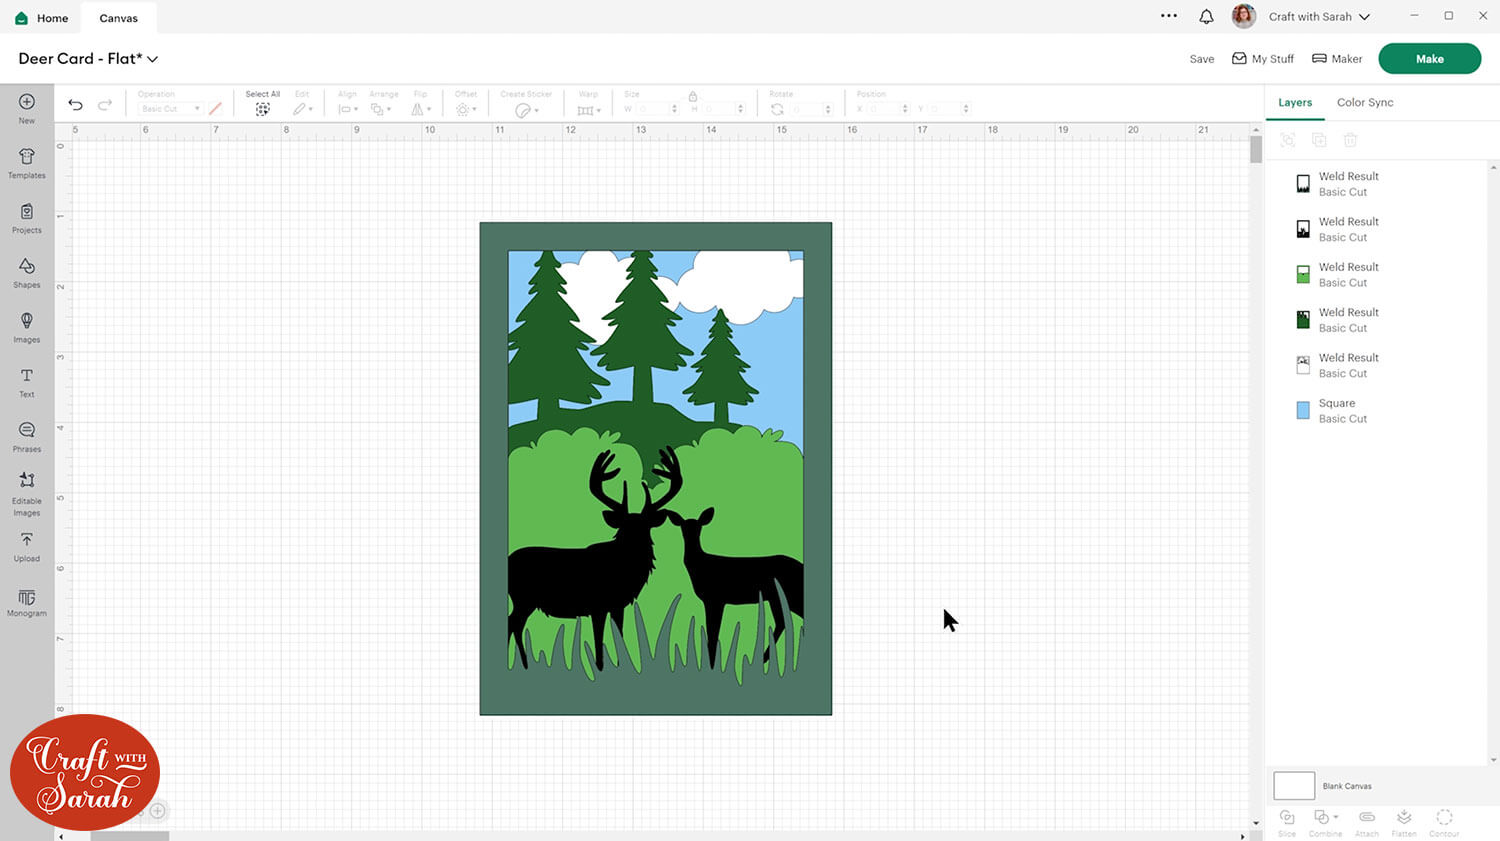
Resize the very bottom layer (the sky) to 10×7 inches and add a score line down the middle.
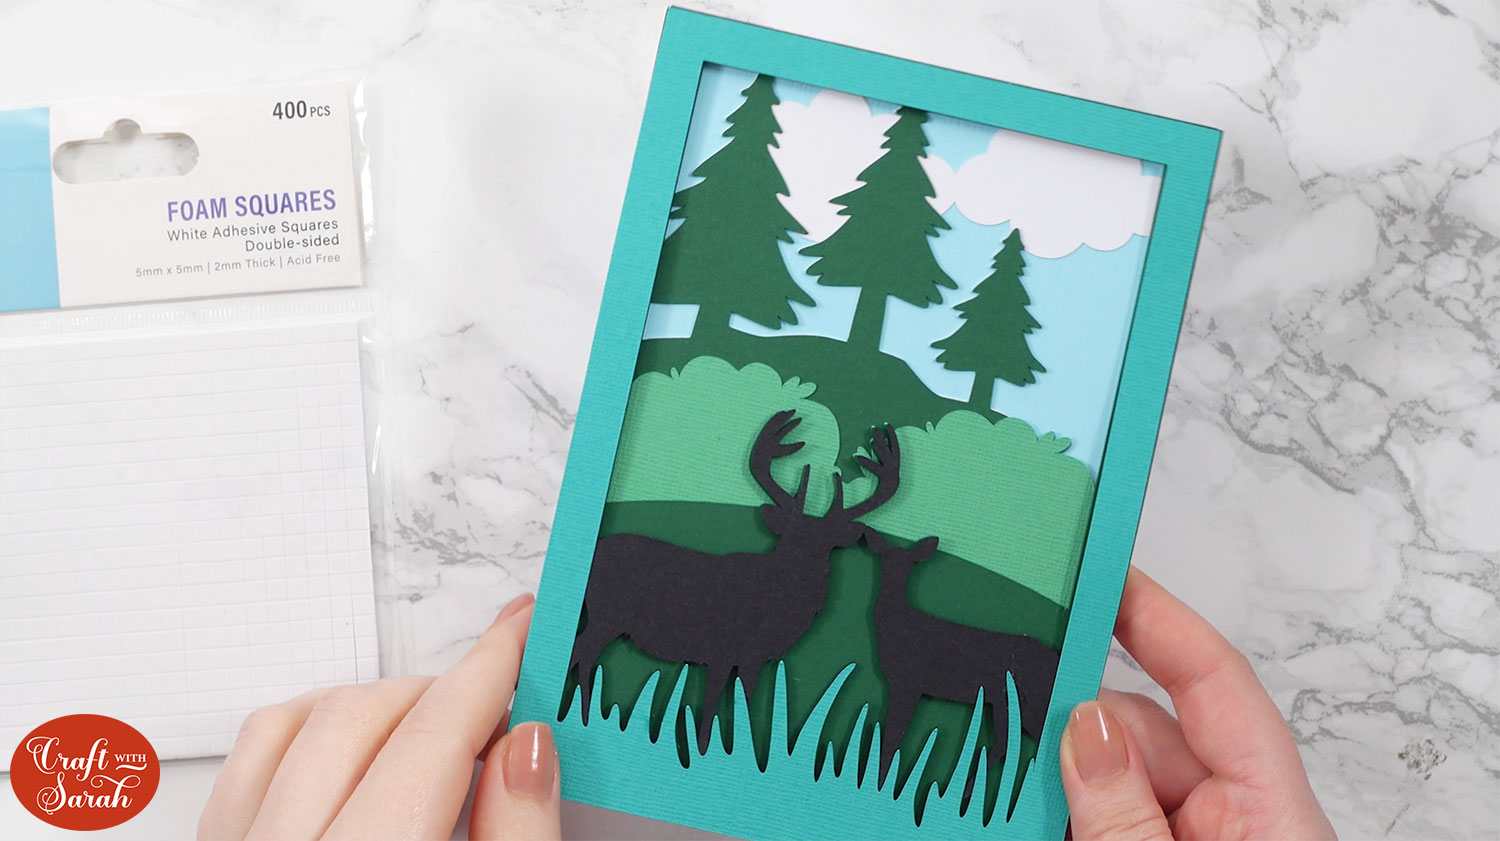
Step 4) Make the card
Save the project and cut it out.
Stick the layers together with a mixture of glue and foam squares.
I used foam squares for the tree layer and the deer layer, and glued the rest.
How to create layered cards with a Cricut
I hope you enjoyed this tutorial on how to design your own layered cards in Cricut Design Space.
While the process can seem a little daunting at first, especially if you are new to Design Space, you’ll find that each time you design a card it goes a little bit quicker and easier, until you are creating new, beautiful designs in no time at all!

Don’t forget to check back tomorrow for the next Card Making Countdown project.
Happy crafting,
Sarah x